Hola amigos de HIVE y de DIYHUB, es un gusto estar por acá participando nuevamente en el concurso mensual: “ TEAPOT”. Asi que No te me vayas marzo que quiero mostrarte mi segunda participación en este gran concurso de teteras 🫖😊.
Hello friends of HIVE and DIYHUB, it is a pleasure to be here participating again in the monthly contest: "TEAPOT". So don't leave me in March, I want to show you my second participation in this great teapot contest 🫖😊.
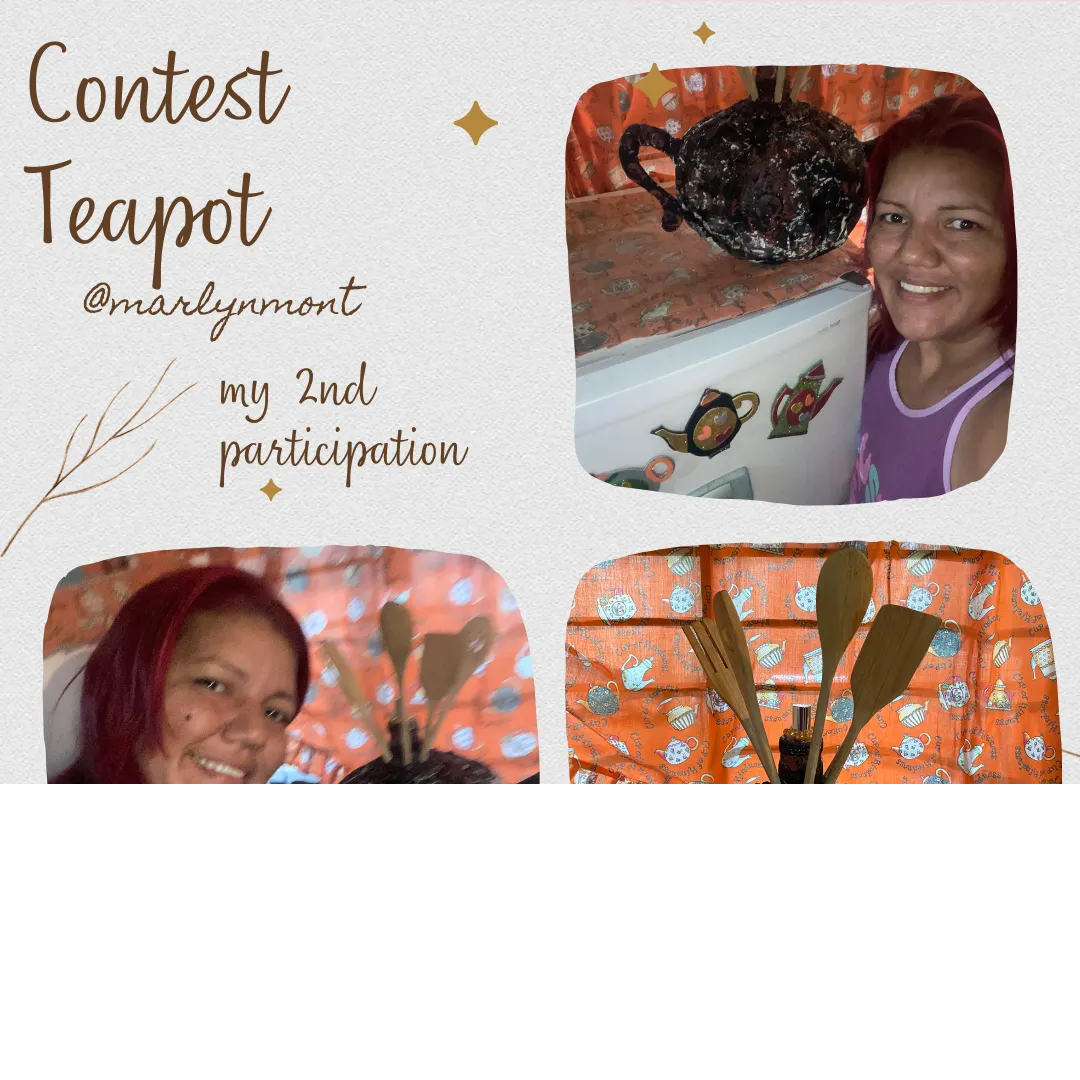
Antes de que finalice el mes quiero mostrarles una linda manualidad que hice con materiales reciclables, y que necesitaba en mi cocina, tengo un juego de paletas de madera y hace unos días se me quebró el porrón de cerámica donde los tenía, entonces decidí hacer una linda Tetera como manualidad para colocarlas y que no me sucediera lo mismo de qué se me fuera a partir mi envase.
Before the end of the month I want to show you a nice craft that I made with recyclable materials, and that I needed in my kitchen, I have a set of wooden palettes and a few days ago the ceramic jug where I had them broke, so I decided to make a Nice Teapot as a craft to place them and that the same thing would not happen to me that my container would break.
♦️♦️♦️♦️♦️🫖♦️♦️♦️♦️♦️
MATERIALES
MATERIALS
Me gustó la idea de las teteras aprovechando para participar en el concurso, me la imaginé y busqué los materiales para hacerlo realidad, me hubiese gustado participar con muchas más cosas ya que tengo varias cosas en mente para hacer de decoración para mi cocina ya que el motivo de teteras combina perfecto con la decoración que le tengo a mi cocina.
Pero lamentablemente no he tenido tiempo suficiente para dedicarme a hacer mis manualidades así que me puse manos a la obra rápidamente para hacer esta manualidad y no dejar pasar el último día del mes de marzo aquí te cuento como la hice y los materiales que utilice:
Para esta manualidad utilice la gran mayoría materiales reciclables, aquí te dejo la lista:
- carton variado
- envase o frasco de plástico
- pega
- silicone
- papel crepe o toalet
- tijeras
- yeso
- pinturas al frío
- decoraciones variadas
I liked the idea of taking advantage of the teapots to participate in the contest, I imagined it and looked for the materials to make it a reality, I would have liked to participate with many more things since I have several things in mind to decorate my kitchen since the Teapot motif combines perfectly with the decoration that I have in my kitchen.
But unfortunately I haven't had enough time to dedicate myself to making my crafts so I quickly got down to work to make this craft and not let the last day of March go by. Here I will tell you how I did it and the materials I used:
For this craft I used the vast majority of recyclable materials, here is the list:
- varied cardboard
- container or plastic jar
- job
-silicone- crepe or towel paper
- scissors
- and so
- cold paints
- various decorations
♦️♦️♦️♦️♦️🫖♦️♦️♦️♦️♦️
PASO A PASO
STEP BY STEP
Para comenzar vamos a cortar aproximadamente 25 piezas de cartón adaptándolas al tamaño de nuestro envase plástico, para la forma utilicé un plato ya que necesitaba que quedara redonda por un lado y me quedó perfecta para el tamaño de mi envase, así debe quedar:
To begin we are going to cut approximately 25 pieces of cardboard, adapting them to the size of our plastic container. For the shape I used a plate since I needed it to be round on one side and it was perfect for the size of my container, this is how it should look:
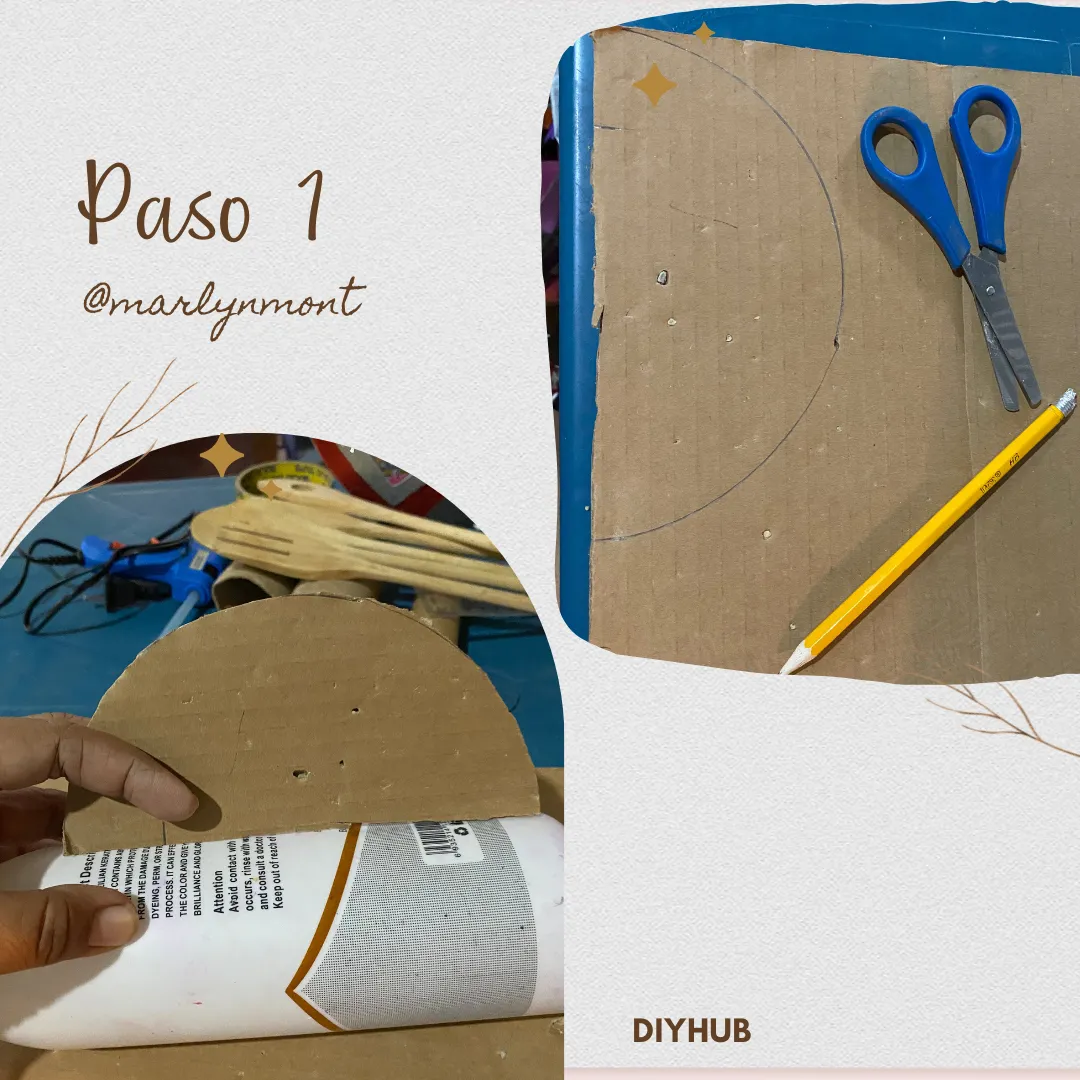
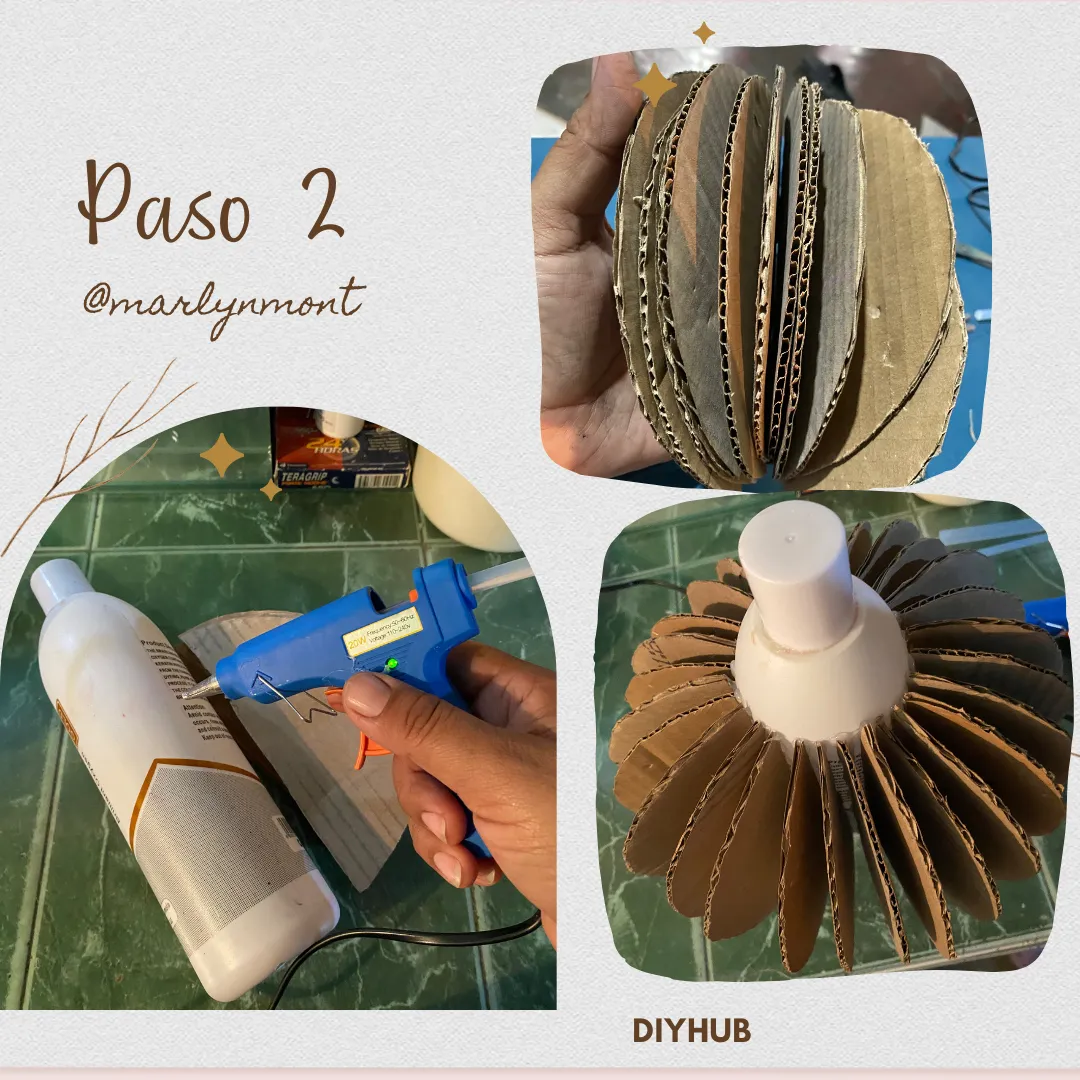
La forma en carton debe ser la mitad de un círculo, por una parte plana y la otra redonda, vamos a pegar como indico en mi imagen alrededor de todo el envase ayudándonos con una pistola de silicona caliente, tratamos de pegarlos lo más unido que podamos, al principio corte varias piezas pero vi que necesitaba más y tuve que cortar mas piezas para que fuera más fácil el siguiente proceso.
The shape on cardboard should be half a circle, on one side flat and the other round, we are going to paste as indicated in my image around the entire container helping us with a hot silicone gun, we try to stick them as close as possible At first I cut several pieces but I saw that I needed more and I had to cut more pieces to make the next process easier.
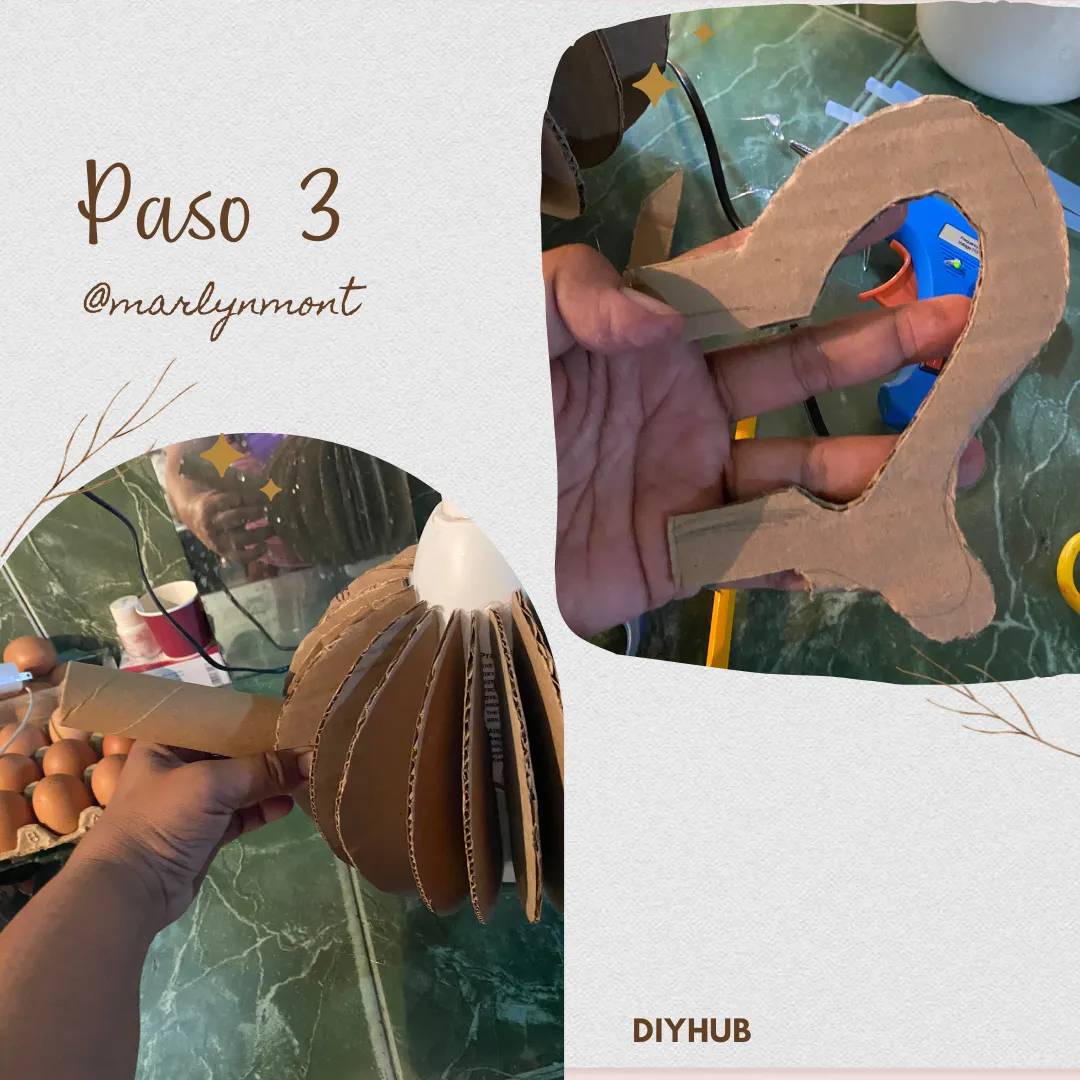
Con un tubo de cartón vamos a hacerle el pico a nuestra tetera, aplastamos uno de sus extremos para poder pegar con silicona entre uno de los cartones que ya pegamos al envase, por el otro lado dibujamos especie de una asa en cartón recortamos y pegamos así:
With a cardboard tube we are going to make the spout of our teapot, we crush one of its ends to be able to glue with silicone between one of the cardboard that we already glued to the container, on the other side we draw a kind of handle on cardboard, we cut and paste like this :
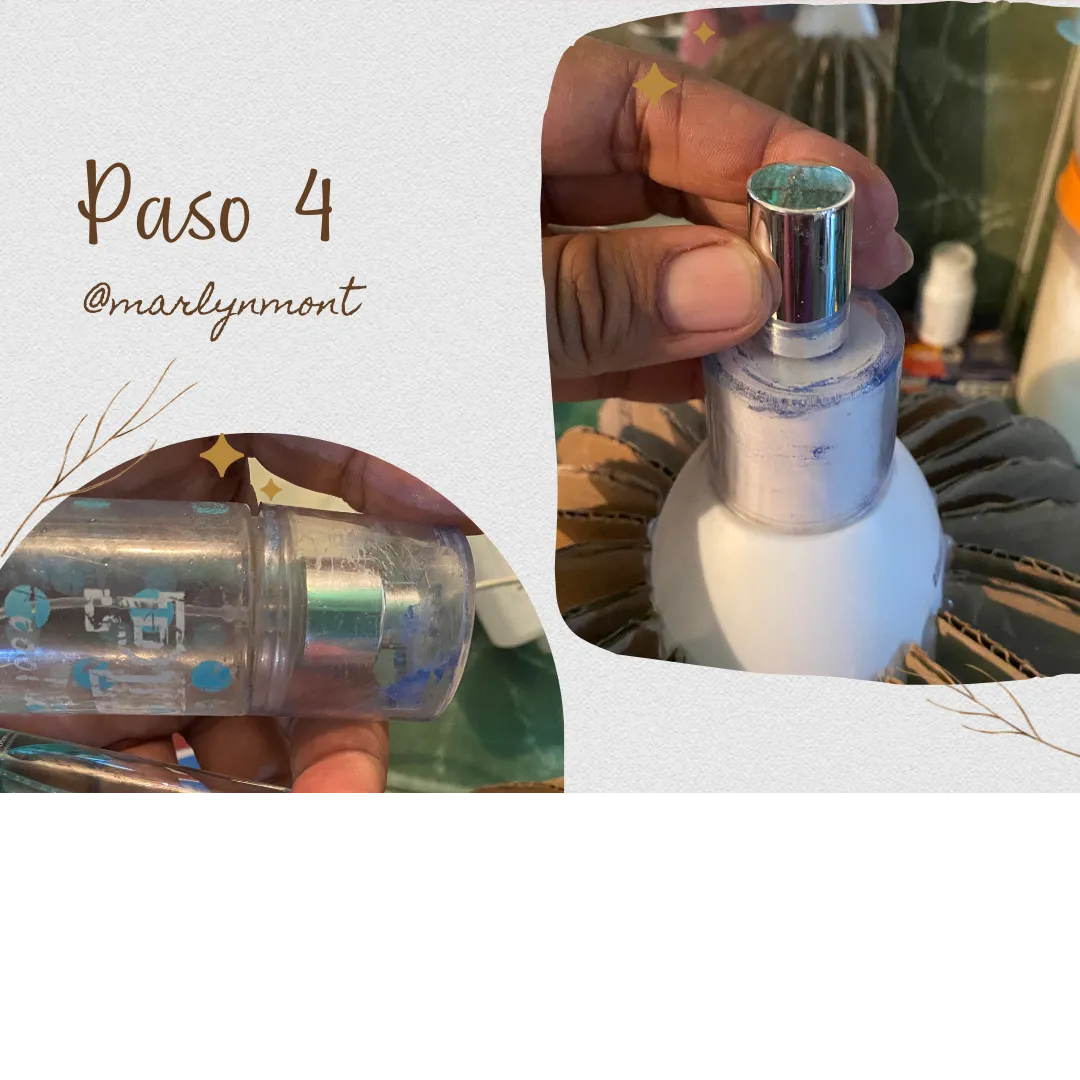
Para la tapa utilice una tapa transparente de un envase de perfume y una tapa plateada de otro envase de perfume más pequeño, pegote con silicona a la tapa del envase, quise hacerlo así ya que la tapa original es muy delgada y no quedaría bien.
For the lid I used a transparent lid from a perfume container and a silver lid from another smaller perfume container, glue the lid of the container with silicone, I wanted to do it that way since the original lid is very thin and would not fit well.
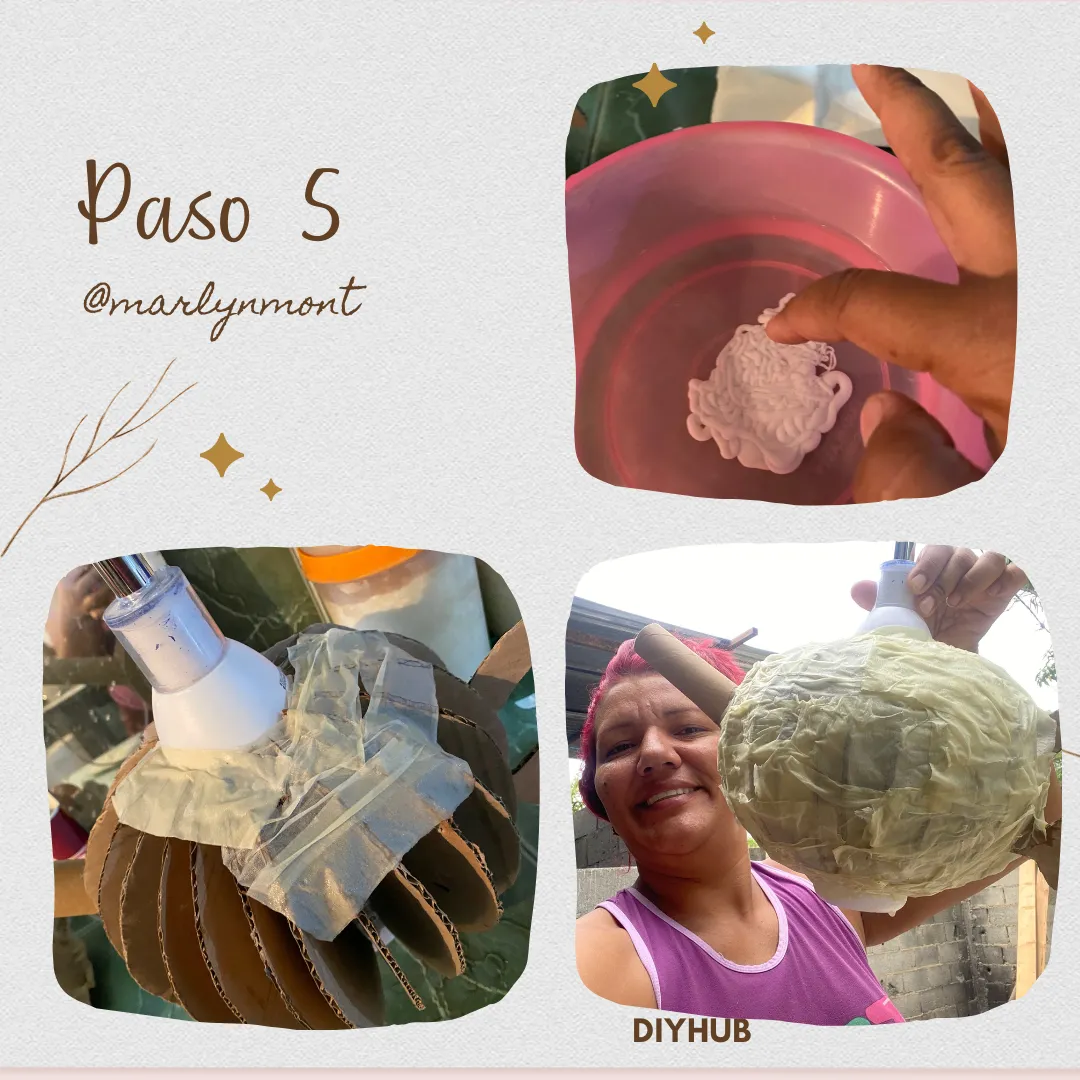
En una taza vamos a colocar agua y pega blanca tratando de qué sean partes iguales unimos bien, cortamos el papel crepé en cuadritos o utilizamos papel toilette igual cortados en tiras pequeñas, estas las vamos mojando en nuestra agua con pega y se la vamos colocando encima a nuestra tetera tratando de cubrirla toda.
In a cup we are going to place water and white glue trying to make them equal parts, we unite well, we cut the crepe paper into squares or we use toilet paper cut into small strips, we are dipping them in our water with glue and we are placing it on top to our teapot trying to cover it all.
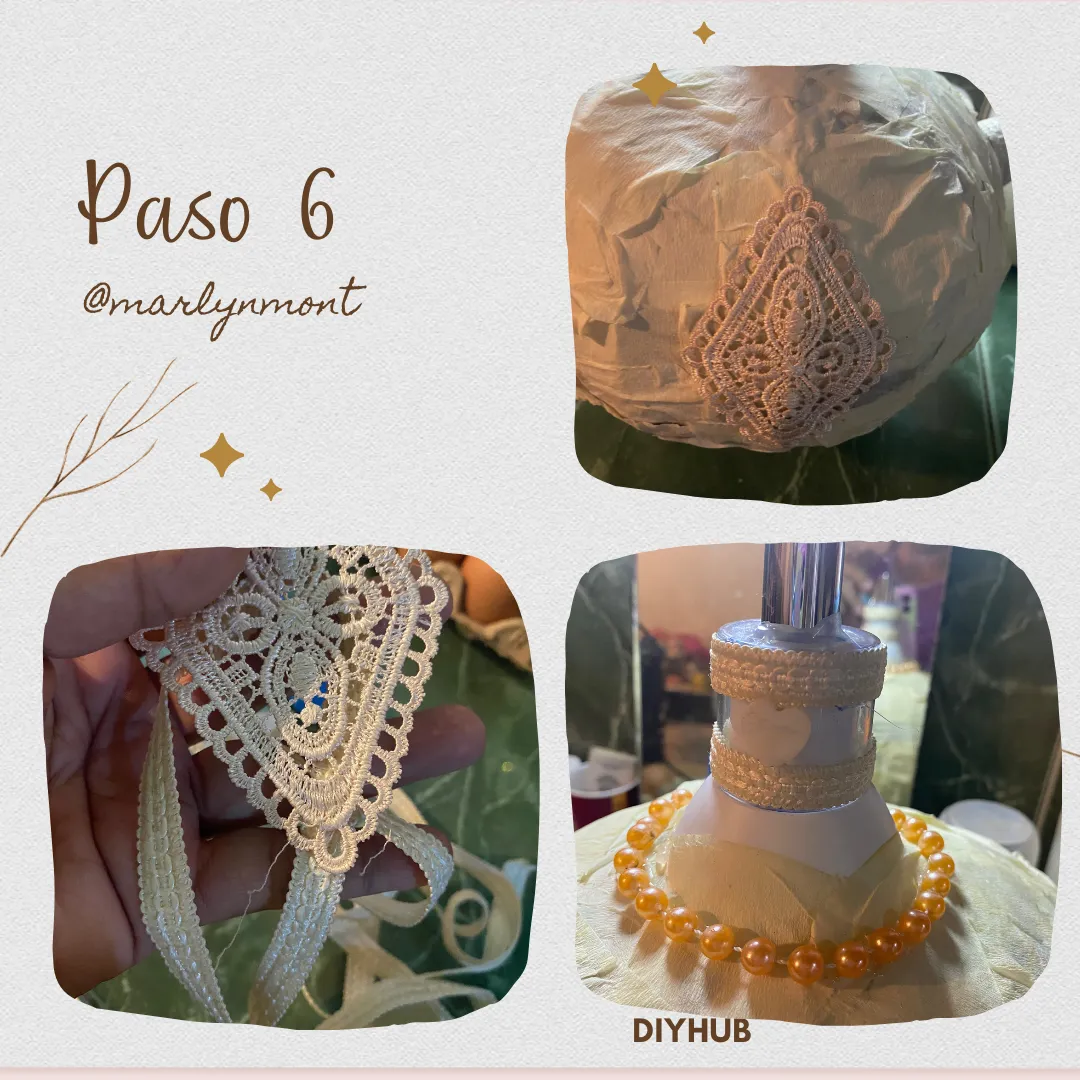
Luego debemos esperar que está se seque por completo para seguir en el siguiente paso, al estar seca le vamos a colocar los adornos que queramos yo utilicé un aplique de torchon pegándolo a mi manualidad, y algunos otros adornos que conseguí entre mis cosas, soy el tipo de personas que guardas de todo ya que algún día le encontramos la utilidad necesaria 😂
Then we must wait for it to dry completely to continue in the next step, when it is dry we are going to place the decorations that we want I used a torchon applique sticking it to my craft, and some other decorations that I got among my things, I am the type of people who keep everything since one day we find the necessary utility 😂
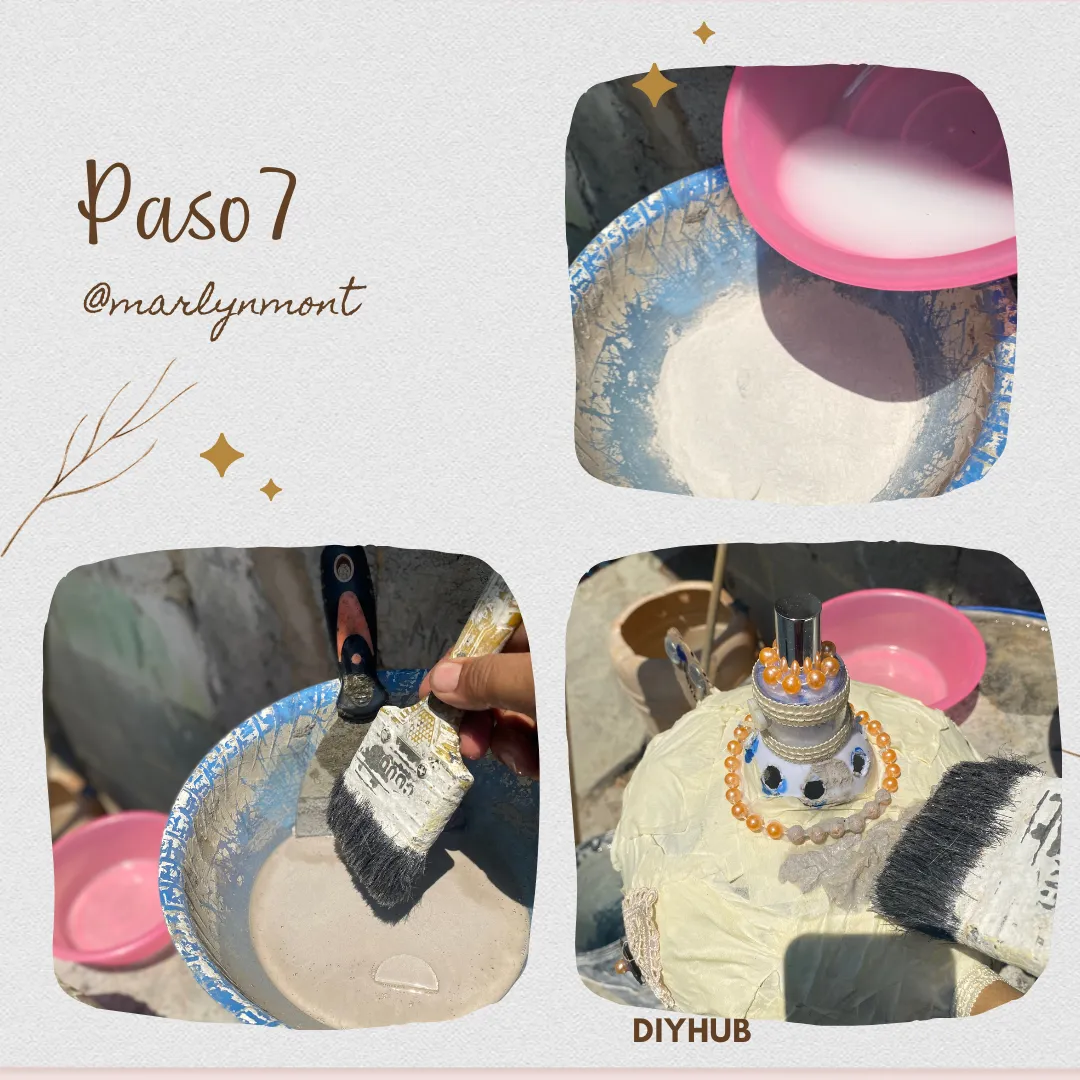
En este nuevo procedimiento vamos a unir un poco de yeso con el agua con pega que nos sobró del paso anterior, y lo aplicamos sobre nuestra tetera utilizando un pincel o una brocha pequeña esto debemos hacerlo rápido ya que el yeso seca muy rápido, y debemos estar pendientes que no se endurezca en la taza tratando de completarle el agua, cubrimos toda la superficie para que quede un poco mas dura , luego dejamos que seque por completo
In this new procedure we are going to join a bit of plaster with the glued water that was left over from the previous step, and we apply it on our teapot using a brush or a small brush. This must be done quickly since the plaster dries very quickly, and we must be aware that it does not harden in the cup trying to complete the water, We cover the entire surface to make it a little harder, then we let it dry completely
Mi tetera es para colocar mis paletas de madera así que a ésta le voy a abrir unos orificios ayudándome con un clavo previamente calentado en la parte superior de mi envase, allí irán mis paletas
My teapot is to place my wooden palettes so I am going to open some holes in it helping me with a previously heated nail in the upper part of my container, my palettes will go there
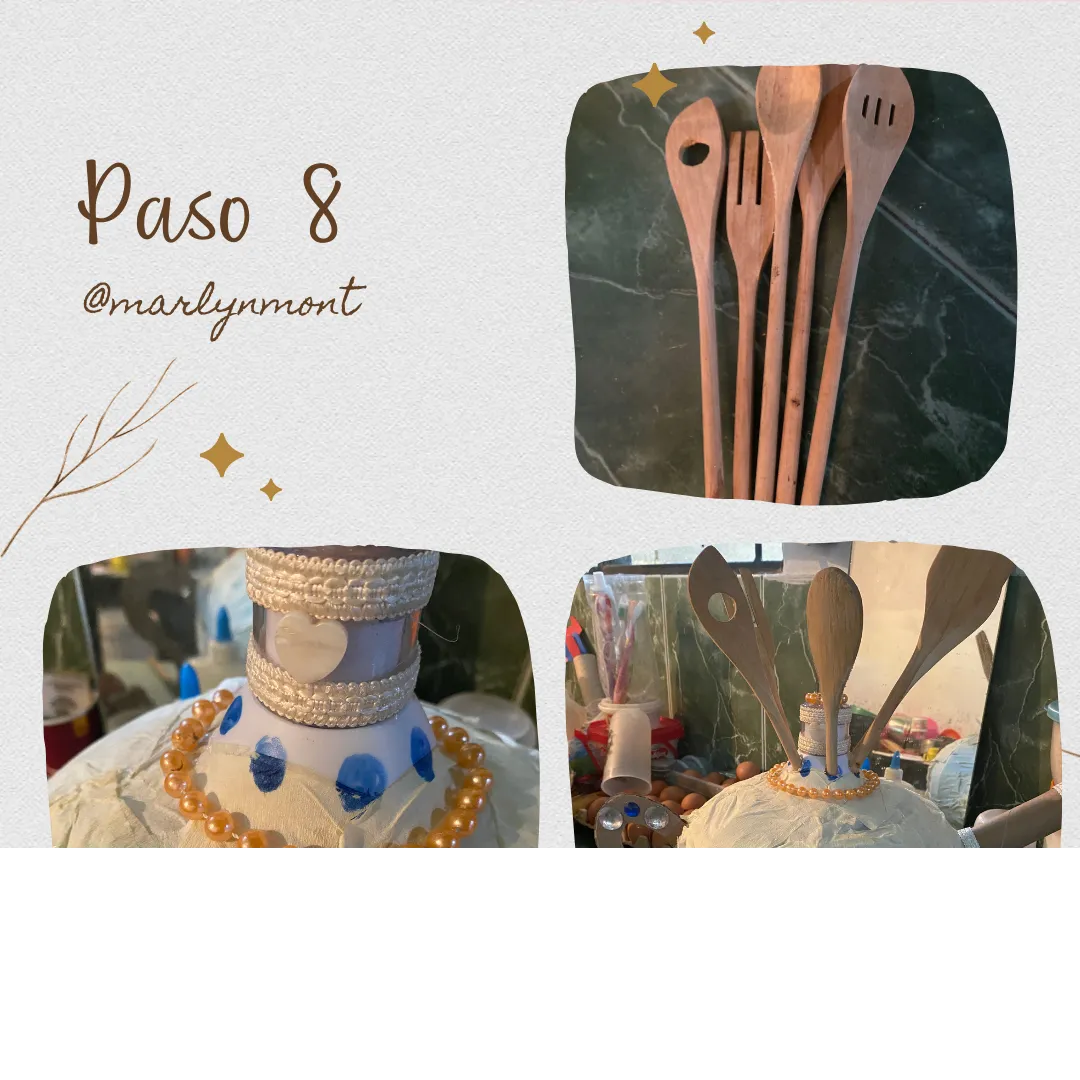
Luego procedemos a pintar del color que nos guste, yo utilicé el color negro y aproveche el color amarillento del papel como base, y ayudándome con un algodón manché de color marrón por encima dando toques ligeros con el algodón, y asi darle aspecto de tetera antigua
Then we proceed to paint the color that we like, I used the black color and took advantage of the yellowish color of the paper as a base, and helping me with a cotton ball I stained brown on top giving light touches with the cotton, and thus give it the appearance of an old teapot

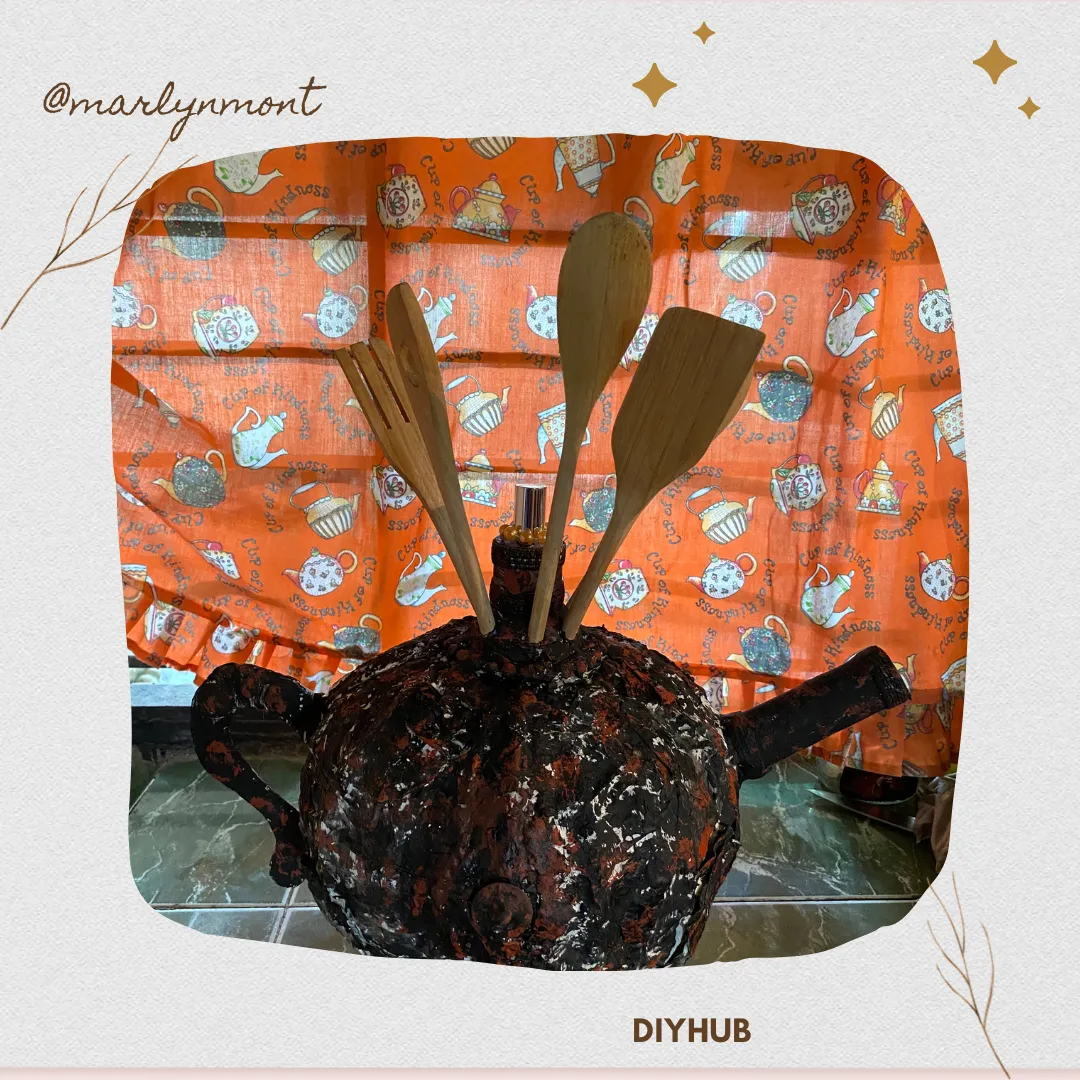
Y luego de todo el procedimiento aquí está el resultado, ahora tengo una nueva decoración para mi cocina, bastante útil para colocar mis paletas de madera:
And after all the procedure here is the result, now I have a new decoration for my kitchen, quite useful to place my wooden pallets:

Me encantó este tipo de concursos ya que nos hace volar la imaginación y la creatividad, espero poder participar en el siguiente concurso gracias por visitar mi post, les deseo mucha suerte a todos, hasta otra oportunidad 😊
I loved this type of contest as it makes our imagination and creativity fly, I hope to be able to participate in the next contest, thanks for visiting my post, I wish you all the best of luck, until another opportunity 😊
♦️♦️♦️♦️♦️🫖♦️♦️♦️♦️♦️
las fotos compartidas son de mi propiedad tomadas con mi teléfono iPhone 11 y editadas en Canva
the shared photos are owned by me taken with my iPhone 11 phone and edited in Canva