✨ ¡Saludos Comunidad Creativa! | ¡Greetings Creative Community! ✨
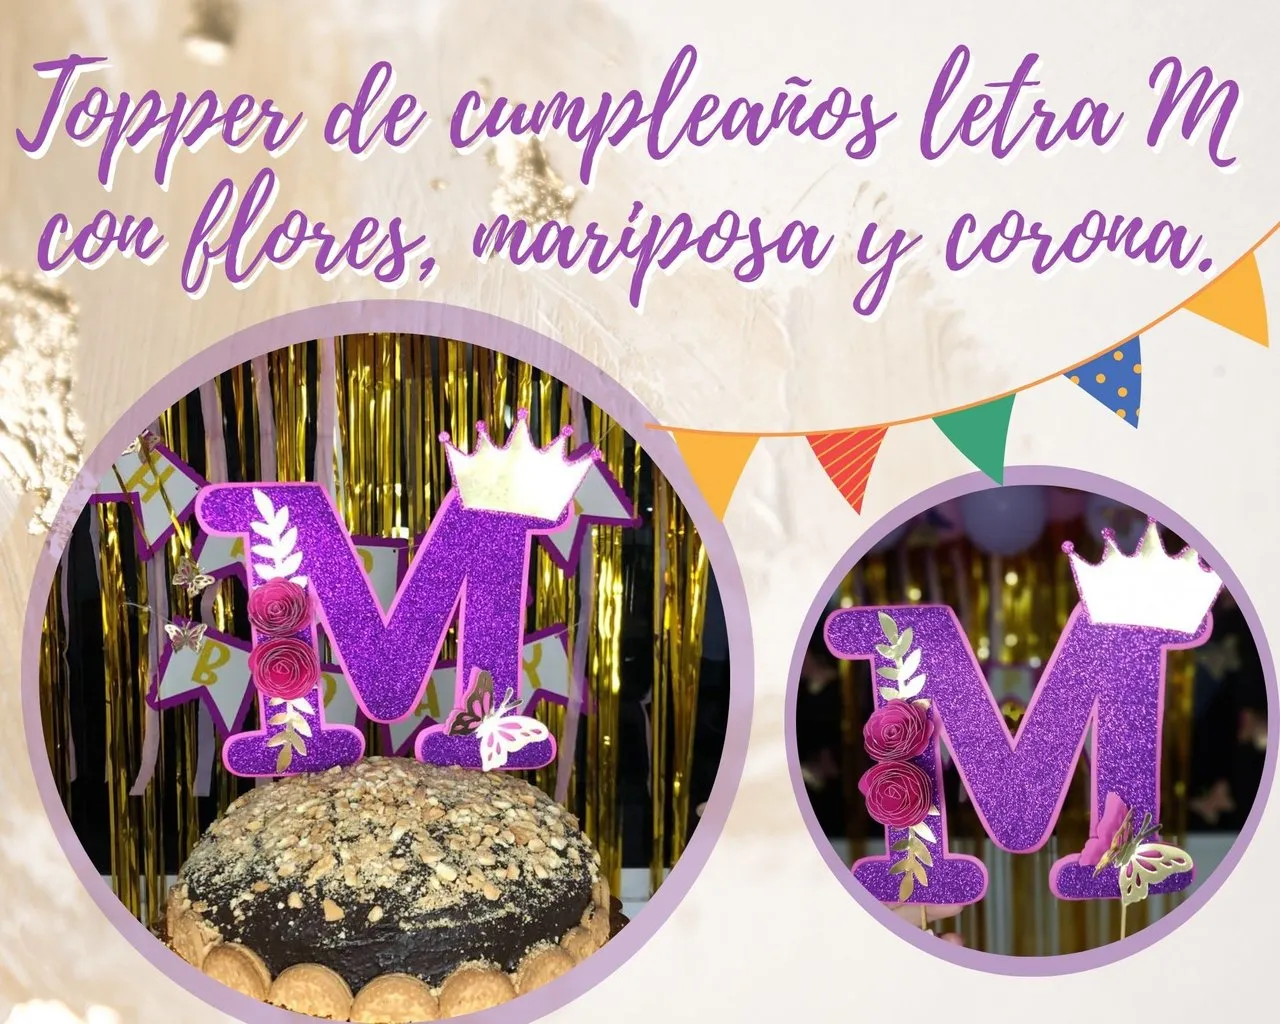
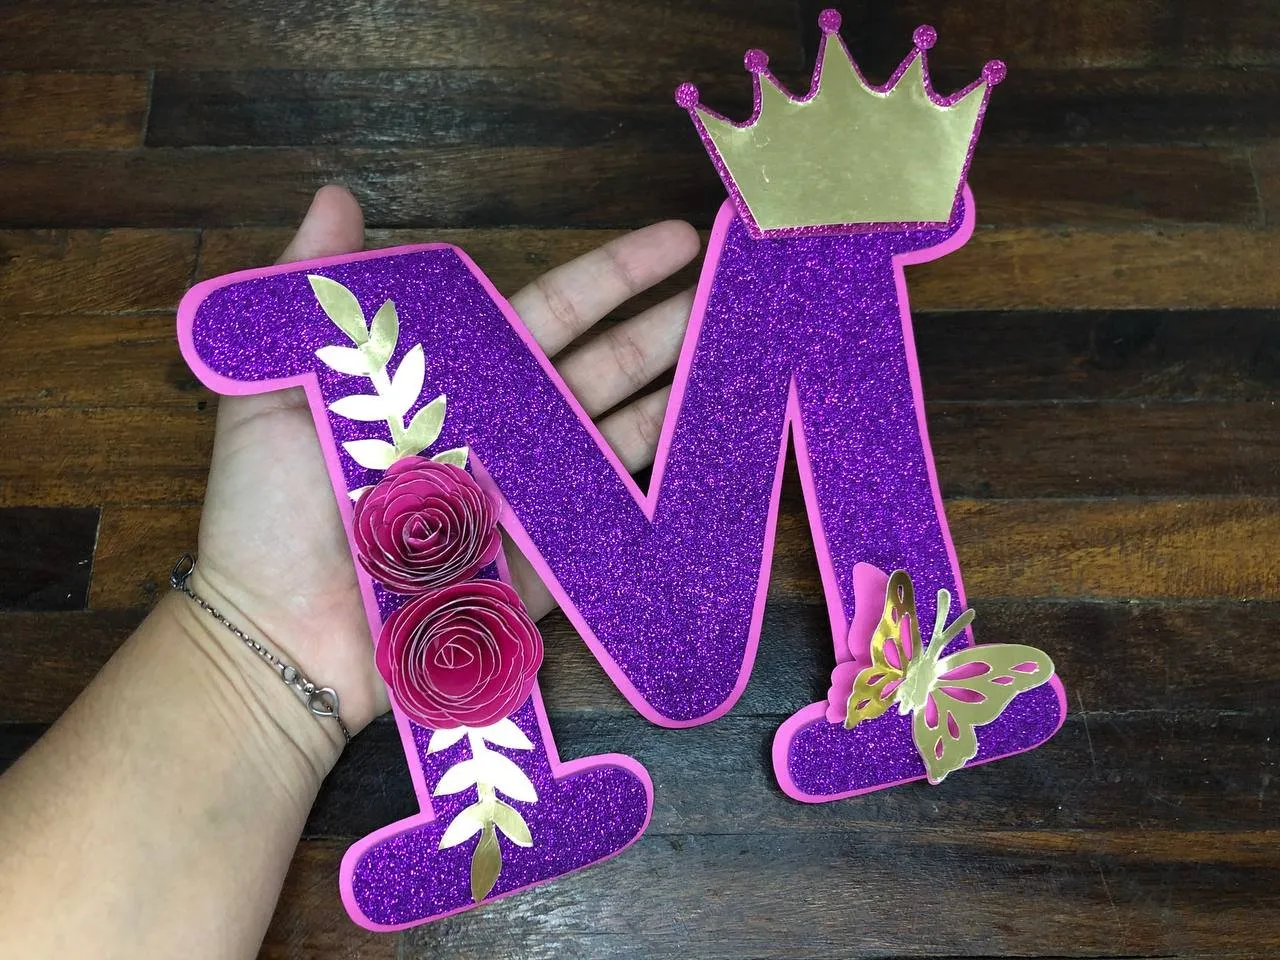
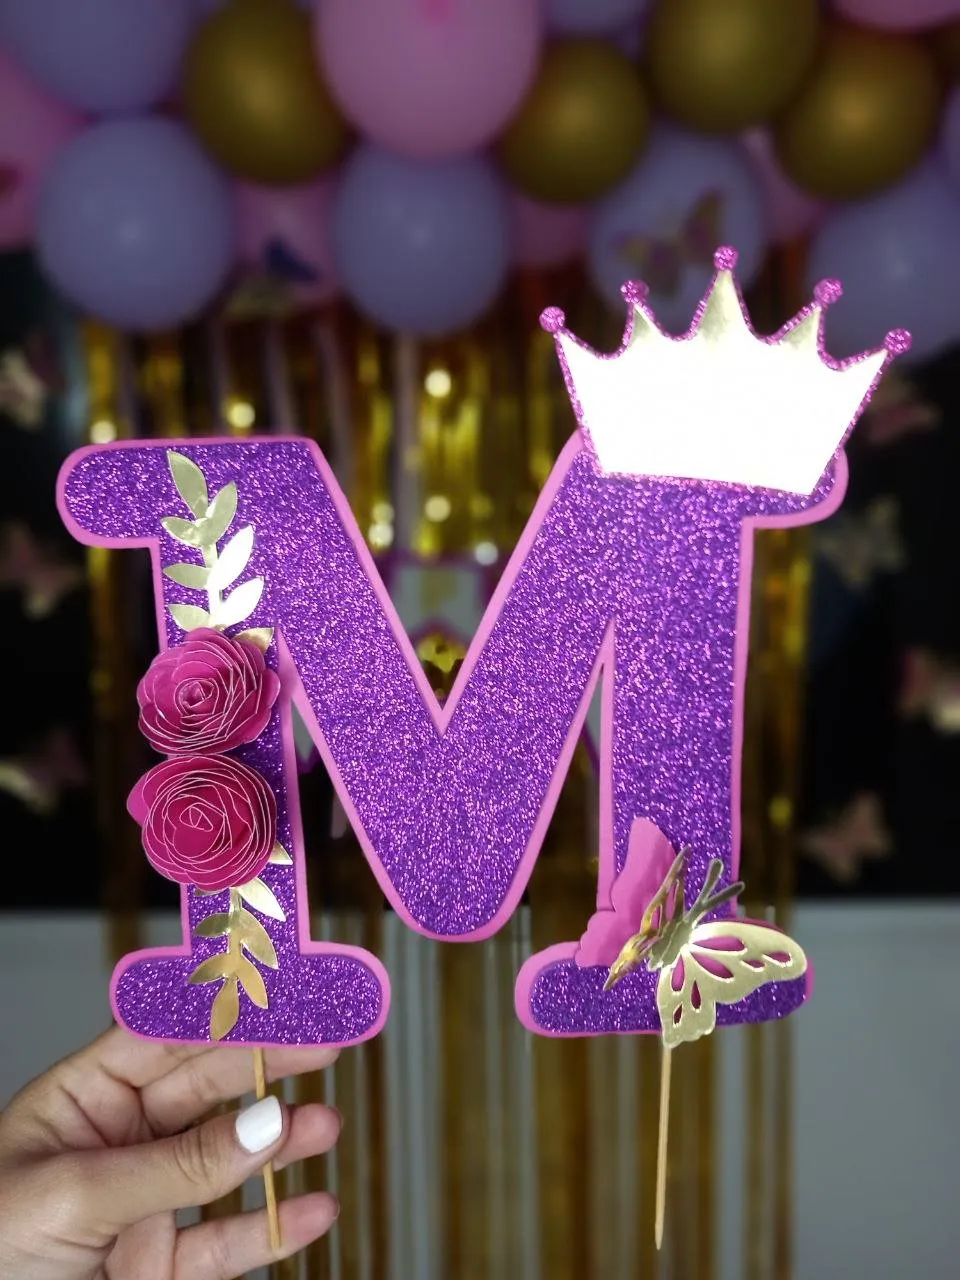
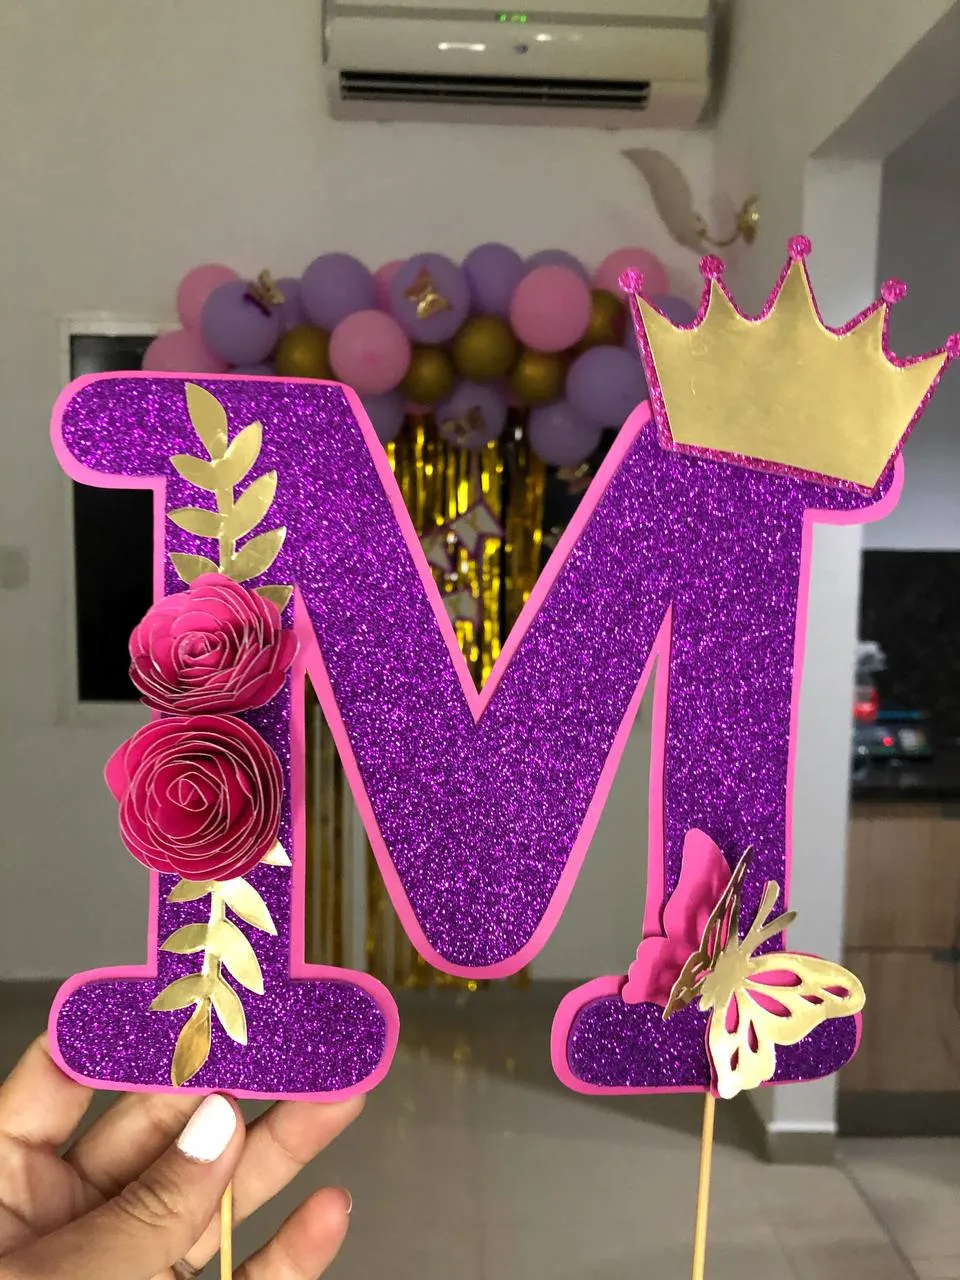
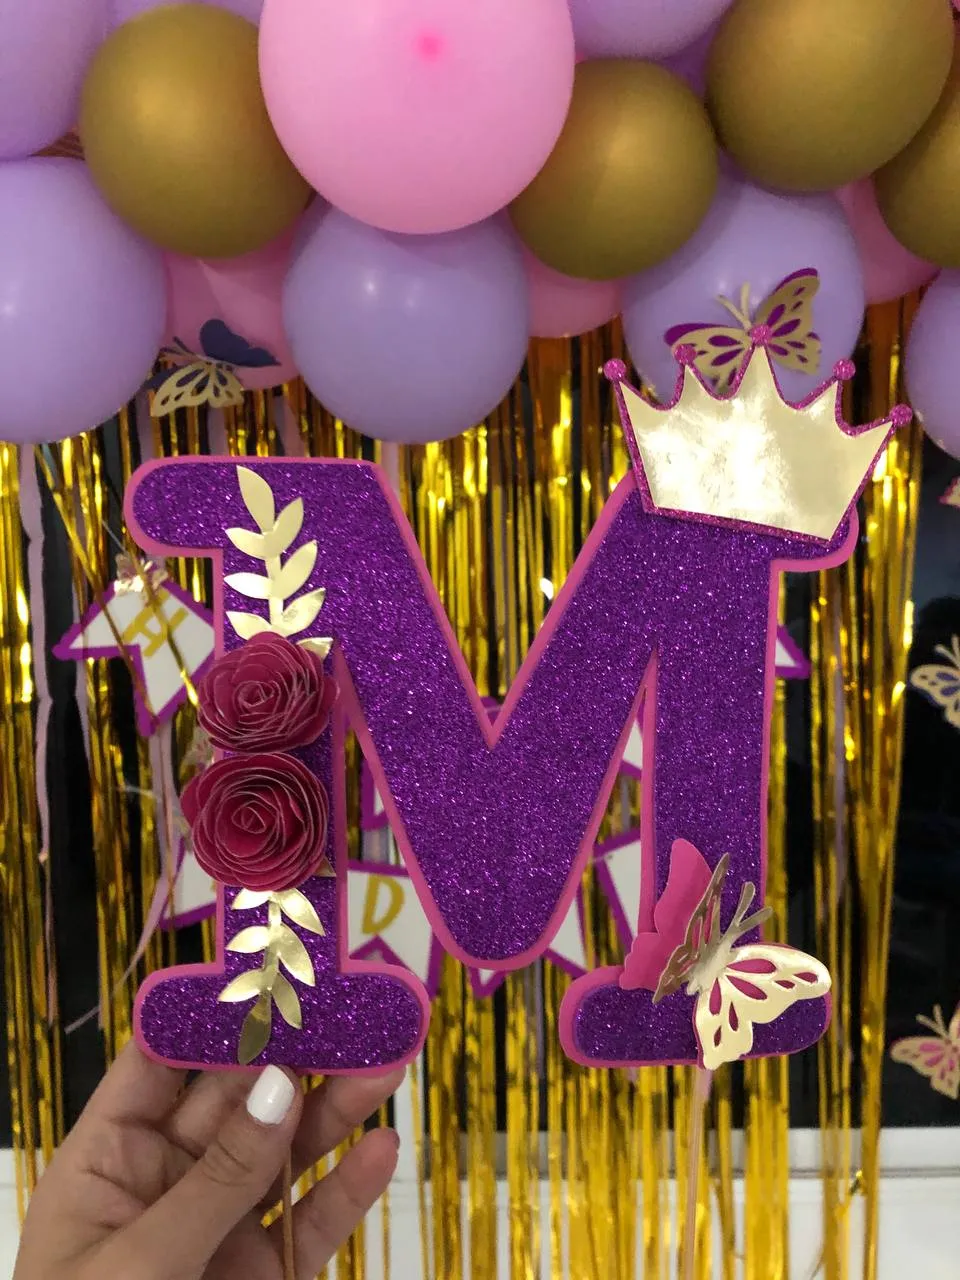
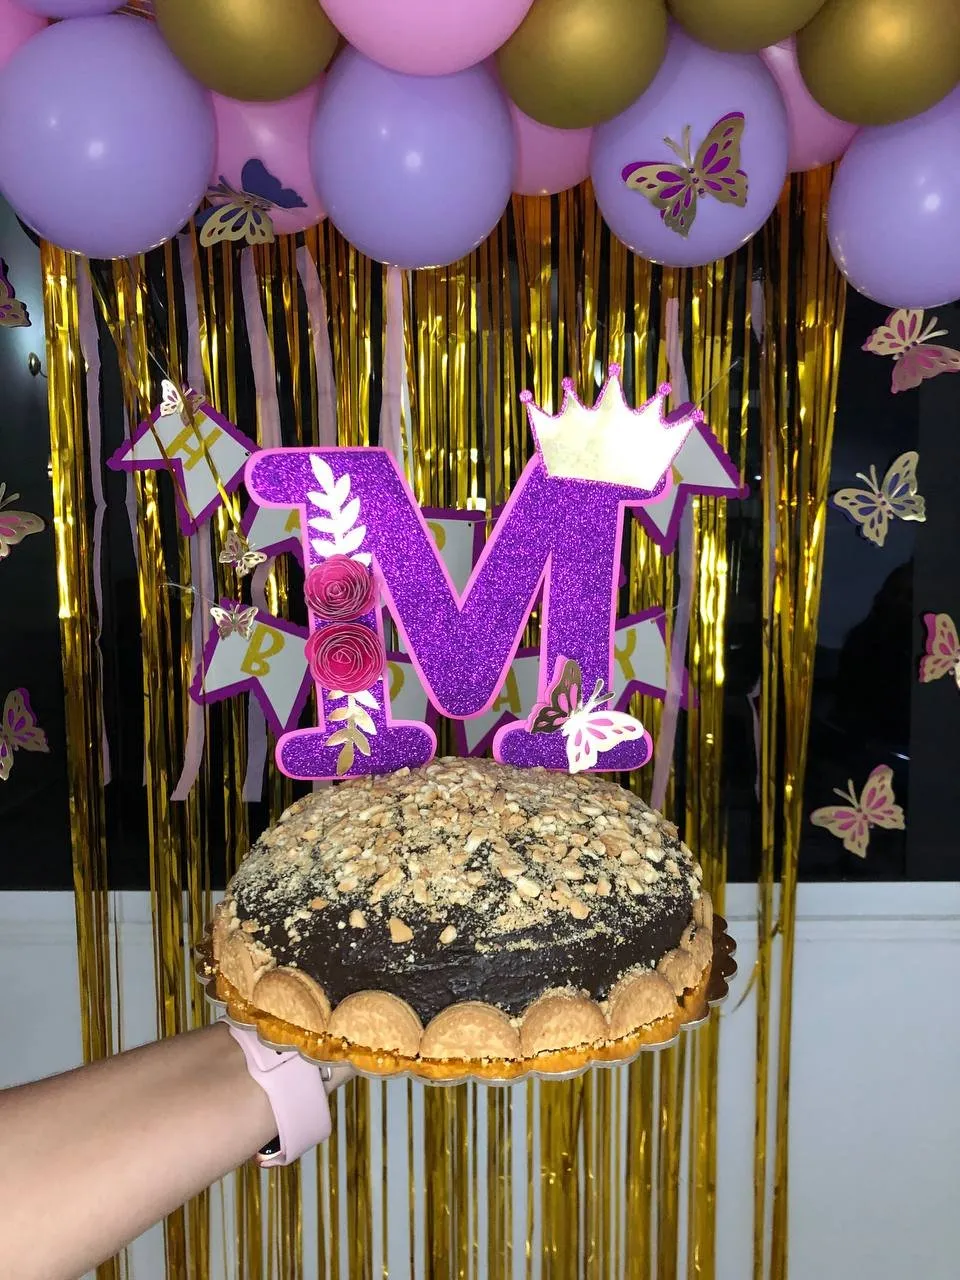
¡Feliz inicio de semana! Espero que esta nueva semana que comienza sea muy productiva y esté llena de cosas buenas, en esta oportunidad les quiero compartir la elaboración de un lindo topper de cumpleaños en forma de letra M utilizando la combinación de colores rosado, morado y dorado y decorado con una mariposa, flores y una corona, un topper bastante lindo y delicado que elaboré para mi cumpleaños y en conjunto con la torta quedó hermoso, hoy les comparto el procedimiento y espero que les guste el resultado tanto como a mí, sin más, ¡vamos a crear!
¡Happy start of the week! I hope that this new week that is beginning is very productive and full of good things, this time I want to share the preparation of a cute birthday topper in the shape of the letter M using the combination of pink, purple and gold colors and decorated with a butterfly, flowers and a crown, a very cute and delicate topper that I made for my birthday and together with the cake it was beautiful, today I share the procedure and I hope you like the result as much as I do, without further ado , ¡We are going to create!

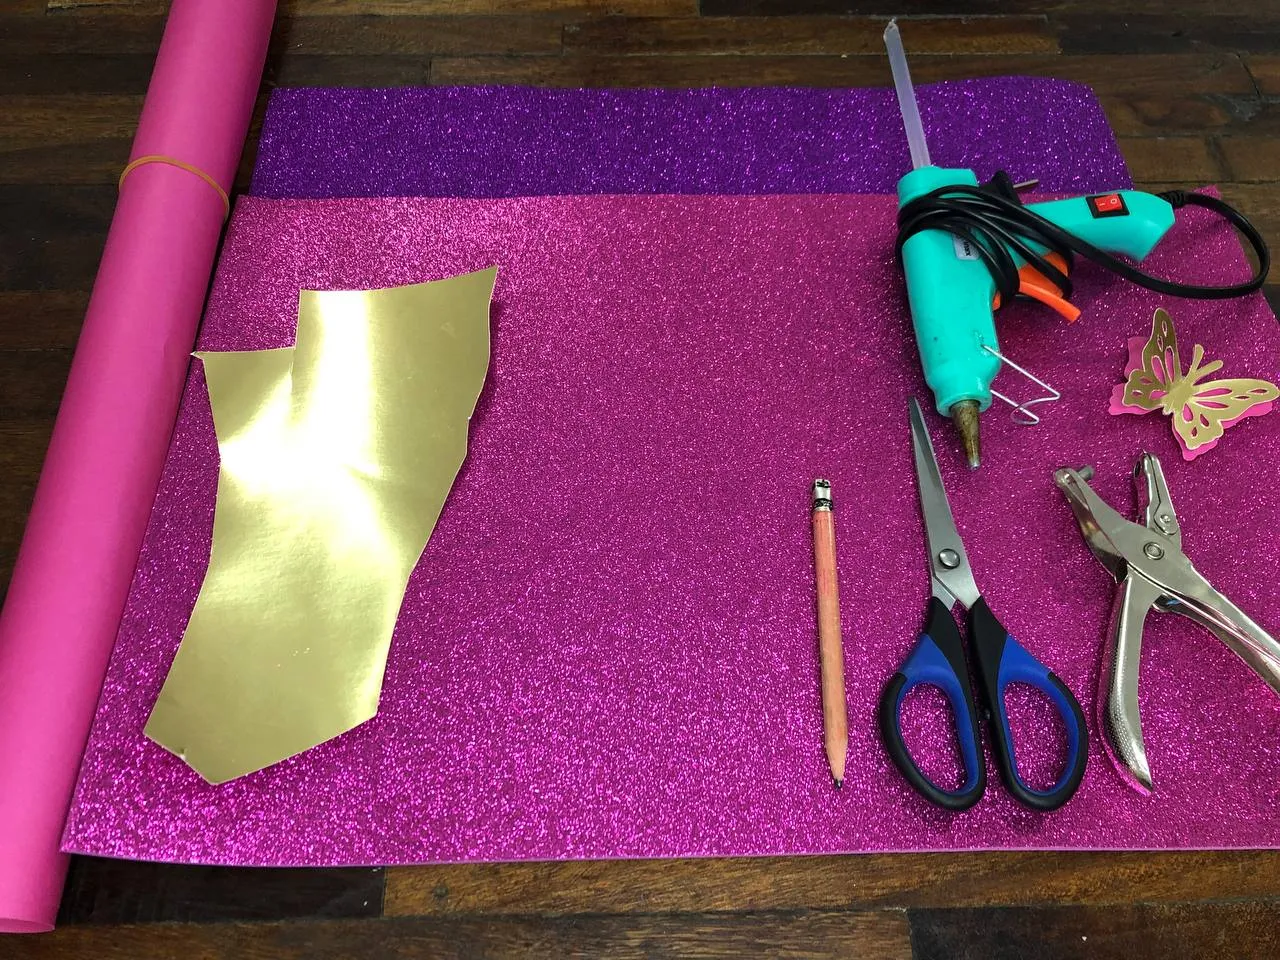
✨ Cartulina metalizada dorada.
✨ Cartulina escolar rosada.
✨ Mariposa troquelada pequeña.
✨ Palito de altura.
✨ Abrehuecos.
✨ Lápiz.
✨ Tijera.
✨ Silicón.
✨ Gold metallic cardboard.
✨ Pink school cardboard.
✨ Small stamped butterfly.
✨ Height stick.
✨ Opener.
✨ Pencil.
✨ Scissors.
✨ Silicone.

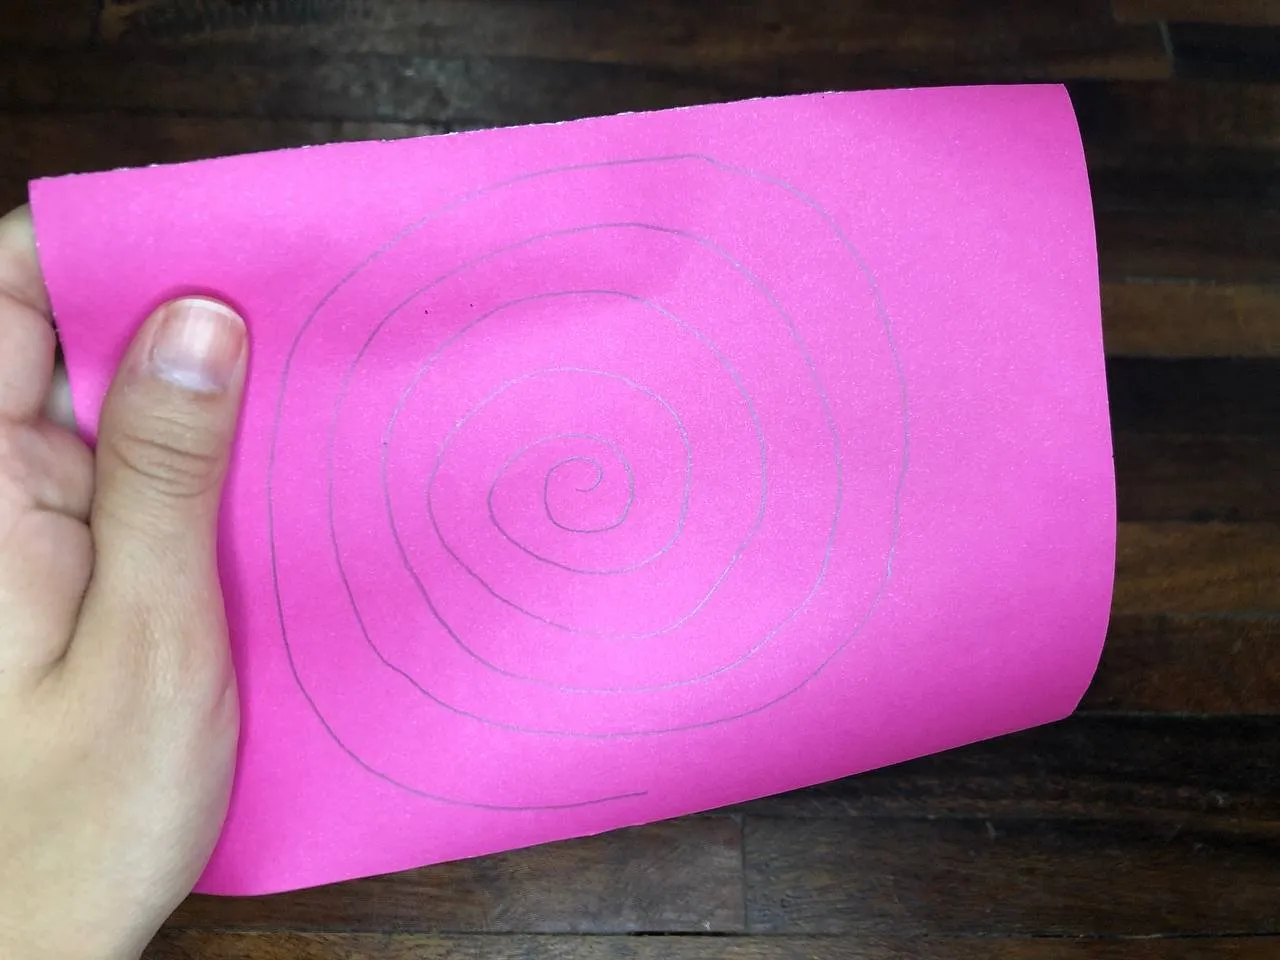
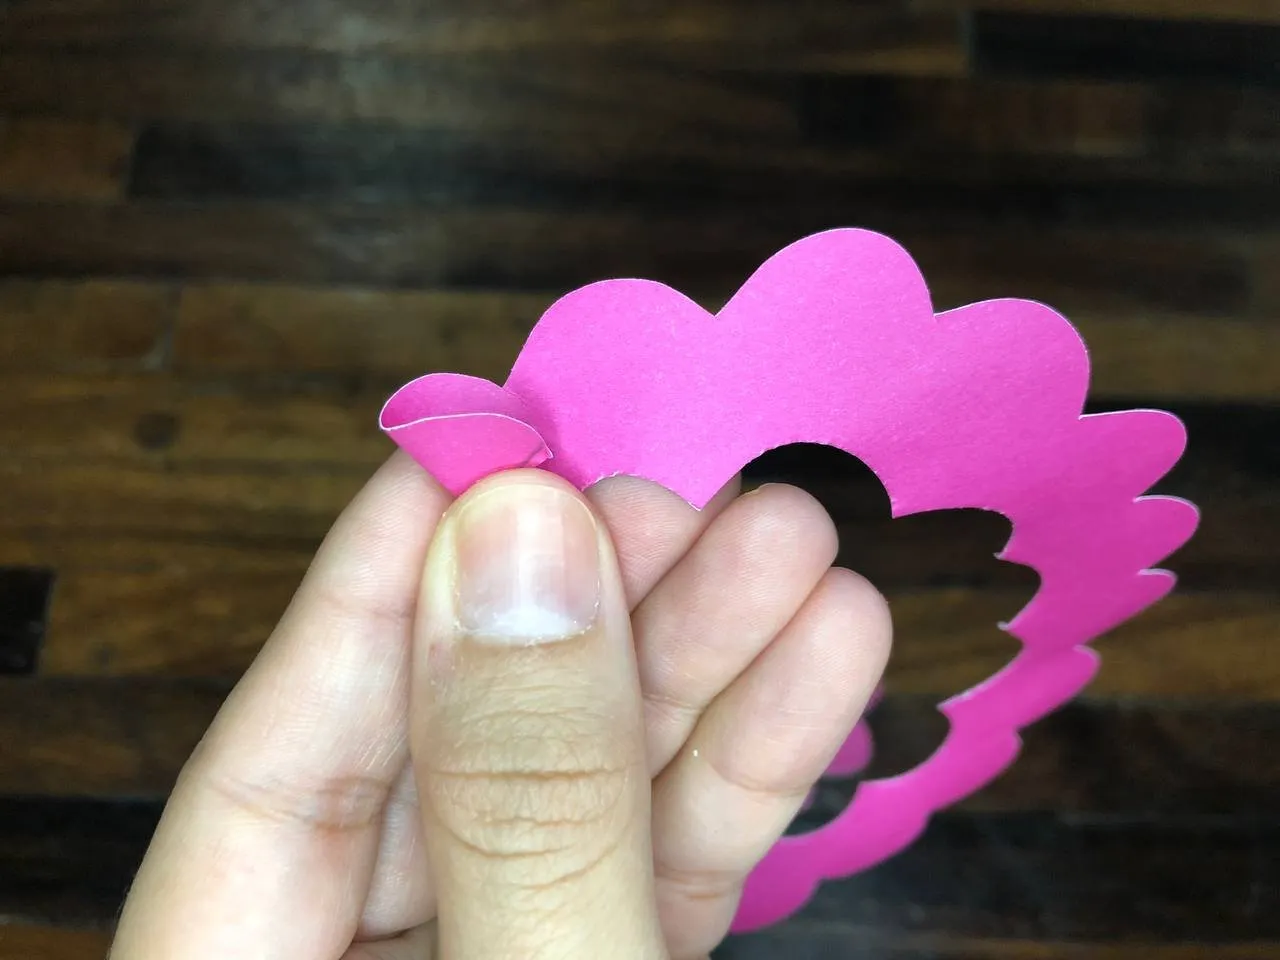
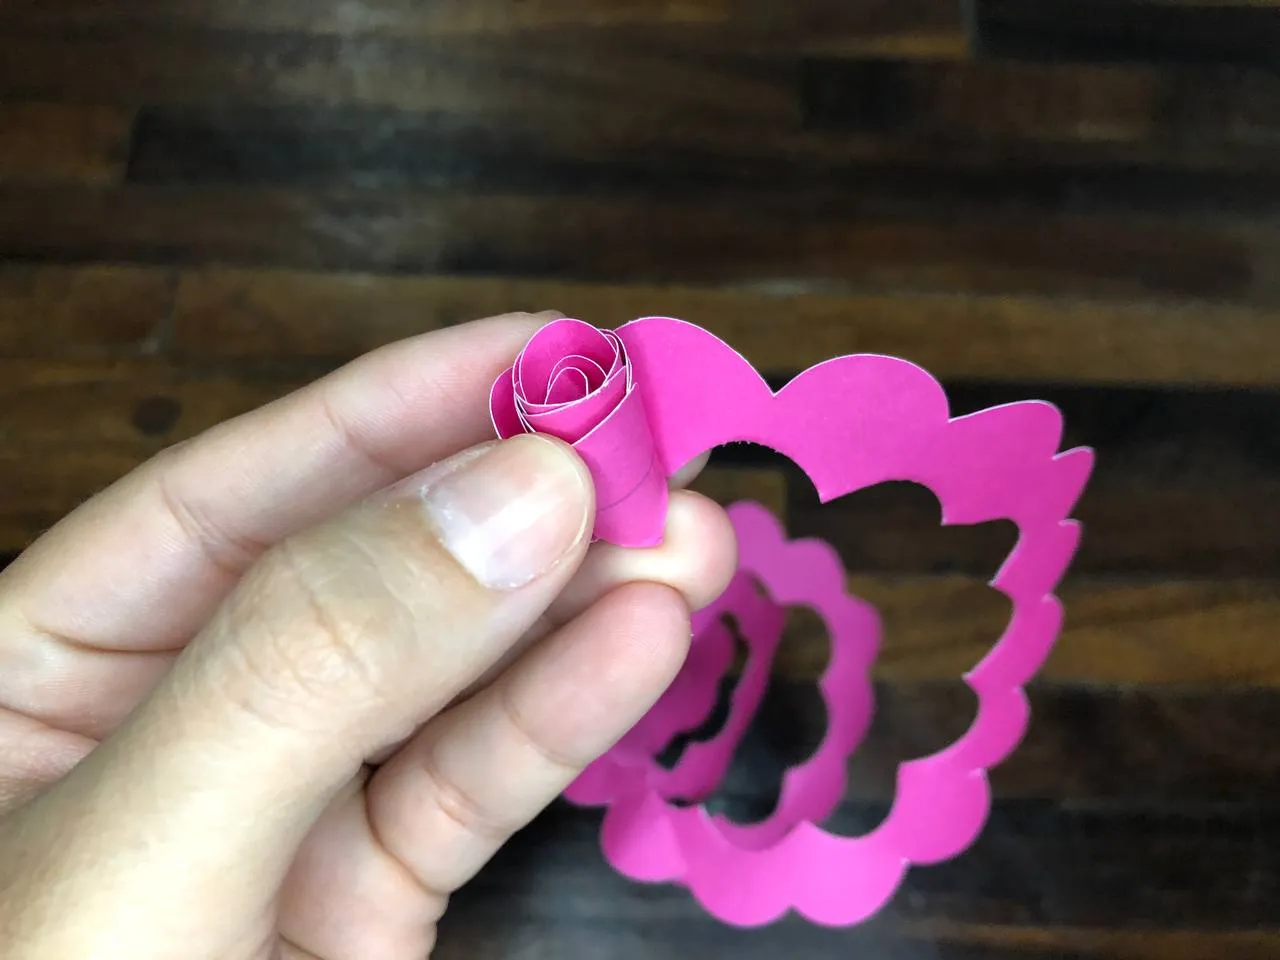
✨ PASO 1. Comenzamos haciendo 2 flores pequeñas, para ello recortaremos 2 piezas de cartulina rosada en forma cuadrada y le dibujamos un espiral en el centro, luego recortamos siguiendo el espiral de afuera hacia adentro pero dándole forma ondulada al recortar y nos debe quedar de la siguiente manera:
✨ STEP 1. We start making 2 small flowers, for this we will cut 2 pieces of pink cardboard in a square shape and we will draw a spiral in the center, then we will cut following the spiral from the outside in but giving it a wavy shape when cutting and we should be as follows:

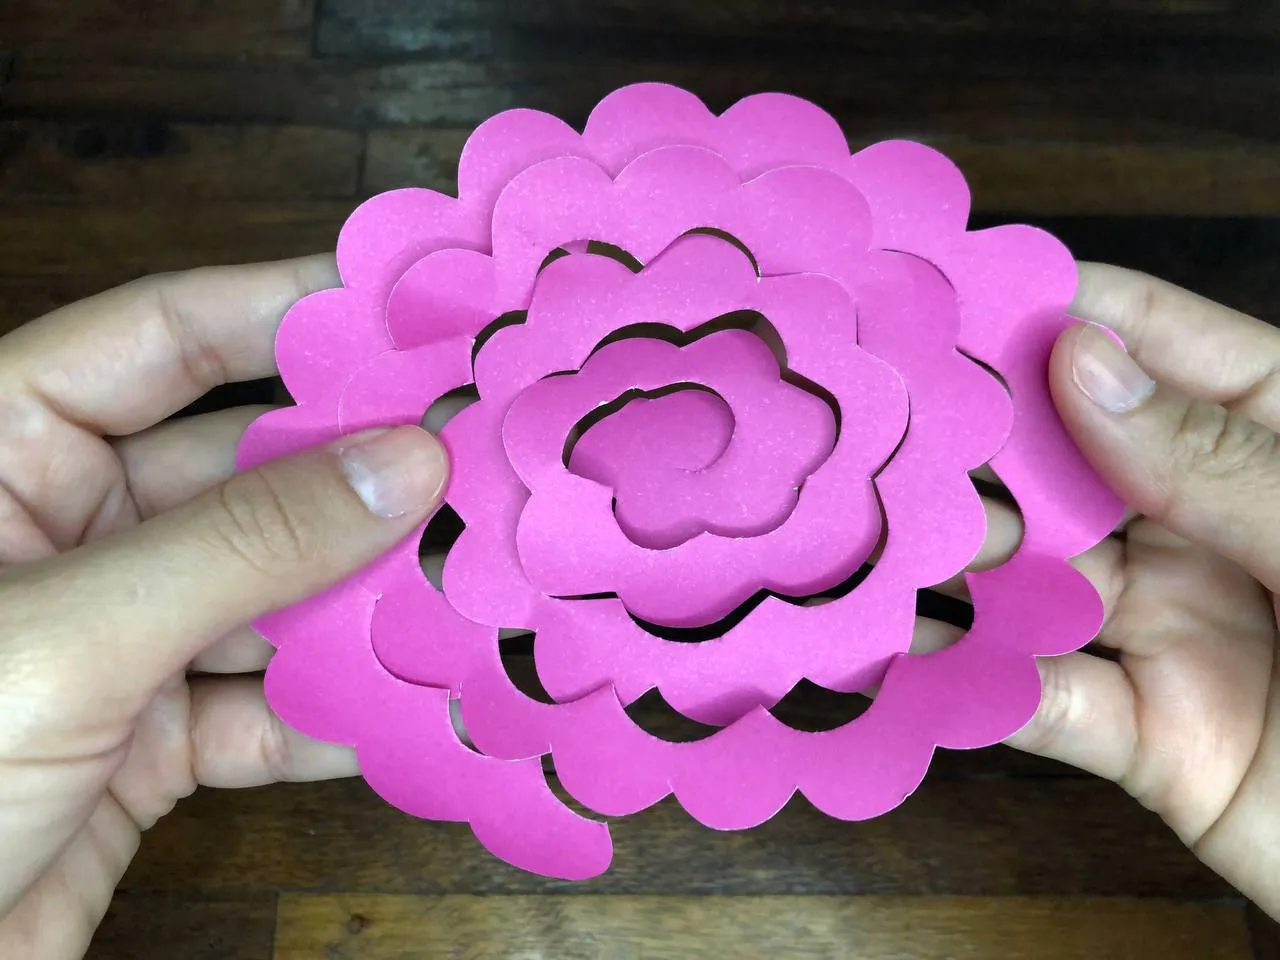
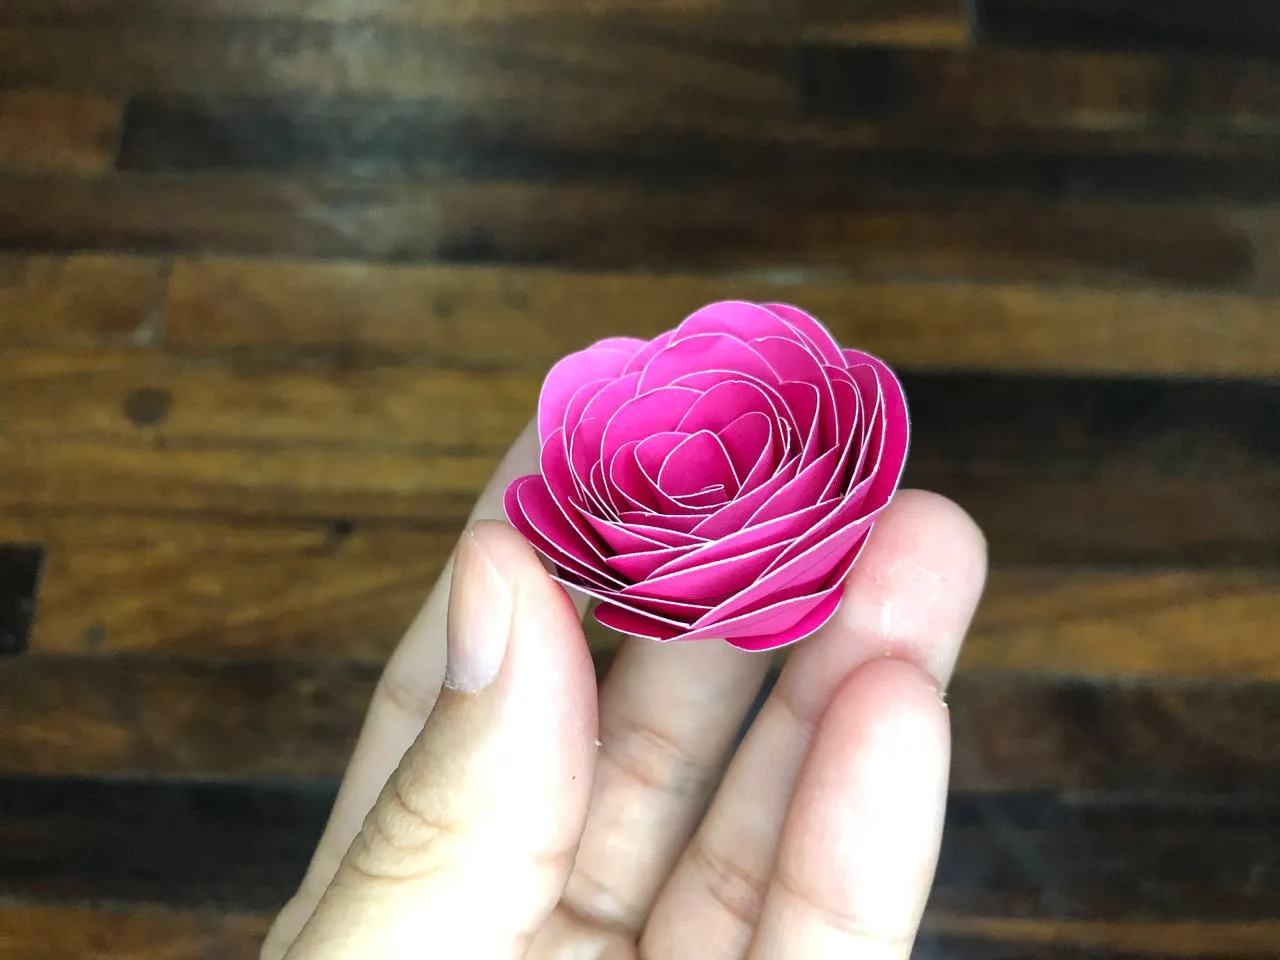
✨ PASO 2. Comenzamos a enrollar la cartulina desde la punta de afuera hasta la de adentro, vamos enrollando procurando que la flor quede bien ajustada, al llegar al final le soltamos un poco de presión y la dejamos del tamaño que más nos guste, por ultimo sellamos con silicón en la parte de abajo para que no pierda la forma.
✨ STEP 2. We begin to roll the cardboard from the outer end to the inner end, we are rolling making sure that the flower fits well, when we reach the end we release a little pressure and leave it the size that best we like it, finally we seal with silicone at the bottom so that it does not lose its shape.

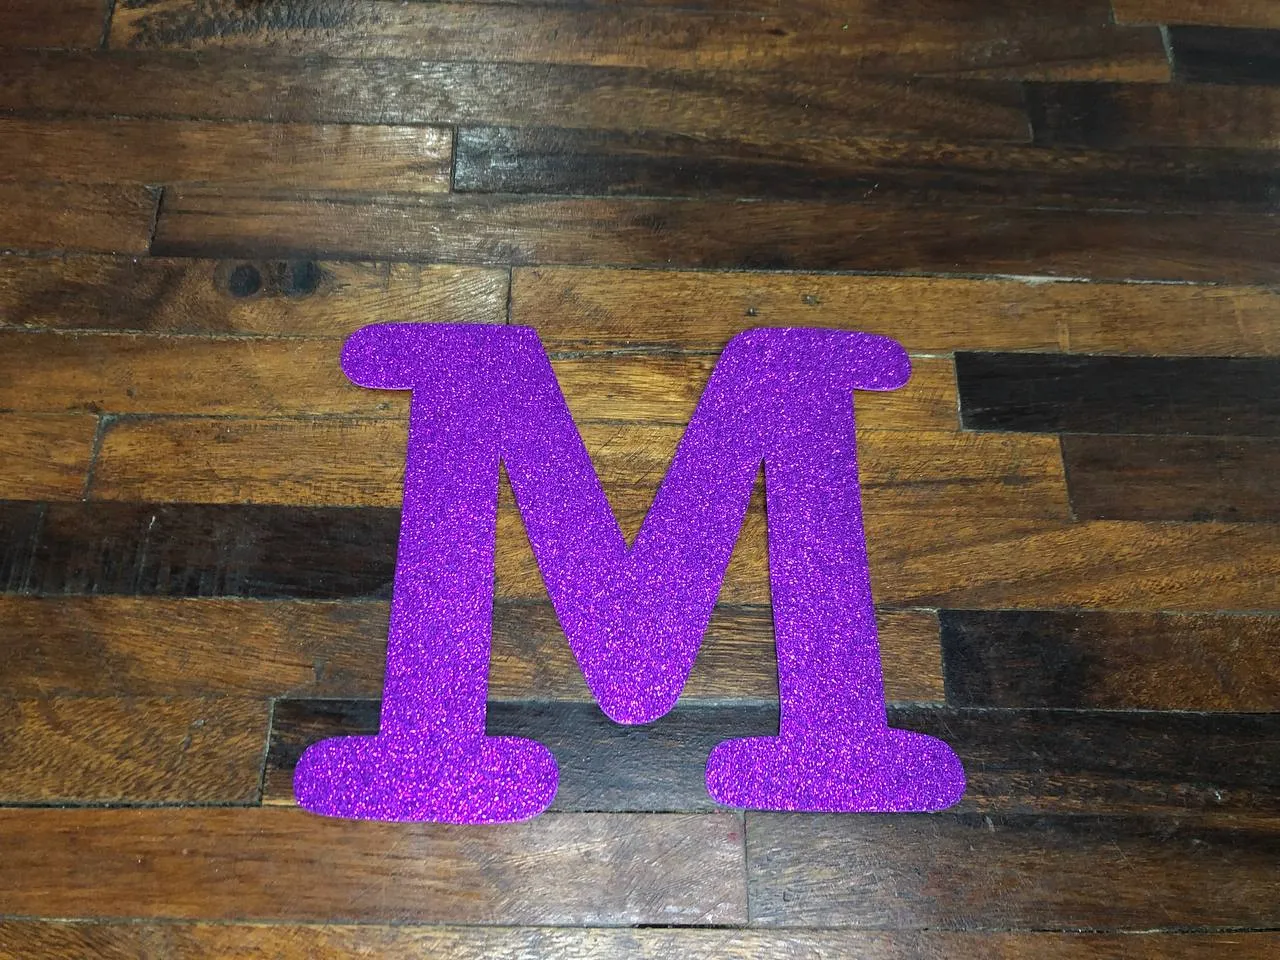
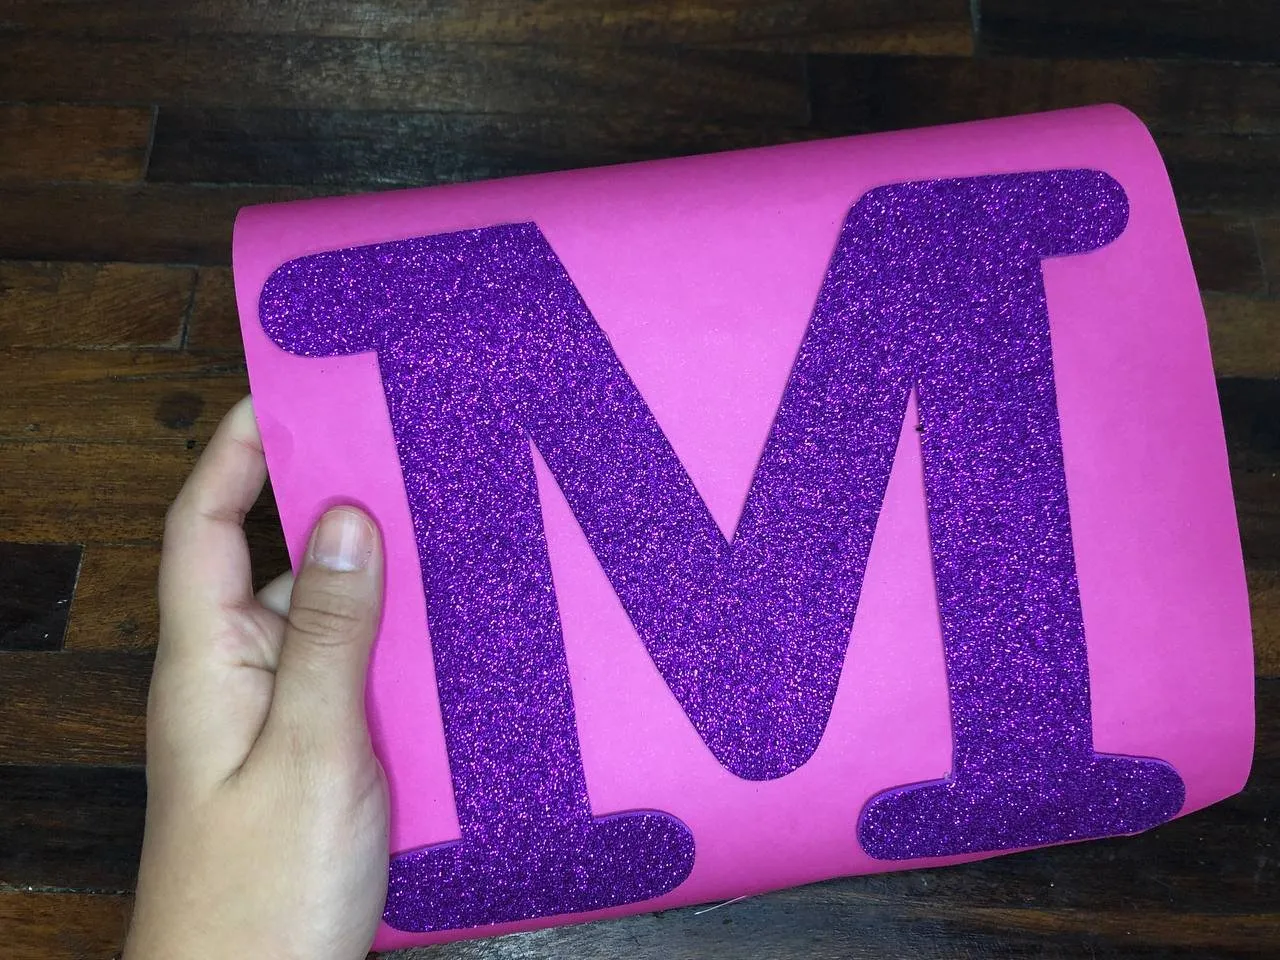
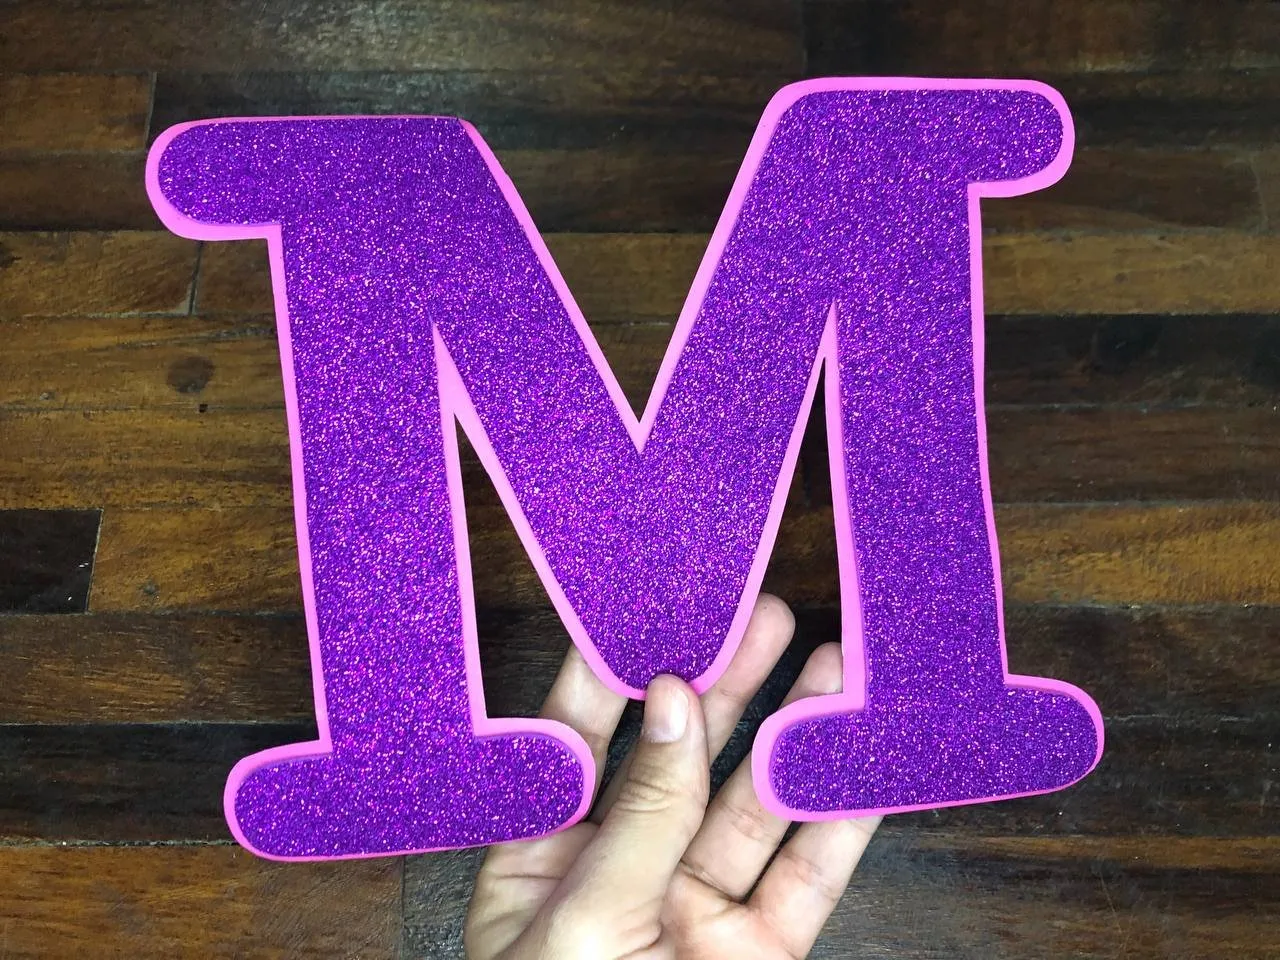
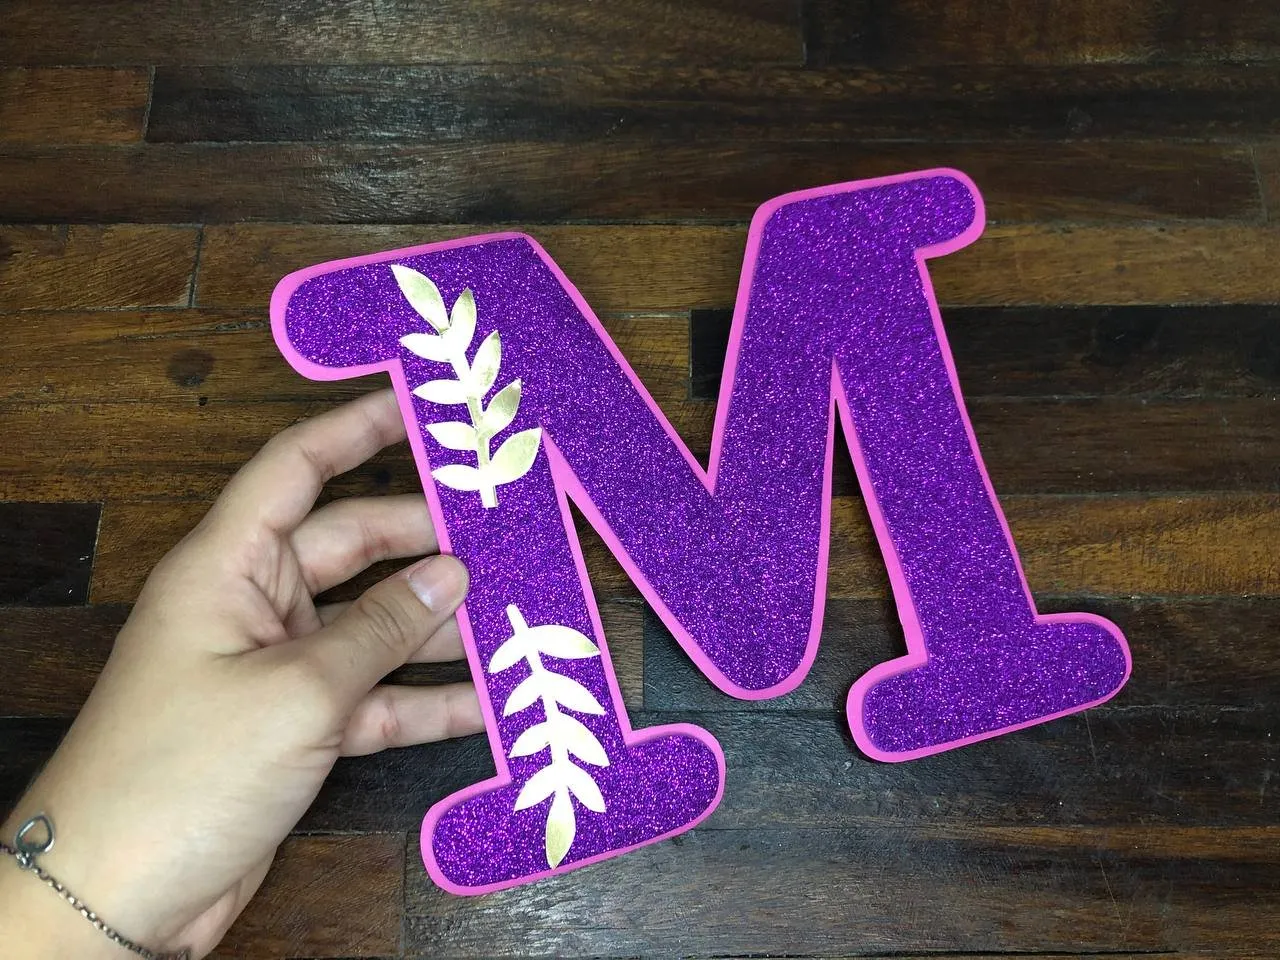
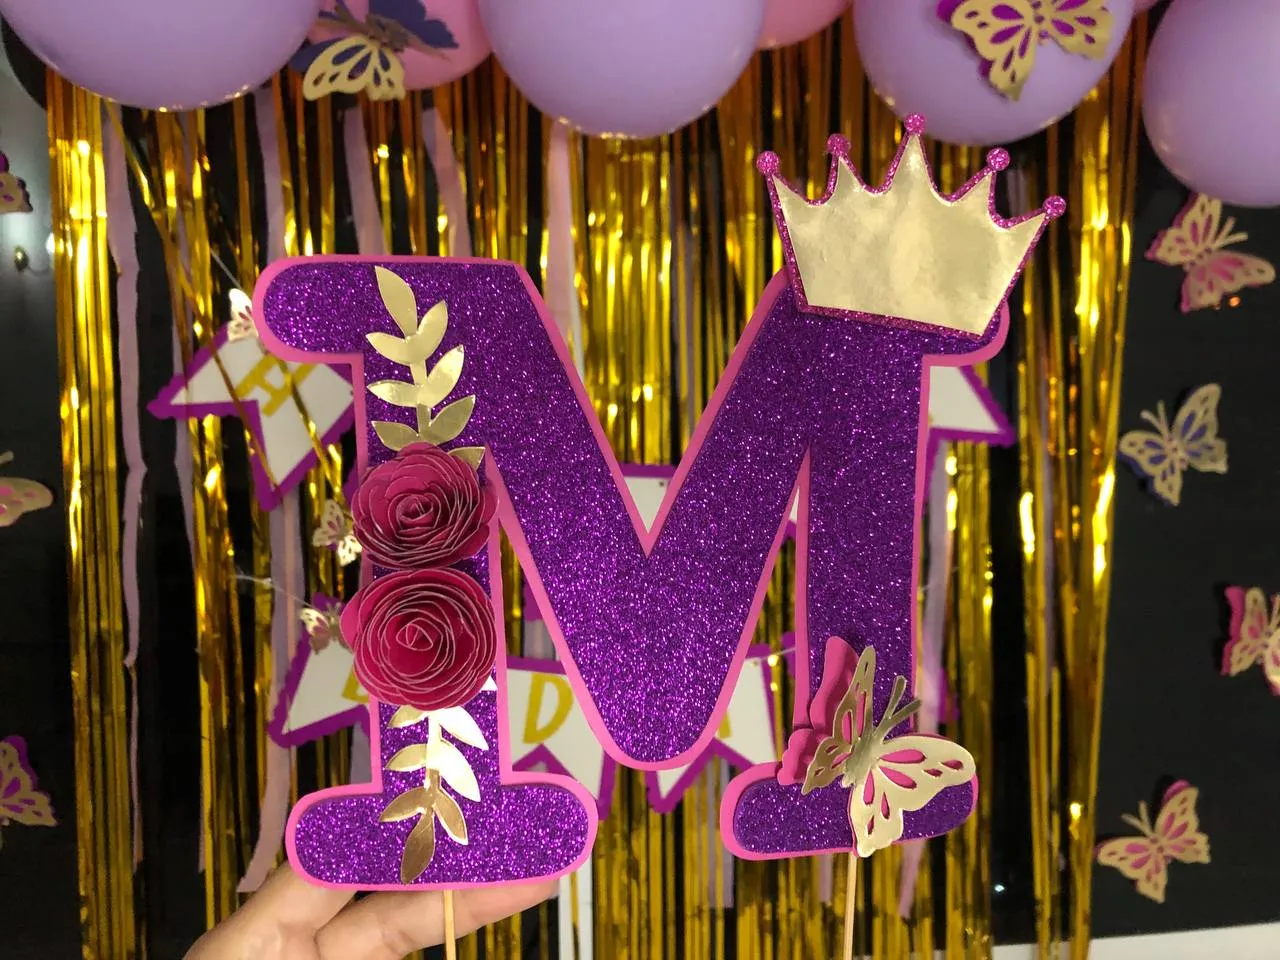
✨ PASO 3. Ahora hacemos la letra en el foami escarchado morado del tamaño de nuestra preferencia, en mi caso haré una letra M y luego recortamos, pegamos la letra sobre la cartulina rosada y vamos a recortar dejando un delgado borde de esta alrededor de la letra.
✨ STEP 3. Now we make the letter in the purple frosted foami the size of our preference, in my case I will make a letter M and then we cut, paste the letter on the pink cardboard and we are going to cut leaving a thin border of it is around the letter.
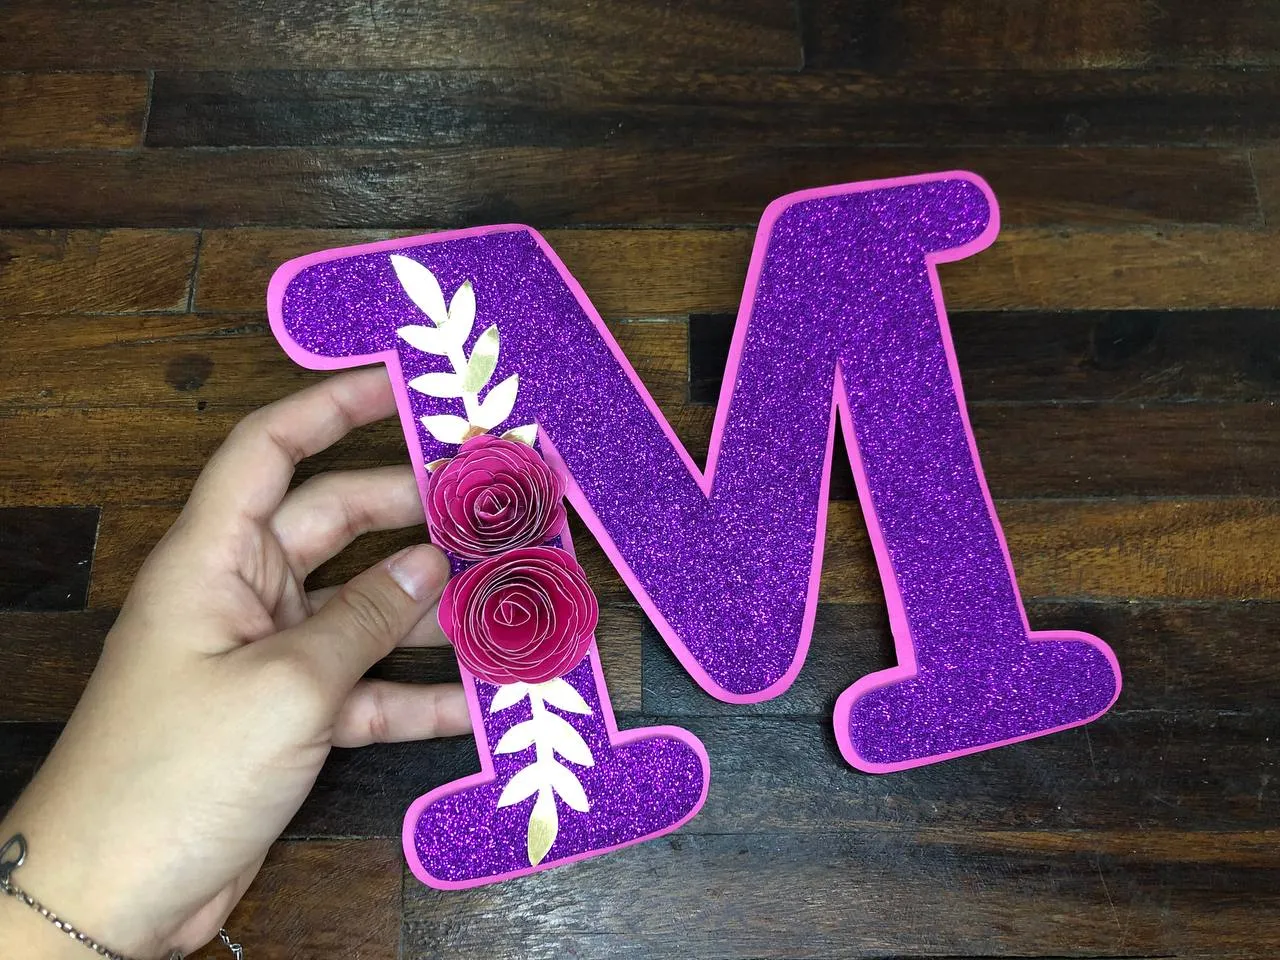
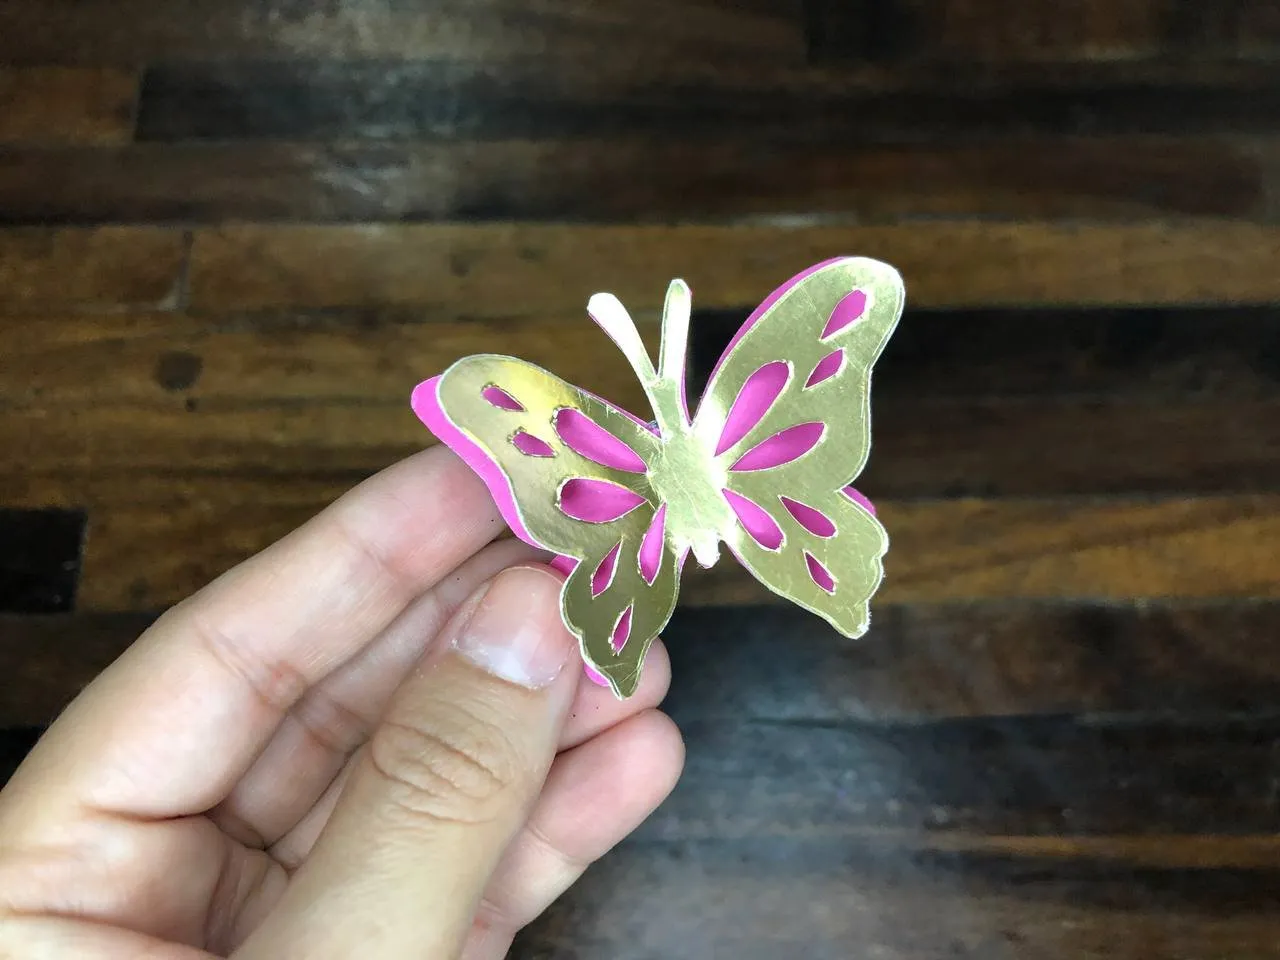
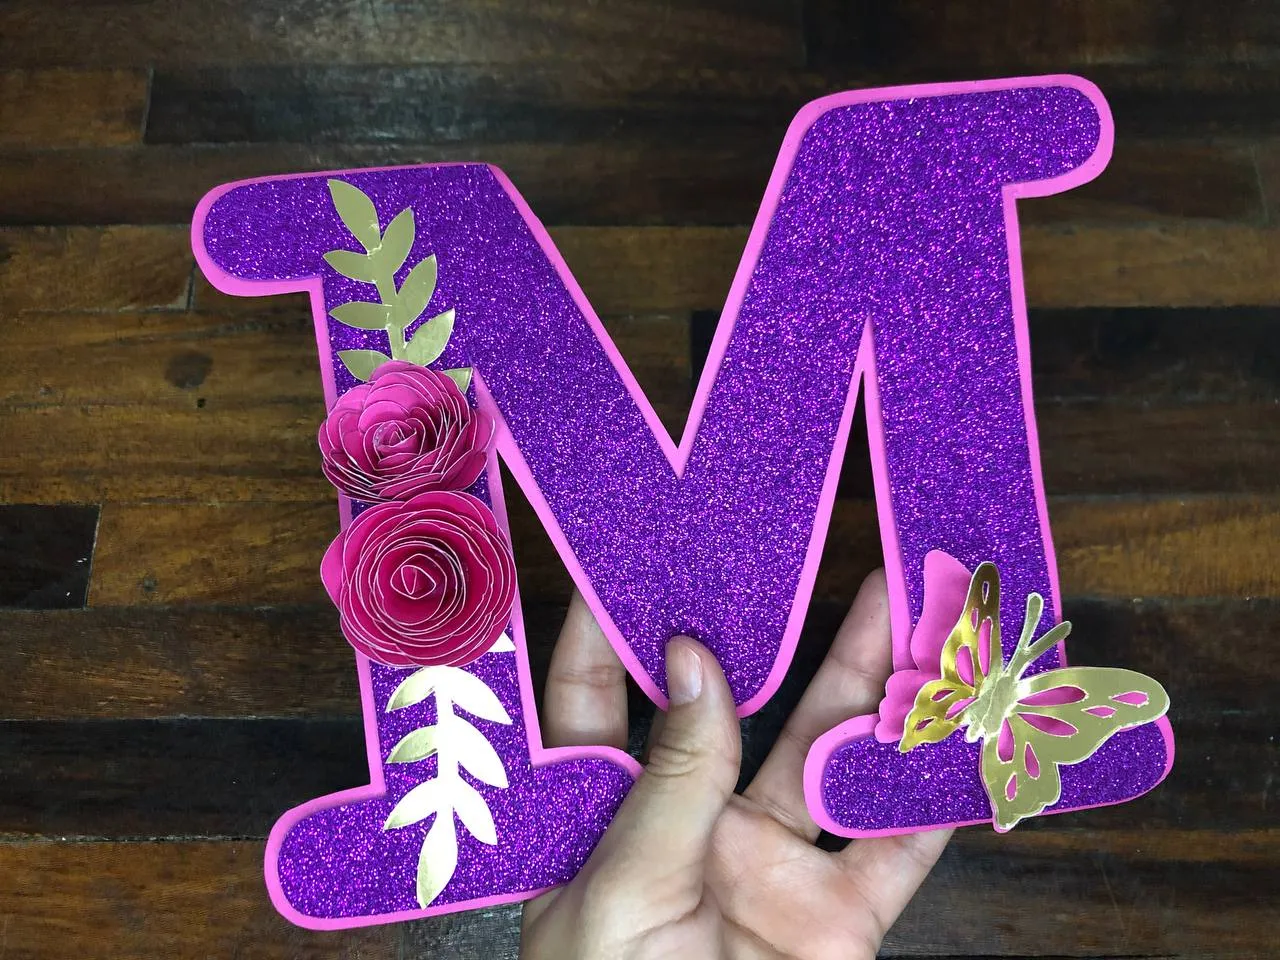
✨ PASO 4. Hacemos 2 ramitas pequeñas en cartulina metalizada dorada y recortamos, luego las pegamos de manera vertical en uno de los lados de la letra cada una hacia un sentido diferente y en el centro de ellas pegamos las flores que hicimos anteriormente, del lado contrario de la letra vamos a pegar la mariposa troquelada, o podemos situarla donde más nos guste.
✨ STEP 4. We make 2 small twigs in golden metallic cardboard and cut them out, then we glue them vertically on one of the sides of the letter, each one towards a different direction and in the center of them we glue the flowers we made Previously, on the opposite side of the letter we are going to paste the die-cut butterfly, or we can place it wherever we like .

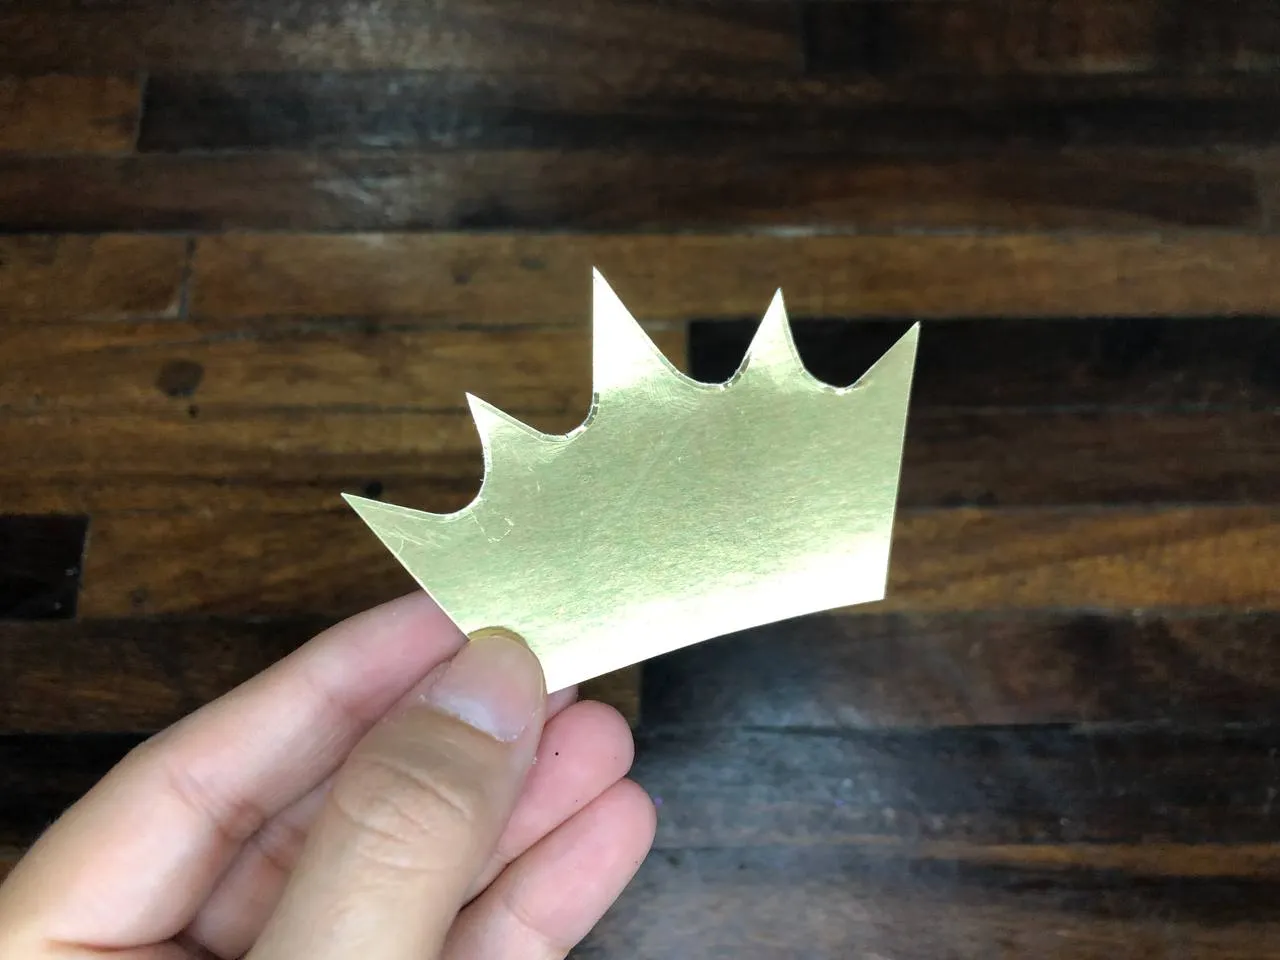
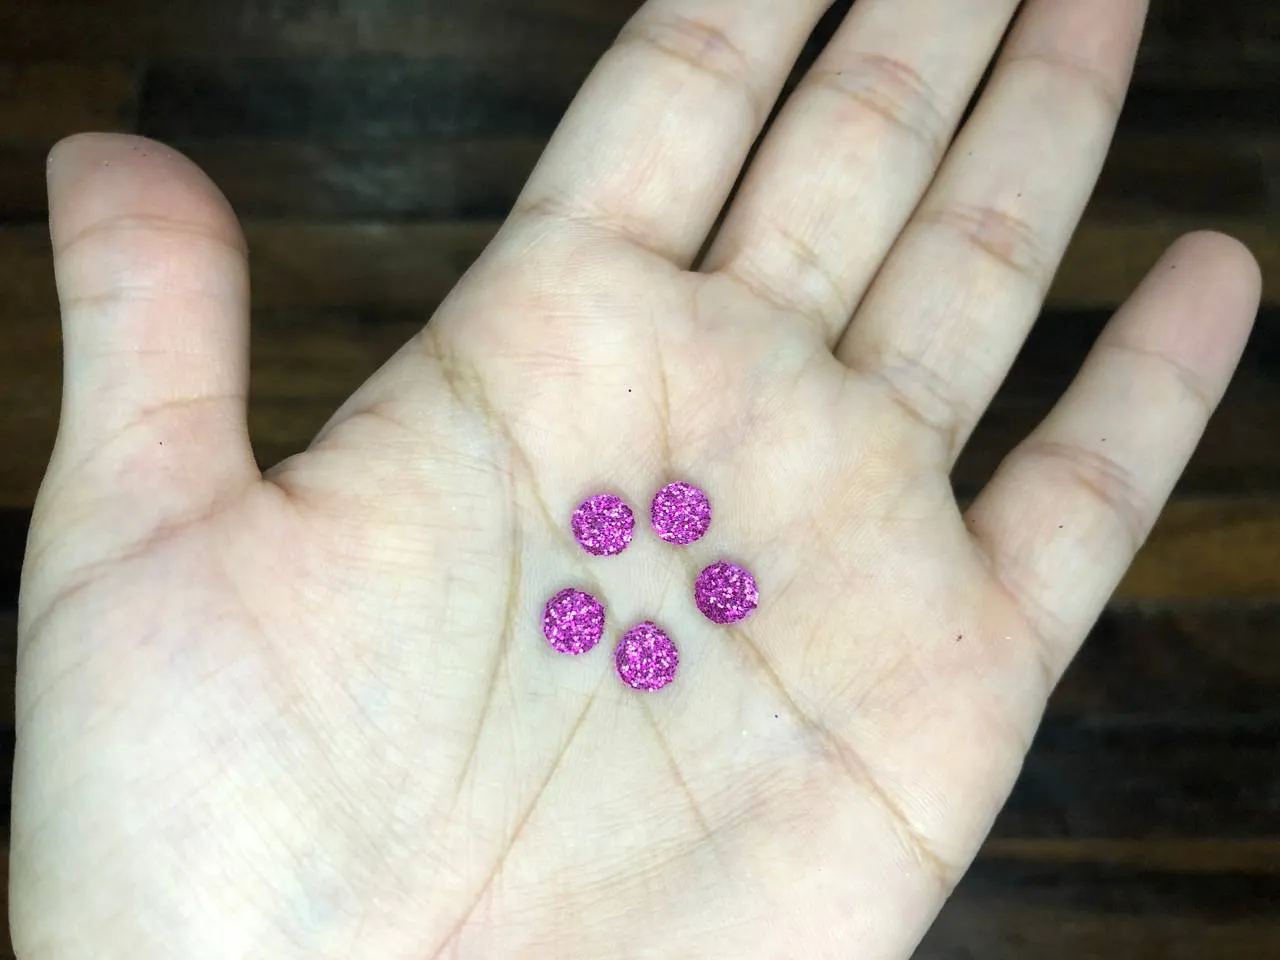
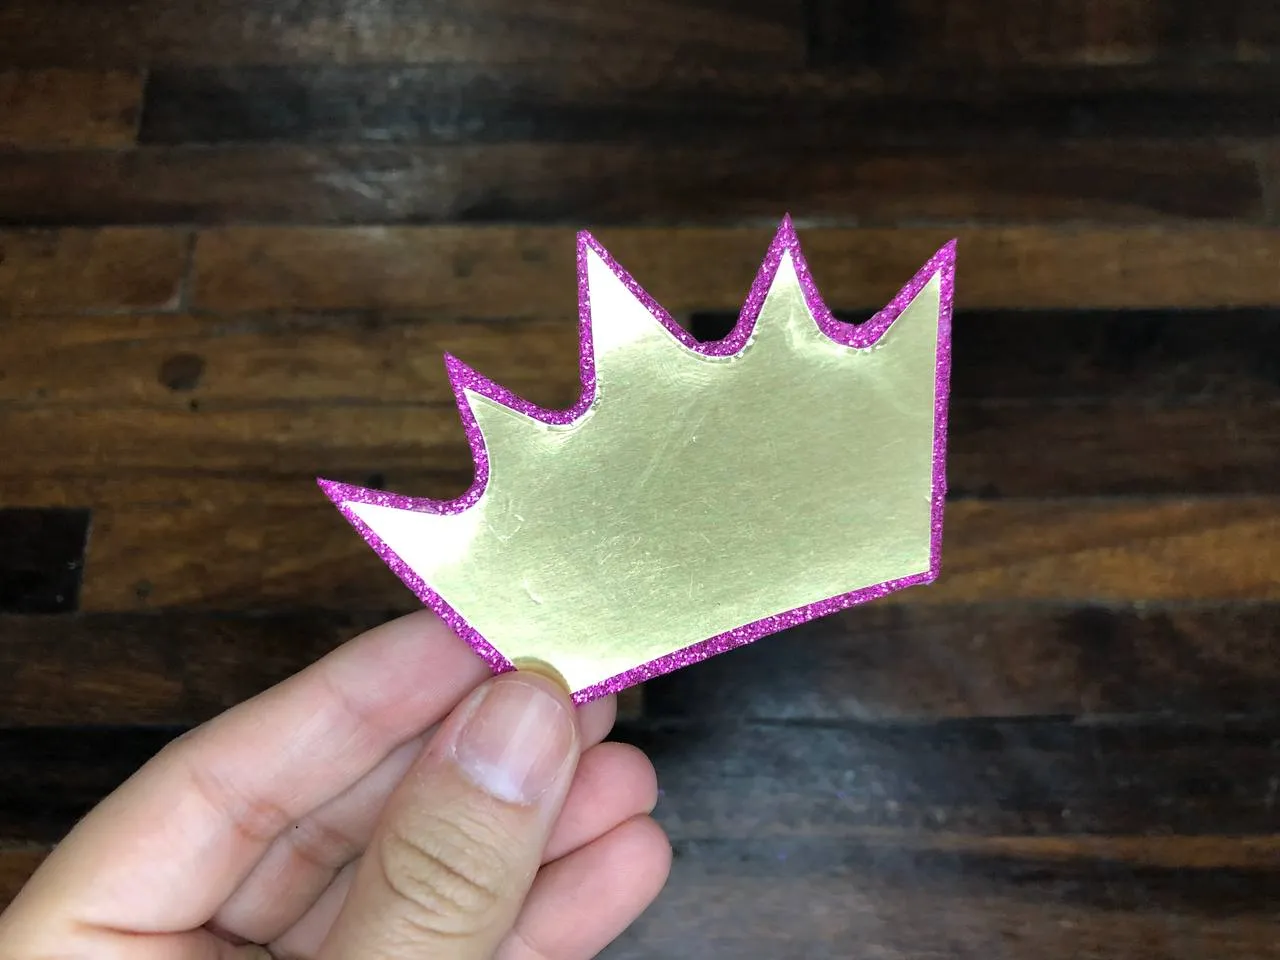
✨ PASO 5. Hacemos una corona mediana de 5 puntas en cartulina metalizada dorada, recortamos y pegamos sobre cartulina rosada y dejándole un delgado borde de esta a su alrededor, con el abrehuecos hacemos 5 círculos de foami escarchado rosado y pegamos uno en cada punta de la corona, luego de esto la pegamos en la parte superior de la letra en el lado contrario a las flores.
✨ STEP 5. We make a medium crown of 5 points in golden metallic cardboard, we cut and paste it on pink cardboard and leaving a thin edge around it, with the hole opener we make 5 circles of pink frosted foami and we glue one at each end of the crown, after this we glue it on the top of the letter on the opposite side to the flowers.

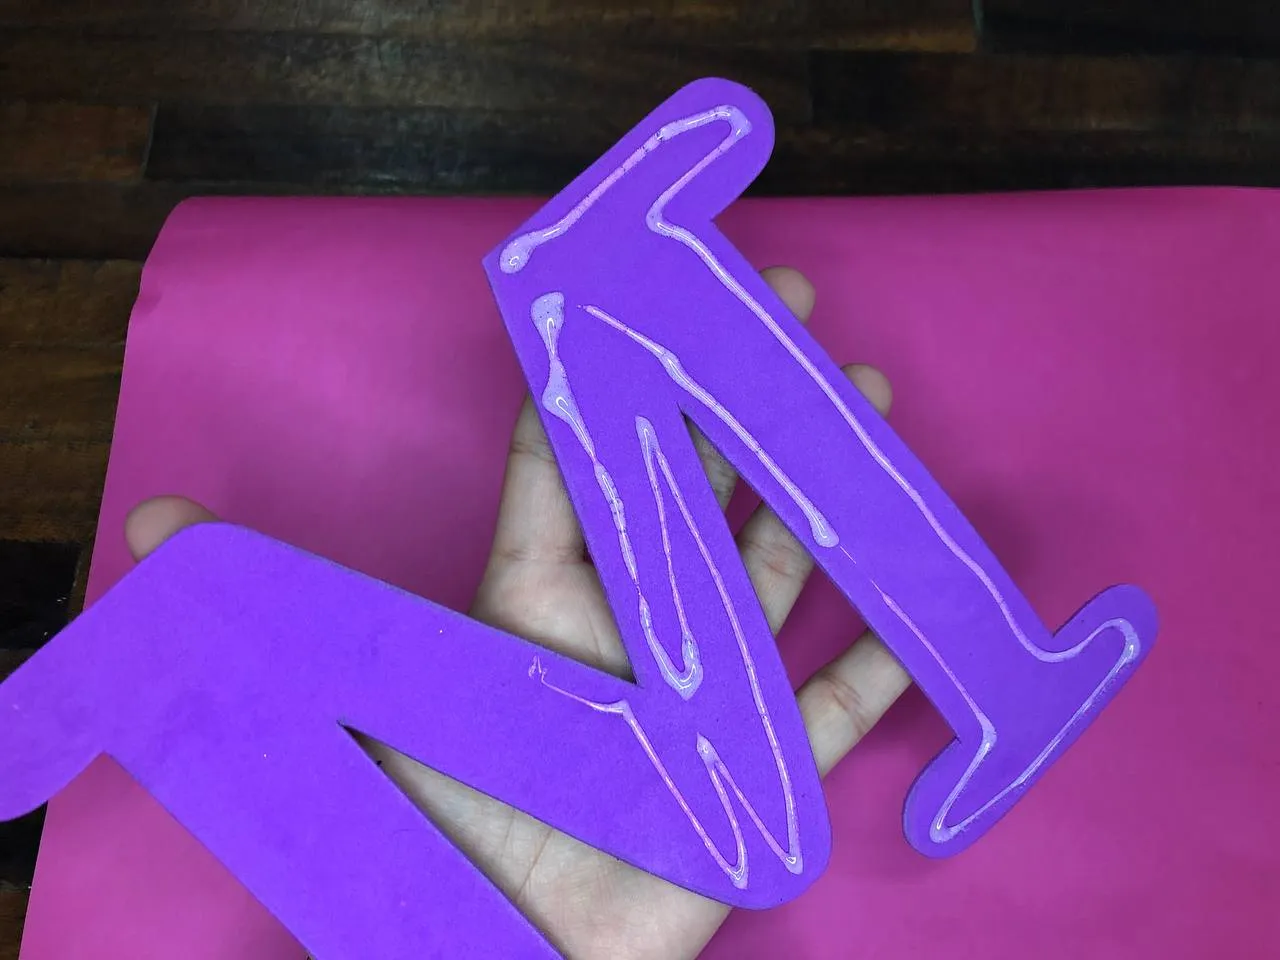
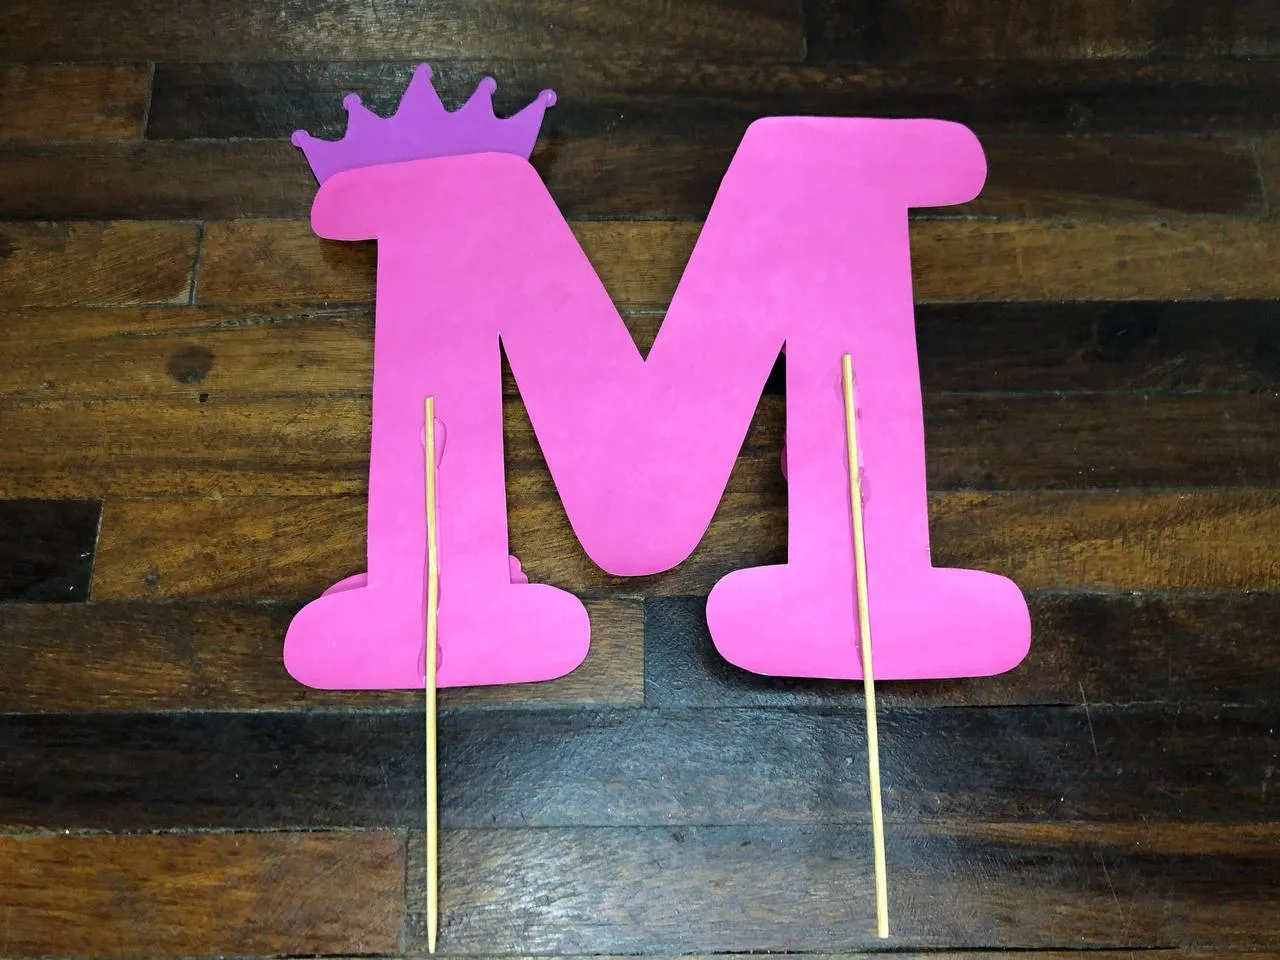
✨ PASO 6. Como último detalle cortamos el palito de altura justo a la mitad obteniendo 2 piezas del mismo tamaño, pegamos cada uno de estas en la parte trasera de la letra, una de cada lado quedando ambos a la misma altura.
✨ STEP 6. As a last detail, we cut the height stick just in half, obtaining 2 pieces of the same size, we glue each of these on the back of the letter, one on each side, leaving both at the same height .
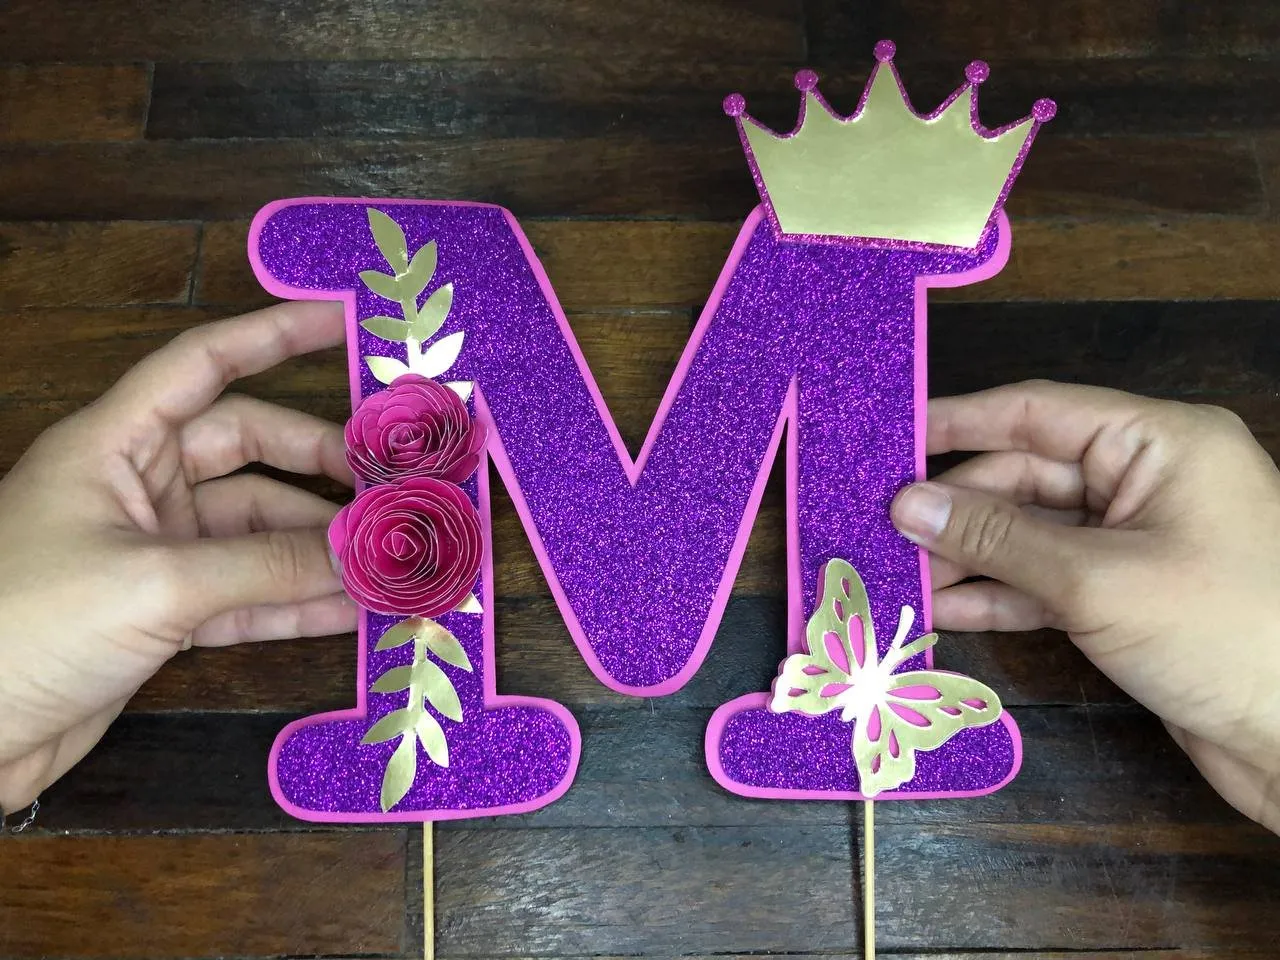
De esta manera tan sencilla es como he elaborado este lindo topper para torta de la letra M para mi cumpleaños, este año quise hacer algo diferente y me decidí por hacer solo la inicial de mi nombre y decorarla con una mariposa, corona y flores, los colores los elegí pensando en la decoración que tenía en mente ya que quería que también el topper combinara y quedó perfecto además de hermoso, espero que les haya gustado esta idea y les sirva para elaborarlo en casa con cualquier otra letra o forma que deseen.
In this simple way is how I have made this cute cake topper with the letter M for my birthday, this year I wanted to do something different and I decided to make only the initial of my name and decorate it with a butterfly, crown and flowers, I chose the colors thinking about the decoration I had in mind since I also wanted the topper to combine and it was perfect as well as beautiful, I hope you liked this idea and it will help you to make it at home with any other letter or shape that they wish.


Todas las fotografías son de mi propiedad.
Fotografías capturadas con mi Iphone 8
Separador de texto elaborado en Canva.
Nos vemos en mi próxima publicación.
¡Tengan un feliz día!
All photographs are my property.
Photos captured with my Iphone 8
Text separator made in Canva.
See you in my next post.
¡Have a happy day!