¡Saludos Comunidad Creativa! | ¡Greetings Creative Community!
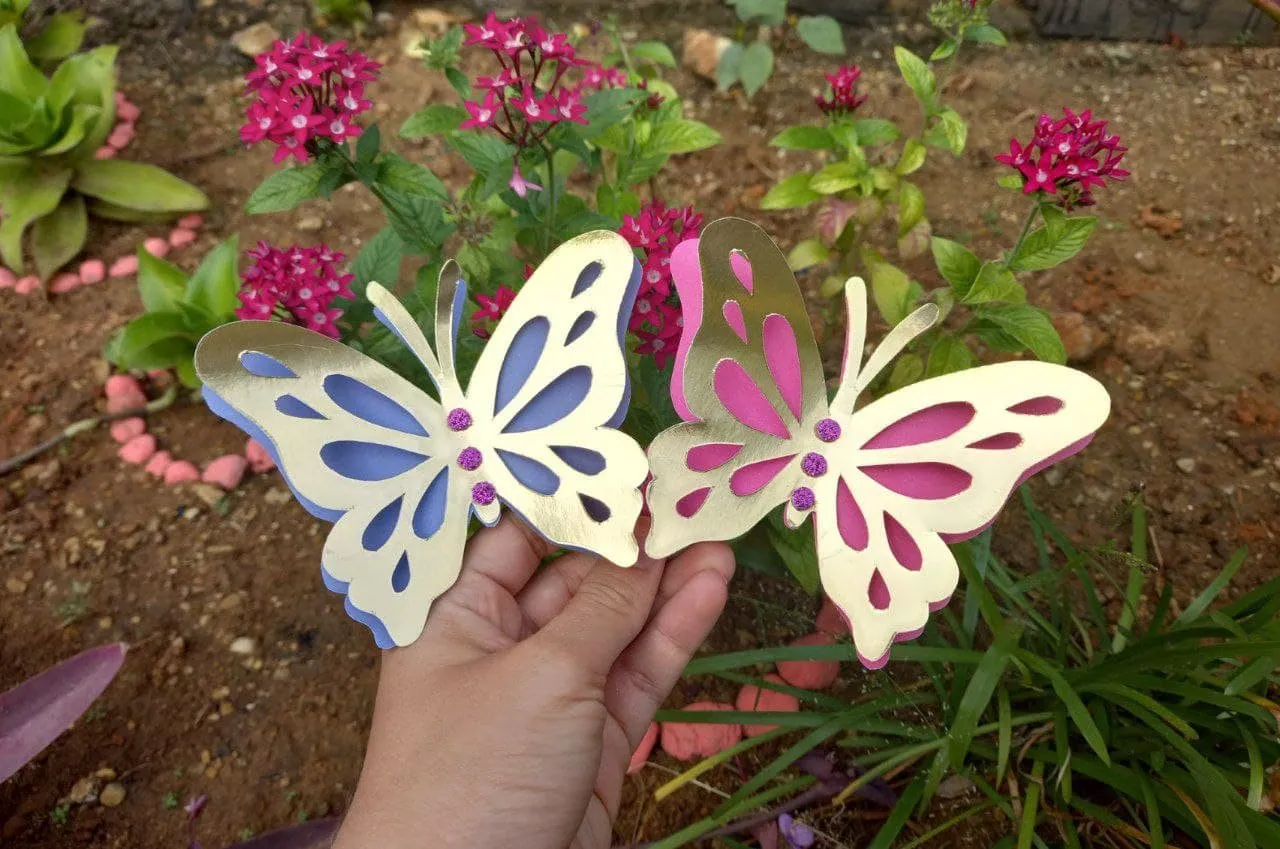
En esta mañana estoy muy feliz de compartirles una hermosa manualidad en la que he estado trabajando, pues, se acerca mi cumpleaños y he decidido celebrarlo este año con la temática de mariposas, un motivo muy lindo y delicado sin importar la edad que tengas. Desde hace tiempo he visto las famosas mariposas troqueladas en internet, las cuales se elaboran con un plotter de corte y según tengo entendido estas manualidades suelen ser costosas, realmente me encantaron ese tipo de mariposas pero quería hacerlas con mis propias manos ya que no cuento con esta máquina que ya les mencioné, así que finalmente me he animado a elaborarlas y hoy les vengo a compartir el resultado, el cual es hermoso y me impresiona lo bien que quedaron para estar hechas a mano, así que aquí les dejo el tutorial y espero que les sea útil para que también las puedan hacer en casa si no cuentan con el plotter de corte.
This morning I am very happy to share with you a beautiful craft that I have been working on, well, my birthday is coming up and I have decided to celebrate it this year with the theme of butterflies, a very cute and delicate motif no matter how old you are. For a long time I have seen the famous die-cut butterflies on the internet, which are made with a cutting plotter and as I understand these crafts are usually expensive, I really loved that type of butterflies but I wanted to make them with my own hands since I do not have this machine that I already mentioned to you, so I have finally encouraged myself to make them and today I am here to share the result, which is beautiful and I am impressed by how well they turned out to be made by hand, so here I leave the tutorial and I hope that it is useful for them so that they can also do them at home if they do not have the cutting plotter.

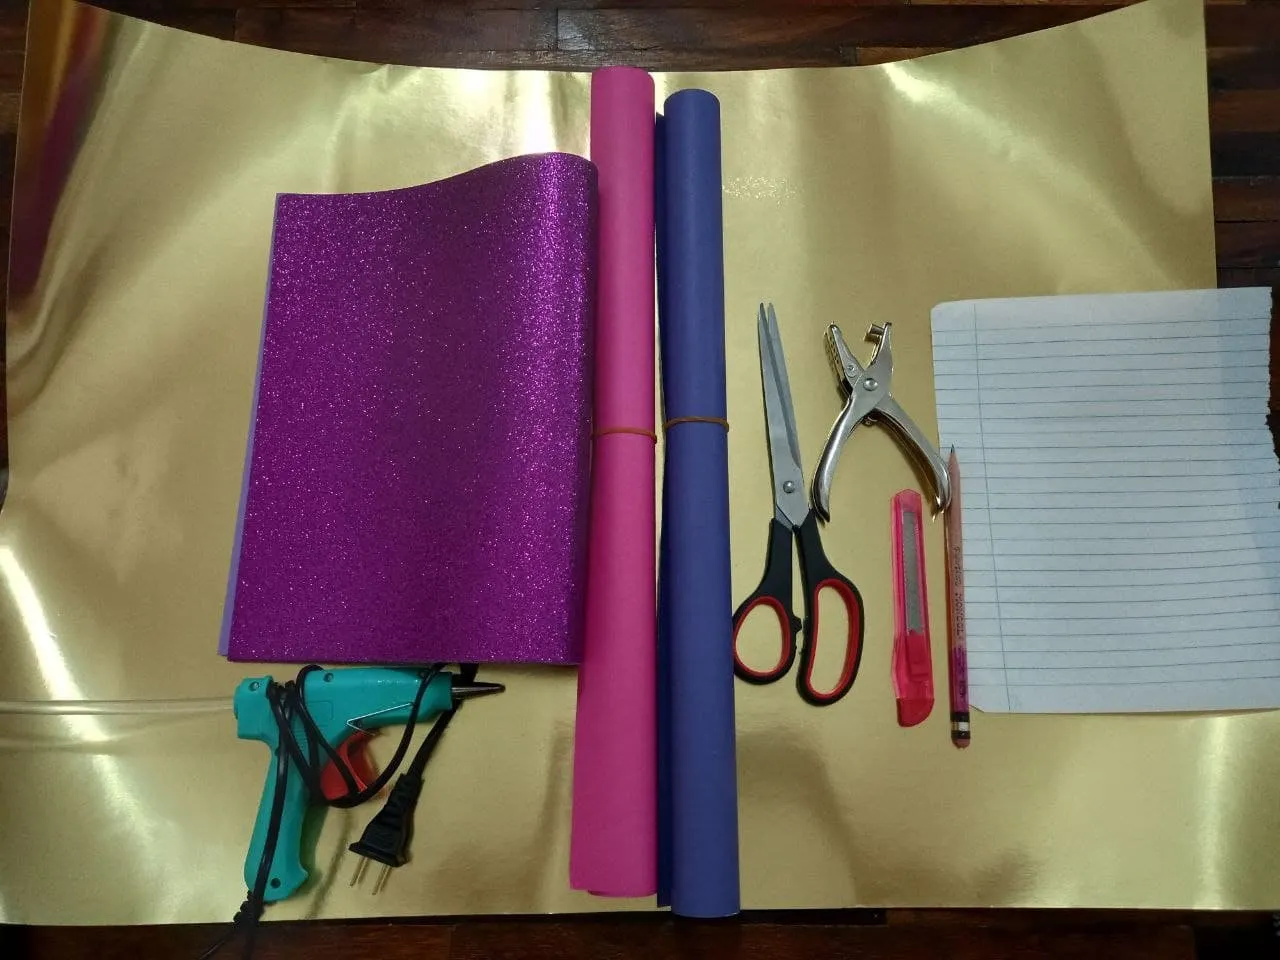
Materiales | Materials
🦋 Cartulina escolar morada y rosada.
🦋 Cartulina metalizada dorada.
🦋 Foami escarchado morado.
🦋 Tijera.
🦋 Lápiz.
🦋 Cutter.
🦋 Silicón caliente.
🦋 Abre huecos.
🦋 Hoja de papel.
🦋 Purple and pink school cardboard.
🦋 Gold metallic cardboard.
🦋 Purple frosty foami.
🦋 Scissor.
🦋 Pencil.
🦋 Cutter.
🦋 Hot silicone.
🦋 Open gaps.
🦋 Sheet of paper.
Procedimiento ✂ | Process ✂
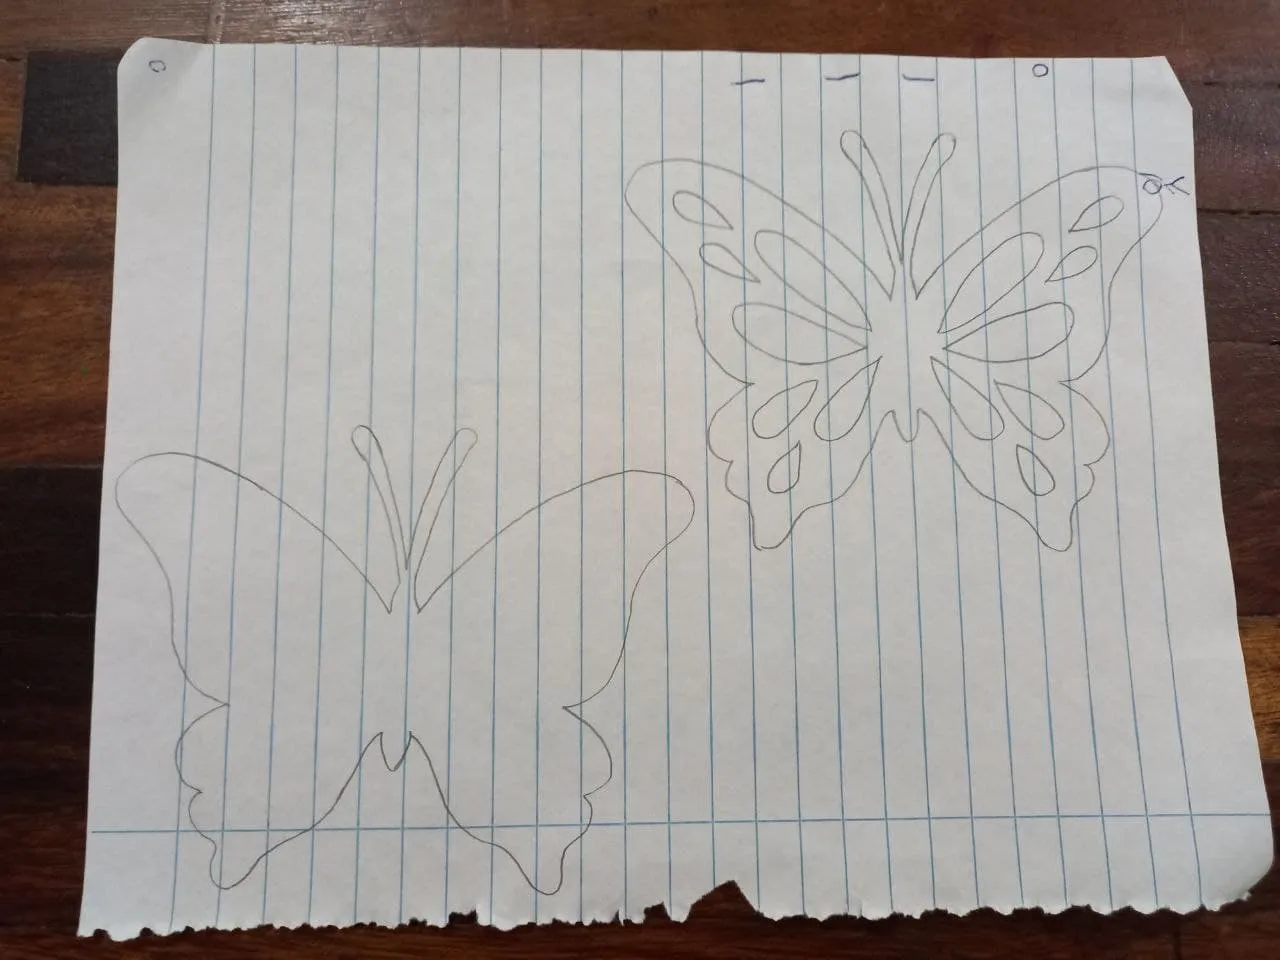
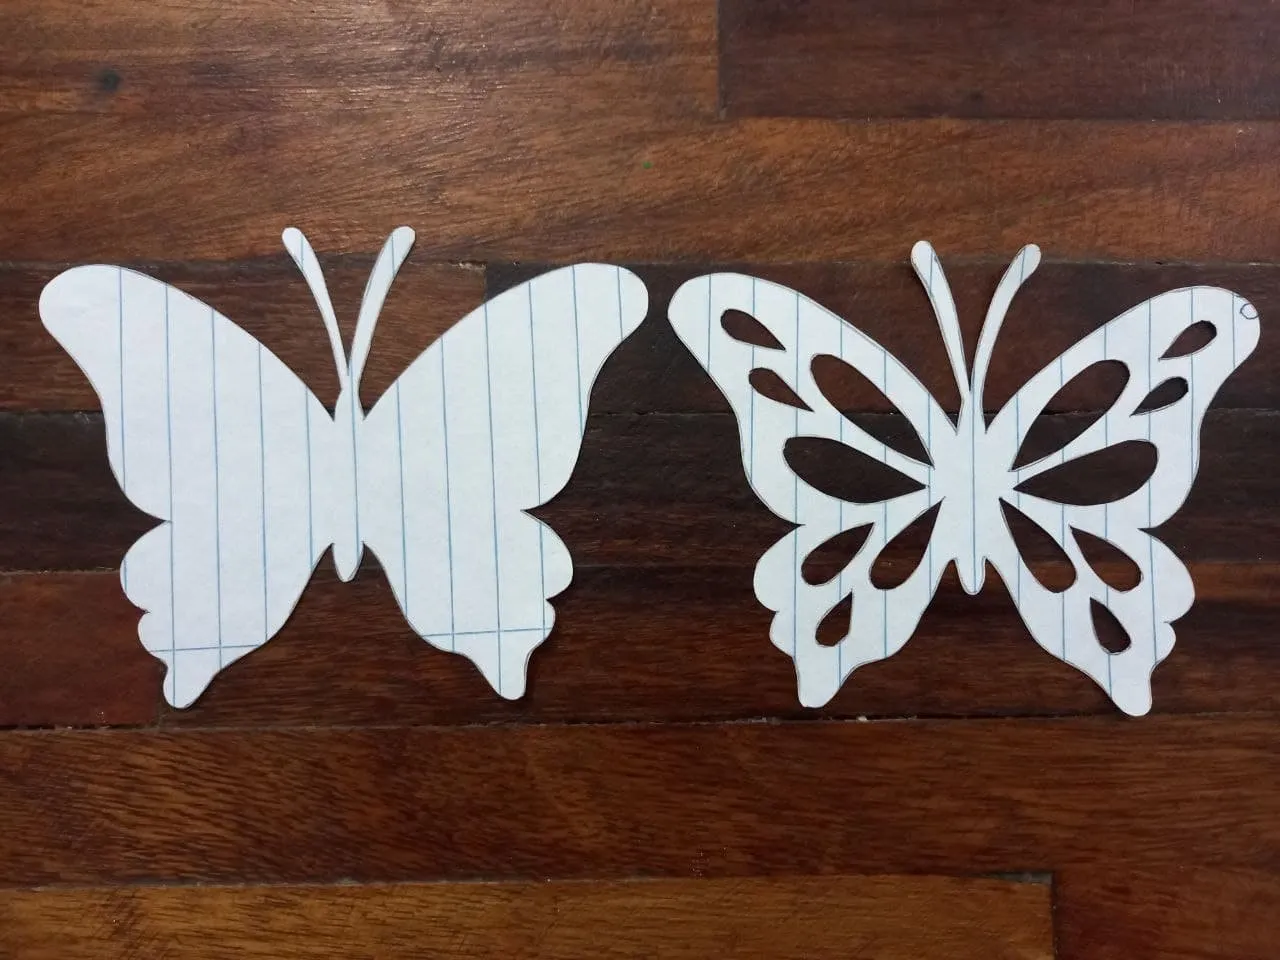
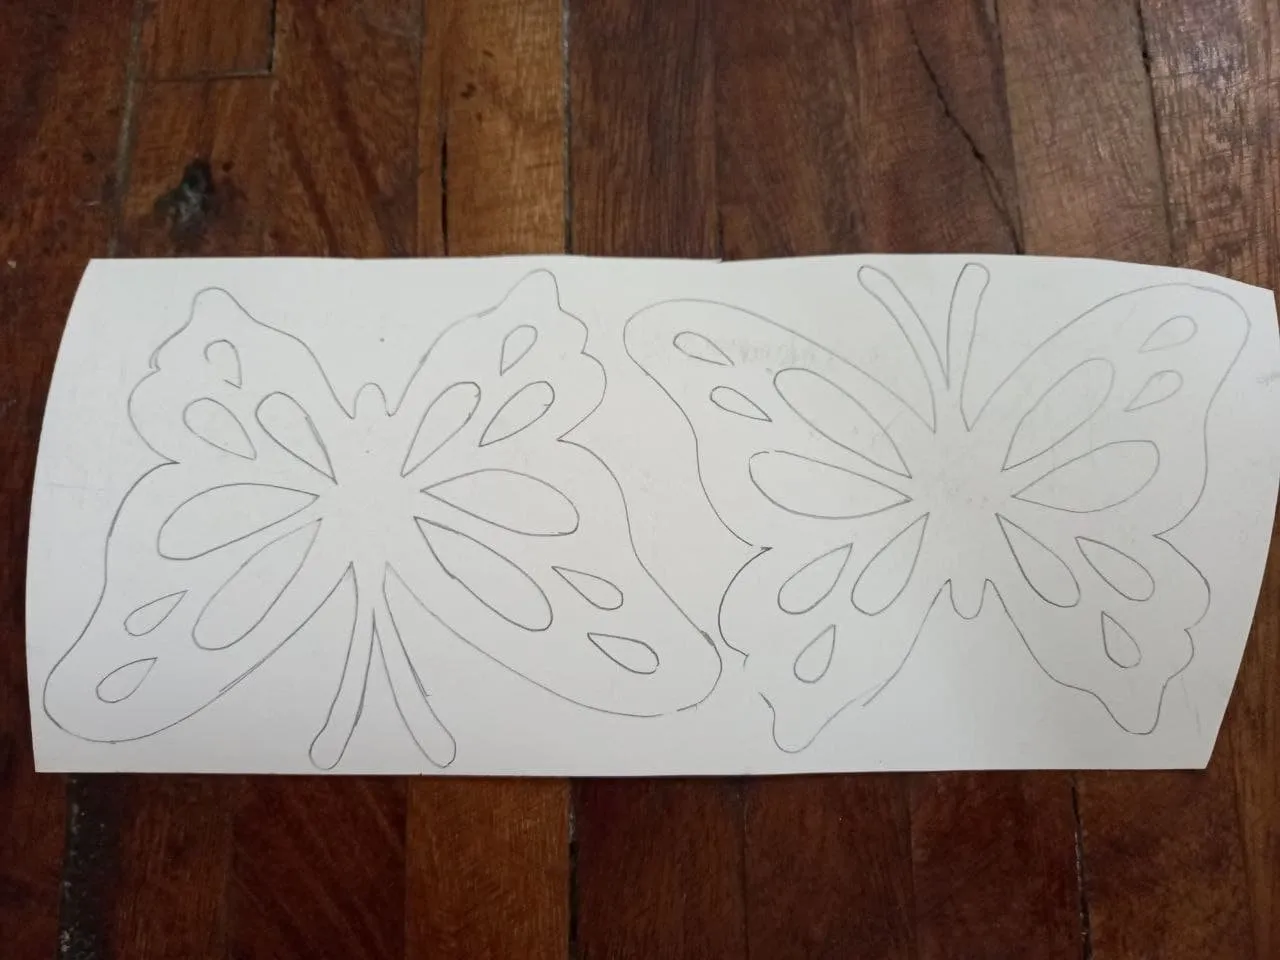
🦋 PASO 1. Haremos el molde en la hoja de papel, se necesitan 2 mariposas del mismo tamaño, una normal y otra con detalles, luego las recortamos.
🦋 STEP 1. We will make the mold on the sheet of paper, we need 2 butterflies of the same size, one normal and one with details, then we cut them out.
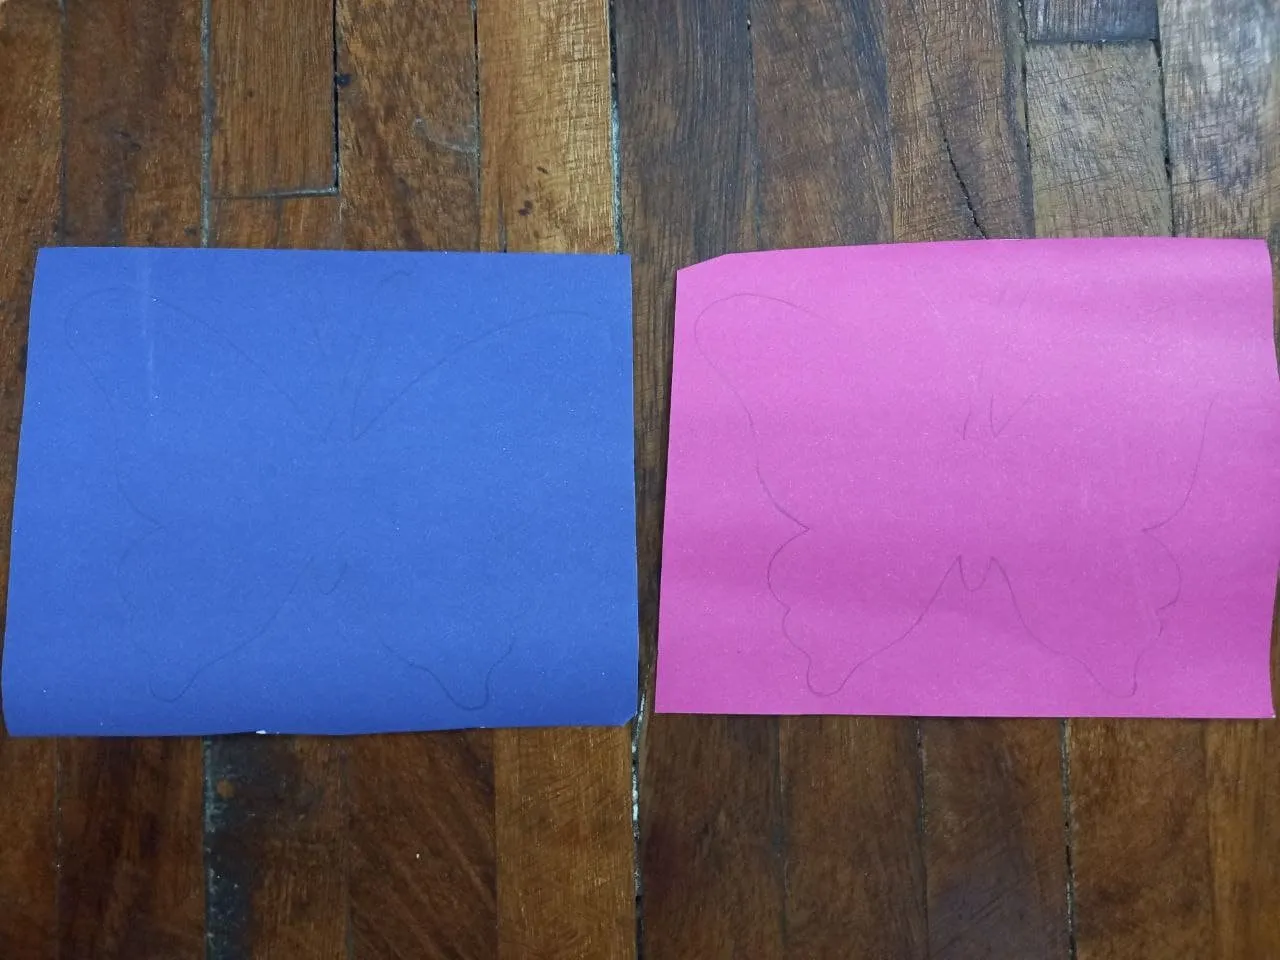
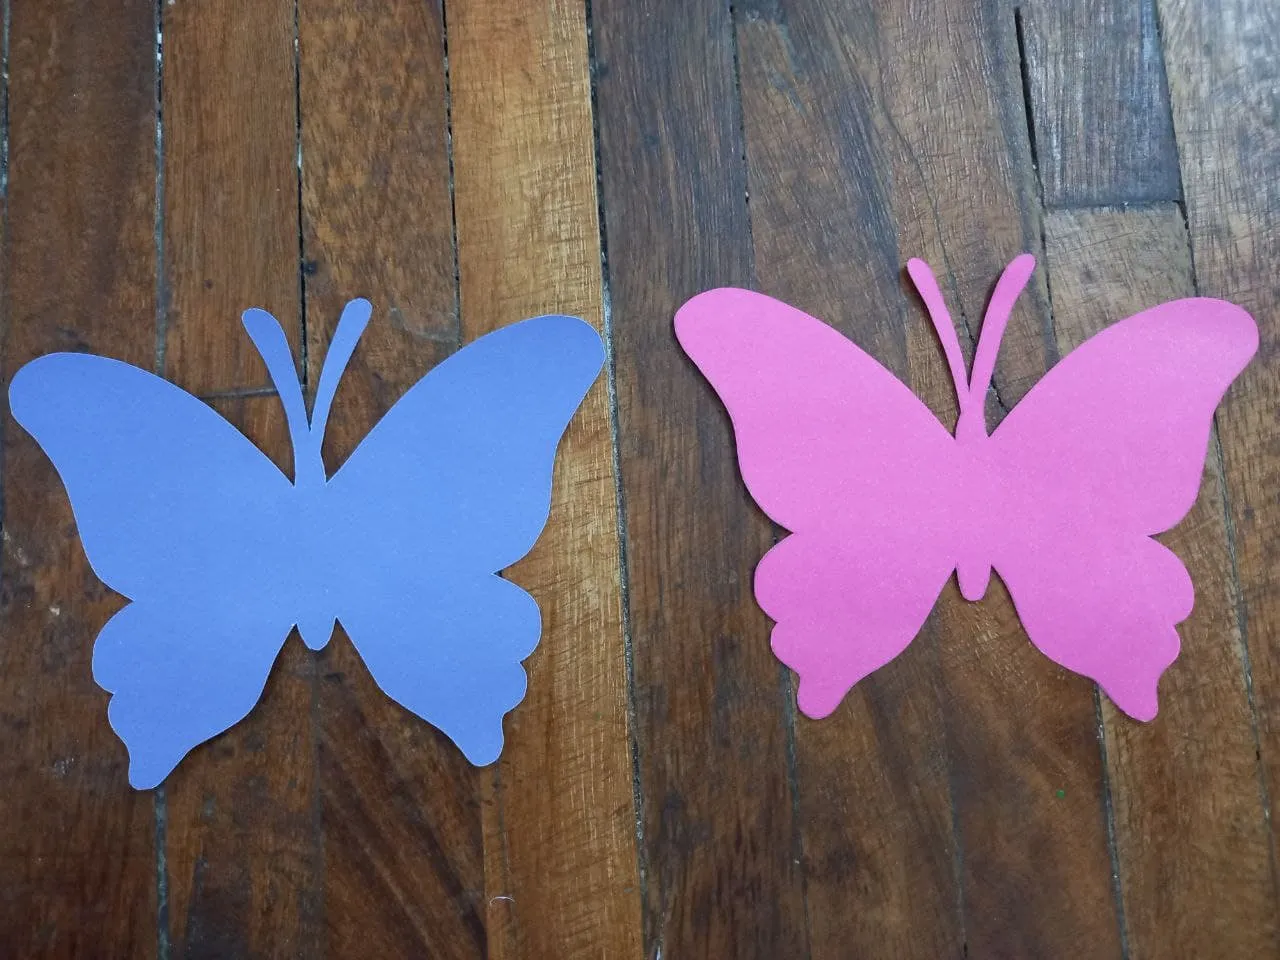
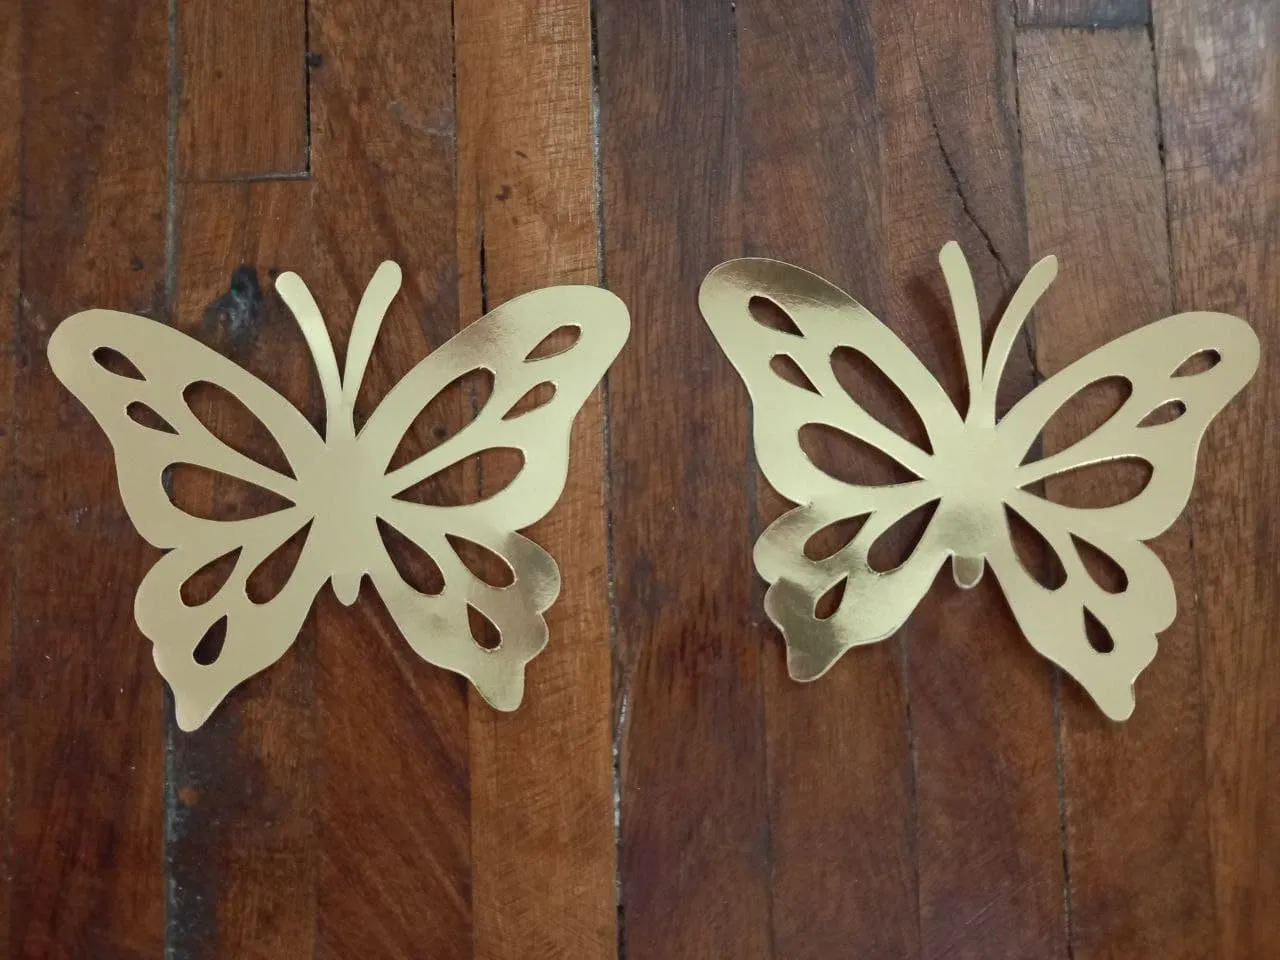
🦋 PASO 2. Pasamos el patrón de la mariposa normal a la cartulina, en mi caso haré 2, una en morado y una en rosado, ya que son los colore que elegí para la decoración de mi cumpleaños, pero pueden hacerlas del color que más les guste, luego pasamos el otro molde a la cartulina metalizada dorada y recortamos los bordes de todas ellas con tijera de la manera mas cuidadosa posible.
🦋 STEP 2. We pass the pattern of the normal butterfly to the cardboard, in my case I will make 2, one in purple and one in pink, since they are the colors that I chose for the decoration of my birthday, but you can do them of the color that you like the most, then we pass the other mold to the gold metallic cardboard and cut the edges of all of them with scissors in the most careful way possible.
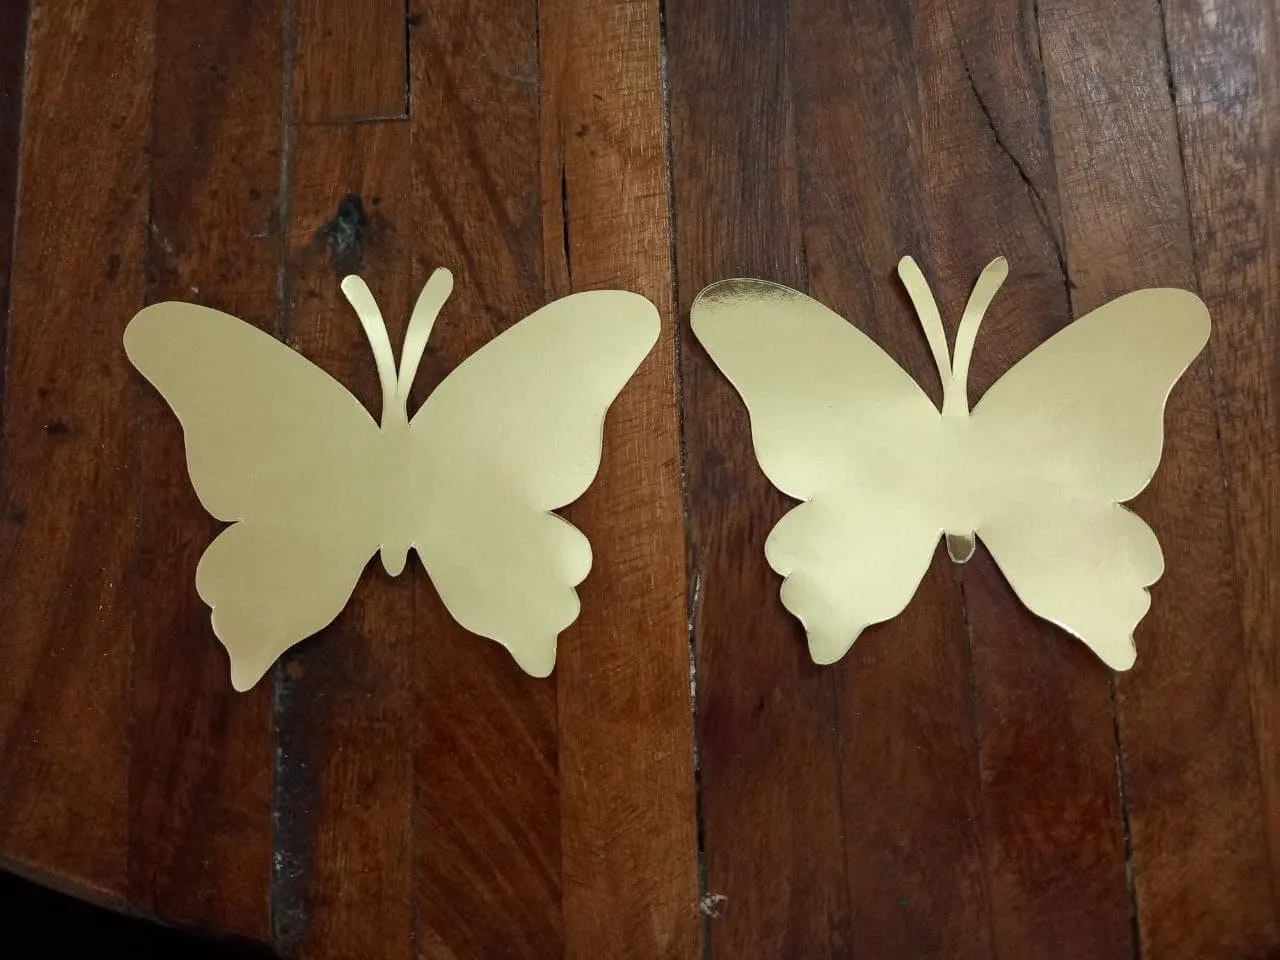
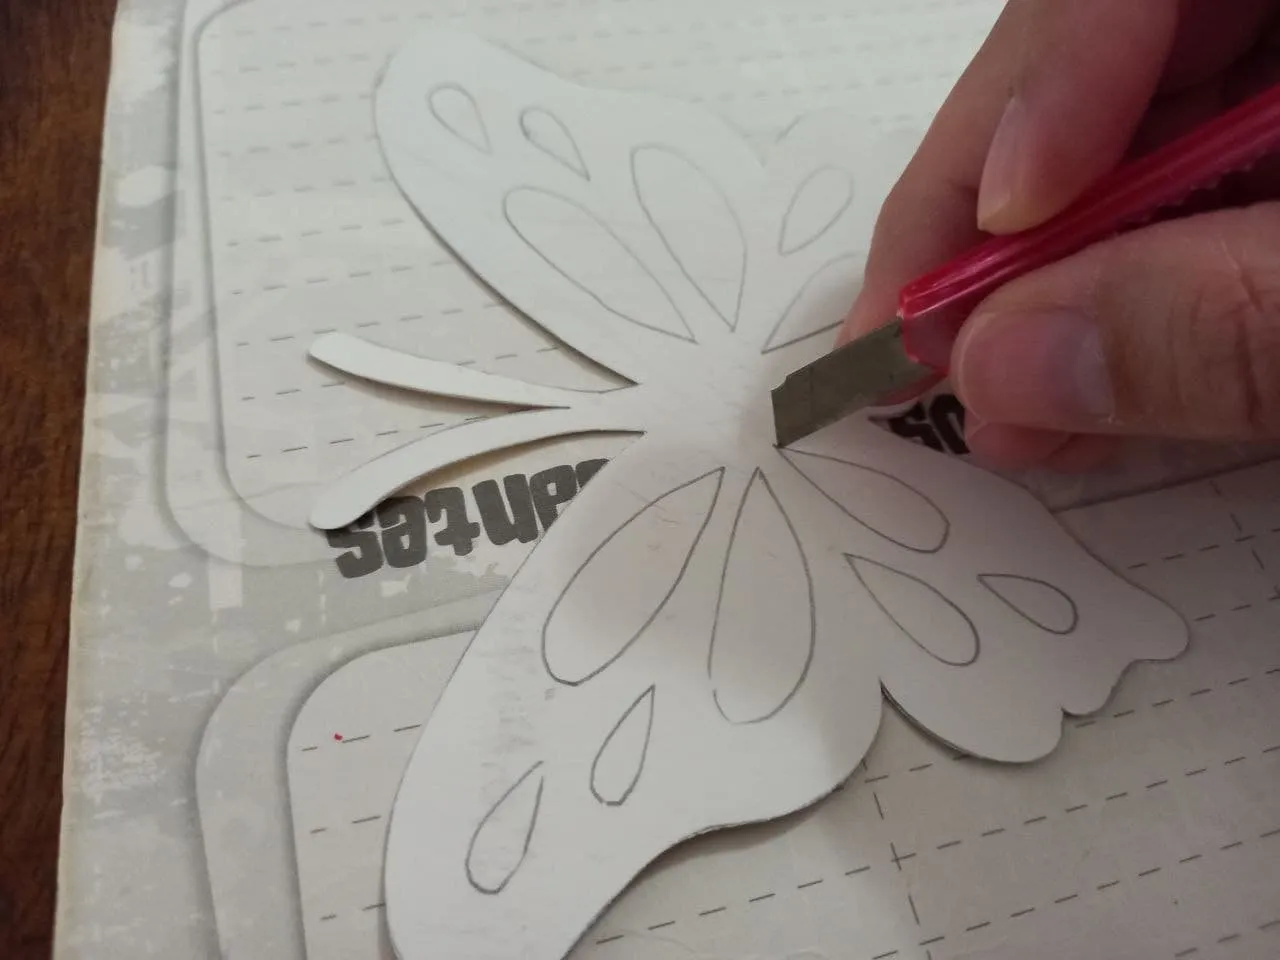
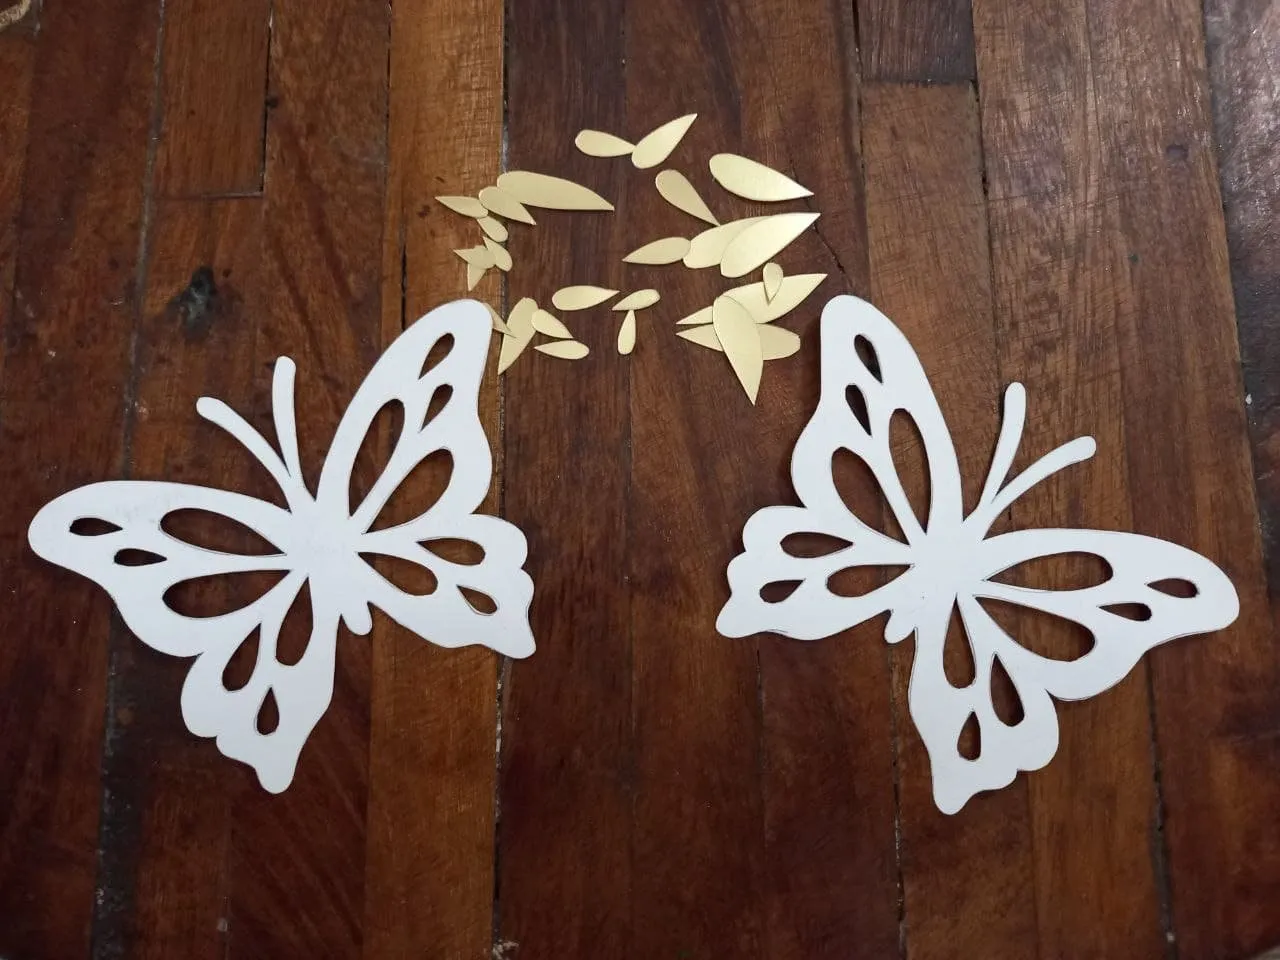
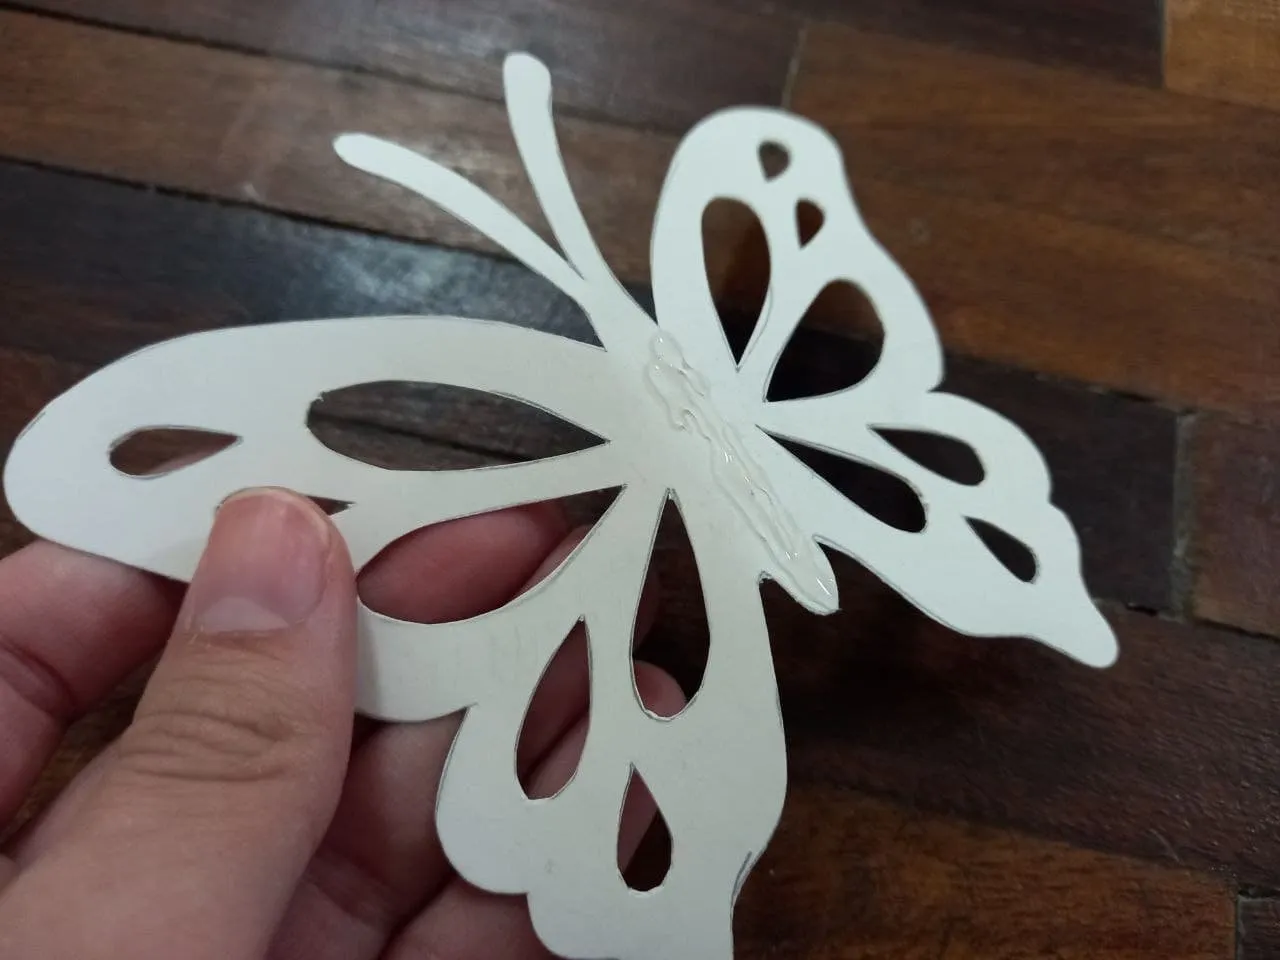
🦋 PASO 3. Con ayuda del cutter vamos a cortar y retirar las partes internas de las mariposas de cartulina metalizada, debemos hacerlo con mucho cuidado ya que este material es un poco delicado y suele marcarse.
🦋 STEP 3. With the help of the cutter we are going to cut and remove the internal parts of the metallic cardboard butterflies, we must do it very carefully since this material is a bit delicate and usually marks.
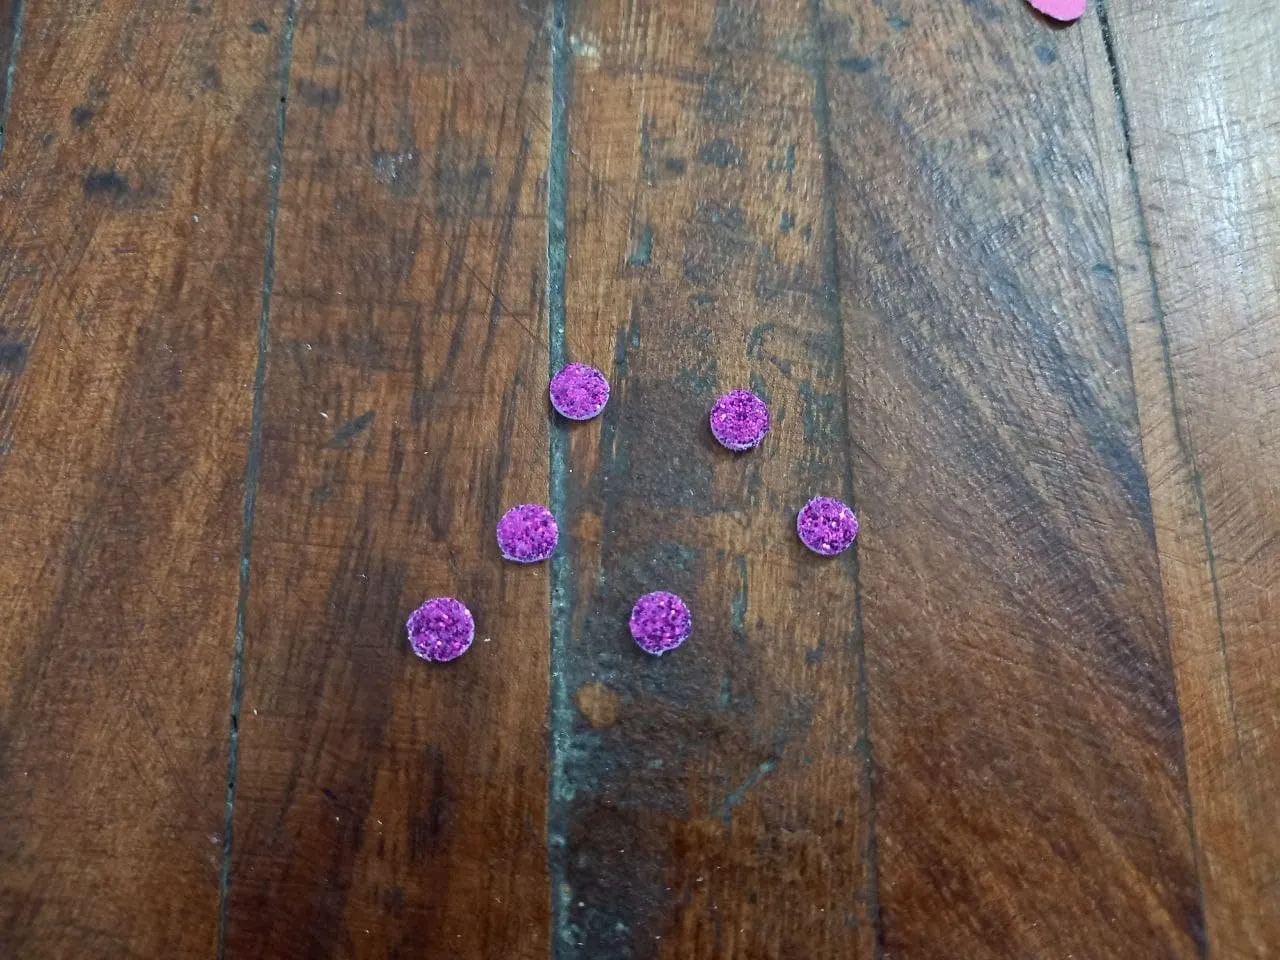
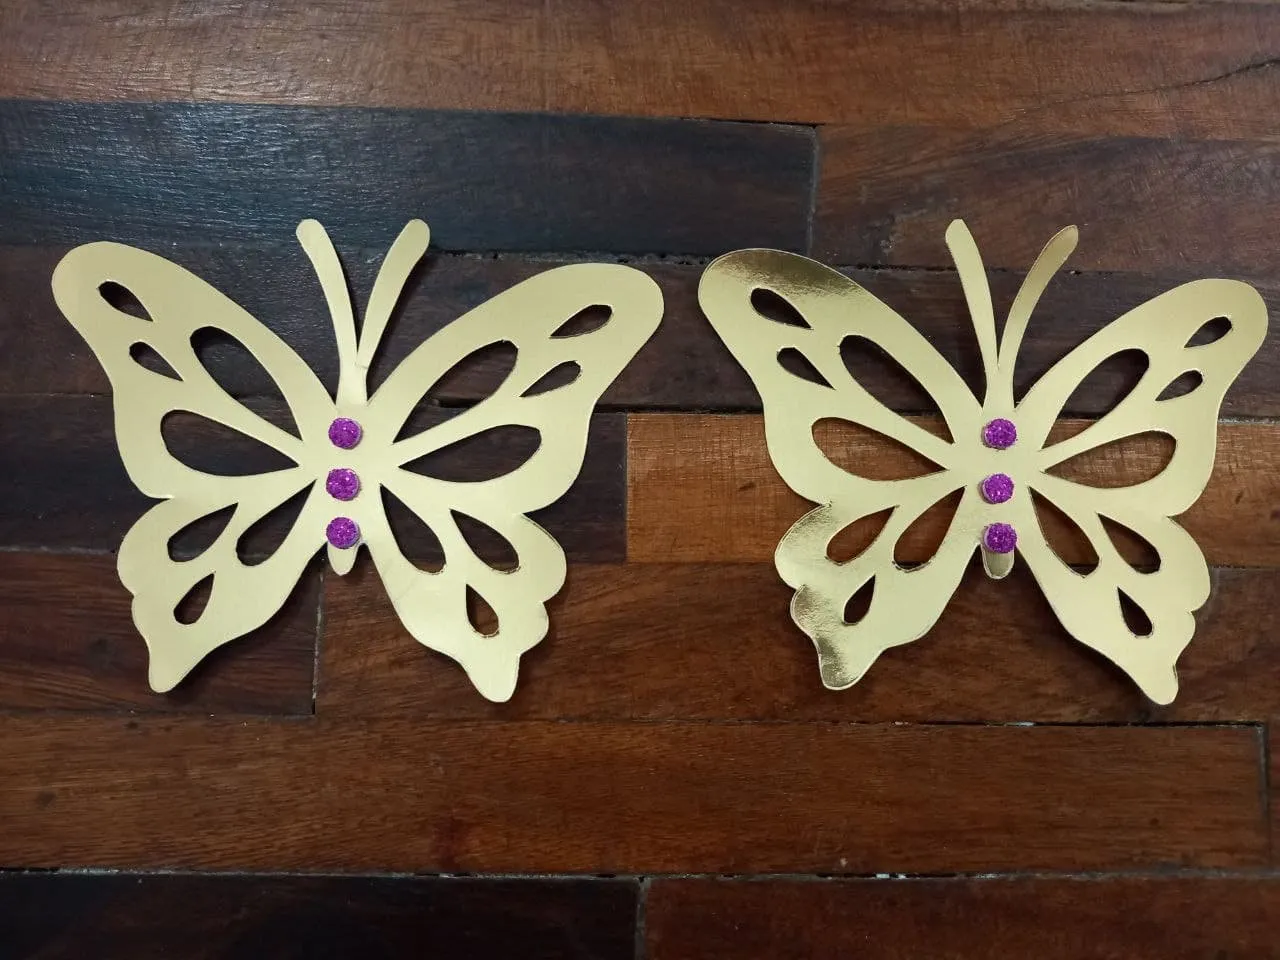
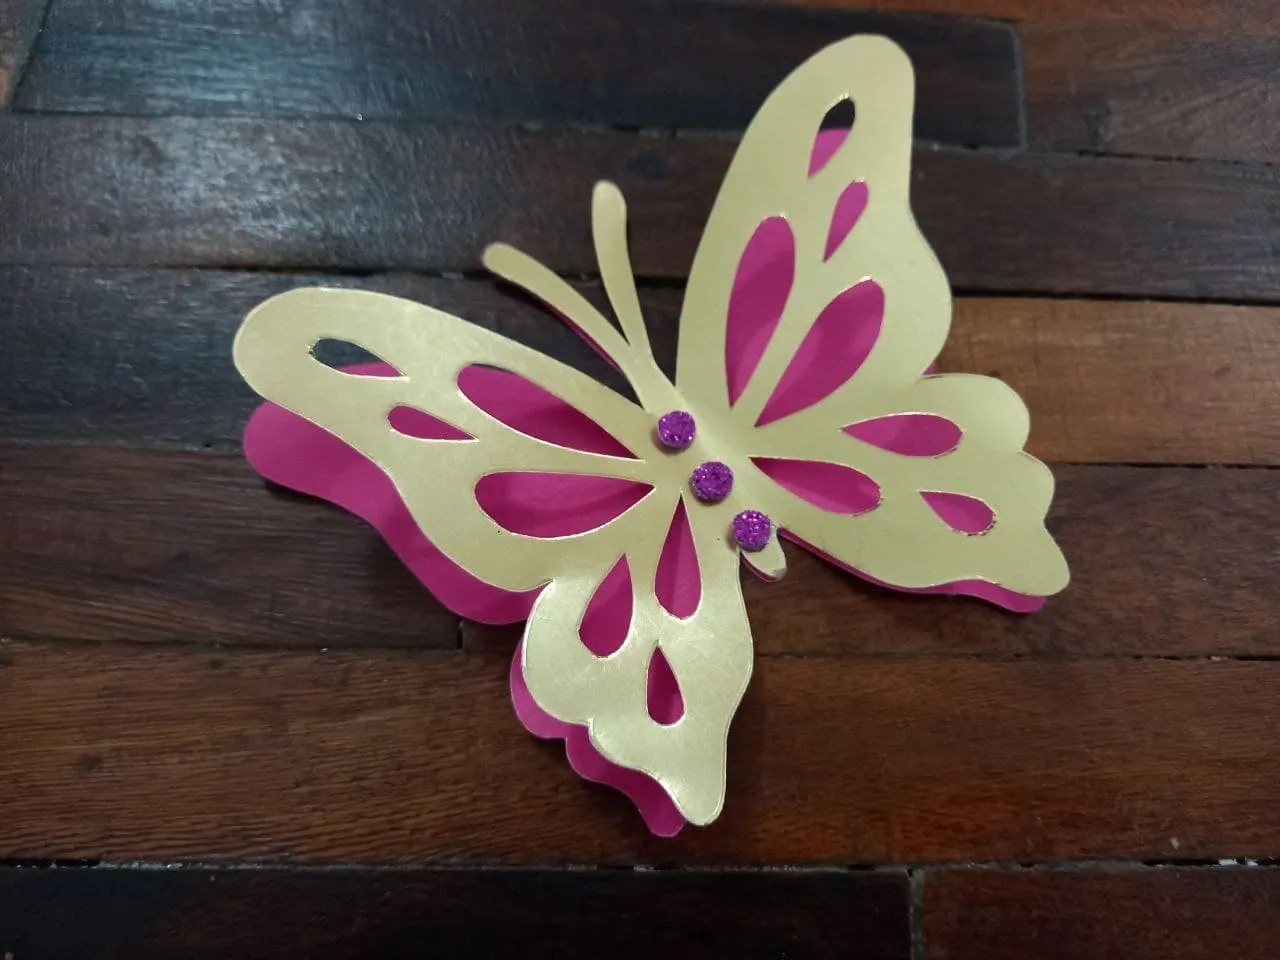
🦋 PASO 4. Con el abre huecos hacemos 6 círculos de foami morado escarchado y pegamos 3 sobre cada mariposa de cartulina metalizada dorada, justo en la parte del centro.
🦋 STEP 4. With the hole opener, we make 6 circles of frosty purple foami and glue 3 on each gold metallic cardboard butterfly, right in the center.
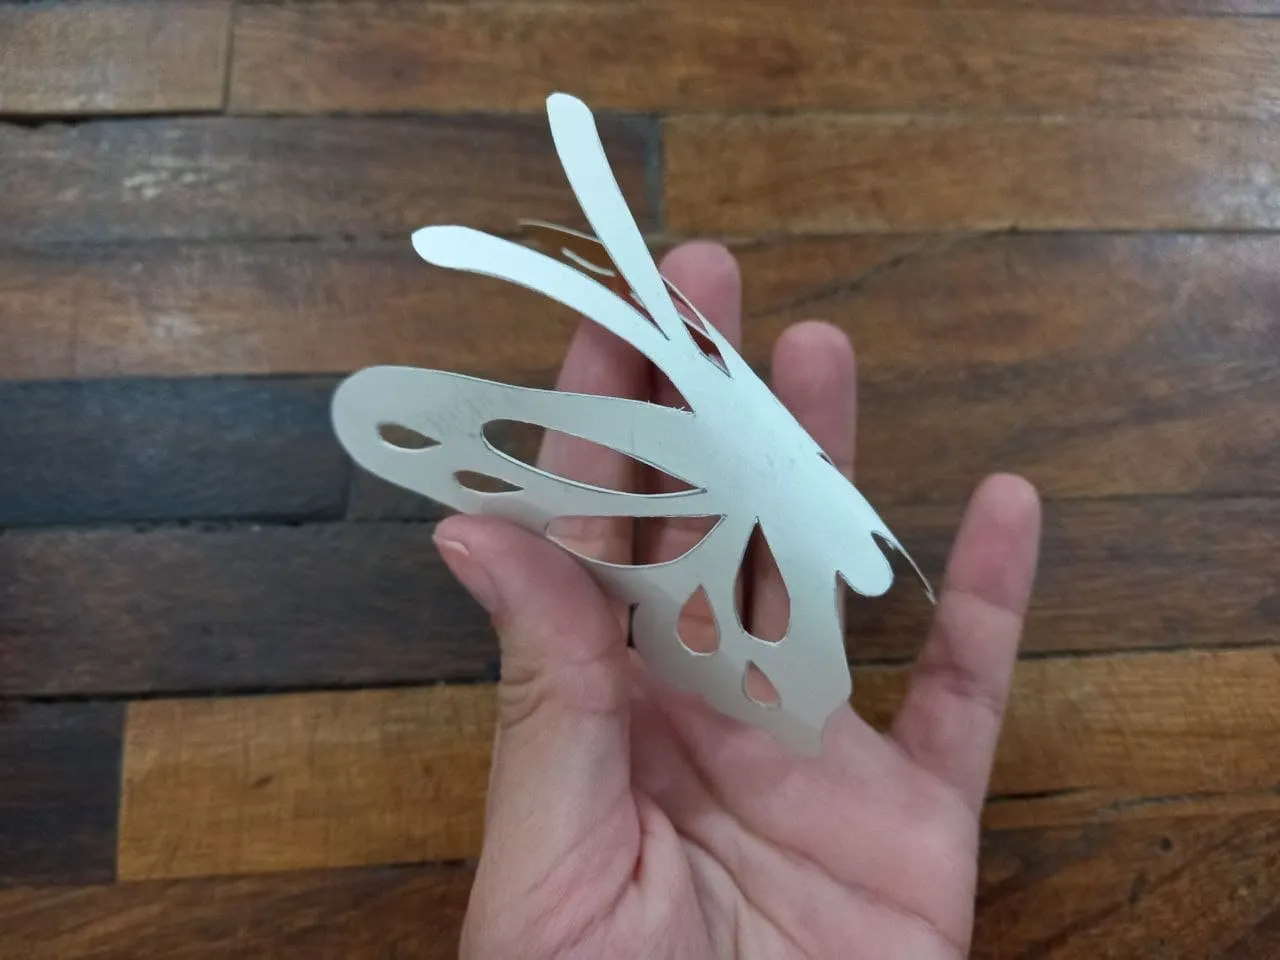
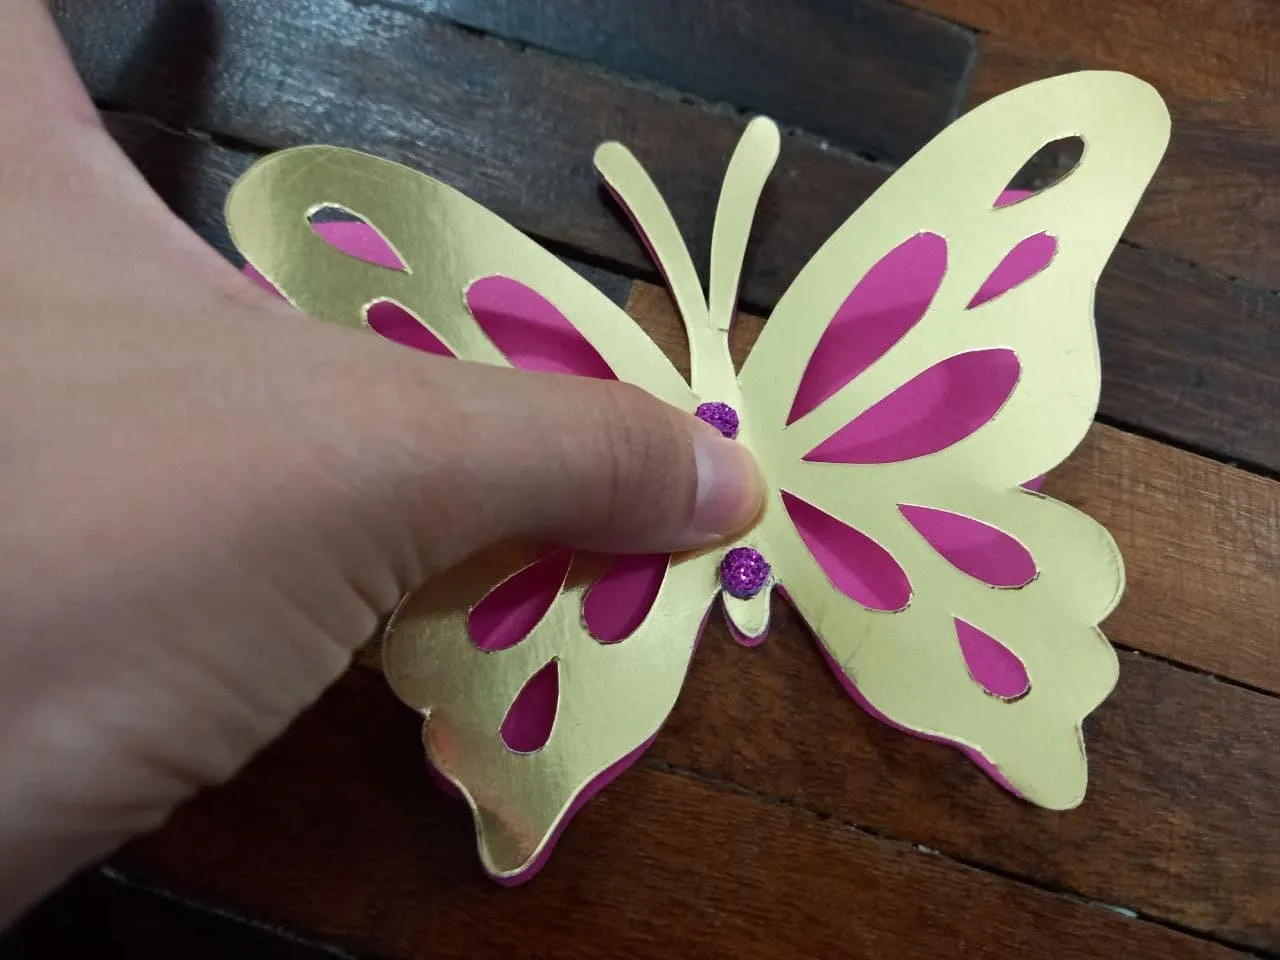
🦋 PASO 5. Tomamos las mariposas de cartulina metalizada dorada y doblamos un poco sus alas hacia adentro pero sin dejar ninguna marca o doblez, solo debemos levantarlas un poco para que queden separadas de la mariposa de color, es decir, la de abajo.
🦋 STEP 5. We take the gold metallic cardboard butterflies and fold their wings inwards a little but without leaving any mark or fold, we just have to lift them a little so that they are separated from the colored butterfly, that is, the down.

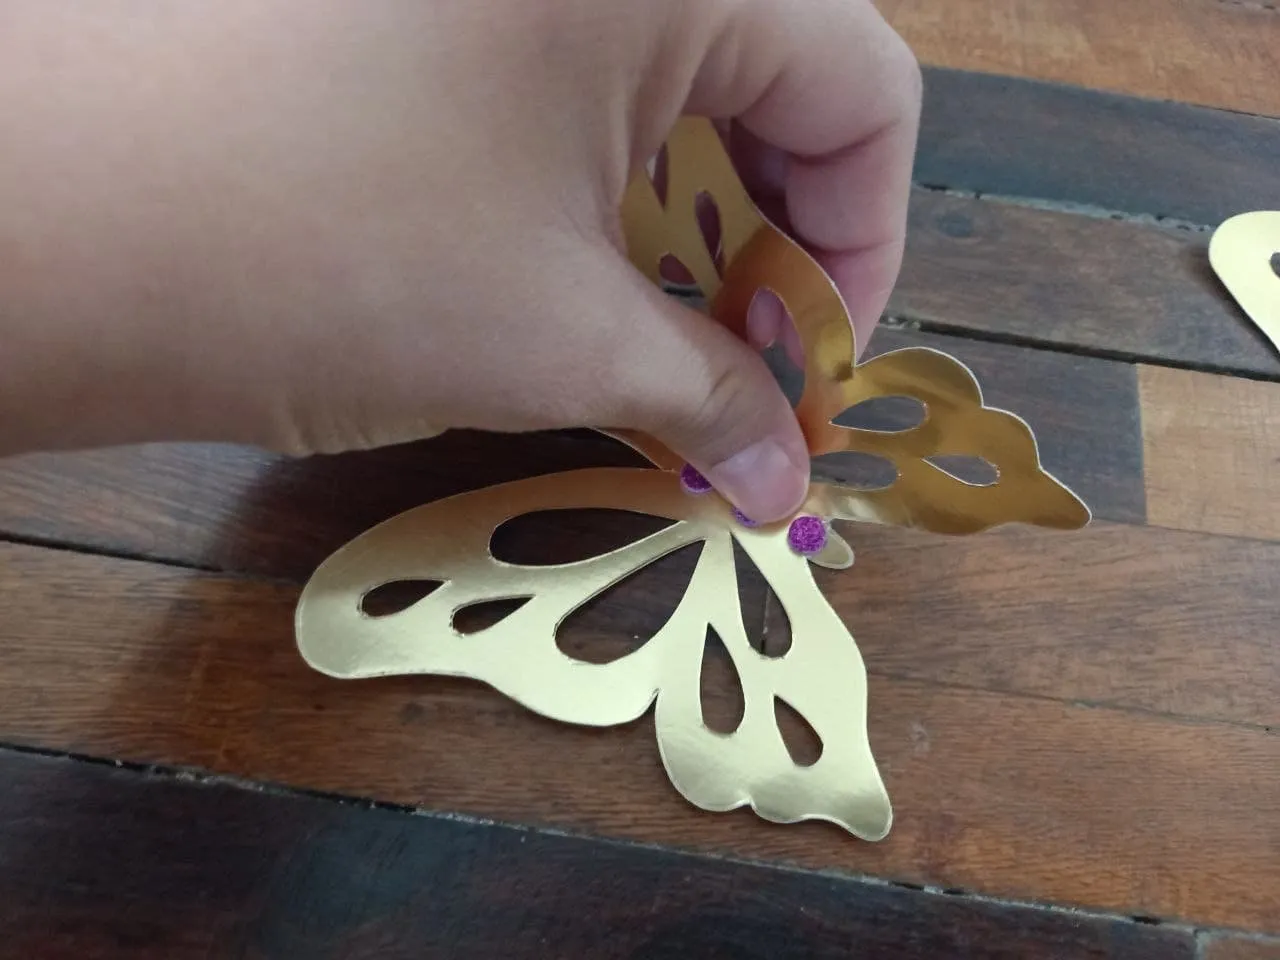
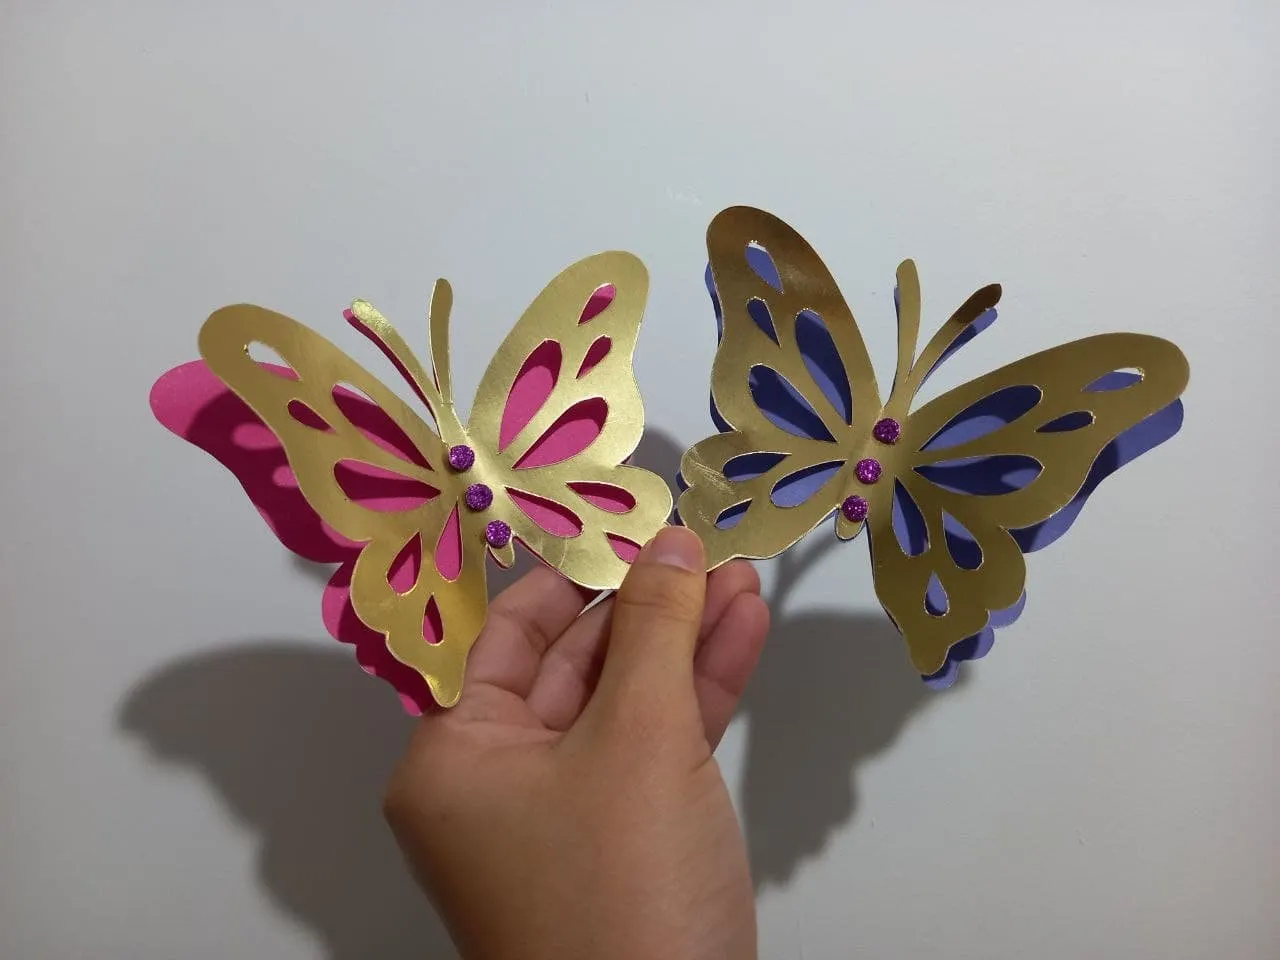
🦋 PASO 6. Por último aplicamos silicón en el centro de la parte trasera de la mariposa de cartulina metalizada y la pegamos sobre la mariposa de cartulina de color, debe quedar justo en el centro.
🦋 STEP 6. Finally we apply silicone in the center of the back of the metallic cardboard butterfly and stick it on the colored cardboard butterfly, it should be right in the center.
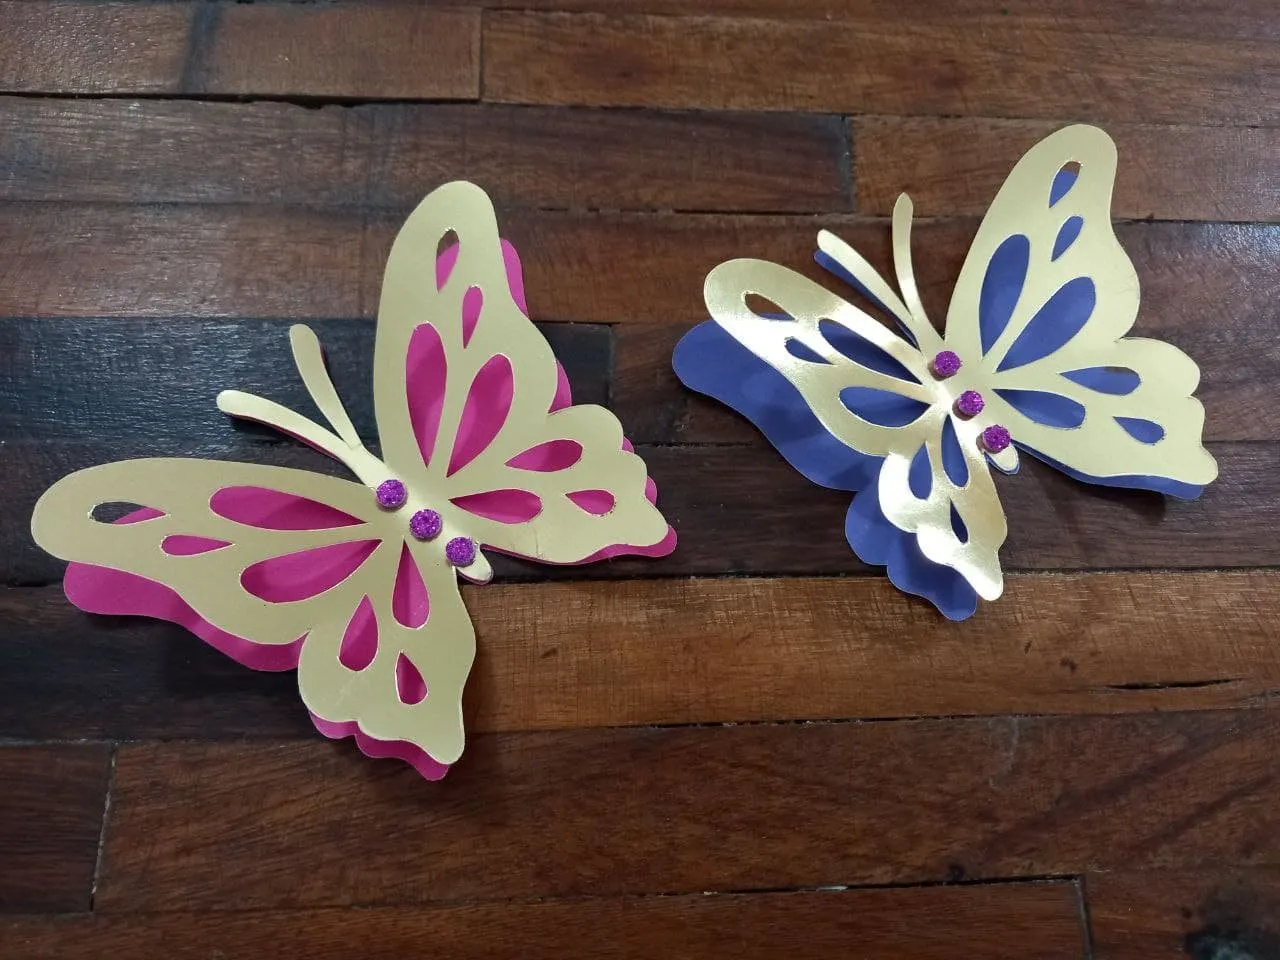
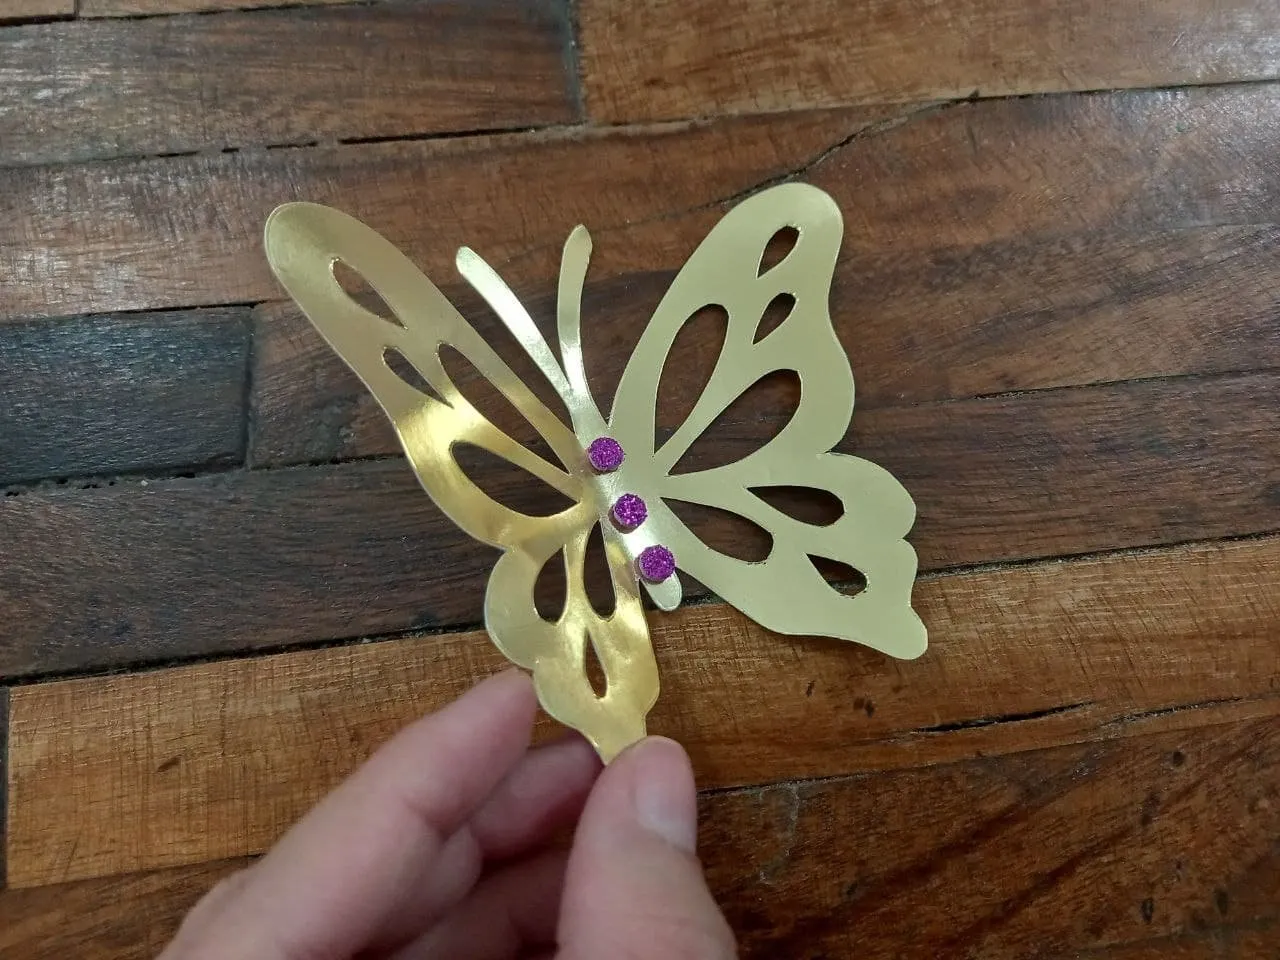
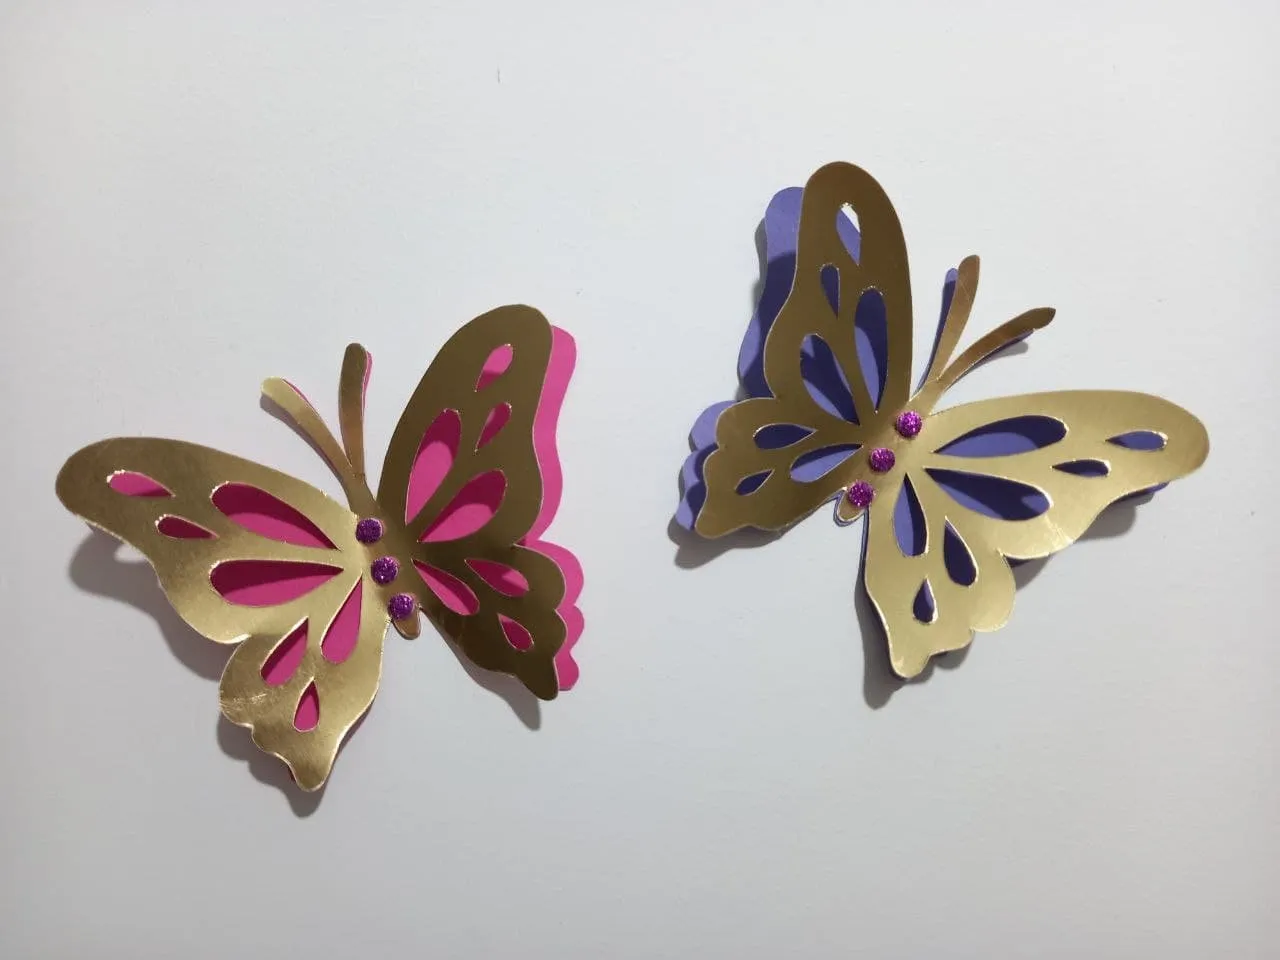
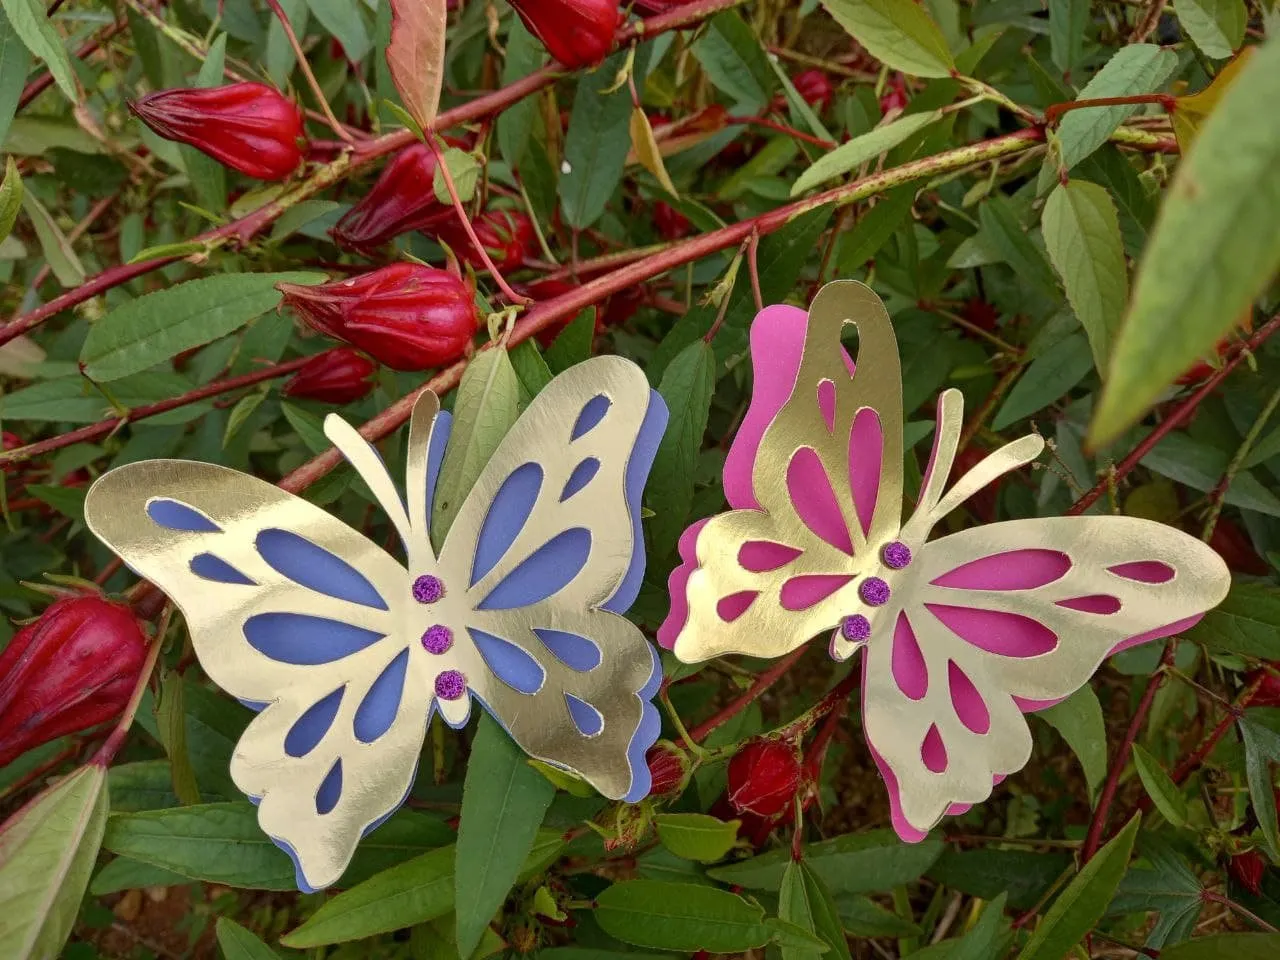
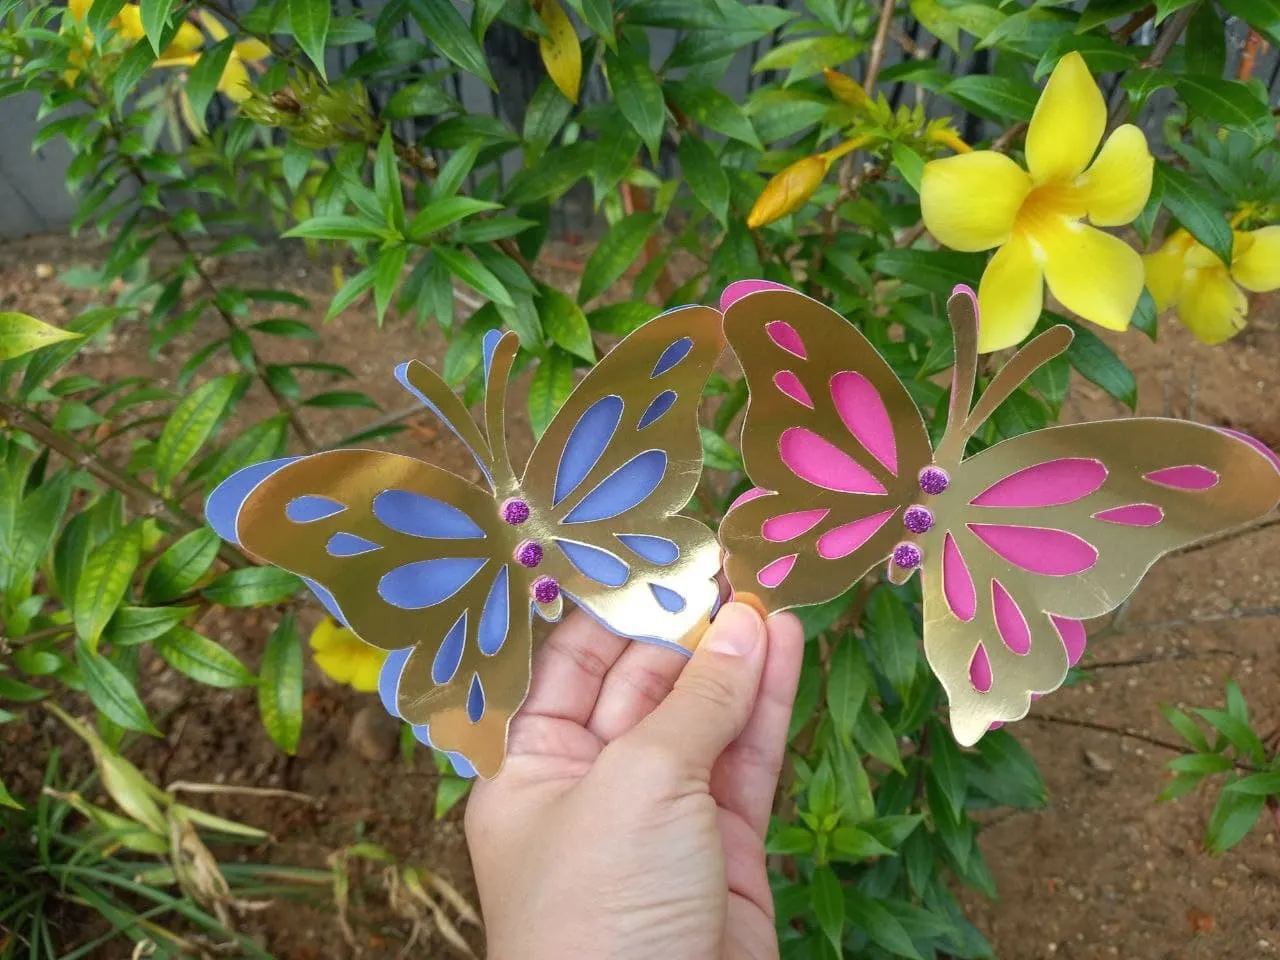
¡Y listo! Ya tenemos nuestras hermosas mariposas troqueladas hechas completamente a mano, son realmente hermosas y si somos muy cuidadosos al hacerlas quedarán perfectas, no tienen nada que envidiarle a las que son hechas en plotter, la única diferencia es que hacerlas a manos requiere de más trabajo, sin embargo, el resultado es tan bueno que vale por completo la pena, podemos hacerlas del color y tamaño que más nos gusten, en mi caso utilicé morado y rosado ya que serán los colores de la decoración de mi cumpleaños y así todo combinará bien, estas en específico quiero colocarlas en la pared para decorar, pero además haré otras para pegar sobre los globos y unas más pequeñas para la torta y dulces, como les dije, pueden hacerse de cualquier tamaño y color y como sea quedan hermosas, espero que les haya gustado este tutorial y puedan elaborarlas en casa si o tienen plotter de corte o no quieren gastar dinero extra.
¡And ready! We already have our beautiful die-cut butterflies made entirely by hand, they are really beautiful and if we are very careful when making them they will be perfect, they have nothing to envy to those made on a plotter, the only difference is that making them by hand requires more work, however, the result is so good that it is completely worth it, we can make them in the color and size that we like the most, in my case I used purple and pink since they will be the colors of my birthday decoration and that way everything will combine well, these specifically I want to place them on the wall to decorate, but I will also make others to stick on the balloons and some smaller ones for the cake and sweets, as I told you, they can be made in any size and color and they are beautiful anyway, I hope you like them have liked this tutorial and can make them at home if they either have a cutting plotter or do not want to spend extra money.
Resultado 🦋 | Result 🦋
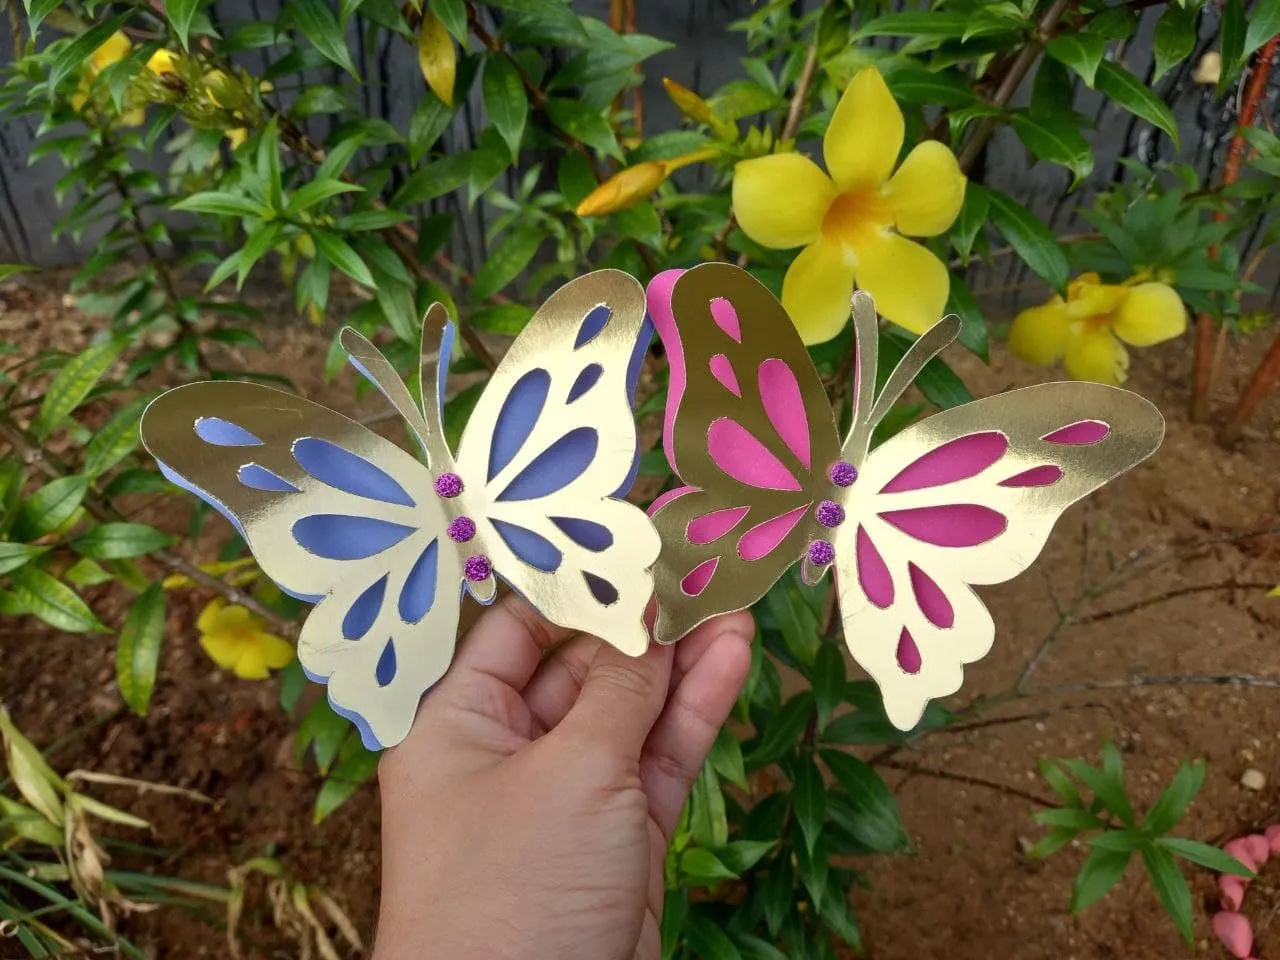
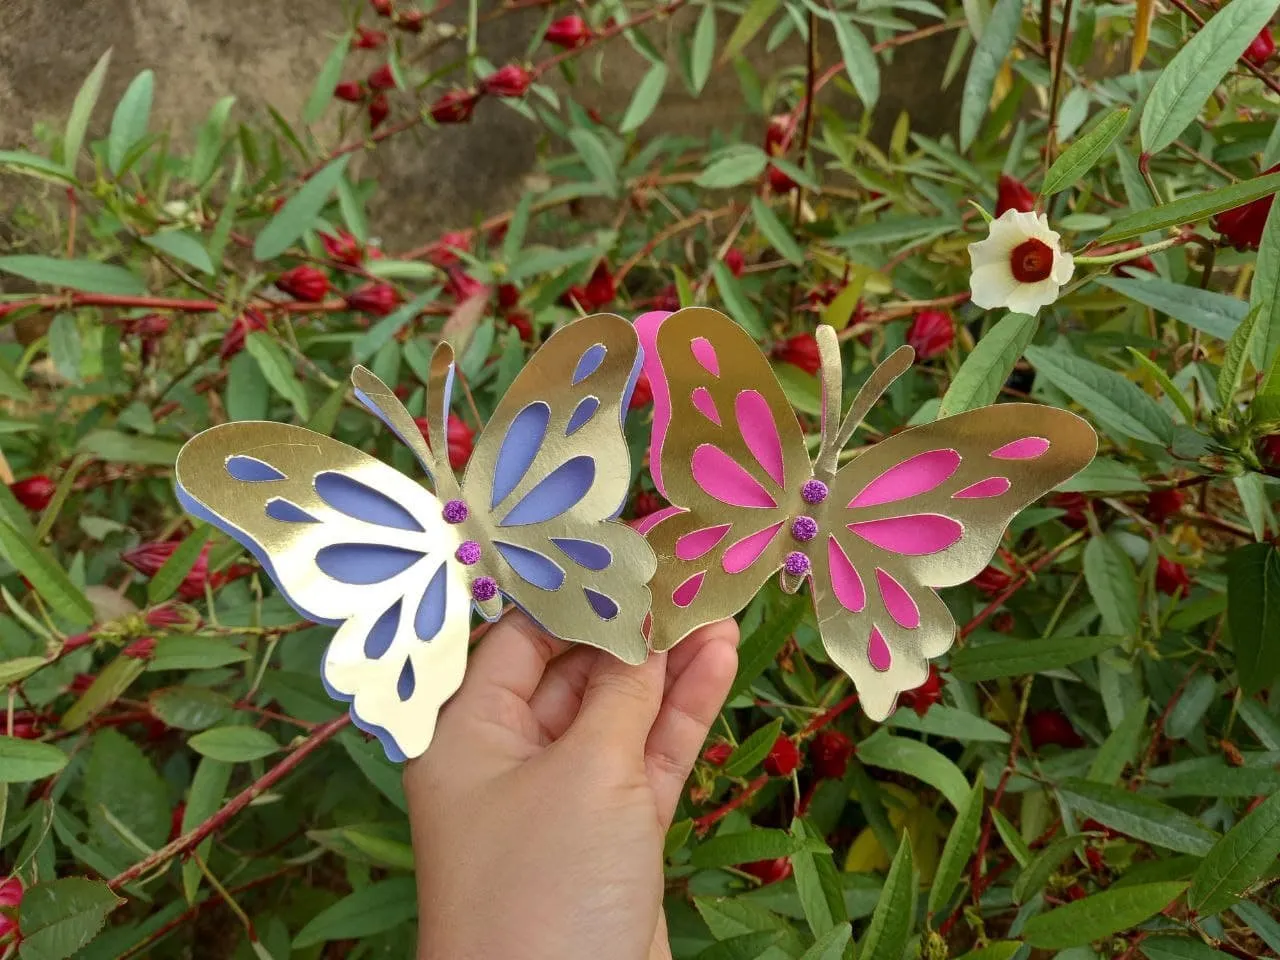


Todas las fotografías son de mi propiedad.
Fotografías capturadas con mi Samsung Galaxy A12
Nos vemos en mi próxima publicación.
¡Tengan un feliz día!
All photographs are my property.
Photos captured with my Samsung Galaxy A12
See you in my next post.
¡Have a happy day!