¡Saludos Comunidad Creativa! 🌟 | ¡Greetings Creative Community! 🌟
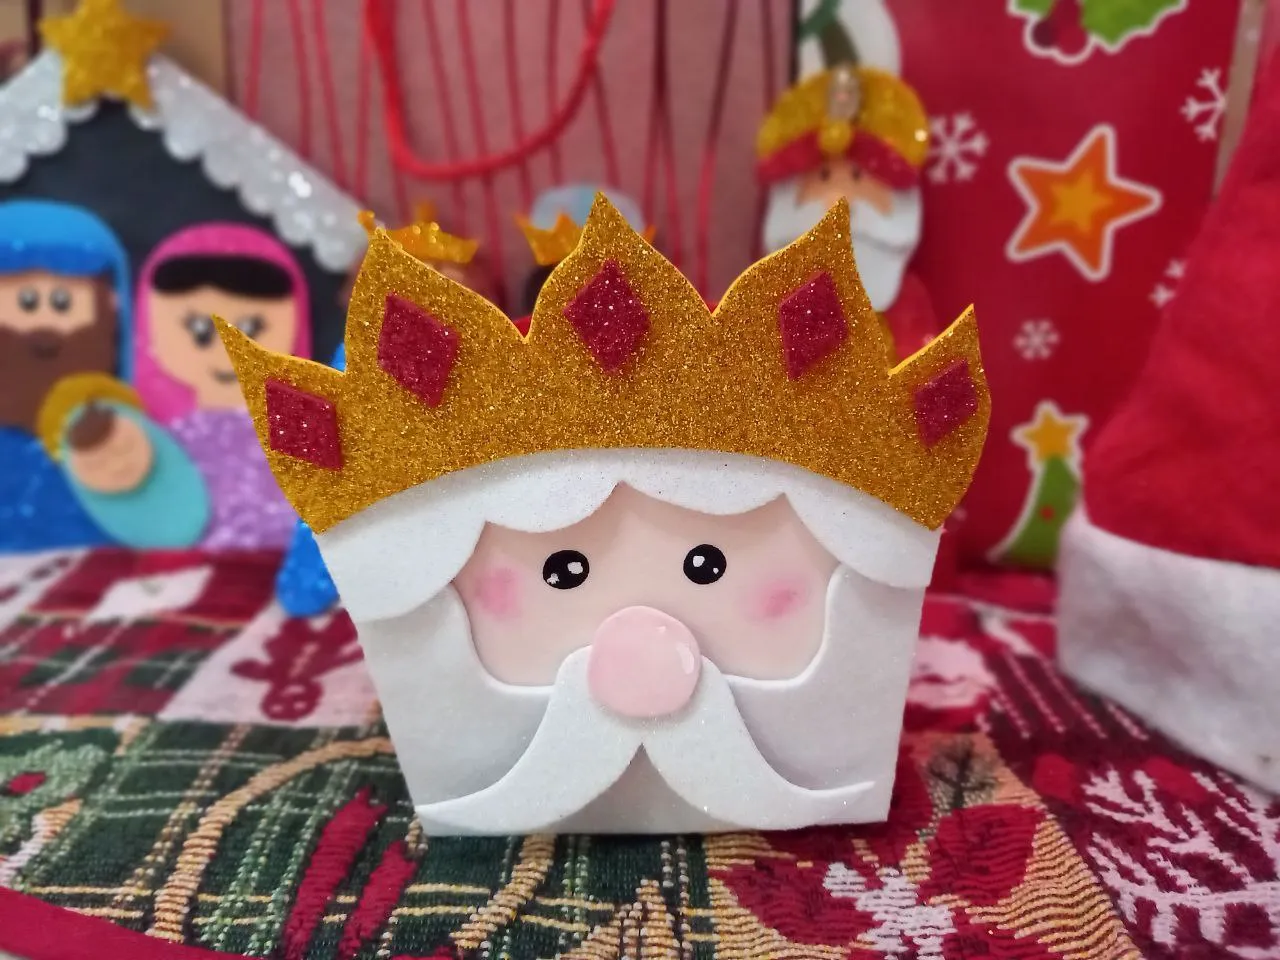
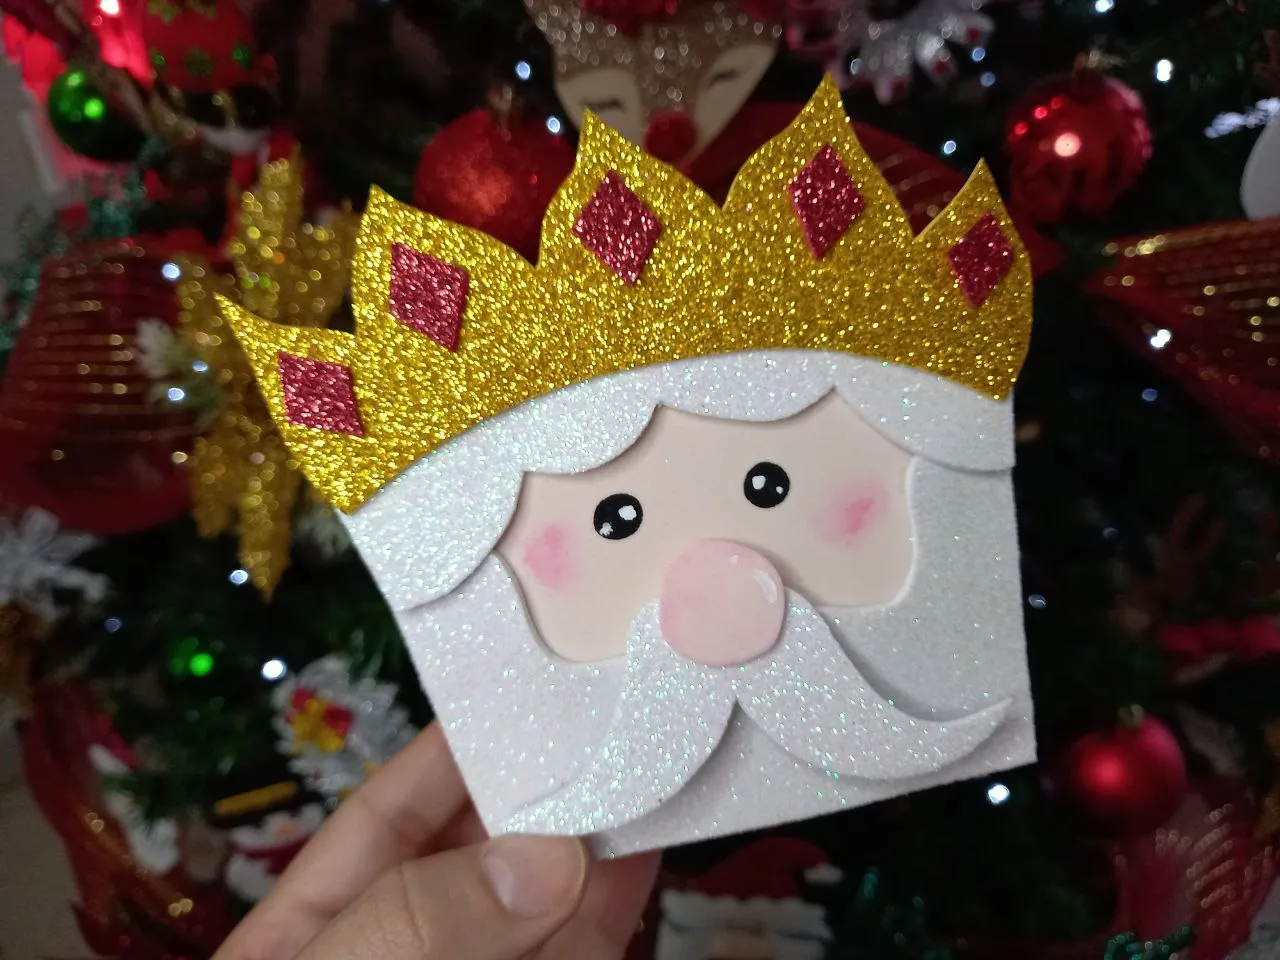
¡Lindo jueves! Espero que se encuentren bien, en vista de que se acerca la primera celebración del año que es el Día de Reyes he elaborado unos lindos detalles alusivos a estos personajes, hoy les comparto el primero y es un dulcero con temática de uno de los Reyes Magos, específicamente Melchor por ser el primero en el orden, a continuación les muestro el procedimiento, espero que les guste, sin más, ¡vamos a crear!
¡Nice thursday! I hope you are well, in view of the fact that the first celebration of the year is approaching, which is Three Kings Day I have elaborated some nice details alluding to these characters, today I am sharing the first one with you and it is a one-themed candy box of the Three Wise Men, specifically Melchor for being the first in the order, below I show you the procedure, I hope you like it, without further ado, ¡let's create!


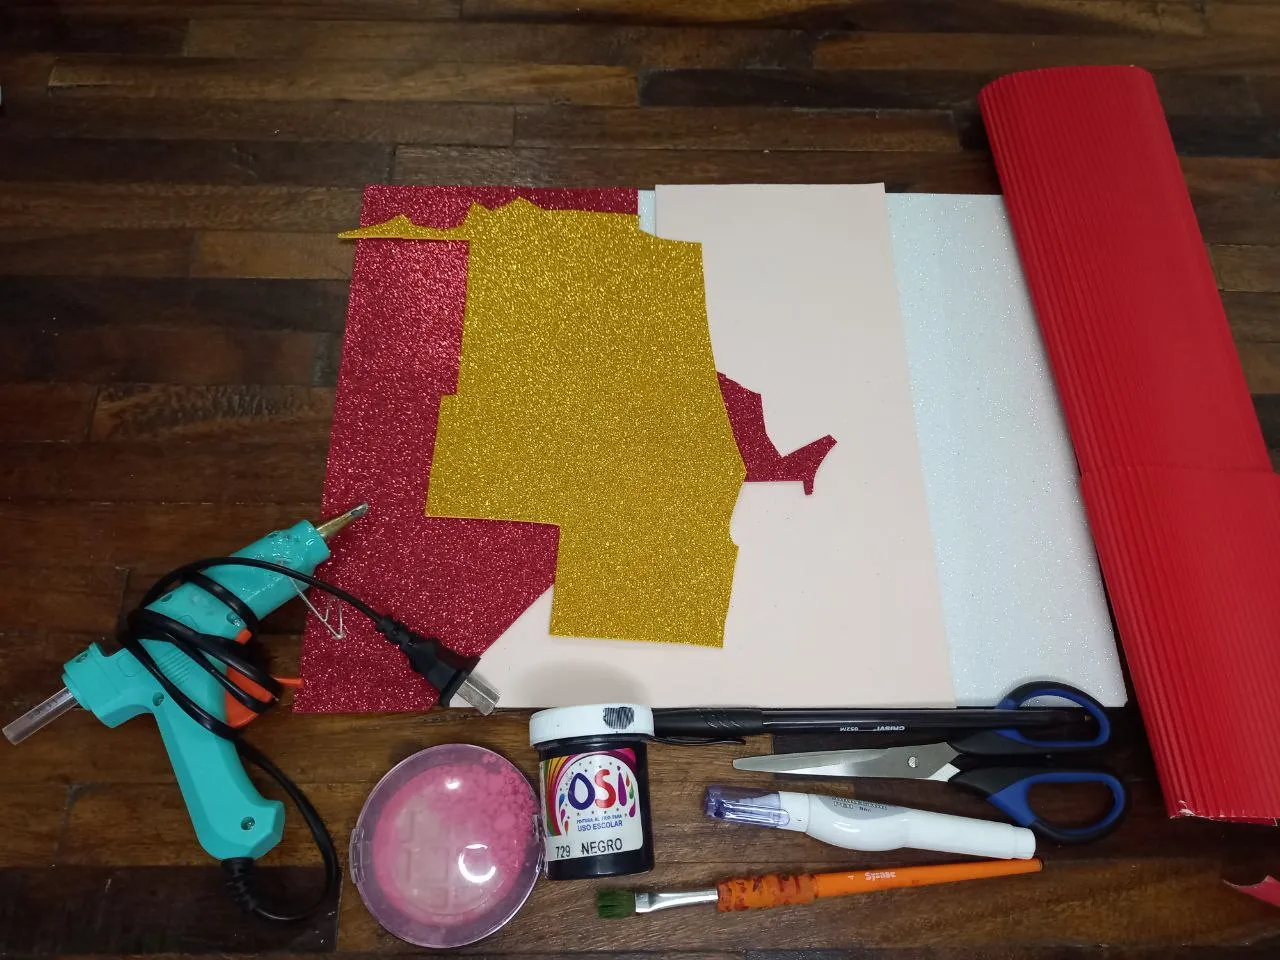
👑 Foami escarchado dorado, blanco y rojo.
👑 Foami color piel sin escarcha.
👑 Pintura negra.
👑 Corrector de tinta.
👑 Rubor.
👑 Pincel.
👑 Lápiz.
👑 Silicón.
👑 Tijera.
👑 Regla.
👑 Gold, white and red frosty foami.
👑 Skin color foami without frost.
👑 Black paint.
👑 Ink concealer.
👑 Blush.
👑 Brush.
👑 Pencil.
👑 Silicone.
👑 Scissors.
👑 Rule.

👑 PASO 1. Lo primero que debemos hacer es los patrones de las piezas que vamos a utilizar, esto lo haremos en una hoja de papel t recortamos, necesitamos el patrón de la cajita, barba, cabello, bigote y corona.
👑 STEP 1. The first thing we must do is the patterns of the pieces that we are going to use, we will do this on a sheet of paper and cut it out, we need the pattern of the box, beard, hair, mustache and crown.


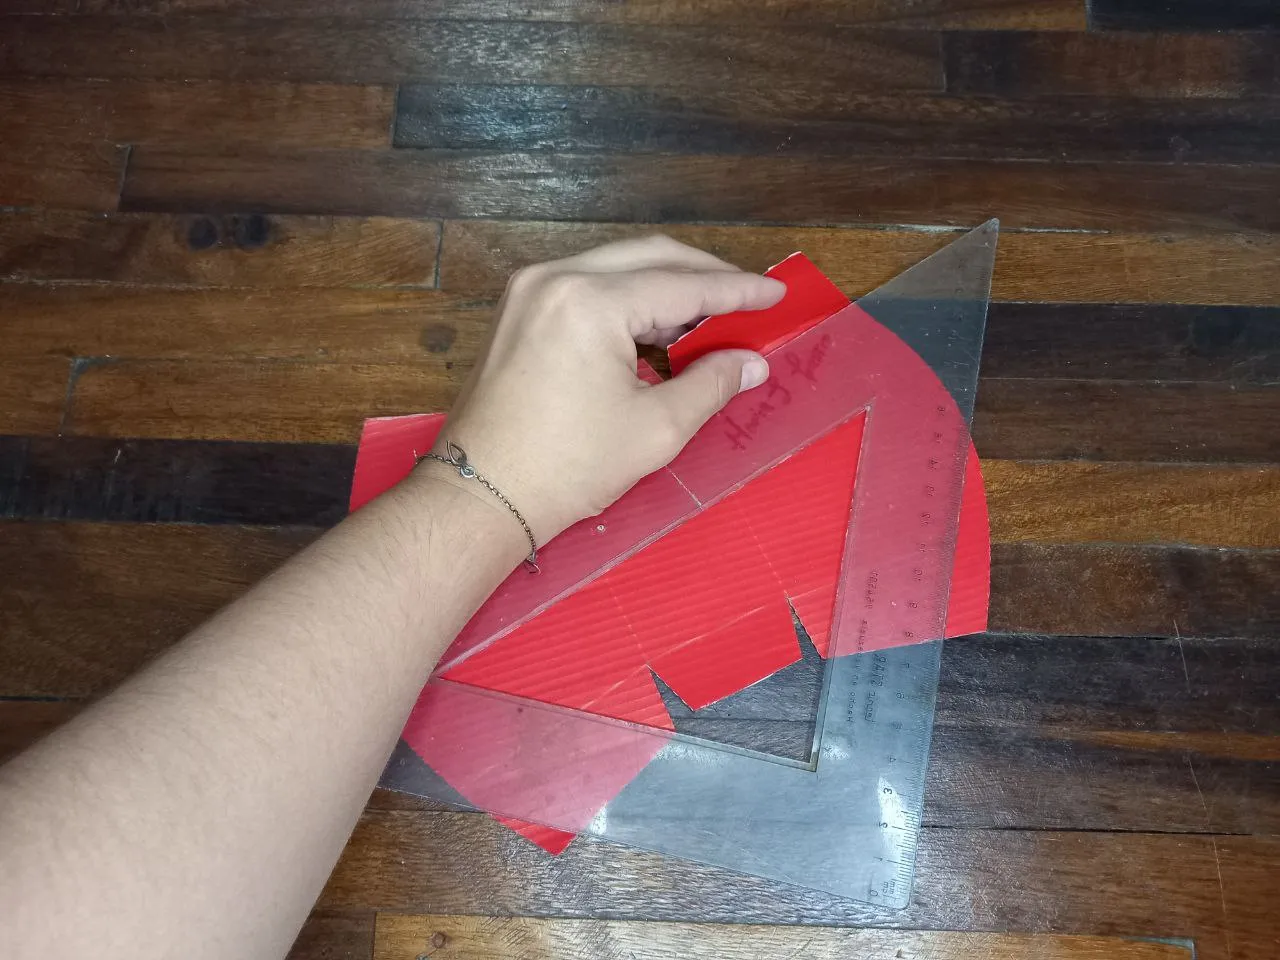
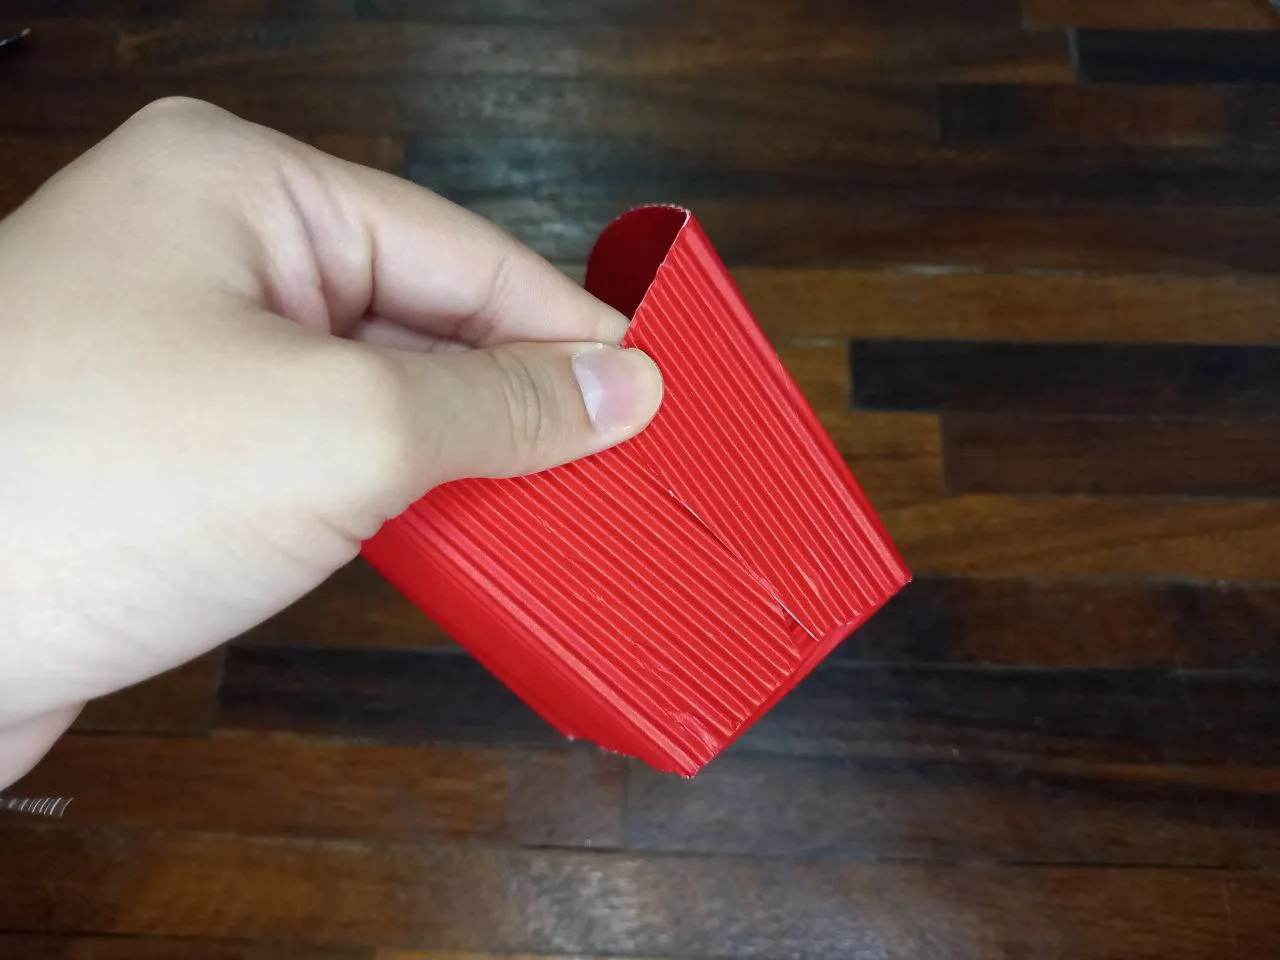
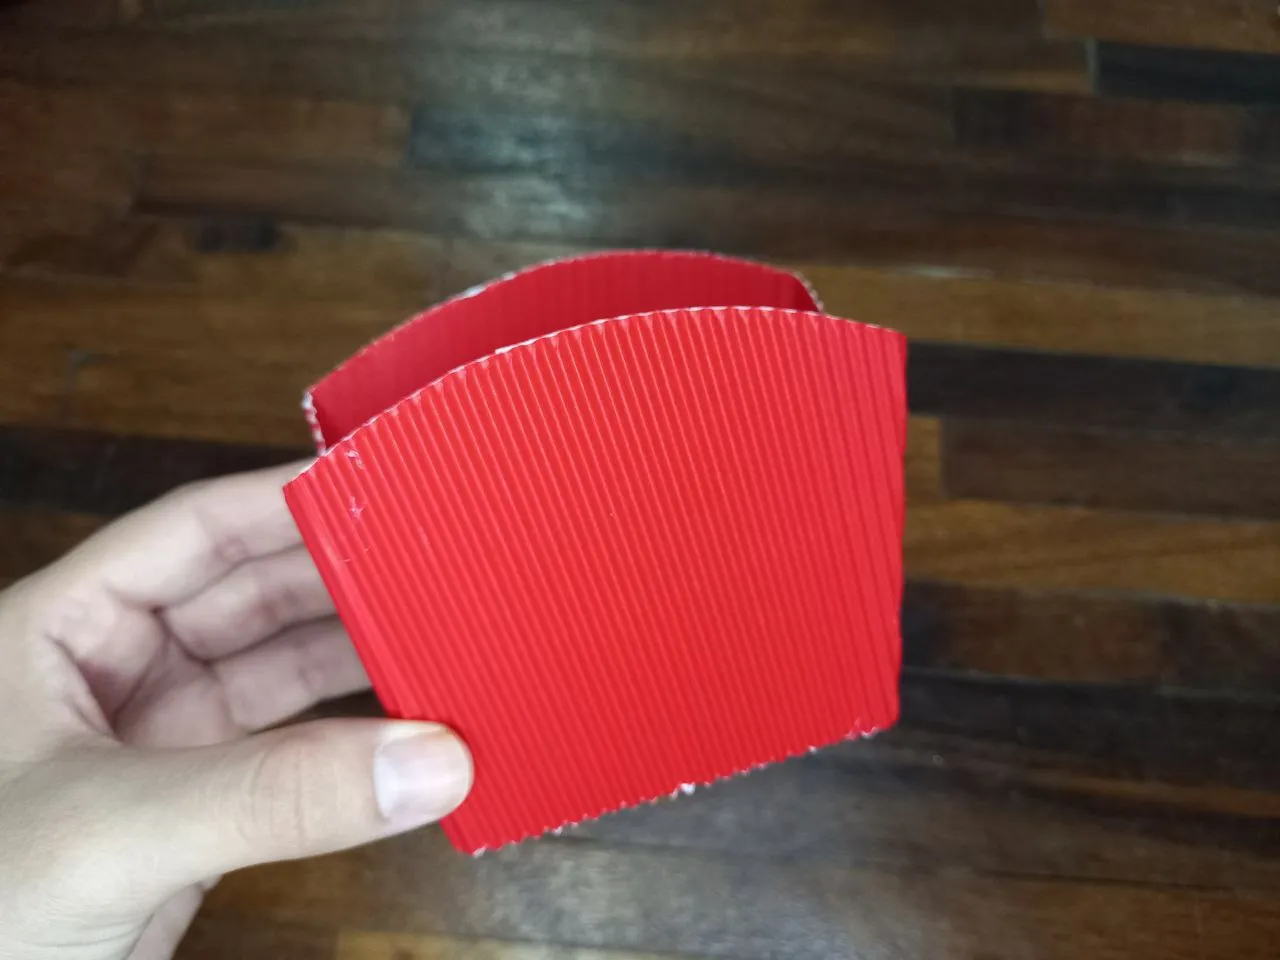
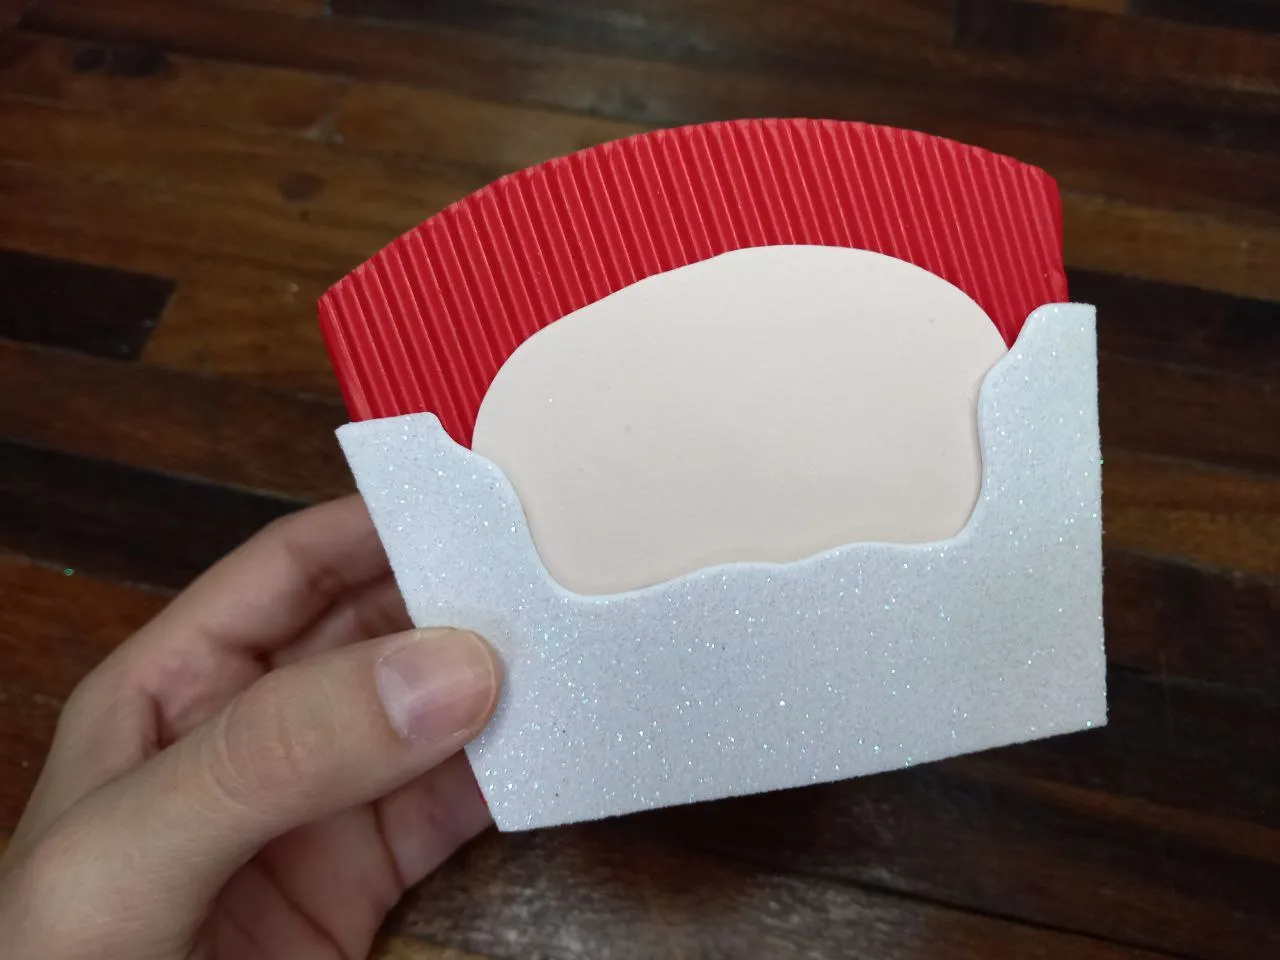
👑 PASO 2. Una vez que tengamos los patrones comenzamos a trabajar en la cajita, transferimos el patrón a la cartulina corrugada roja, recortamos y con ayuda de la regla marcamos todos los dobleces.
👑 STEP 2. Once we have the patterns we begin to work on the box, we transfer the pattern to the red corrugated cardboard, cut out and with the help of the ruler we mark all the folds.

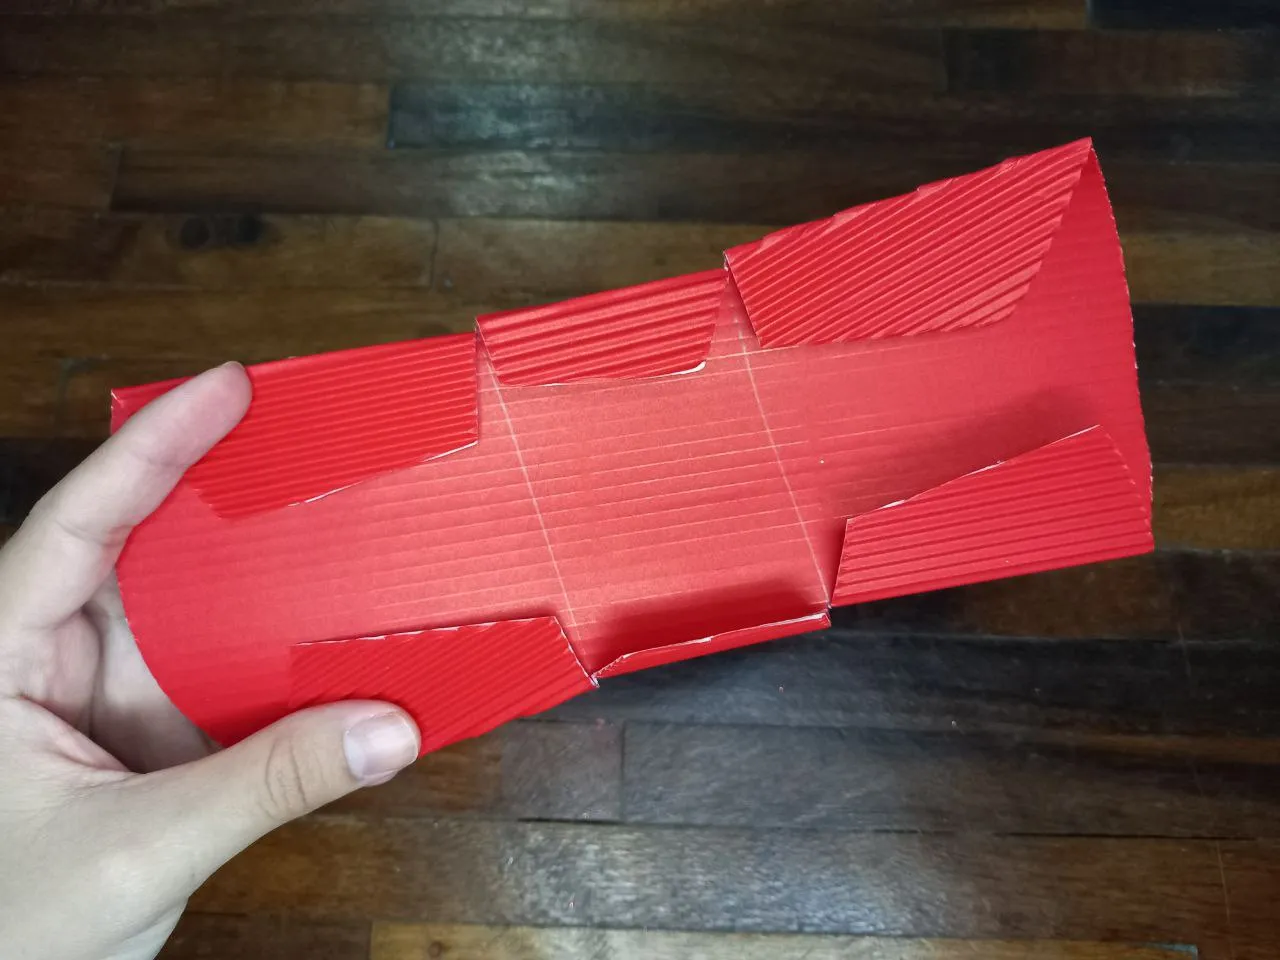
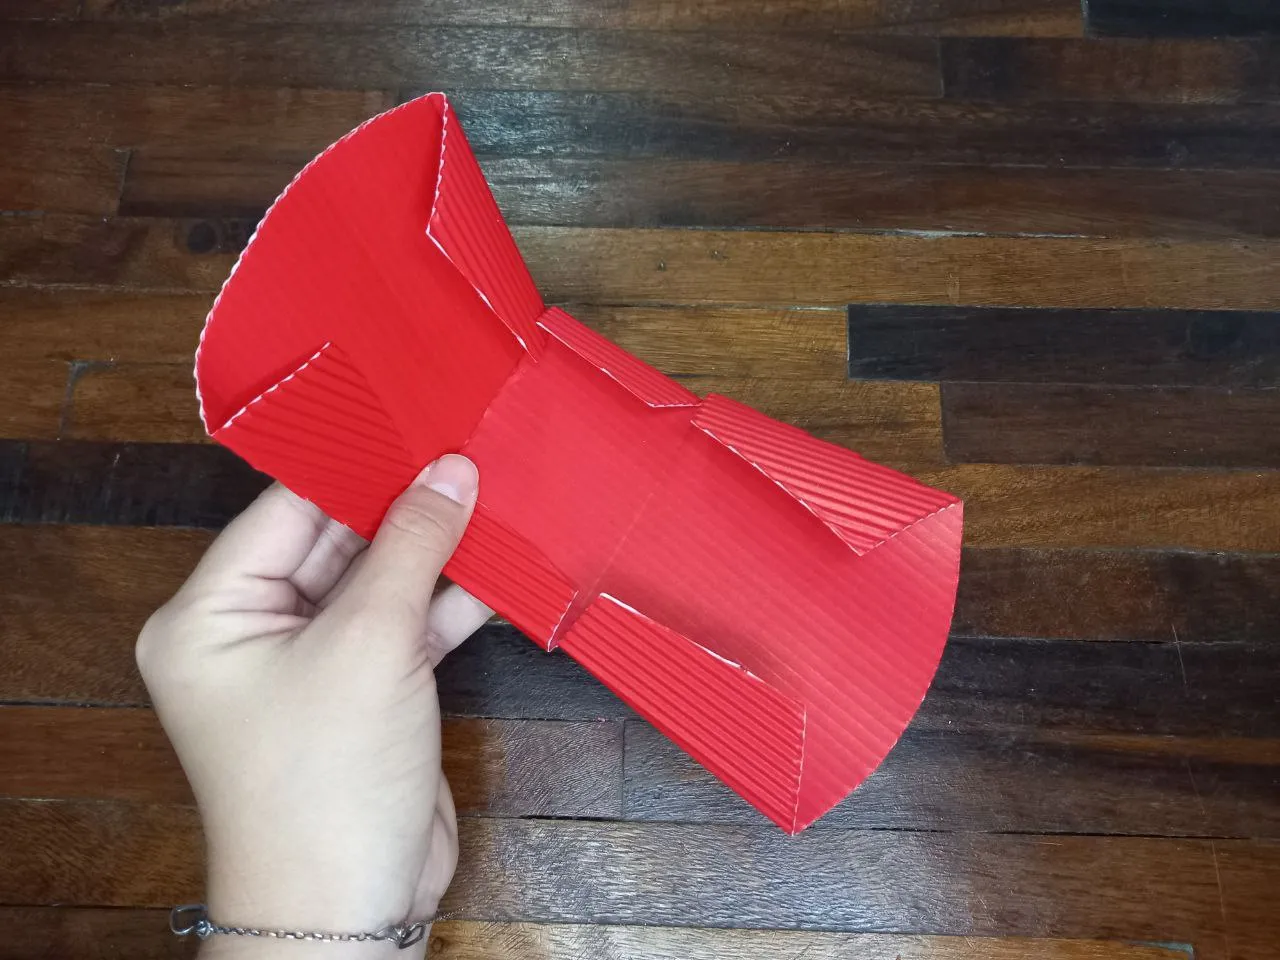

👑 PASO 3. Comenzamos a unir los dobleces pegando con silicón hasta darle la forma a la cajita.
👑 STEP 3. We begin to join the folds by gluing with silicone until we shape the box.

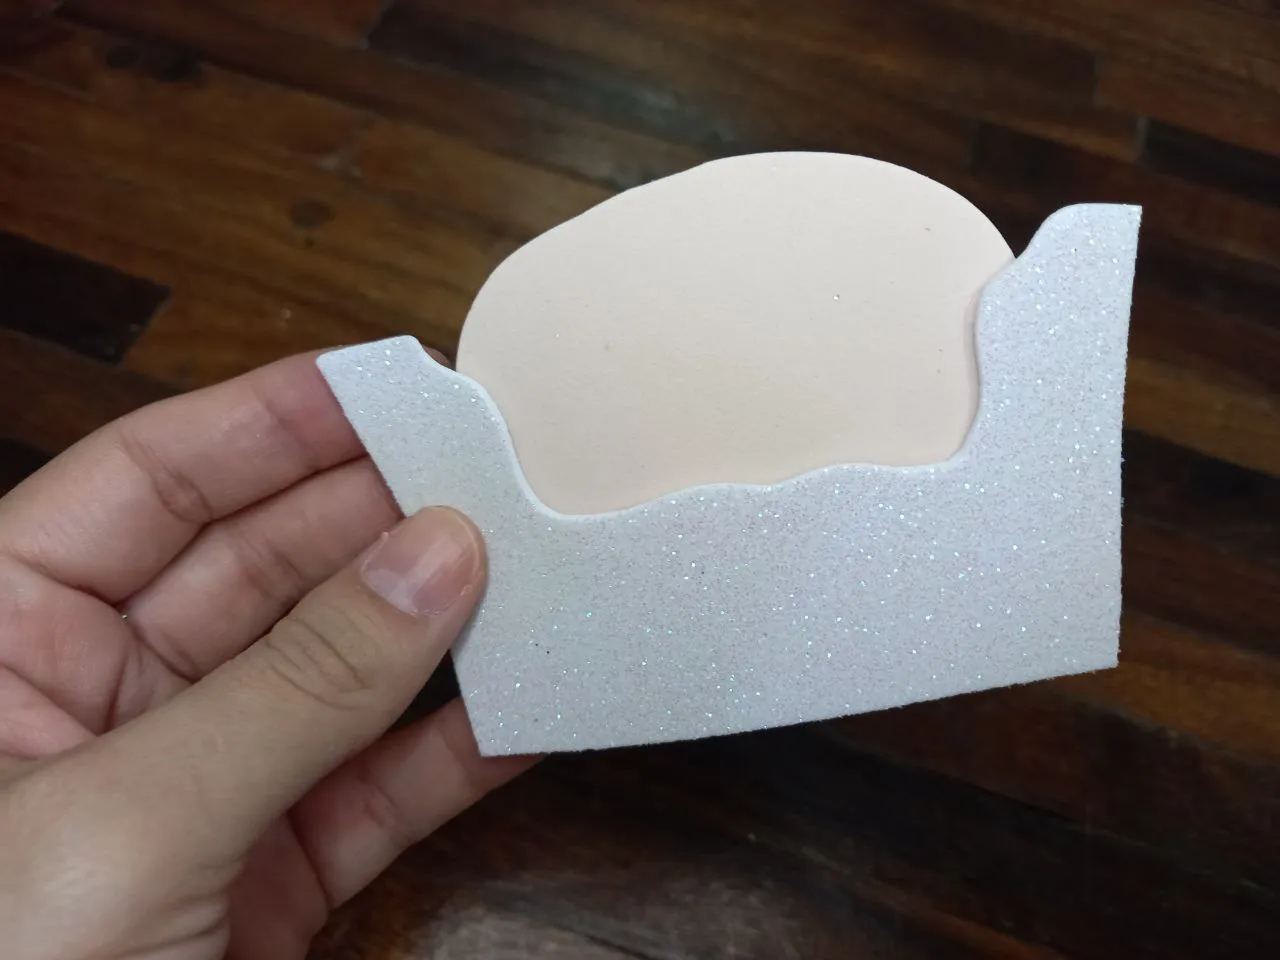
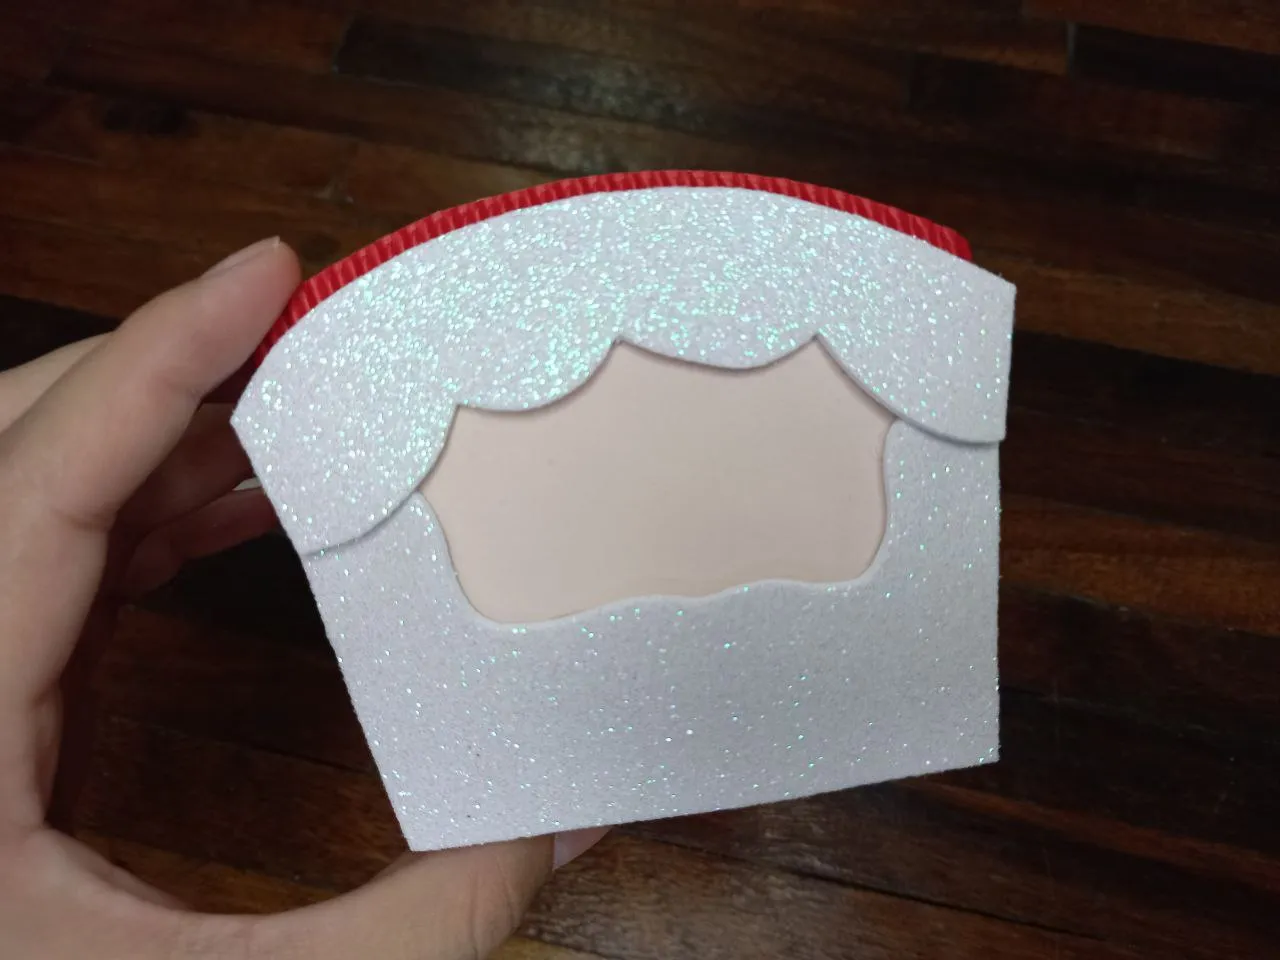
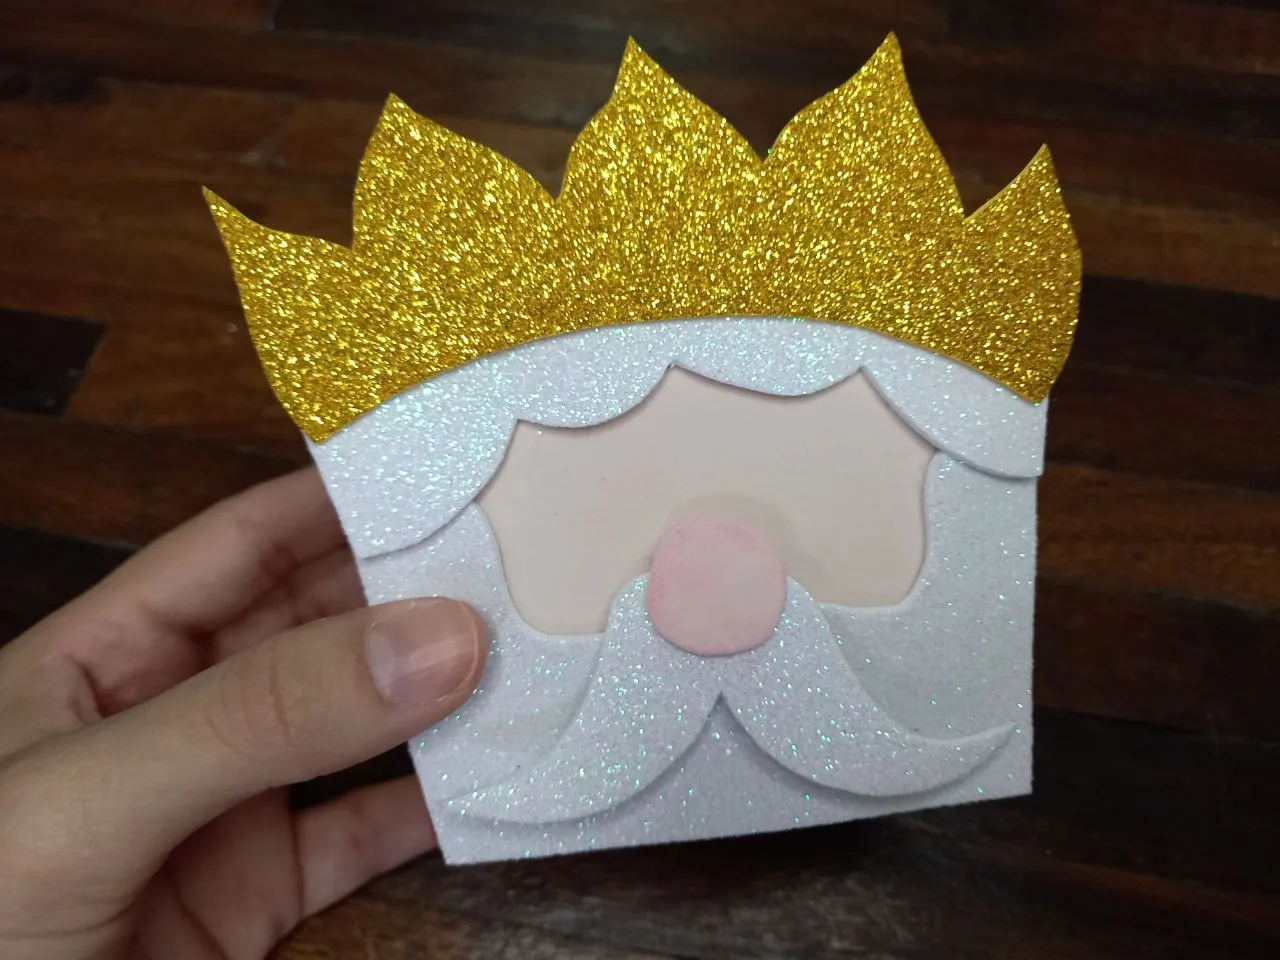
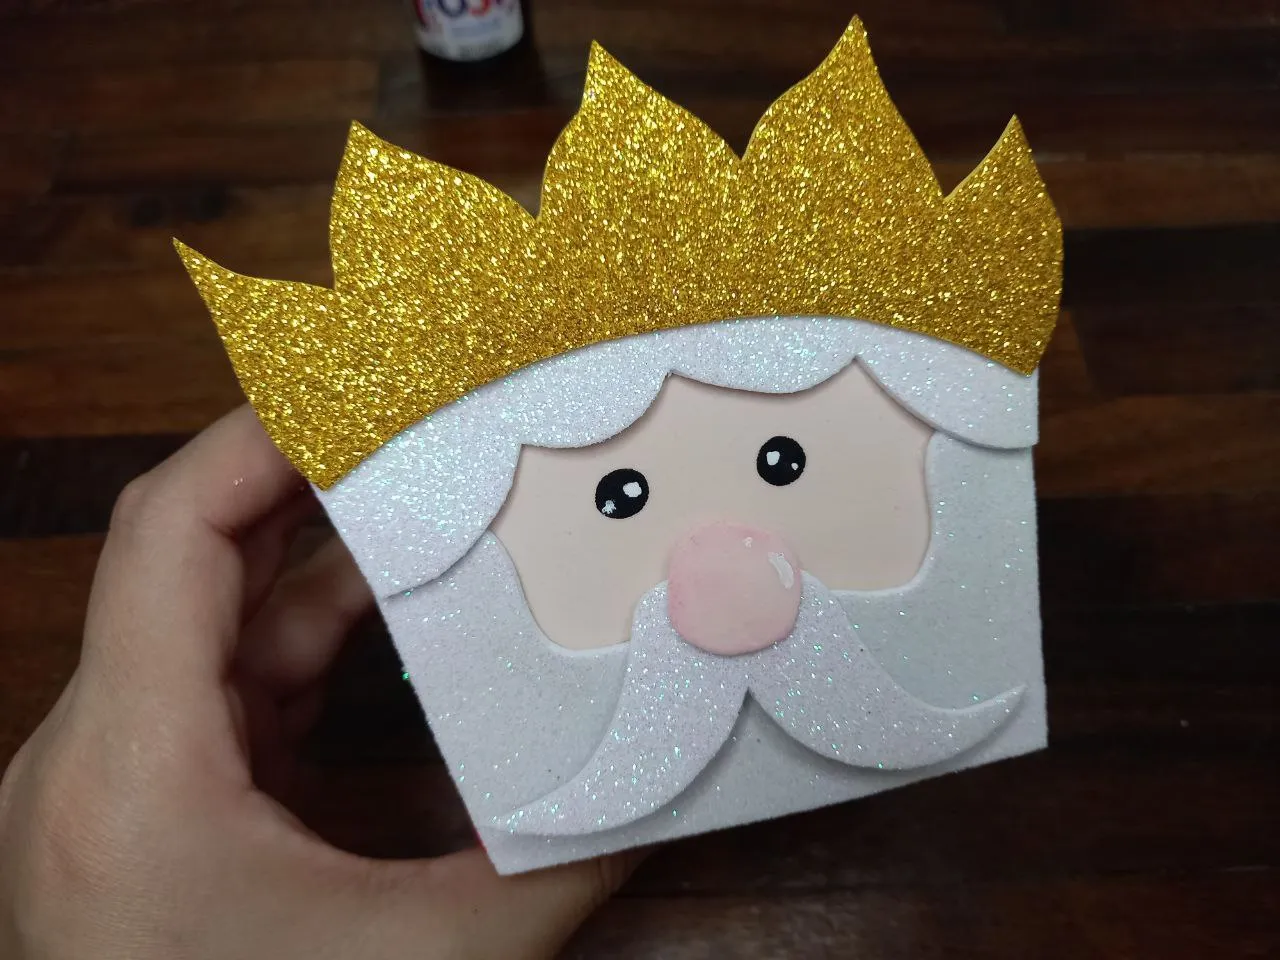
👑 PASO 4. Ahora transferimos el patrón de las demás piezas al foami en sus colores correspondientes, debemos tomar en cuenta que la barba debe tener la forma de la parte inferior de la cajita y el cabello y la corona deben encajar en la parte superior.
👑 STEP 4. Now we transfer the pattern of the other pieces to the foami in their corresponding colors, we must take into account that the beard must have the shape of the lower part of the box and the hair and the crown must fit in the upper part.

👑 PASO 5. Pegamos la barba sobre el rostro, luego la pegamos en la parte inferior frontal de la cajita, pegamos el cabello y sobre este la corona, luego pegamos el bigote en el centro de la barba, con el rubor marcamos el borde de la nariz y la pegamos sobre el bigote en el centro de esta.
👑 STEP 5. We glue the beard on the face, then we glue it on the lower front part of the box, we glue the hair and on it the crown, then we glue the mustache in the center of the beard, with the blush We mark the edge of the nose and glue it on the mustache in the center of it.

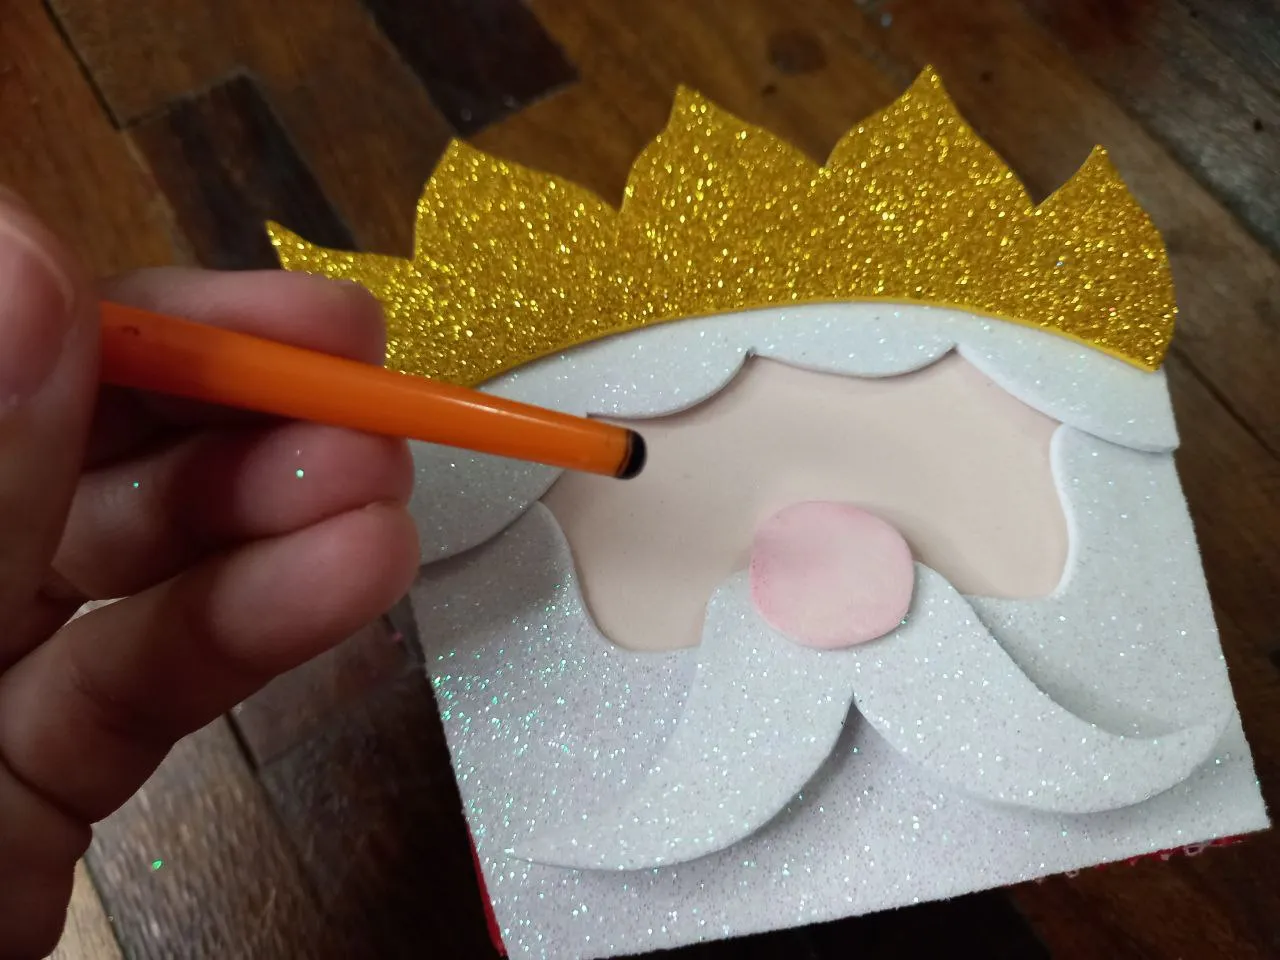
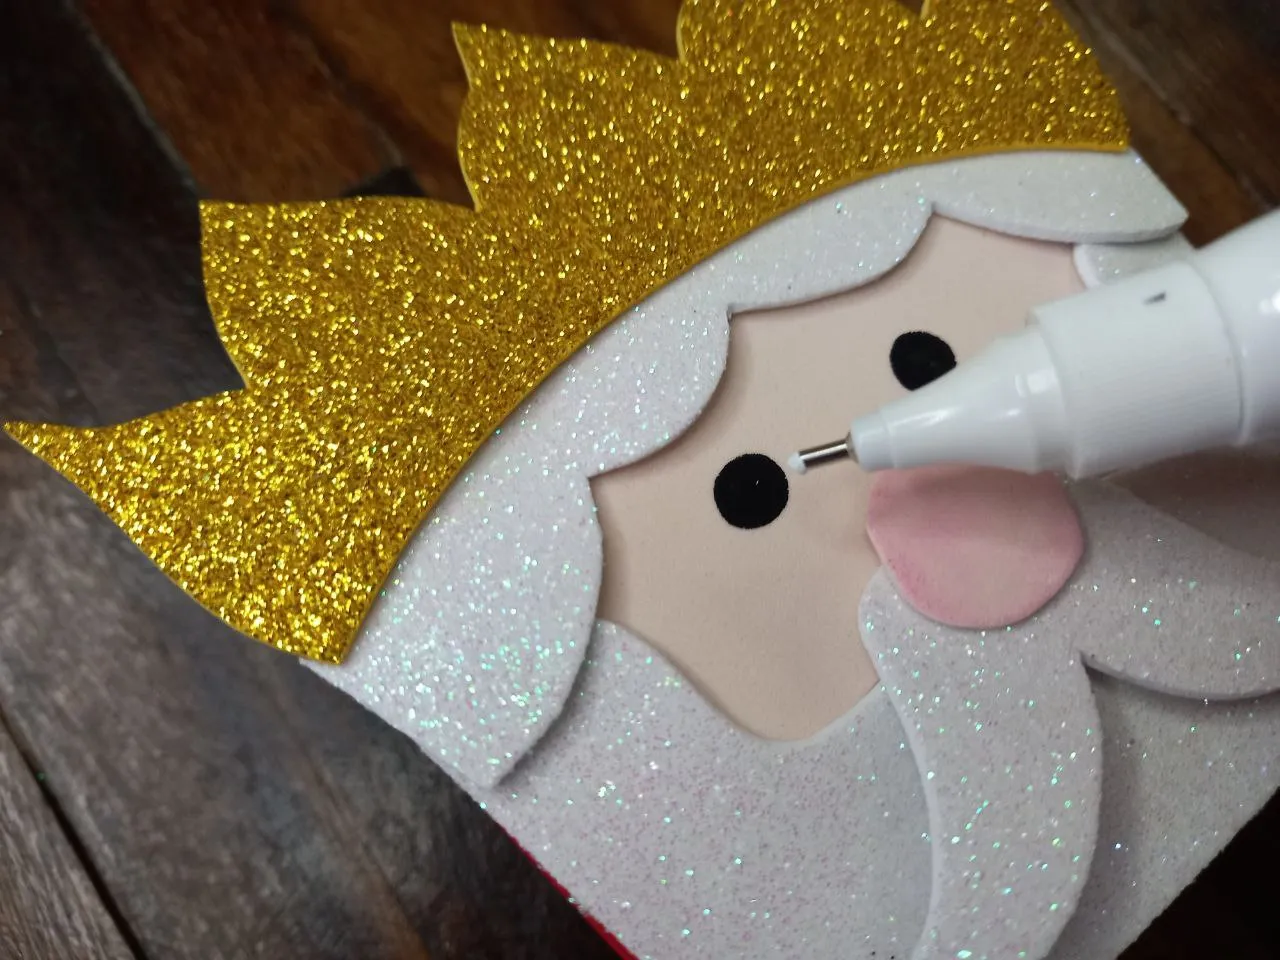
👑 PASO 6. Tomamos un poco de pintura negra con la parte trasera del pincel y dibujamos 2 círculos en el rostro, una vez que se haya secado bien la pintura le dibujamos 2 puntitos blancos con el corrector de tinta.
👑 STEP 6. We take a little black paint with the back of the brush and draw 2 circles on the face, once the paint has dried well we draw 2 white dots with the ink concealer.

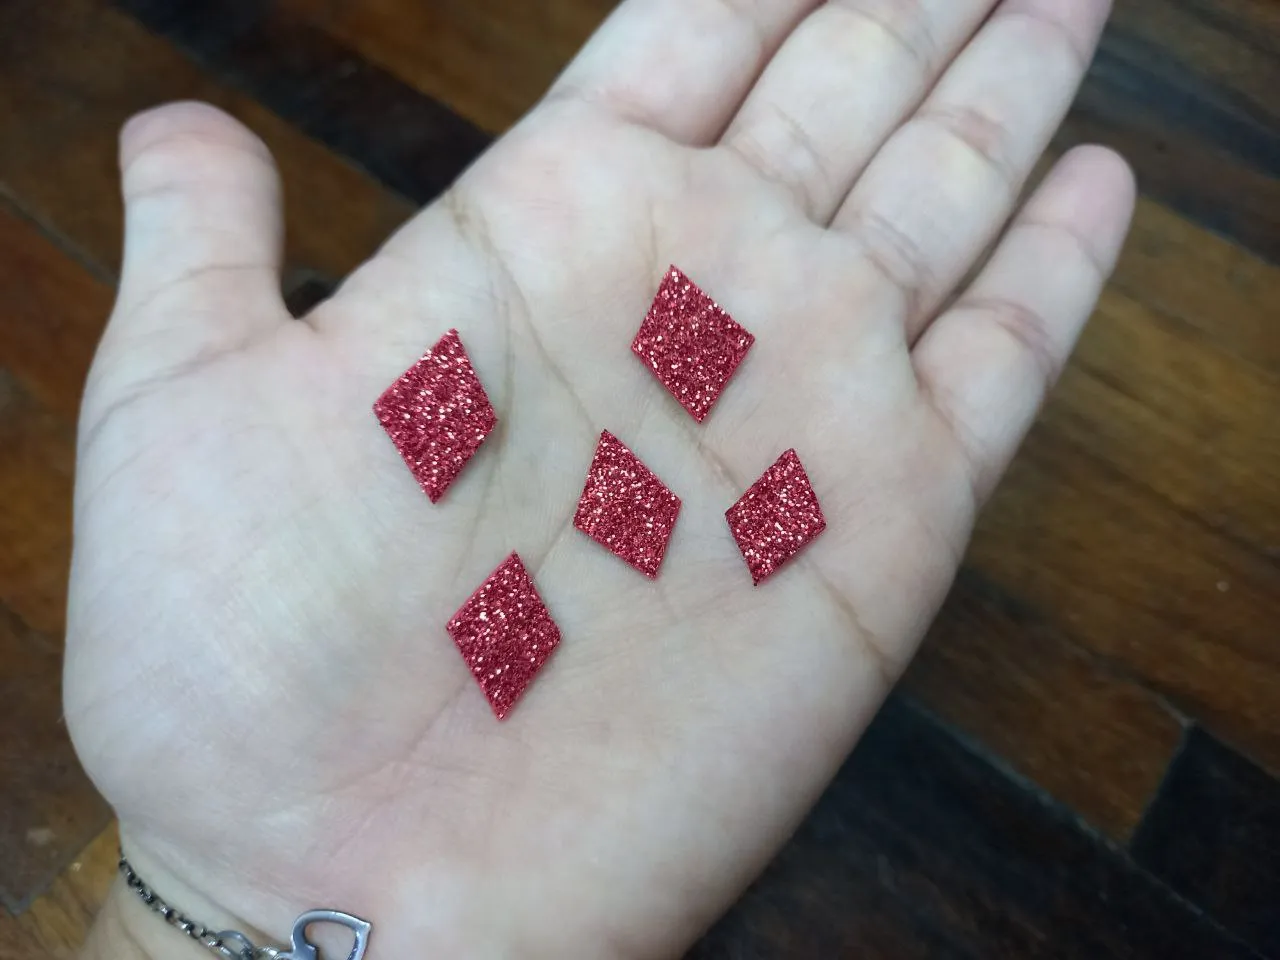
👑 PASO 7. Recortamos 5 rombos pequeños de foami escarchado rojo y los pegamos en la corona debajo de cada punta como decoración, como detalle final dibujamos las mejillas con rubor y listo.
👑 STEP 7. Cut 5 small diamonds out of red frosted foam and glue them to the crown under each tip as decoration, as a final detail we draw the cheeks with blush and that's it.
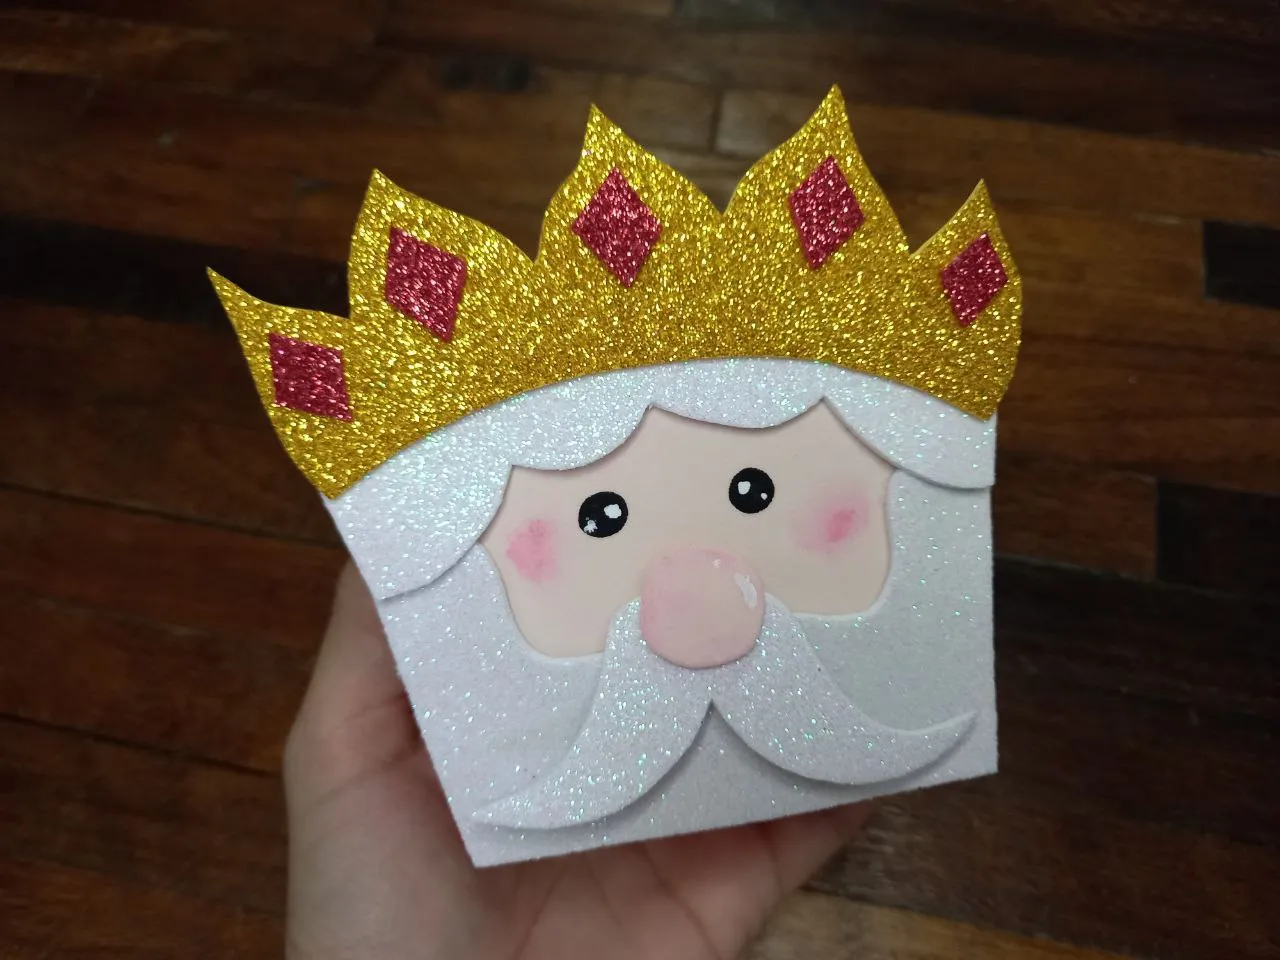
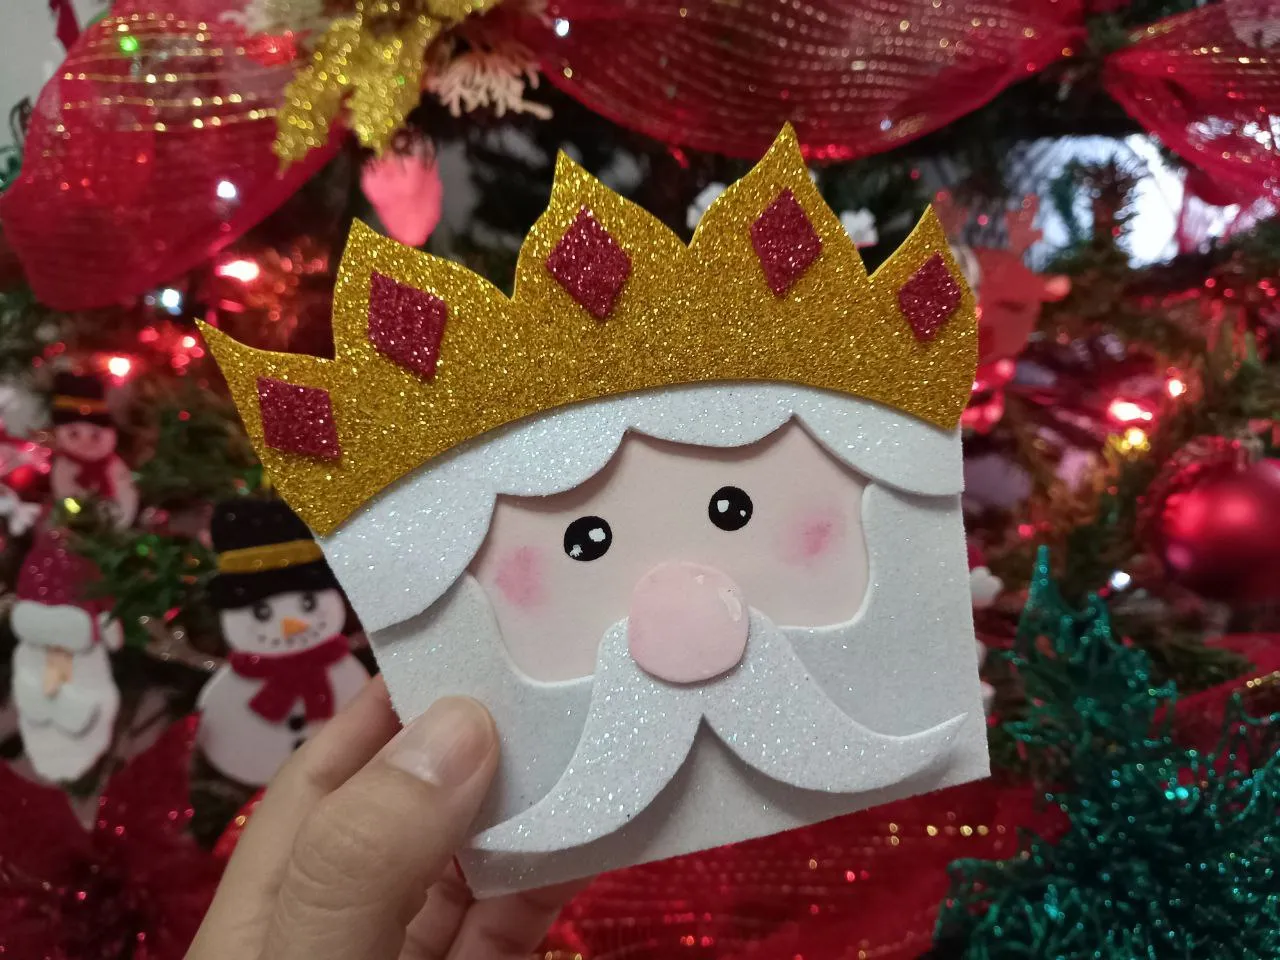
De esta manera es como he elaborado este lindo dulcero con temática del Rey Mago Melchor, una creación sencilla pero hermosa para obsequiar un detalle especial durante estas fechas, luego les comparto 2 creaciones más con las temáticas de los Reyes Magos faltantes, mientras tanto espero que les haya gustado esta idea y les pueda servir para hacer un detalle en casa.
This is how I have made this beautiful candy box with the theme of the Wise Man Melchor, a simple but beautiful creation to give a special detail during these dates, then I share 2 more creations with the themes of the missing Wise Men, meanwhile I hope you liked this idea and it can be used to make a detail at home.


Todas las fotografías son de mi propiedad.
Fotografías capturadas con mi Samsung Galaxy A12
Separador de texto elaborado en Canva.
Nos vemos en mi próxima publicación.
¡Tengan un feliz día!
All photographs are my property.
Photos captured with my Samsung Galaxy A12
Text separator made in Canva.
See you in my next post.
¡Have a happy day!