Desde hace tiempo vengo pensando en tener en mi puesto de joyería para ferias artesanales un modelo de anillo diferente, llamativo, original y fácil de hacer, por lo que tomando en base este modelo este estilo de trepador del cual hice ya un paso a paso, si les interesa revisar.
Lo interesante de este proyecto de joyería artesanal es que es altamente sencillo si te quieres iniciar en esto de hacer joyas con alambre y agarrar confianza, lo puedes realizar con pocos materiales y herramientas, solo debes guiarte por las indicaciones.
Use lo siguiente:
Alambre de bisutería plateado #18 o de 1 mm, usted puede usar el que desee, ya sea dorado, cobre o bronce.
Pinzas de bisutería planas, yo recomiendo las que tenga una punta fina, para dar mejor forma.
Piqueta o tijera para cortar alambres o puede ser también un cortaúñas o incluso una tijera de latonería o de cortar metal, claro esta que sea pequeña.
Mandril de anillo o una estructura redonda como un marcador.
Una regla, en este caso use un palo de helado para marcar las medidas, puedes usar cualquier cosa que te sirva de referencia.
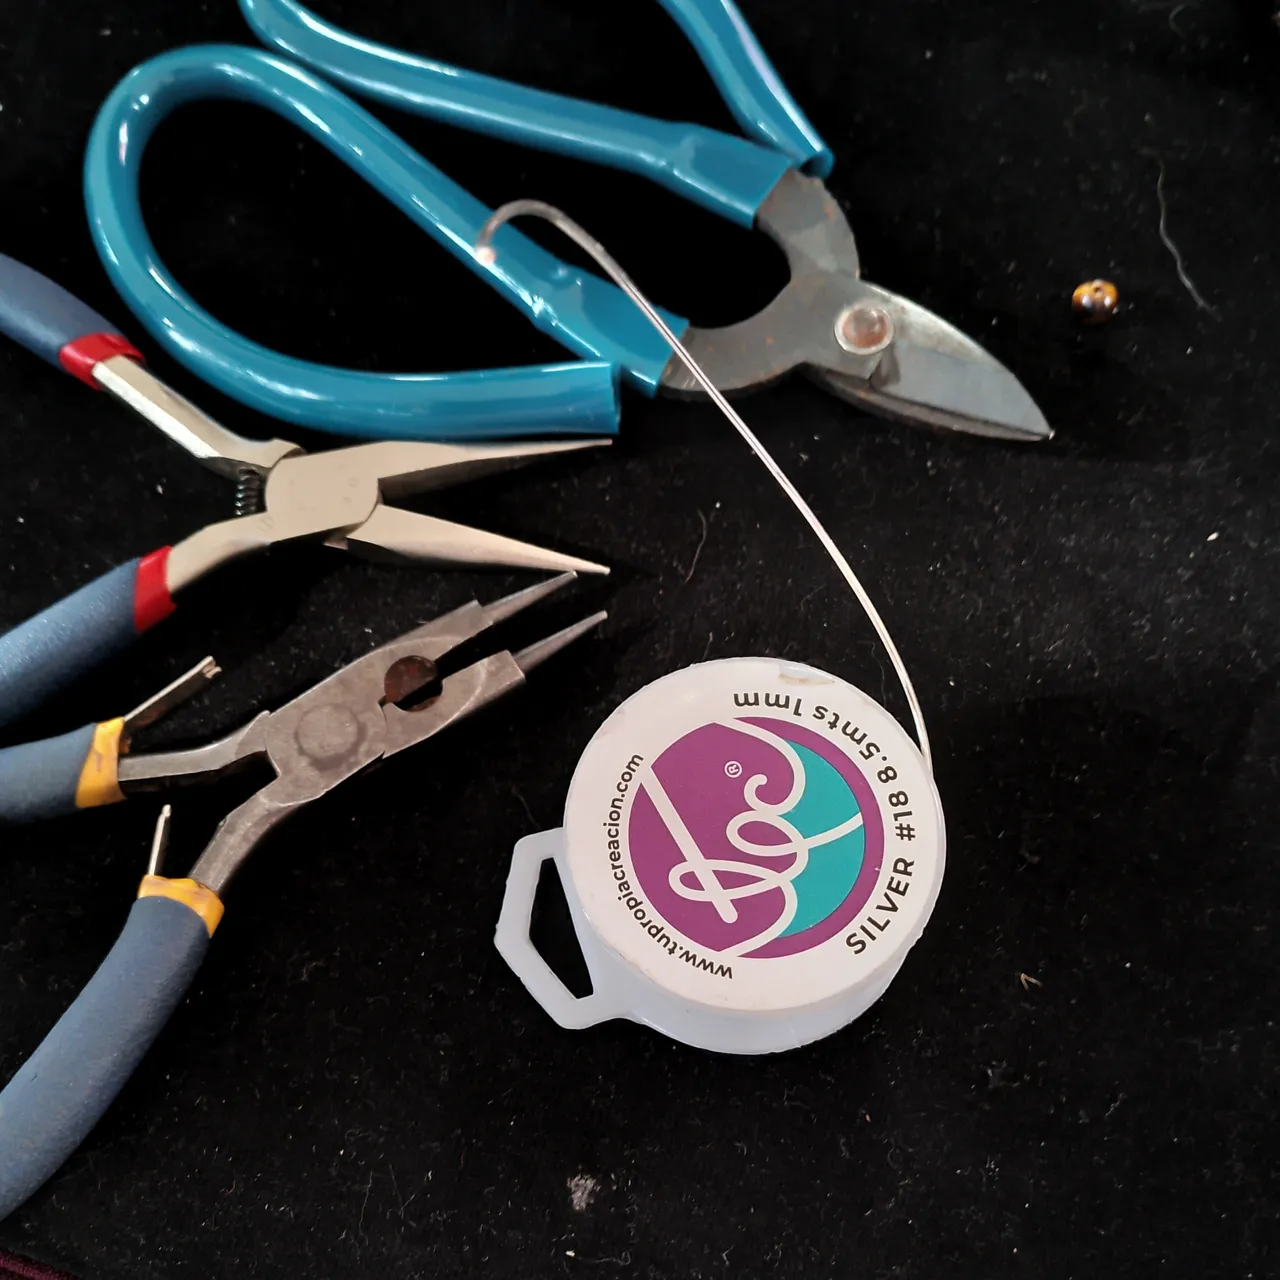
Algunas herramientas básicas para este trabajo
PASOS

Primero comenzamos a doblar el alambre con la pinza de joyería plana con punta fina, se deben hacer formas que no exceda de 0,65 mm de ancho, puedes ir verificando con tu propio dedo para hacerte una idea. Como consejo trata de tener una idea preestablecida antes de elaborar, incluso puedes dibujar los márgenes de guía.
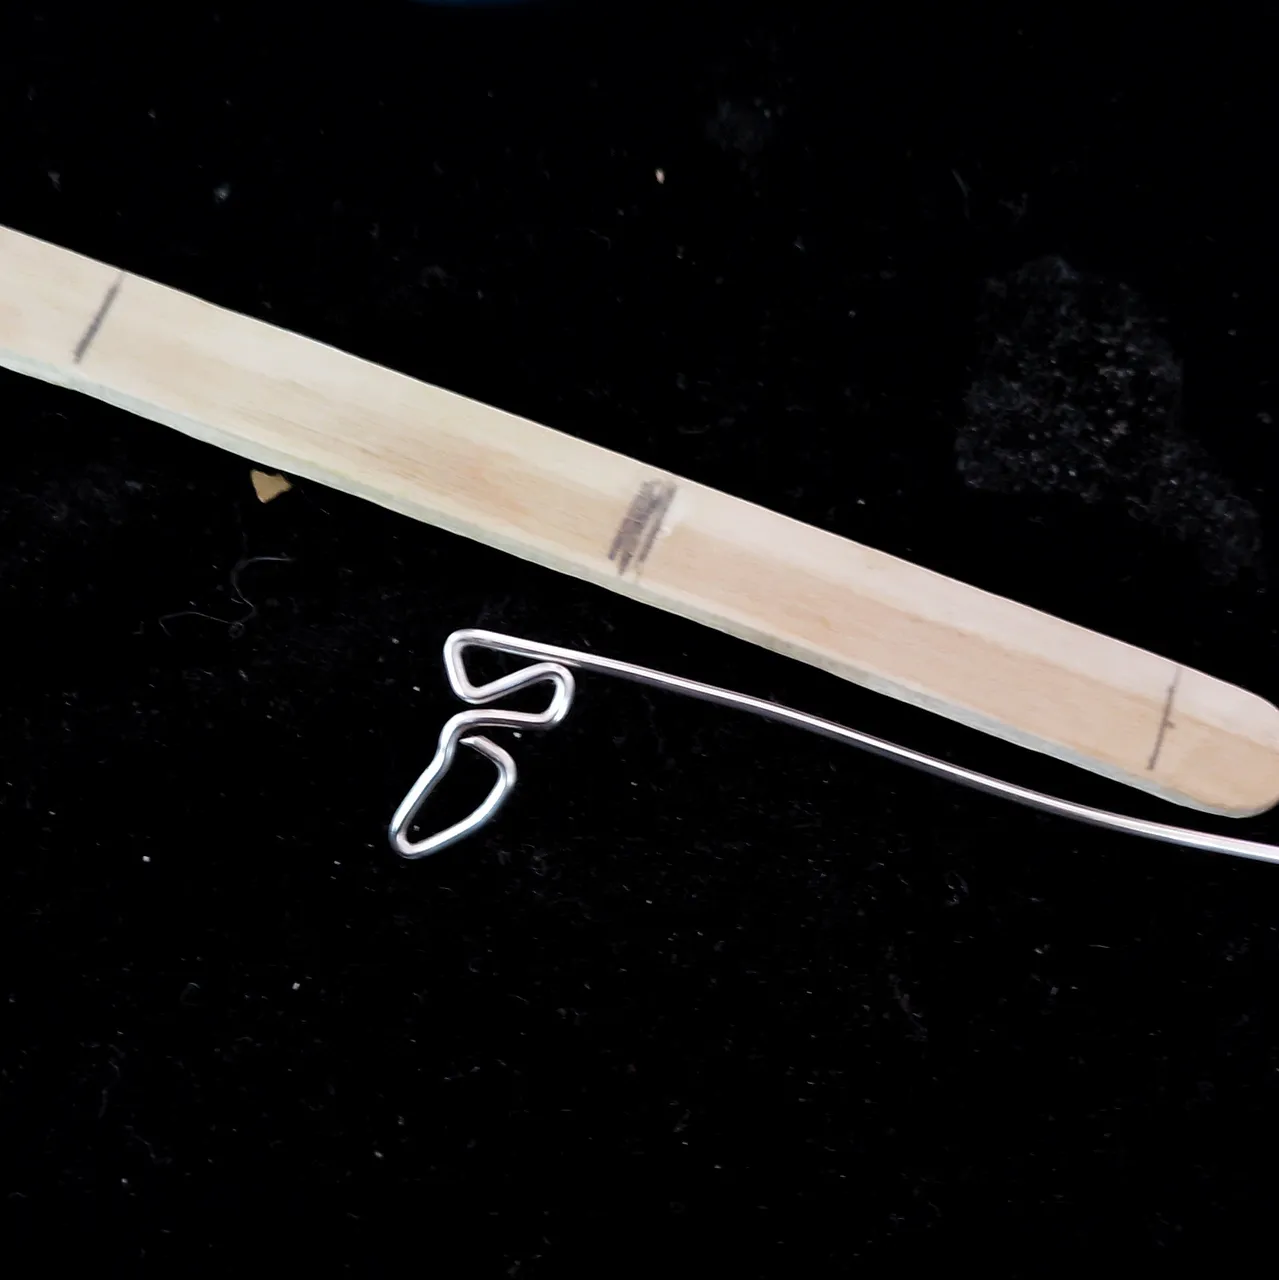
Yo marqué el largo del anillo con un palo de helado que tenía a mano, en este caso está entre 6,5 a 7 cm, como el anillo es ajustable, es bueno dejar un margen para poder subir o bajar las medidas a conveniencia y que se mantenga seguro en el dedo.
Como ven trate de marcar el centro, la figura debería estar allí, pero aquí por apurado me pase un poco, pero igualmente no es algo que dañe lo que ya se ha avanzado.
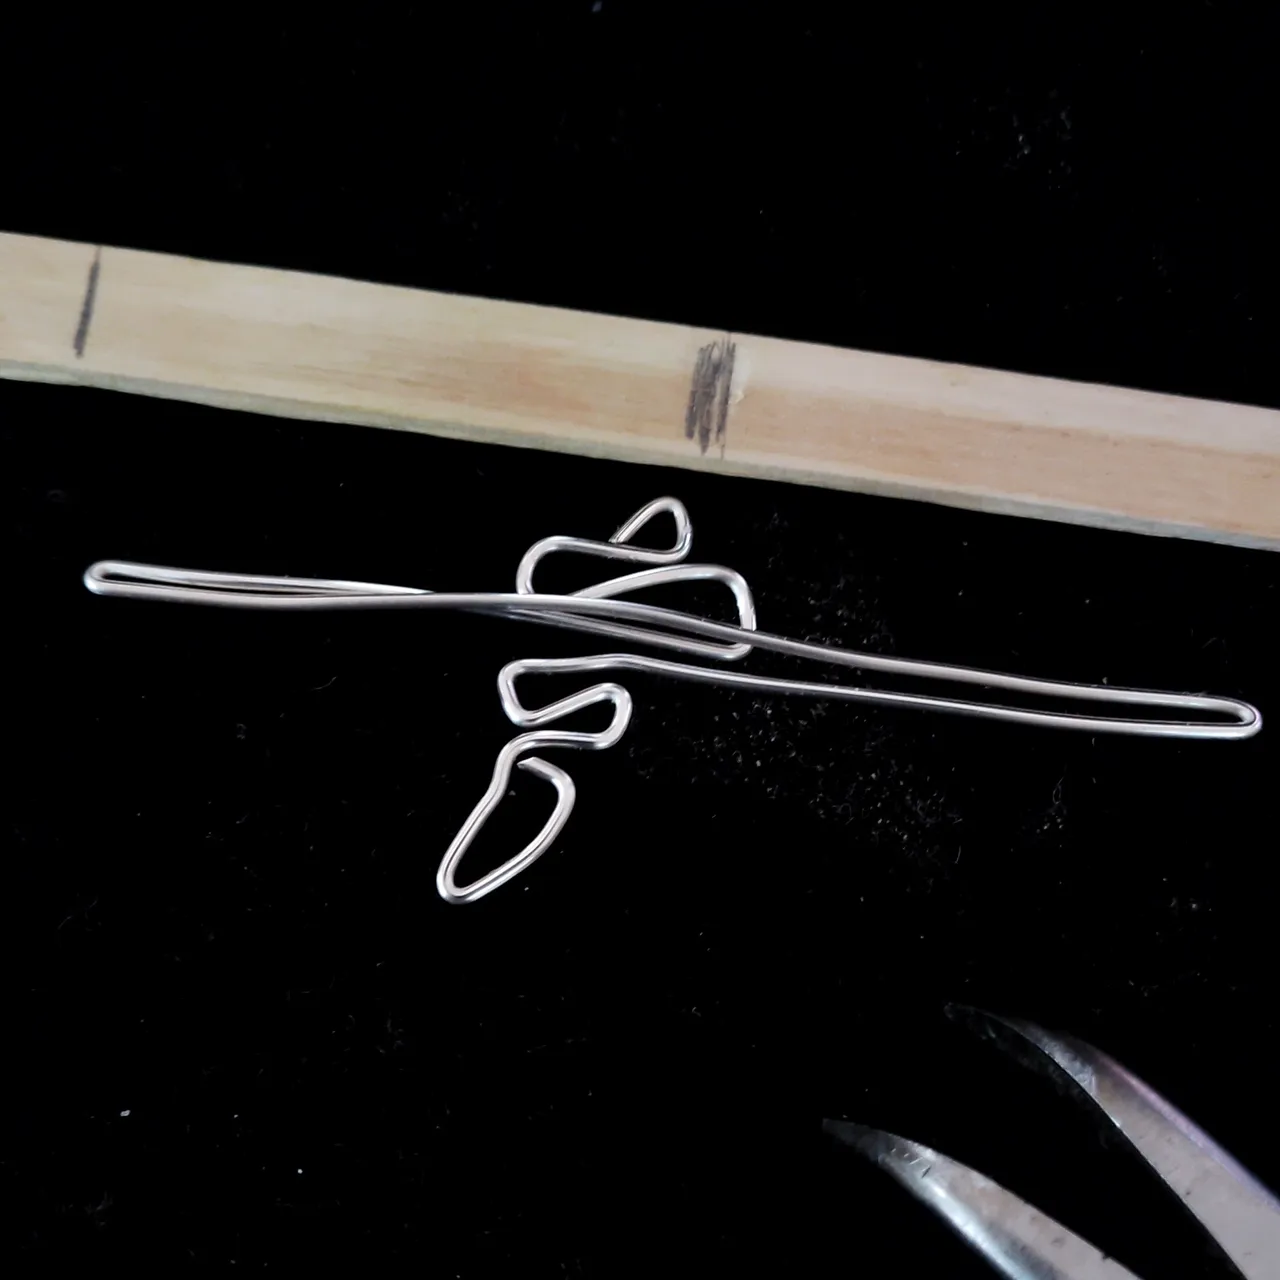
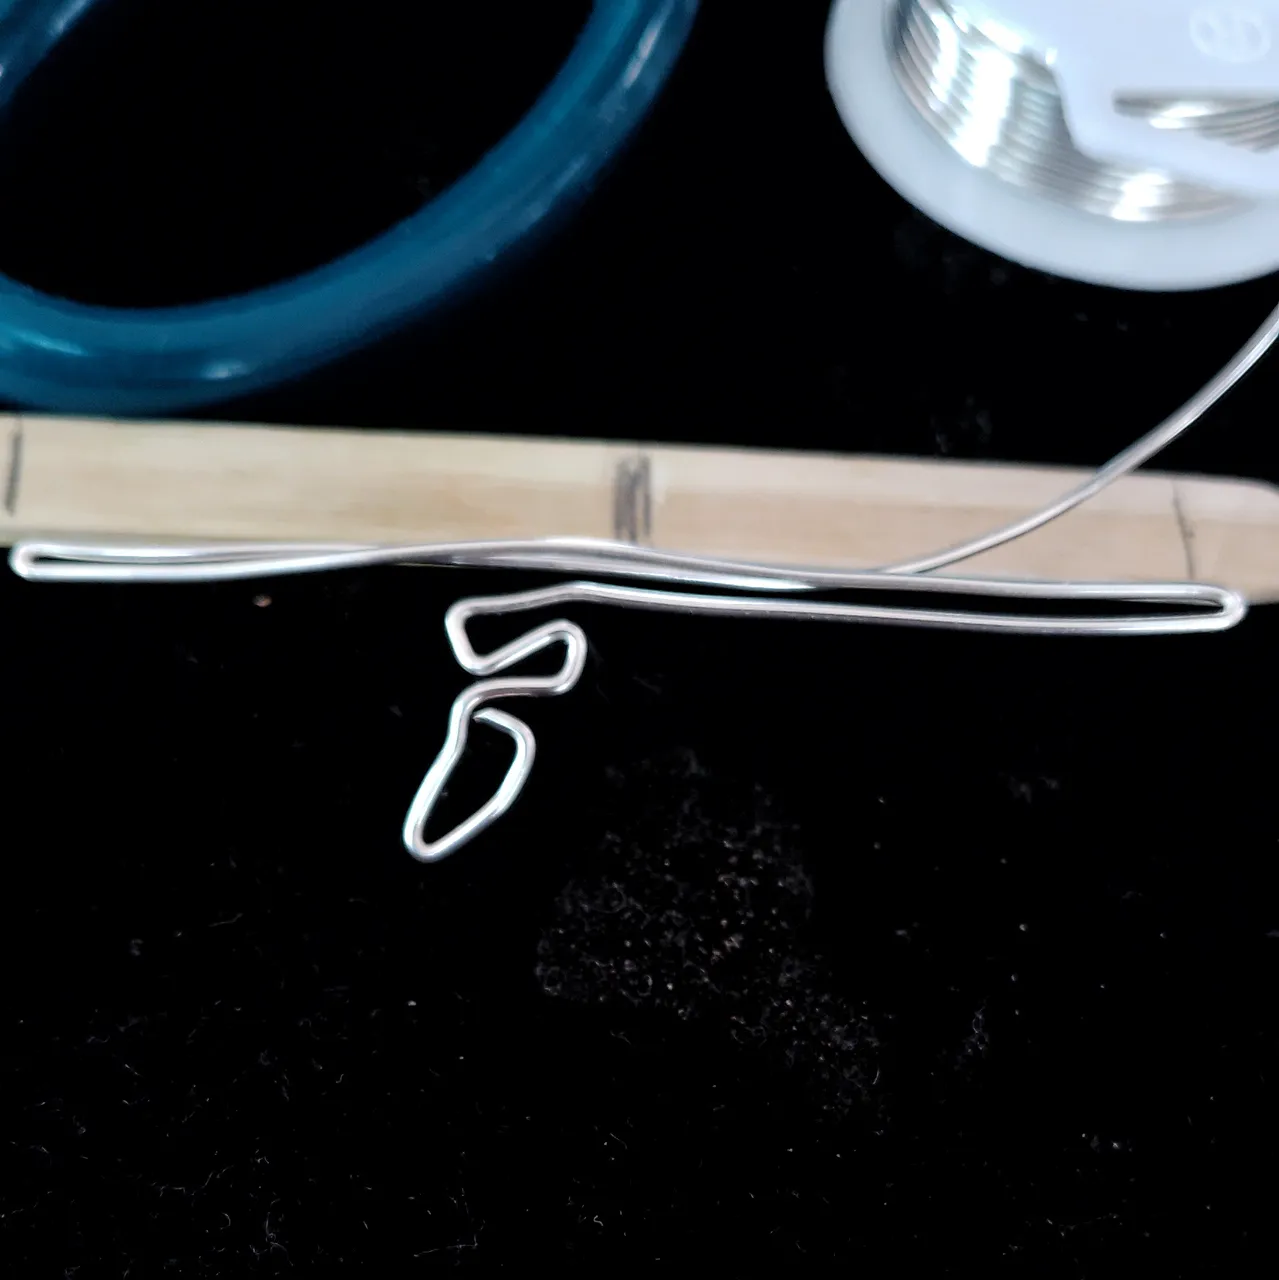
En los límites de la guía hago él dobles de largo del anillo, hay que darle con la pinza para que quede bien cerrado, después avance haciendo los dobleces de la figura central. En la imagen pueden observar que el anillo se compone de una secuencia de una sola línea que va de aquí para allá, es sencillo, pero lleva su lógica.
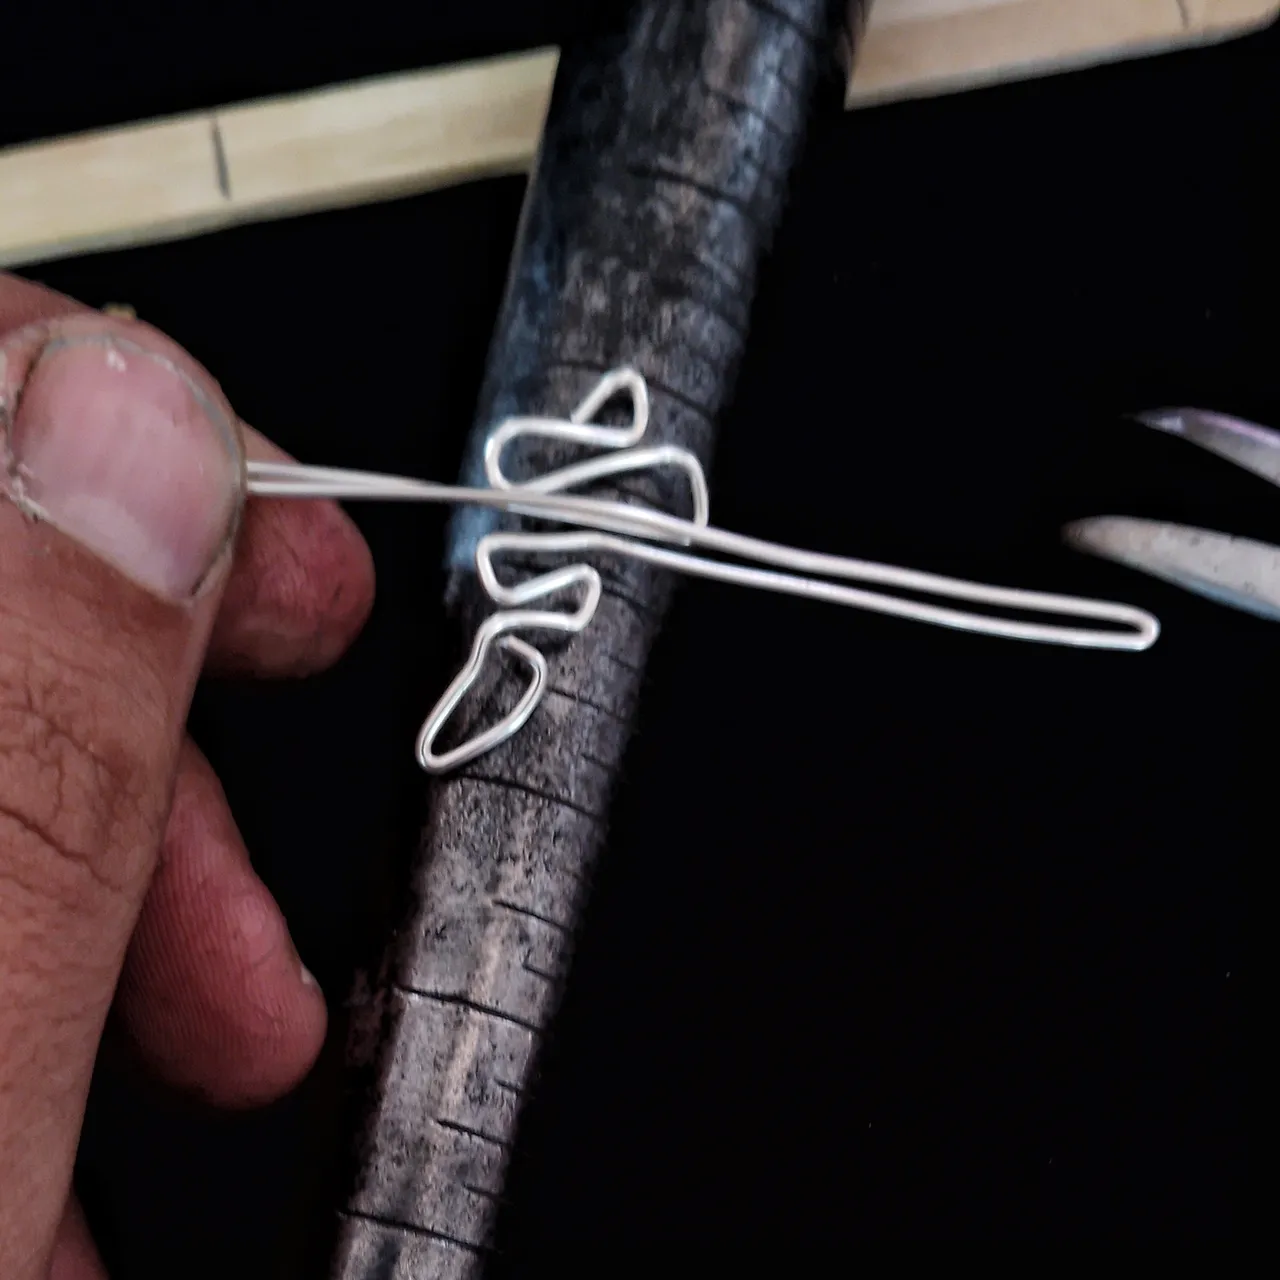

Procedo a montar el anillo en el mandril para ir dándole forma y colocarlo en una medida adecuada a lo que se necesite, es bueno ayudarse con las mismas pinzas u otro objeto para facilitar el darle la circunferencia, suele ponerse duro en los extremos, igualmente con la pinza le hice un mini dobles para que cerrara mejor y no quedara levantado

Así se ve por delante igual toca redondear los detalles para que el anillo quede de una mejor forma, pero esto sí, hazlo con delicadeza, puede ser con los mismos dedos, él va cediendo poco a poco.
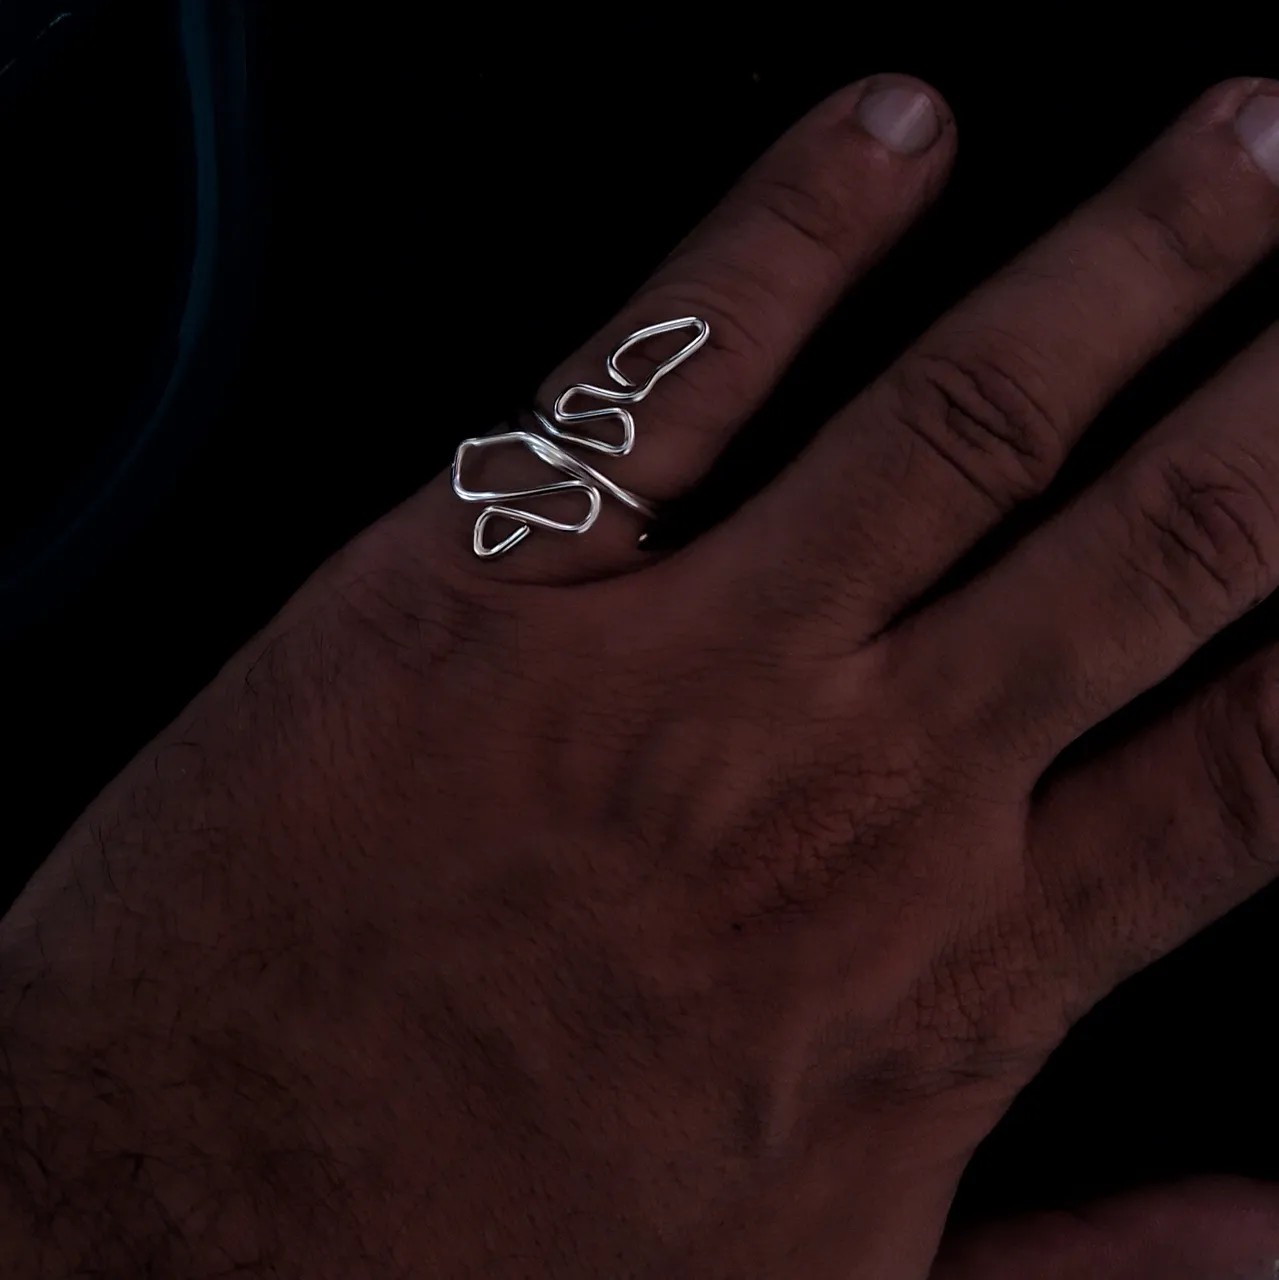
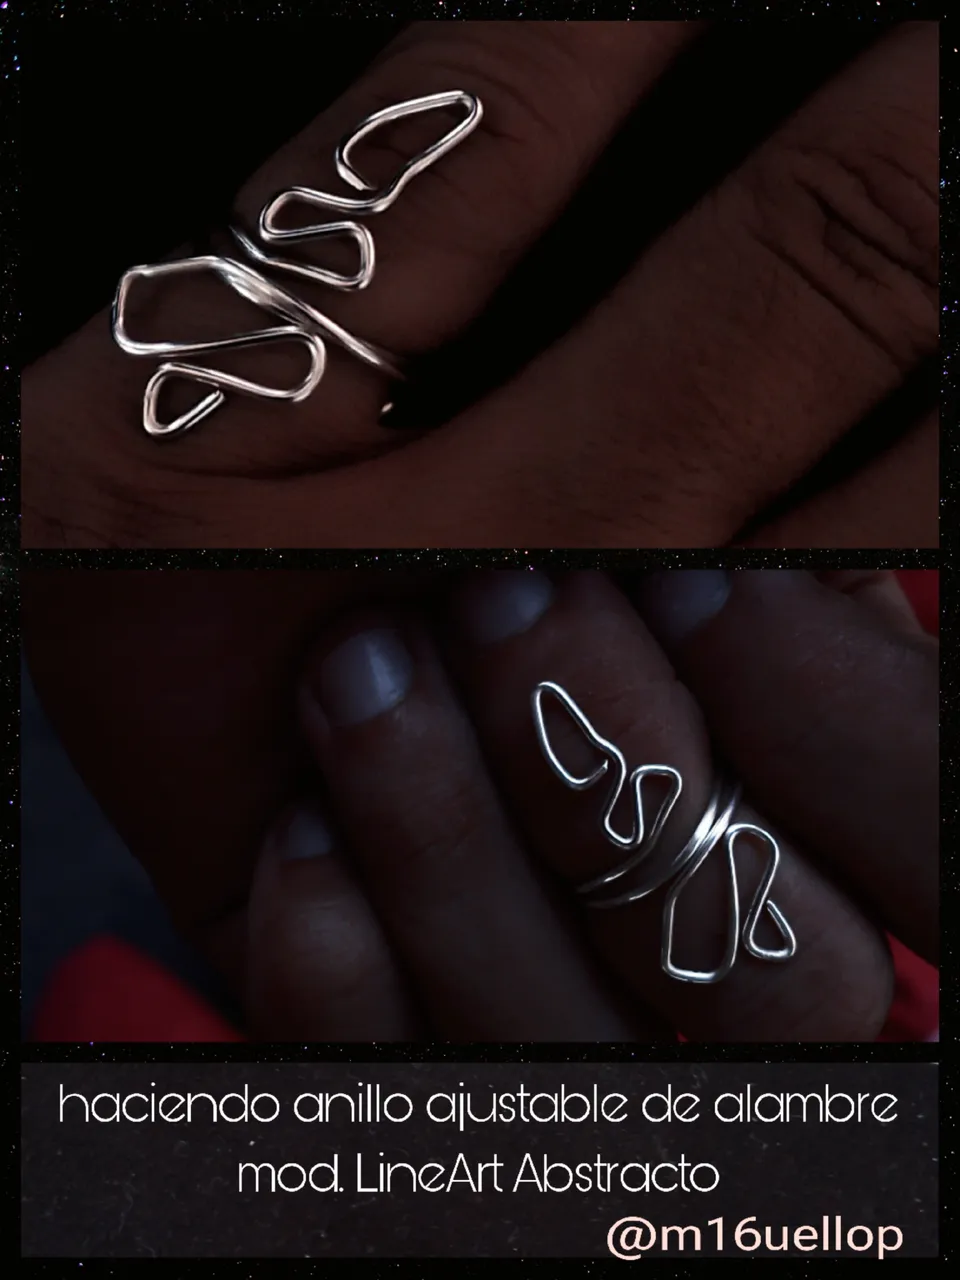
Este es el resultado final y así luce en mi dedo.
Espero saber su opinión y si se atreverían a lucir o hacer uno.
Sí, gustan ver mi trabajo de joyería
https://www.instagram.com/m16ueljoyas
++++++
++++++
++++++
ENGLISH GOOGLE TRANSLATOR
For a long time I have been thinking about having a different, striking, original and easy-to-make ring model at my jewelry stand for craft fairs, so based on this model, this [climber style](https://ecency. com/hive-189641/@m16uellop/hazando-zarcillo-climbing-earcuff-en) of which I already did a step by step, if you are interested in reviewing.
The interesting thing about this handmade jewelry project is that it is highly simple if you want to start making jewelry with wire and gain confidence, you can do it with few materials and tools, you just have to be guided by the instructions.
Use the following:
#18 or 1 mm silver plated jewelry wire, you can use whatever you want, whether gold, copper or bronze.
Flat jewelry tweezers, I recommend those with a fine tip, to give better shape.
Pickaxe or scissors to cut wires or it can also be a nail clipper or even brass or metal cutting scissors, of course it should be small.
Ring mandrel or a round structure like a marker.
A ruler, in this case I used an ice cream stick to mark the measurements, you can use anything that serves as a reference.

Some basic tools for this job
STEPS
First we begin to bend the wire with the flat jewelry pliers with a fine tip, shapes should be made that do not exceed 0.65 mm in width, you can check with your own finger to get an idea. As a tip, try to have a pre-established idea before elaborating, you can even draw the guide margins.
I marked the length of the ring with an ice cream stick that I had on hand, in this case it is between 6.5 to 7 cm, as the ring is adjustable, it is good to leave a margin to be able to raise or lower the measurements as desired and that stays secure on your finger.
As you can see, I tried to mark the center, the figure should be there, but here because I was in a hurry I missed it a little, but it is not something that damages what has already been advanced.
At the limits of the guide I make double the length of the ring, you have to give it with the tweezers so that it is well closed, then move forward making the folds of the central figure. In the image you can see that the ring is made up of a sequence of a single line that goes from here to there, it is simple, but it has its logic.
I proceed to mount the ring on the mandrel to give it shape and place it in a size appropriate to what is needed. It is good to use the same tweezers or another object to facilitate giving it the circumference. It tends to get hard at the ends, also with I made a mini double of the clamp so that it would close better and not stay up
This is what it looks like from the front, maybe you have to round off the details so that the ring is in a better shape, but yes, do it delicately, it can be with the same fingers, it gives way little by little.
This is the final result and this is what it looks like on my finger.
I hope to know your opinion and if you would dare to wear or make one.
Yes, they like to see my jewelry work
https://www.instagram.com/m16ueljoyas