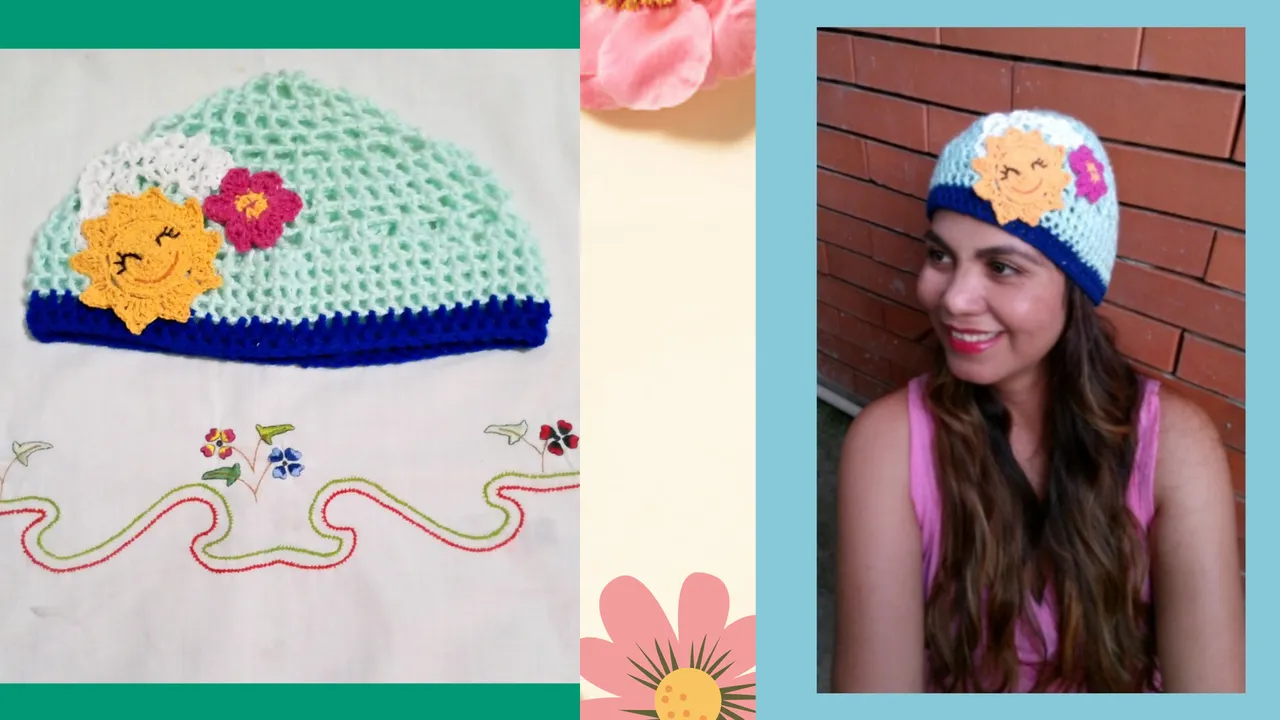

Feliz viernes para todos, espero que pasen un estupendo y prospero fin de semana cargado de energía, el día de hoy vengo a compartir con ustedes un gorro a croché adornado con un sol como protagonista, como parte de mi segunda participación en el concurso del mes de mi querida comunidad DIYHUB, dedicado a la estrella más grande del universo como lo es el sol esa lámpara que nos llena a todos de las vitaminas esenciales para nuestro sano, desarrollo el universo es perfecto.
Esta iniciativa me surgió debido a que estoy haciendo unas visitas muy seguidas a un lindo y agradable lugar donde hace frío y un gorro es una buena opción, además que combina muy bien con un sol para calentar nuestro cuerpo.
Las fotografías que verán a continuación, fueron tomadas con mi teléfono modelo TECNO SPARK GO 2023.

Happy Friday to everyone, I hope you have a great and prosperous weekend full of energy, today I come to share with you a crochet hat decorated with a sun as a protagonist, as part of my second participation in the contest of the month of my dear DIYHUB community, dedicated to the biggest star in the universe as is the sun, that lamp that fills us all with essential vitamins for our healthy, development the universe is perfect.
This initiative came to me because I am making some visits to a nice and pleasant place where it is cold and a hat is a good choice, plus it combines very well with a sun to warm our body.
The pictures you will see below were taken with my phone model TECNO SPARK GO 2023.

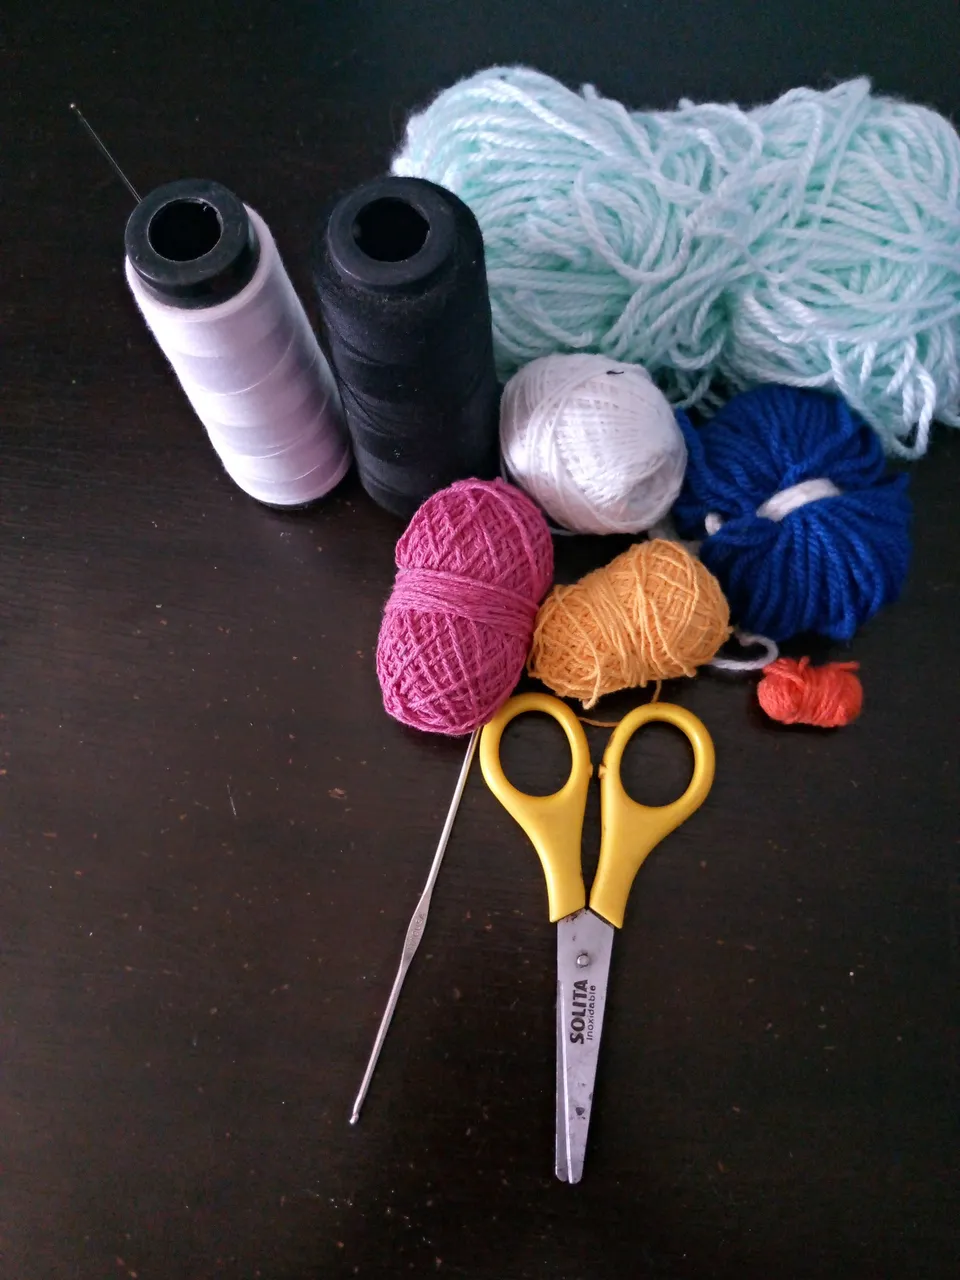
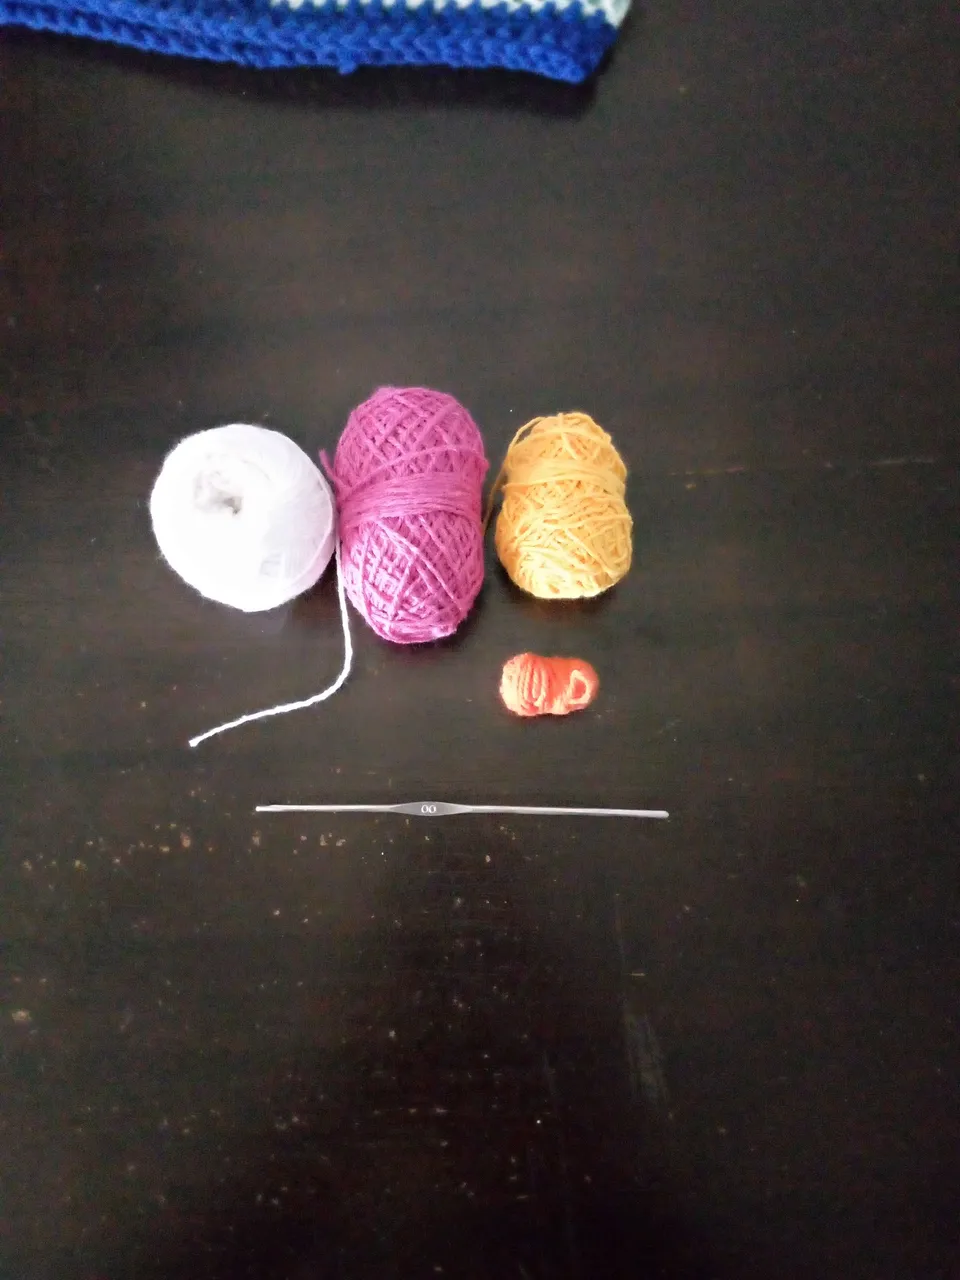
Les voy a nombrar los materiales que utilice para crear esté cómodo y hermoso gorro.
- Hilo de estambre en 2 tonos de azul
- Pabilo de colores
- Hilos
- Tijera
- Aguja de cocer
- Aguja de tejer número 0
I am going to name the materials I used to create this comfortable and beautiful hat.
- Yarn in 2 shades of blue
- Colored wick
- Yarn
- Scissors
- Knitting needle
- Knitting needle number 0
 |  |  |  |
|---|
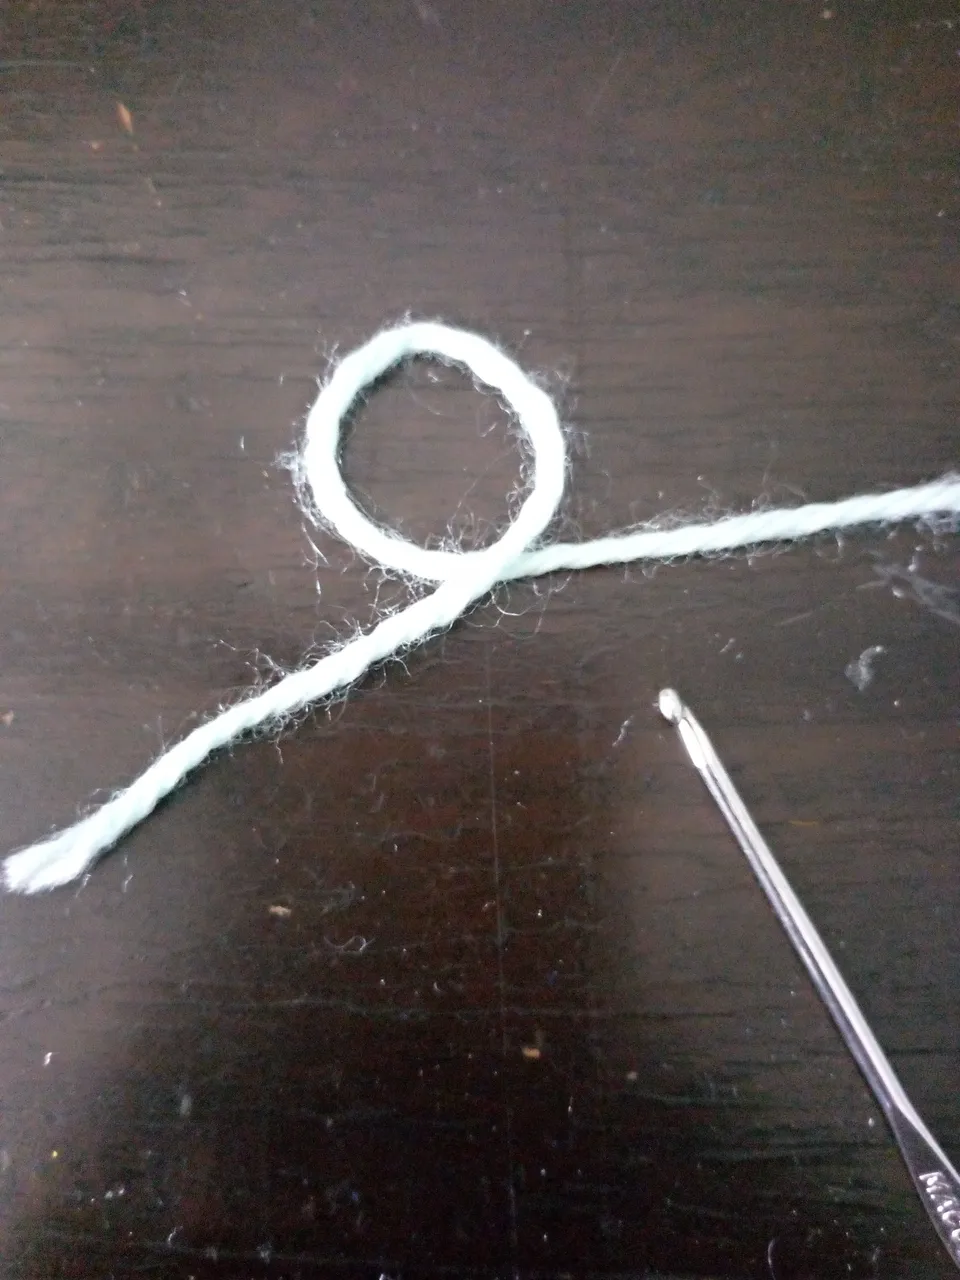
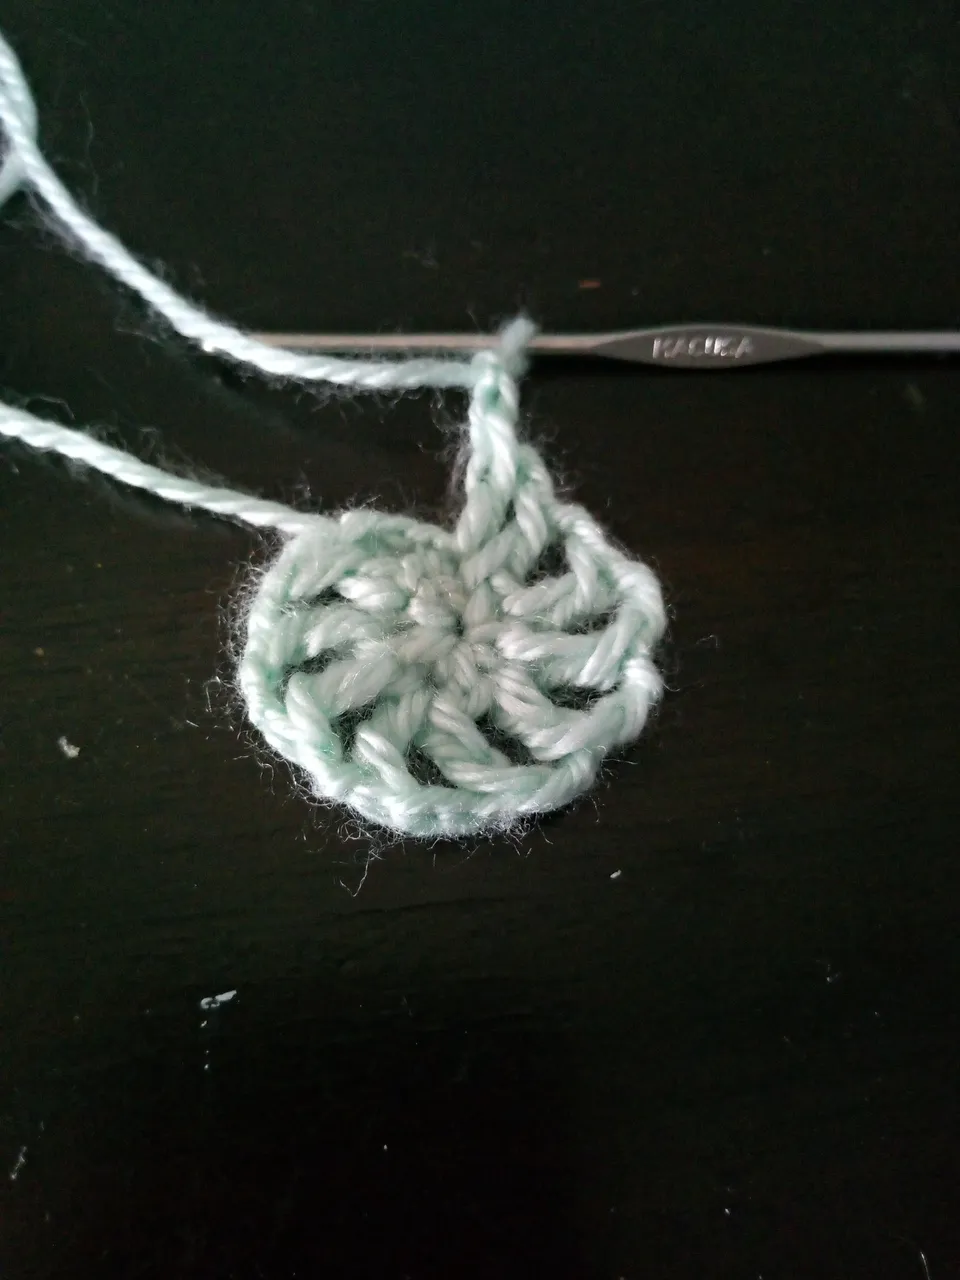
Para comenzar usé el hilo de estambre azul celeste, con este hilo realice un aro para partir desde allí con el tejido, luego con la aguja pase el hilo de estambre por detrás del aro dando una vuelta y enlazando el primer punto bajo, el resultado es un aro doble para fijar desde aquí los próximos puntos.
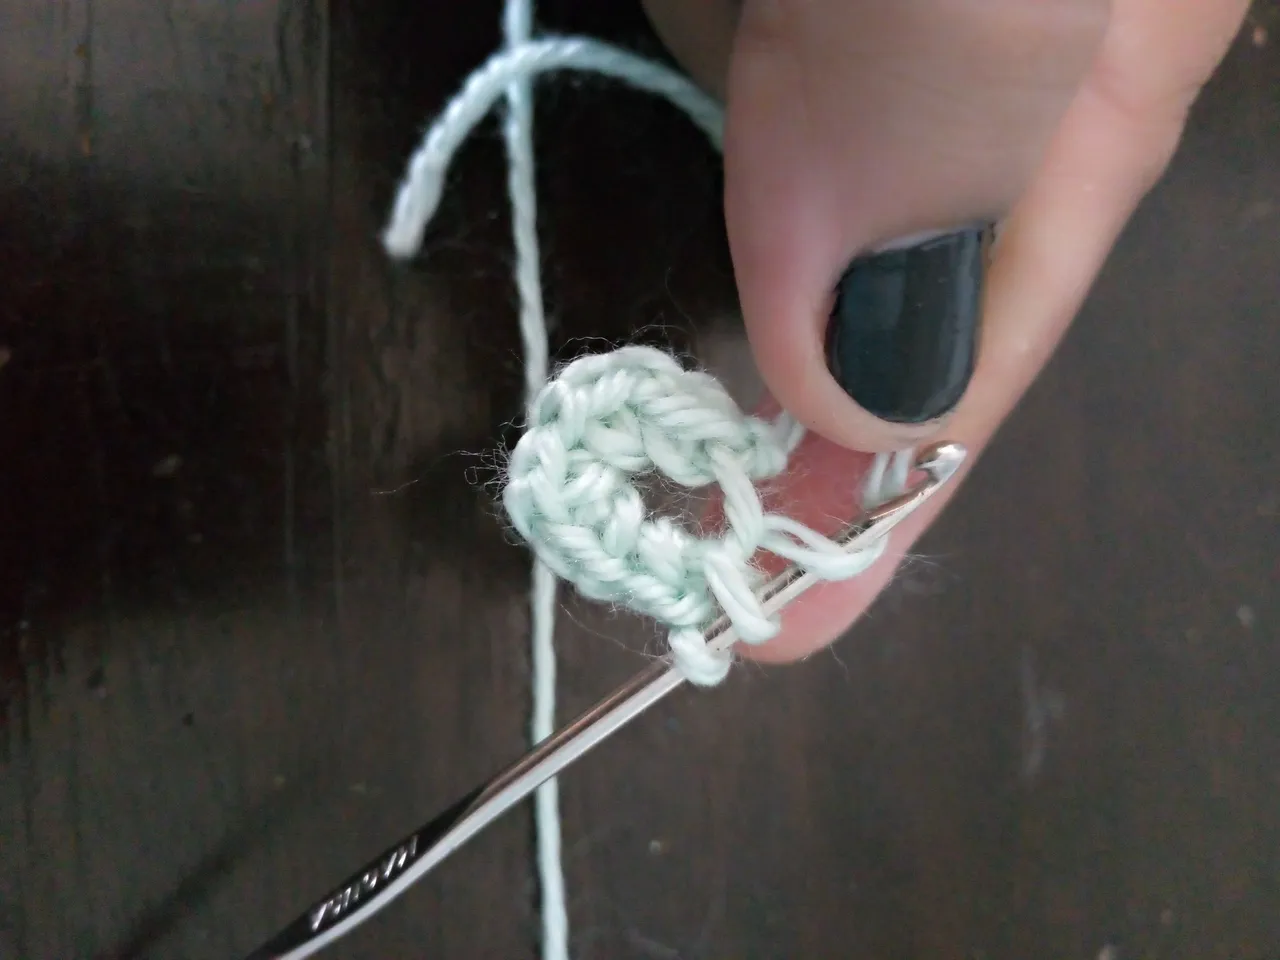
Culminando todos los puntos bajos de inicio, cerré el aro y comencé a tejer la primera vuelta de los puntos altos que fue un total de 10 puntos, en este punto cerré la vuelta, e inicie la vuelta siguiente haciendo 3 puntos de cadena y luego un punto alto y de esta manera hice las primeras 4 vueltas de puntos altos con espacio de 2 cadenas entre puntos altos.
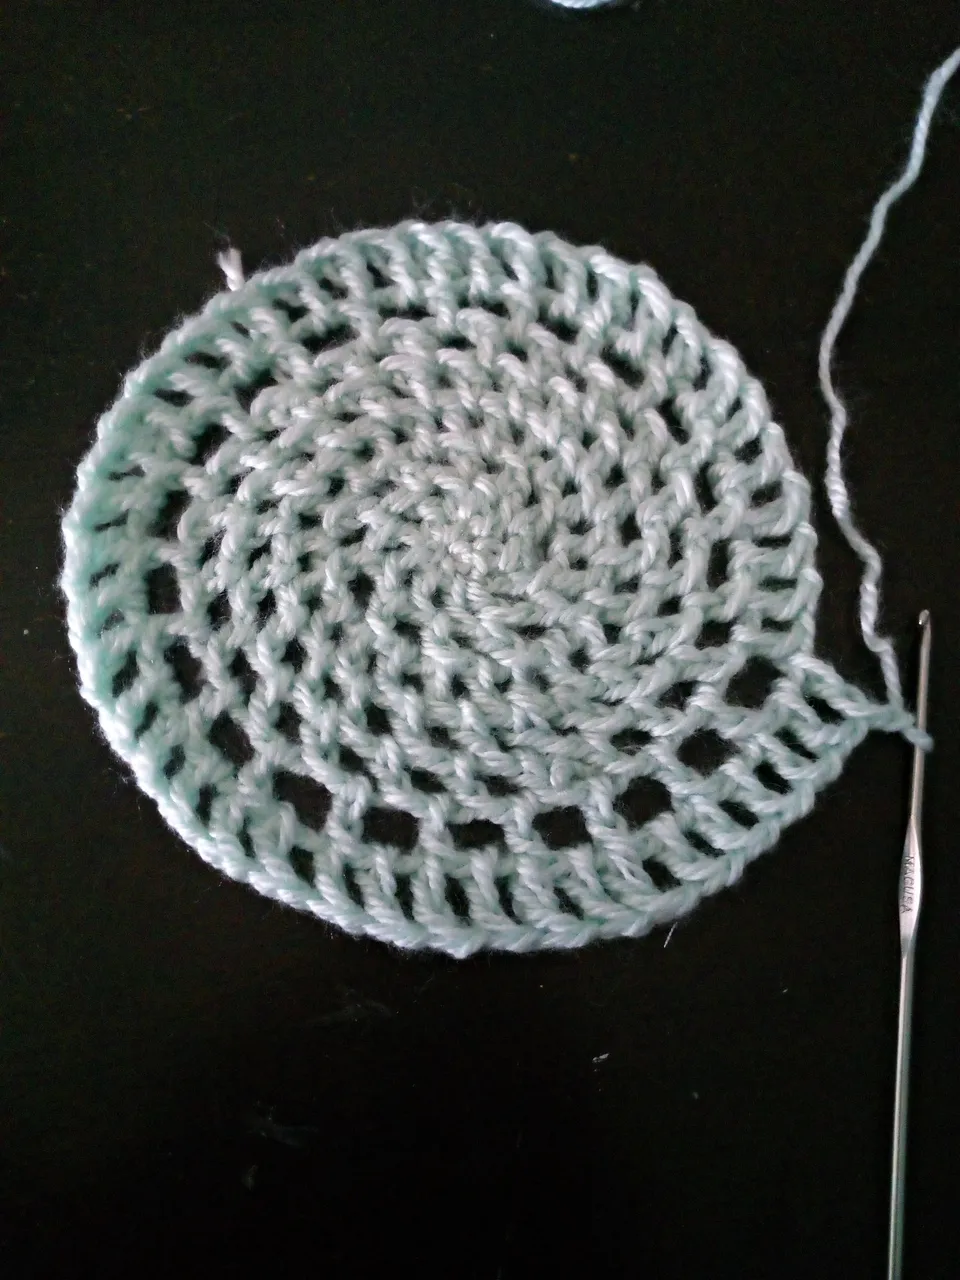
En la vuelta 5 deje más espacio entre puntos, aquí deje 4 cadenas por cada punto alto, seguido hice la vuelta 6 en aumento de puntos altos y espacios de 2 cadenas entre puntos para ir haciendo mi gorro más ancho.
To start I used the light blue worsted yarn, with this yarn I made a ring to start from there with the knitting, then with the needle I passed the worsted yarn behind the ring making a turn and linking the first low stitch, the result is a double ring to fix from here the next stitches.
Finishing all the low stitches at the beginning, I closed the ring and started knitting the first round of the high stitches which was a total of 10 stitches, at this point I closed the round, and started the next round making 3 chain stitches and then a high stitch and in this way I made the first 4 rounds of high stitches with space of 2 chains between high stitches.
In row 5 I left more space between stitches, here I left 4 chains for each high stitch, then I did row 6 in increase of high stitches and spaces of 2 chains between stitches to make my hat wider.
 |  |  |  |
|---|
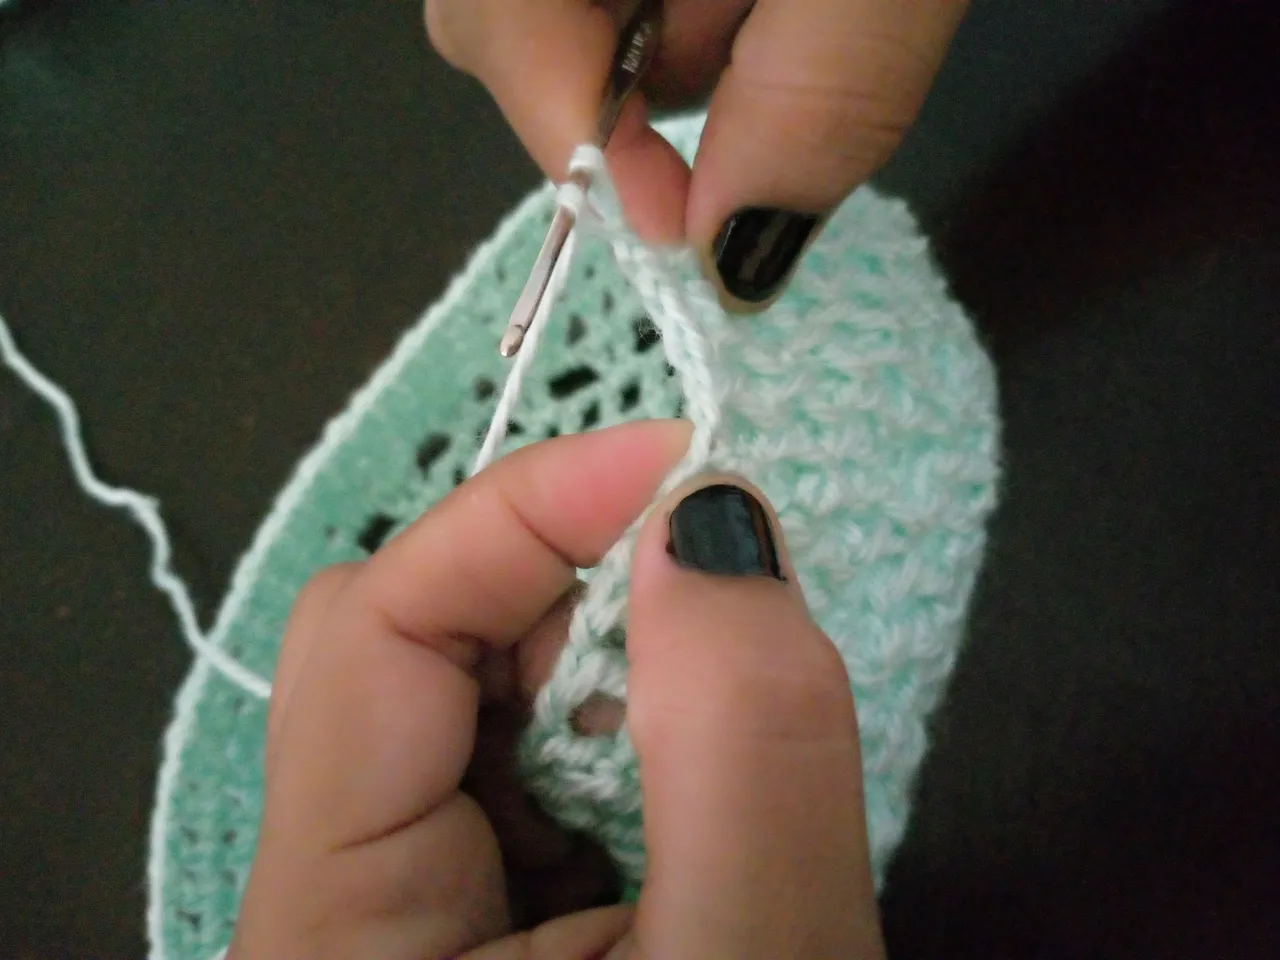
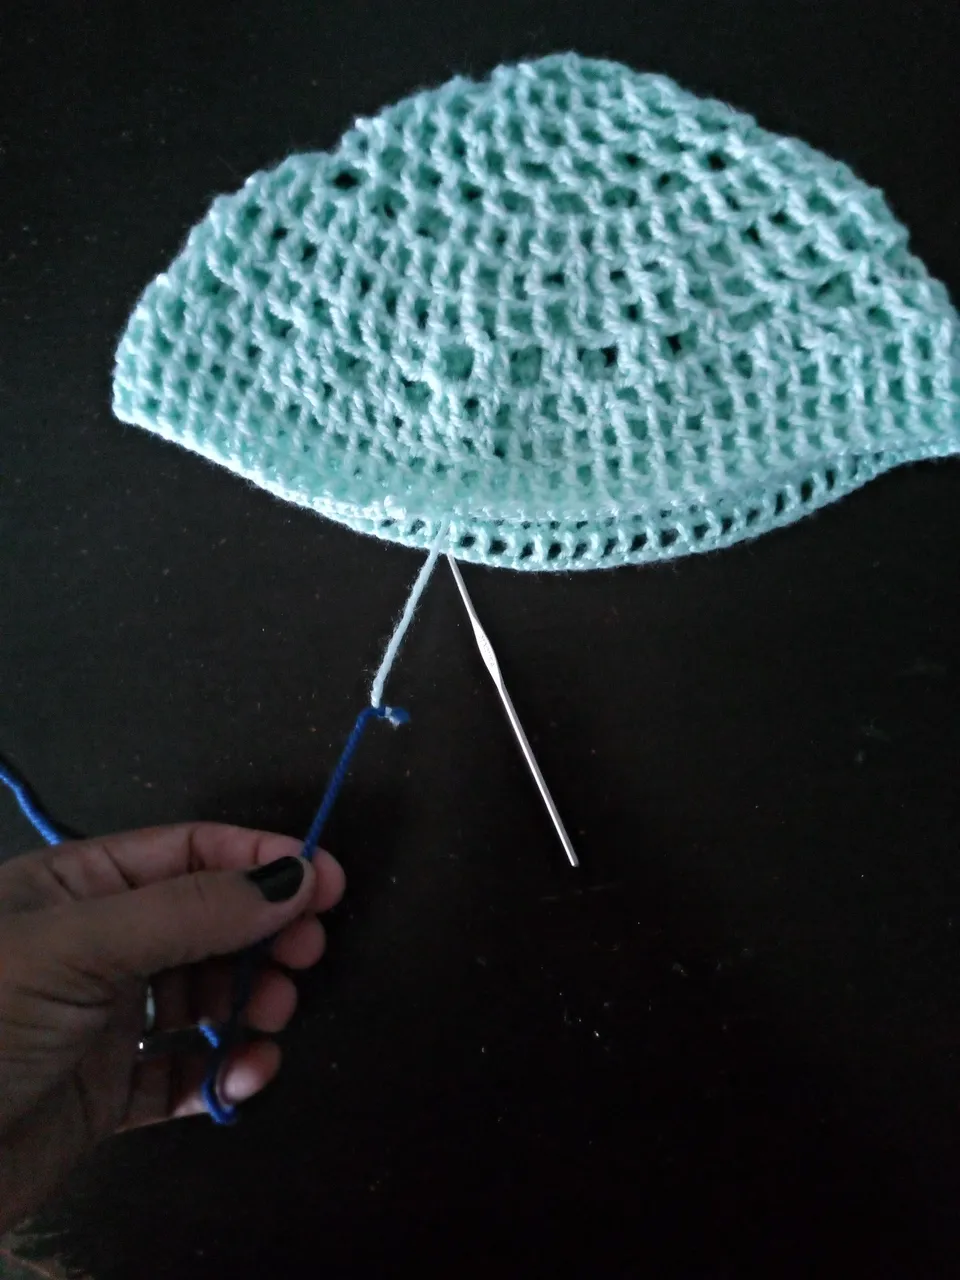
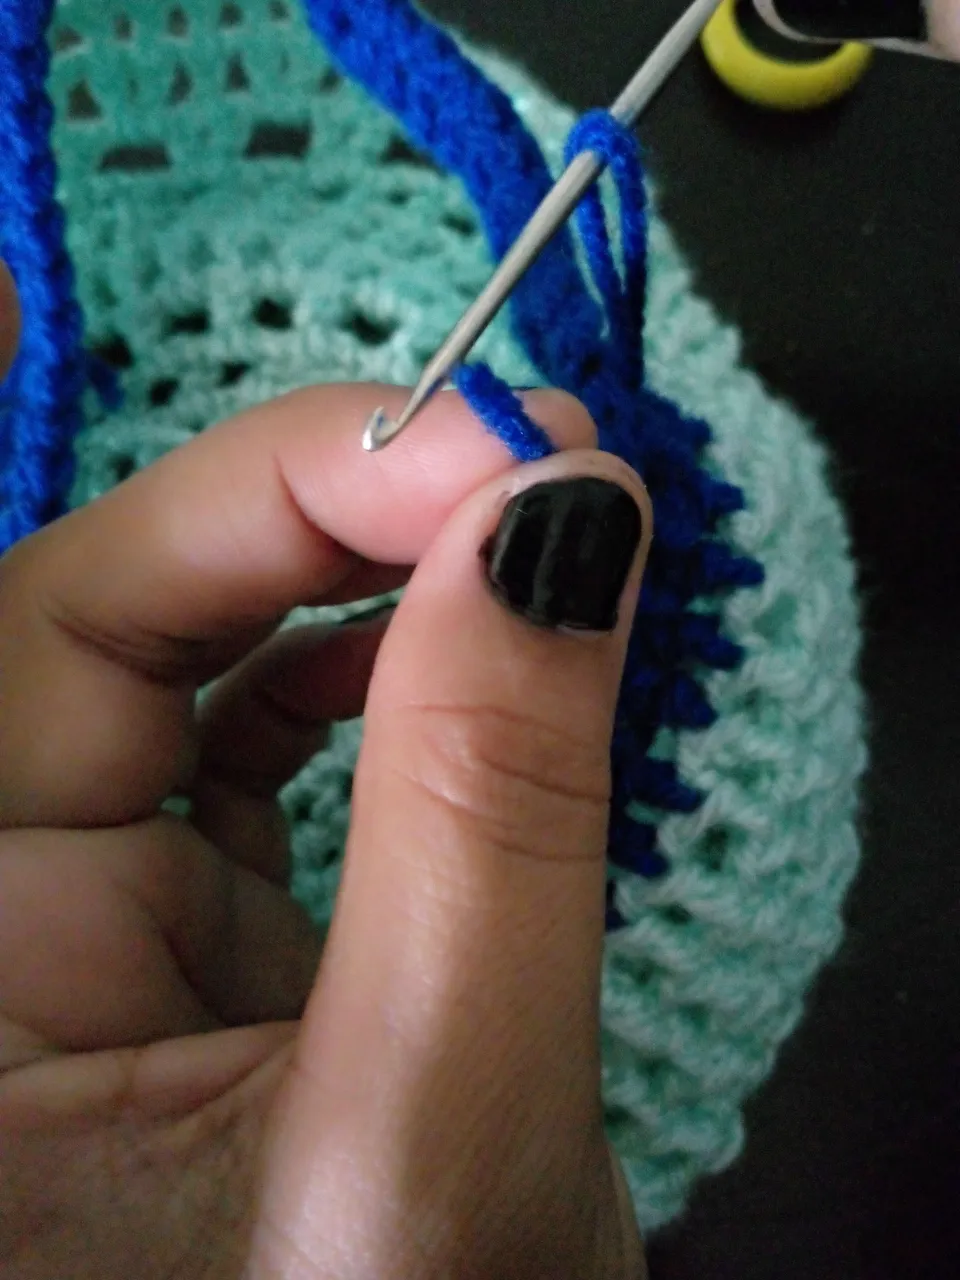
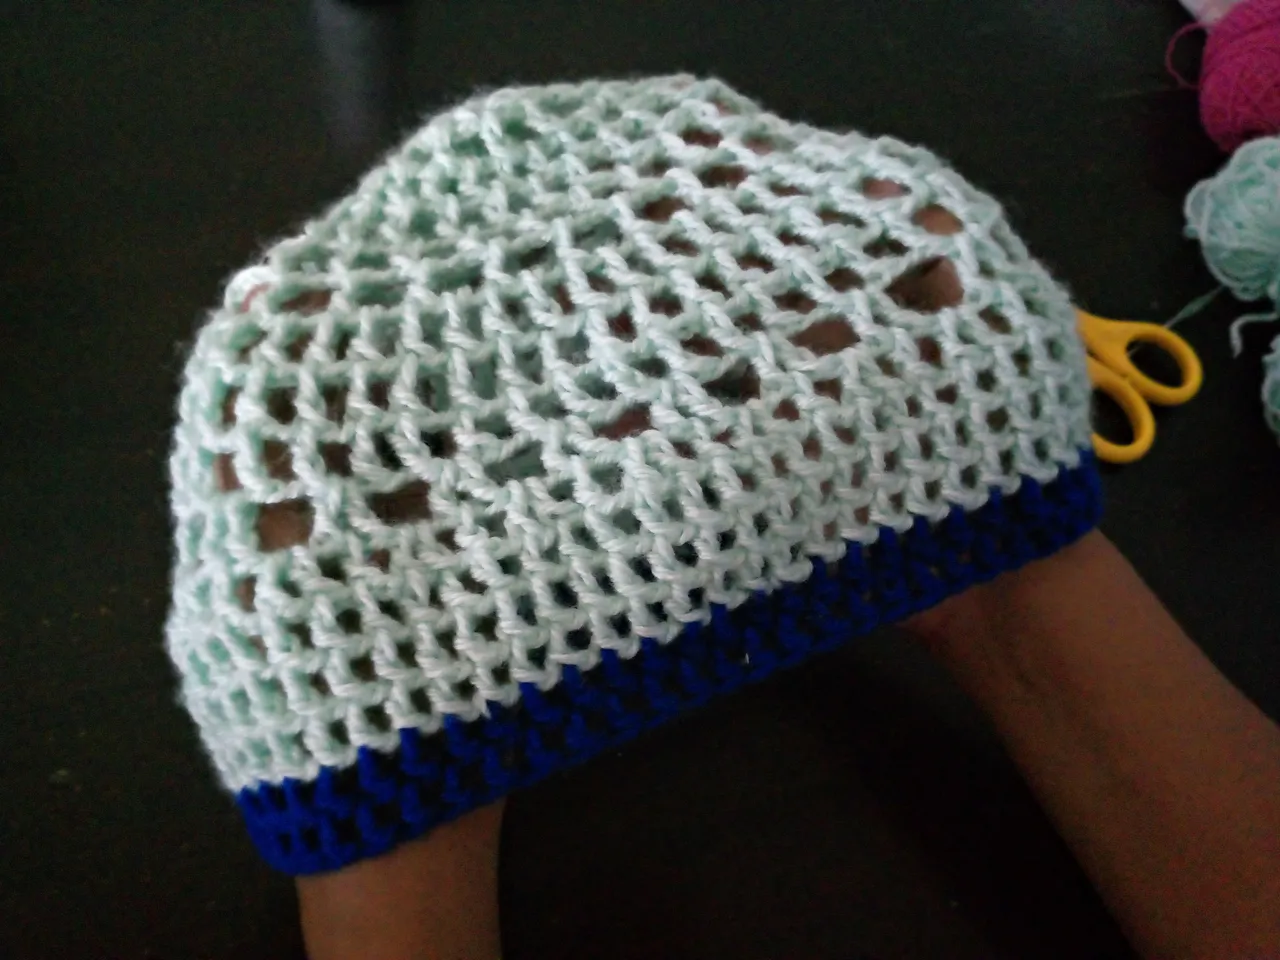
A partir de la vuelta 7 hasta la vuelta 18 realicé puntos altos combinados de 2 puntos altos juntos, más 3 cadenas de separación, en otras hice los puntos altos seguidos más 2 puntos de separación y fui combinando los puntos y creando mi diseño, finalmente en las 2 últimas vueltas utilicé el hilo de estambre azul más oscuro o azul rey dándole un contraste de azules para hacerlo más llamativo.
Las puntadas y vueltas las hice de acuerdo a mi gusto, ya que hay gorros que son más nutridos, otros más abiertos, todo dependerá de la creatividad y gusto de cada quien, como aprendiz de este arte de croché estoy poniendo a prueba el dominio de puntos y llevándolos a una forma.
From row 7 to row 18 I made high stitches combined of 2 high stitches together, plus 3 chains of separation, in others I made the high stitches followed by 2 stitches of separation and I was combining the stitches and creating my design, finally in the last 2 rows I used the darkest blue yarn or king blue yarn giving it a contrast of blues to make it more eye-catching.
The stitches and rows I did according to my taste, as there are hats that are more nourished, others more open, everything will depend on the creativity and taste of each person, as an apprentice of this crochet art I am testing the mastery of stitches and taking them to a form.
 |  |  |  |
|---|
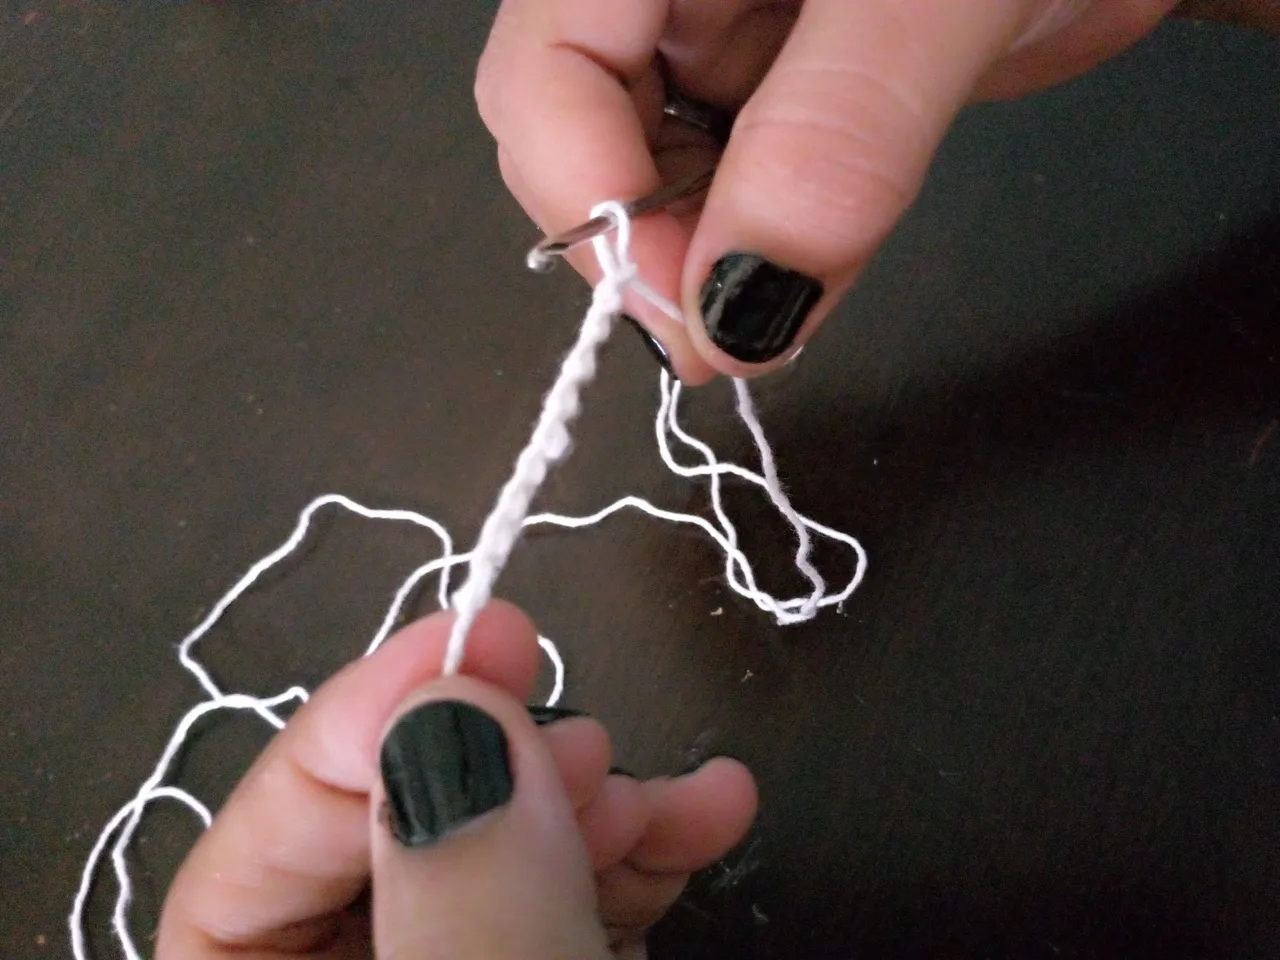
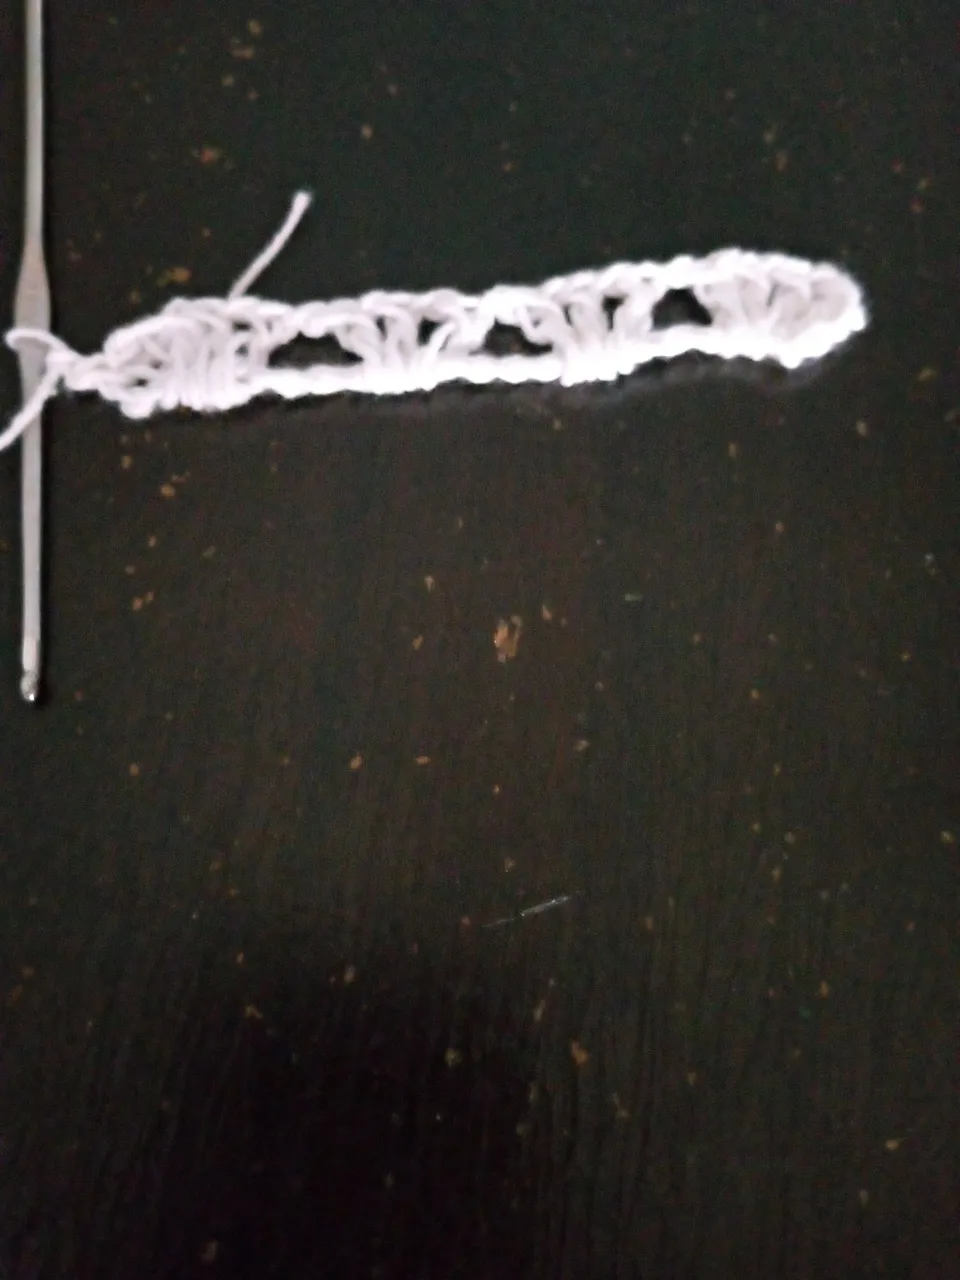
Luego de tener listo el gorro, empecé hacer los adornos para decorarlo, comenzando con el tejido de una nube, aquí use el hilo de tejer blanco y empecé hacer una cadena, luego subí 3 cadenas y desde allí comencé hacer 3 puntos altos seguidos, pero sueltos en la base de la cadena y sujetos en la parte de arriba, esto con la idea de practicar un punto que vi en un tutorial donde se puede cerrar o abrir los puntos corriendo cada uno y darle la forma deseada.
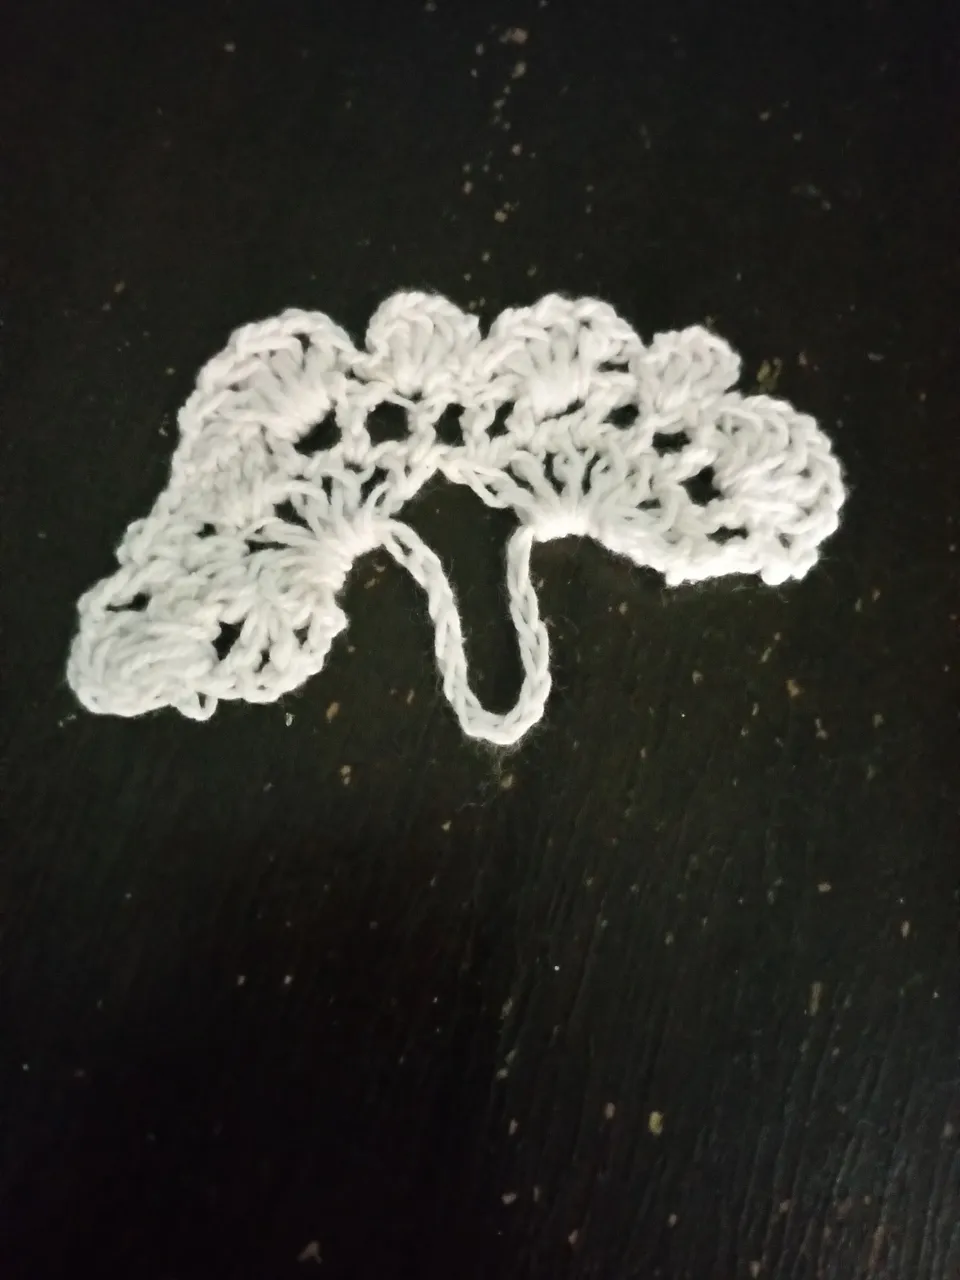
Continúe tejiendo sobre los puntos anteriores otros puntos altos, aquí aumente los puntos altos a 5 puntos, el próximo a 3 puntos altos, y así fue haciendo la variedad de puntos para darle volumen a la nube, luego con la cadena de inicio uni a la mitad los puntos para darle forma de nube a mi tejido.
After having the hat ready, I started making the ornaments to decorate it, starting with the knitting of a cloud, here I used the white knitting yarn and started making a chain, then I went up 3 chains and from there I started making 3 high stitches in a row, but loose at the base of the chain and fastened at the top, this with the idea of practicing a stitch that I saw in a tutorial where you can close or open the stitches running each one and give it the desired shape.
I continued knitting over the previous stitches other high stitches, here I increased the high stitches to 5 stitches, the next one to 3 high stitches, and so was making the variety of stitches to give volume to the cloud, then with the beginning chain I joined the stitches in half to give the cloud shape to my knitting.
 |  |  |  |
|---|
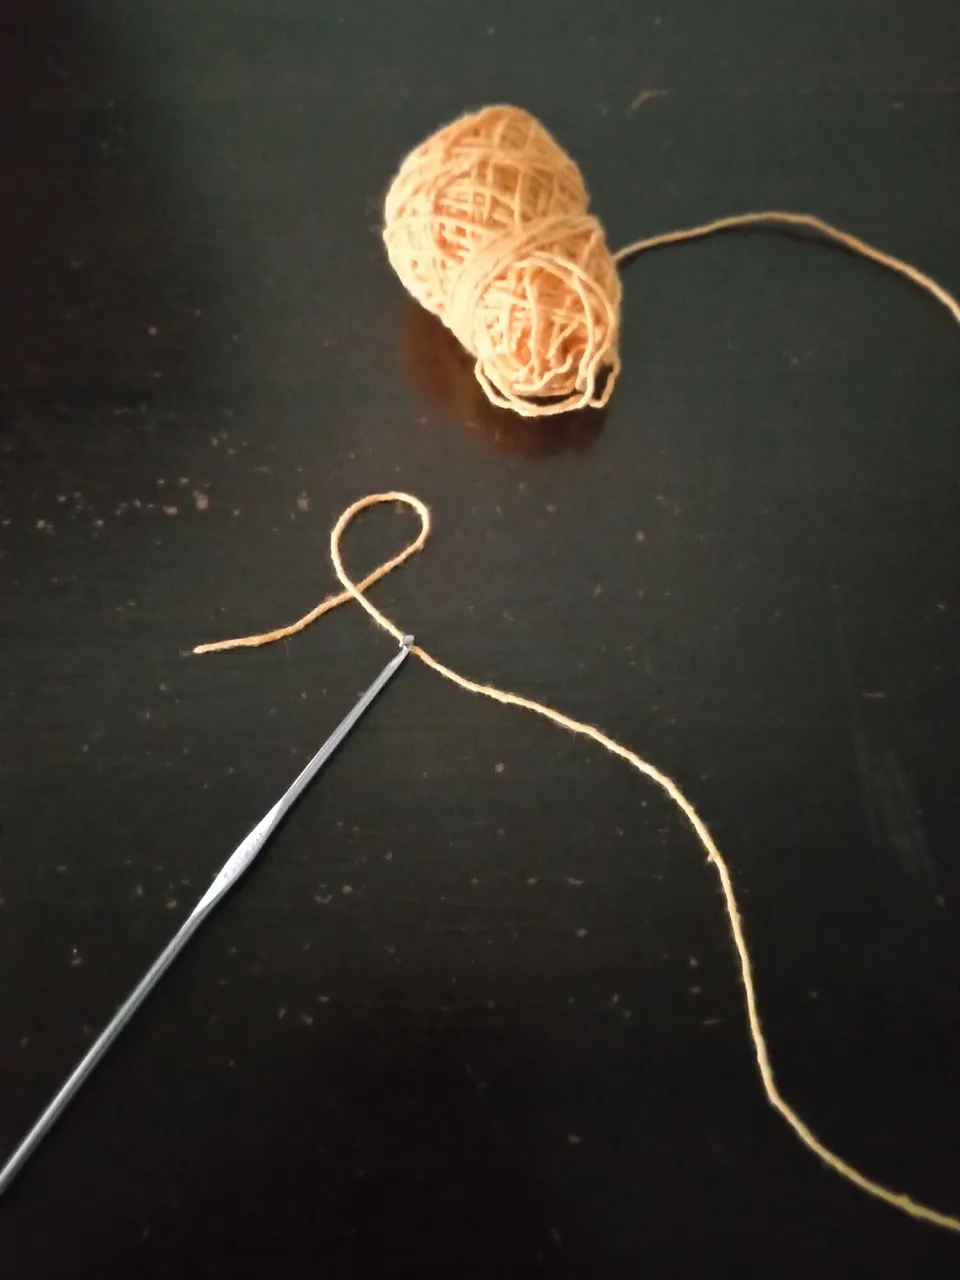
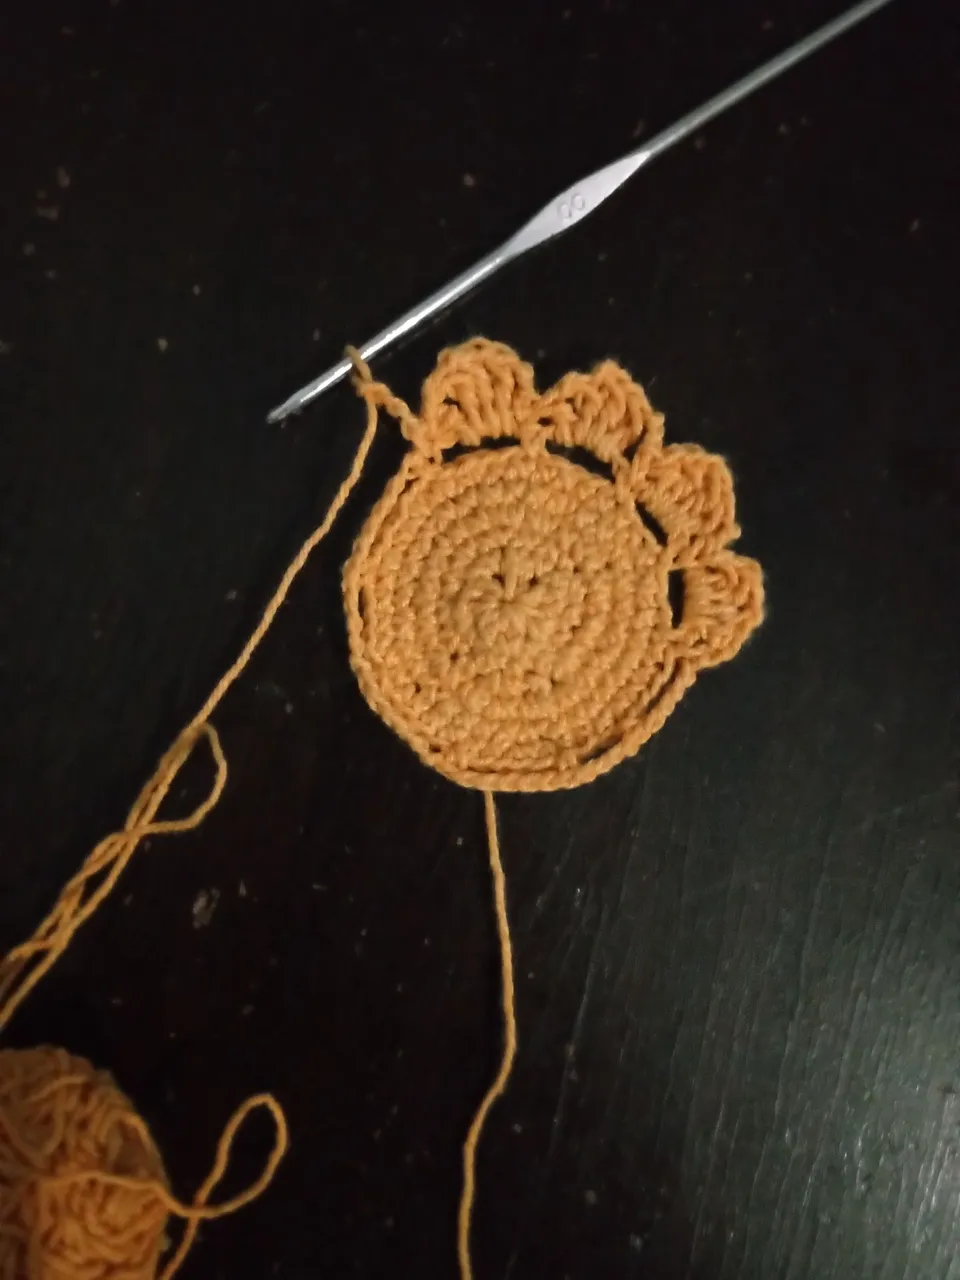
Comienzo hacer el sol, en este punto se puede decir que es repetir siempre los puntos, porque aquí para iniciar solo utilice el punto bajo hasta lograr el tamaño que necesite iniciando el sol con el aro más los puntos bajos de inicio, luego cerrando en aro desde la cuerda de hilo que deje sobrando, la misma es muy importante para aumentar el tamaño inicial del tejido que queremos lograr.
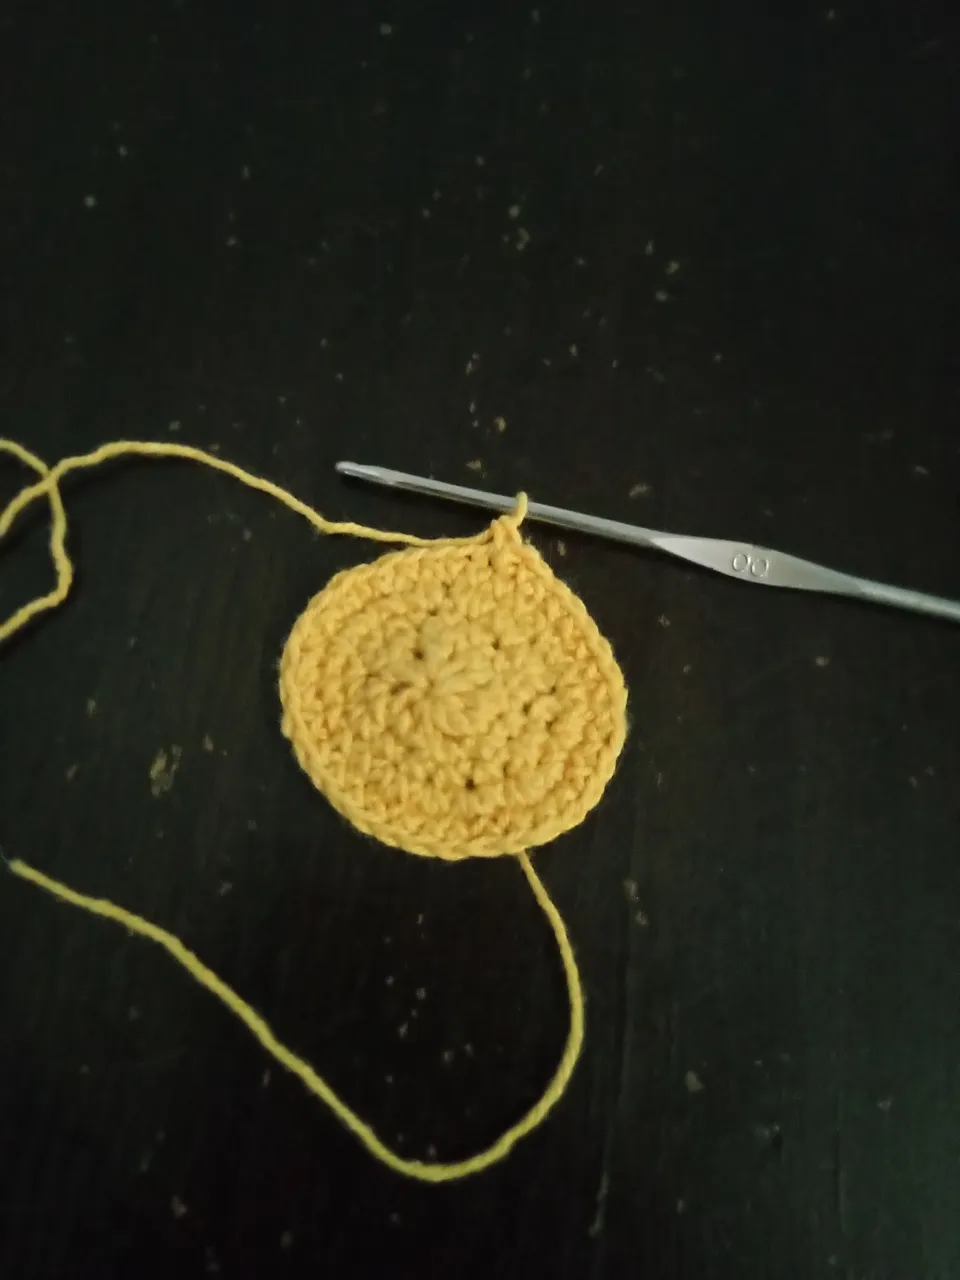
Comenzando con el primer punto bajo, seguido en aumento de 2 puntos por cada cadena y así continué aumentando los puntos bajos y a medida que iba ampliando la circunferencia del sol iba aumentando los puntos y las cadenas.
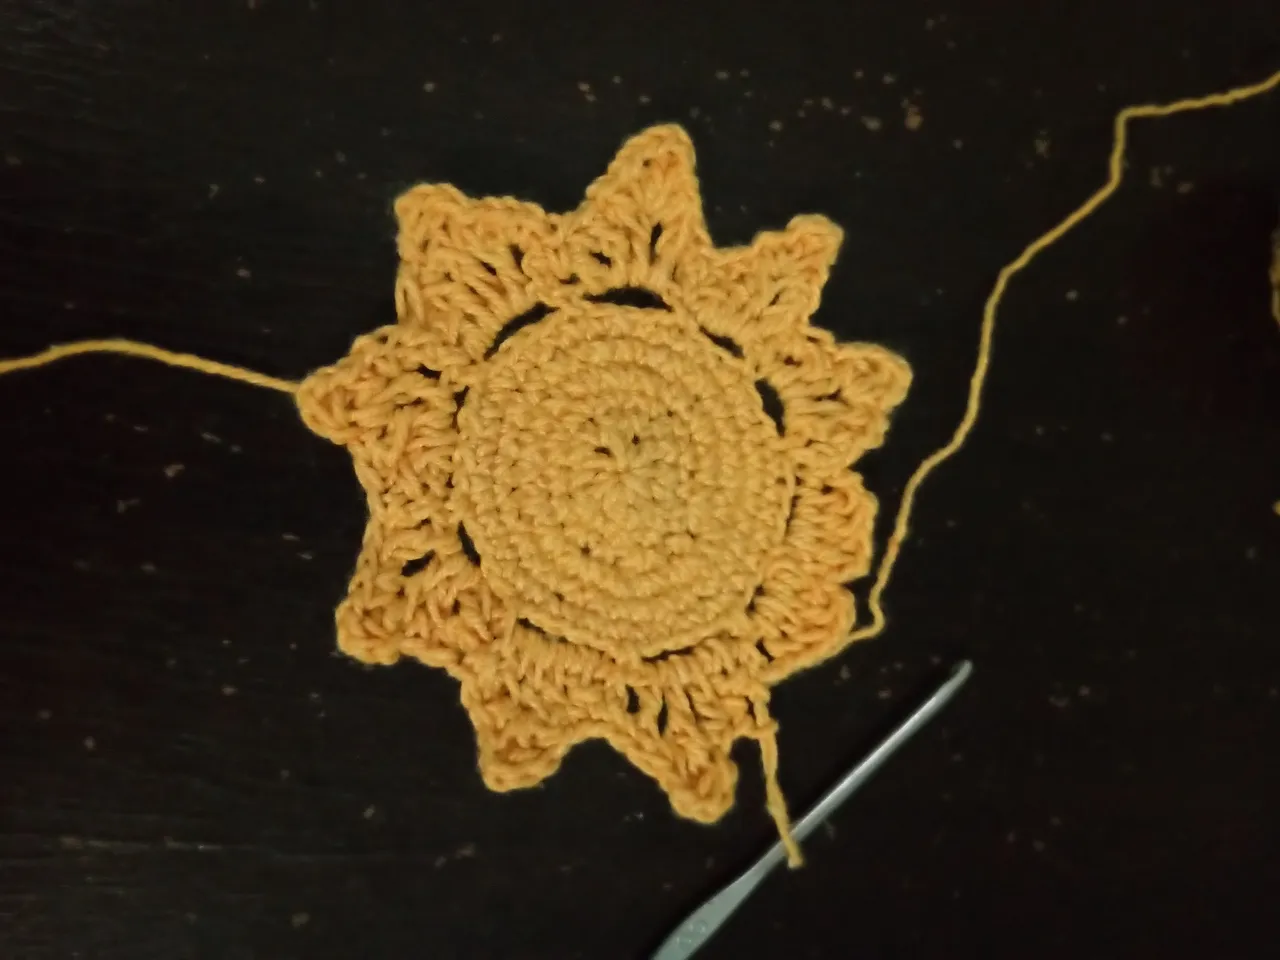
Con el tamaño deseado tejí varias cadenas simples por todo el borde del sol para hacer los rayos solares y fui tejiendo como en forma de flor, en este caso subí 3 cortas cadenas y tejí 4 puntos medios por cada separación de cadena uniendo entre sí para formar como un pétalo de una flor.
Luego de culminar los pétalos, subí una cadena de 3 puntos para hacer las puntas del sol, haciendo 3 puntos altos y cerrando, para hacer unas puntas en forma de estrella.
I start making the sun, at this point you can say that it is always repeating the stitches, because here to start only use the single crochet to achieve the size you need starting the sun with the hoop plus the low stitches to start, then closing the hoop from the string of yarn left over, it is very important to increase the initial size of the fabric that we want to achieve.
Starting with the first single crochet, followed by an increase of 2 stitches for each chain and so I continued increasing the single crochets and as I was enlarging the circumference of the sun I was increasing the stitches and chains.
With the desired size I knitted several simple chains all around the edge of the sun to make the sun rays and I knitted as a flower shape, in this case I went up 3 short chains and knitted 4 medium stitches for each chain separation joining them together to form a petal of a flower.
After finishing the petals, I went up a chain of 3 stitches to make the points of the sun, making 3 high stitches and closing, to make some points in the shape of a star.
 |  |  |  |
|---|
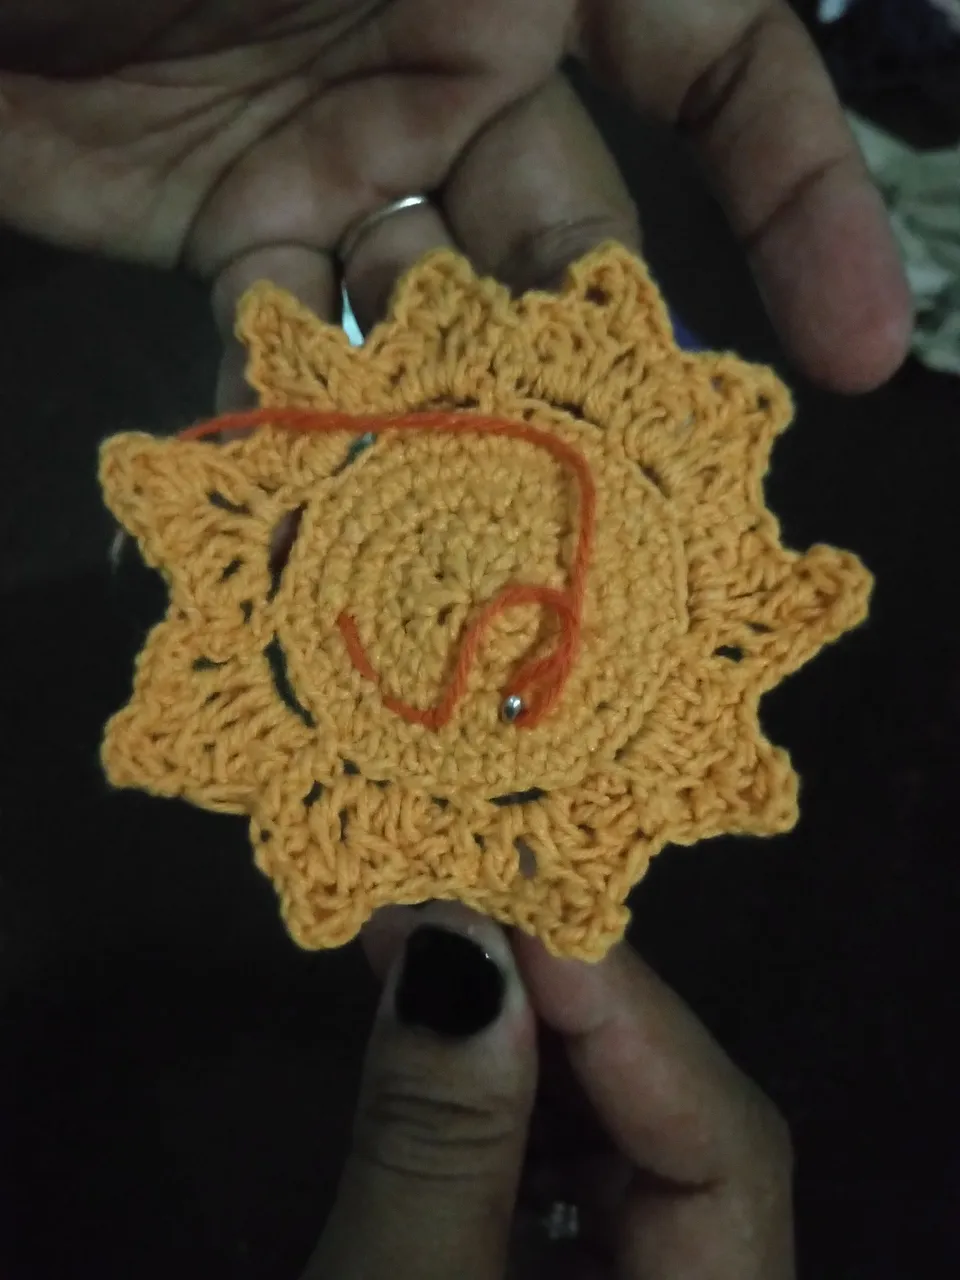
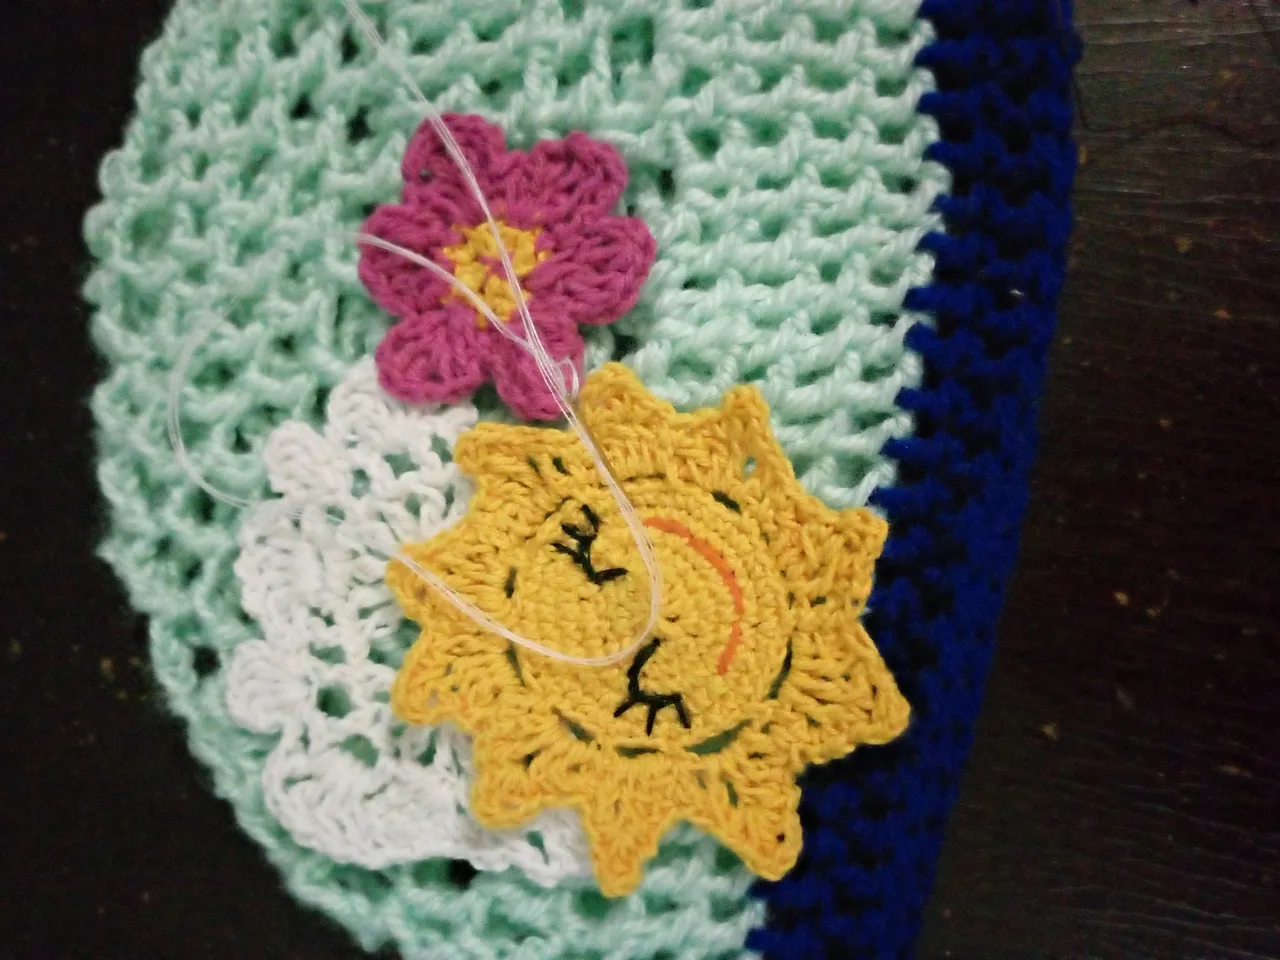
Me gusto mucho hacer un sol feliz y no podía faltar esa sonrisa que siempre desde niños nos enseñaron hacer, así que con el hilo de color naranja y la aguja de tejer hice una costura de puntadas seguidas hasta formar una linda sonrisa, es muy fácil de hacer solo es hacer como una costura de puntos seguidos.
También le adorné los ojos, pero en este caso utilice hilo de color negro y una aguja para cocer, haciendo una costura de bordado punto atrás y para las pestañas punto seguido sencillo logre hacer unos hermosos ojos para mi sol feliz.
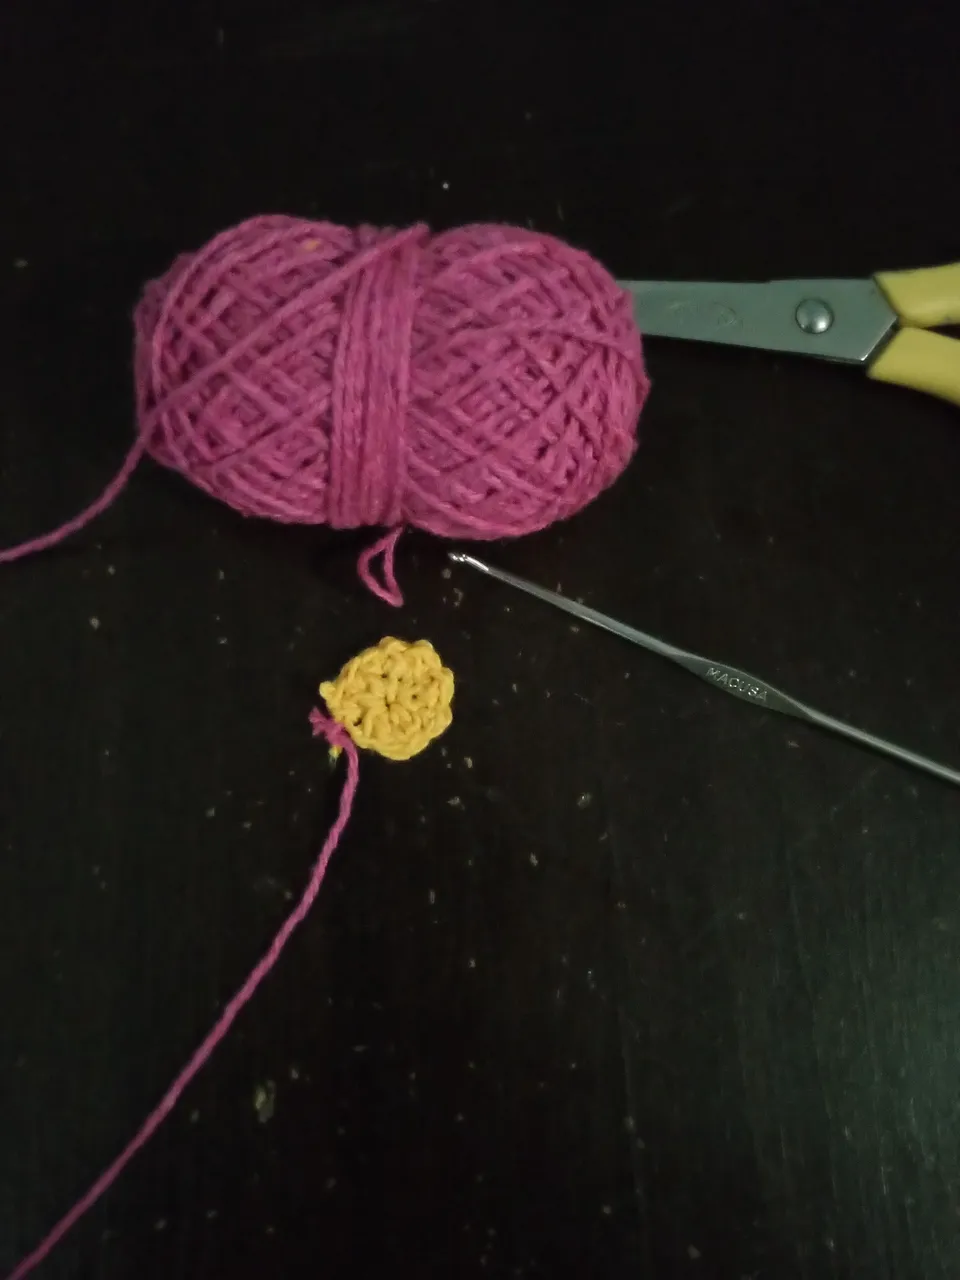
Finalmente, con un poco de hilo para tejer amarillo y fucsia hice una linda flor, la que no puede faltar para nosotras, las amantes de las flores siempre vamos a incluir las flores en todo.
Para hacer esta flor comencé haciendo un anillo con puntos bajos y una sola vuelta, desde allí tomé los espacios para hacer los pétalos haciendo la tradicional cadena de 3 puntos para elevar los puntos altos, los mismos son 4 puntos altos por cada pétalo, cerrando cada uno con un punto bajo para separarlos entre sí.
I really liked to make a happy sun and I couldn't miss that smile that we were always taught to make since we were children, so with the orange thread and the knitting needle I made a seam of stitches in a row to form a nice smile, it's very easy to do, it's just like a seam of stitches in a row.
I also embellished the eyes, but in this case I used black thread and a knitting needle, making a back stitch embroidery stitch and for the eyelashes I managed to make beautiful eyes for my happy sun.
Finally, with some yellow and fuchsia knitting yarn I made a beautiful flower, which is a must for us flower lovers, we will always include flowers in everything.
To make this flower I started making a ring with single crochet and a single row, from there I took the spaces to make the petals making the traditional chain of 3 stitches to raise the high stitches, they are 4 high stitches for each petal, closing each one with a low stitch to separate them from each other.
 |  |
|---|
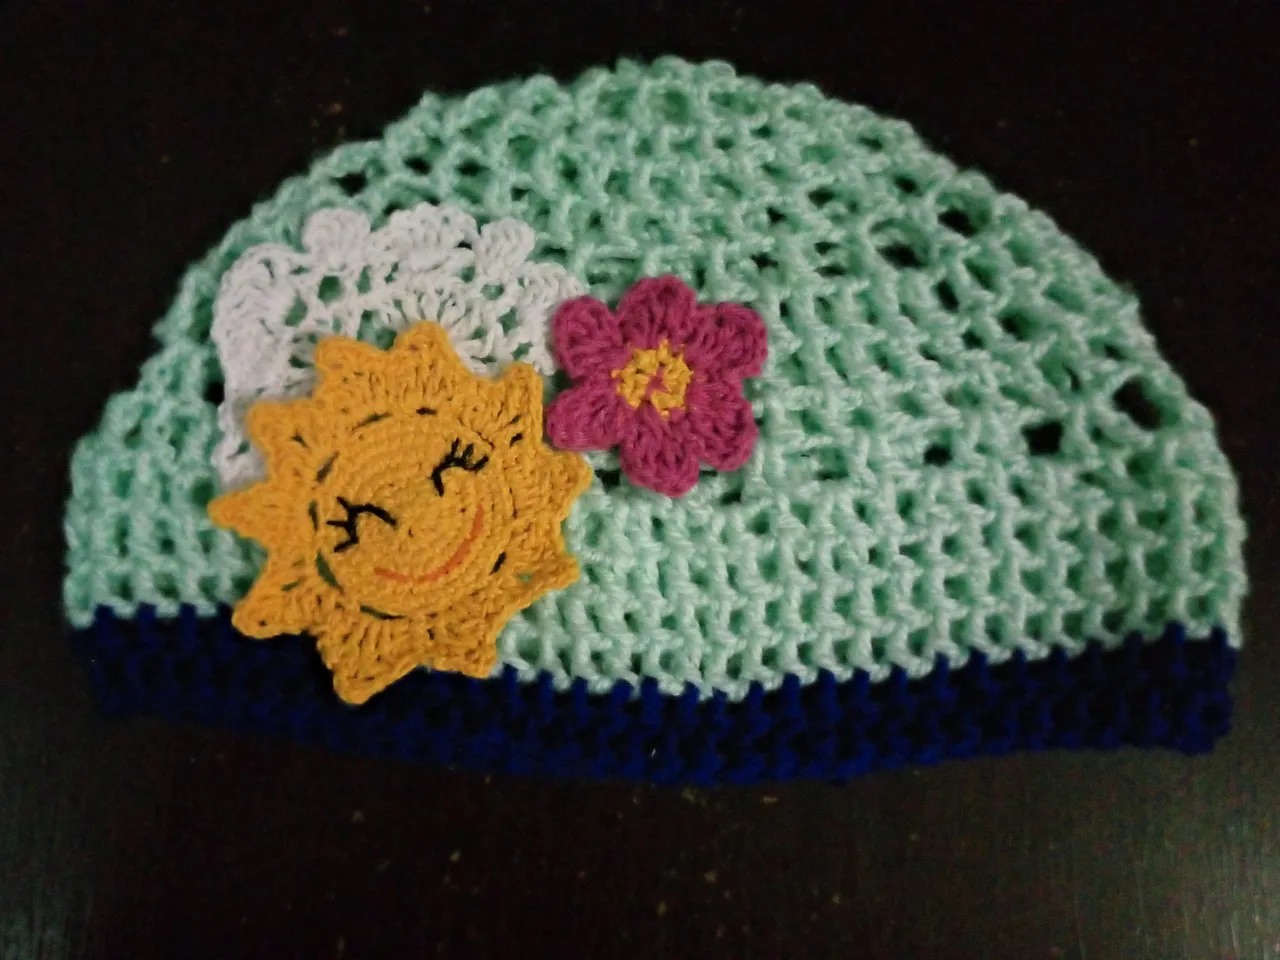
Finalizo colocando los adornos decorativos a mi gorro, y así culmina mi publicación de hoy, esperando que me hayan entendido.
Es un enorme placer para mí estar aquí compartiendo con ustedes los conocimientos adquiridos en el transcurso de este tiempo y con cada práctica y experiencia que he logrado me ha ayudado mucho a sentirme cada día más útil, también me he sentido más relajada porque sé que ustedes siempre están allí para motivarme cada día, espero que todos estén bien y como siempre les envió un abrazo fuerte del tamaño del sol y el cielo.😘
I finish by placing the decorative ornaments on my hat, and this is the end of today's publication, hoping that you have understood me.
It is a huge pleasure for me to be here sharing with you the knowledge acquired in the course of this time and with every practice and experience I have achieved has helped me a lot to feel more useful every day, I have also felt more relaxed because I know that you are always there to motivate me every day, I hope everyone is well and as always I send you a strong hug the size of the sun and the sky.😘
social networks / redes sociales
![]()
![]()
Traductor Deepl
Translated Deepl
Ediciones Canva
Editions Canva