Español
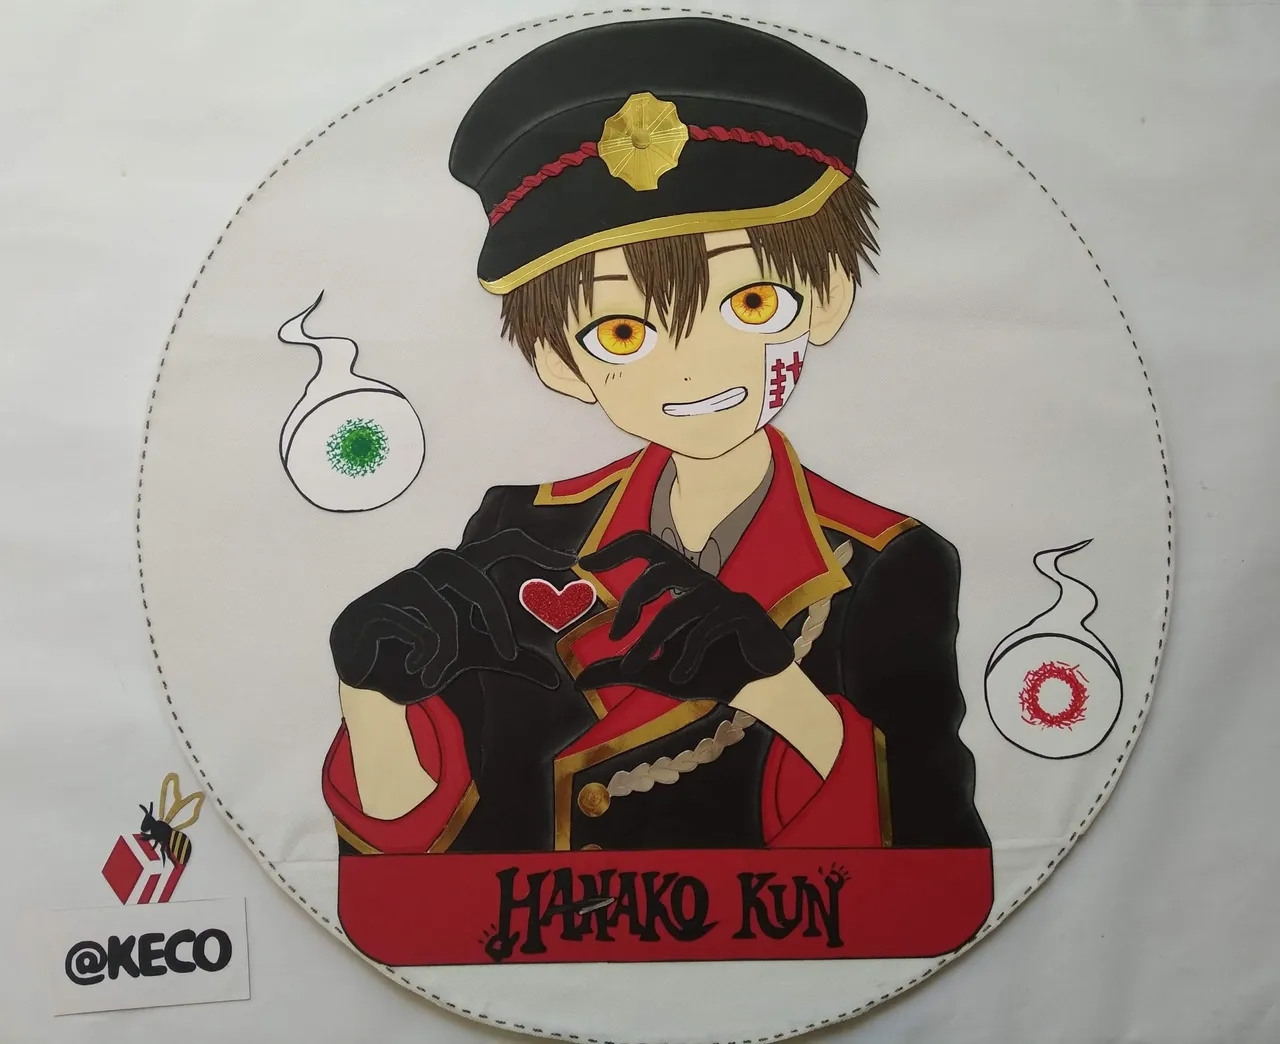
Hola mis estimados creadores, hoy les traigo un trabajo especial hecho con demasiado amor para celebrar la vida de la adorable Camila Imarú, ella es amante de la serie de manga llamada “Jibaku Shōnen Hanako-kun”, también llamada Hanako-kun, el fantasma del lavabo.
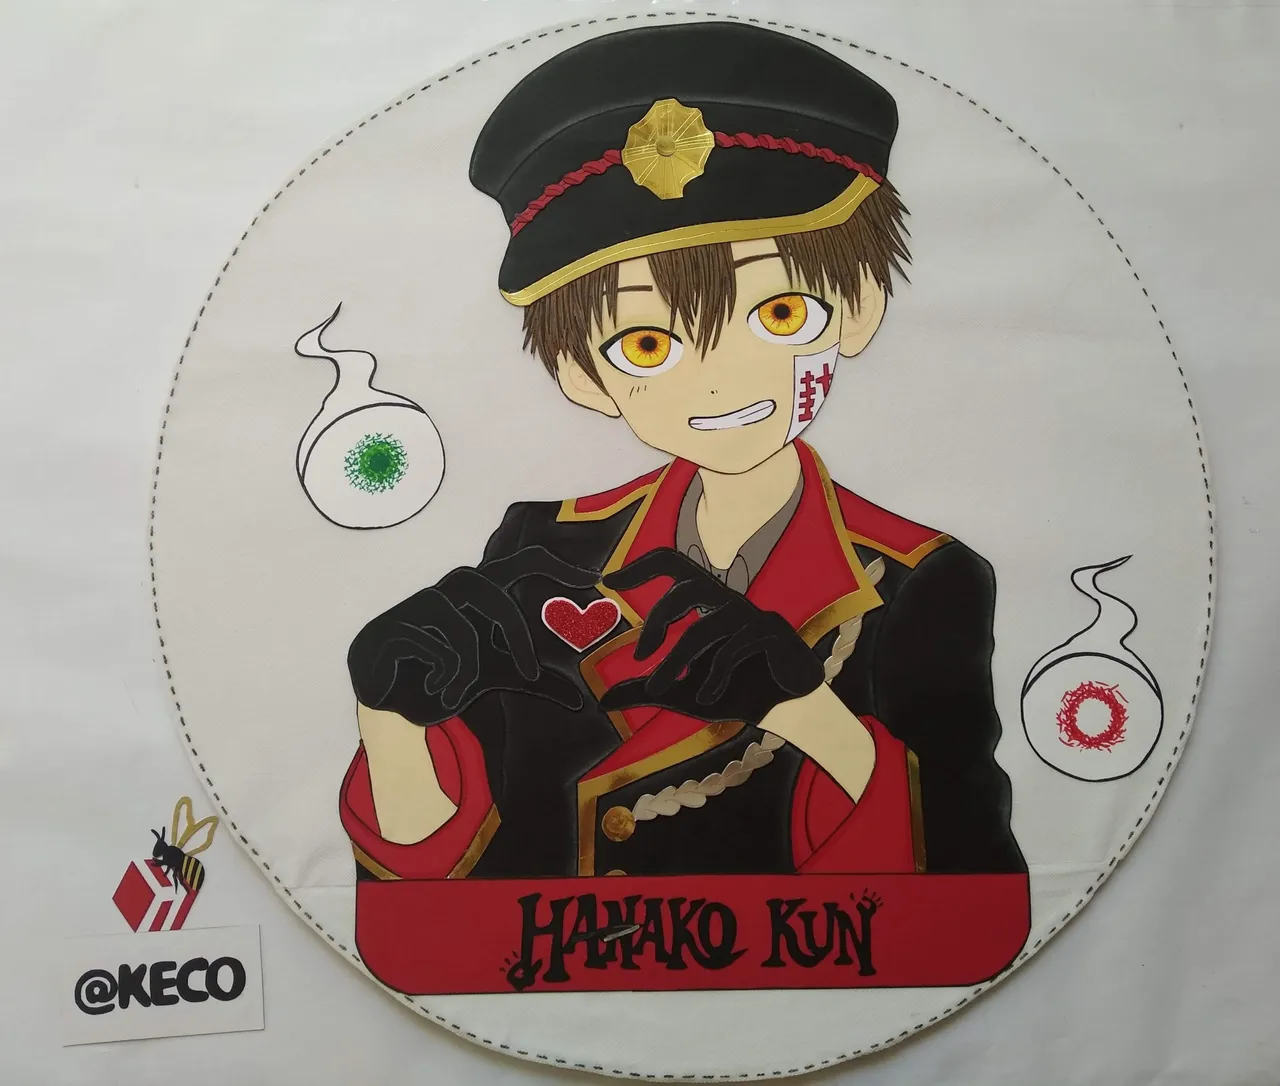
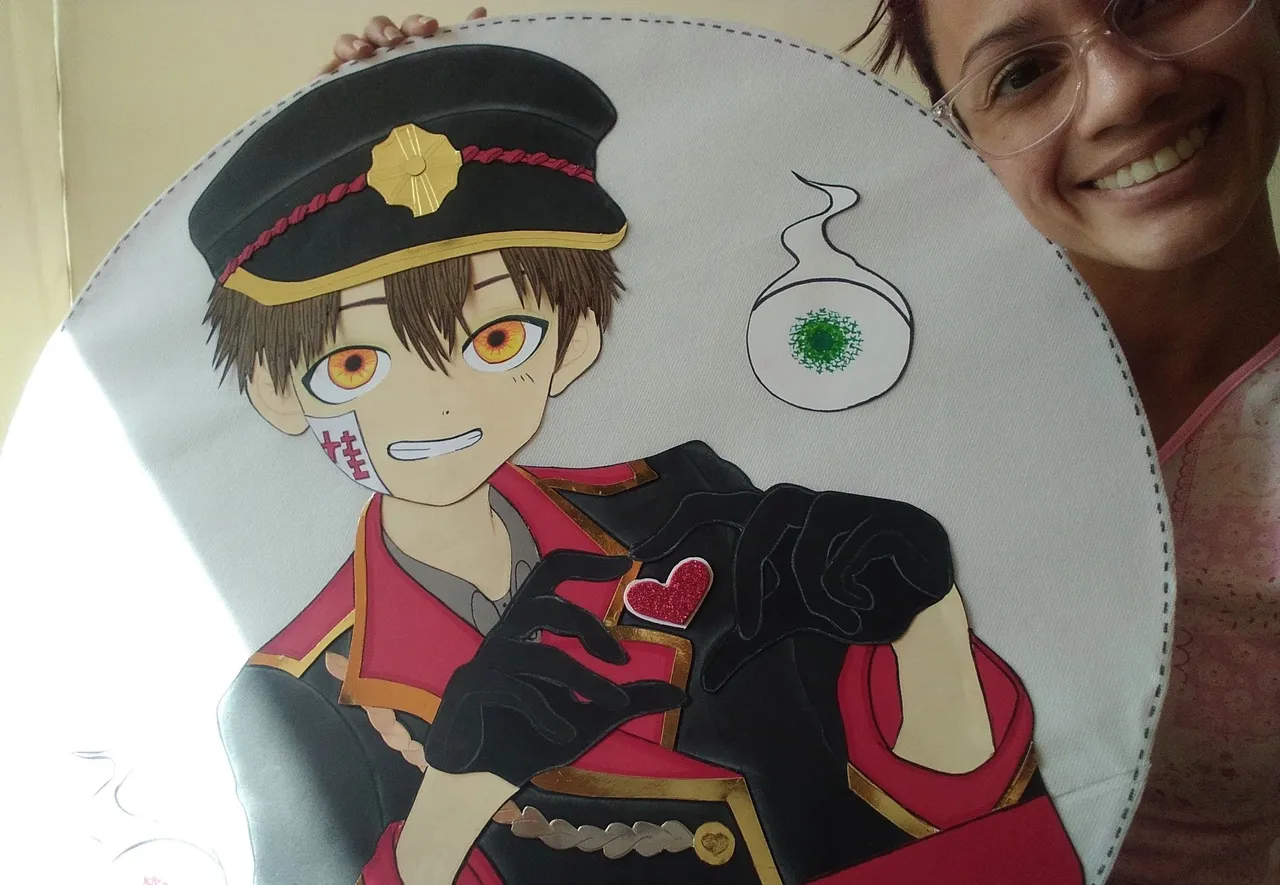
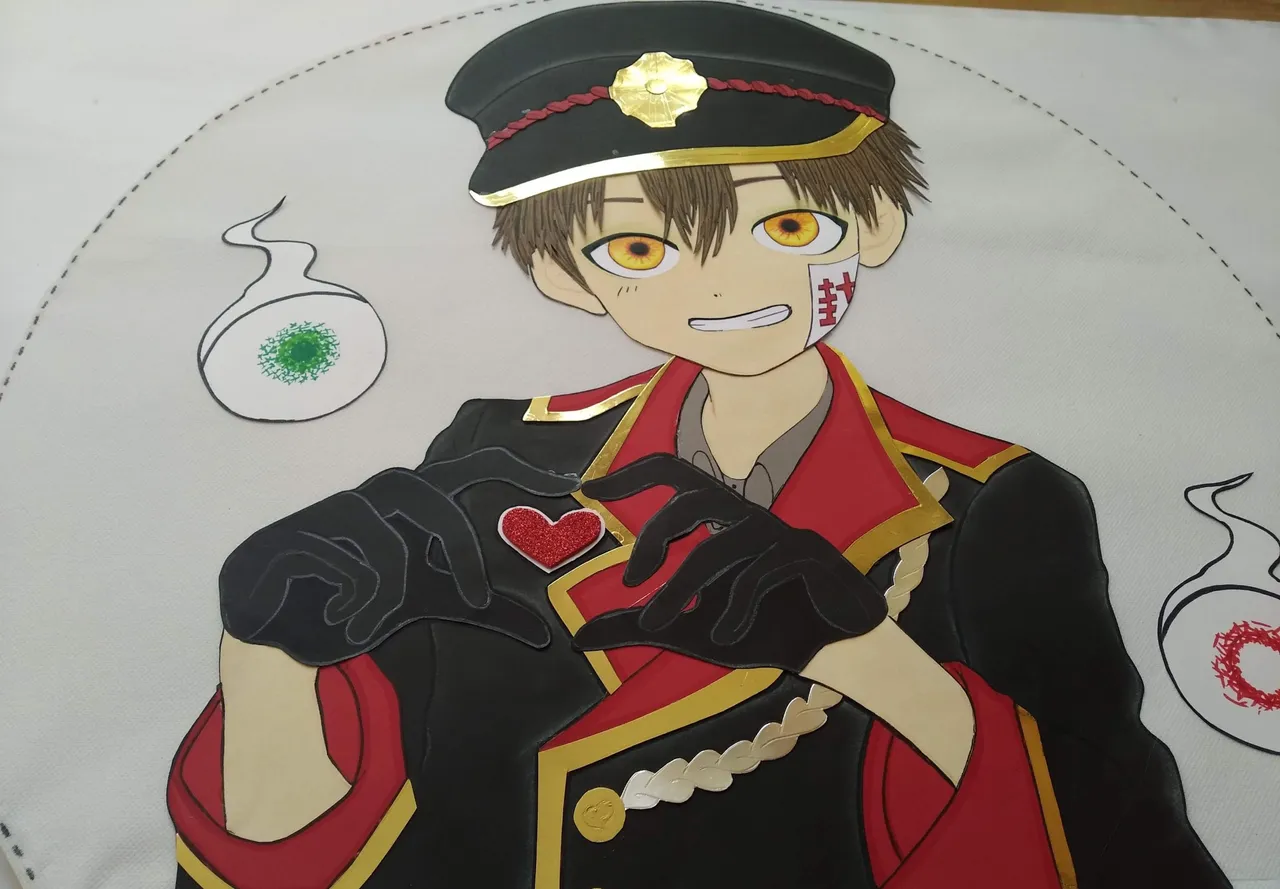
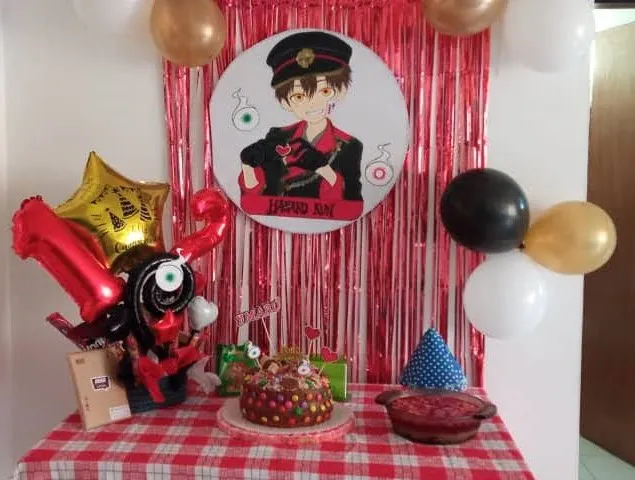
Esto es un trabajo que sin duda sabrán admirar los amantes del anime… esta realizado en ensamble de cartulinas de colores de tamaño aproximado de 60 cm de alto y aunque sirvió para sorprenderla en su cumpleaños le permitió luego conservarlo y decorar su habitación con su personaje favorito.
Sin más, y esperando disfruten del trabajo realizado les dejo los materiales utilizados, el proceso y las imágenes del trabajo.
- Plantilla del diseño en Papel Bond
- Lápiz y lápices de colores
- Marcadores permanentes de colores
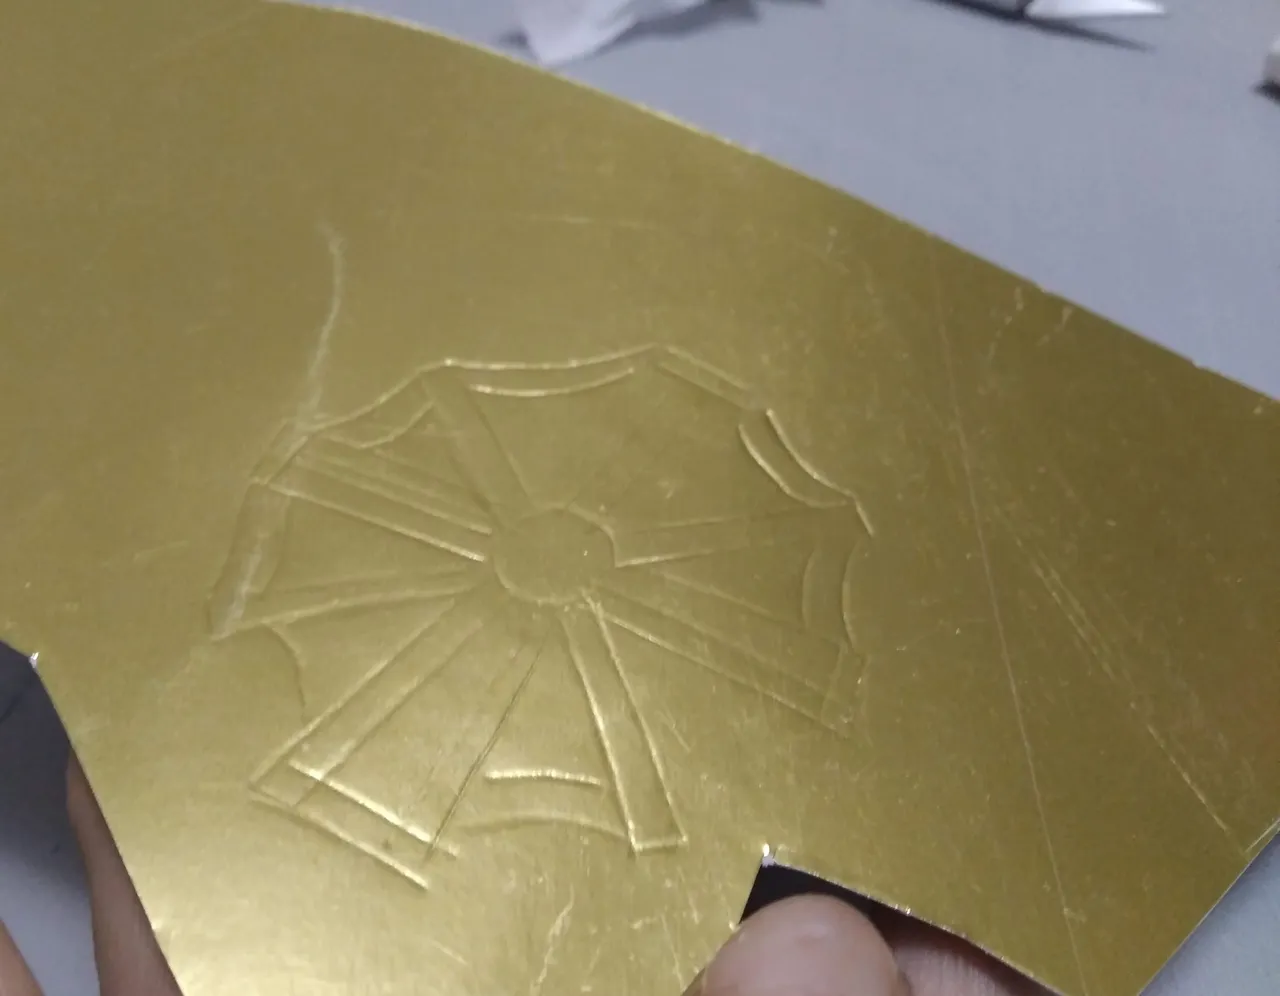
- Cartulinas de Colores de acuerdo al diseño a realizar (para este se usó: negro, rojo, beige claro, marrón, blanco, gris)
- Cartulina dorada tipo espejo
- Tiza Blanca
- Tela POP blanca
- Tijeras (grandes y pequeñas)
- Cutter
- Silicón frio
- Silicón Caliente
- Cartón grueso (doble canal)
- Foami escarchado de color rojo.
English
Hello my dear creators, today I bring you a special work made with too much love to celebrate the life of the adorable Camila Imaru, she is a lover of the manga series called "Jibaku Shōnen Hanako-kun", also called Hanako-kun, the ghost of the sink.
This is a work that will undoubtedly be admired by anime lovers... it is made of colored cardboard assemblies of approximately 60 cm high and although it served to surprise her on her birthday, it allowed her to keep it and decorate her room with her favorite character.
Without further ado, and hoping you enjoy the work done I leave you the materials used, the process and the images of the work.
Translated with DeepL.com (free version)
- Design template on Bond Paper
- Pencil and colored pencils
- Colored permanent markers
- Color cards according to the design to be made (for this one we used: black, red, light beige, brown, white, gray).
- Gold mirror cardboard
- White chalk
- White POP cloth
- Scissors (large and small)
- Cutter
- Cold Silicone
- Hot Silicone
- Thick cardboard (double channel)
- Red colored frosted Foami.
1.- Lo primero para realizar cualquier trabajo es definir el diseño a realizar. Es este caso se eligió en la web una imagen de Hanaku versión elegante. Una vez definida la misma se plasma en el papel bond del tamaño deseado. Este es de aproximadamente es de 60 cm.
1.- The first thing to do any work is to define the design to be done. In this case an image of Hanaku elegant version was chosen from the web. Once it is defined, it is printed on bond paper of the desired size. This is approximately 60 cm.
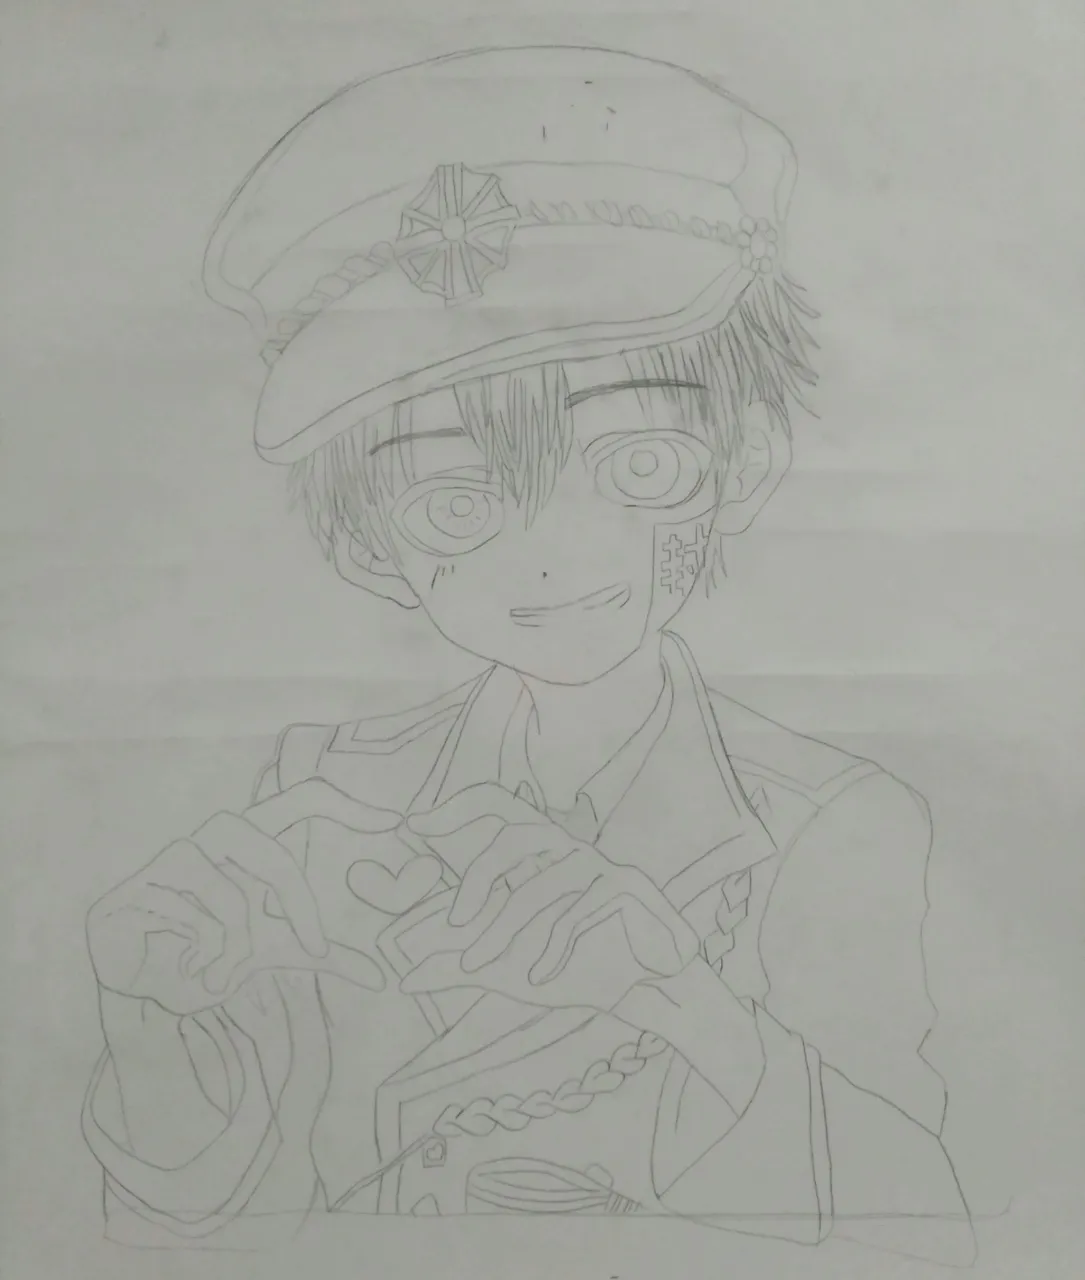

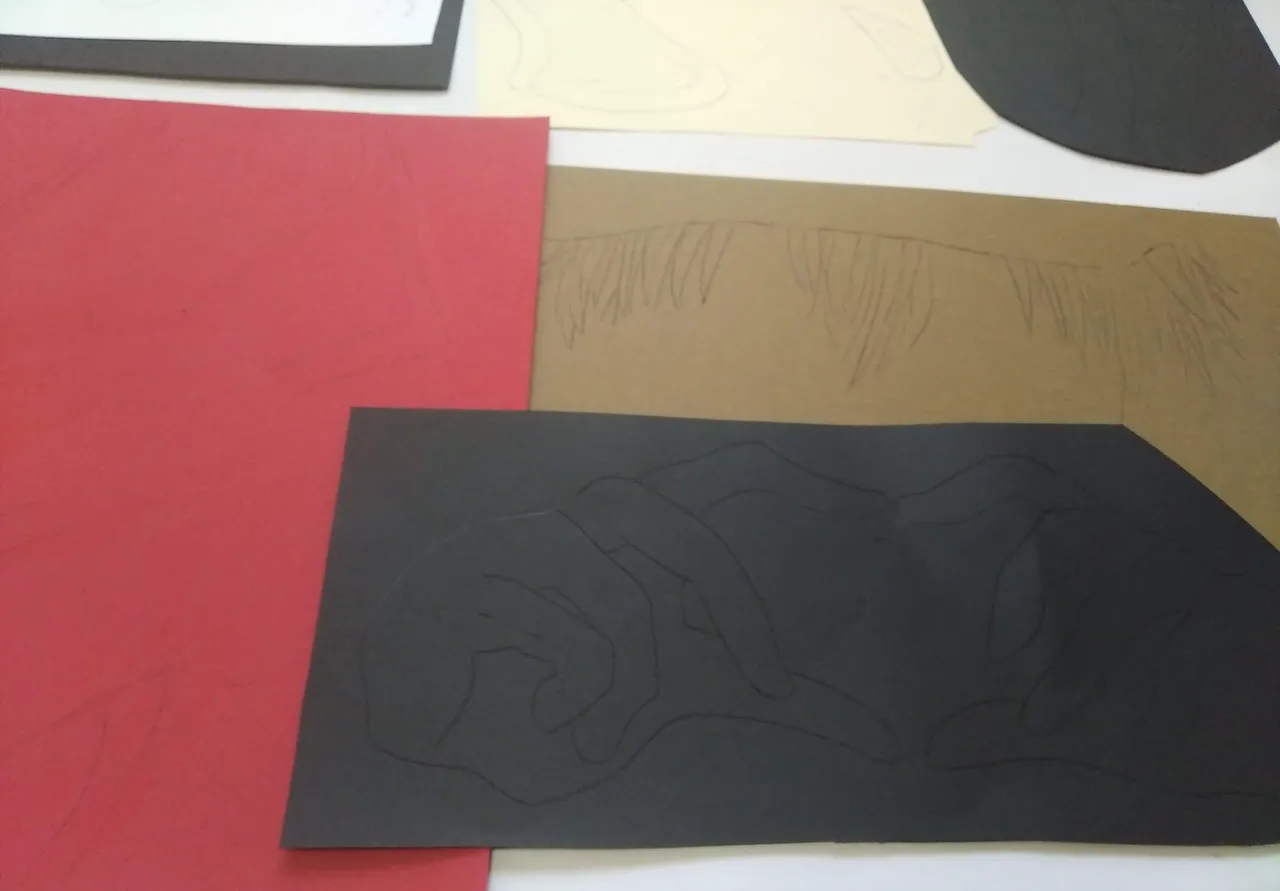
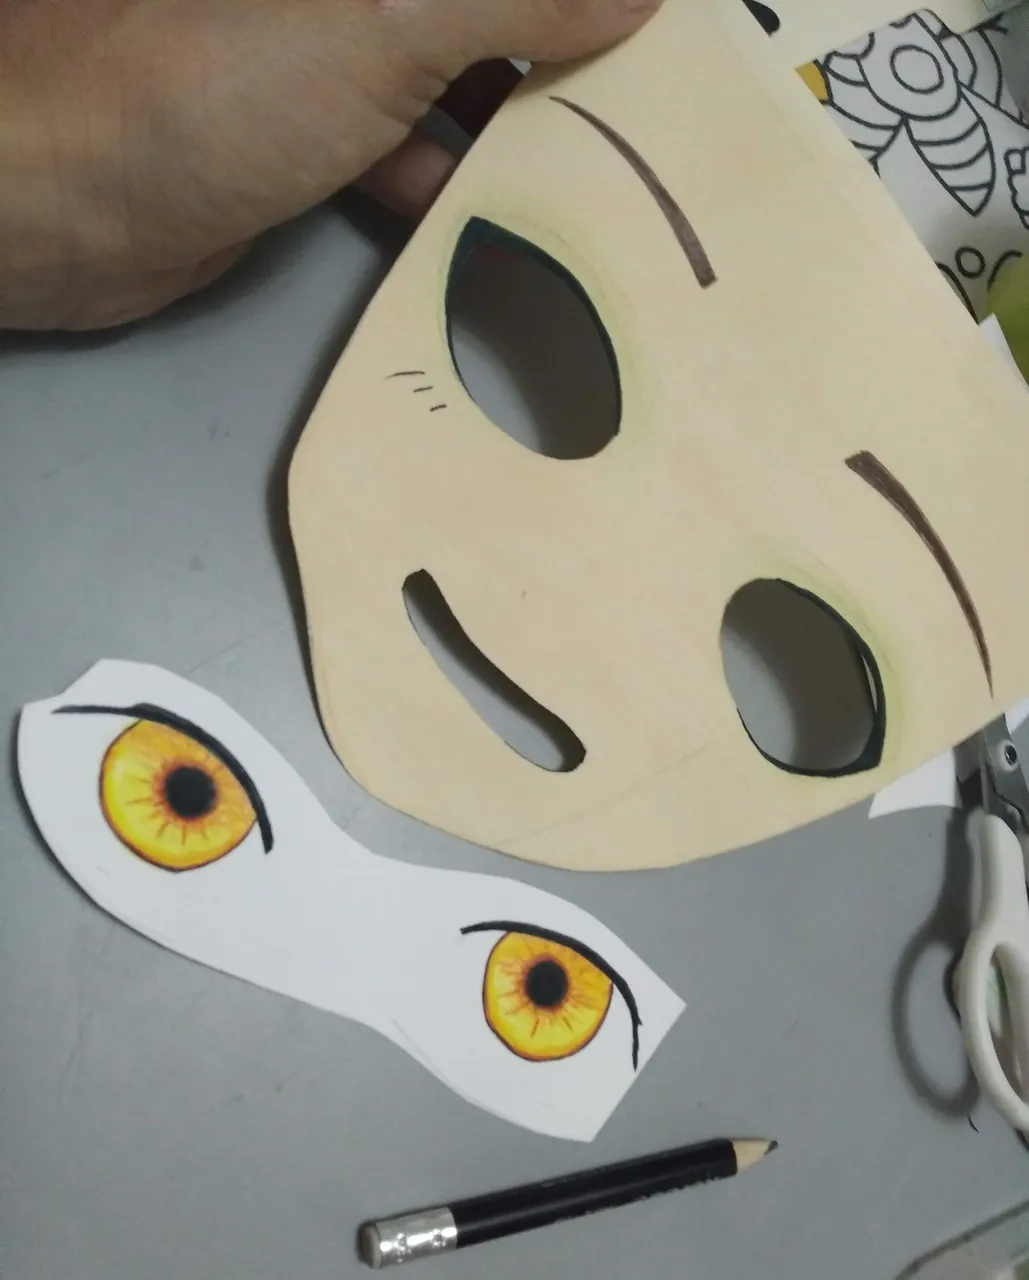
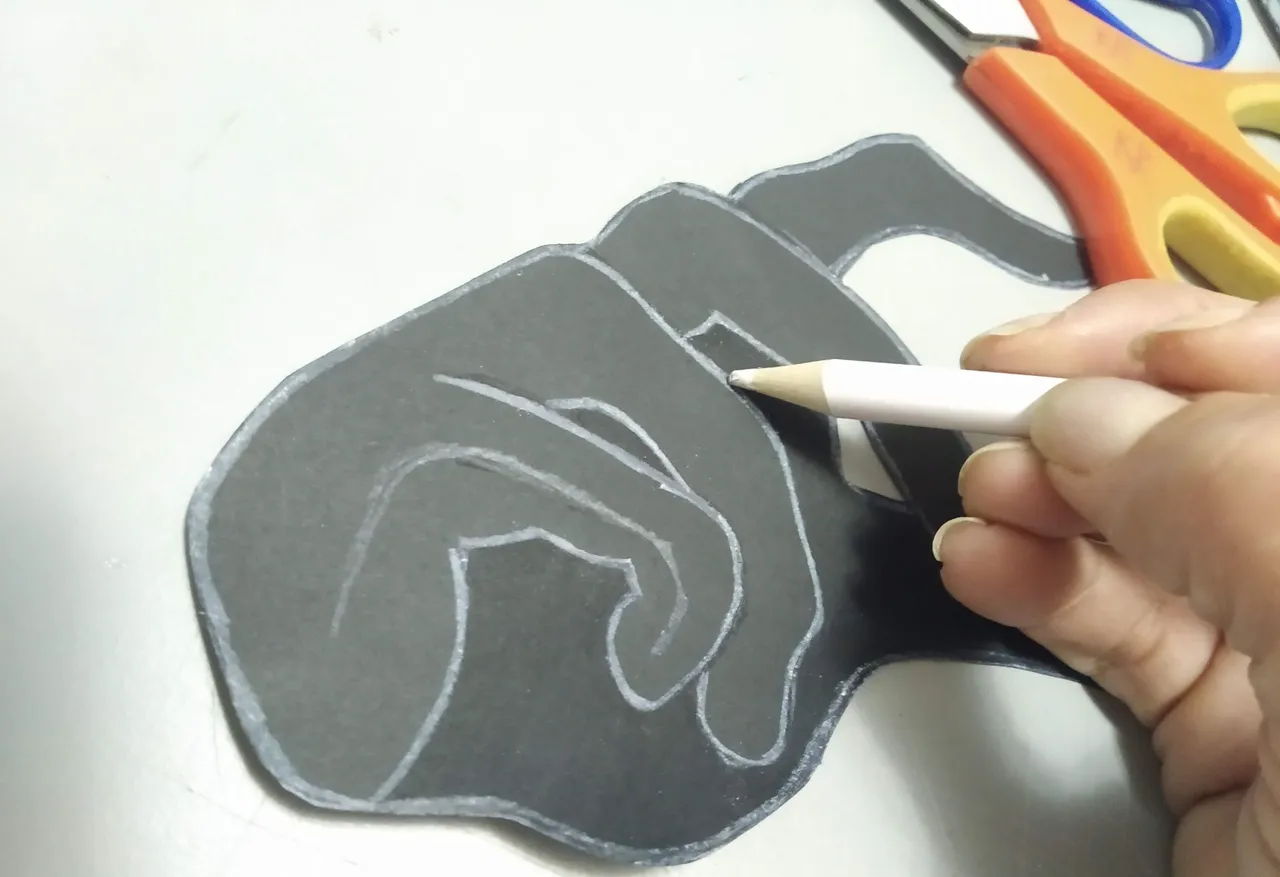
2.- Una vez terminada el dibujo, el mismo servirá de plantilla ya que permite marcar las distintas partes del diseño en las cartulinas correspondientes.
2.- Once the drawing is finished, it will serve as a template to mark the different parts of the design on the corresponding cardboard.
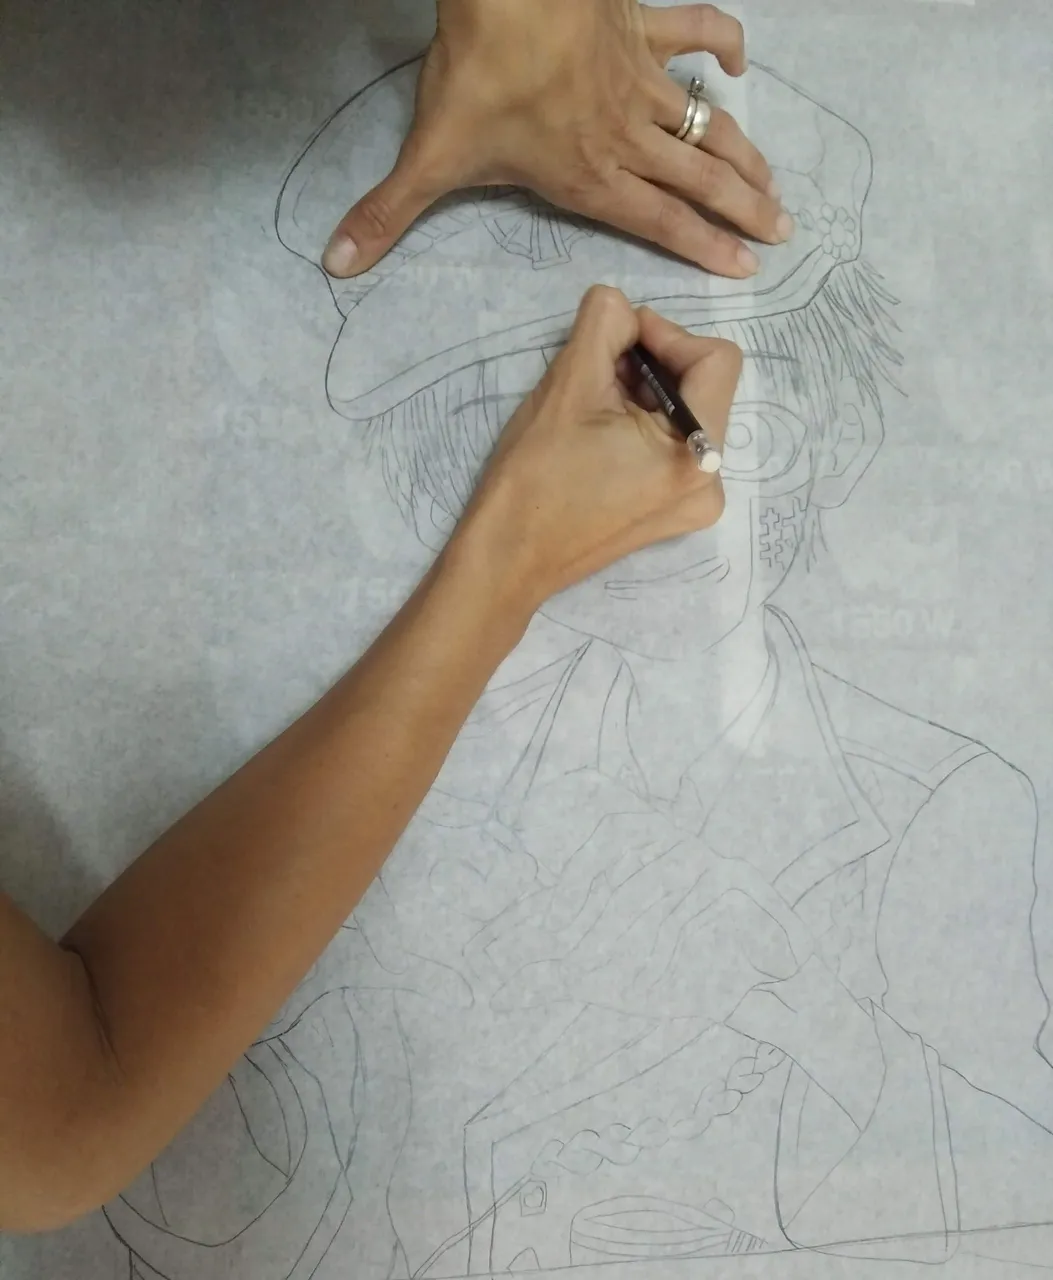
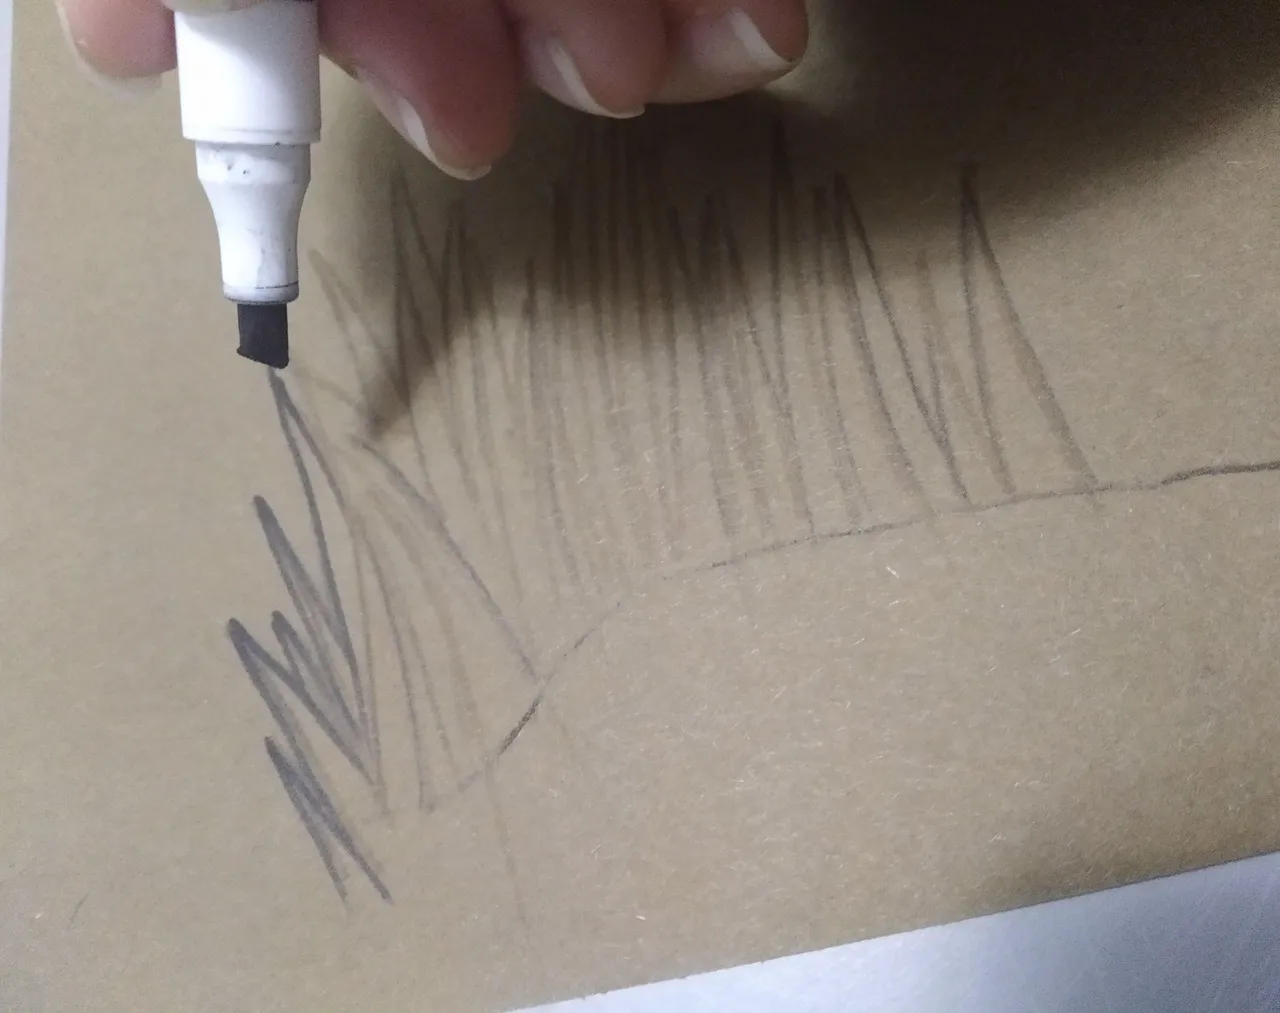
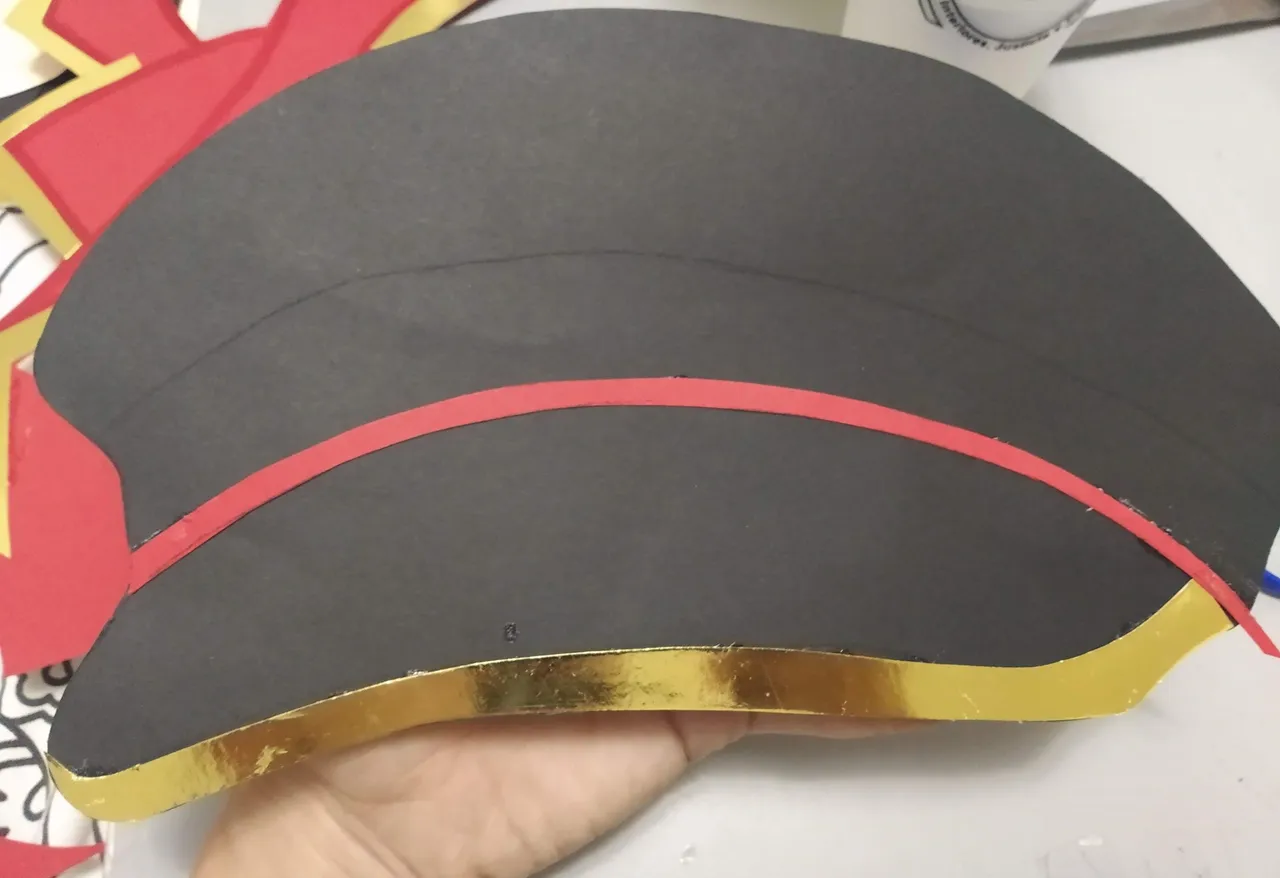
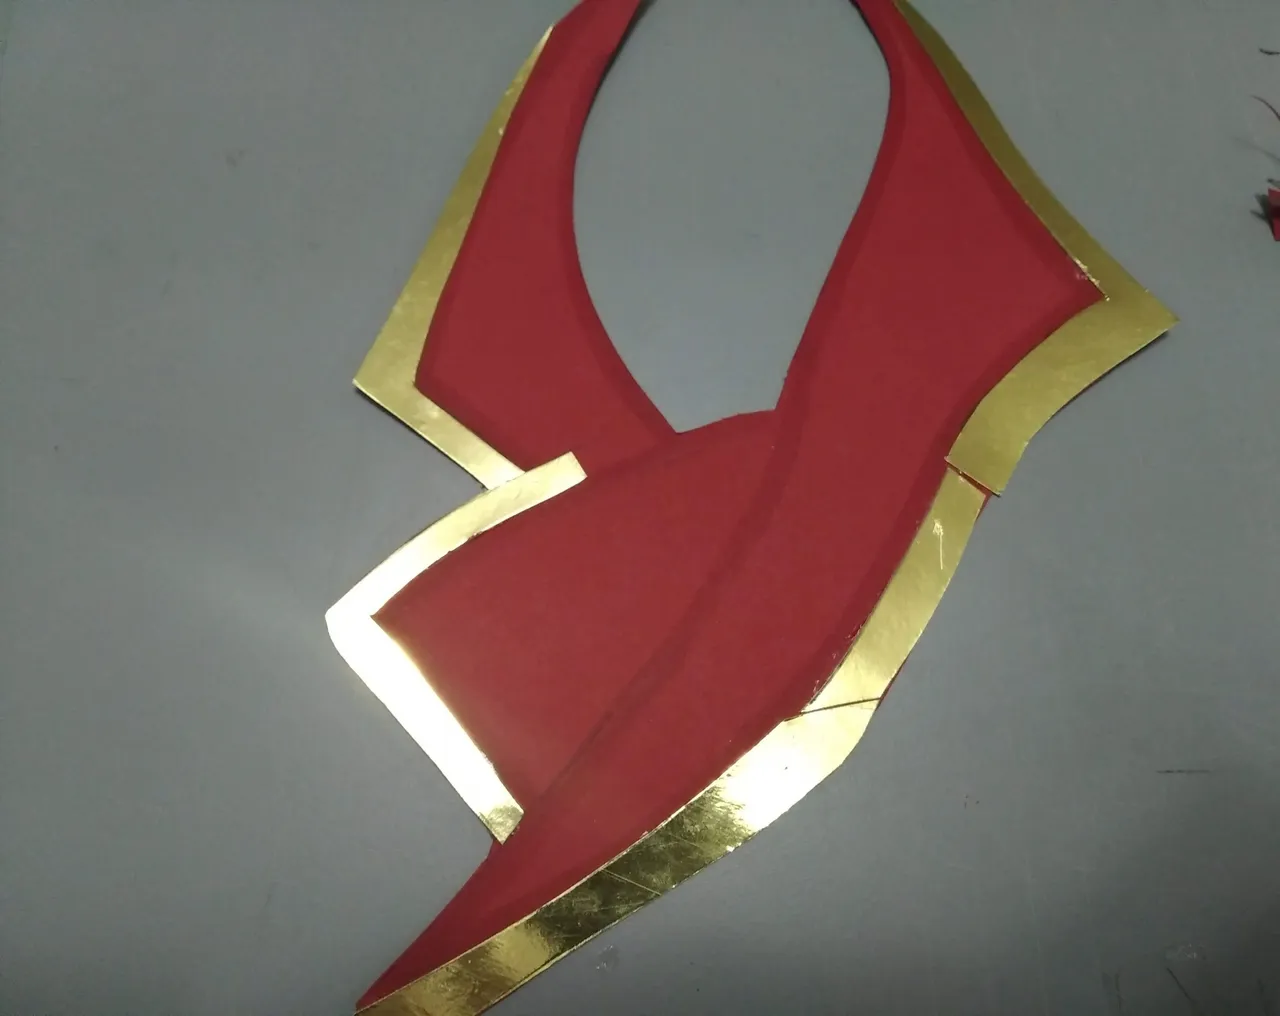
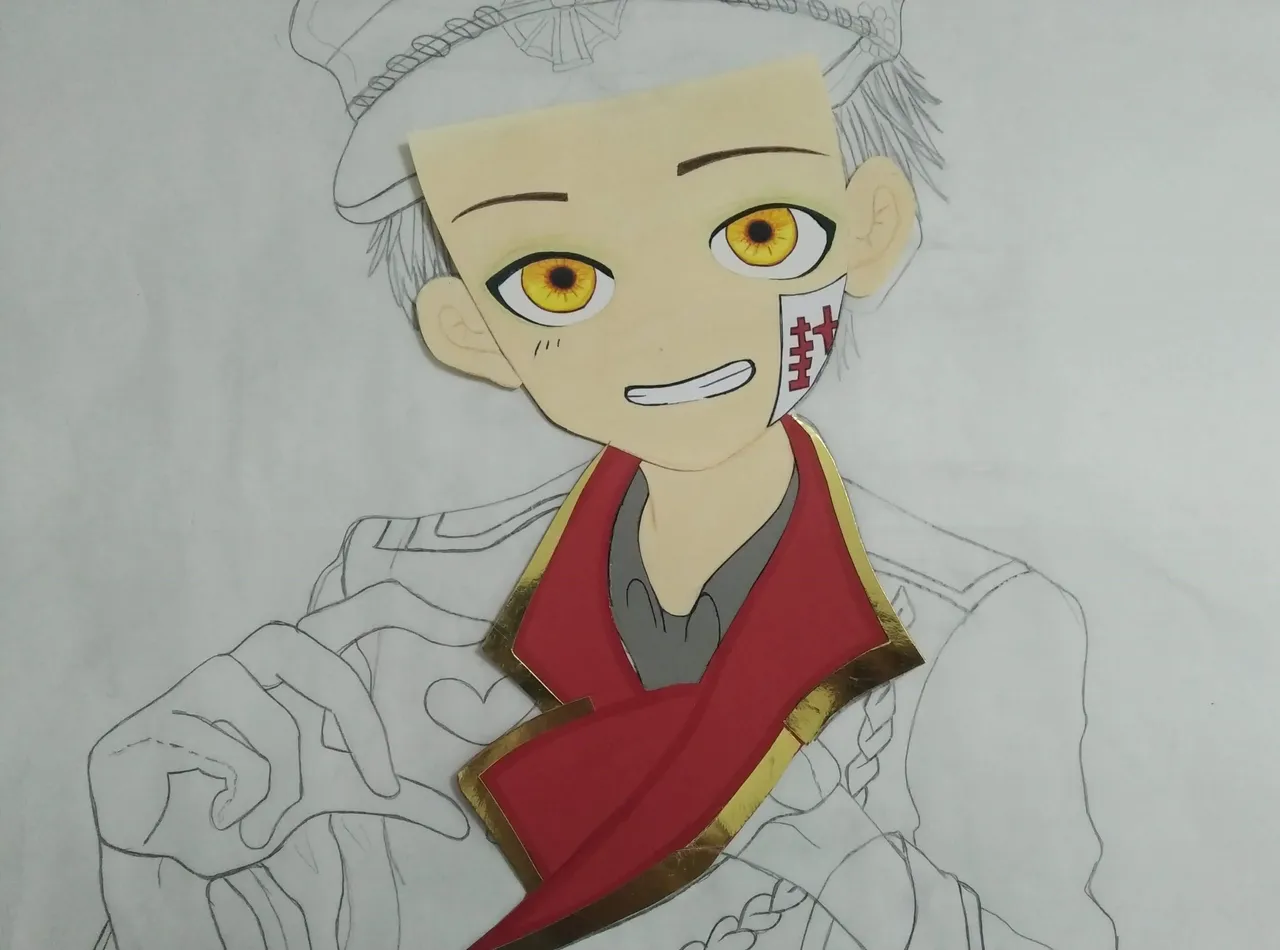
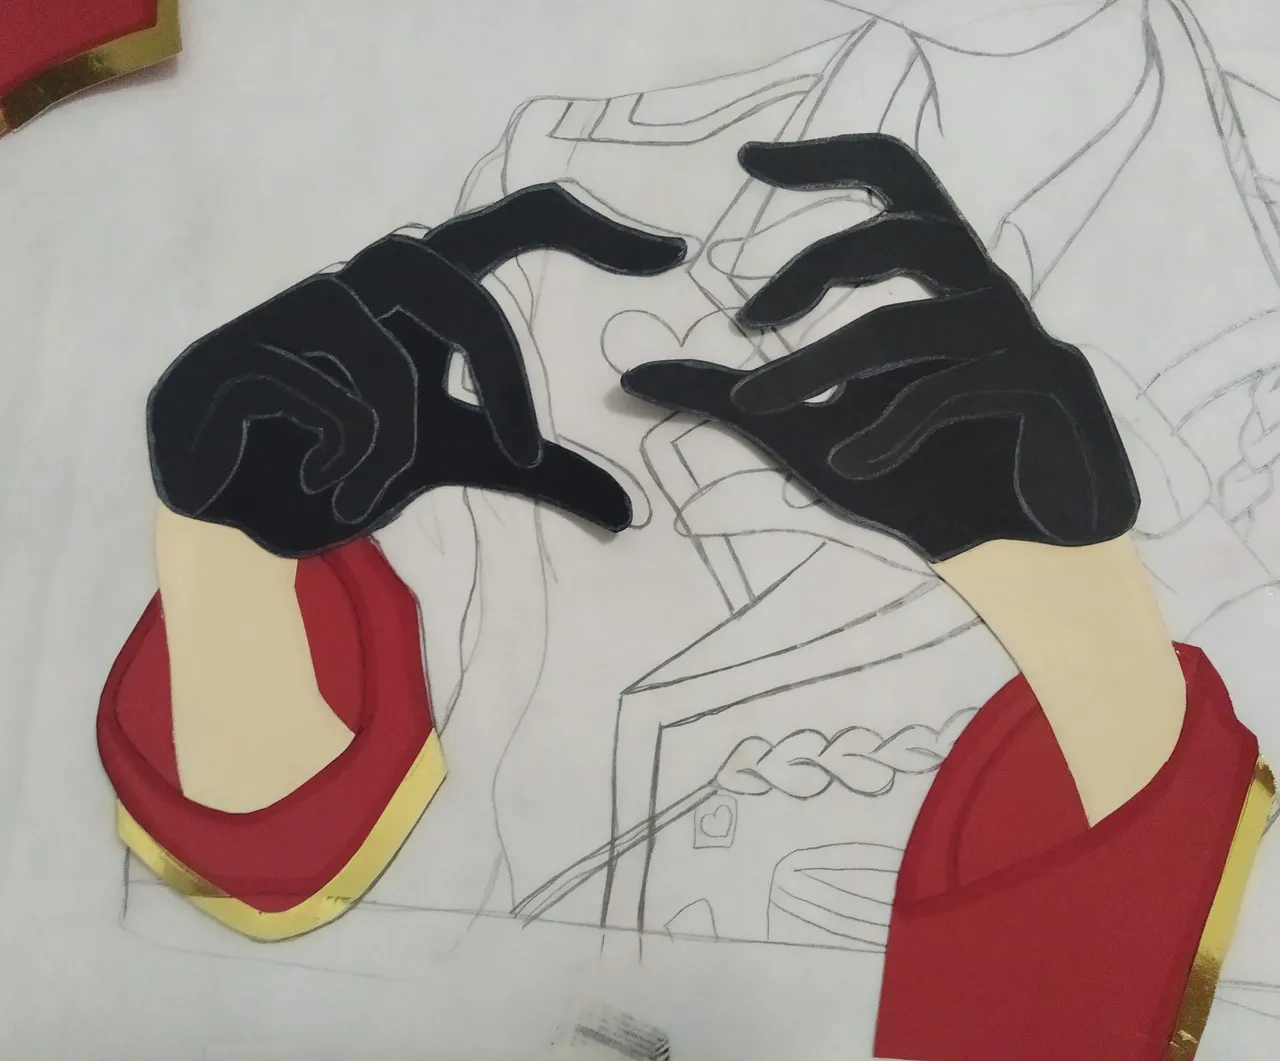
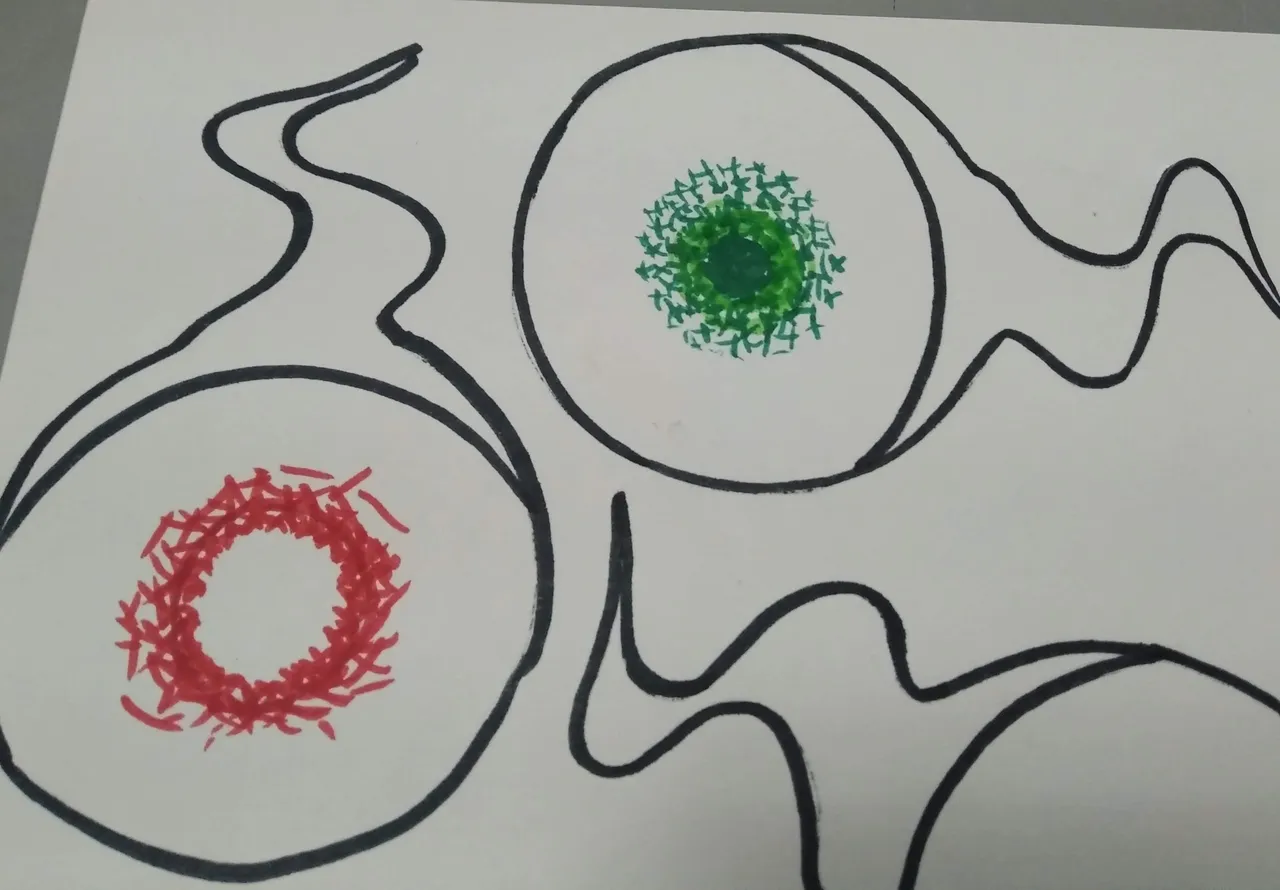
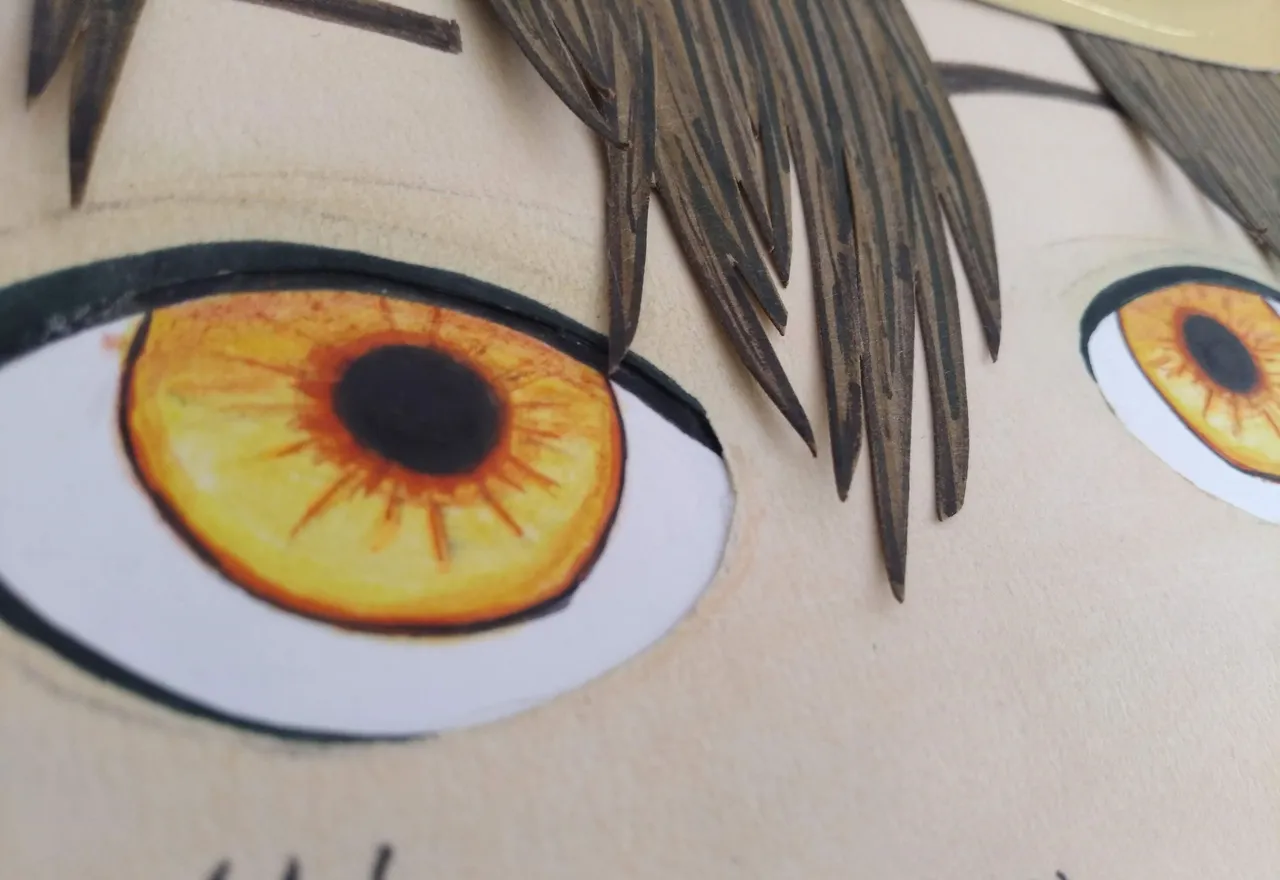
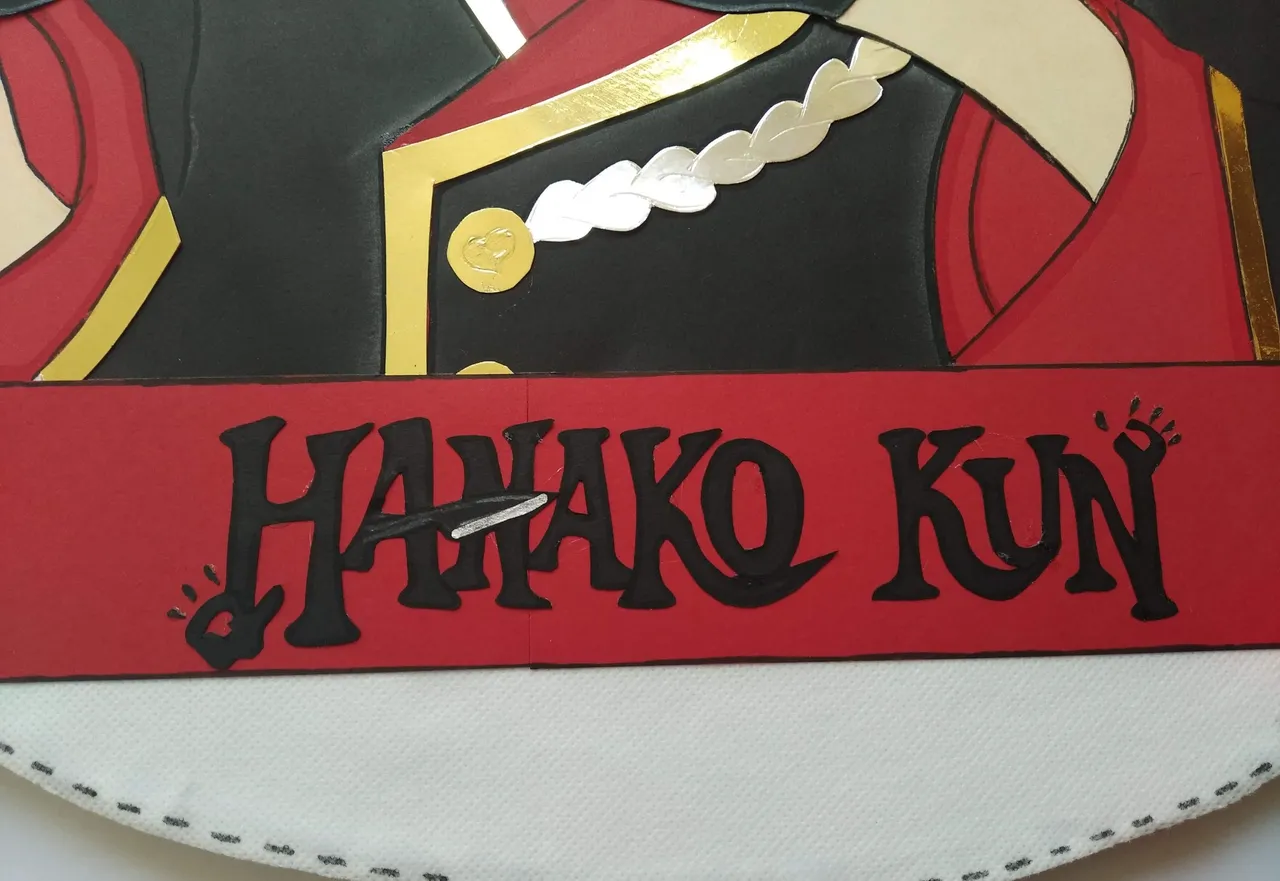
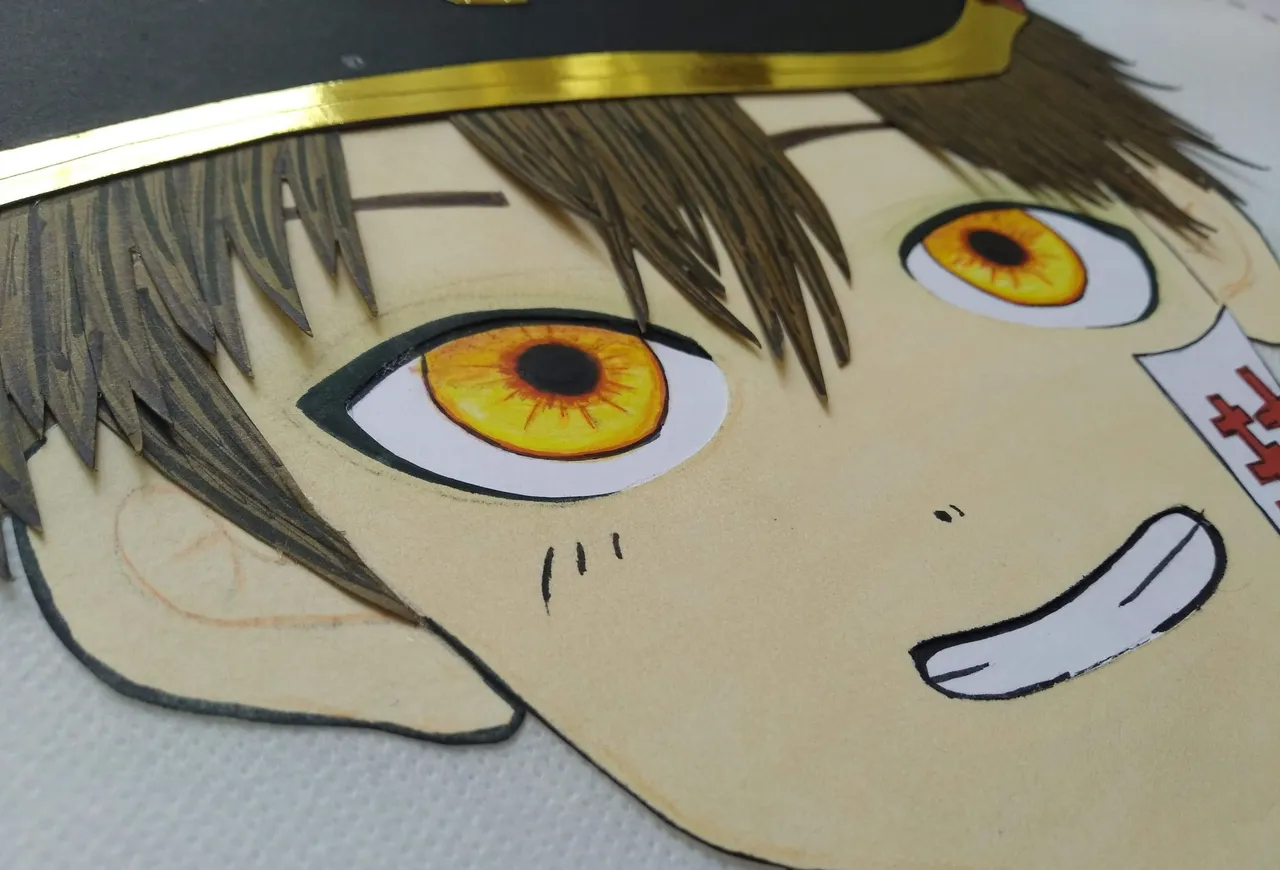
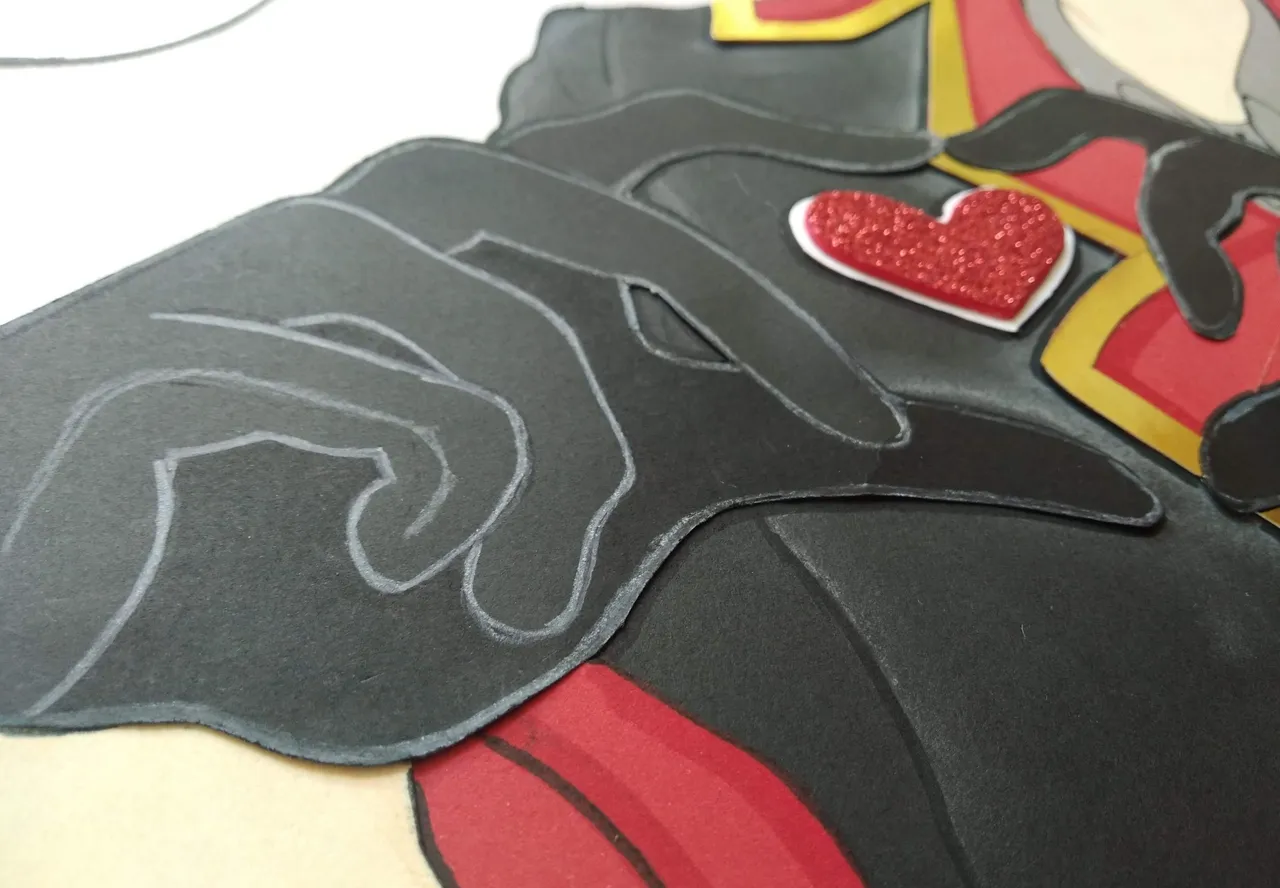
3.- Al tener todas las piezas marcadas en las cartulinas, se trabajan por separado cada una, resaltando con marcadores y colores los elementos resaltantes de cada pieza, así como incorporarle elementos adicionales que sean necesarios.
3.- Once all the pieces are marked on the cardboard, each one is worked on separately, highlighting with markers and colors the most important elements of each piece, as well as incorporating additional elements that may be necessary.
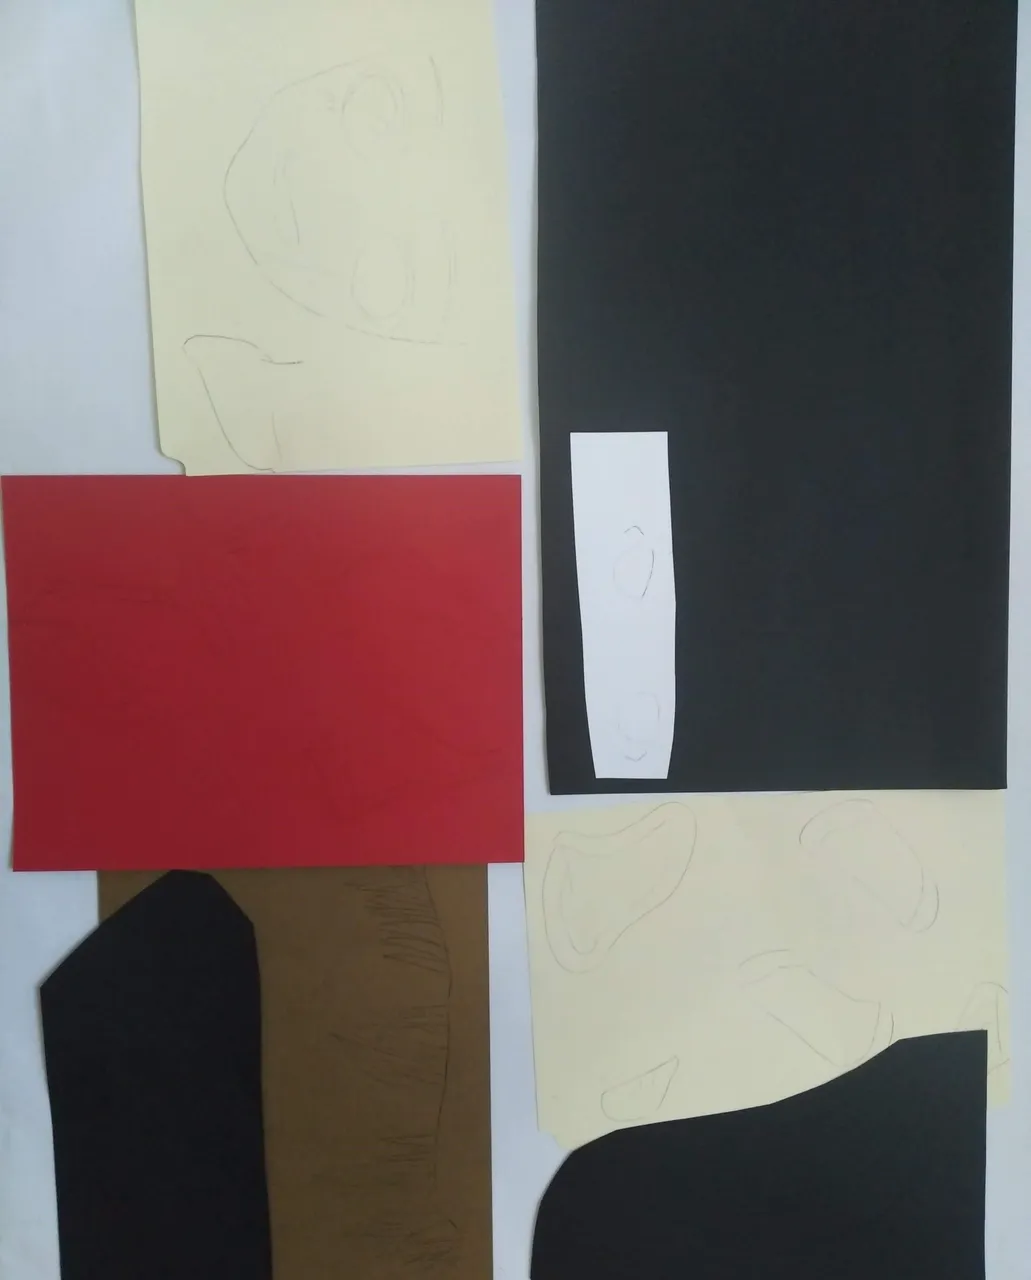
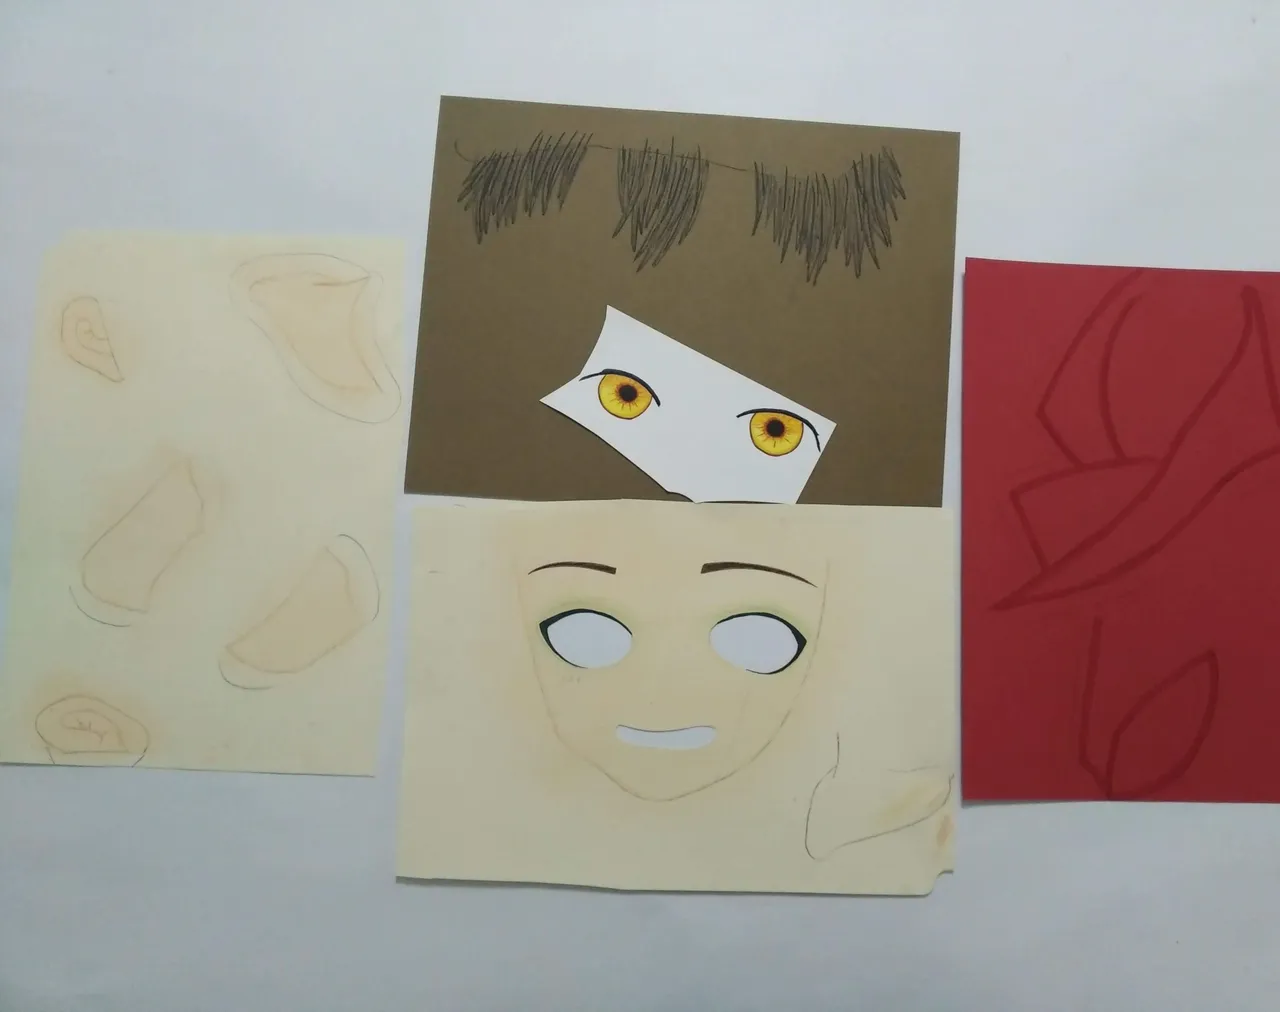
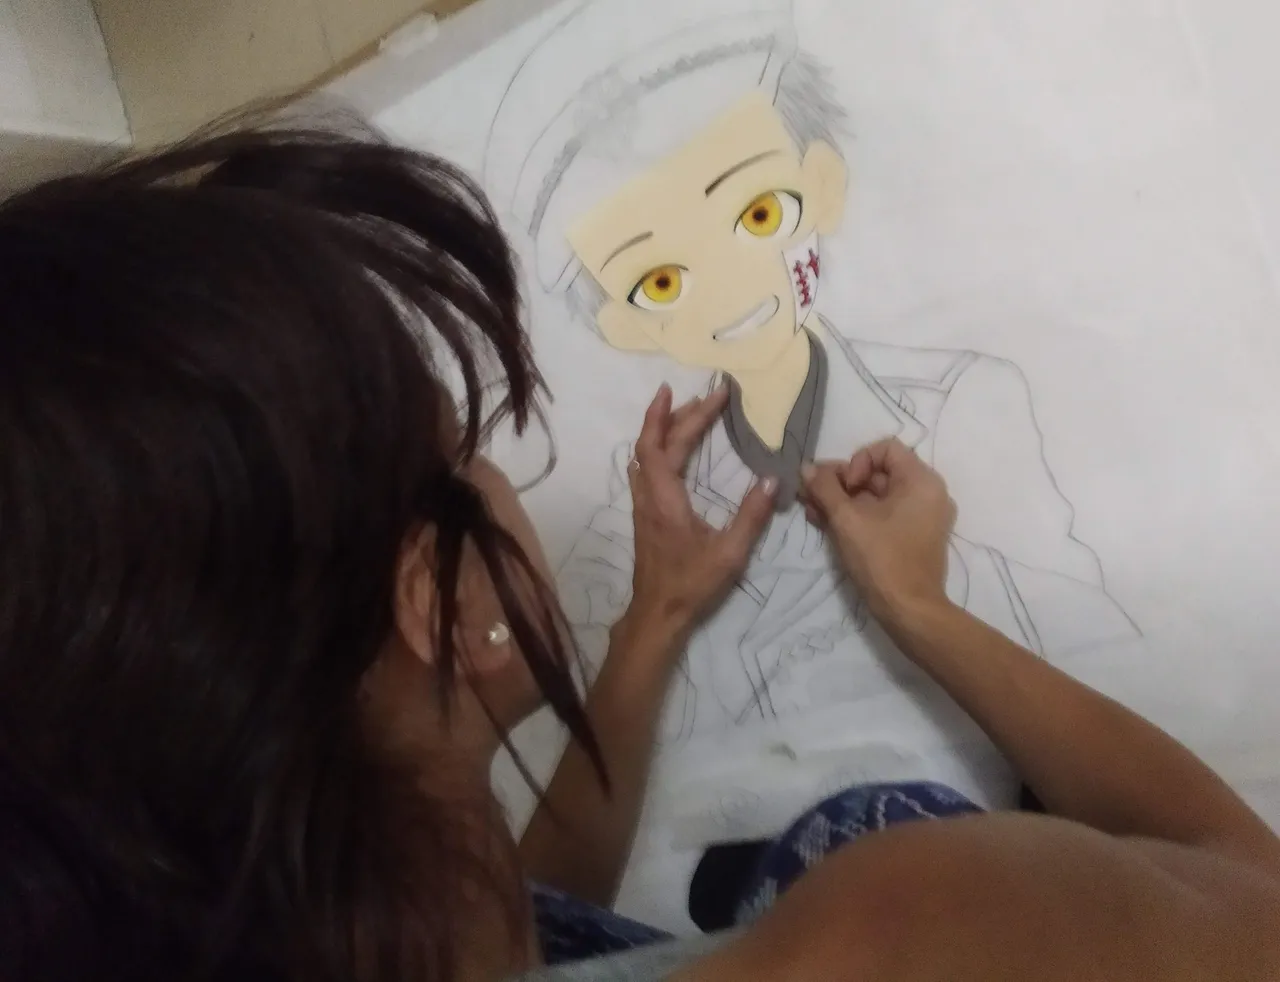
4.- Recortar todas las piezas siguiendo el patrón de cada una para poder ensamblarlas como el diseño original.
4.- Cut out all the pieces following the pattern of each one in order to assemble them as the original design.

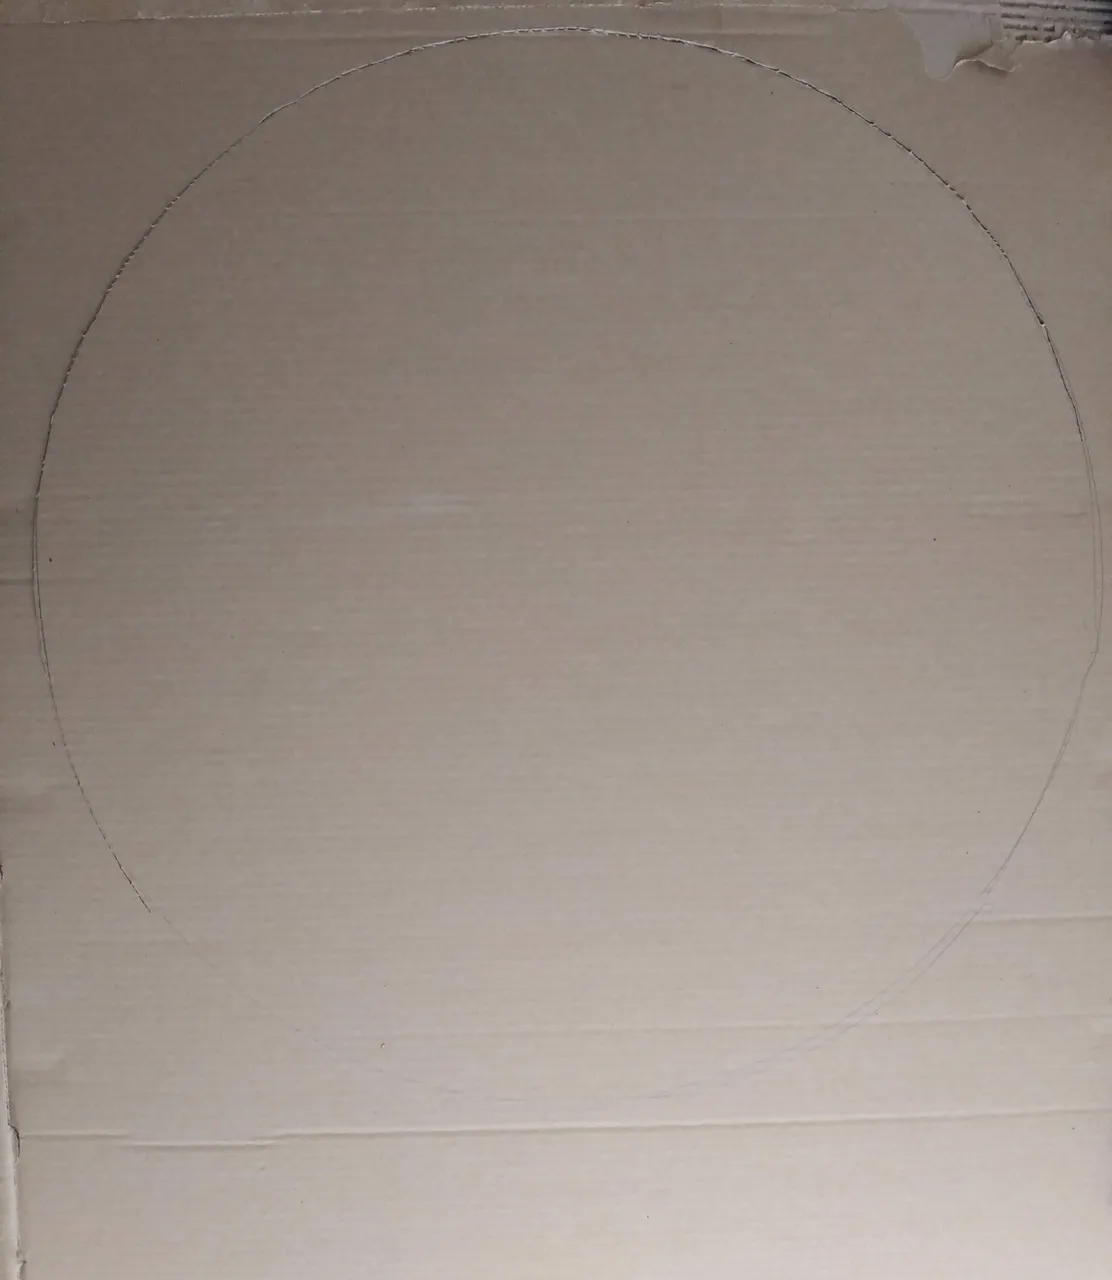
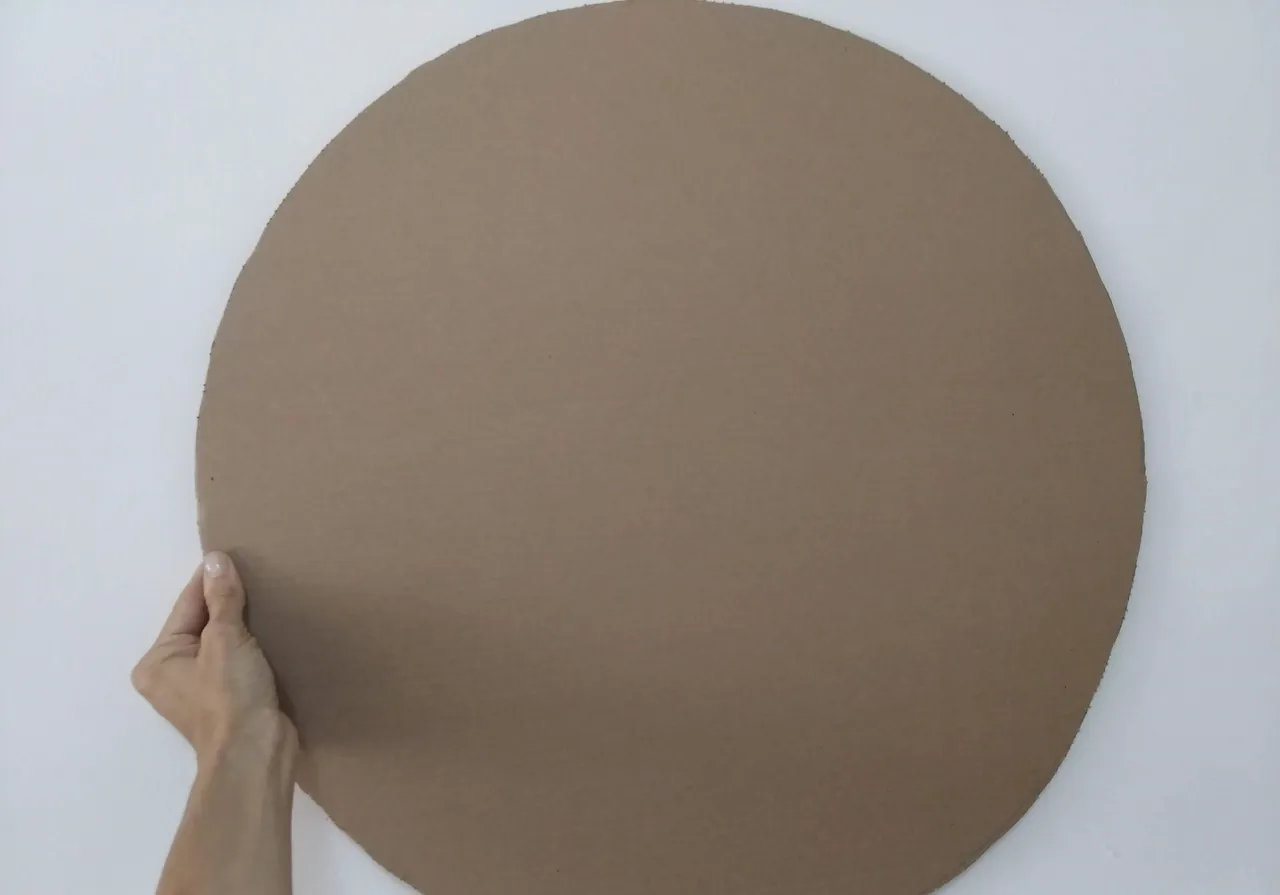
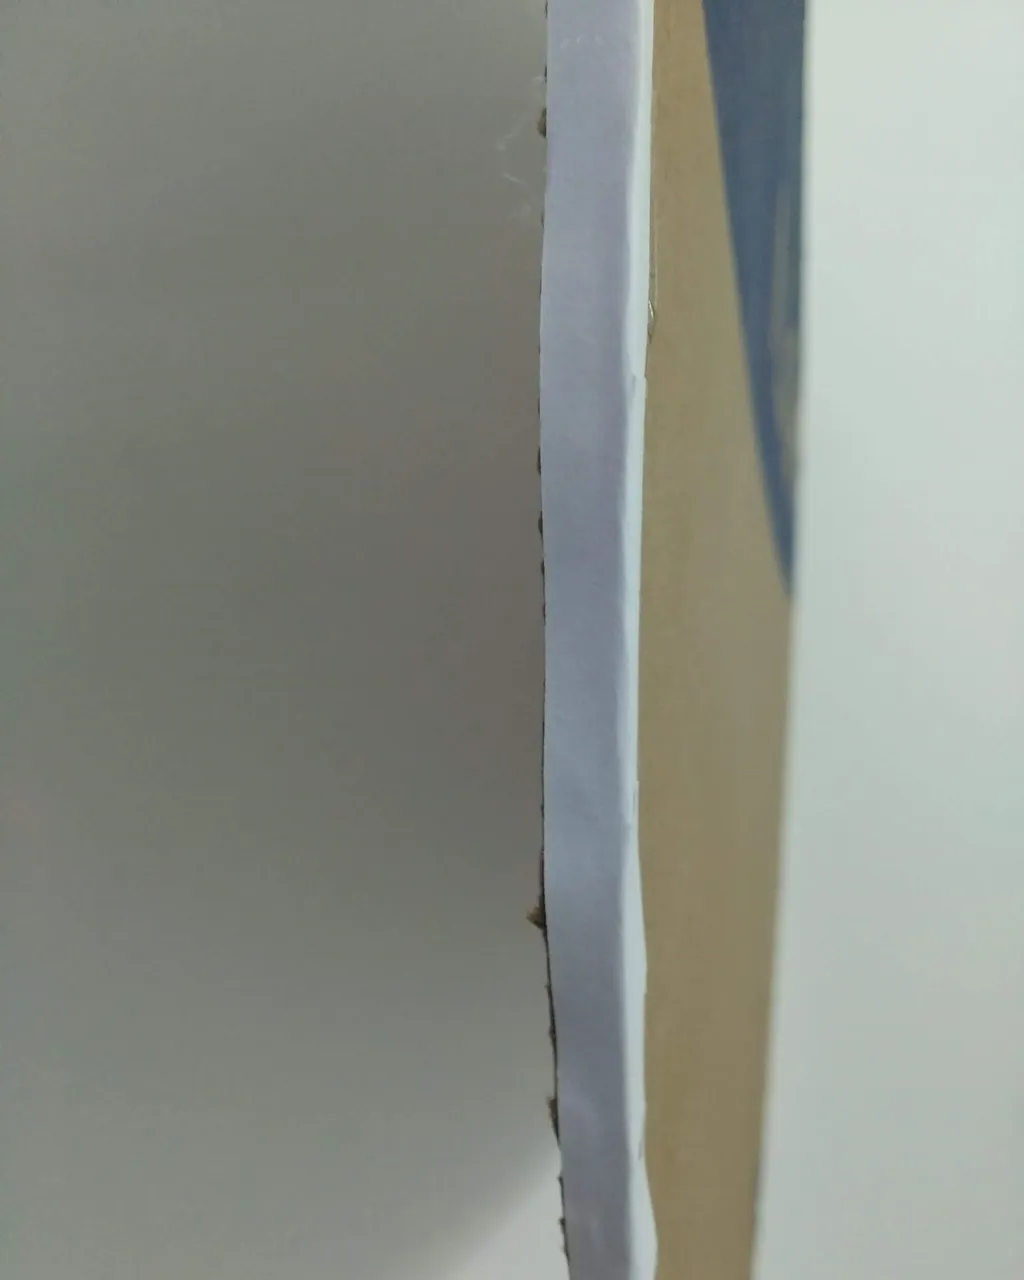
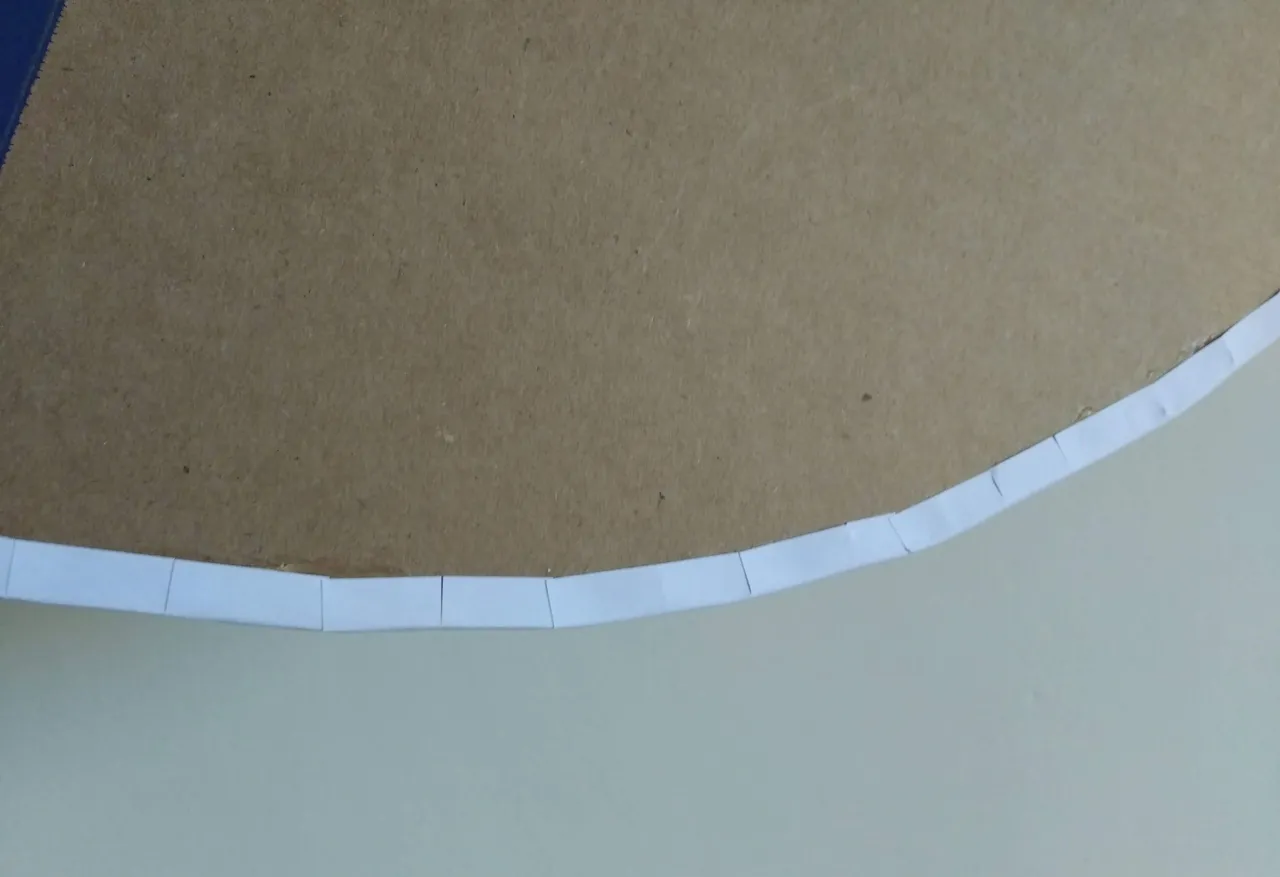
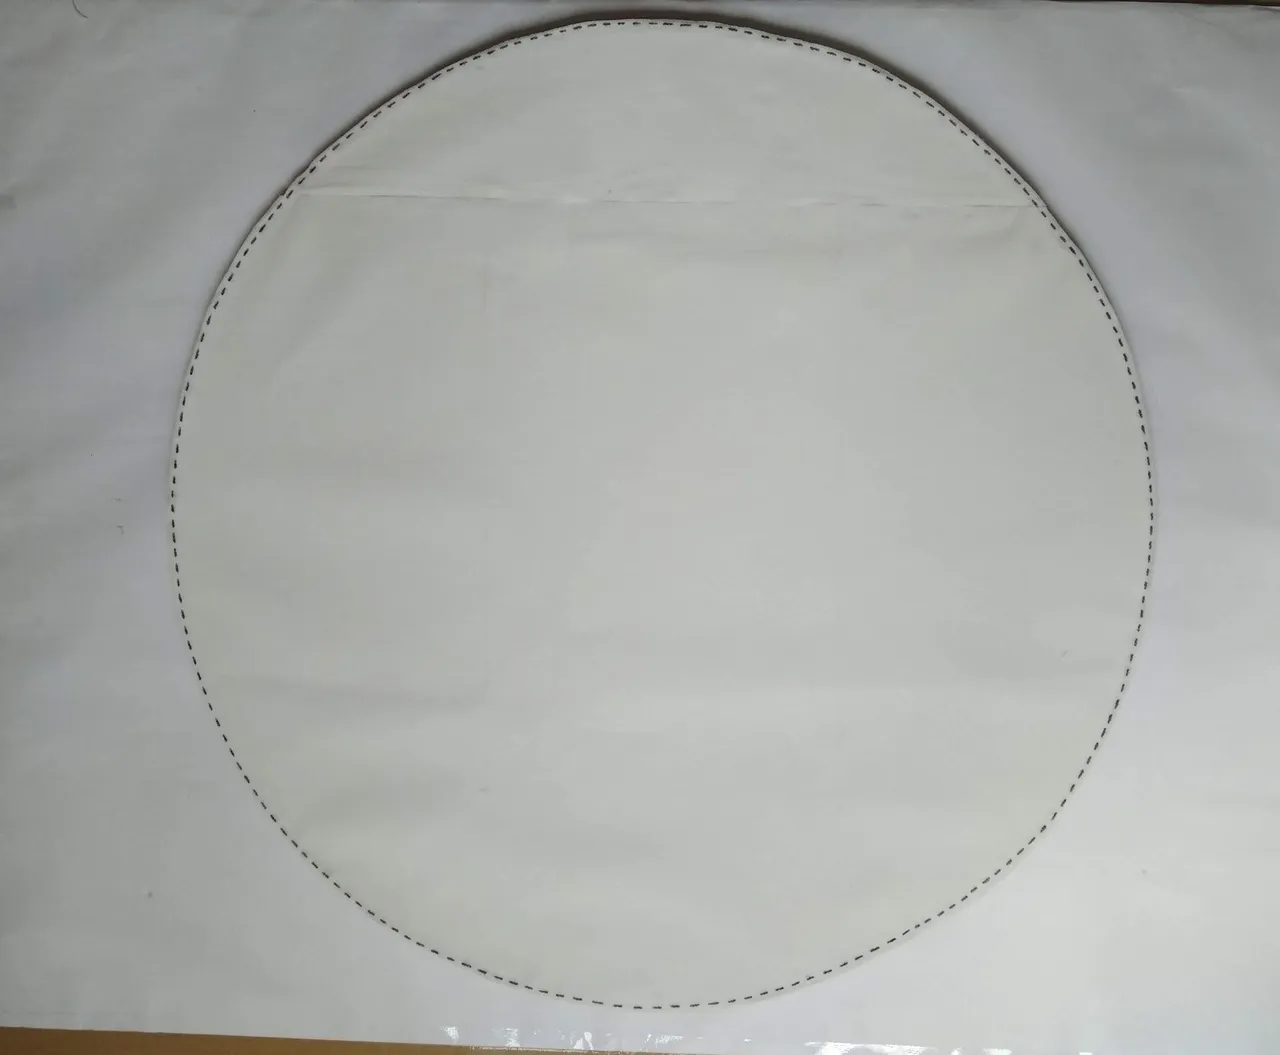
5.- Una vez ensamblada las piezas de cartulinas en una sola figura, tomar el cartón, marcarlo y recortarlo. En este caso, decidí usar un fondo de forma redonda para que hiciera juego con las figuras adicionales que le adornan; pero la base del diseño es a gusto personal de cada persona. Una vez recortada la forma, se debe cubrir los bordes para que se vea más prolijo, en este caso usé cartulina blanca en tiras y que el fondo sería blanco.
5.- Once the pieces of cardboard are assembled into a single figure, take the cardboard, mark it and cut it out. In this case, I decided to use a round shaped background to match the additional figures that adorn it; but the basis of the design is up to each person's personal taste. Once the shape is cut out, the edges should be covered to make it look neater, in this case I used white cardboard in strips and the background would be white.

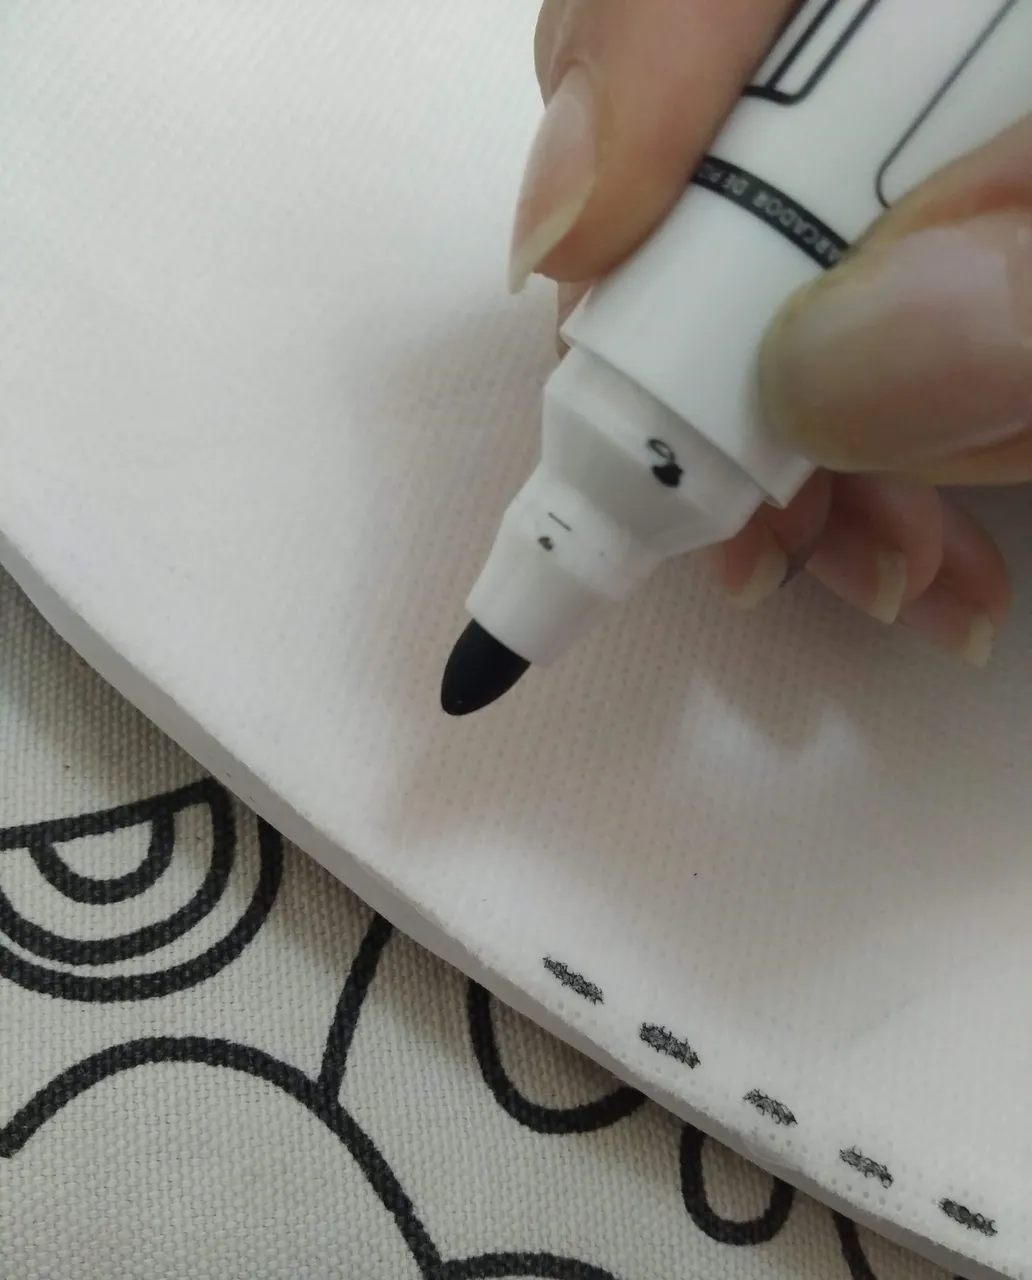
6.- Con los bordes listos, se forra con la tela POP blanca el lado donde se pegará el personaje construido en cartulina, se debe cuidar de que al recortar la tela la misma quede uniforme y pareja con el cartón. Pegar con silicón frío, los bordes se pueden decorar con lo que se desee, puede ser cordones, foami, tela, etc.; en este caso, por practicidad y rapidez, simulé con marcador permanente una costura en tela.
6.- With the edges ready, line the side where the cardboard character will be glued with the white POP fabric, making sure that when the fabric is cut out it is uniform and even with the cardboard. Glue with cold silicone, the edges can be decorated with whatever you want, it can be laces, foami, fabric, etc.; in this case, for practicality and speed, I simulated with permanent marker a seam in fabric.

7.- Una vez se termine la base con los remates deseados, medir y pegar la figura creada, terminar las decoraciones a gusto y listo, a disfrutar de la magia de lo creado.
7.- Once the base is finished with the desired finishes, measure and glue the created figure, finish the decorations to taste and ready, to enjoy the magic of what has been created.
Espero les haya gustado y sobre todo se entusiasmen a crear algo parecido para sorprender a familiares y amigos.
I hope you liked it and, above all, I hope you get excited to create something similar to surprise your family and friends.

Fuente
SALUDOS / REGARDS
Todas las Fotos fueron tomadas con mi teléfono
Contenido original de @keco (fotos y texto) - Todos los derechos reservados Publicado en HIVE así como en mi instagram : http://instagram.com/carton_pintura_algo_mas
All Photos were taken with phone.
Original content from @keco (photos and text) - All rights reserved Posted on HIVE as well as on my instagram: http://instagram.com/carton_pintura_algo_mas