. ..(ENG)
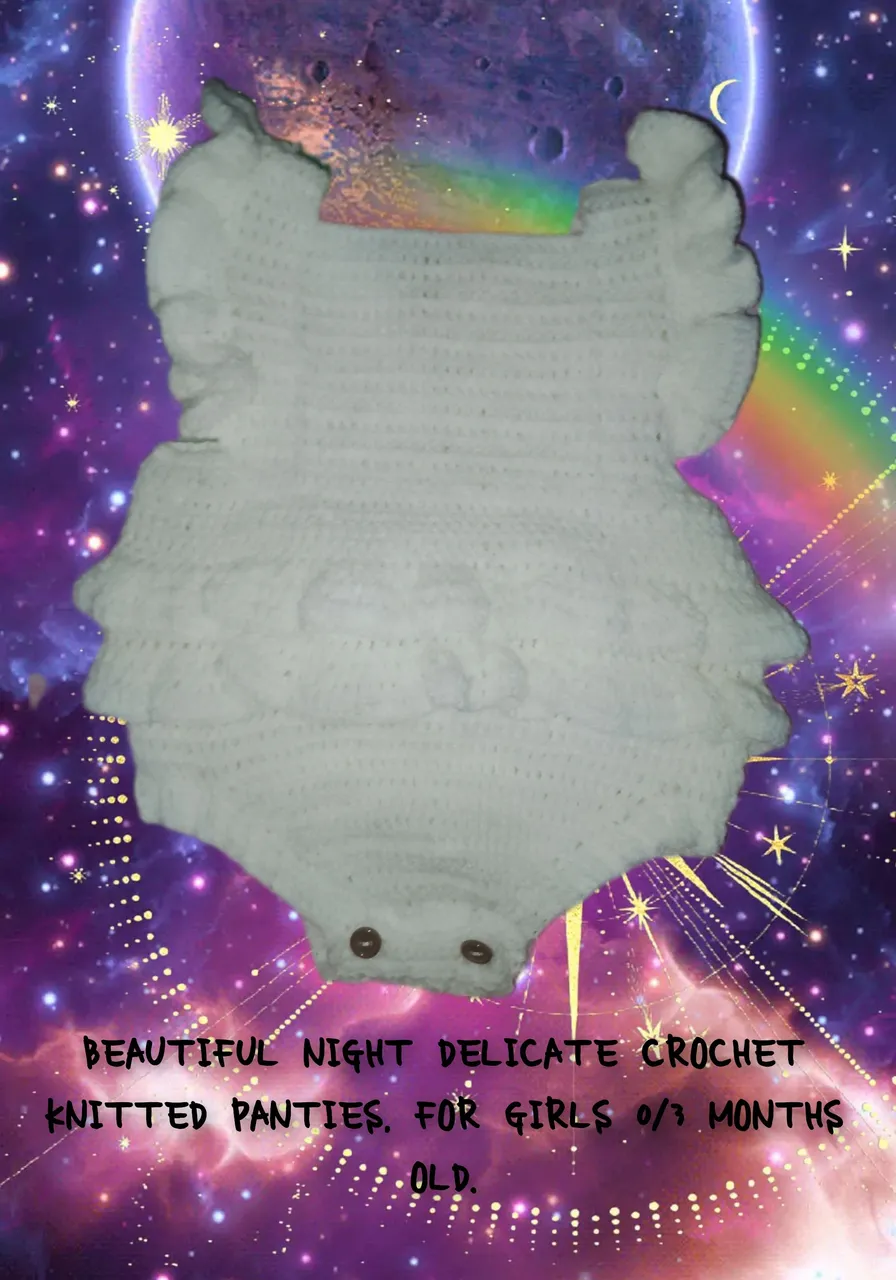
Hello, how pleased I am to be with all of you again at @diyhub, today to show something very beautiful and creative, to make the prettiest and little ones in the house look, it is a very beautiful, Panties, Made with the crochet technique, ideal for use on girls 0/3 months old, it could even be used as a first wear; and its color is very delicate, and its texture is very soft and would protect it from the cold. I invite you. Follow me until the end and I'll show you how to do it.
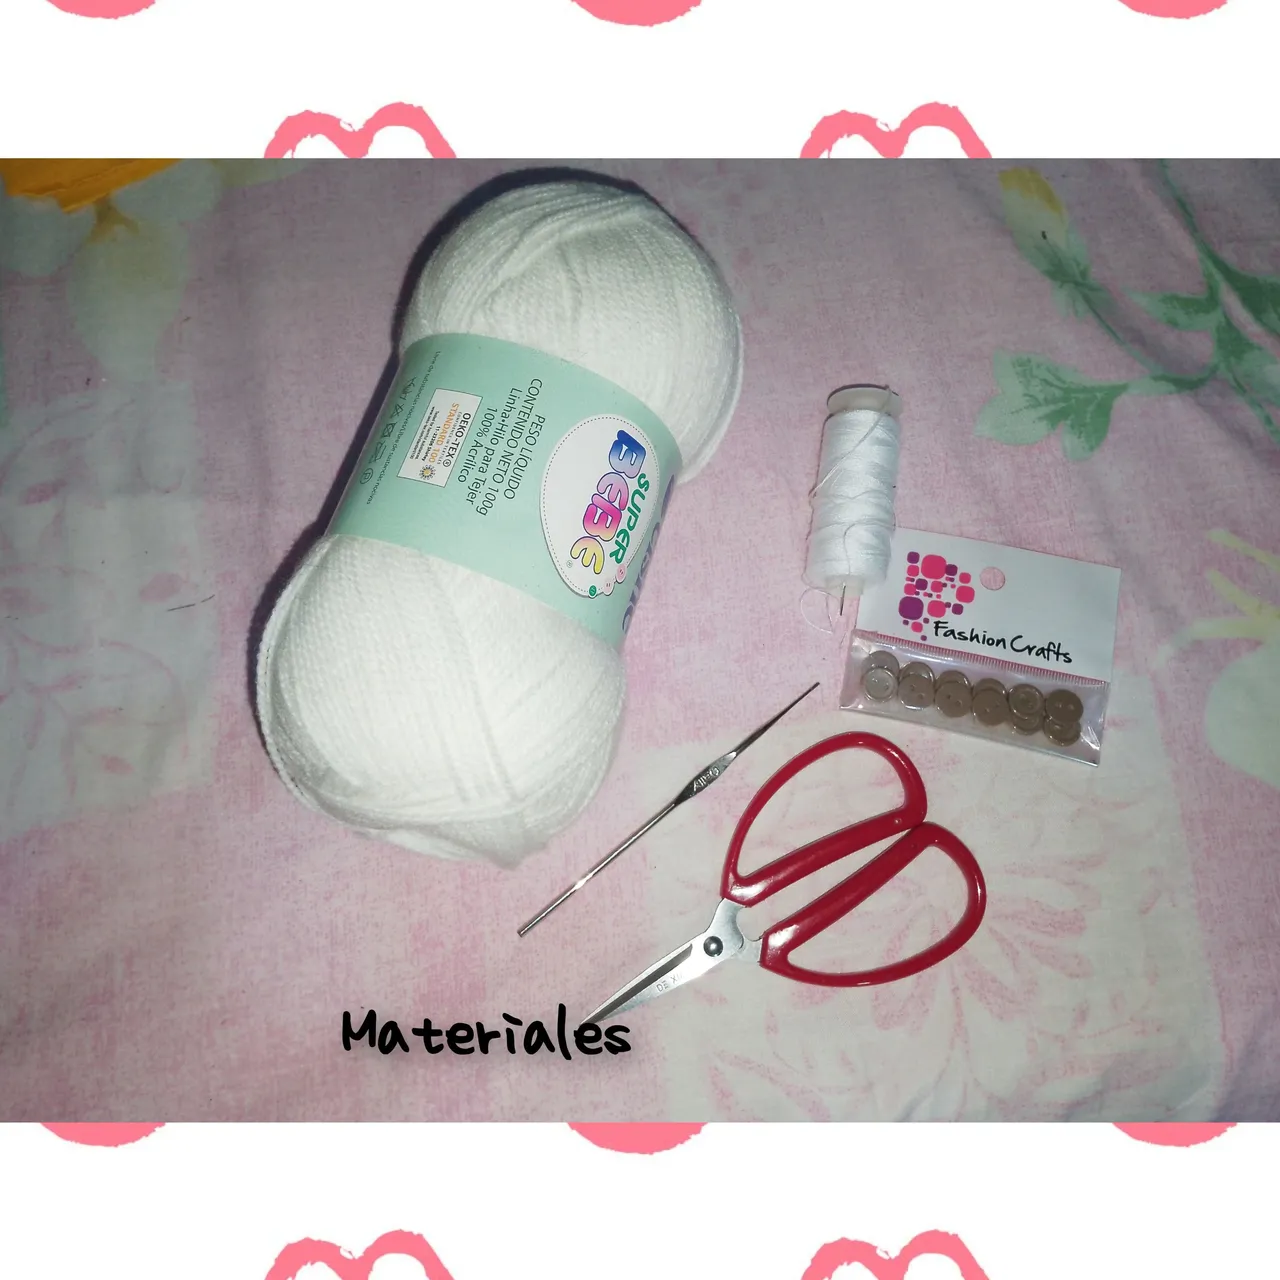
To do this, use the following materials:
. Anti-allergic wool, white.
. Knitting needle.
. Buttons with two eyes, small.
. Scissors.
. Sewing thread.
. Wool needle.
. Sewing needle.
Steps:
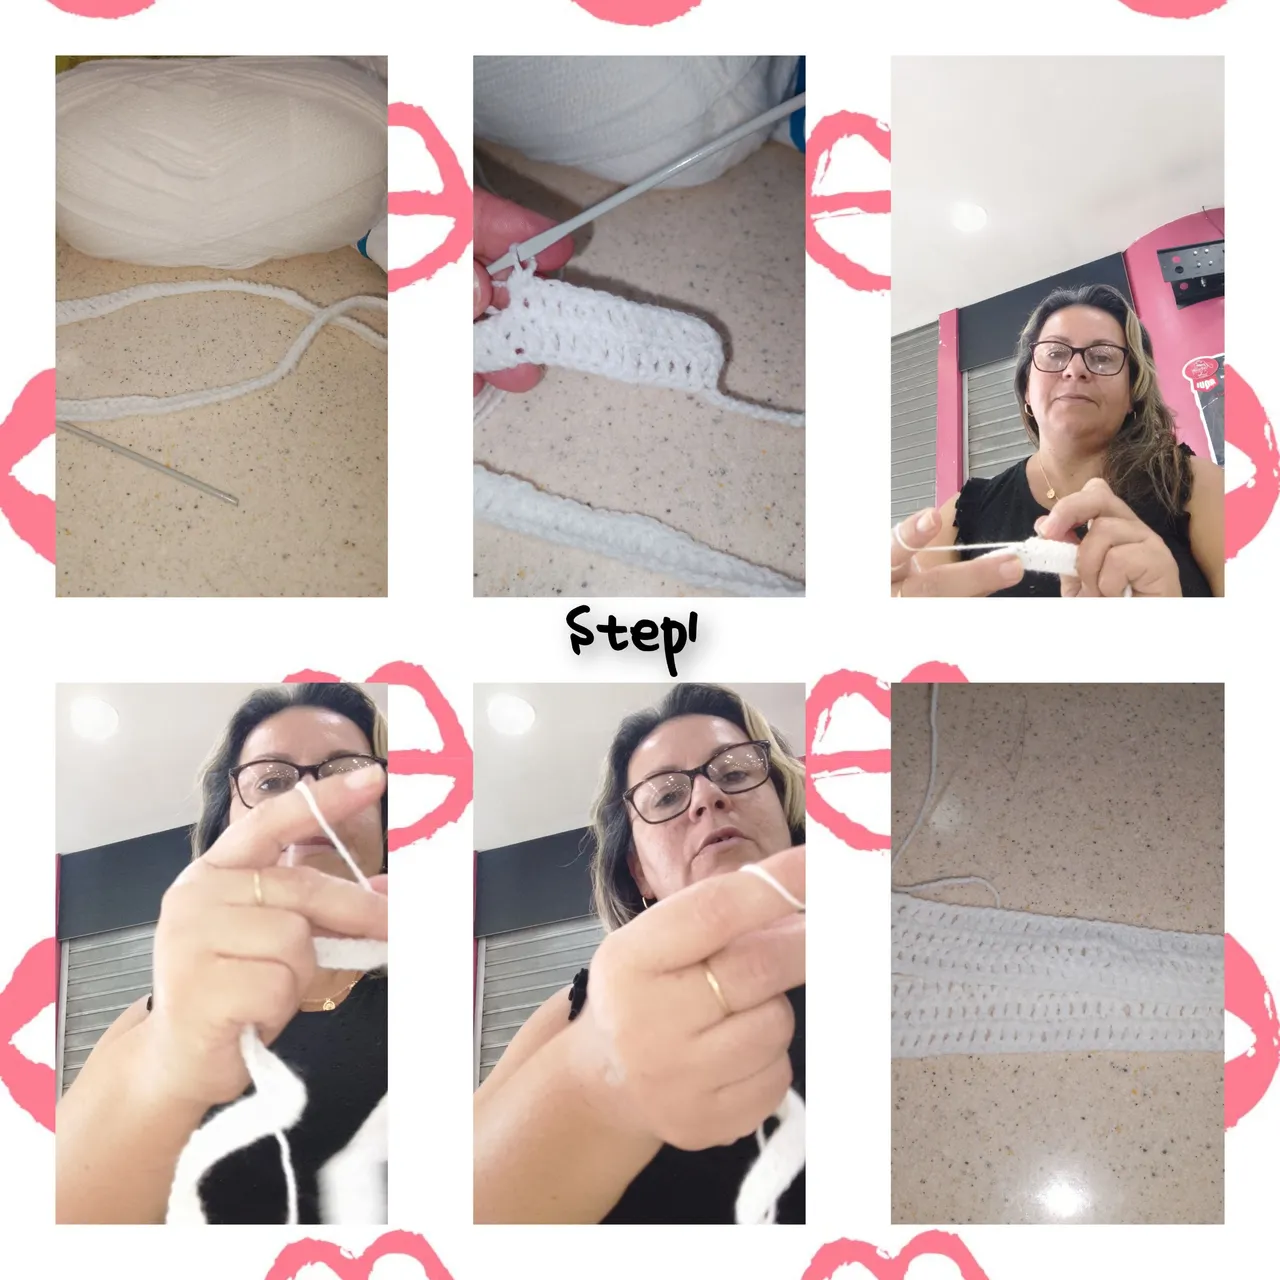
1.) I really enjoyed the first steps, since the making of this beautiful and delicate panty came after having bought some materials. When I left the store, it started to rain, and I went up to a commercial interior to have a coffee. While I was drinking it, I took out my wool and needle and started on my way. Despite not being clear about what I wanted, I still started, because what I was clear about was that I needed to knit, to give a gift to Linda Luciana, when she is born. Her mother loves knitted clothes and had made some advances to me... So based on that, she bequeathed 150 chain points. Then a double crochet in each of them, I knit a ribbon of 5 rows, 150 stitches, per row.
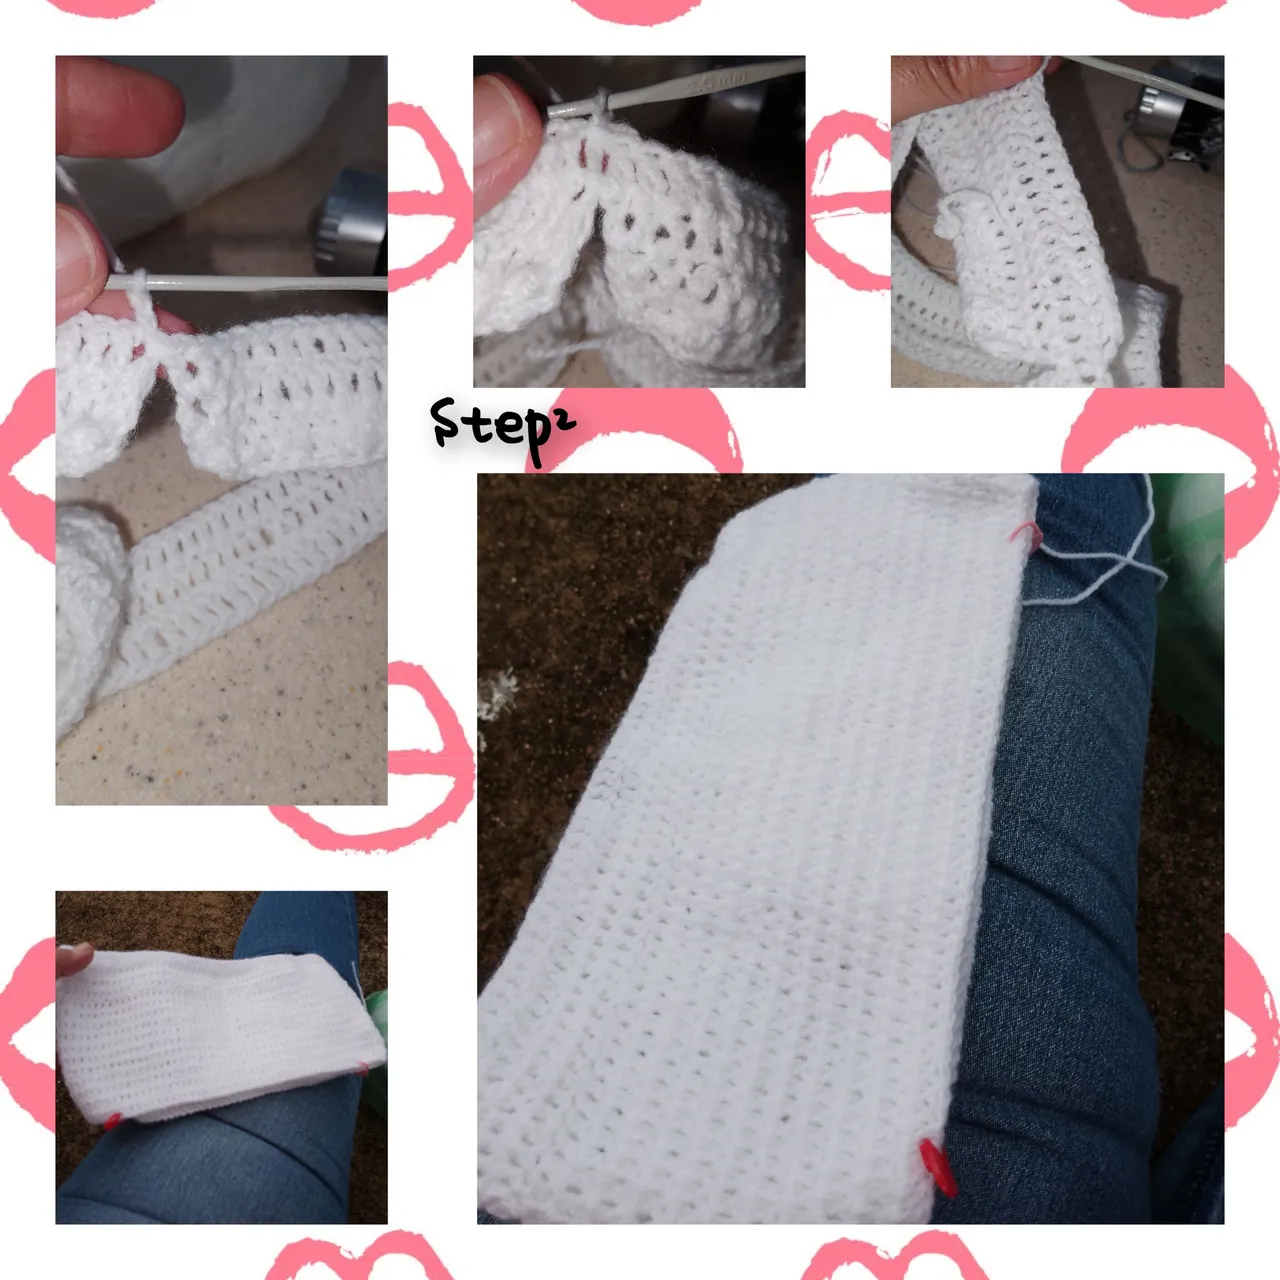
2.) It still hasn't stopped raining, and my husband calls me to find out my location, I send it to him and he tells me it will take a while, since the supervision had been delayed as a result of the rain, I happily tell him, "take the time you need." need "the shopping center closes at nine at night, it's only six." I continue my knitting and glue for the next round, the knitted ribbon and continue now in a circular shape, since I have joined both sides. , to form the part of the pantyhose, when achieving the desired size, mark, past eight double crochets at each of the ends on both sides.
3.) My departure is approaching, I received the call, and I had only made part of the pantyhose. I did this, from the marked points, making decreases at each end of two double crochets together. They tell me to go down. I told my husband to wait until I picked up everything, he went up, he laughs when he sees me knitting. And he gives me the chance to do the other part, the back of the panties, and I didn't waste the offer. I continued.
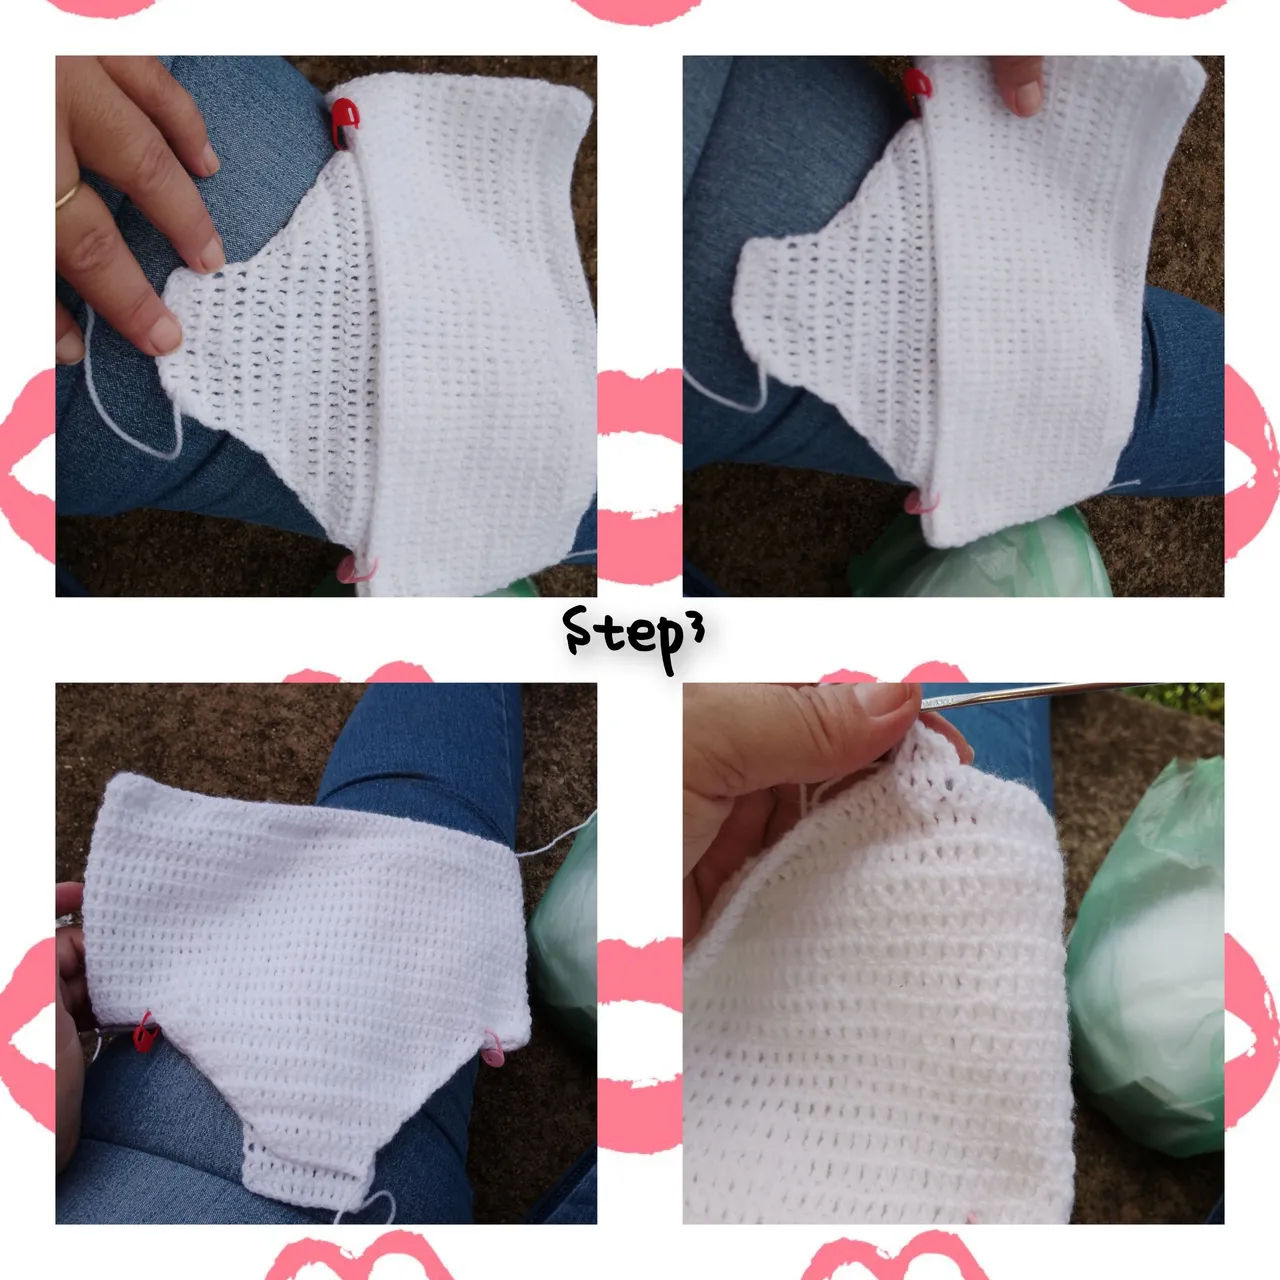
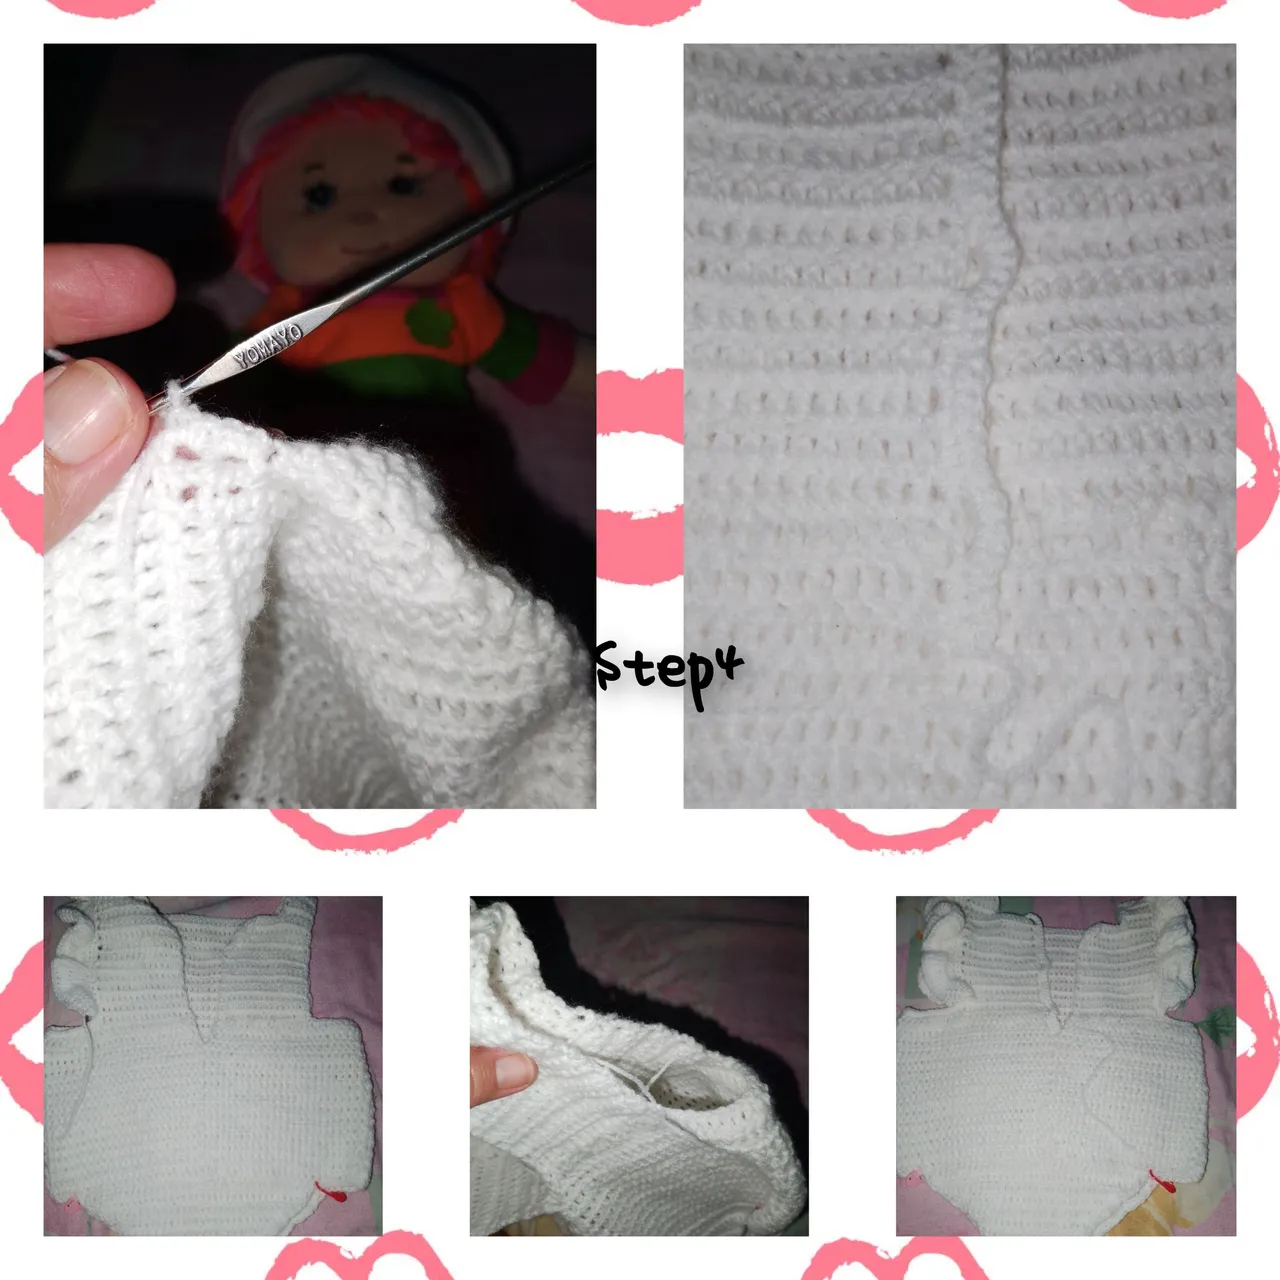
4.) Start. Knitting the bib, to do this, I continue using the markers as a guide, so I knit 15 rows, out of 55, double crochets, achieving this number of rows, for the shot, I knit six double crochets and ten rows for both ends of the bib. For the back part, I knit in two parts to leave an opening for the buttons, and I repeat the same step for the shots, and with slipped stitches, I glue the front and back shots. Then I knit in the opening, single crochets and three spaces of two chain stitches, for the buttonholes. To collect and give shapes to the sleeves, I knit half stitches, then two half stitches in each, single crochet from the previous round, Lara the next row, after two stitches an increase of twodouble crochet, for the next round, a double crochet, in each double crochet, I repeat for the next sleeve.
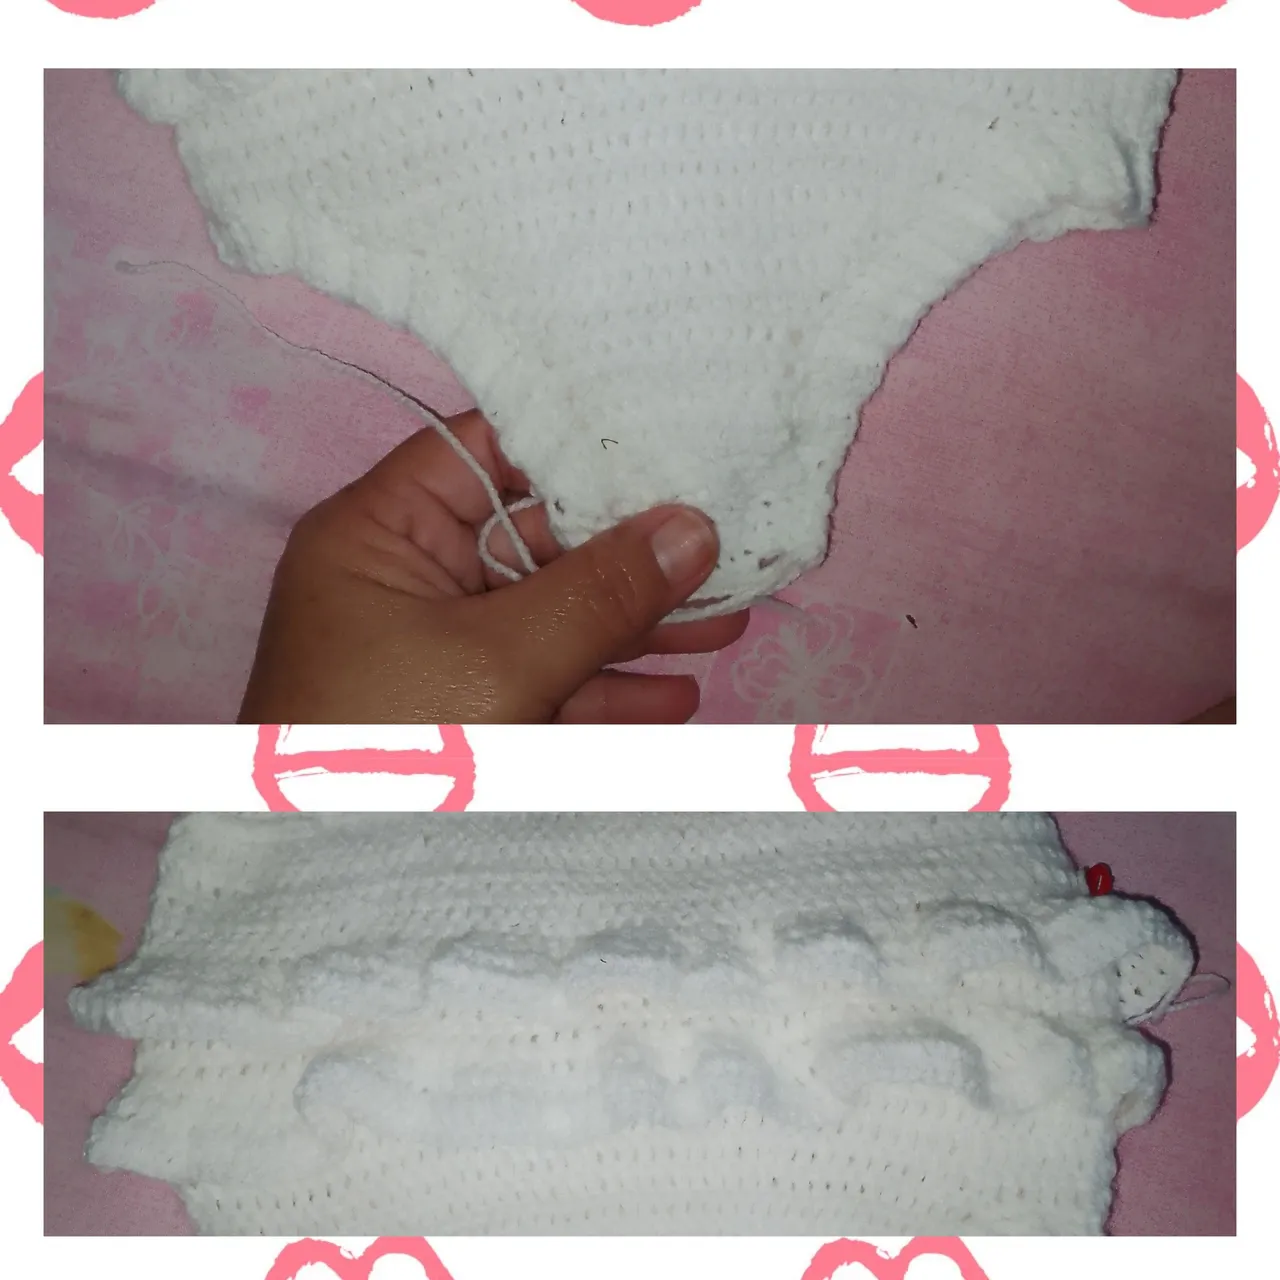
5.) For the contour of the legs and between the legs, I will knit one round of single crochets, and four rounds in a gradient of two stitches (two below and two above) to give an elastic effect. Likewise, I will do one last turn around the crotch to place the buttons, making two buttonholes.
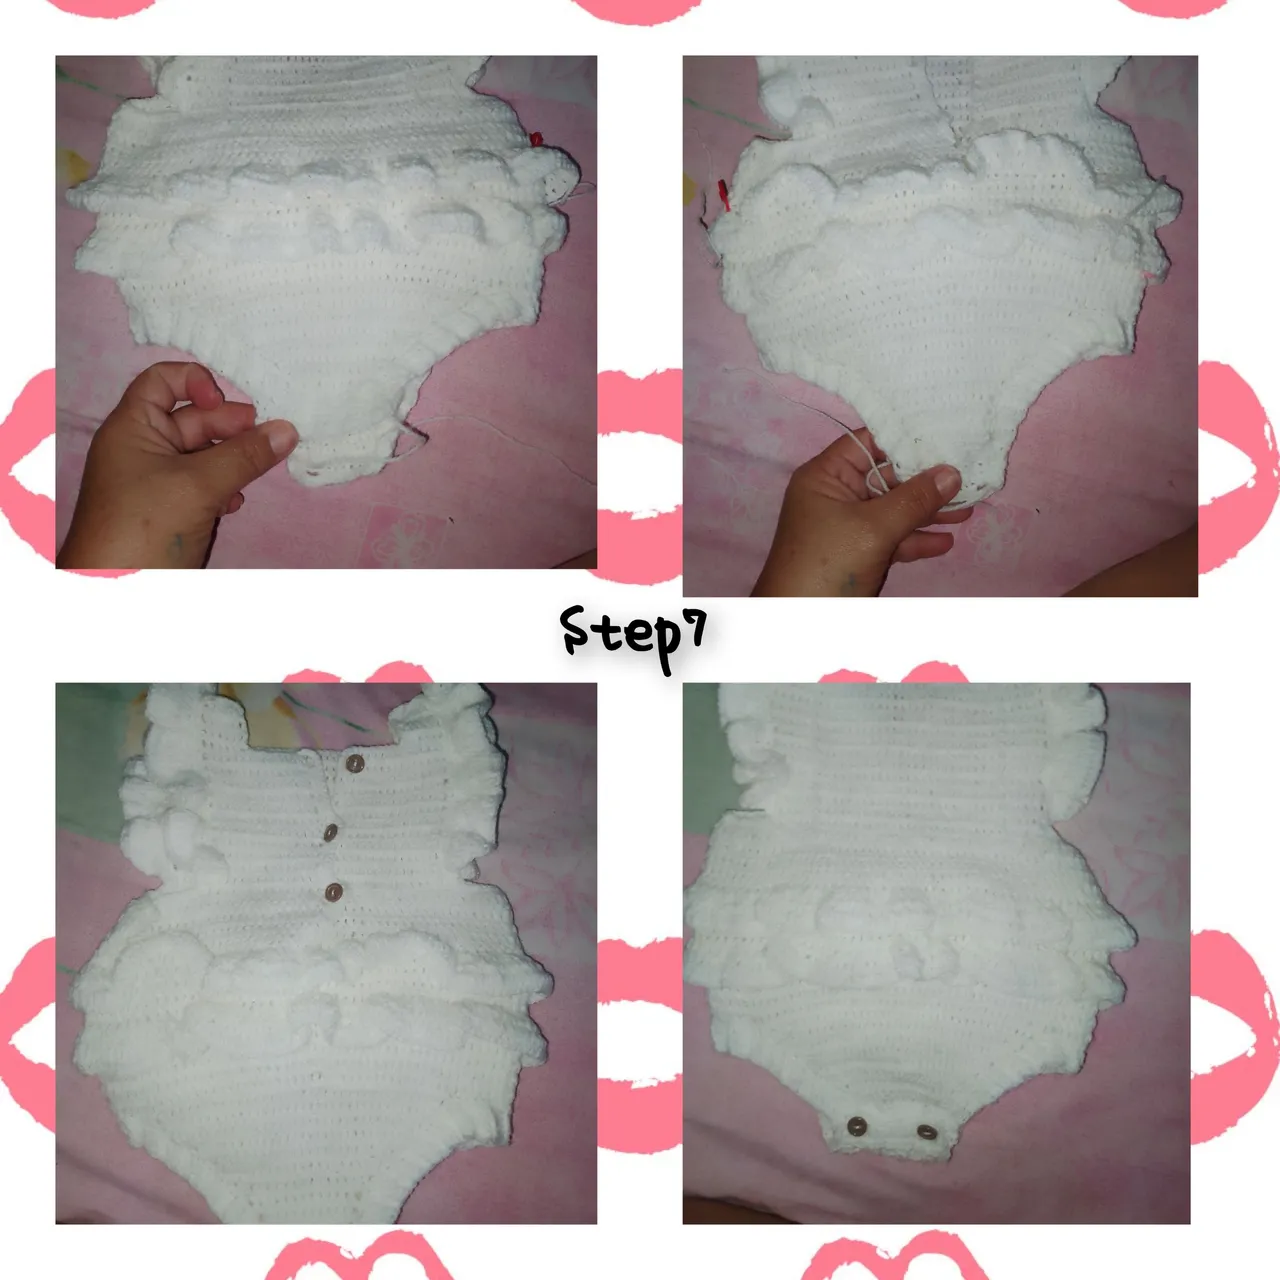
6/7) Finally, I glue the buttons and make the residue of the threads left during cutting disappear with the wool needle.
. All photos are my property.
. Use incollage
. Use language translator.
Grateful as always, for your visit to my blog, it is always a pleasure to show you my most recent publications. I hope you liked it and enjoyed it, until the next opportunity.
(ESP)
Hola, que gusto me da, al estar de nuevo con todos ustedes en @diyhub, hoy para mostrar algo muy bonito y creativo, par hacer lucir a las mas linda y pequeñitas de la casa, se trata de una muy hermosa, Braga, Hecha con la técnica de crochet, ideal para usar en niñas de 0/3meses de nacida, incluso podría, ser usada como primera puesta,;y que su color es muy delicado, y su textura muy suave y la protegería de el frío. Les invito. Seguirme hasta el final y les muestro como hacerla.
Para ello use los siguientes materiales'
. Lana antialérgica, de color blanca.
. Aguja de tejer.
. Botones dos ojos, pequeños.
. Tijeras.
. Hilo de coser.
. Aguja lanera.
. Aguja de coser.
Pasos:
1.) Disfrute muchos los primeros pasos, ya que la elaboración de esta hermosa y delicada braga, surgió, luego de haber comprado algunos, materiales. Al salir de la tienda, comenzó a llover, y subí a un dentro comercial, a tomar un café, mientras lo tomaba, saque mi lana y la aguja y emprendo el camino. A pesar de no tener claro lo que quería aún comencé, porque lo que si estaba clara, es que necesitaba, tejer, para dar un regalo, a la Linda Luciana, cuando Nazca. Su madre adora las ropa tejidas y me había hecho algunas insinuaciones... Así que basado en eso, legó 150 puntos cadenas. Luego un punto alto en cada una de ellas, tejo un liston de 5 vueltas, de 150 puntos, por vuelta.
2.) Aún no deja de llover, y mi esposo me llama para saber mí ubicación, se la envio y me dice que tardara, ya que la supervisión, había tardado a consecuencia de la lluvia, le digo feliz, "tome el tiempo que necesite" el centro comercial lo cierran a las nueve de la noche, apenas son las seis". Continúe mi tejido. Retomo el tejido y pego para la siguiente vuelta, el listón tejido y continuo ahora en forma circular, ya que he unido ambos lados, par formar la parte de la pantis, al lograr el tamaño deseado, marco, pasado ocho puntos altos en cada uno de los extremos en ambos lados.
3.) ya se acerca mi partida, recibí la llamada, y había hecho sólo una parte de la pantis. Está la hice, desde los puntos marcados, haciendo disminuciones en cada extremo de dos puntos altos juntos. Me dicen que bajo. Le dije a mi esposo que espere que recogí todo, el subió, se ríe cuando me ve tejer. Y me da chance de hacer la otra parte, la tracera de la pantis, y no desaproveche la oferta. Seguí.
4.) Comienzo. Tejer la pechera, para ello, sigo tomando como guía los marcadores, así que tejo 15 vueltas, de 55, puntos altos, logrado está cantidad de vueltas, para el tiro, tejo seis puntos altos y diez vueltas para ambos extremos de la pechera. Para la parte tracera, tejo en dos partes para dejar una abertura, para los botones, y repito para los tiros el mismo paso, y con puntos deslizados,pego el tiro delantero y tracero. Luego tejo en la abertura, puntos bajos y tres espacios de dos puntos cadenas, para los ojales. Para recoger y dar formas en las mangas, tejo medios puntos, luego dos medios puntos en cada, punto bajo de la vuelta anterior, Lara la siguiente pasada, luego de dos puntos un aumento de dos puntos altos, para lo siguiente vuelta, un punto alto, en cada punto alto, repito par la siguiente manga.
5.) Para el contorno de las piernas y entre piernas, tejere una vuelta de puntos bajos, y cuatro vueltas en degradado de dos puntos ( dos por debajo y dos por arriba) para dar efecto de elástico. Así mismo daré una última vuelta a la entrepierna para colocar los botones, haciendo dos ojales.
6/7) finalmente, pego los botones y hago desaparecer con la aguja lanera los residuos de los hilos, dejado durante el corte de los mismos.
. Todas las fotos son de mí propiedad.
. Use incollage
. Use traductor lenguaje.
Agradecida como siempre, por su visita a mí blog, siempre es un gusto mostrarles, mís más recientes publicaciones. Deseo les haya gustado y disfrutado, será hasta una próxima oportunidad.