(ENG)
Good night everyone, at @diyhub, I am very happy to be with you, hoping in God that you are well, that this is a great week, full of many good and productive things, that great and new ideas flow through you. On this occasion I come to show you a very simple tutorial, where I show you how to decorate a metal headband, using crochet techniques. Ideal to make those beautiful and spoiled princesses of the house look beautiful. I invite you to follow me and I show you the process. I hope you enjoy it and are encouraged to make the darlings of the house, I'm sure you'll love it.
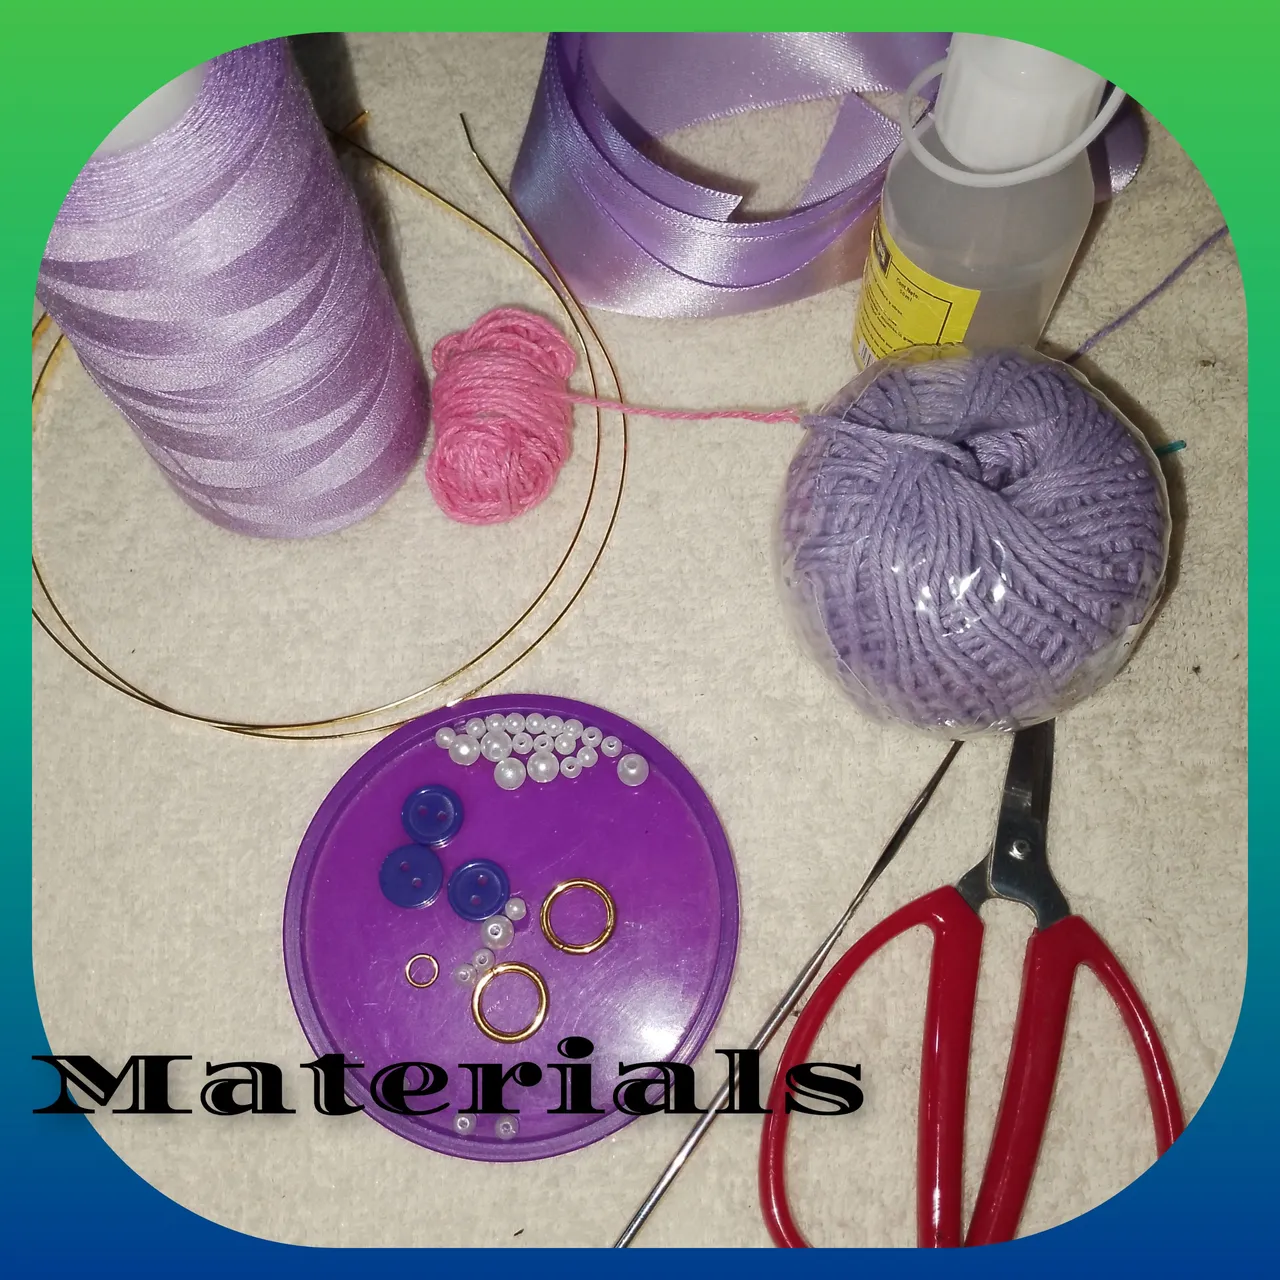
Materials:
. Metal headband.
. Small metal hoop.
. Glue.
. Threads for knitting, colors (purple and pink)
. Knitting needle.
. Sewing needle and thread.
. White pearls.
. Scissors.
. Thick purple ribbon.
. Small purple buttons.
Steps:
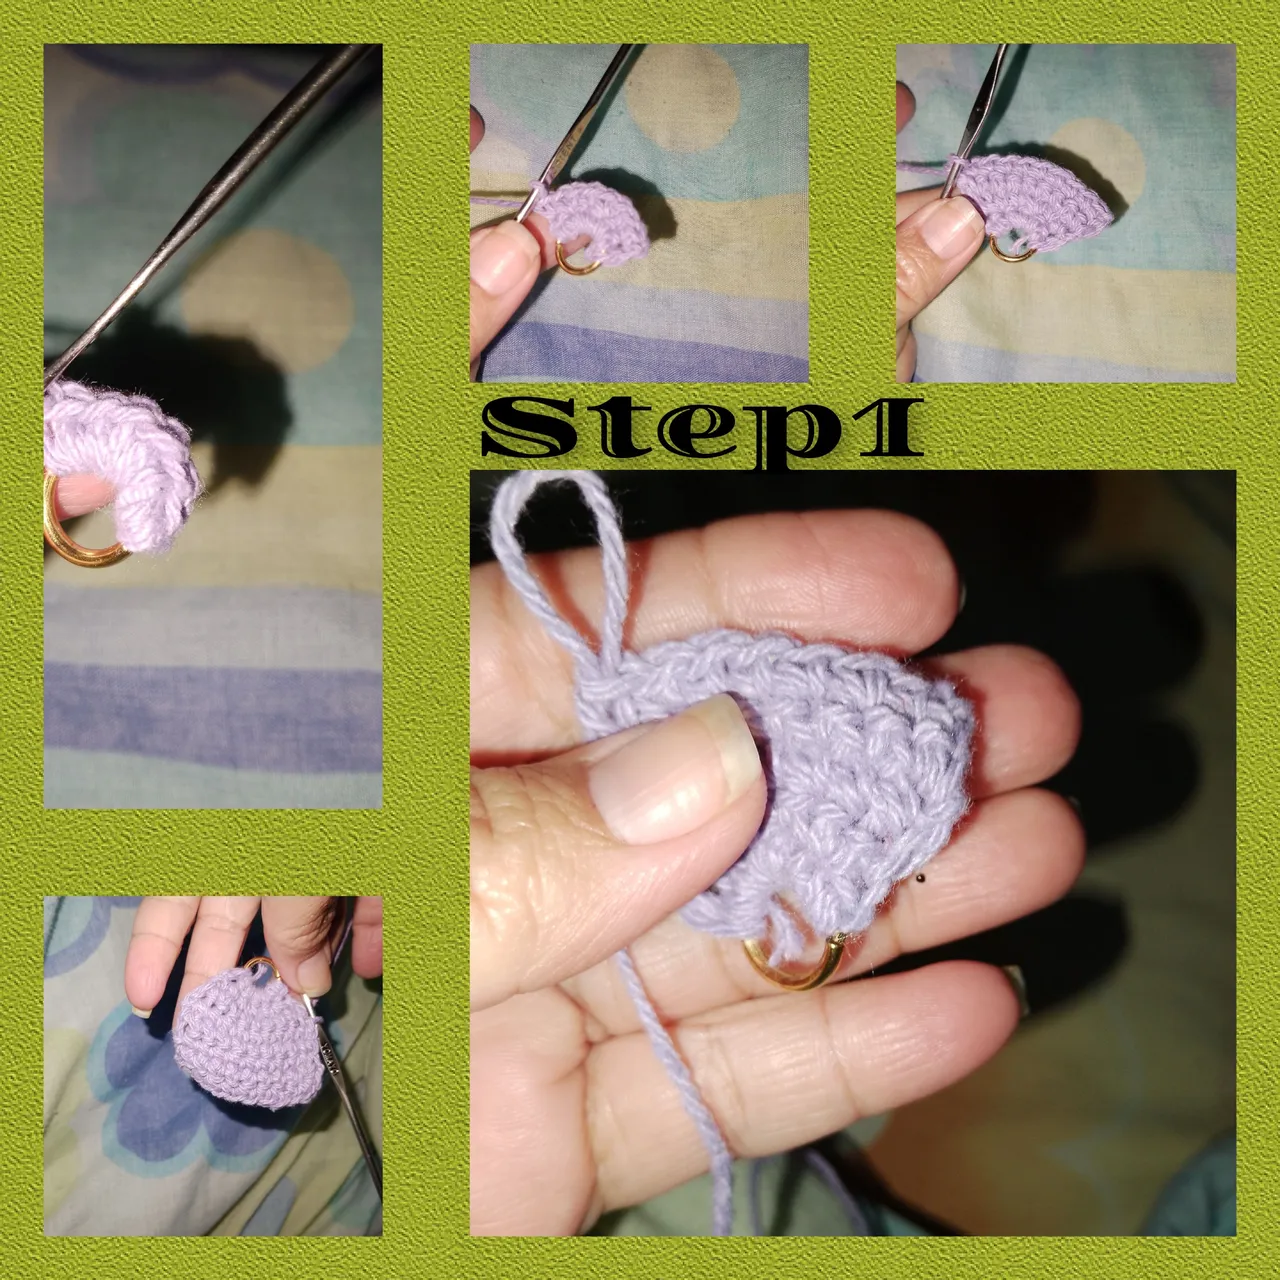
1.) I start knitting, using the purple thread, I knit in one space, eight half stitches, I turn and knit one half stitch followed by an increase, to obtain twelve half stitches, I continue turning the fabric, but in the next six, without making increases, that is, I continue knitting twelve half stitches.
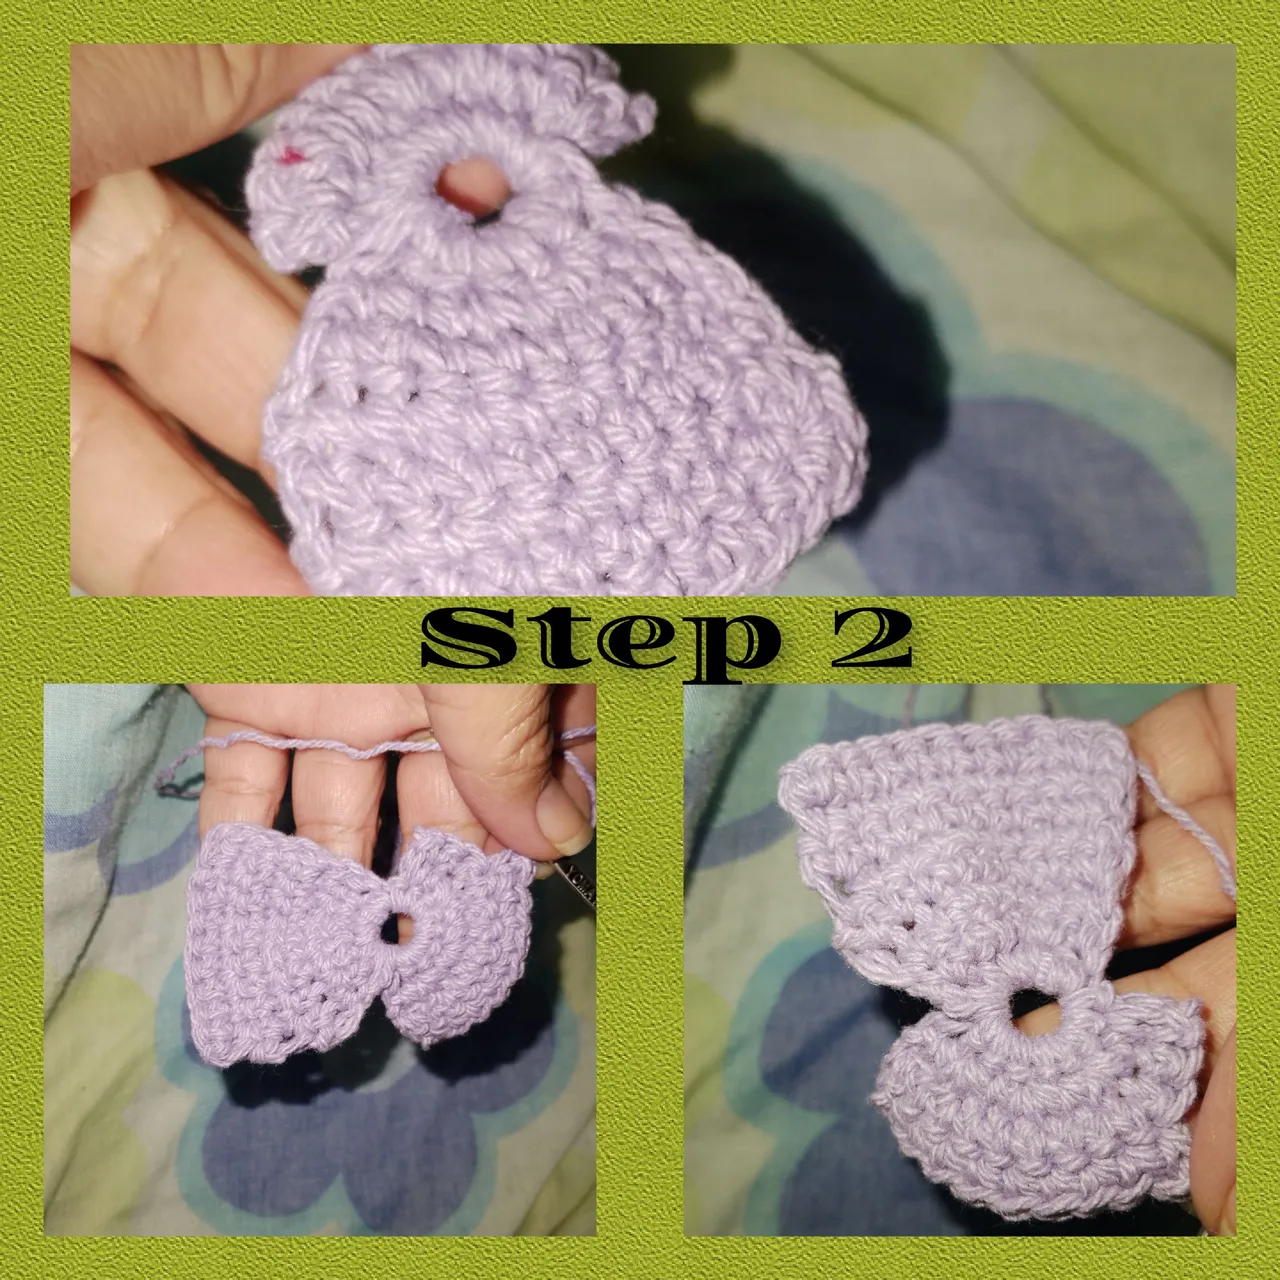
2.) knitting, slipped stitches, I position myself, again on the metal hoop, so I repeat the process, on the next side. I cut the thread and finish off. Thus obtaining a nice and delicate bow
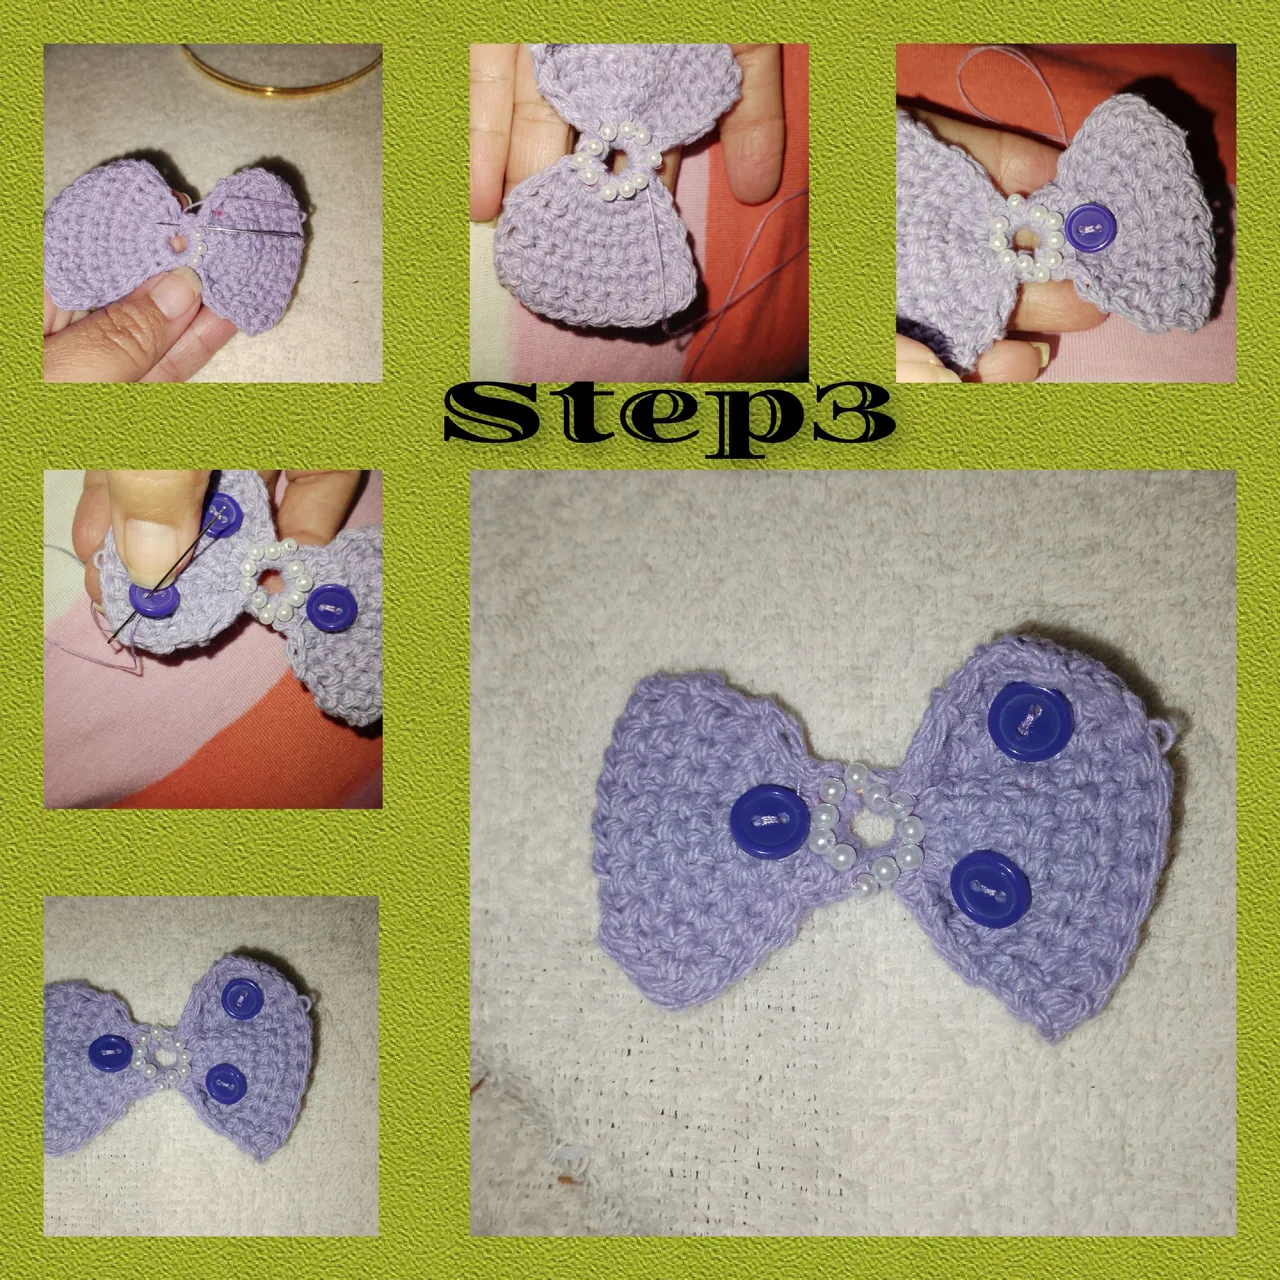
3.) With the thread and sewing needle, I glue pearls in the center of the bow and alternate the buttons.
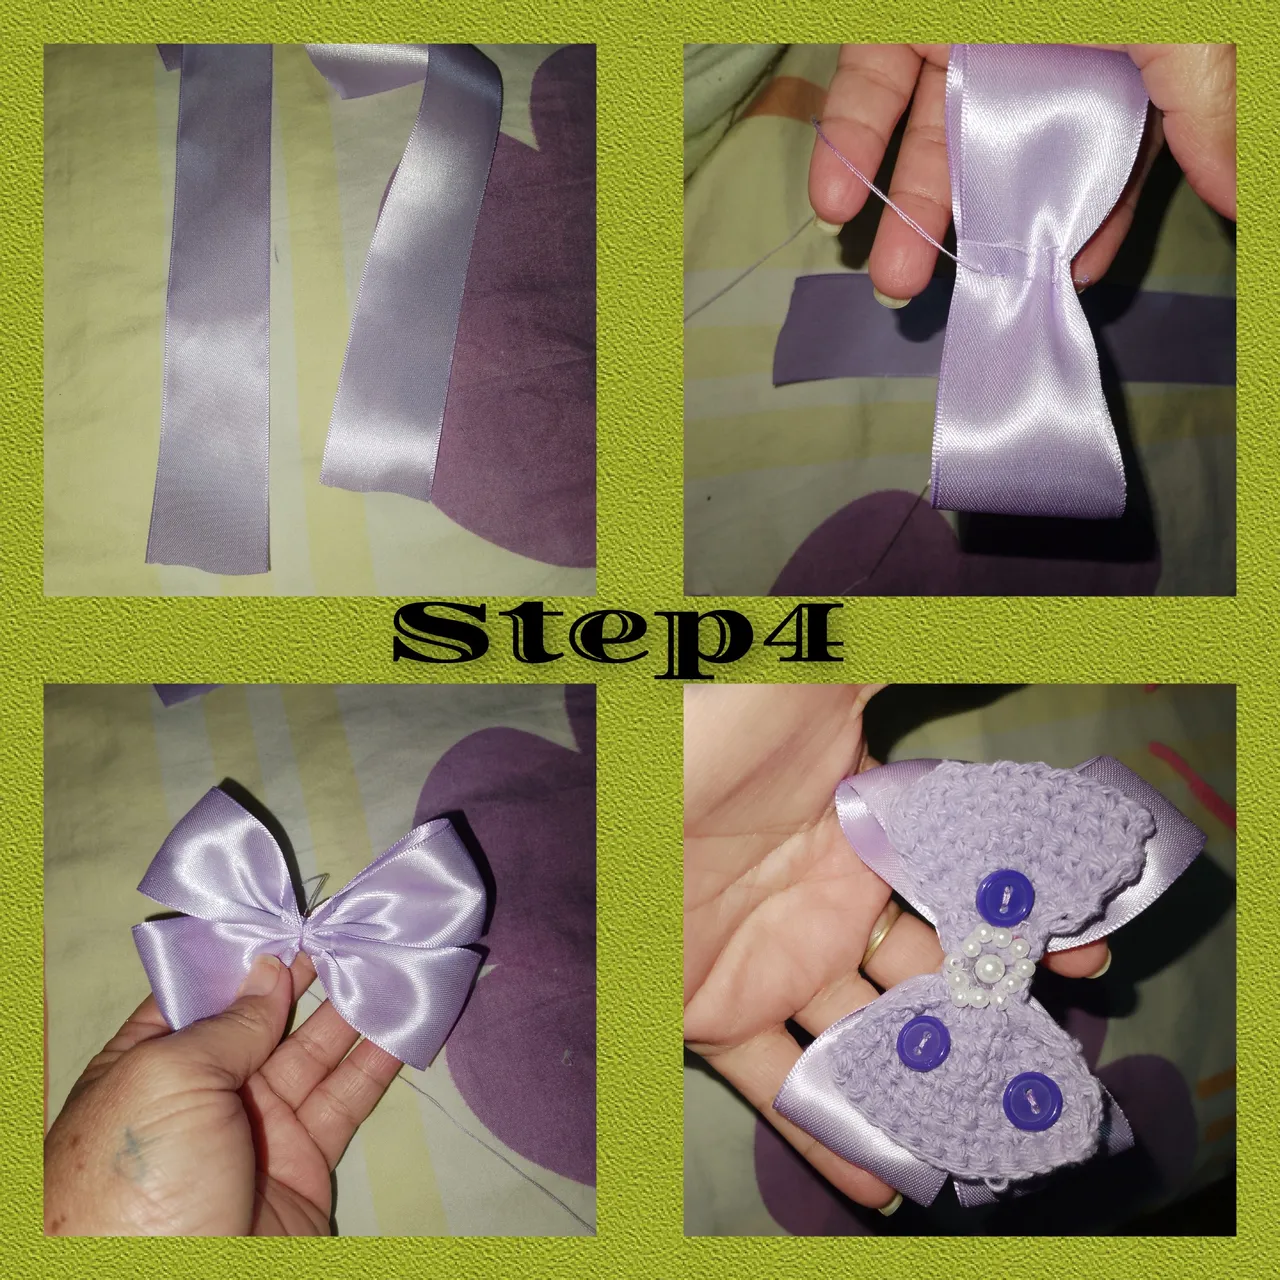
4.) Cut two pieces of thick purple ribbon, both the same size, put together two bows and one, then glue the crocheted bow on top.
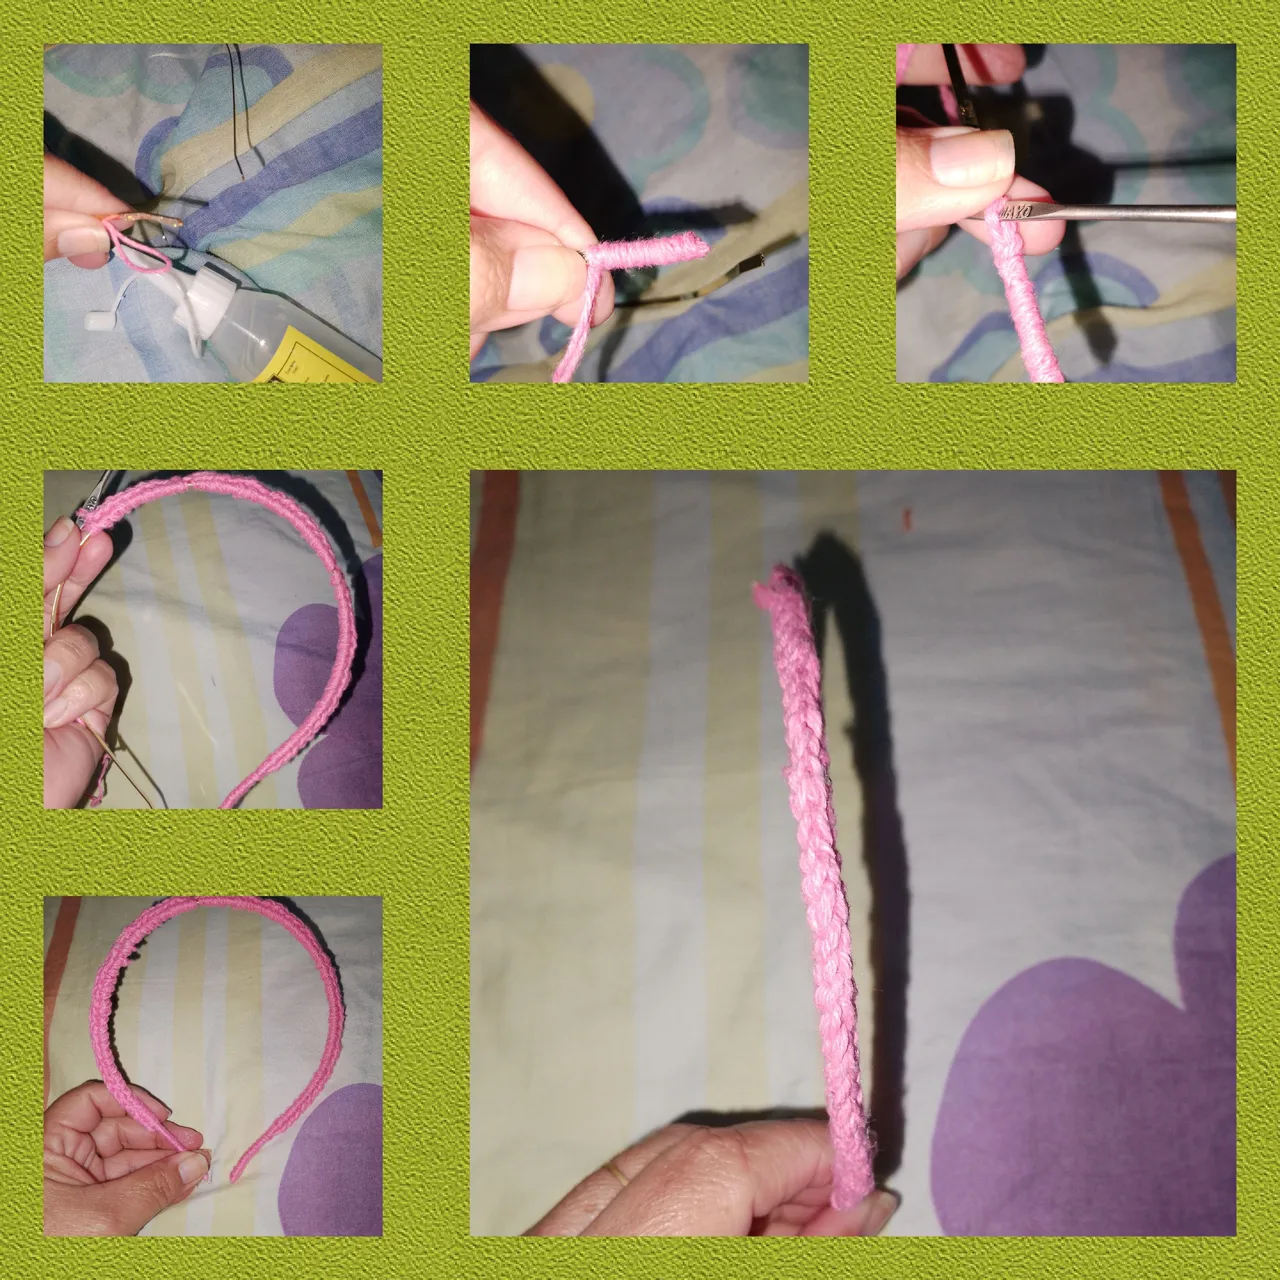
5.) To cover the headband, I begin to go around at the beginning of the metal headband, then I stop and begin to knit half stitches, until it is covered, almost completely and considering the starting space and I repeat, for this I have used pink thread.
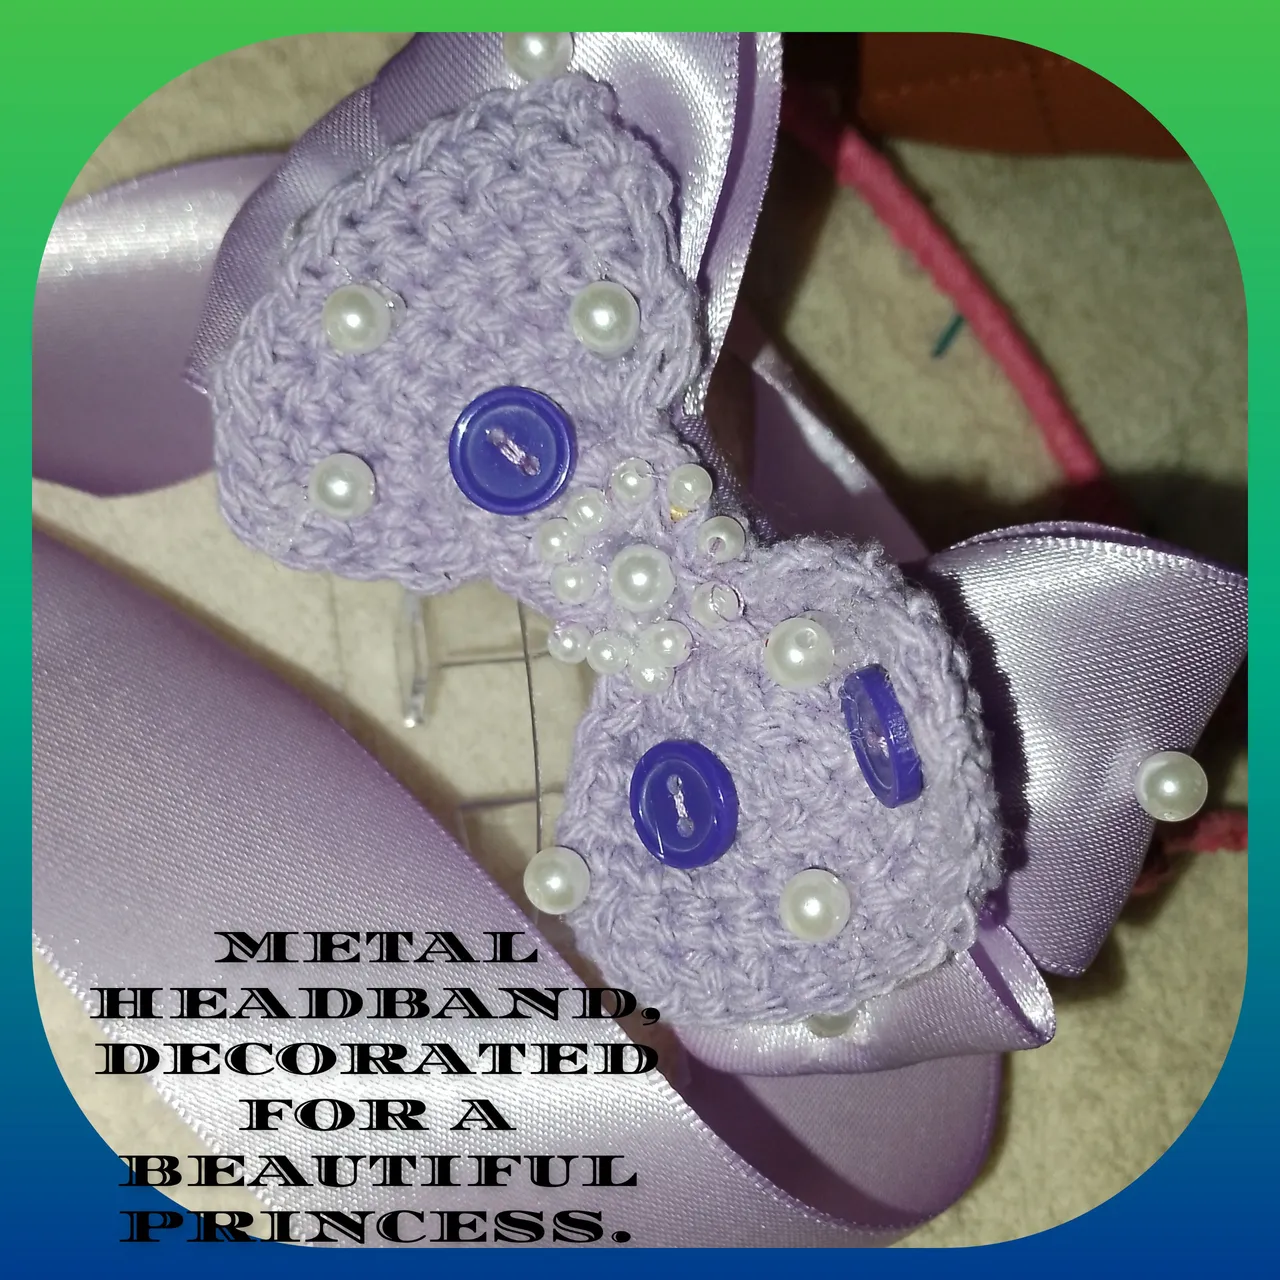
6.) After lining or covering the headband, I apply glue and glue the bow and on it some pearls, likewise on the bow made of silk ribbon... done this, I glue some pearls on the headband
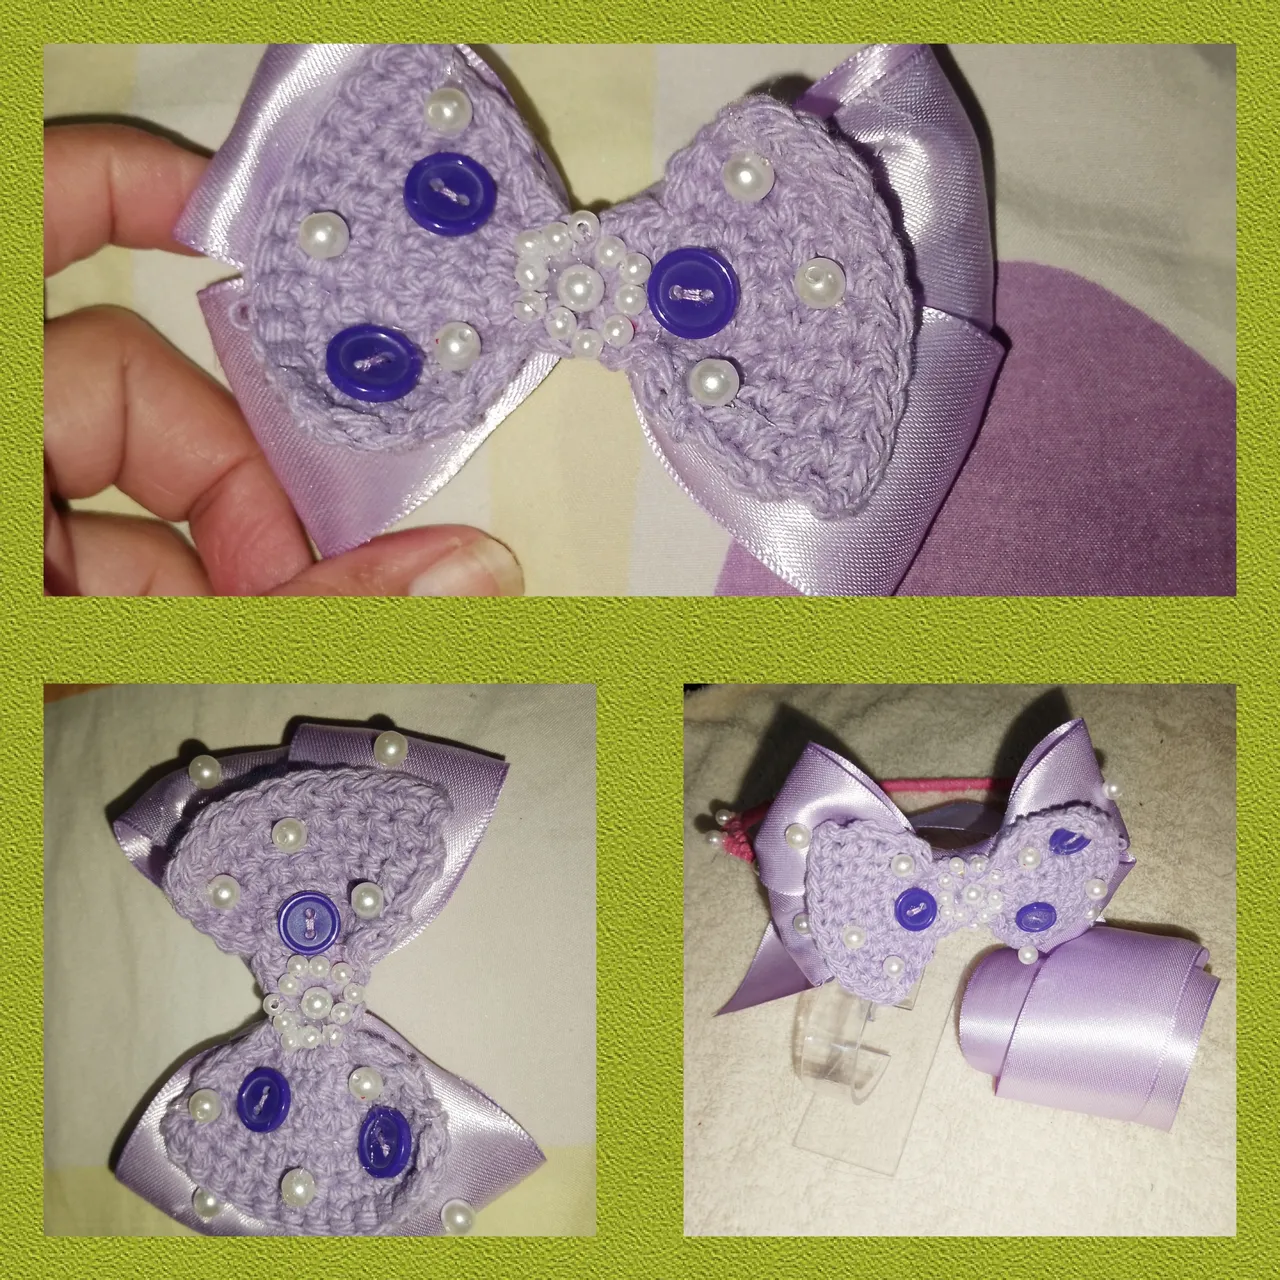
In this way, she shows off the already decorated headband, very pleased and satisfied with the final result.
. Use gifs videos for presentation. . Use incollage to show the steps.
. Use language translator.
Grateful for your visit to my blog, you are always welcome. I wish to be with you in the next opportunity.
Muy buen noche a todos, en @diyhub, me da mucho gusto estar con ustedes, esperando en Dios, se encuentren bien, que está sea una gran semana, llena de muchas cosas buenas y productivas, que fluya en ustedes grande y novedosas ideas. En esta oportunidad vengo, a mostrarles un muy sencillo, tutorial, dónde les muestro colo decorar un cintillo de metal, usando las técnicas de crochet. Ideal para hacer lucir a esa princesas hermosas y consentidas de la casa. Les invito a seguirme y les muestro el proceso. Espero lo disfruten y se animen, a realizar a las consentidas de la casa, de seguro les encantará.
Materiales:
. Cintillo de metal.
. Arito pequeño de metal.
. Pégamento.
. Hilos para tejer, colores ( morado y rosado)
. Aguja par tejer.
. Aguja par coser e hilo.
. Perlas de color blanco.
. Tijeras.
. Cinta gruesa de color morado.
. Botones pequeños de color morado.
Pasos:
1.) comienzo a tejer, usando el hilo de color morado, tejo en un espacio, ocho medios puntos, doy vueltas y tejo un medio puntos seguido de un aumentos, para obtener doce medios puntos, sigo dando vueltas a el tejido, pero en la seis siguientes, sin hacer aumentos, es decir continuo tejiendo doce medios puntos.
2.) tejiendo, puntos deslizados, me ubico, nuevamente en el aro de metal, así que repito el proceso, en el siguiente lado. Corto el hilo y remato. Obteniendo así, un lindo y delicado lazo
3.) Con el hilo y aguja de coser, pego perlitas por el centro de el lazo y alterno, los botones.
4.) Corto, dos trozos de cinta gruesa de color morado,ambas de mismo tamaño, armó dos lazos y uno, luego sobre el pego el lazo tejido a crochet.
5.) Para forrar el cintillo, comienzo, a dar vueltas en el inicio de el cintillo de metal, luego hago un alto y comienzo a tejer medios puntos, hasta cubrirlo, casi por completo y considerando el espacio de inicio y repito, para esto he usado el hilo de color rosado.
6.) Luego de forrar o cubrir el cintillo, aplico pegamento y pego el lazo y sobre el algunas perlas así mismo en el lazo hecho, de cinta de seda...hecho esto, pego algunas perlas sobre, el cintillo
De esta manera, luce el cintillo ya decorado, muy complacida y satisfecha con el resultado final.
. Use gifs videos, para la presentación.
. Use incollage para mostrar los pasos.
. Use traductor lenguaje.
Agradecida por su visita, a mí blog, siempre serán bienvenidos. Deseo estar con ustedes en un próxima oportunidad.