(ENG)
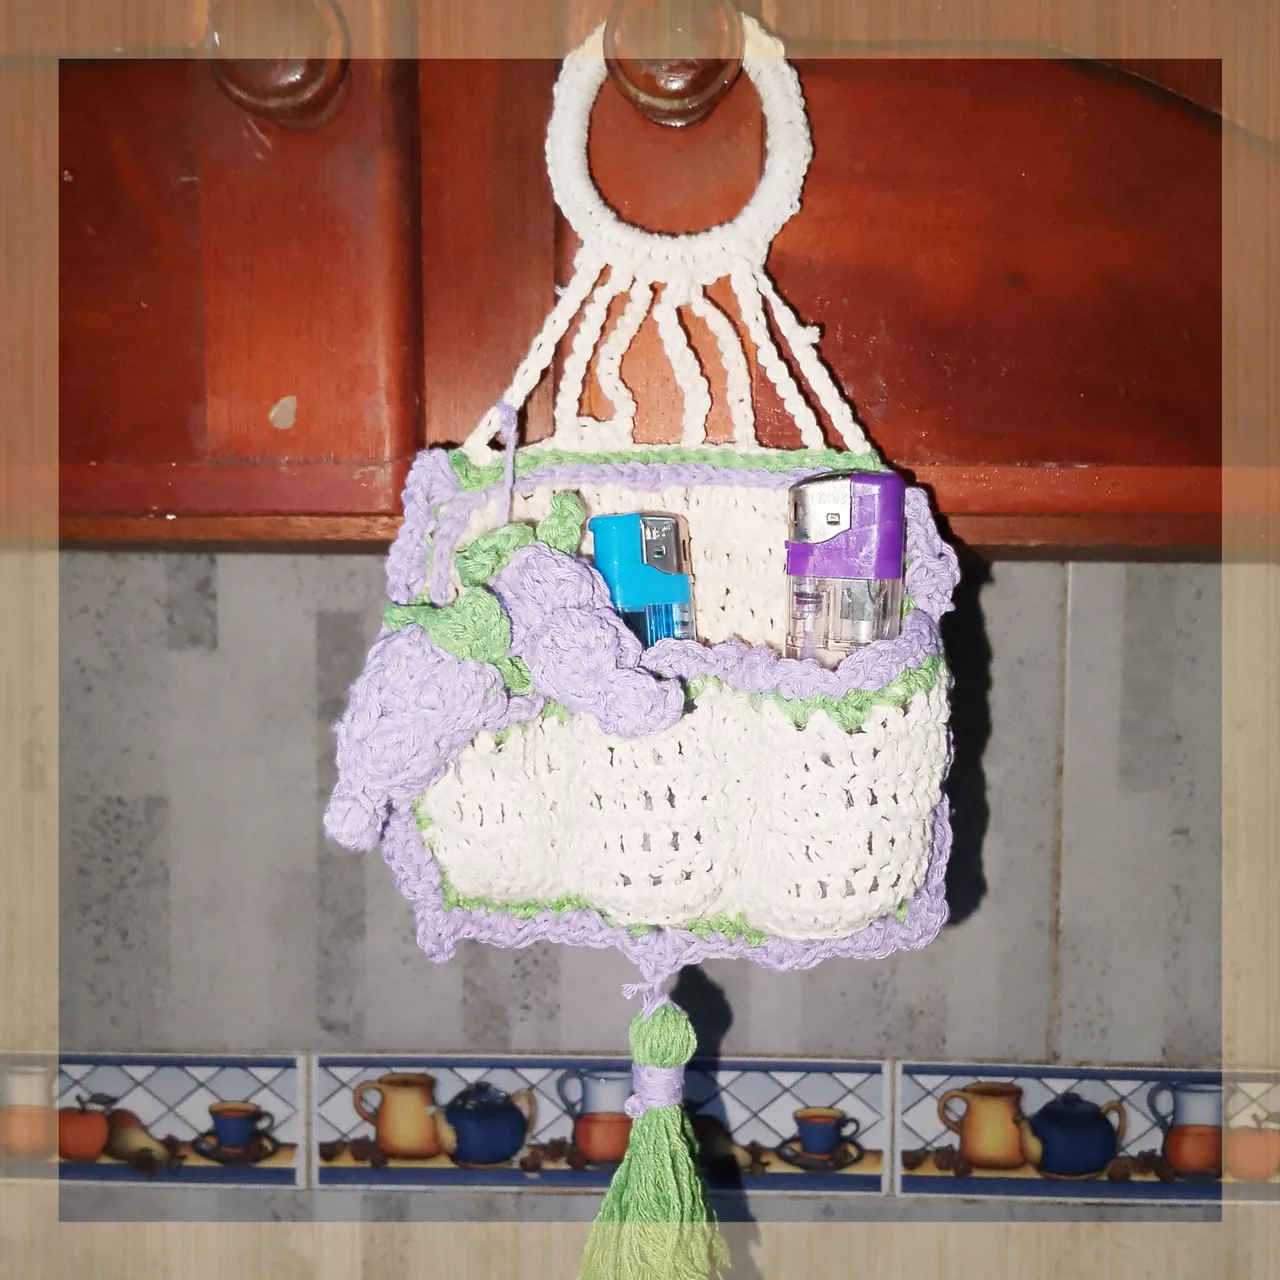
Blessed afternoon for everyone, I am pleased to be with all of you today, wishing health and many good things, for everyone in the @diyhub community, today I am going to show you a very simple and beautiful project, where I used the crochet and recycling technique, to make a Beautiful and Decorative matchbox, Inspired by some sweet Grapes. Ideal for keeping our matches and yeboxes organized. The invitation is to follow me and I.
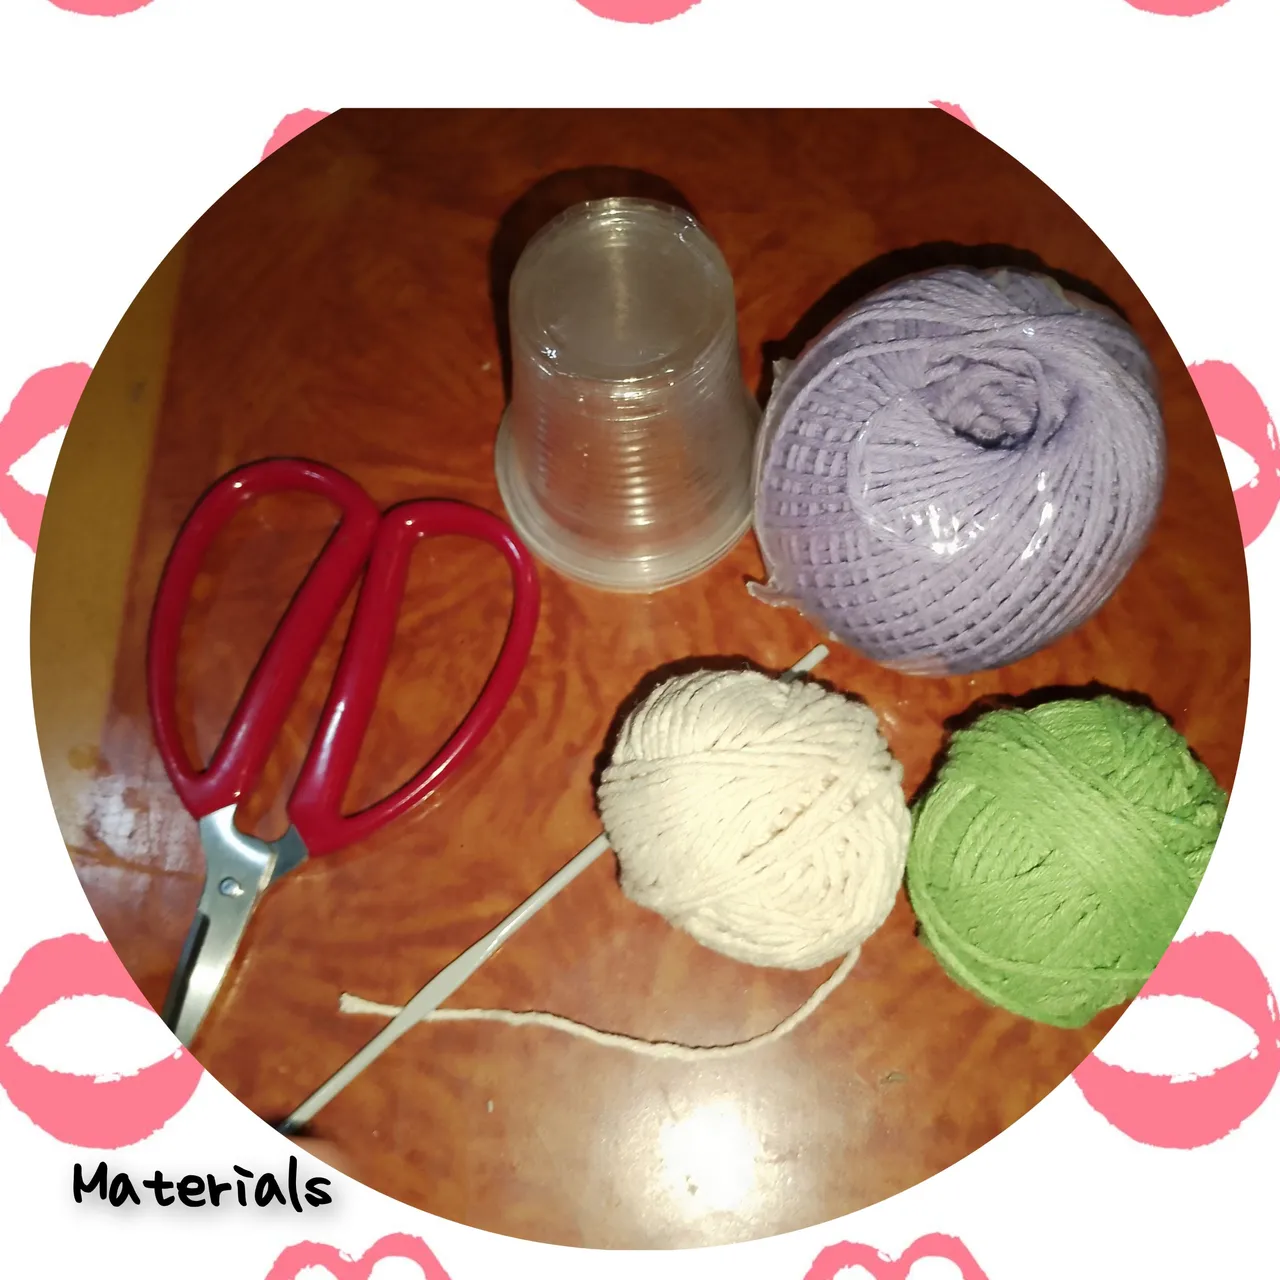
Used materials:
. Colored wick threads (traditional, green, purple).
. Knitting needle.
. Plastic coffee cups.
. Scissors.
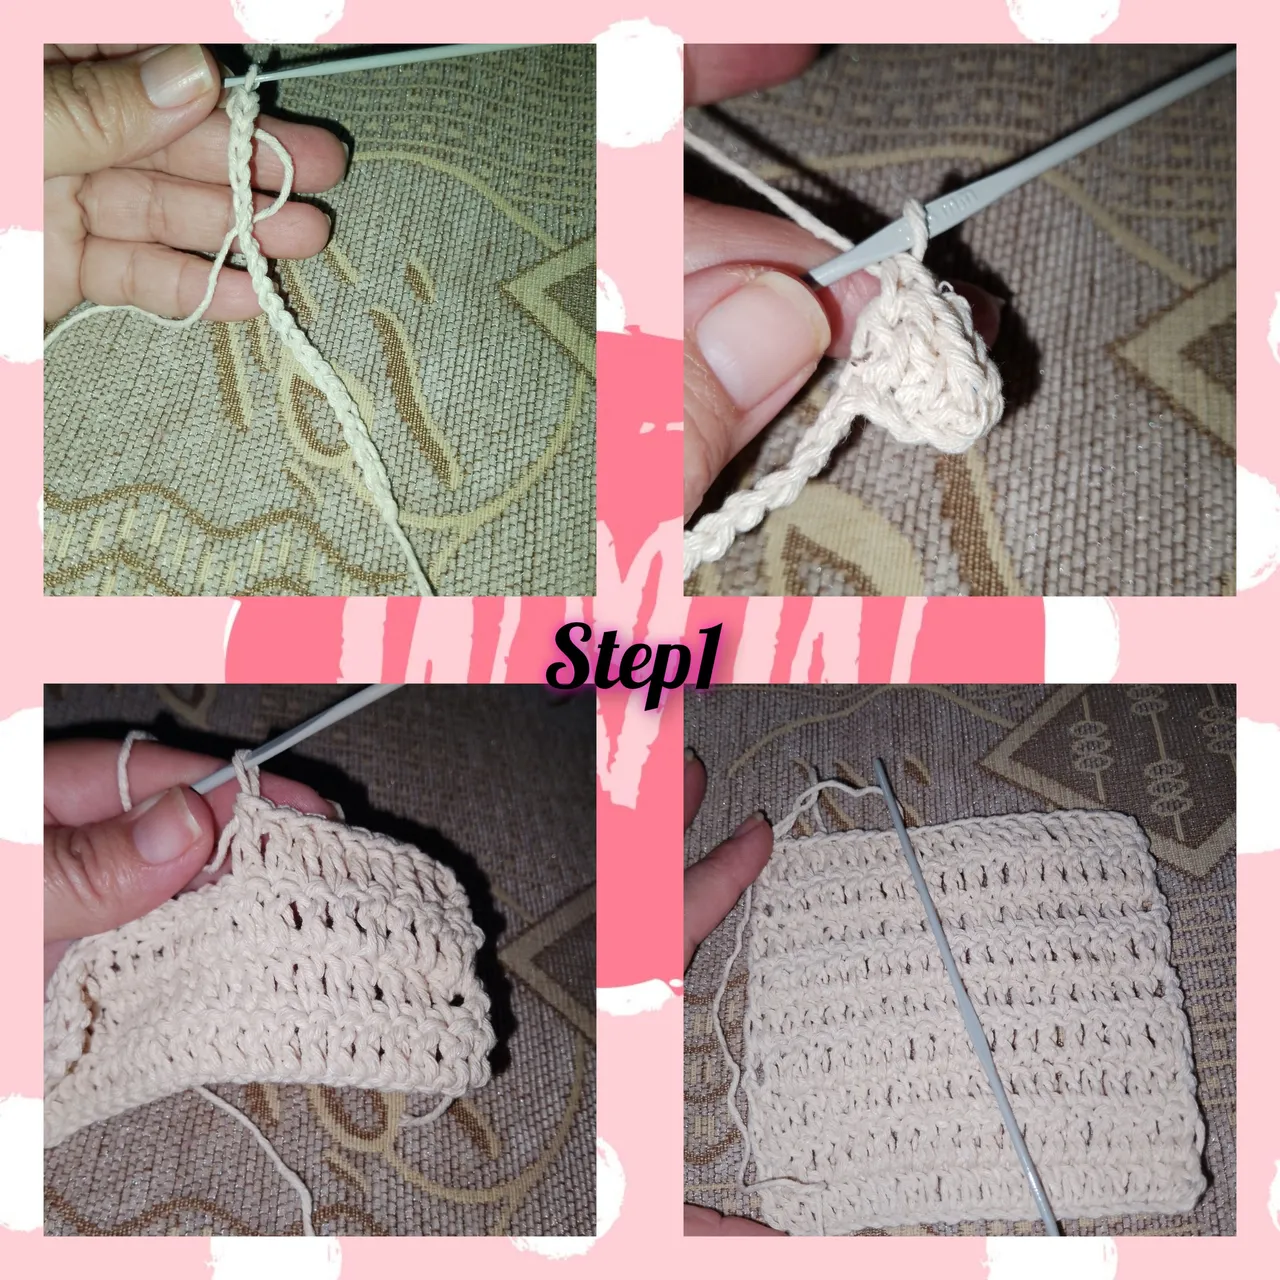
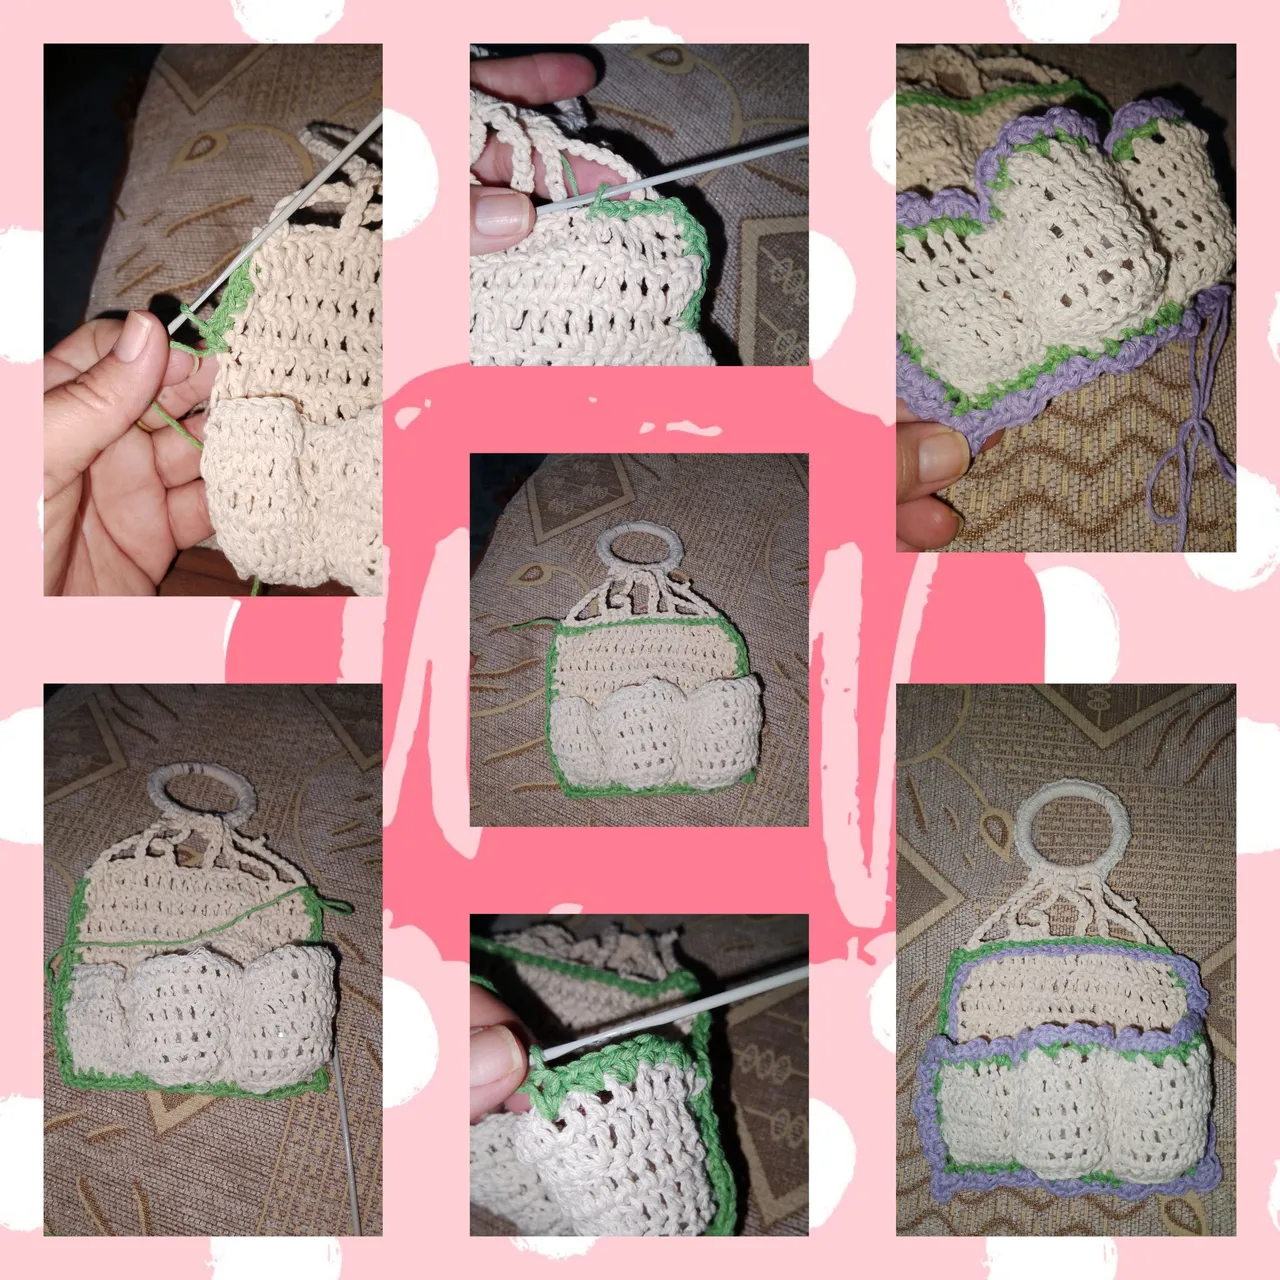
Steps: 1.) At the beginning I raise twenty chain stitches, I raise three more chain stitches, I return and the point number twenty, I raise a double crochet, I continue the route and I knit a double crochet, in each chain stitch, I turn the knitting and repeat , in this way I will knit nine rounds of 20 double crochets.
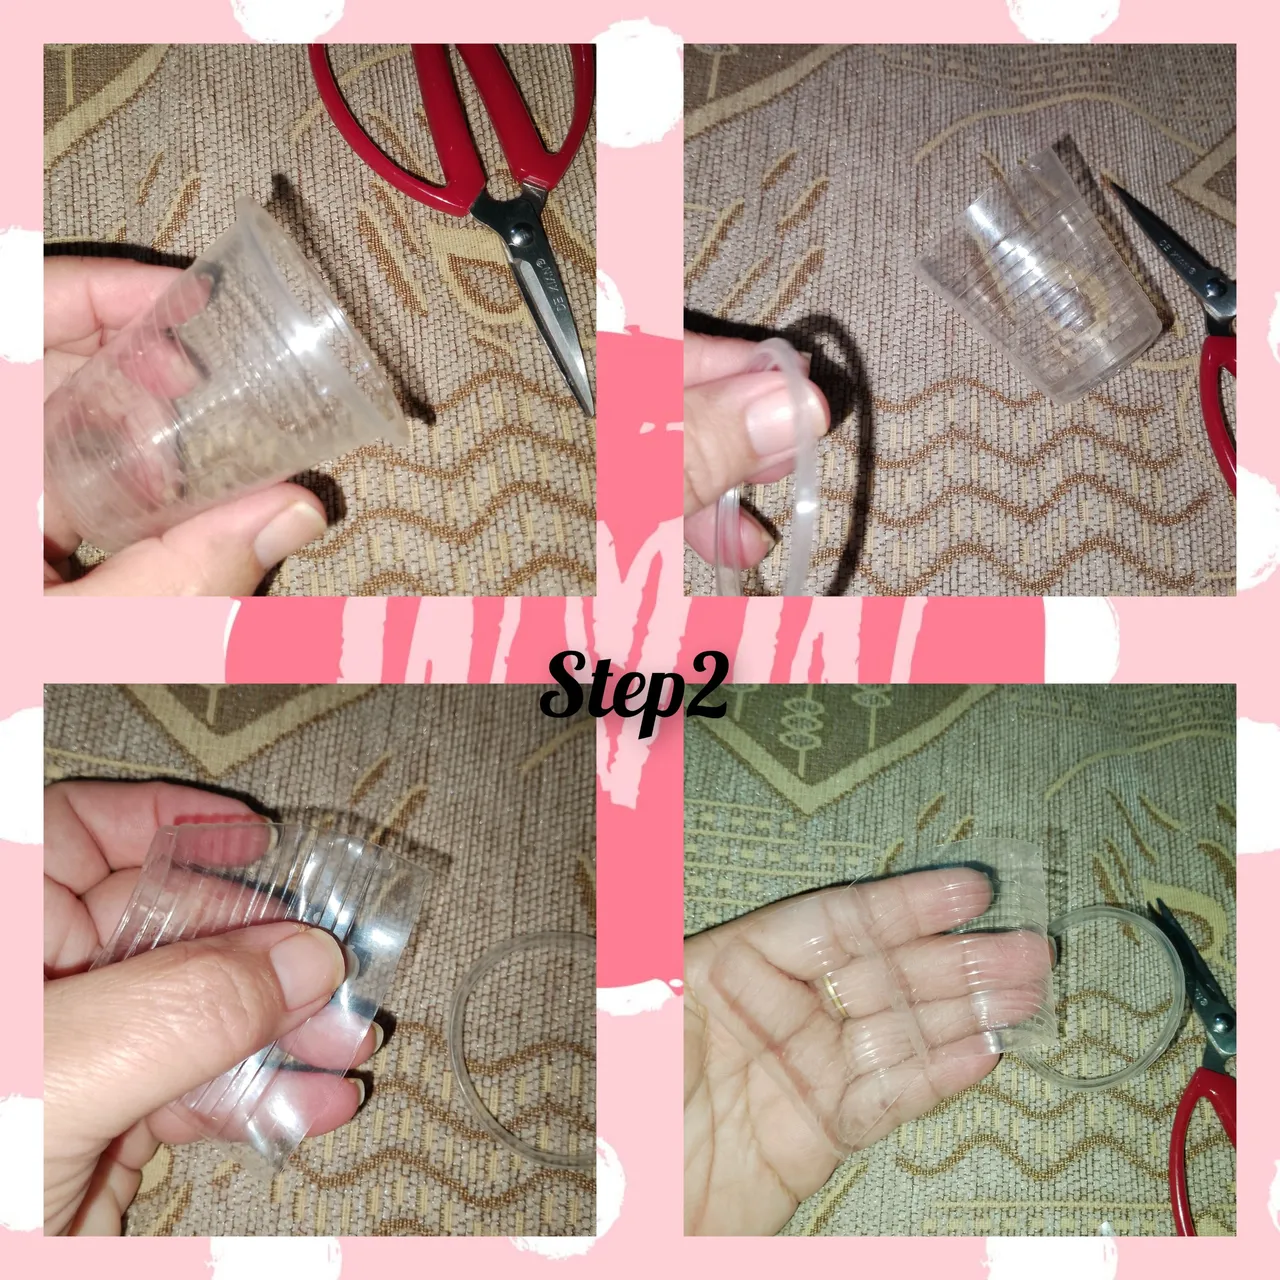
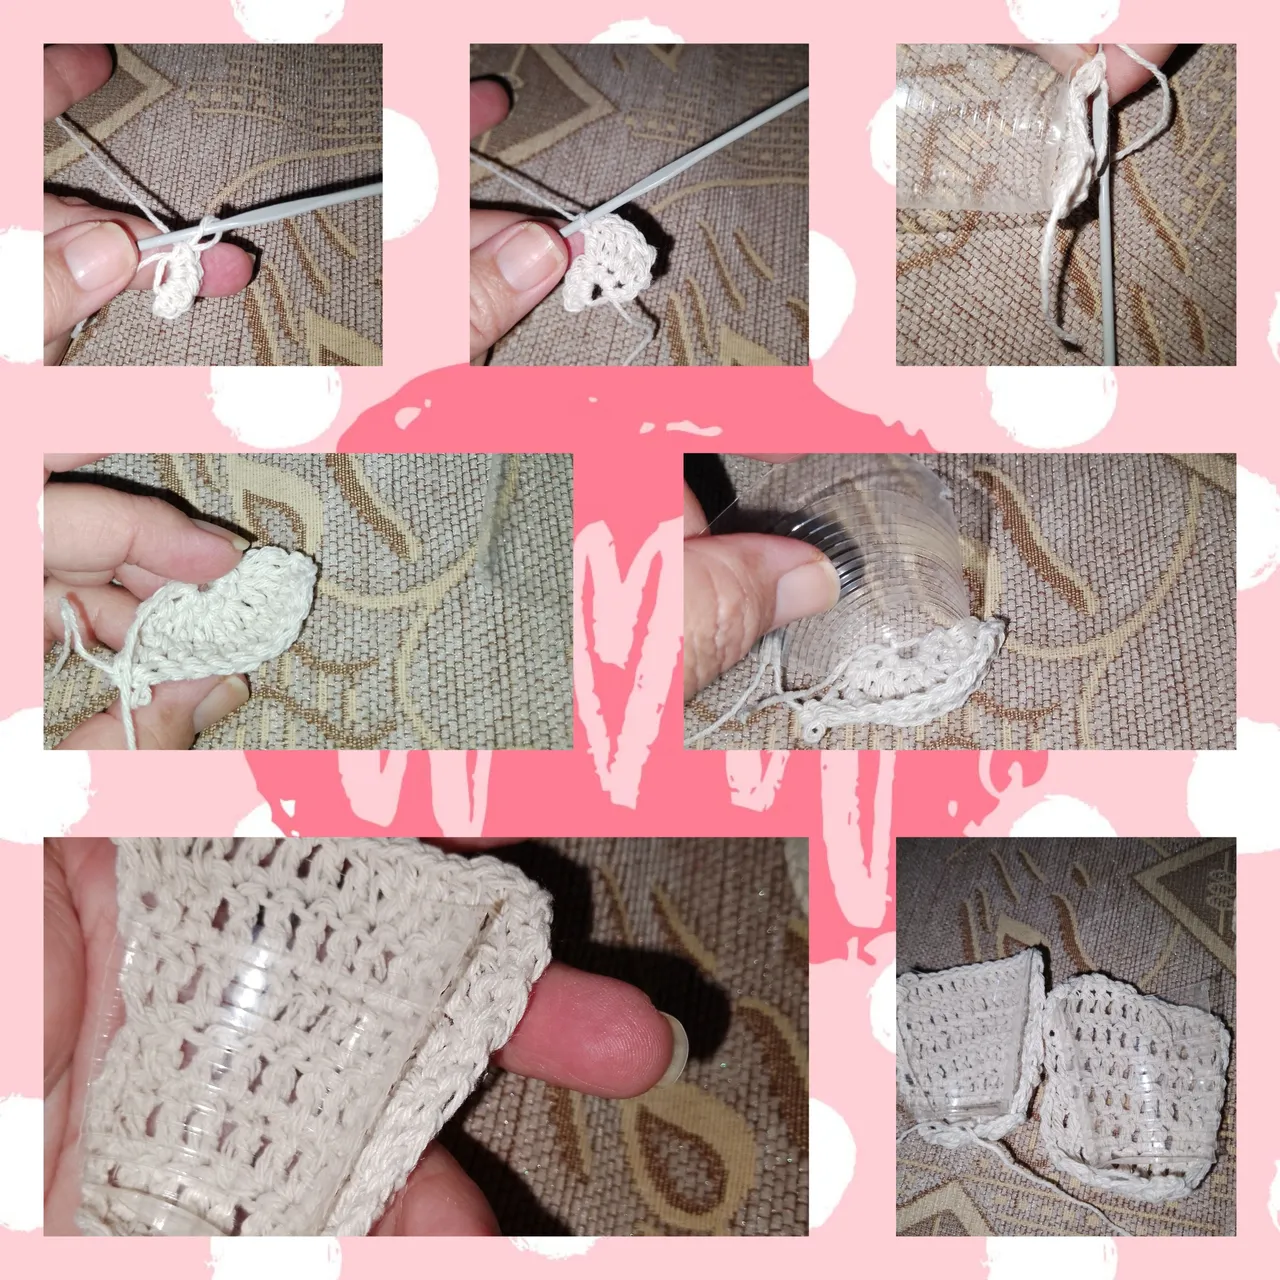
2.) I take a small plastic cup and with the scissors, I cut the ring that holds the edge of the glass, I bend the glass a little and cut it into two of equal size. I cut the residue from the edge.
3.) I resume knitting and pick up ten chain stitches, and start with single crochets to hug the plastic hoop, I knit two single crochets, hugging the hoop, I pick up ten chain stitches and go down, leaving two spaces, and in the third, I knit slip stitch, in this way, I will repeat until I cover the upper part of the cloth woven in step one. Once I have finished the route, I finish covering the plastic hoop with single crochet stitches. I cut and finish the thread.
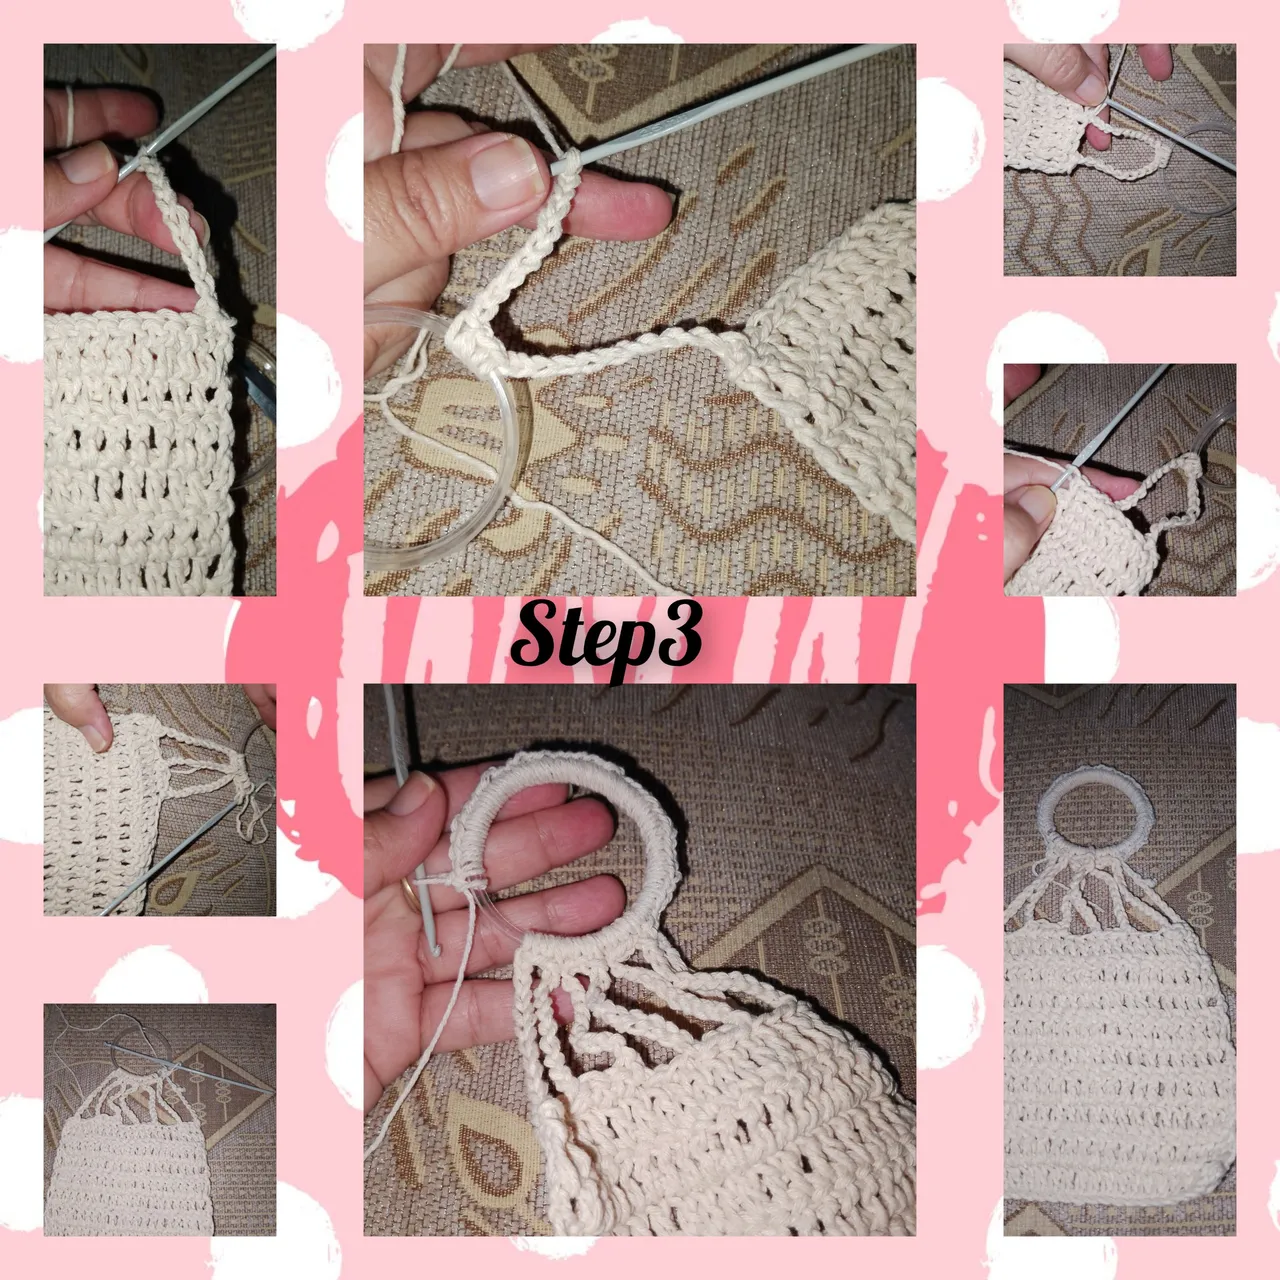
4.) I make a magic ring and inside it, I knit six half stitches, one a little bit the ring, but without closing completely, I simply leave it as a fan shape, with the intention of covering the bottom of the half of the plastic cup. I turn the fabric and make an increase in each half stitch of the last round, covering the bottom of the glass, I will knit five rounds of twelve double crochets, in this way I will cover the height of the glass, so I repeat, for the next half .
5.) Once the previous step is done, with slipped stitches, I will begin to glue the compartments of the MATCH BOX.
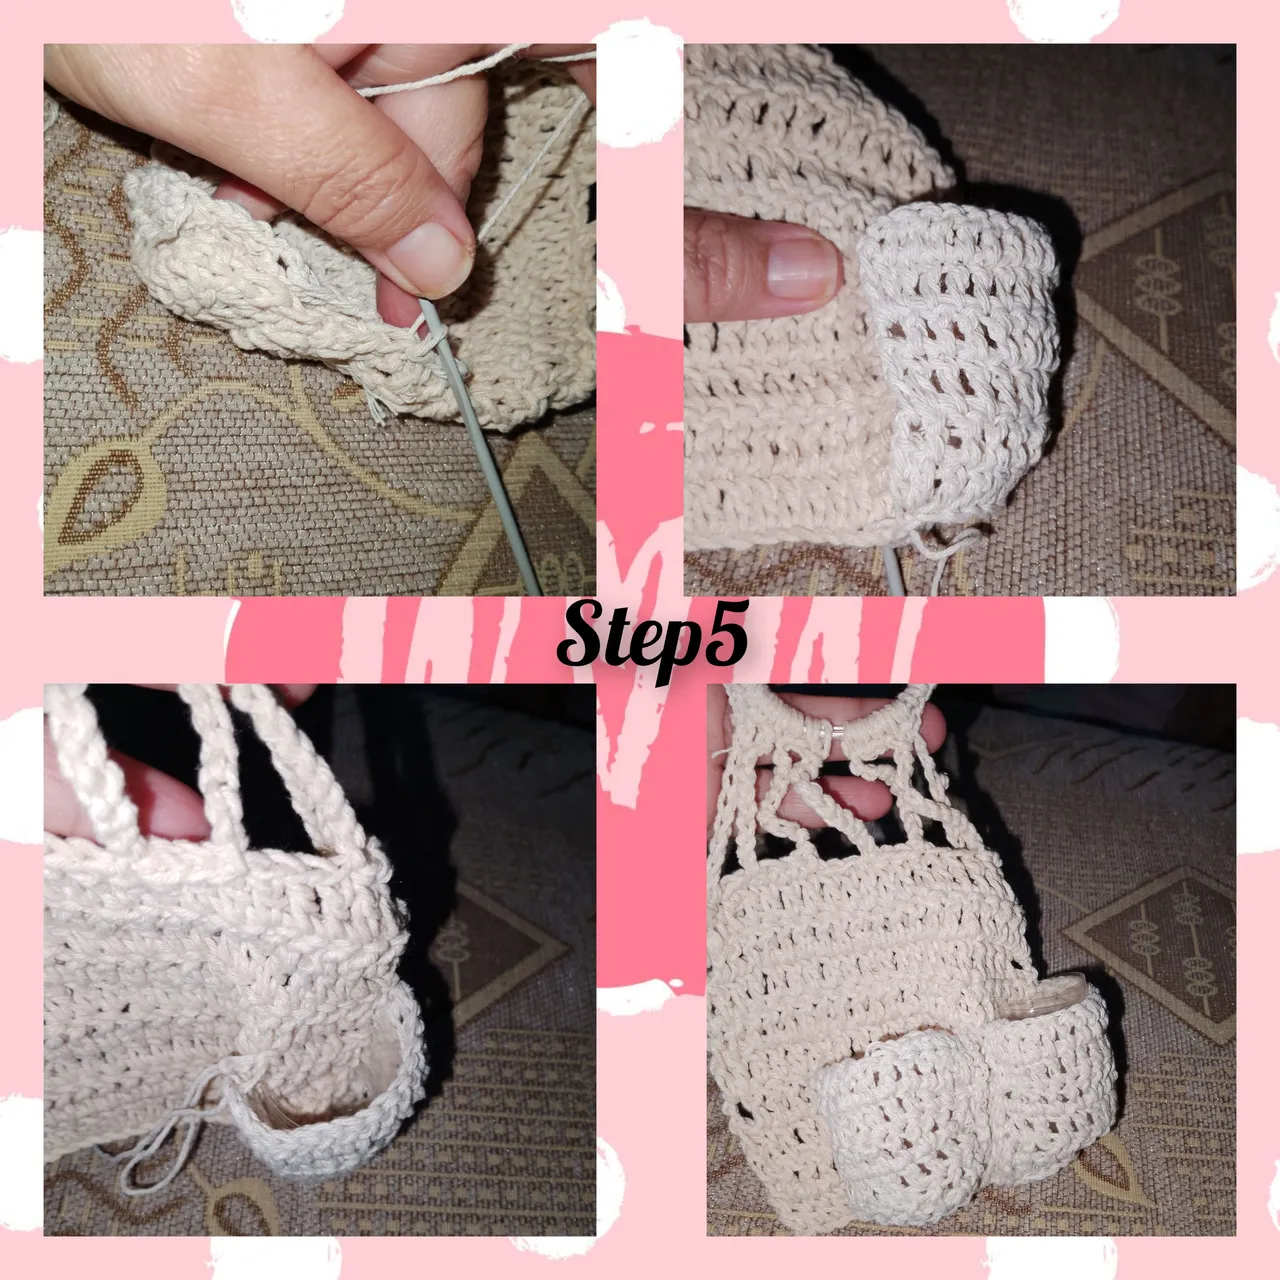
6.) For the free space, which I have left on the next side of the matchbox, I will knit a small list of double crochets, with ten stitches and five rows, I repeat the process of slipped stitches topaste.
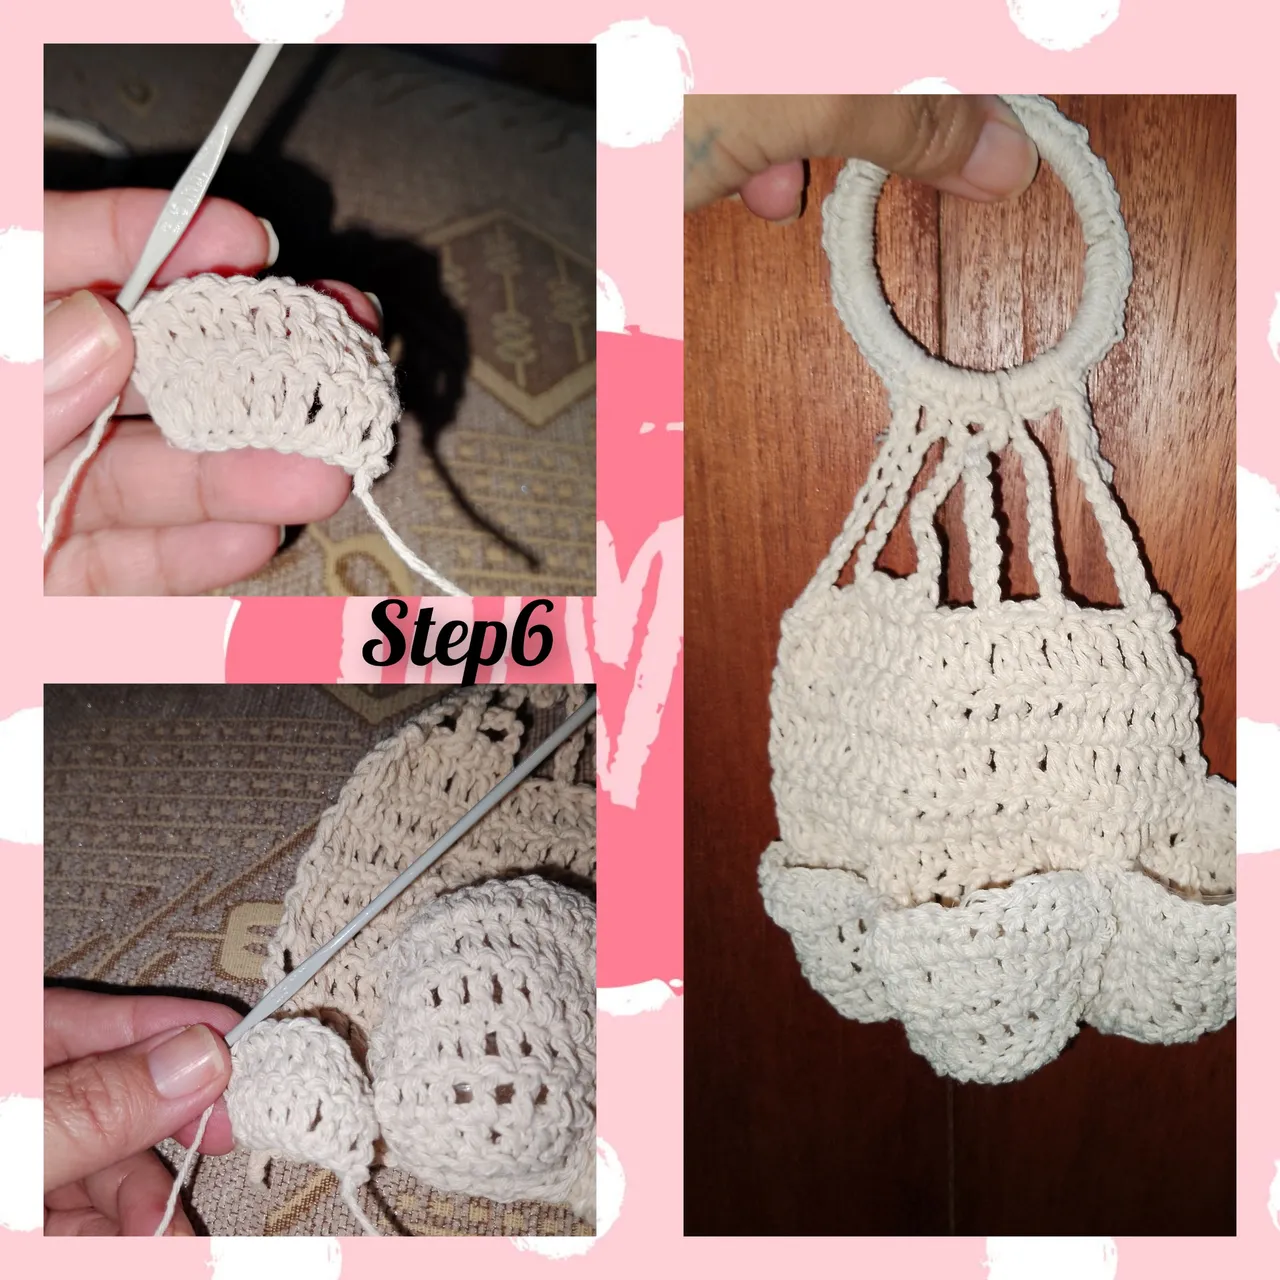
7.) I continue, going around the matchbox with half stitches, first with the green thread, then with the purple thread, with this I make a small lace, to make the work eye-catching.
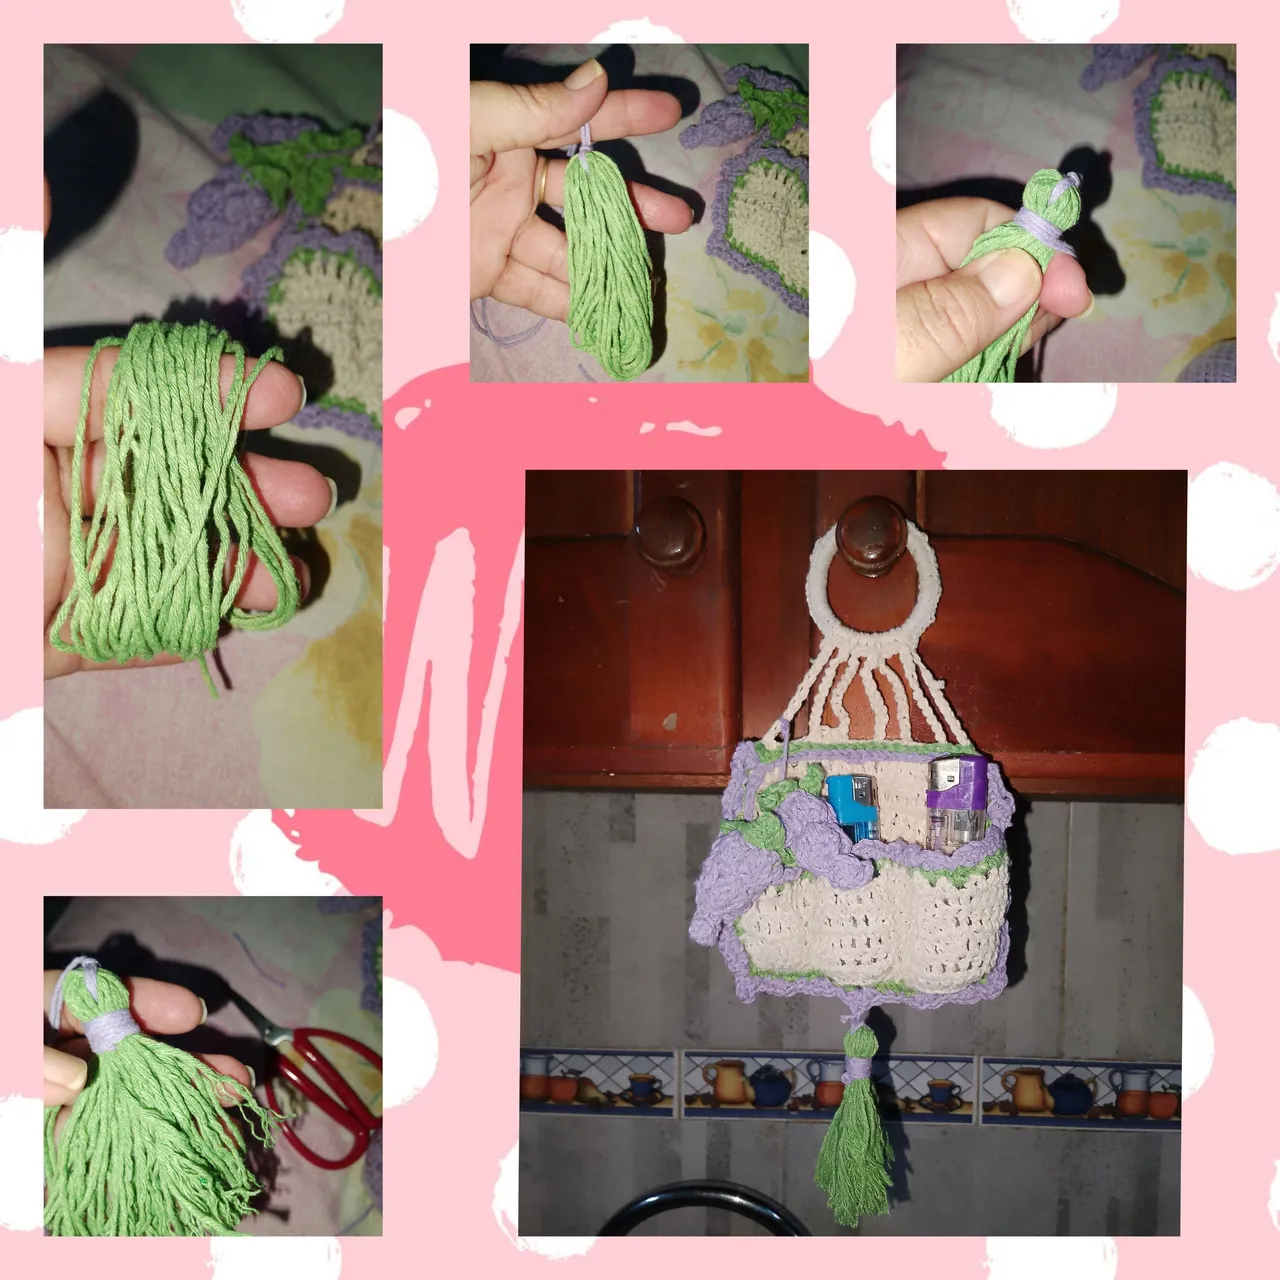
8.) In this step, I will knit the grapes, make a magic ring, and close, change the color of the thread, knit under the leaves, groups of four double crochets, take out the knitting needle, insert into the upper part of the first double stitch, and I bring with it the thread, I knit three chains and go down to the starting place, knitting a slip stitch, I repeat this and three more times, I go down and join these groups with slip stitches, and I knit three groups more, of double crochets, when finishing them, I go down again and knit only one. In this way, I shape a bunch of grapes.

9.) The next thing will be to make a small pom pom, so I will use the green thread, I give thirty beads, from the index finger to the little finger, I cut the thread, I tie with purple thread. And so he created the pompo. To finish the decoration, I tie the grape clusters on one side of the matchbox and tie the pendant at the bottom.
. All photos are my property.
. Use incollage
. Use language translator.
Grateful for your visit to my blog, you will always be welcome, until the next opportunity.
( ESP)
Bendecida tarde para todos, me complace estar, hoy con todos ustedes, deseando, salud y muchas cosas buenas, para todos en wat comunidad @diyhub, hoy paso a mostrarles un muy sencillo y bonito proyecto, dónde use la técnica de crochet y reciclaje, para realizar un Hermosa y Decorativa fosforera Inspirada en unas dulces Uvas. Ideal para mantener organizados nuestro cerillos y yequeros. La invitación es a seguirme y les muestro, lo fácil de su elaboración.
Materiales usados:
. Hilos pabilos colores( tradicional, verde, morado).
. Aguja para tejer.
. Vasos plásticos para café.
. Tijeras.
Pasos:
1.) Inicio levanto veinte puntos cadenas, levanto tres puntos cadenas más, me devuelto y el el punto número veinte, levanto un punto alto, continuo el recorrido y tejo un punto alto, en cada punto cadena, doy vuelta a el tejido y repito, de esta manera tejere nueve vueltas de 20 puntos altos.
2.) tomo un vasito plástico y con la tijera, corto el aro que sostiene el borde de el vaso, doblo un poco el vaso y corto en dos de igual tamaño.
Corto el residuo de el borde.
3.) Retomo el tejido y levanto diez puntos cadenas, y comienzo con puntos bajos a abrazar el aro plástico, tejo dos puntos bajos, abrazando el aro, levanto diez puntos cadenas y bajo, dejo dos espacios, y en el tercer, t jo punto deslizado, de esta manera, ire repitiendo hasta recorrer, la parte superior de el paño tejido en el paso uno. Hecho el recorrido, termino de cubrir el aro plástico con puntos bajos. Corto y remato el hilo.
4.) Hago un anillo mágico y dentro de el, tejo seis medios puntos, uno un poco el anillo, pero sin cerrar completamente, simplemente, lo dejo como en forma de abanico, con la intención de cubrir, el fondo de la mitad de el vaso plástico. Doy vuelta a el tejido y hago un aumento en cada medio puntos de la vuelta pasada, cubierto el fondo de el vaso, tejere cinco vueltas de doce puntos altos, de esta manera cubrire la altura de el vaso, así repito, para la siguiente mitad.
5.) Hecho el paso anterior, con puntos deslizados, Comenzare a pegar, los compartimiento de la FOSFORERA.
6.) Para el espacio libre, que me queda en el siguiente lado de la fosforera, tejere un pequeño listos de puntos altos, de diez puntos y cinco vueltas, repito el proceso de puntos deslizados para pegar.
7.) continuo, recorriendo con medios puntos, el alrededor de la fosforera, primero con el hilo de color verde, seguidamente, con el hilo de color morado, com este hago un pequeño encaje, para hacer llamativo el trabajo.
8.) En este paso, tejere las uvas, hago un anillo mágico, y cierro, cambio de color de hilo, tejo por debajo de las hojas, grupos de cuatro puntos altos, saco la aguja de tejer, introduzco en la parte alta de el primer punto alto,y traigo con ella, el hilo, tejo tres cadenas y bajo a el lugar de partida, tejiendo un punto deslizado, así repito y tres veces más, voy bajando y uniendo estos grupos con puntos deslizados, y tejo tres grupos más, de puntos altos, al concluirlos, bajo nuevamente y tejo solo uno. De esta manera, doy forma, de un racimo de uvas.
9.) Lo siguiente será armar un pequeño pompos, así que usaré el hilo de color verde, doy treinta cuentas, de el dedo índice a el meñique, corto el hilo, ato con hilo de color morado. Y así elaboró el pompo. Fara finalizar decoro, la fosforera, ato en uno de los lados los racimos que uvas y en la parte inferior ato el colgante.
. Todas las fotos son de mí propiedad.
. Use incollage
. Use traductor lenguaje.
Agradecida, por su visita a mí blog, siempre serán bienvenidos, será hasta una próxima oportunidad.