Hello to everyone in this community. Hope all of you are fine.💞💞
If we talk about the diy projects its all about the bond you create with the things you make.It allows us to put our heart and soul into the things we create.When you diy something,it's like creating a bond with your creation because you know how much effort and love you have poured into that thing to make it beautiful.
For me,diy is like a creative adventure where i get to express myself while also making pratical and useful things.Whenever i see a thing related to art and craft my eyes glitter and i want to buy all of them and make something creative.Last week when i went shopping with my sister i bought colourful ice cream sticks and wanted to make something from them.
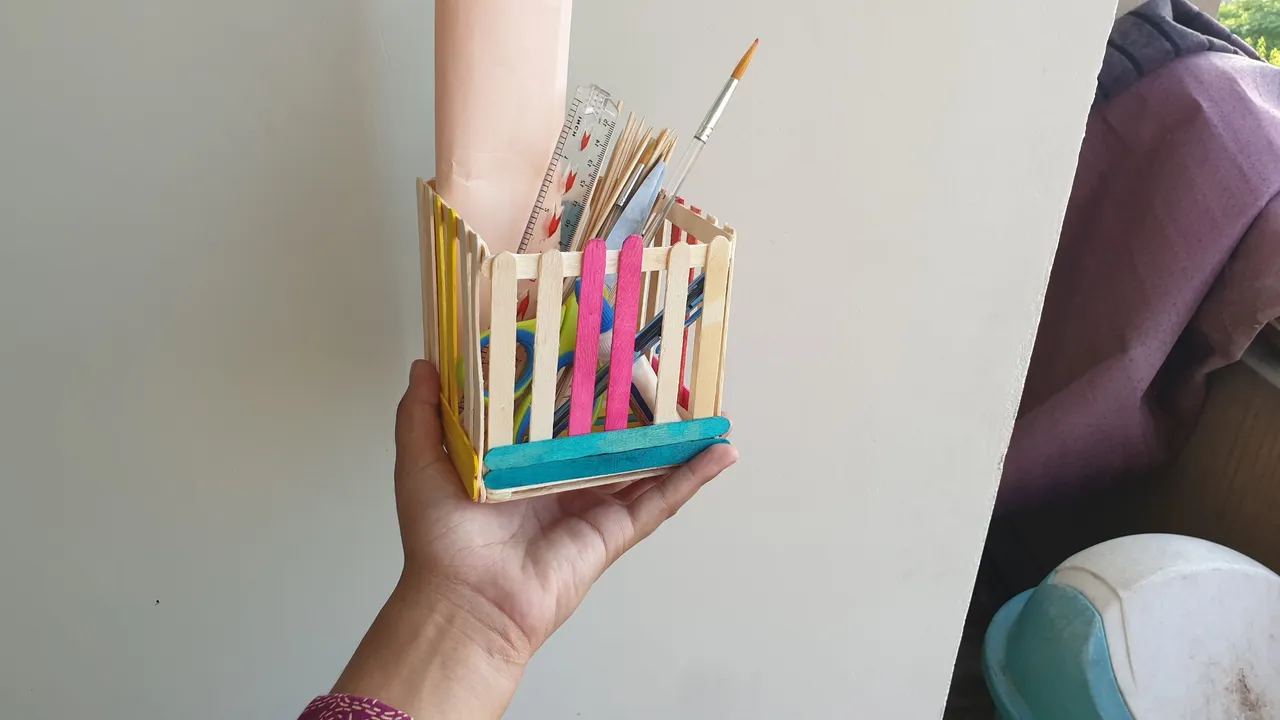
So today was the day and i made a beautiful organizer from them.

As you all know i am in my new hostel now so i wanted to make a organizer for the things that i use while making my projects like paint brushes,scissor,scale etc so i made this basket.Firstly i was planning on making a bigger one but i accidentally bought small size ice cream sticks so i made a small one.
Now let me share the process of the project with you guys.
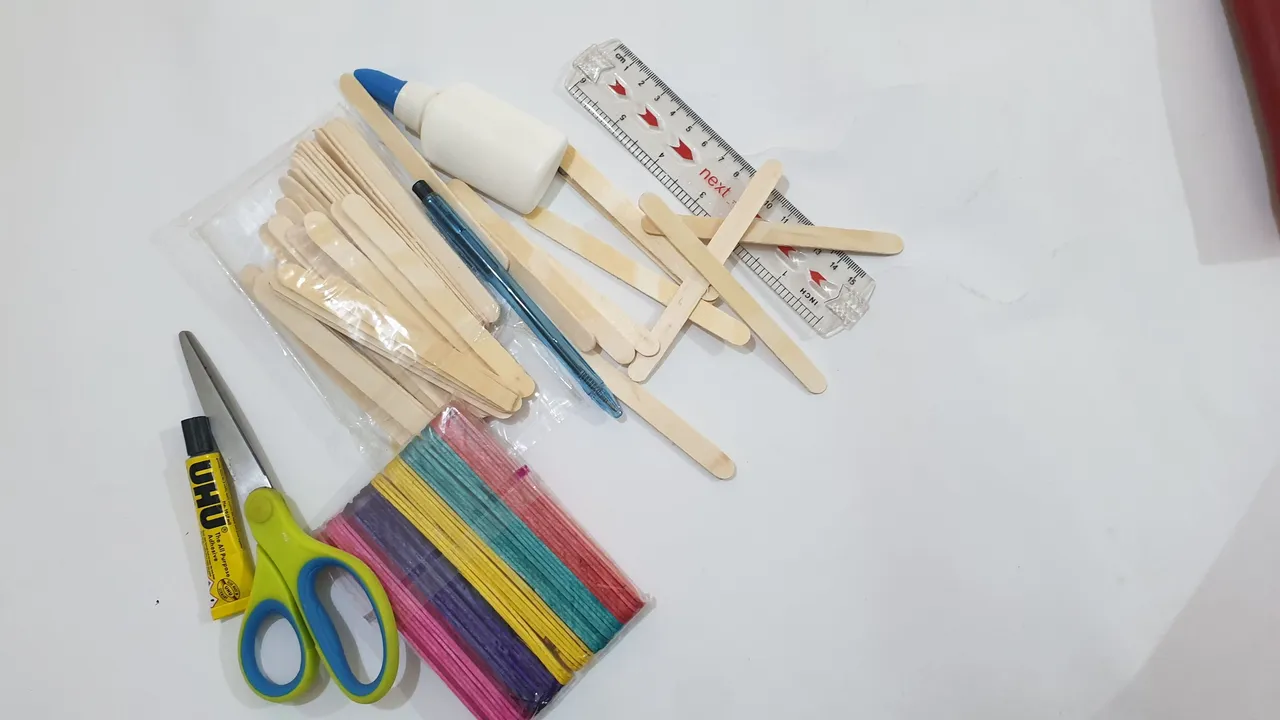
Things you need
1)ice cream sticks
2)UHU(or any other adhesive)
3)scissors
The process
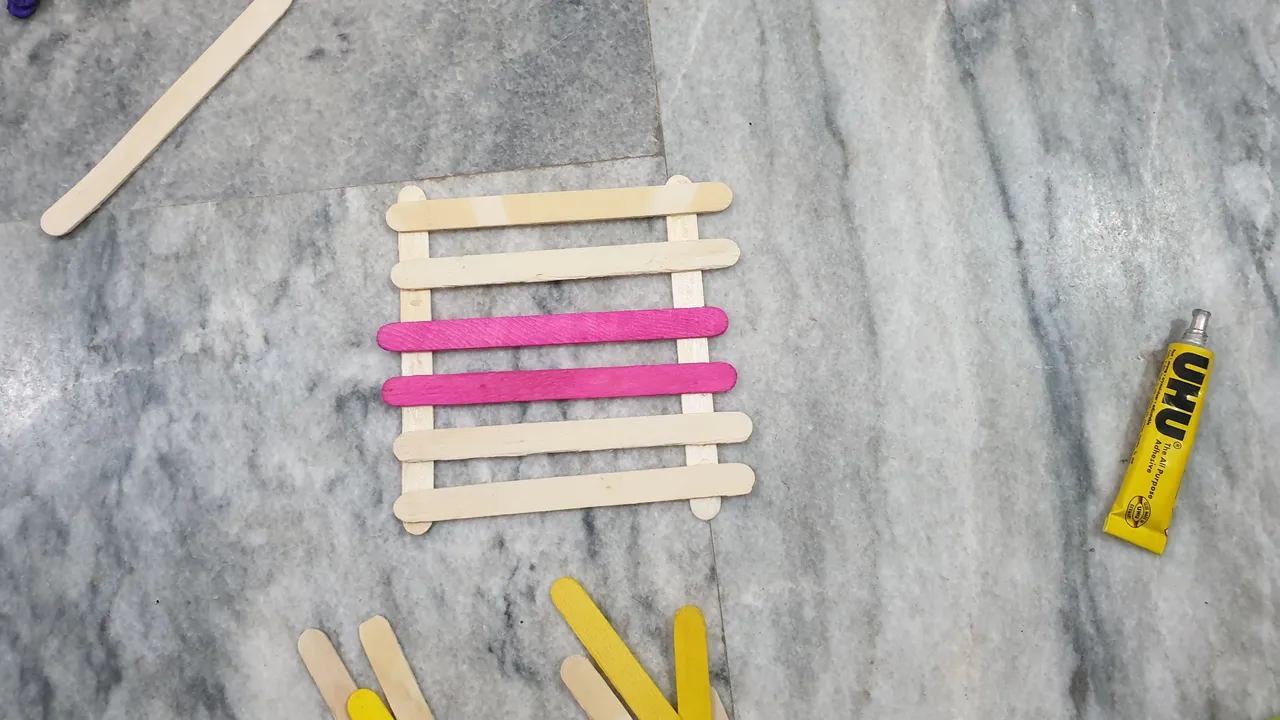
1)Firstly i took 6 ice cream sticks and placed them horizontally and attached them with 2 other ice cream sticks vertically to attach them all.
Like this:
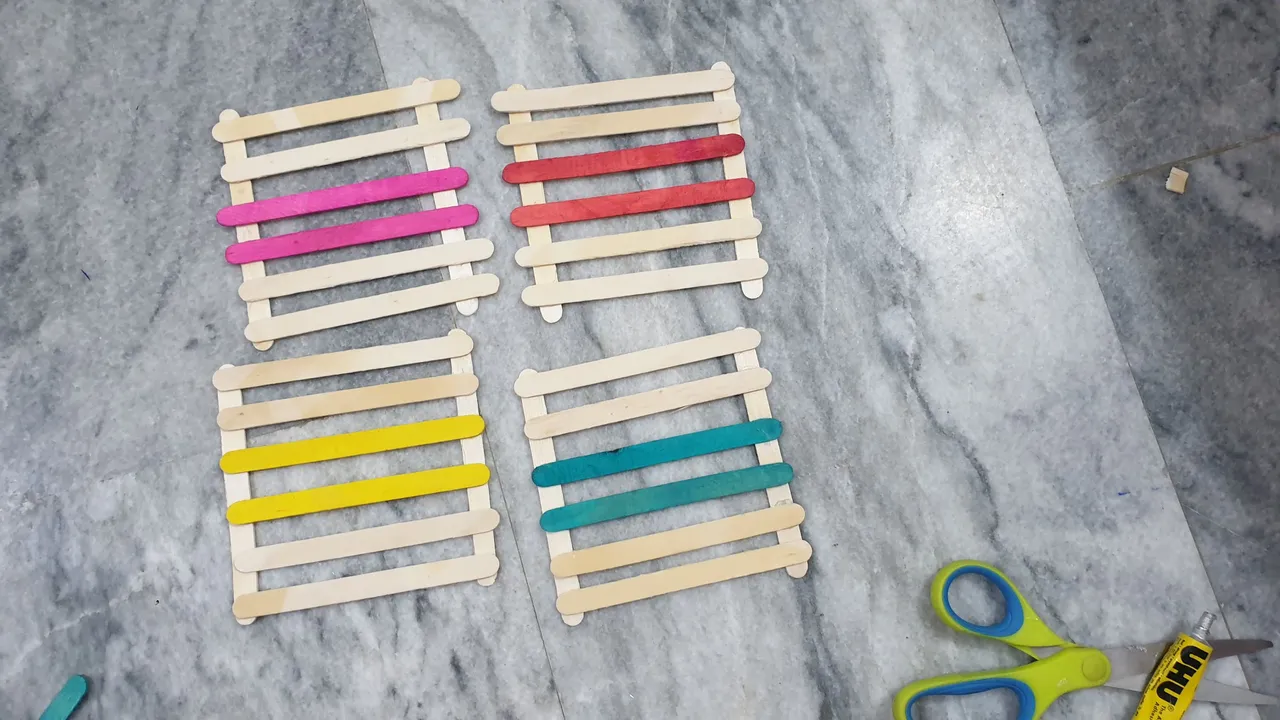
2)Then i made four of them to complete the sides of the basket like this:
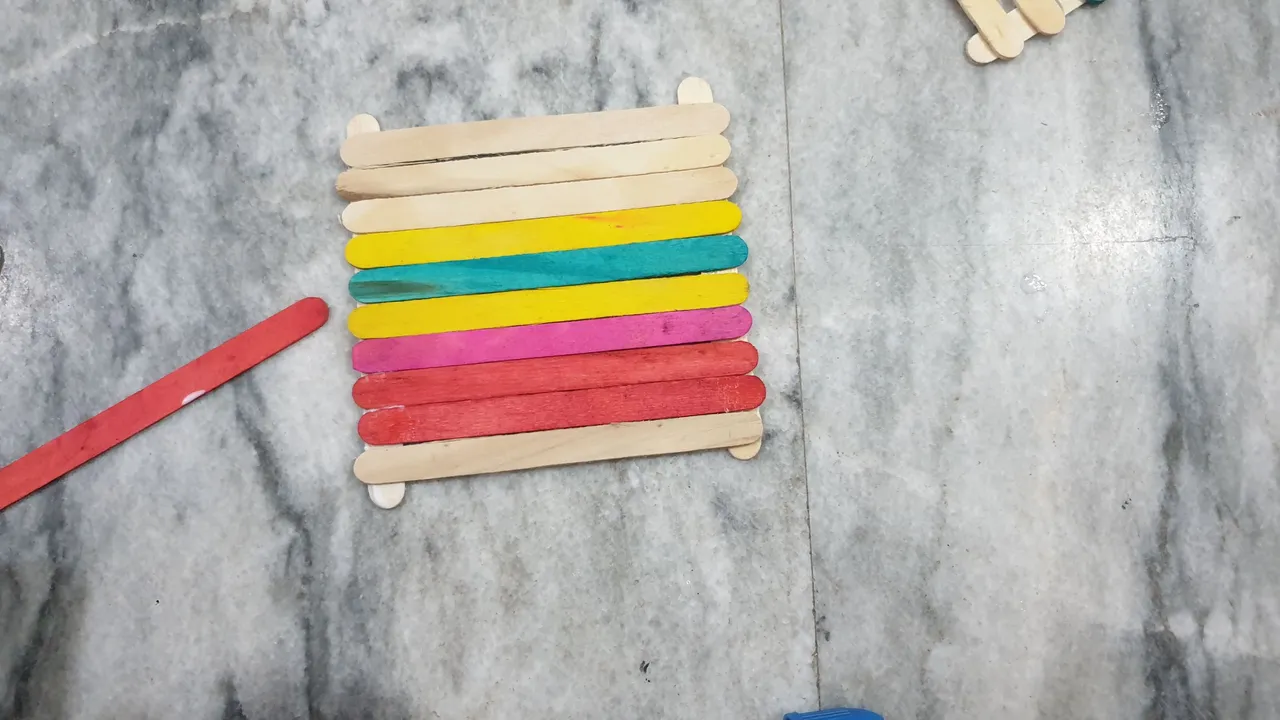
3)Then i made the base of the basket but a little differently from the sides.For keeping things safe i left no space while making the base part like this:
- Then after making all the parts i assembled all the parts to the base by using UHU one by one.

Make sure to give it enough time to attach with other parts and let the UHU dry completely and then you are ready to go.

5)Then lastly i added 2 coloured sticks on the side to make it more secure.This part is optional so you guys can skip it if you want to.

And then i excitedly stuffed this with me accessories and took many pictures of the organizer.😅
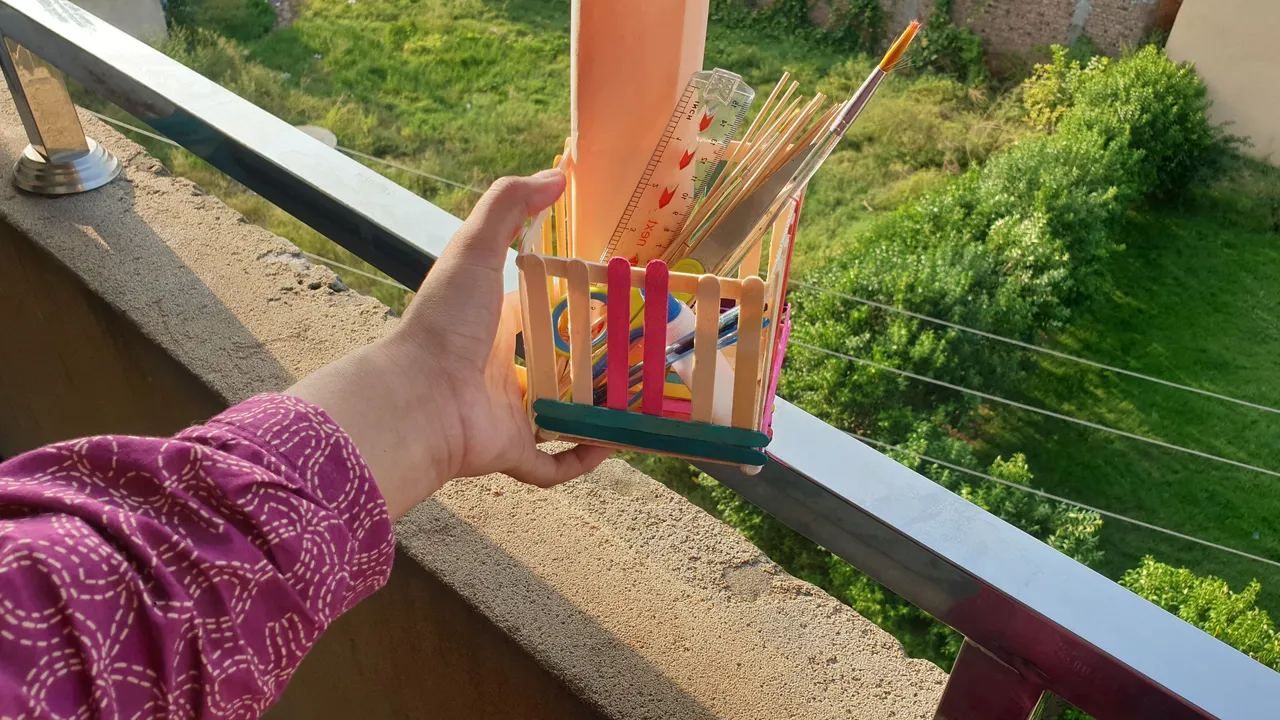
And then i placed it in my room and stared at it for almost 10 minutes.
Ok ok that's all for today.Hope you guys loved it alot and by my staring time you can also guess how much i loved it.
See you soon with more diys.
Feel free to share your opinions with me.
Bye Bye💞💞
Take care.

Video edited in capcut