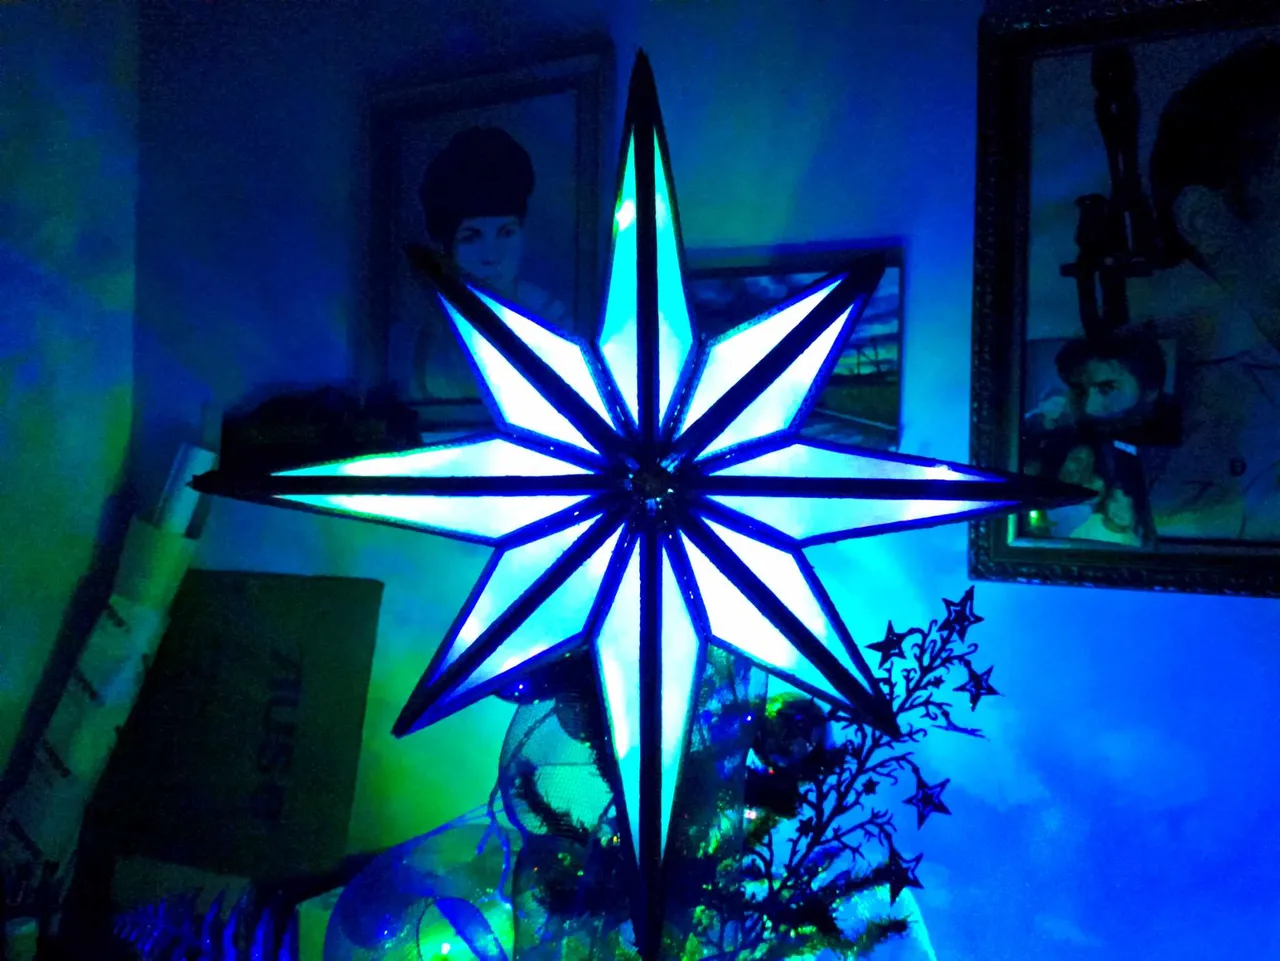
Hello dear friends, I wish you a very good night today is the day of the Spirit of Christmas, where we have the longest night thanks to the Winter Solstice in the northern hemisphere and to celebrate it I want to share with you a craft that is the star of Bethlehem . The Bible tells in the Gospels that a very bright star appeared in the sky, and for several nights it led the eastern wise men who came to see the birth of the Messiah, said star was made up of angels of God. Using this story I have built an eight-pointed star, using recycled material such as cardboard, paper and colored lights to illuminate. Hope you like.
Hola queridos amigos, les deseo muy buenas noches hoy se celebra el día del Espíritu de la Navidad, donde tenemos la noche más larga gracias al Solsticio de Invierno en el hemisferio norte y para celebrarlo quiero compartir con ustedes una manualidad que es la estrella de Belén. Cuenta la Biblia en los Evangelios que una estrella muy brillante apareció en el cielo, y por varias noches condujo a los sabios orientales que venían a ver el nacimiento del Mesías, dicha estrella estaba conformada por ángeles de Dios. Haciendo uso de este relato he construido una estrella de ocho puntas, utilizando material de reciclaje como cartón, papel y luces de colores para iluminar. Espero que les guste.

 |  |  |
|---|---|---|
 | 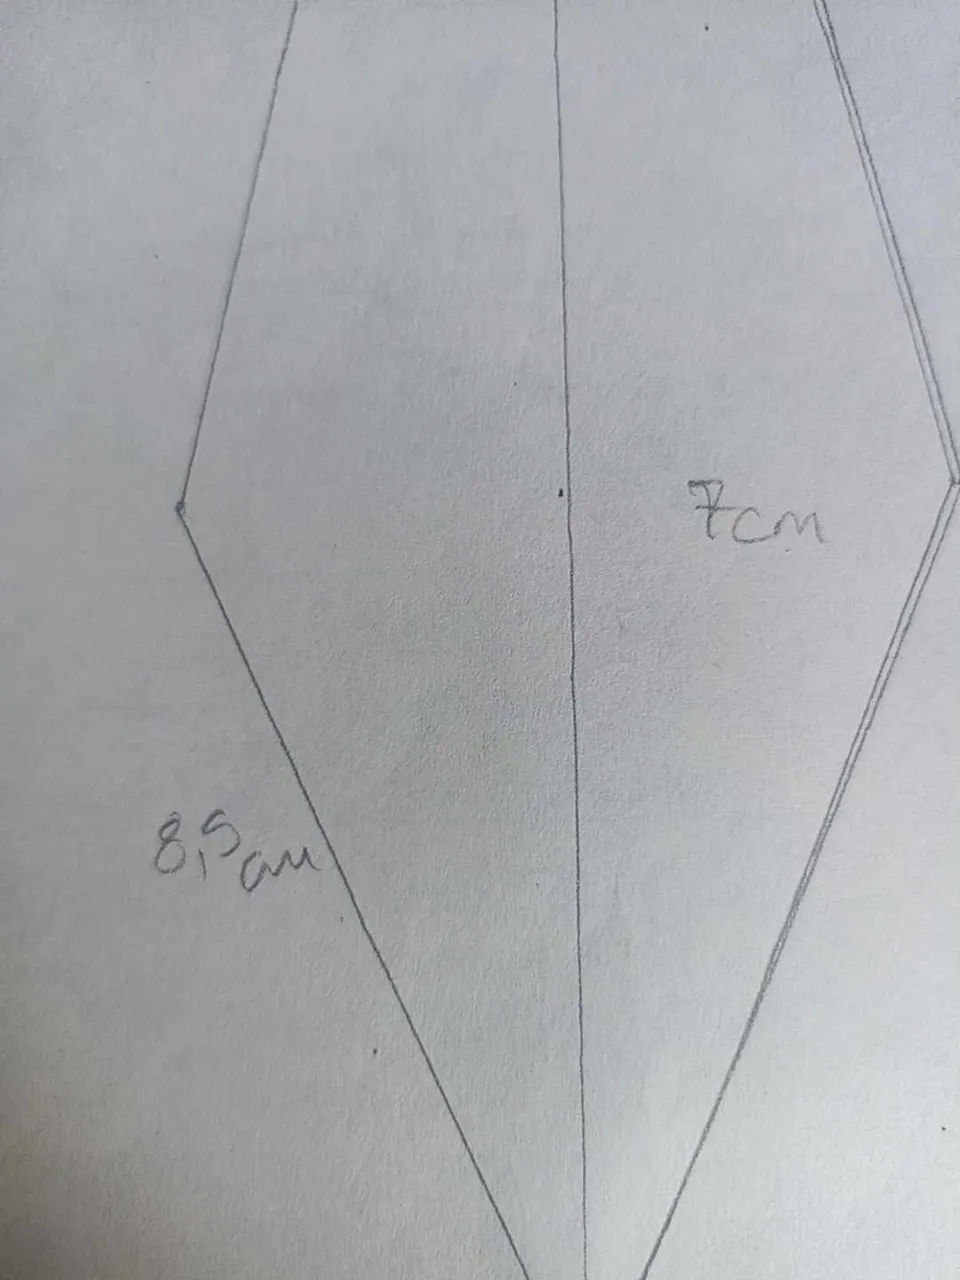 | 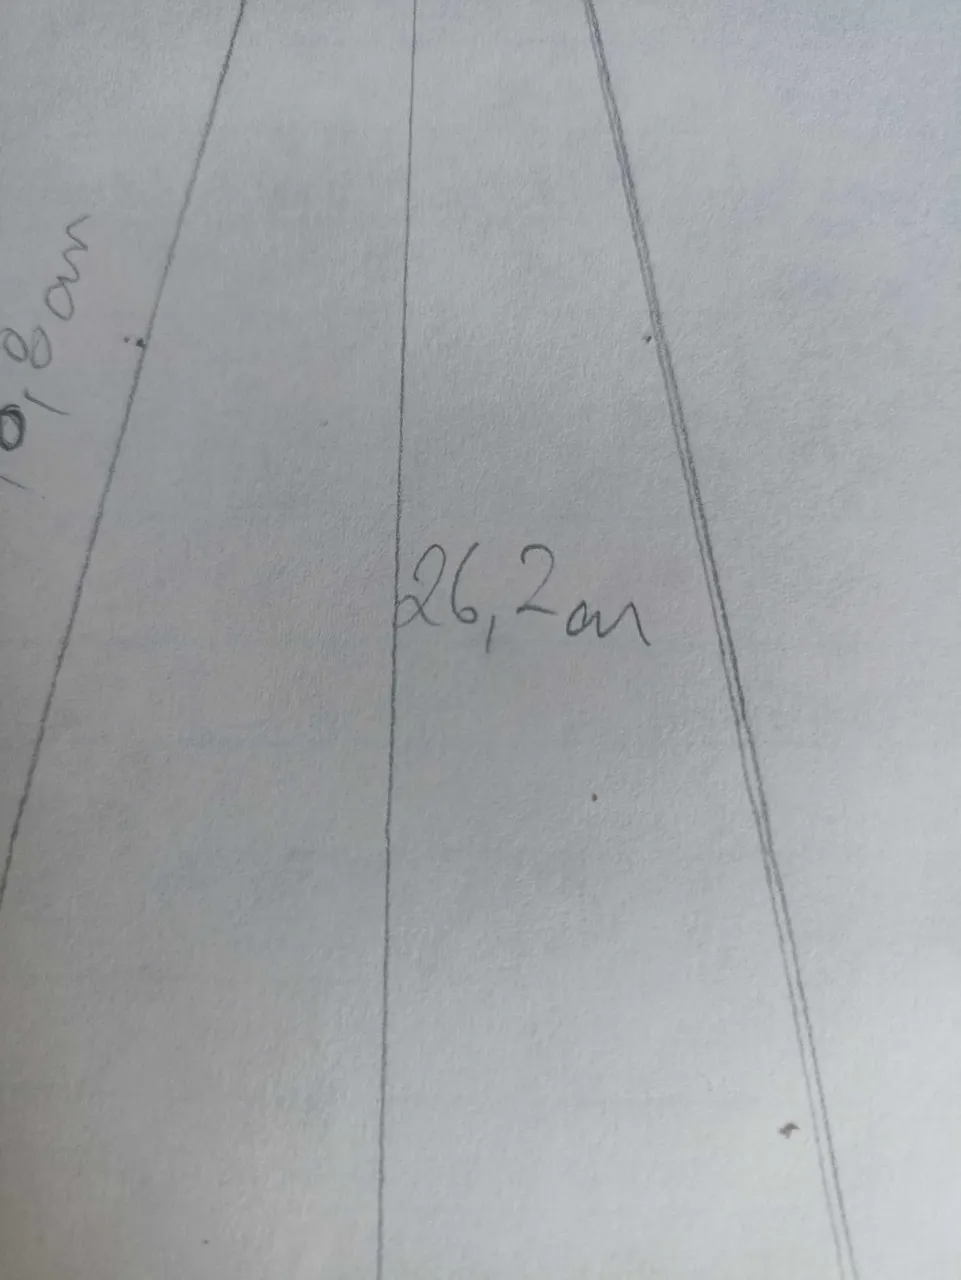 |
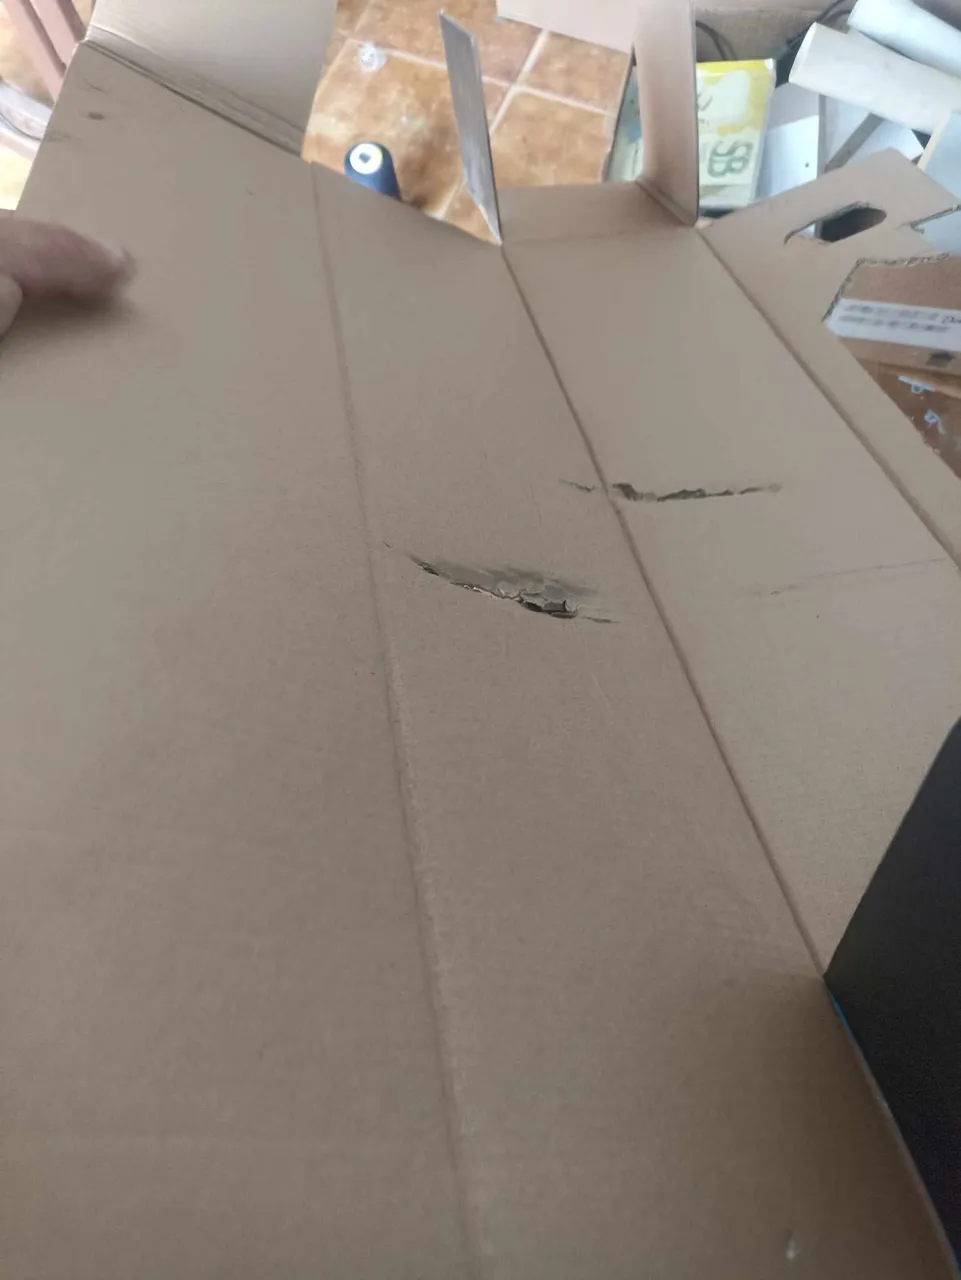
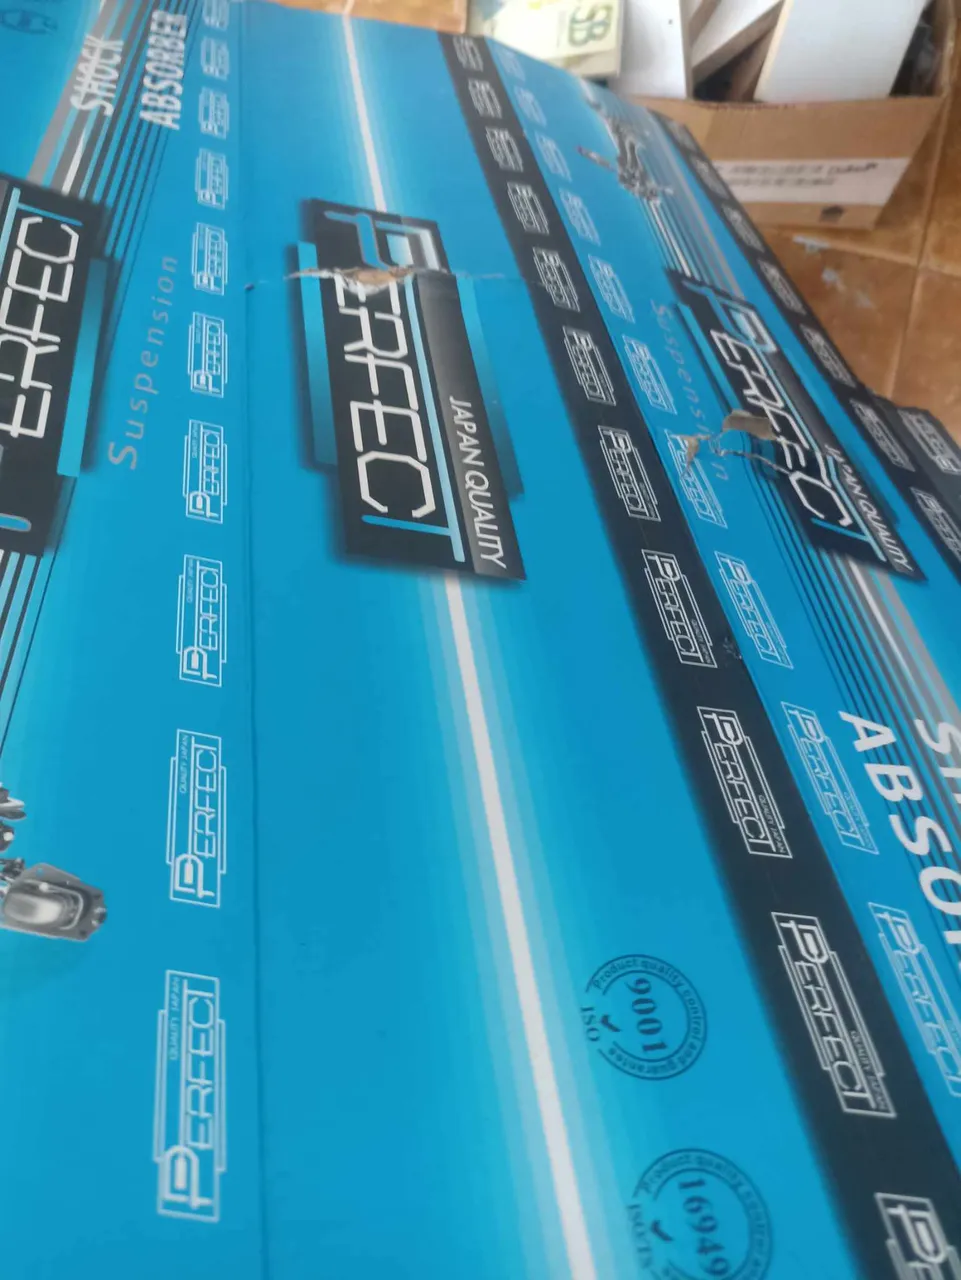
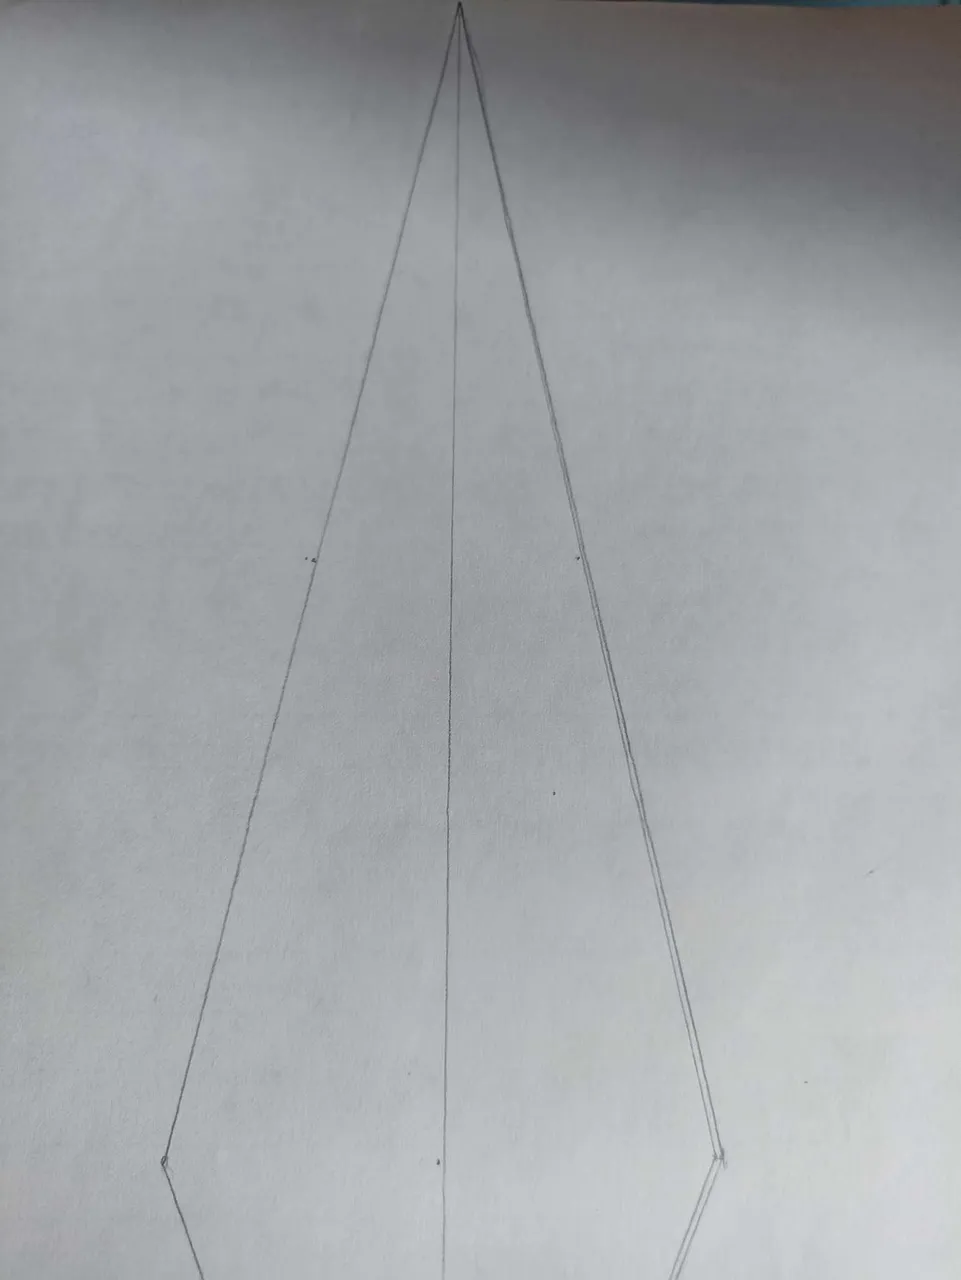
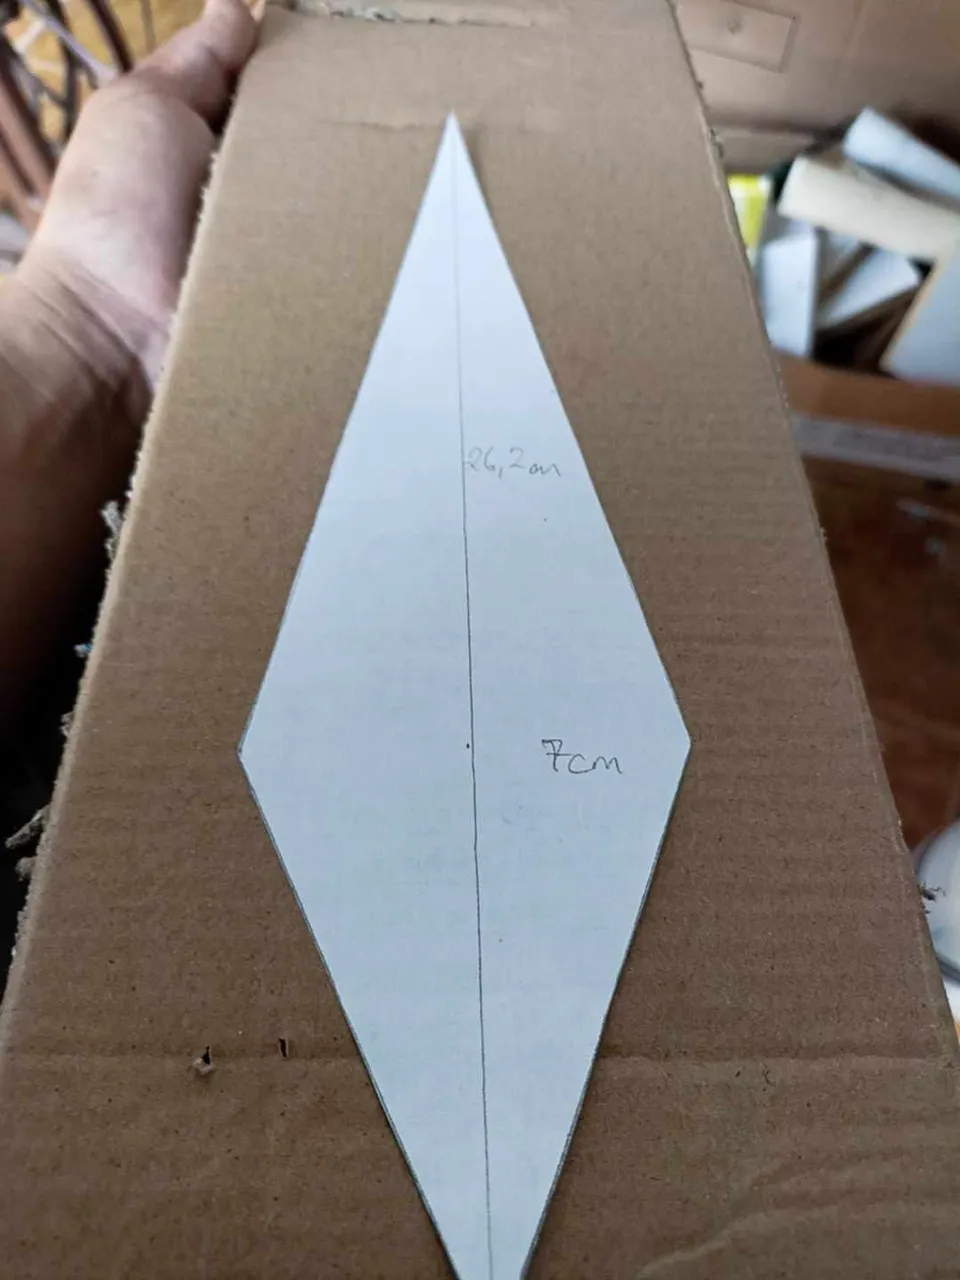
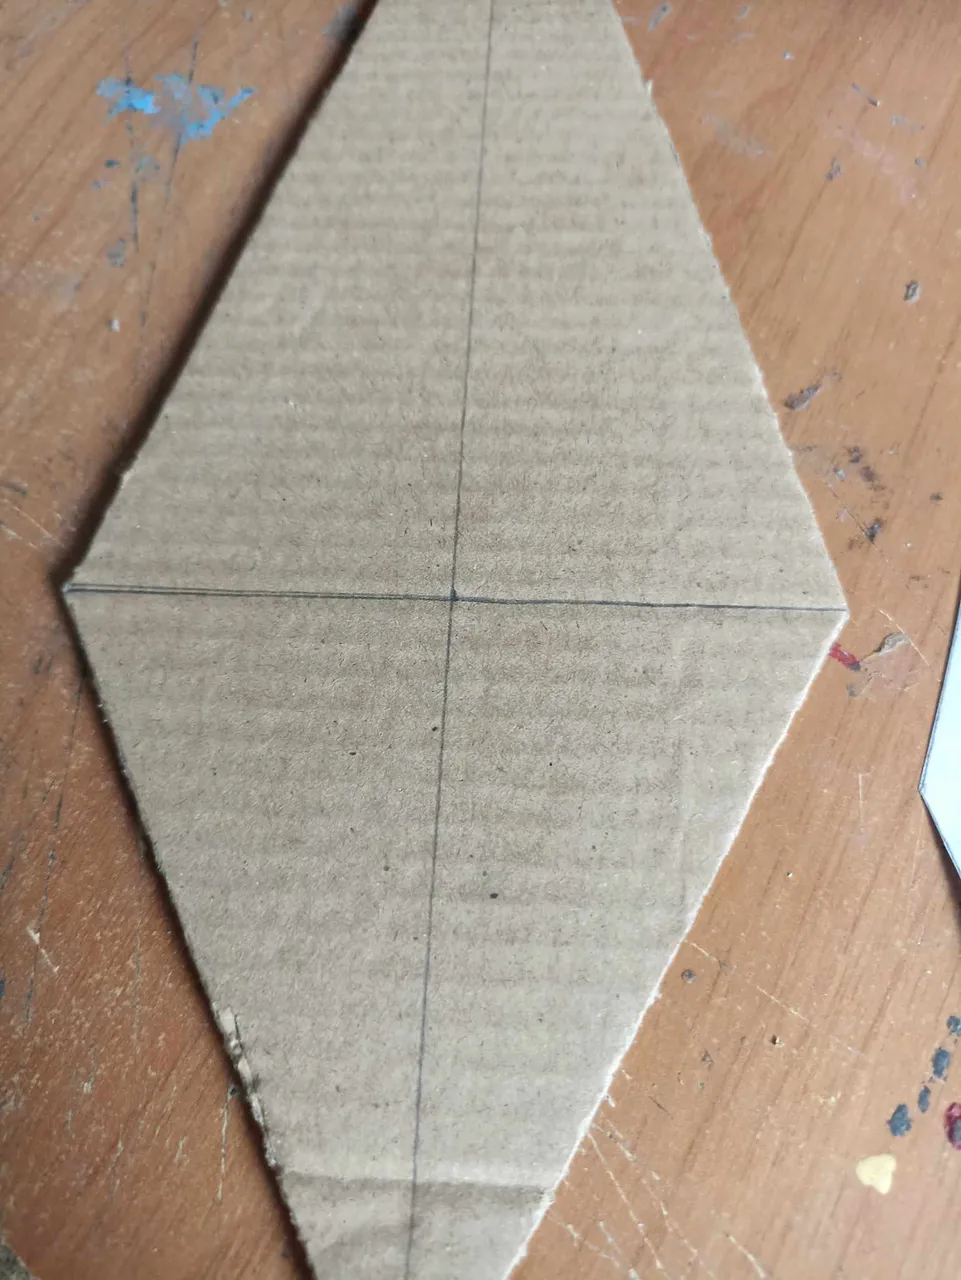
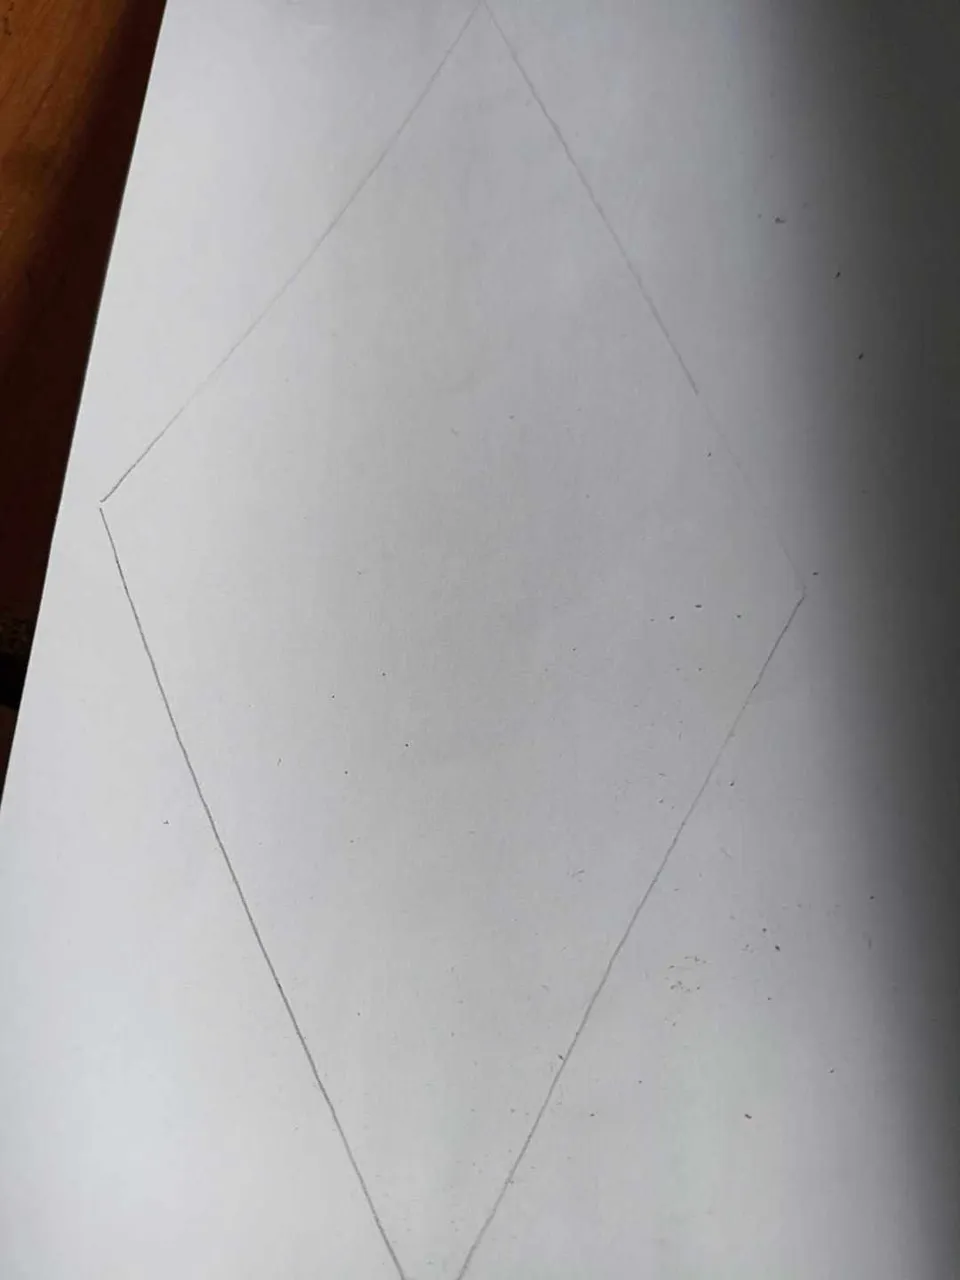
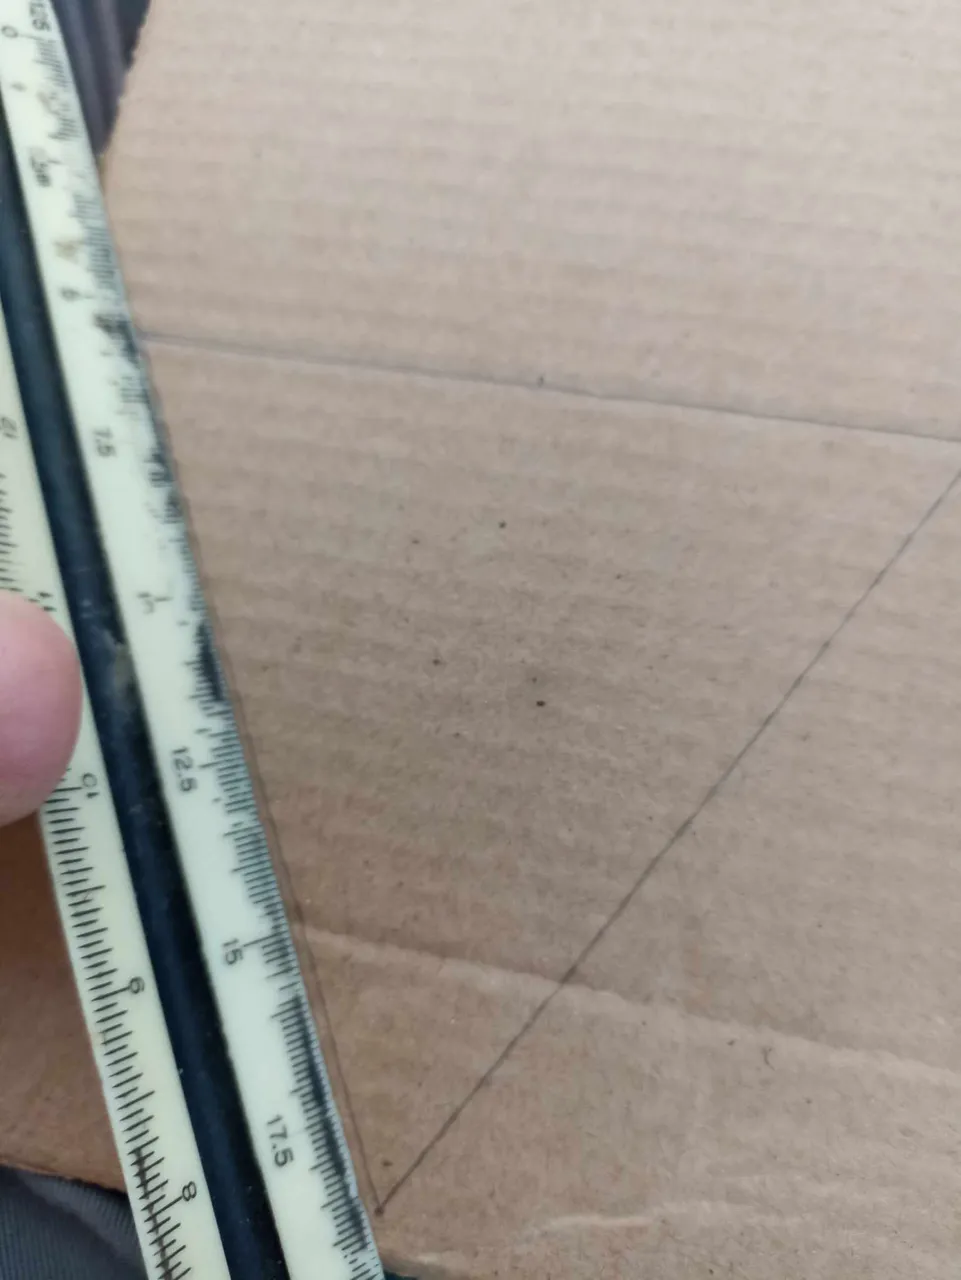
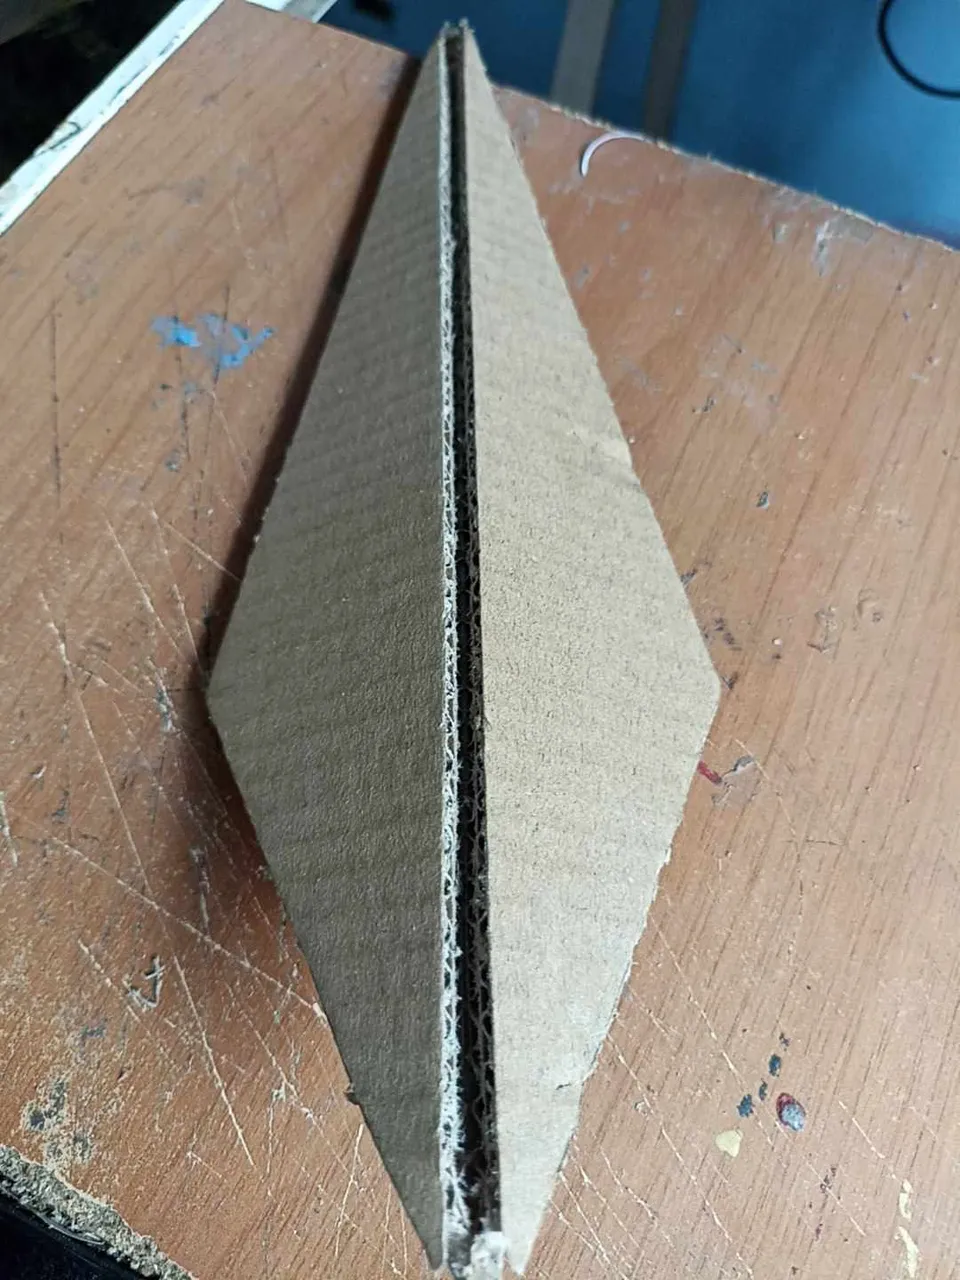
I used a cardboard box that had car parts, this type of box is very hard and resistant to be able to transport this type of items, I disassembled it and then cut it. I made some simple templates, I made 4 large templates for the longest points of the stars, 27 centimeters long and I also made 4 shorter points that measure centimeters long, since this model of stars is like that, not like the classic star of 5 points that are all the same size.
Utilicé una caja de cartón que tenía repuestos de automóvil, esta tipo de cajas es muy dura y resistente para poder transportar esta clase de artículos, la desarme para luego cortar. Hice una sencillas plantillas, hice 4 plantillas grandes para las puntas más largas de la estrellas, de 27 centímetros de largo y también hice 4 puntas mas cortas que miden centímetros de largo, ya que este modelo de estrellas es así, no como la estrella clásica de 5 puntas que todas son del mismo tamaño.
 |  |  |
|---|---|---|
 | 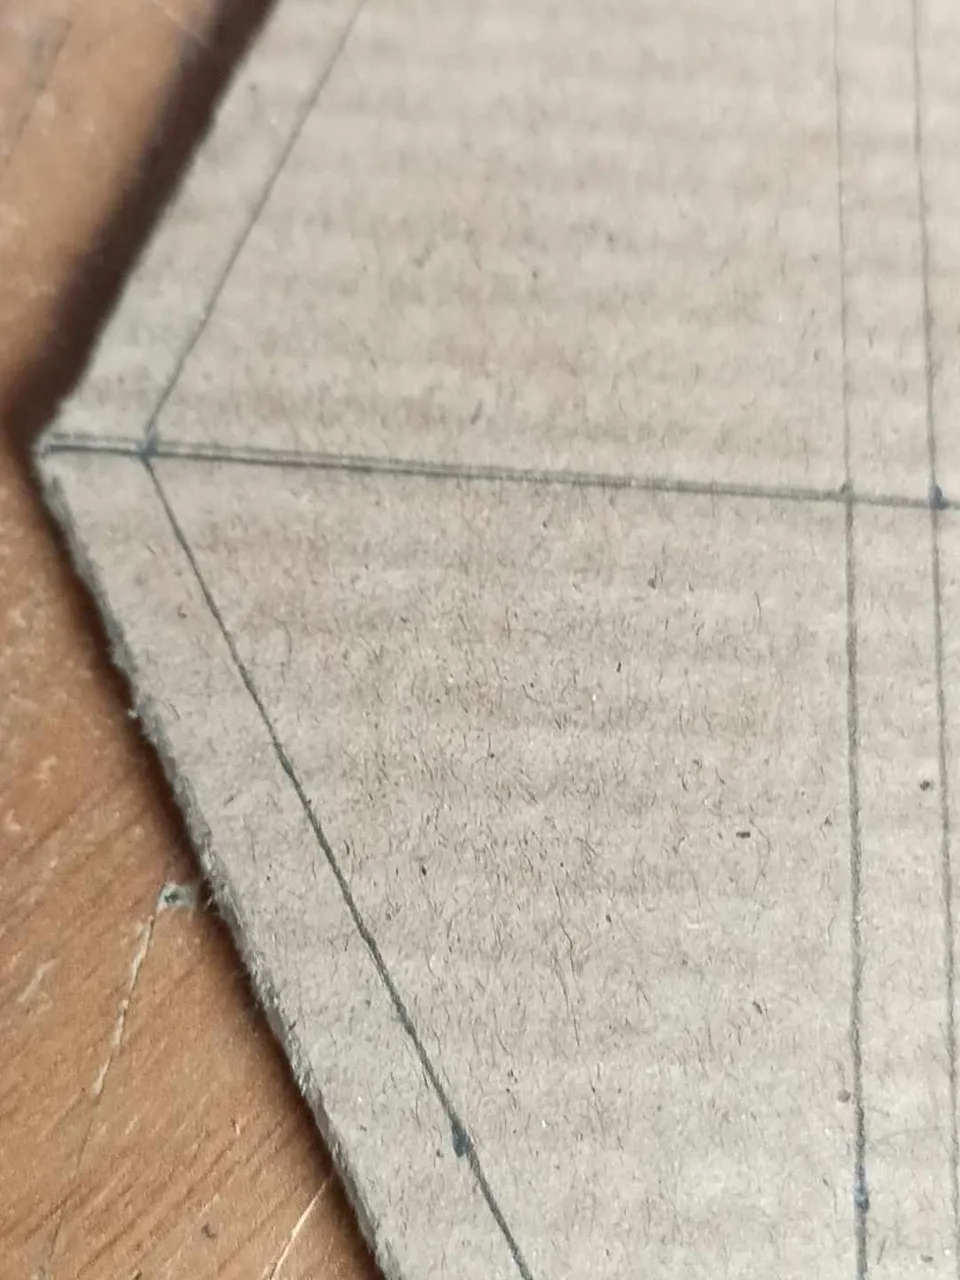 |  |
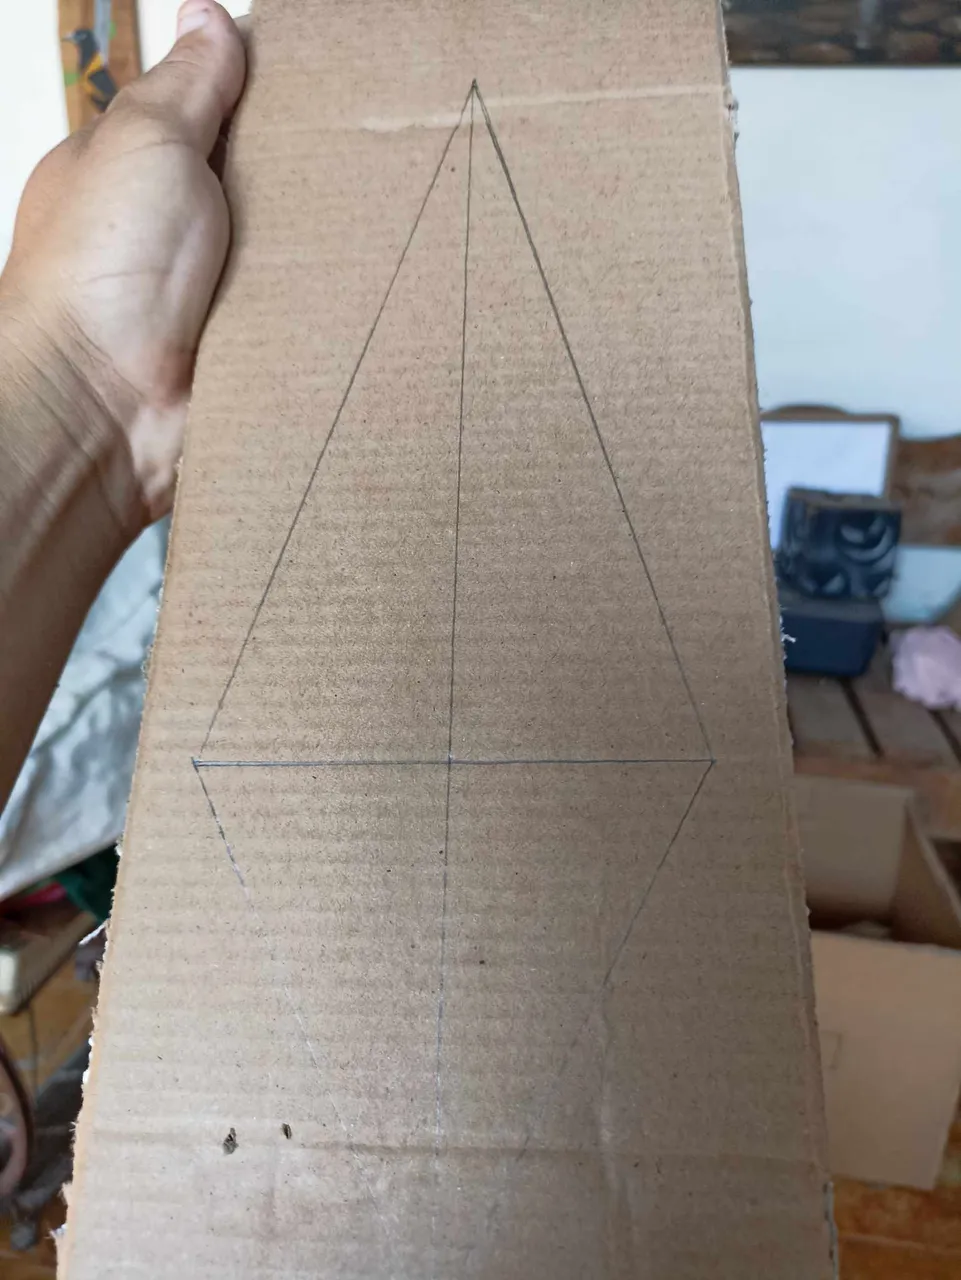
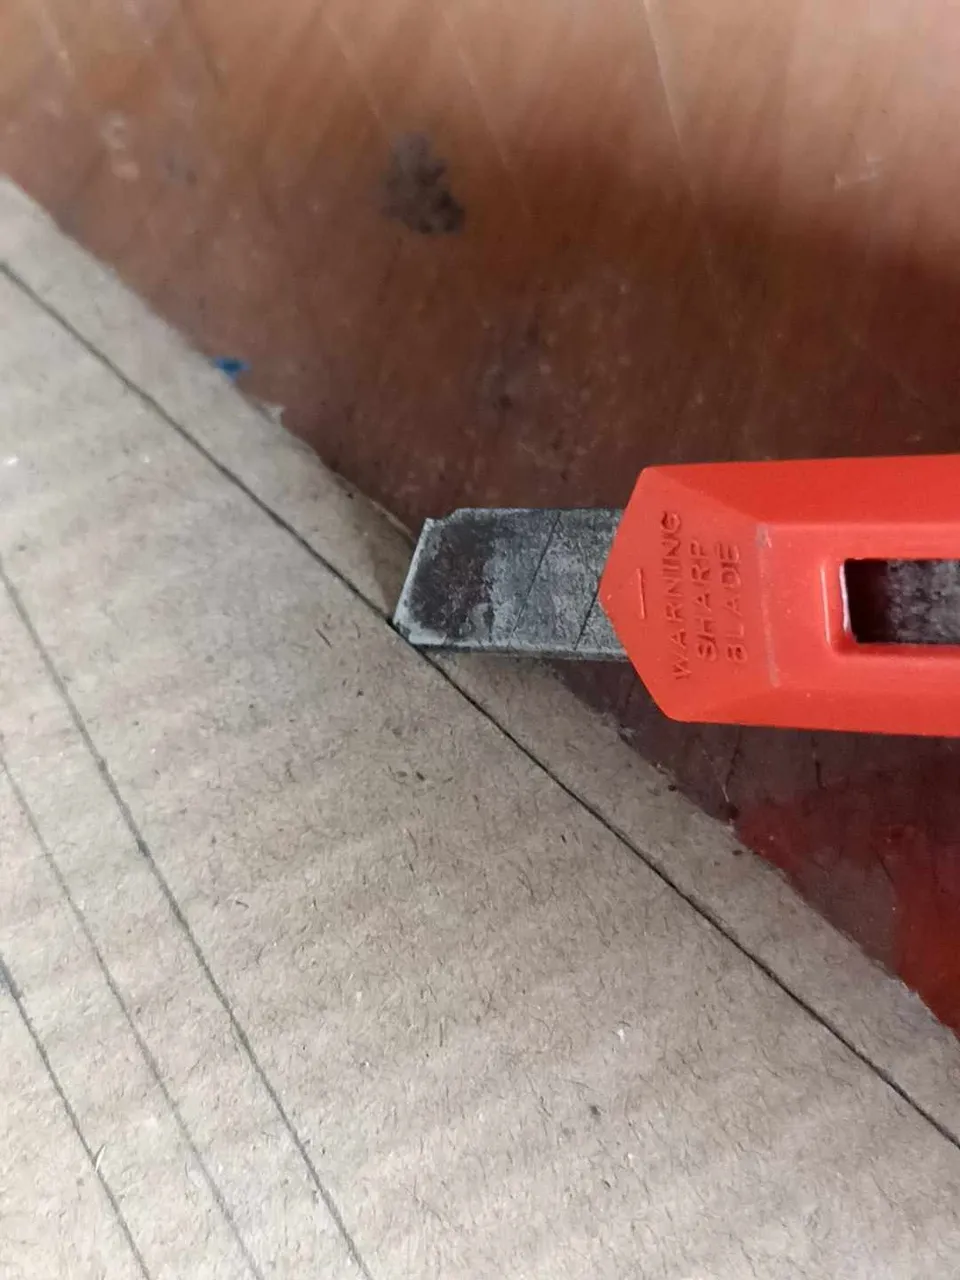
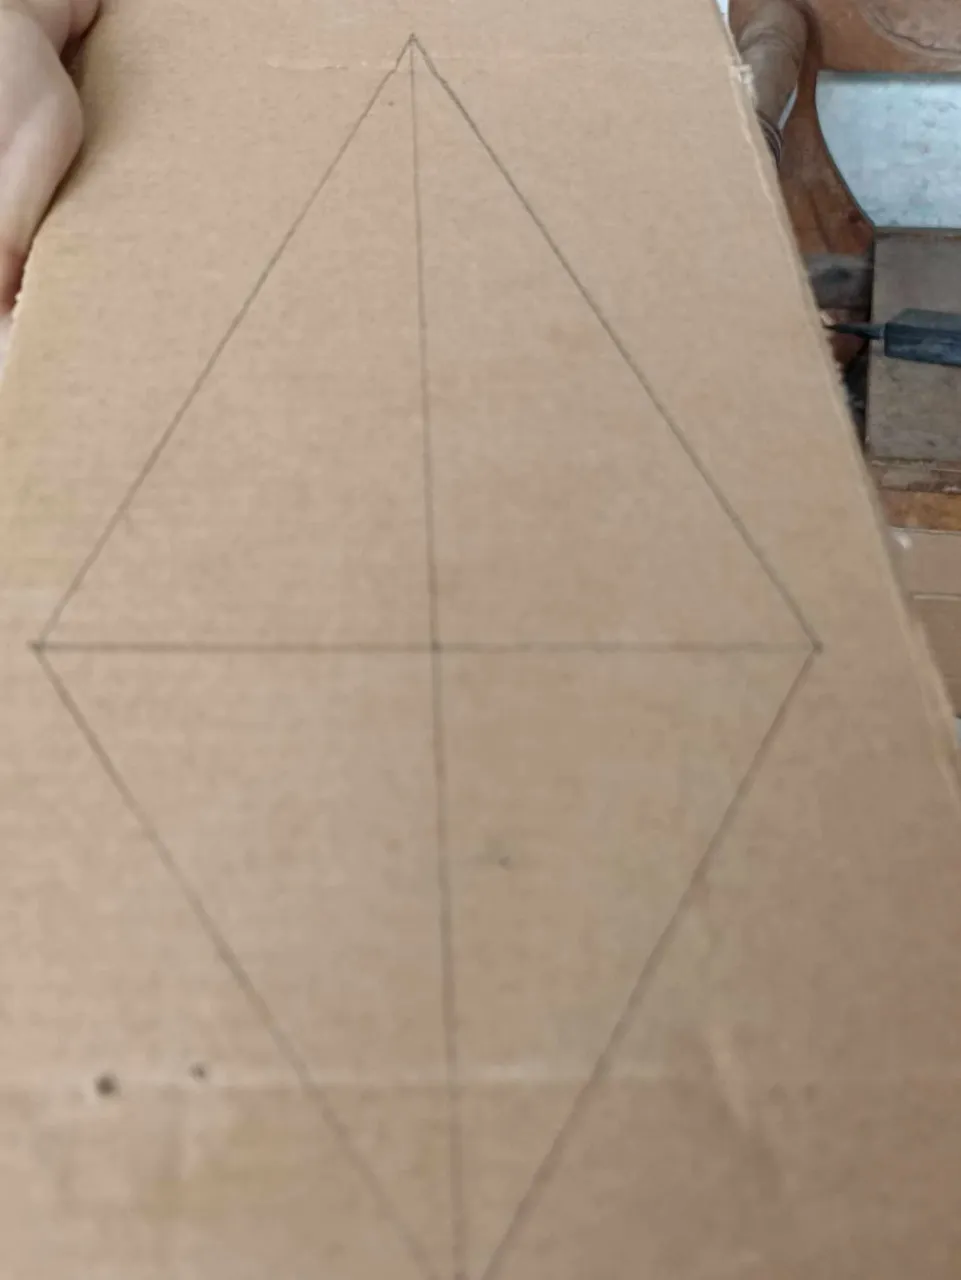
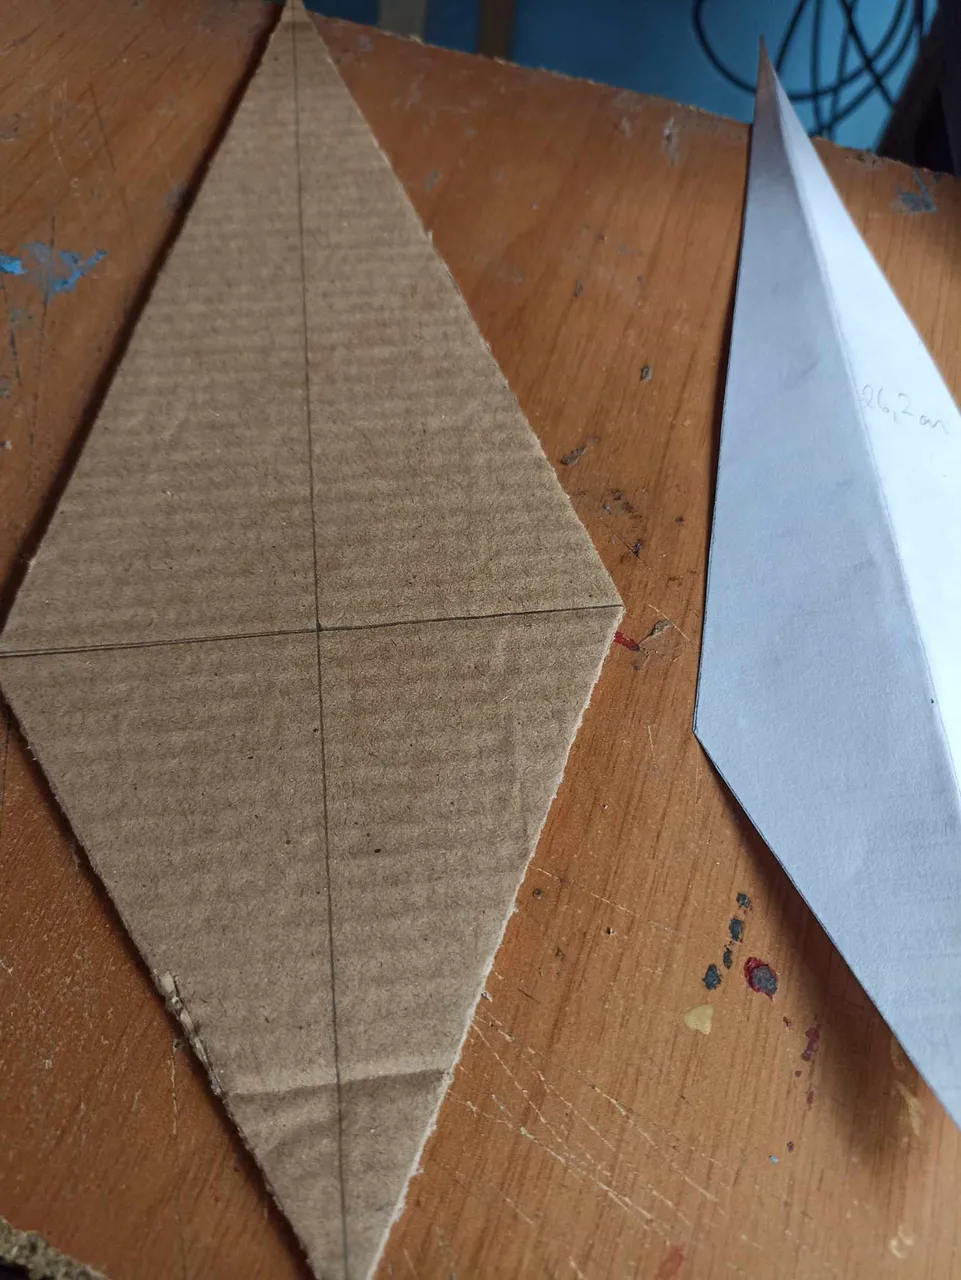
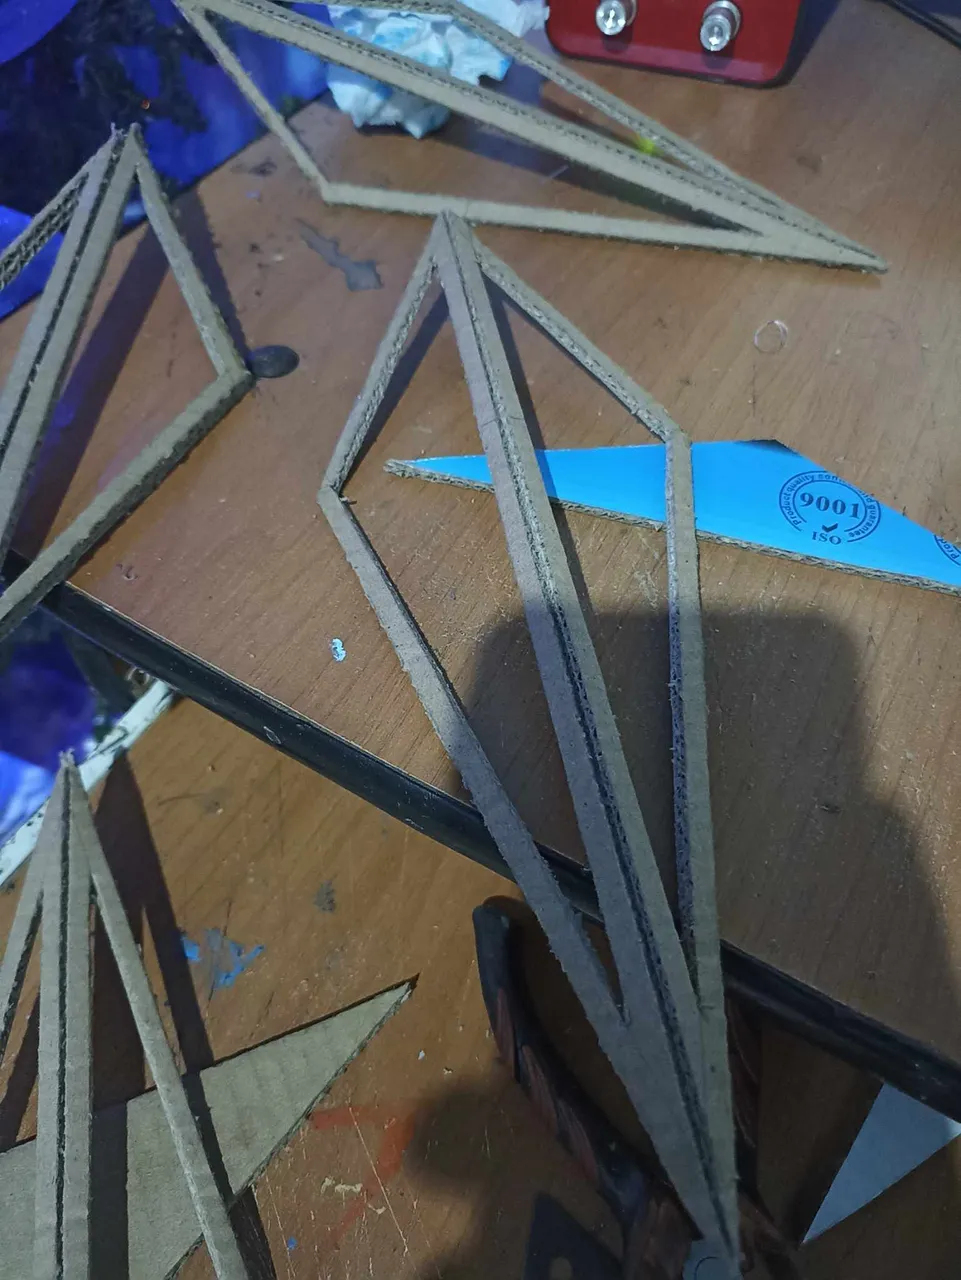
With the paper template I began to draw on top of the cardboard, I started with the long tips. I drew and then with a knife I started cutting, I didn't use scissors because the cardboard is very hard so the scissors didn't work well. Then I removed the entire part that I cut until I had the desired shape, then I drew some lines 5 millimeters thick around each edge, and in the middle I made a line measuring 1 centimeter divided into 5 millimeters each.
Con la plantilla de papel comencé a dibujar encima del cartón, comencé con las puntas largas. Dibujé y luego con una navaja comencé a cortar, no usé tijeras porque el cartón es muy duro entonces la tijera no funcionaba bien. Luego retiré toda la parte que corte hasta tener la forma deseada, luego dibujé alrededor de cada borde unas líneas de 5 milímetros de grosor, y en el medio hice una línea que mide 1 centímetro dividida en 5 milímetros cada una.
 |  |  |
|---|---|---|
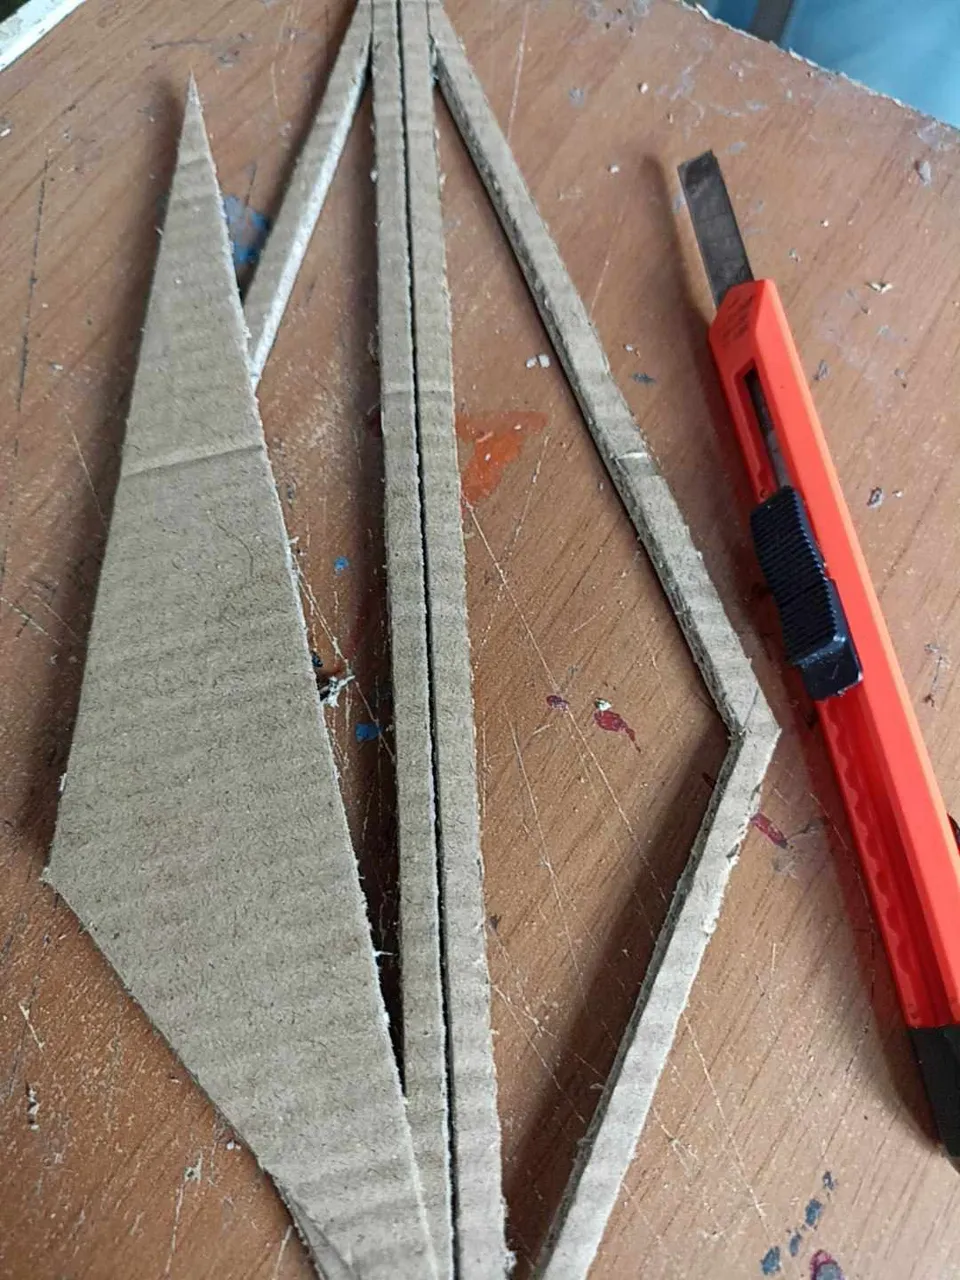 |  | 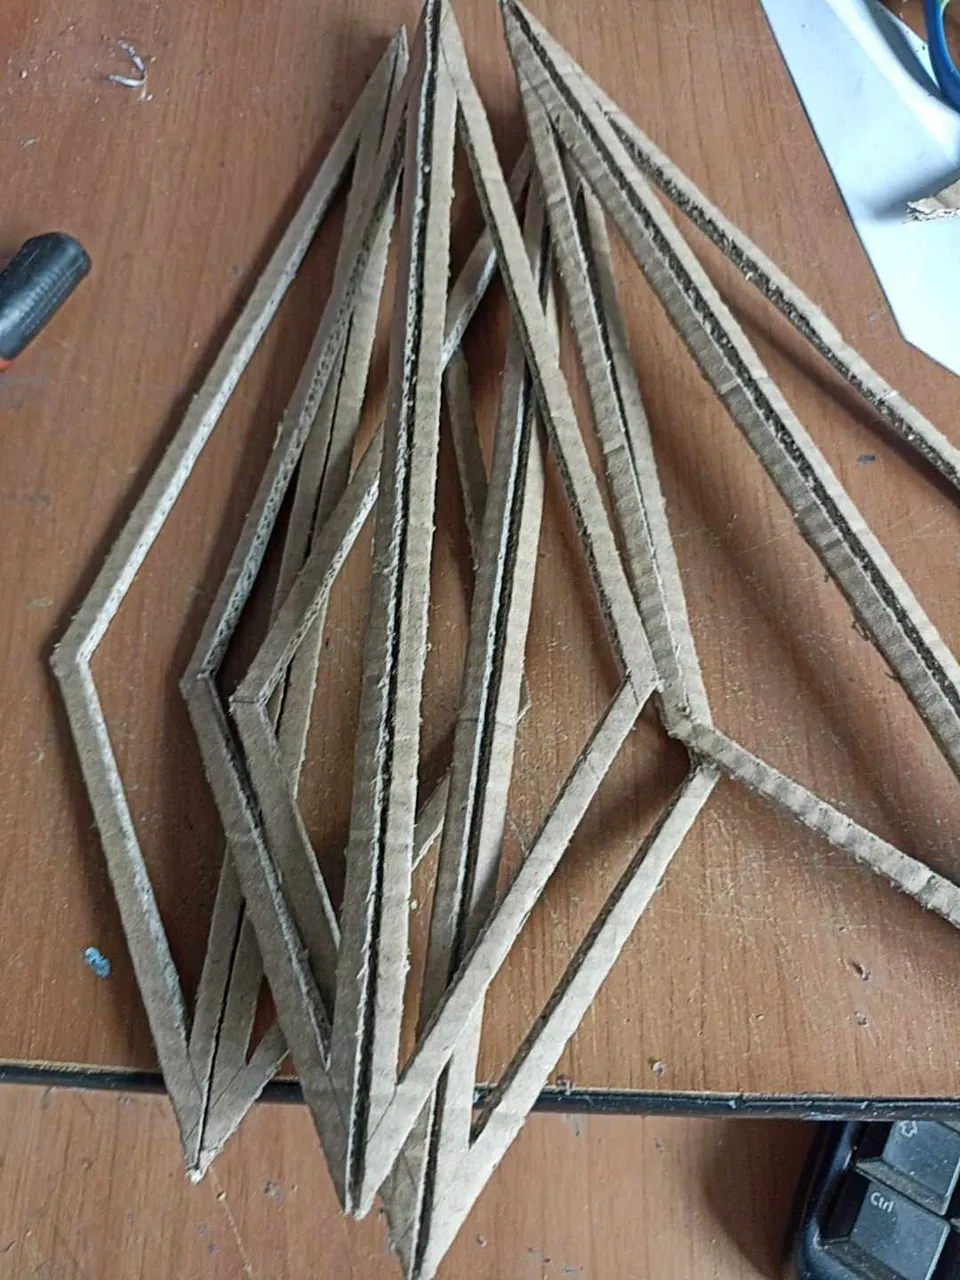 |
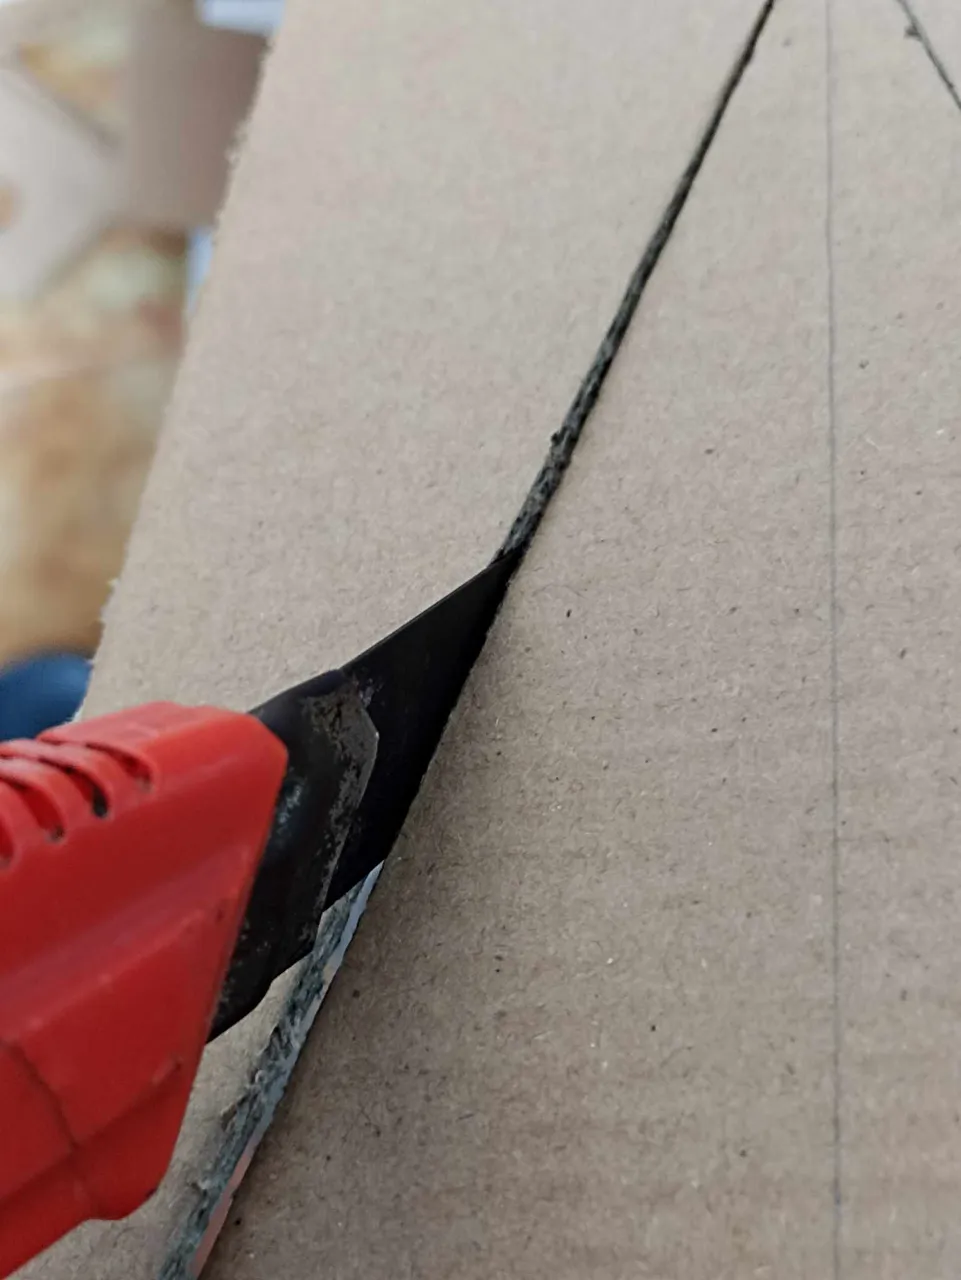
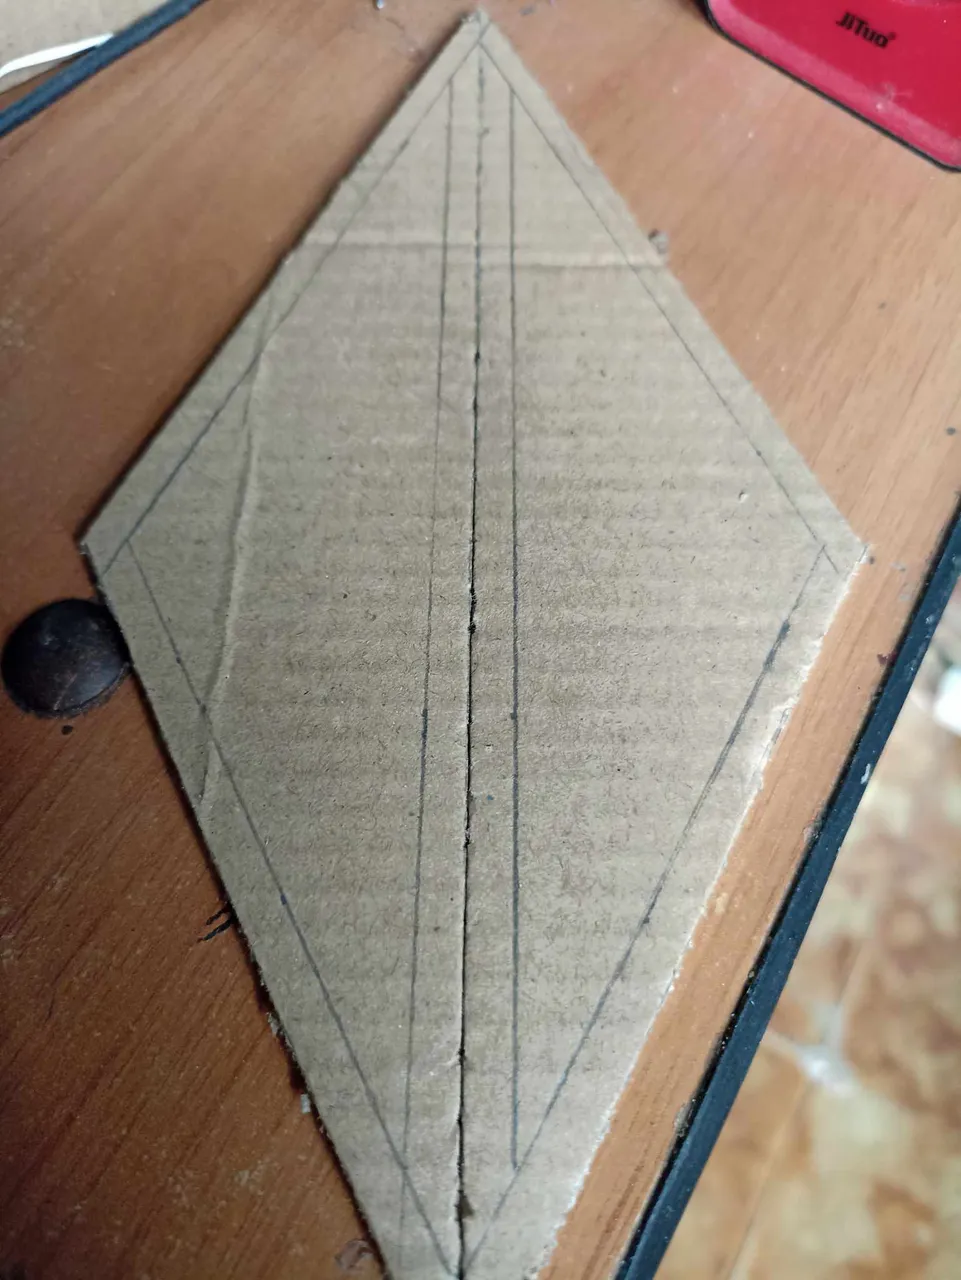
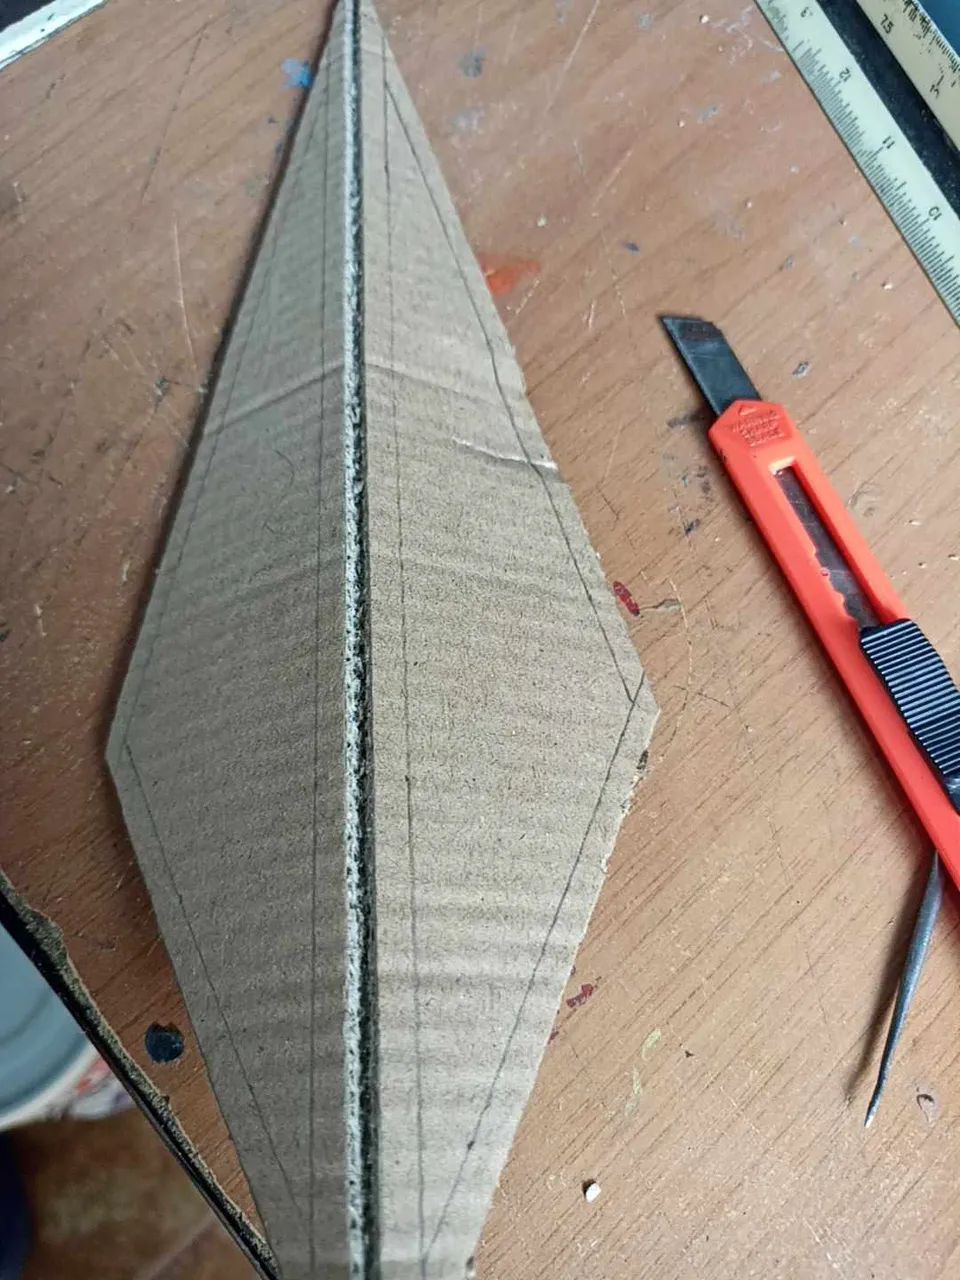
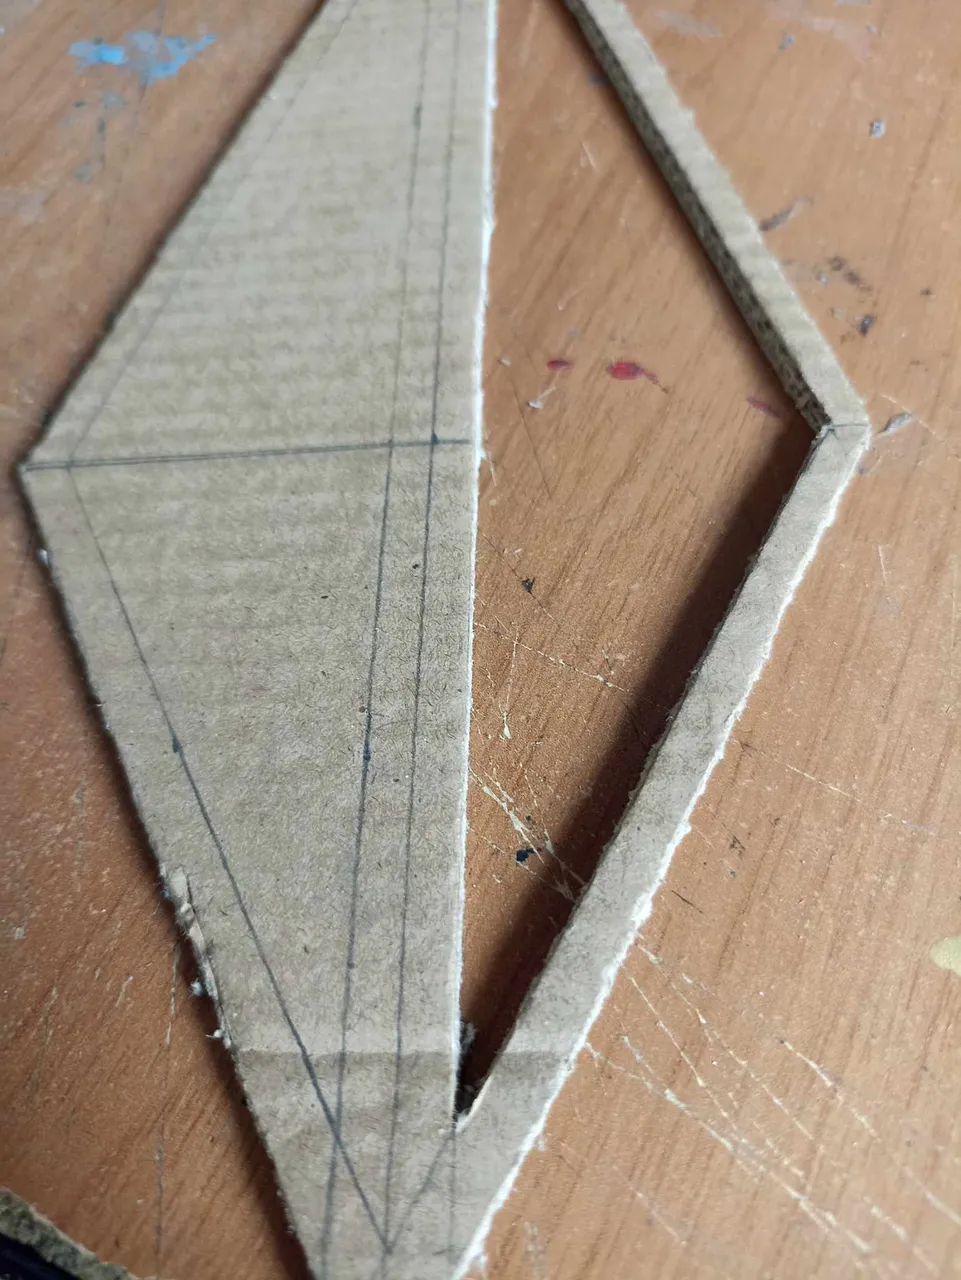
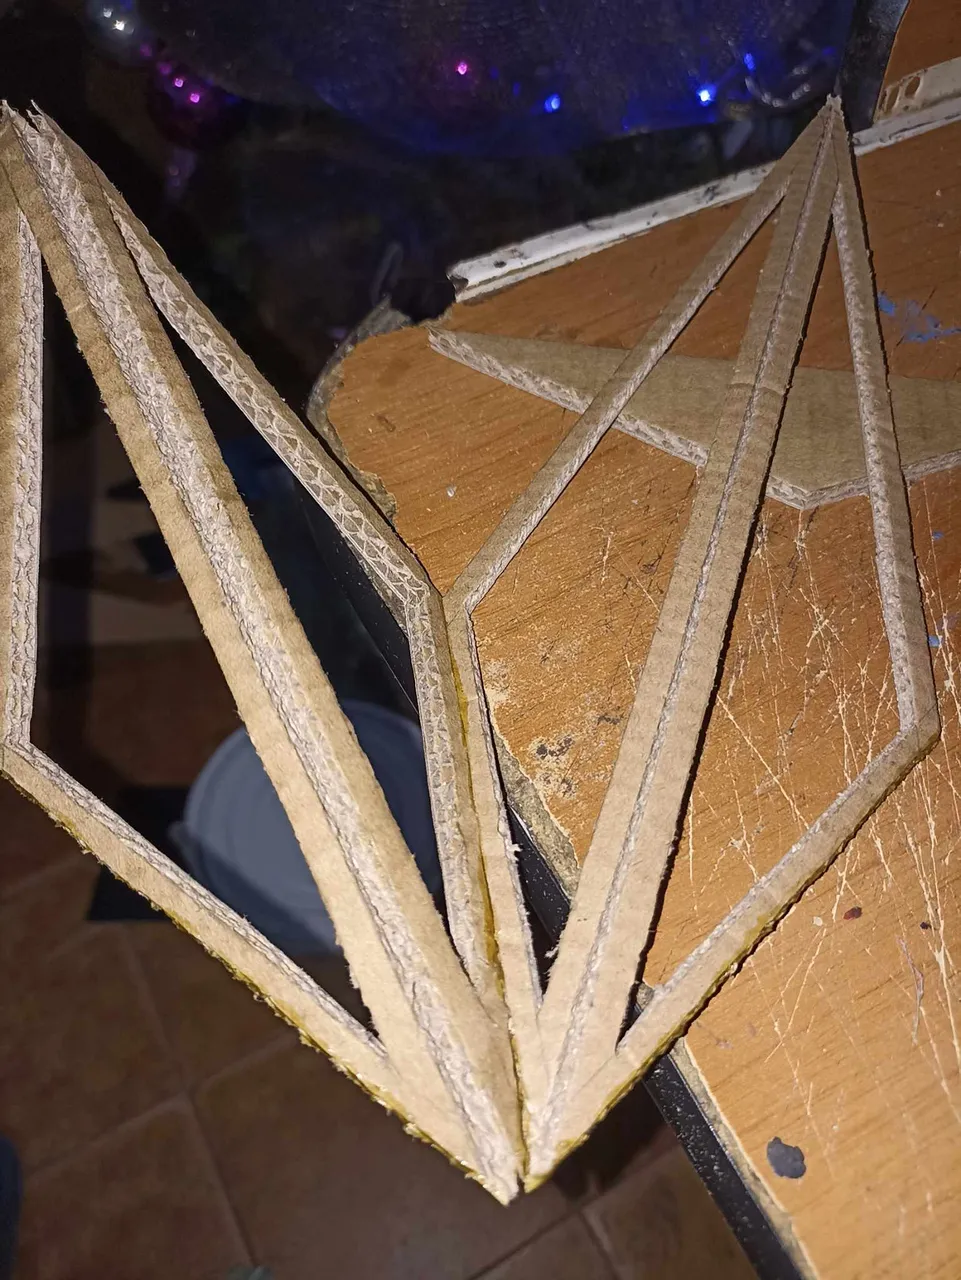
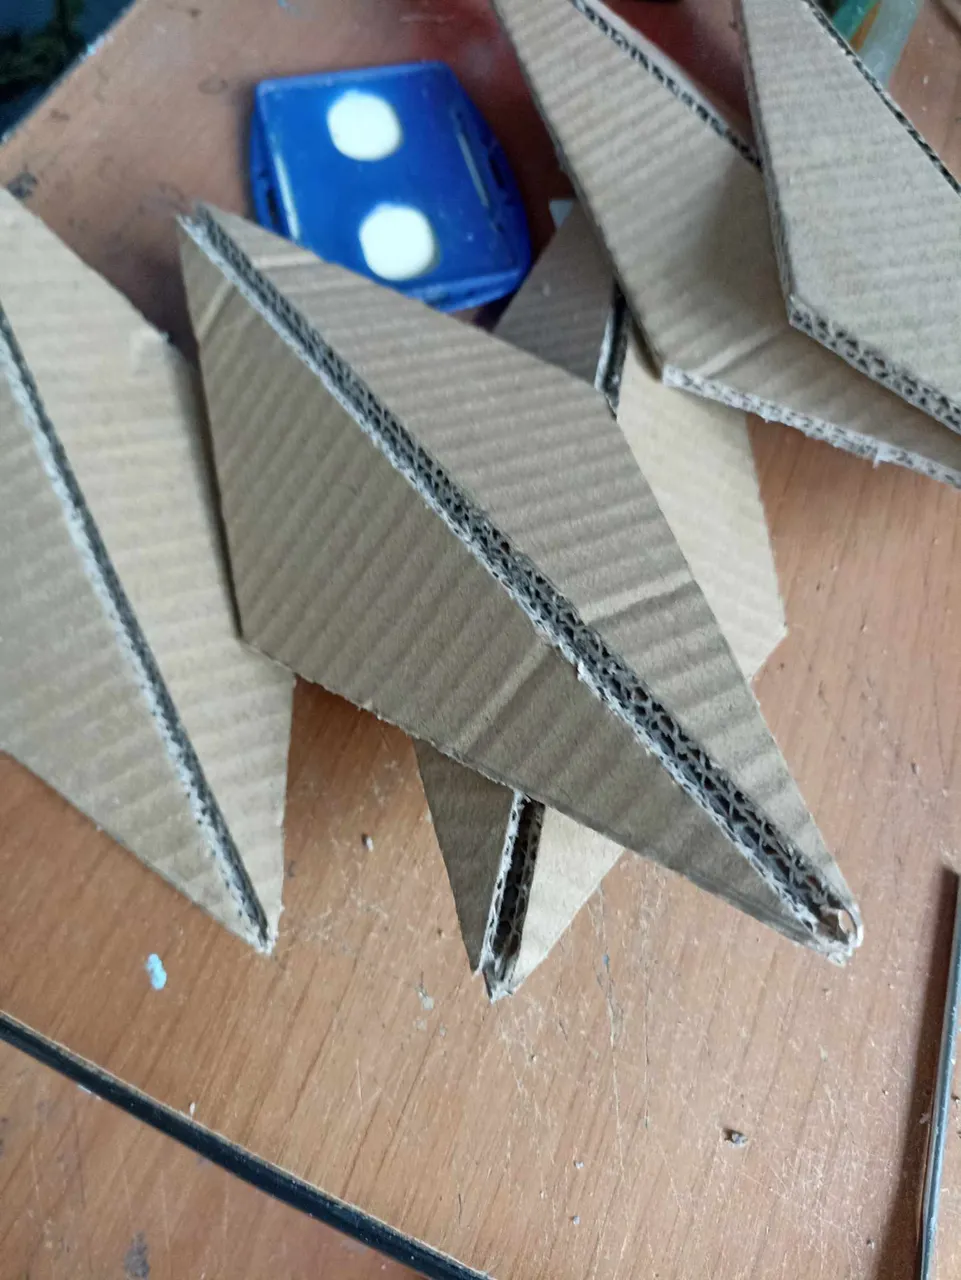
Now the next step is to remove the parts outside the lines that I drew before, so that when removing them the tips will be left with an edge of 5 millimeters. First I make a cut in half along the entire middle stripe, but without cutting the cardboard completely, then along the sides, this is how I do it with each of the ends until I complete the 4 that I made.
Ahora el siguiente paso es retirar las partes fueras de las líneas que dibujé antes, así que al quitarlas las puntas quedaran con un borde de 5 milímetros. Primero hago un corte en la mitad por toda la raya del medio, pero sin cortar el cartón por completo, luego por los lados, así voy haciendo con cada una de las puntas hasta completar las 4 que hice.
 |  | |
|---|---|---|
 |  |
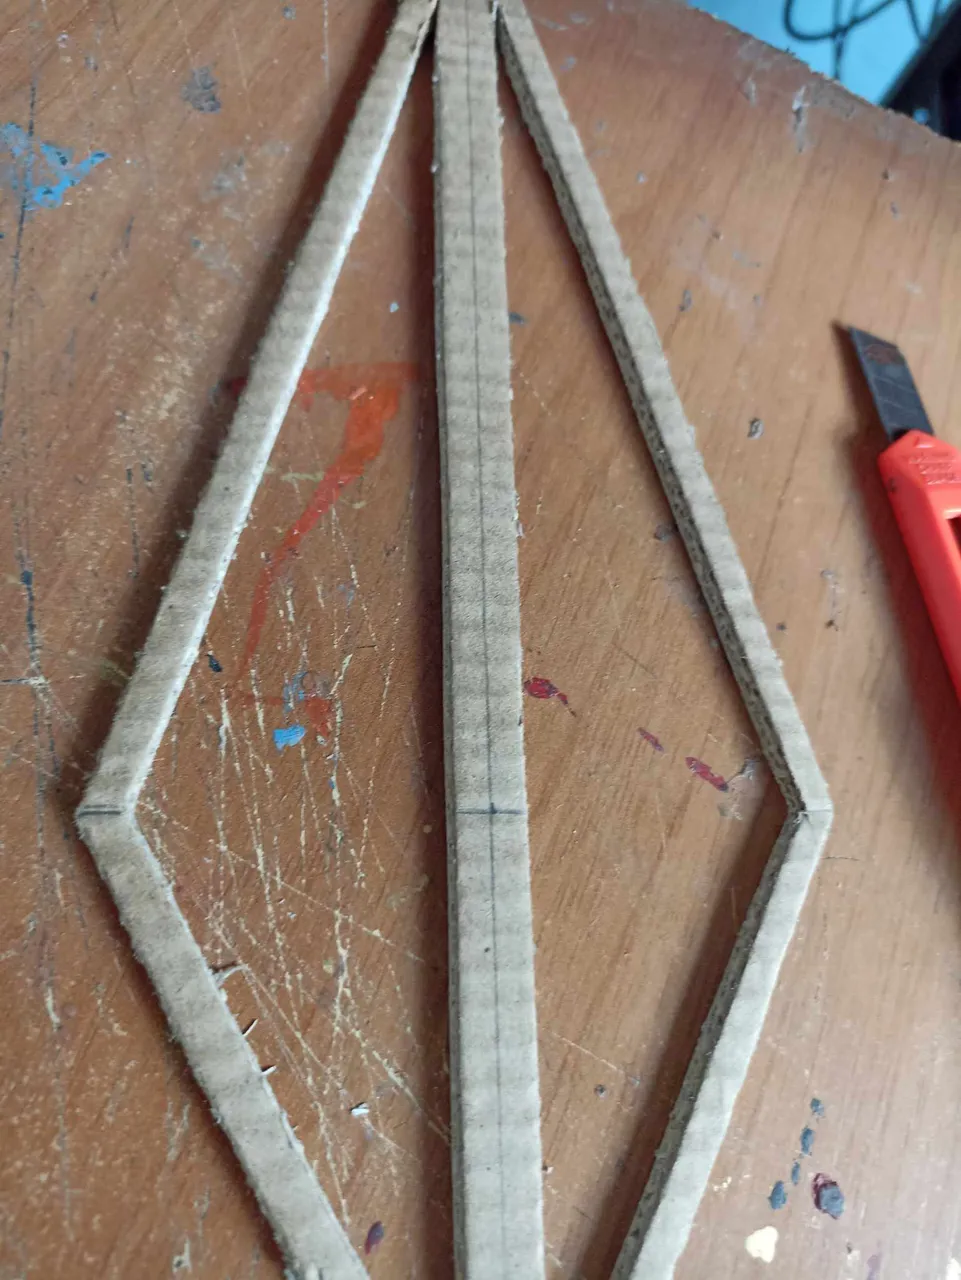
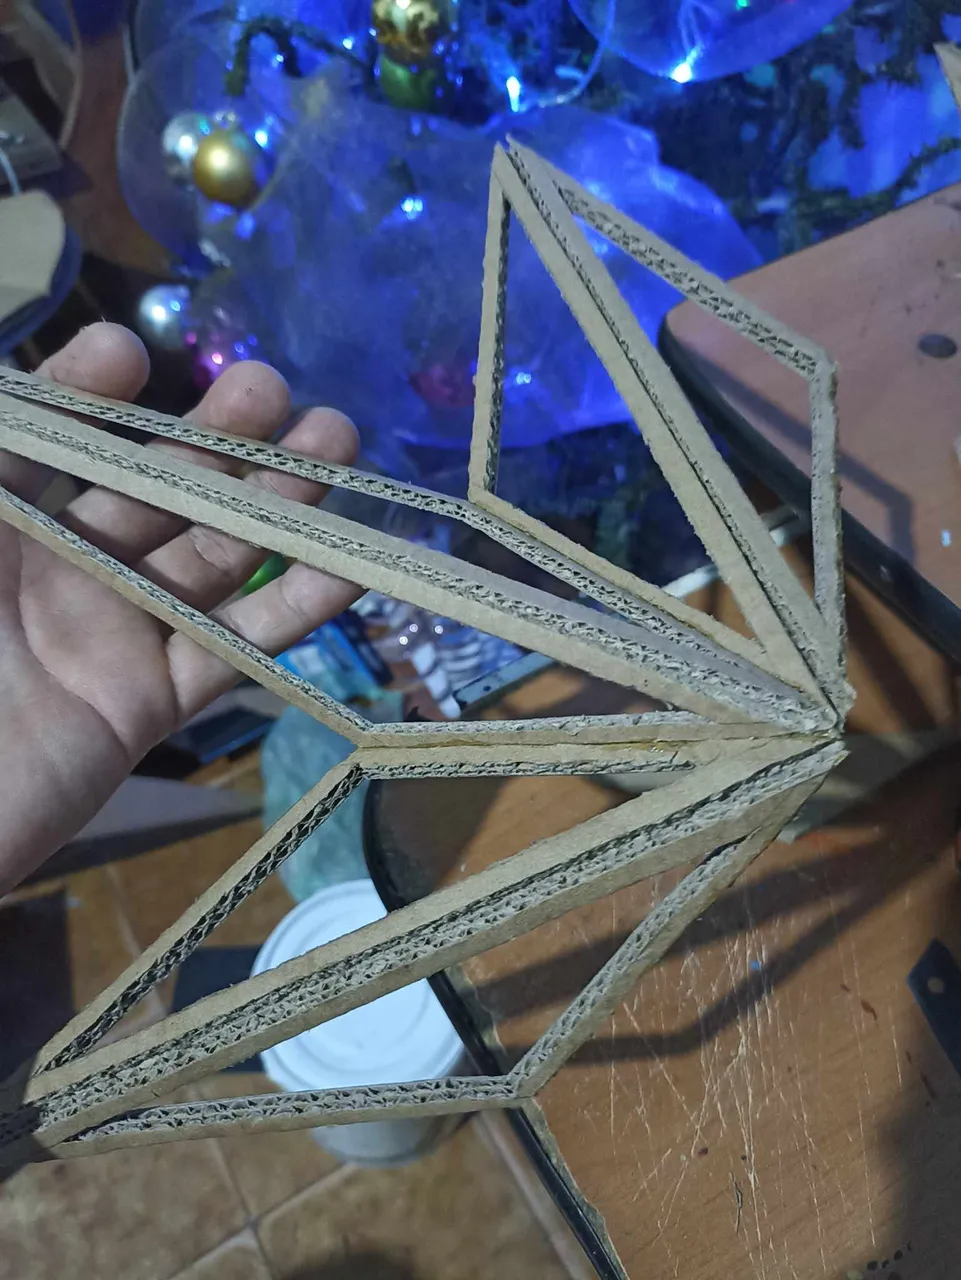
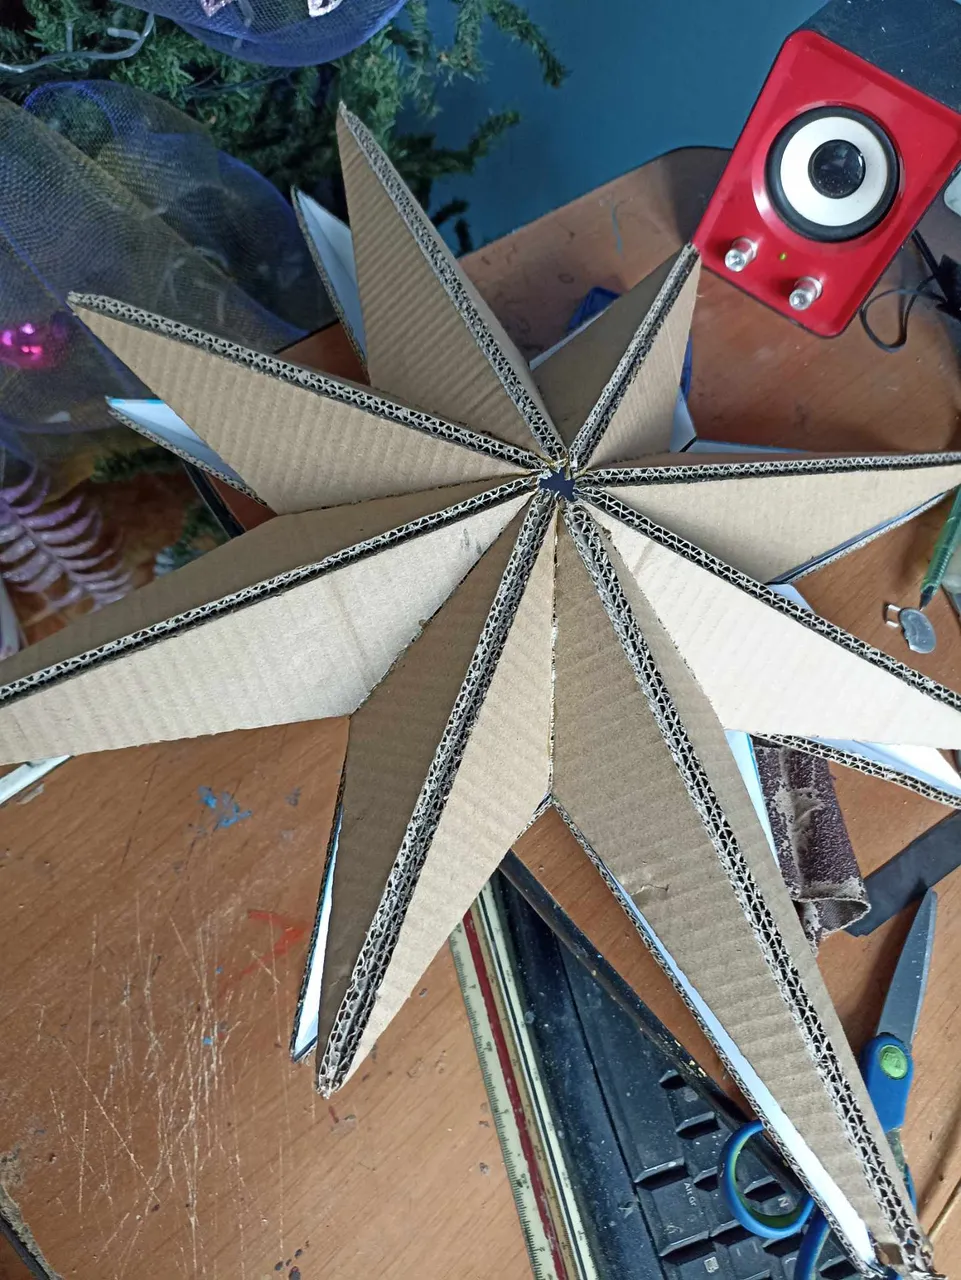
I used the same process to remove the rest of the pieces, 4 in total that were smaller, measuring 18 centimeters. Then you have to put glue on all the edges to be able to join them and thus have the first face of the star.
El mismo proceso utilicé para sacar el resto de piezas, 4 en total que eran más pequeñas, las que miden 18 centímetros. Luego toca ponerle pegamento por todos los bordes para poder unirlas y así tener la primera cara de la estrella.
 |  |  |
|---|---|---|
 |  |  |
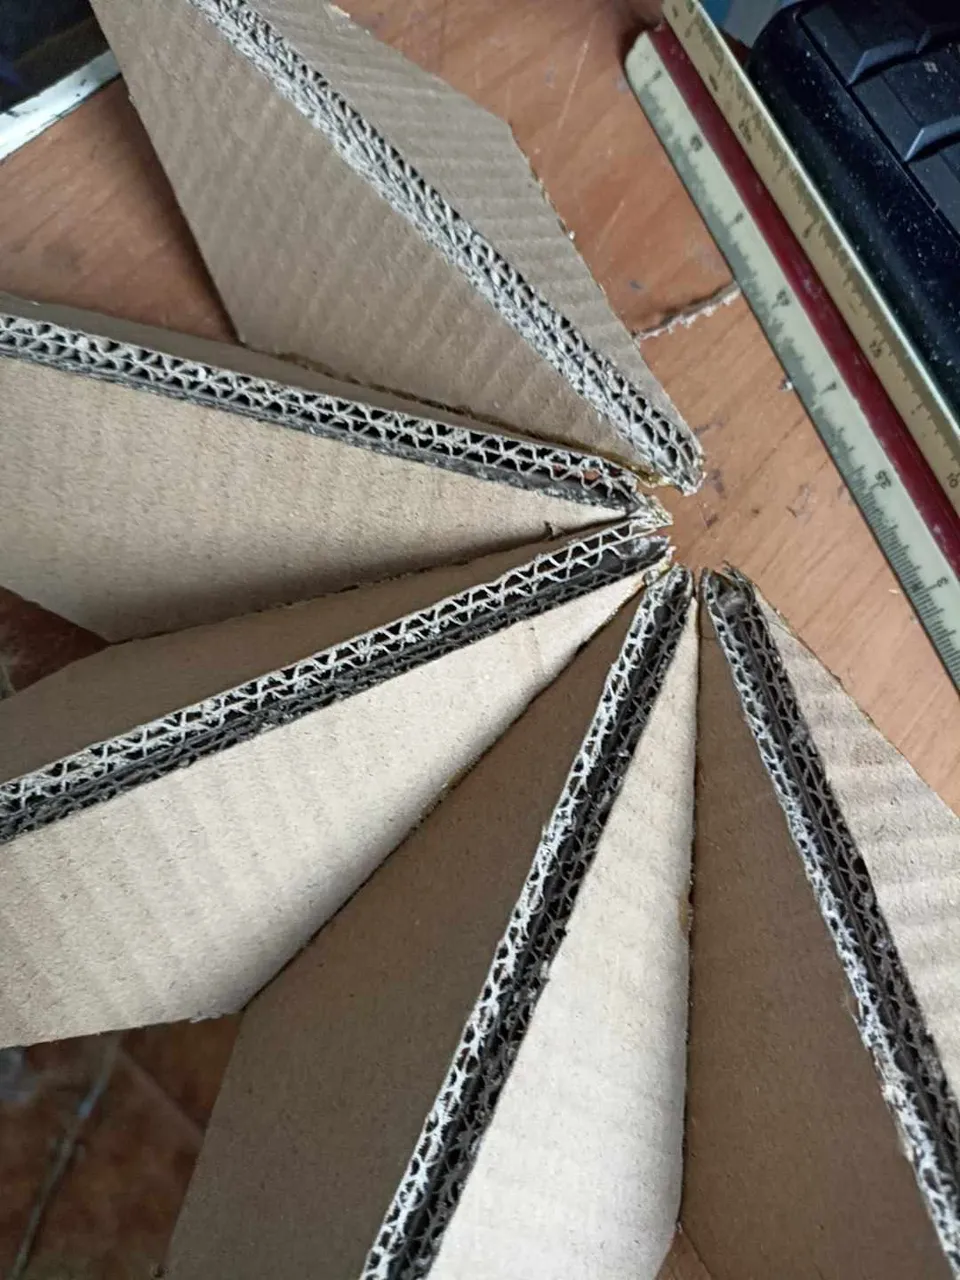
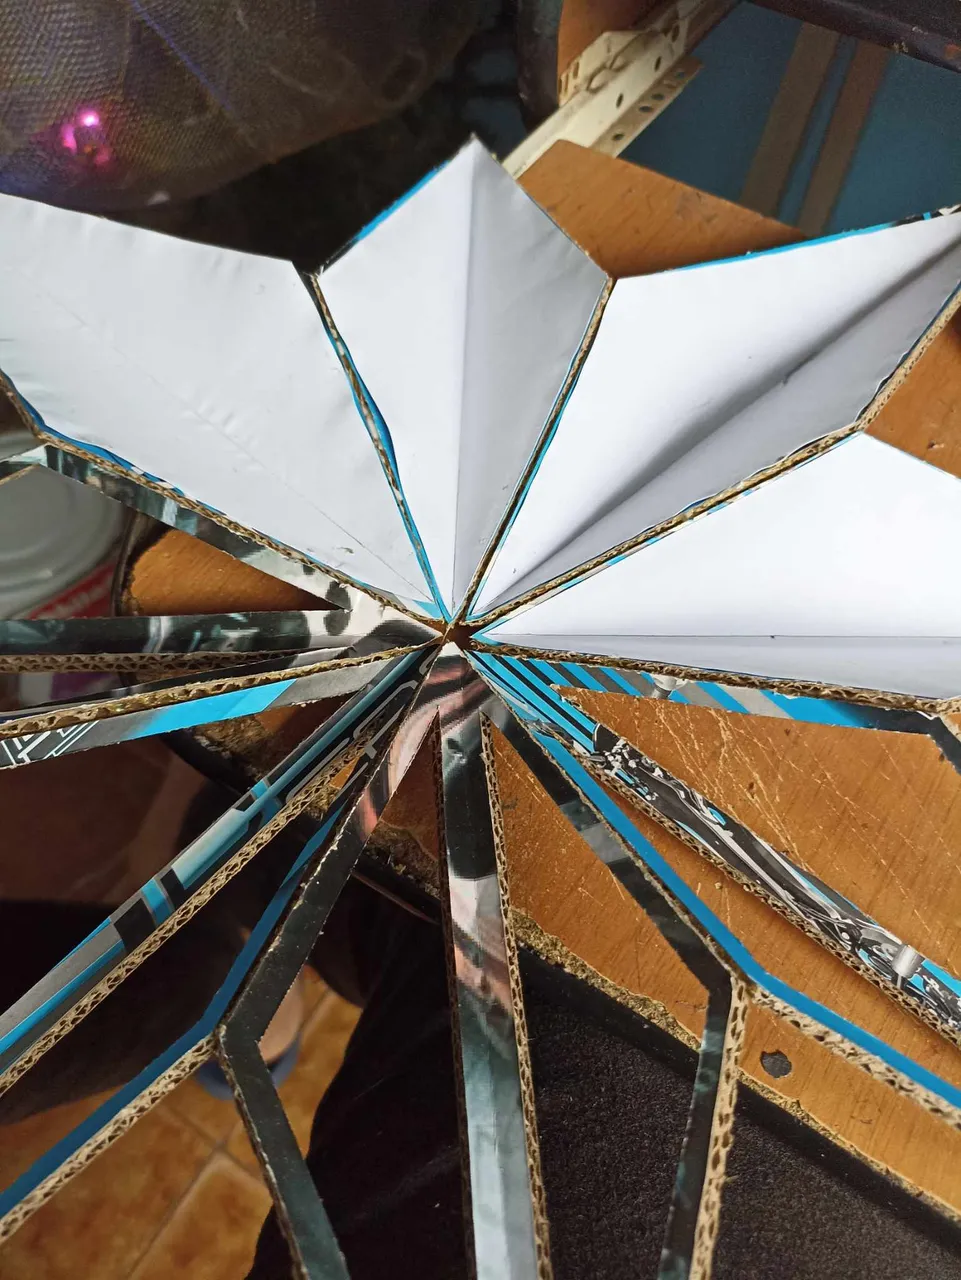
The next step is to put glue on the edges, this time on the shortest edge that would be like the base of each tip. When applying glue, we let it dry for a few minutes and join each tip one by one, ensuring that the glue is in order and on the same line. This way we can complete the first and most important part of the star.
EL paso siguiente es poner pegamento por los bordes, en etsa oportunidad por el borde mas corte que sería como la base de cada punta. Al poner pegamento dejamos secar por unos minutos y vamos uniendo una a una cada punta, asegurándo que el pegado este en orden y en la misma línea. Así podremos completar la primera parte de la estrella y la más importante.
 |  |  |
|---|---|---|
 | 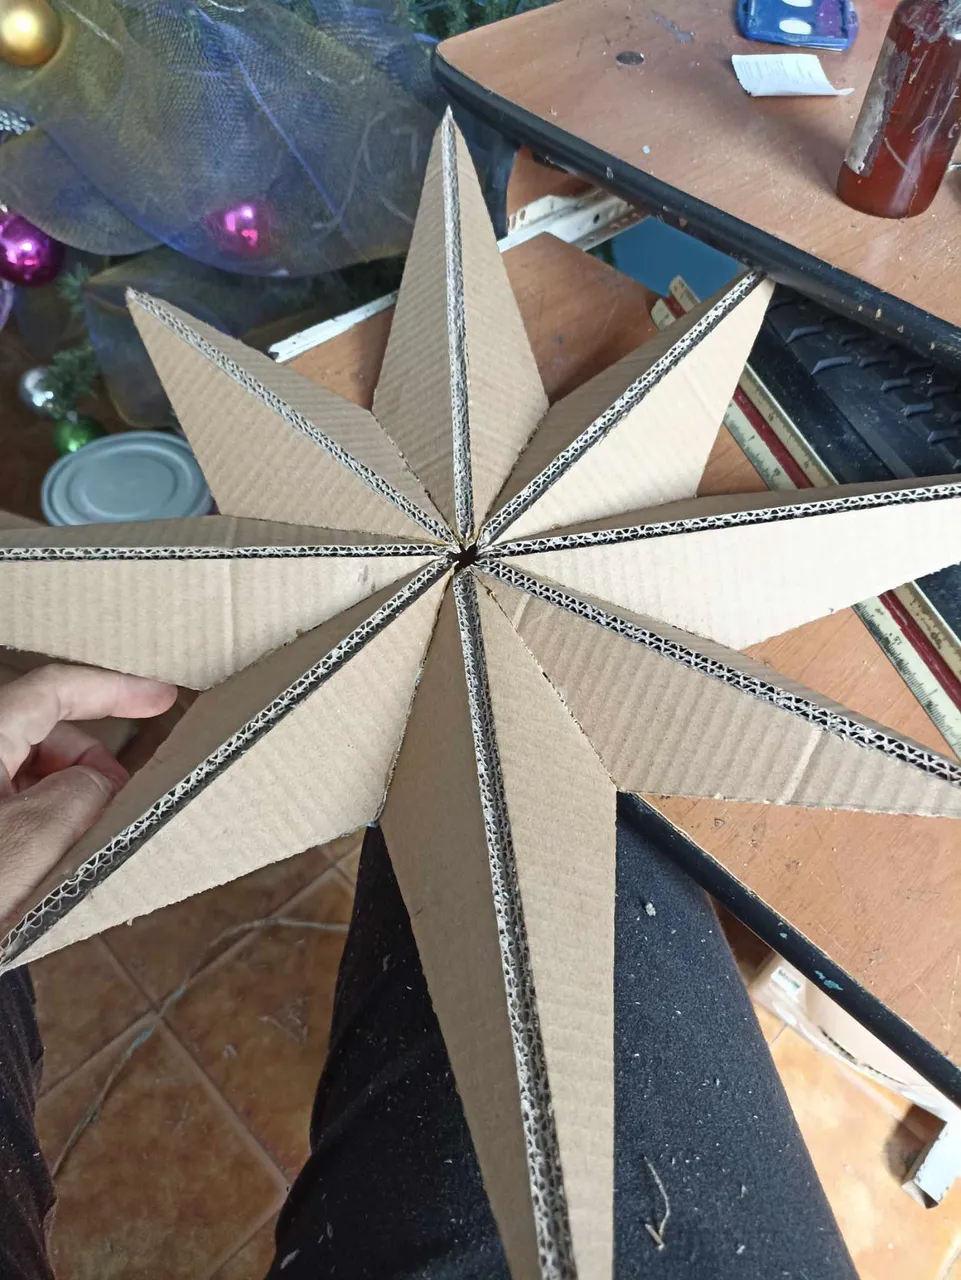 |  |
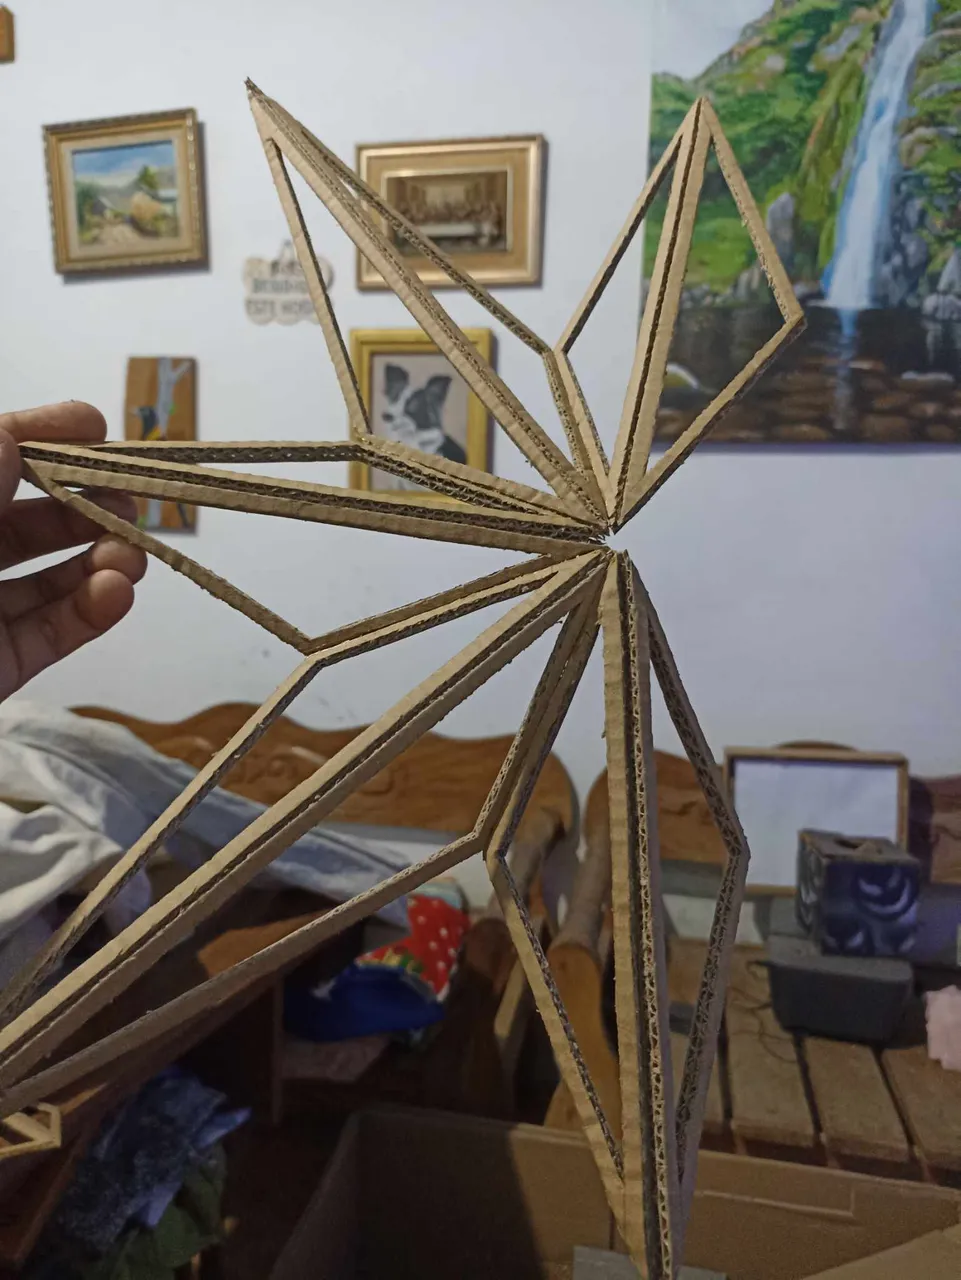
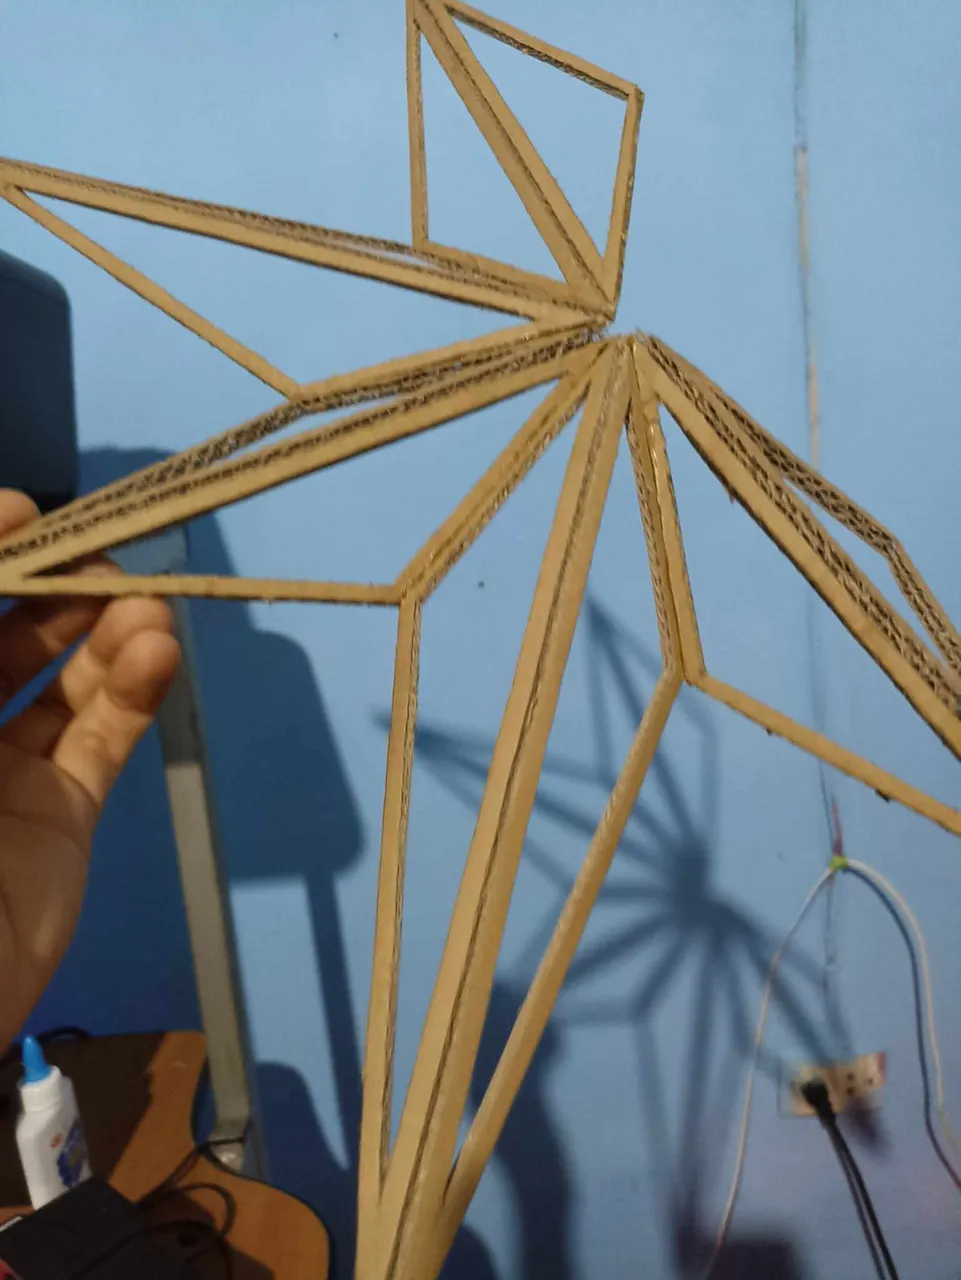
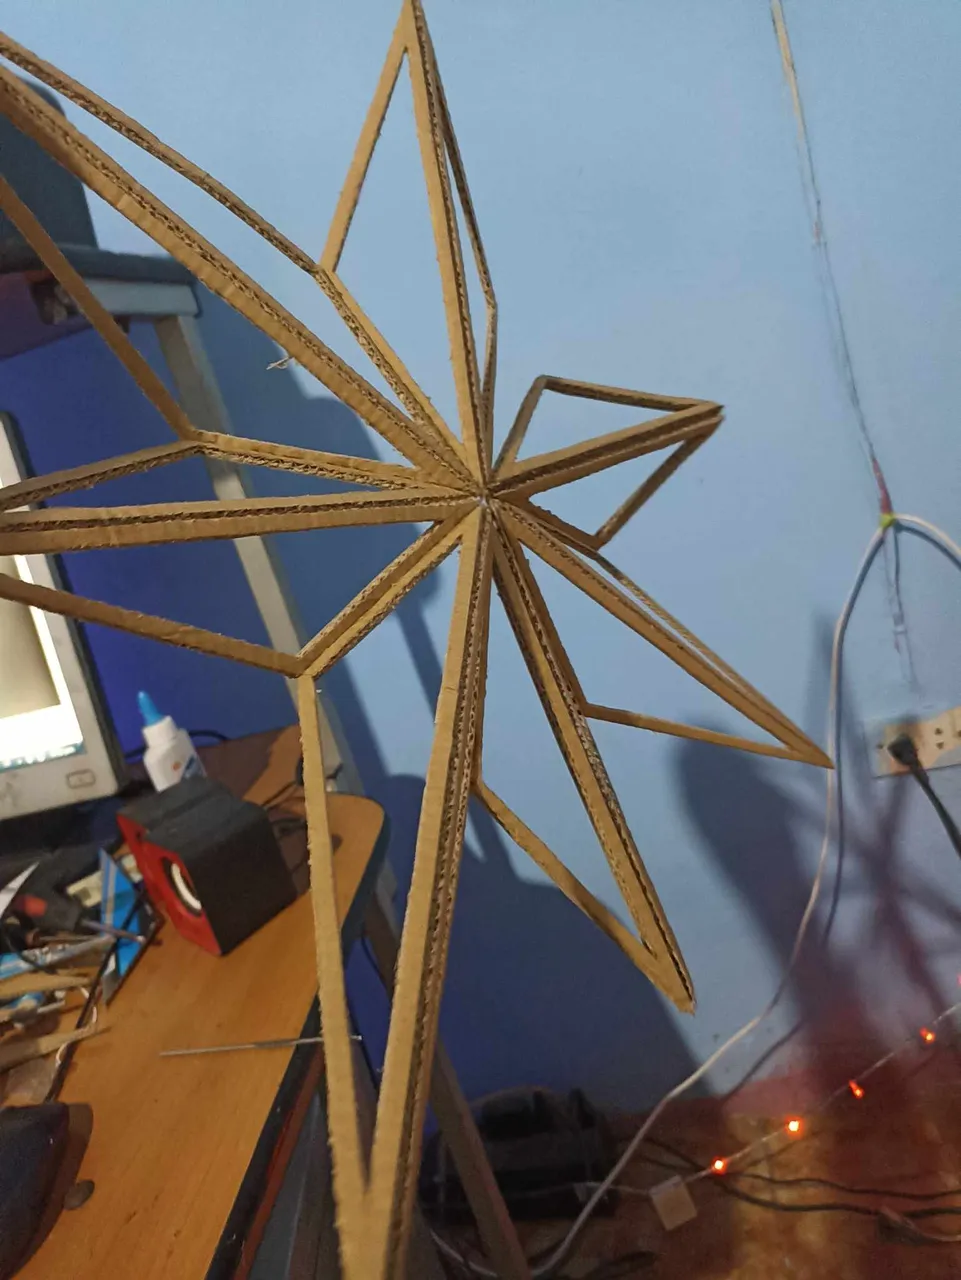
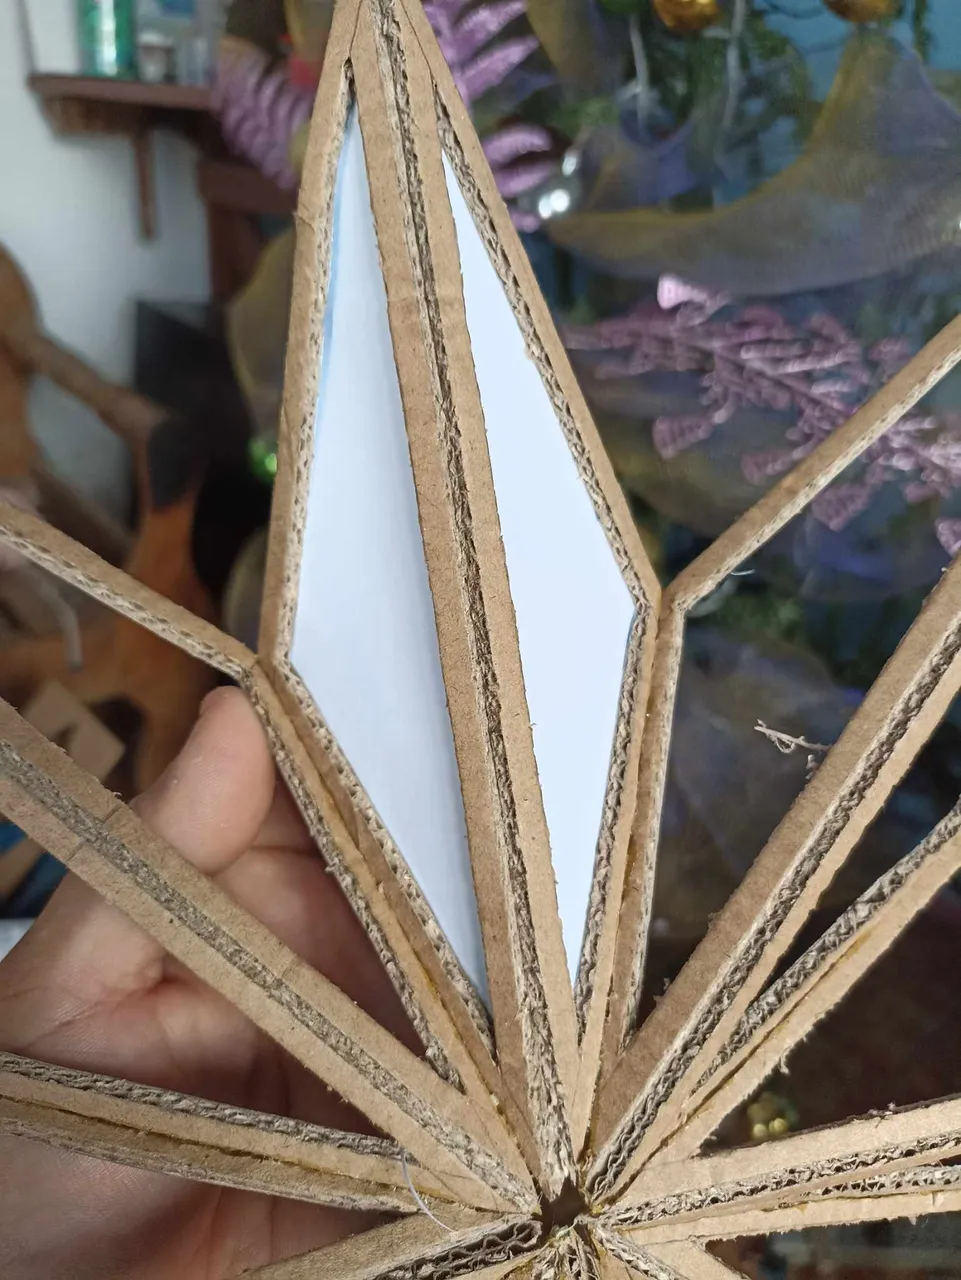
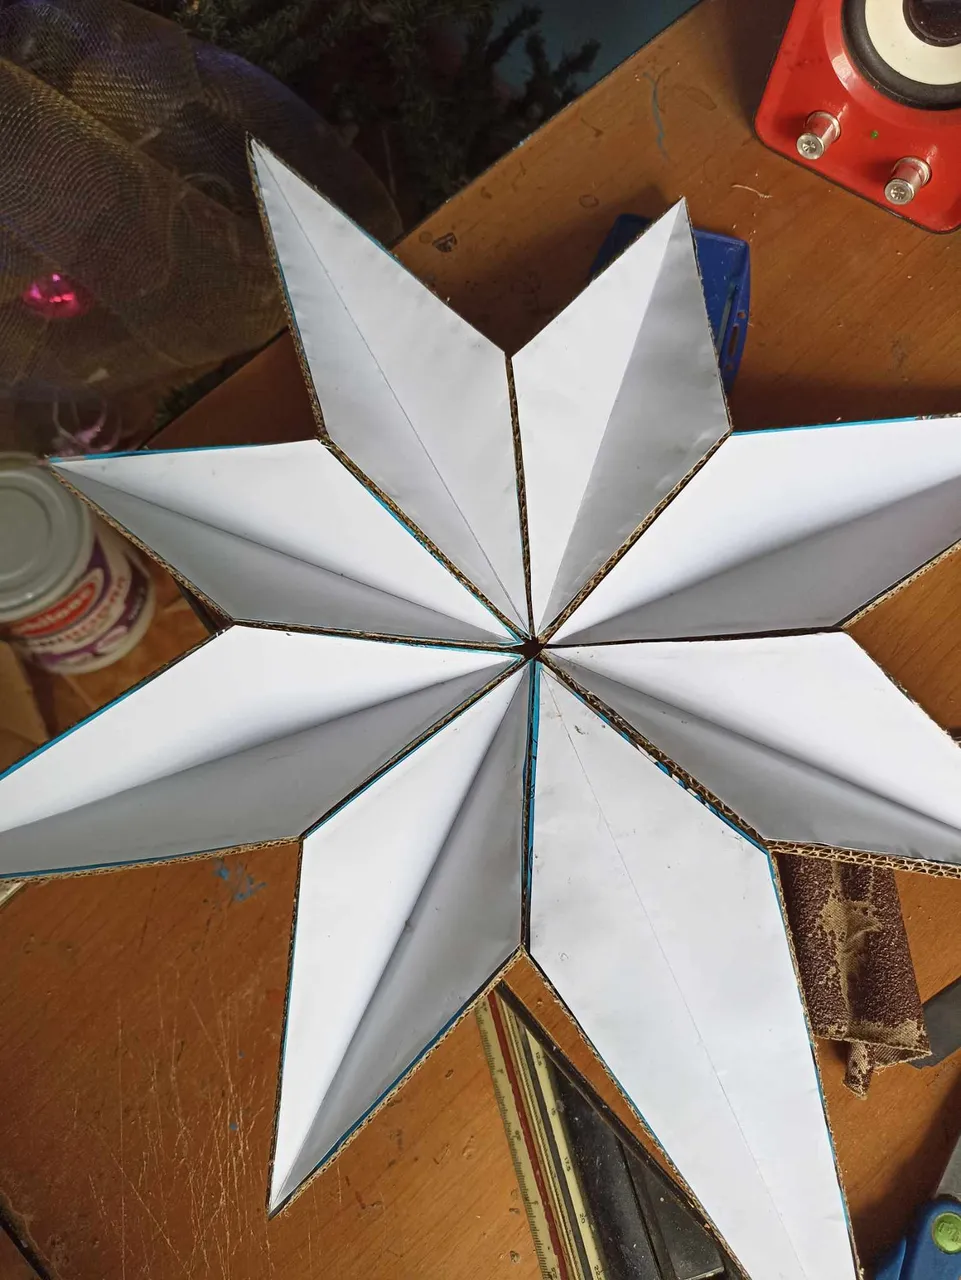
Next I made the other part of the star that is not cut, I used the same measurements as before and then cut the 8 pieces, I only cut the middle to make the relief shape. In the same way I glued each of the tips along the edges using glue.
Seguidamente hice la otra parte de la estrella que no está cortada, utilicé las mismas medidas anteriores y luego corte las 8 piezas, solamente hice el corte de la mitad para hacerle la forma del relieve. De la misma forma pegué cada una las puntas por los bordes utilizando pegamento.
 |  |  |
|---|---|---|
 |  | 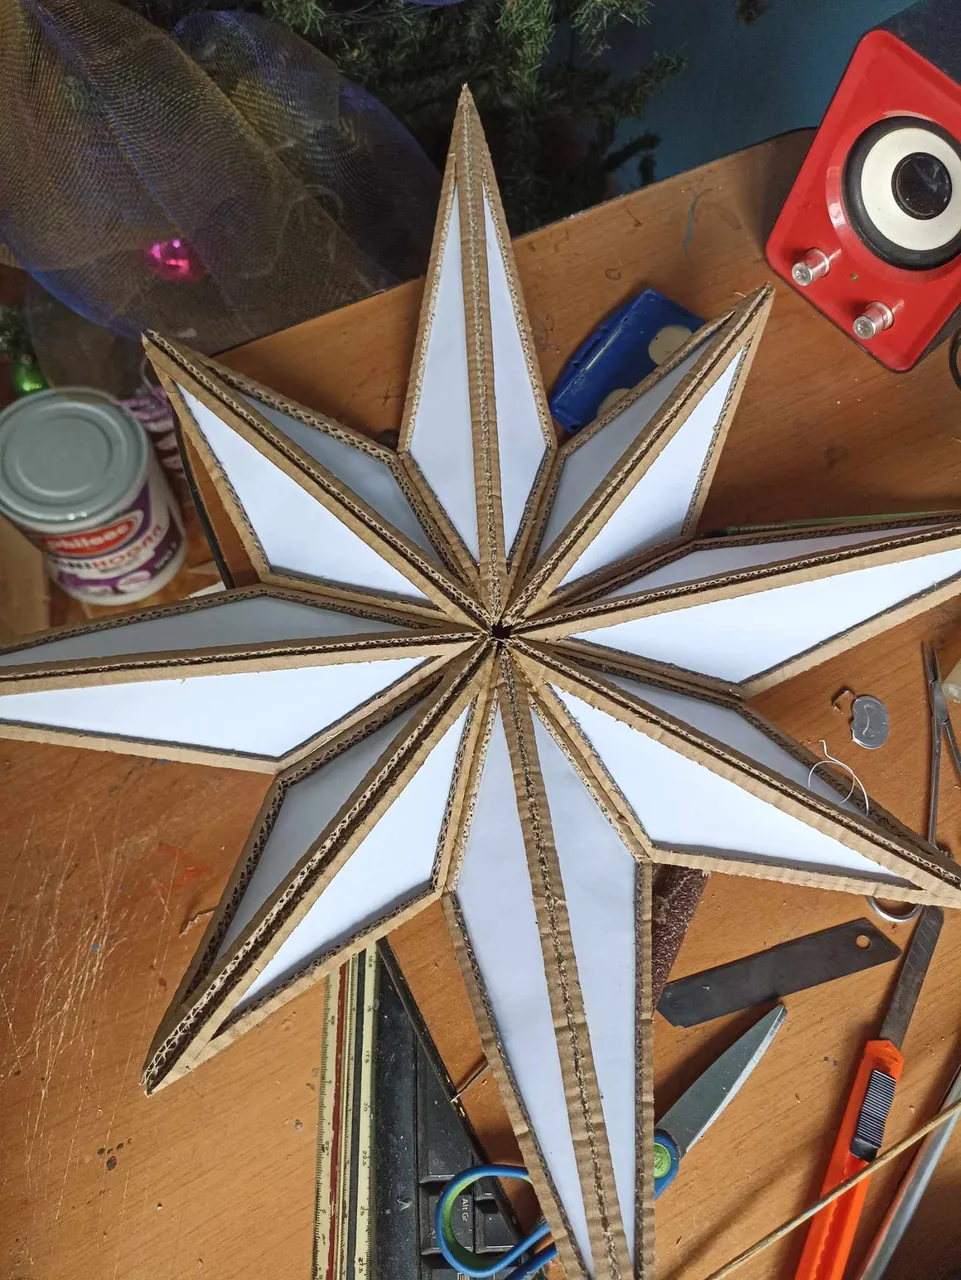 |
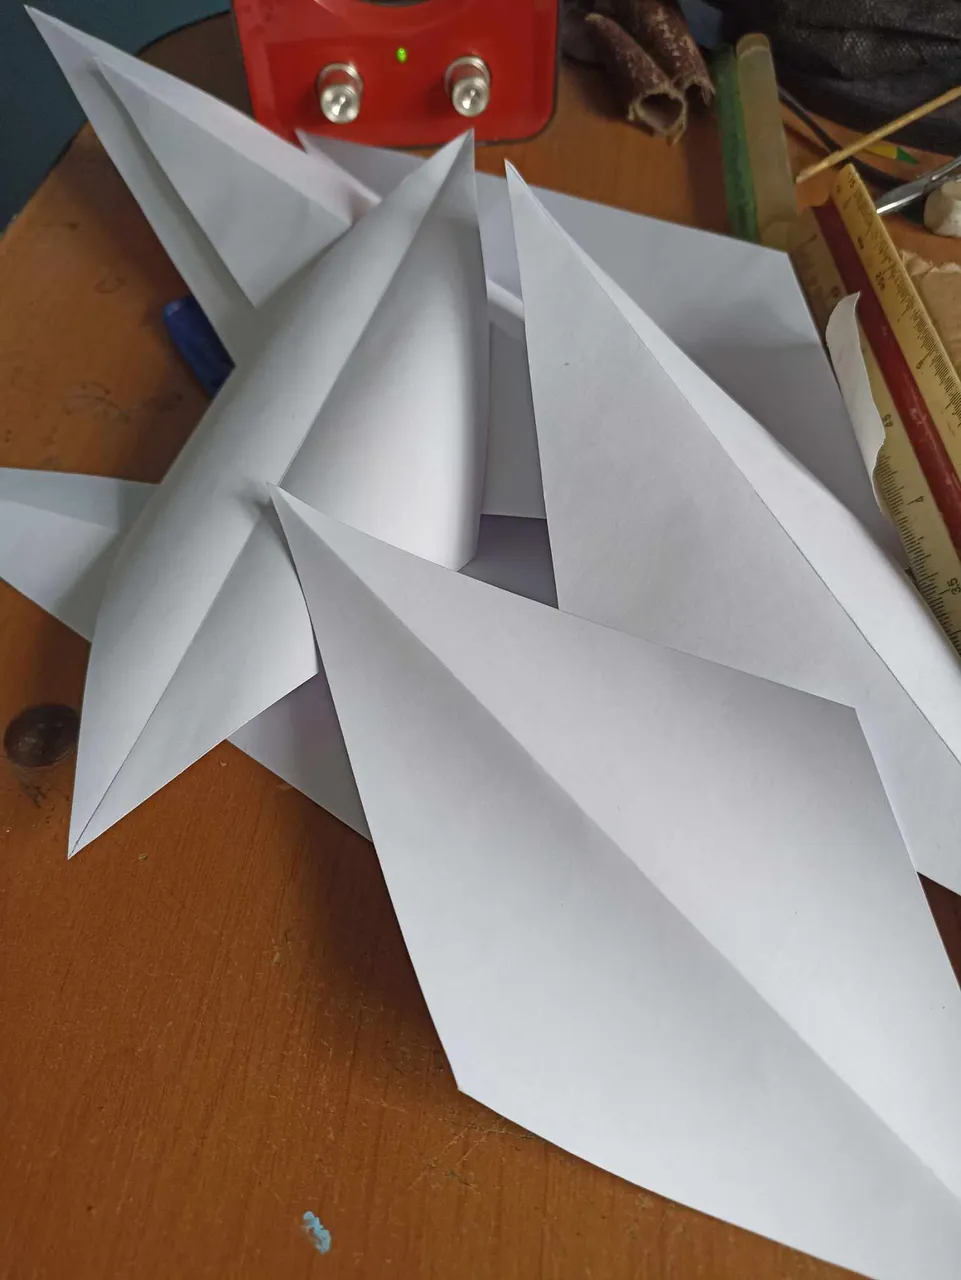
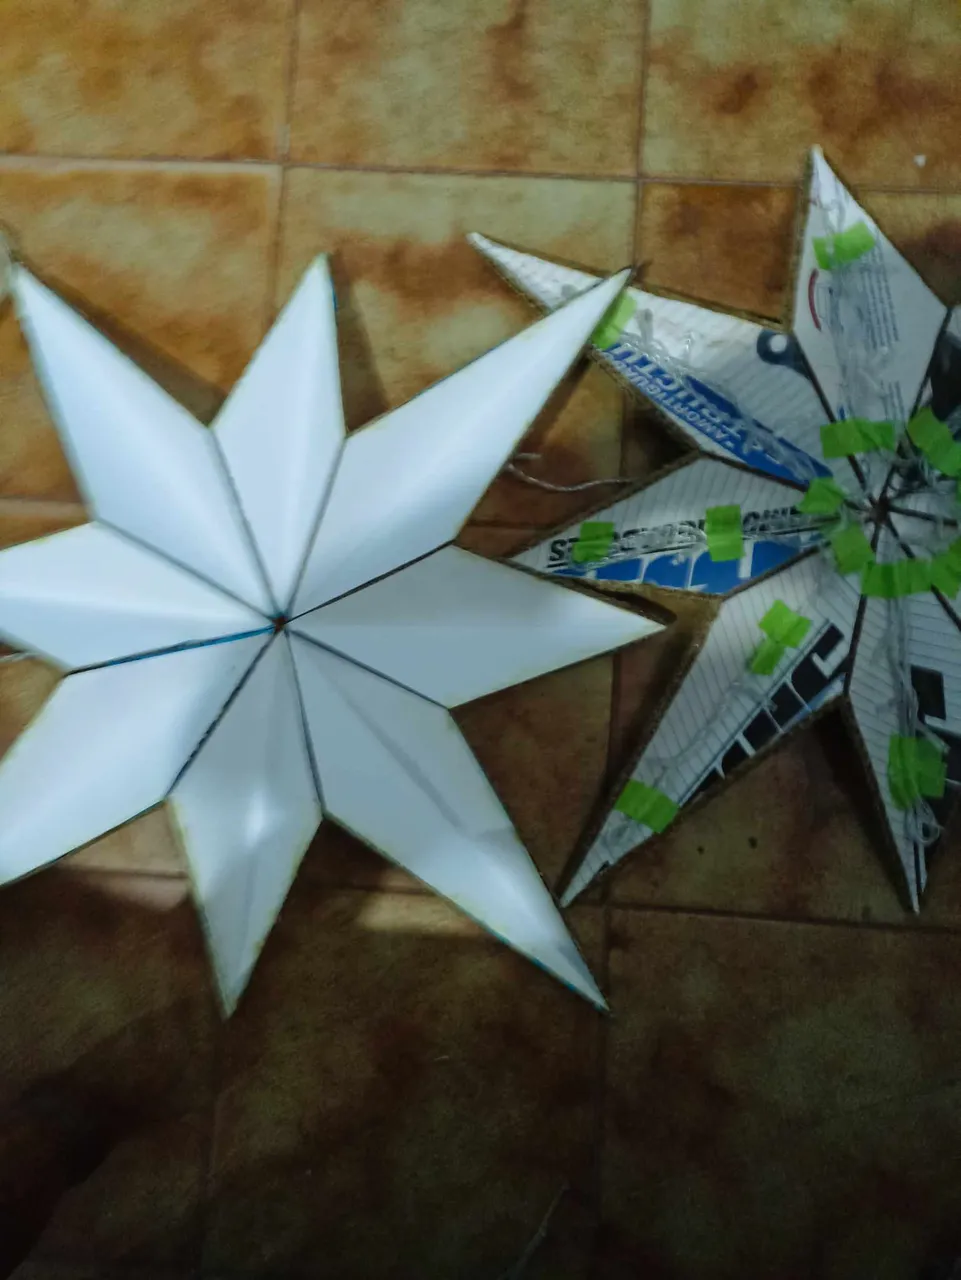
Then I used white cardboard to cut some panels and place them on each of the points of the front face of the star. I cut the templates one by one and using school glue I placed them one by one in their corresponding place.
Después usé una cartulina de color blanco para cortar unos páneles y ponerlos en cada una de las puntas de la cara frontal de la estrella. Corté una a una de las plantillas y utilizando pegamento escolar fui colocando una a una en el lugar que les correspondía.
 |  |  |
|---|---|---|
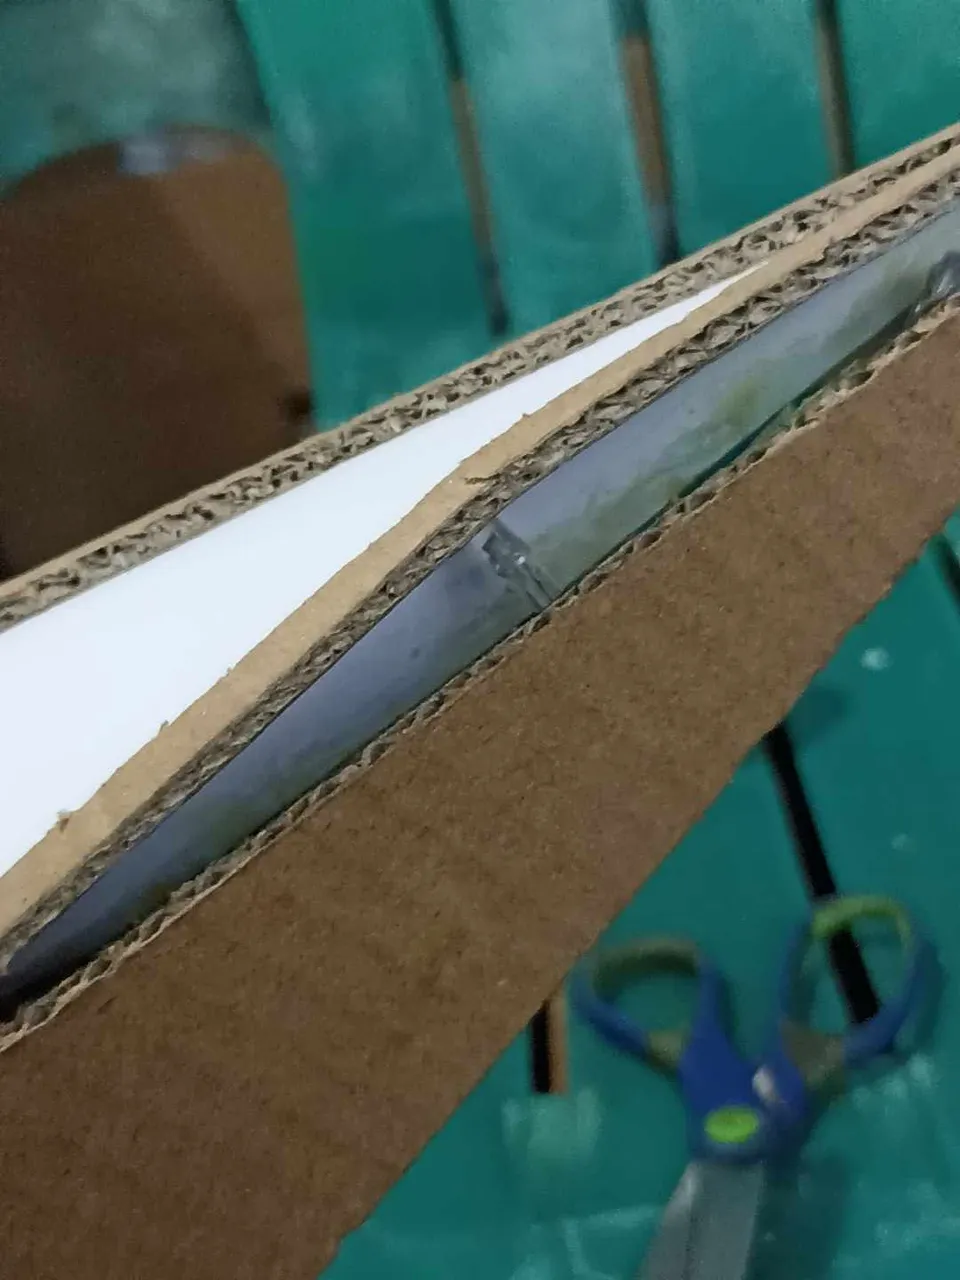 | 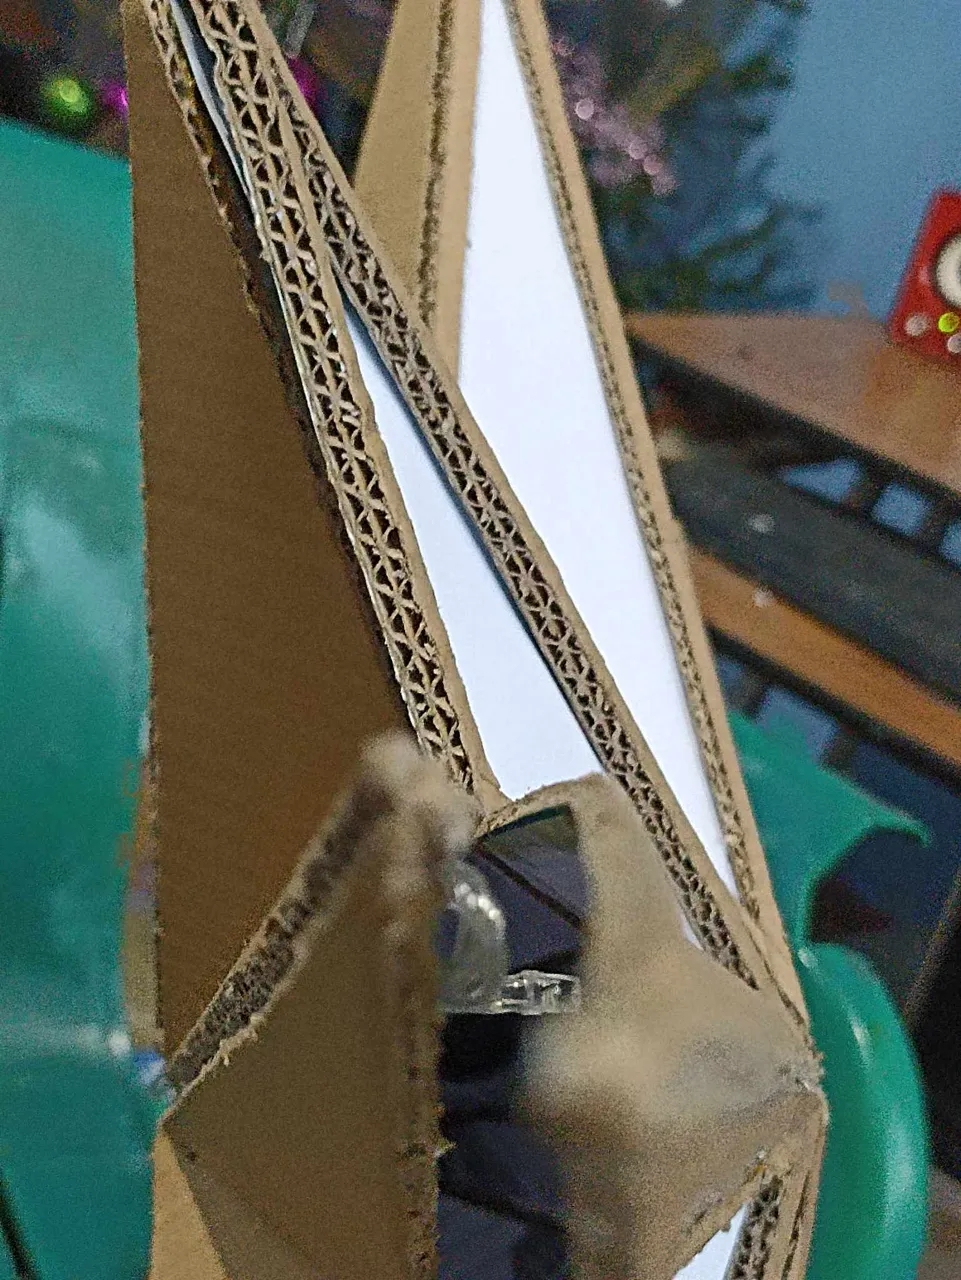 |  |
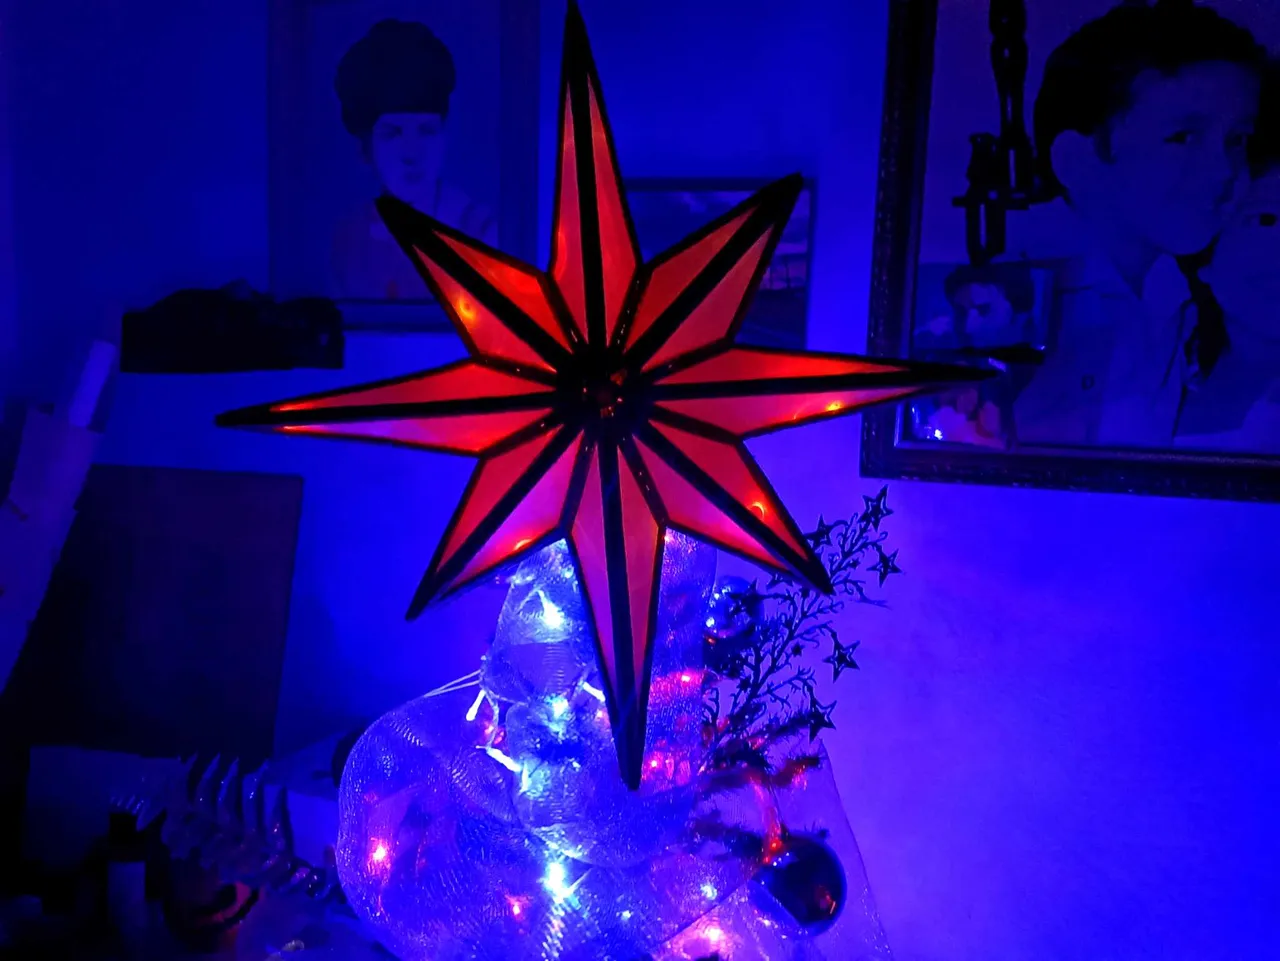
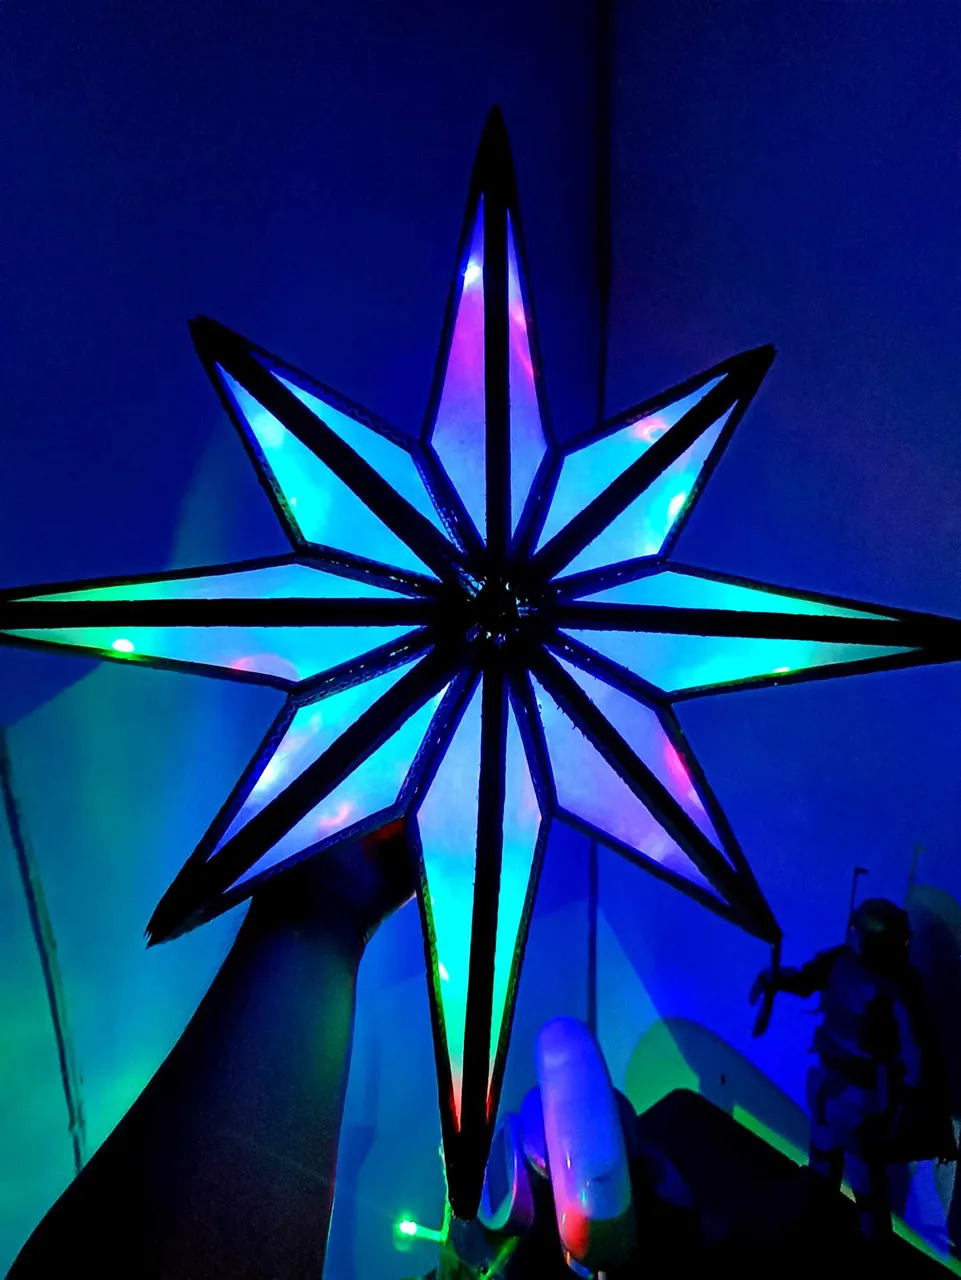
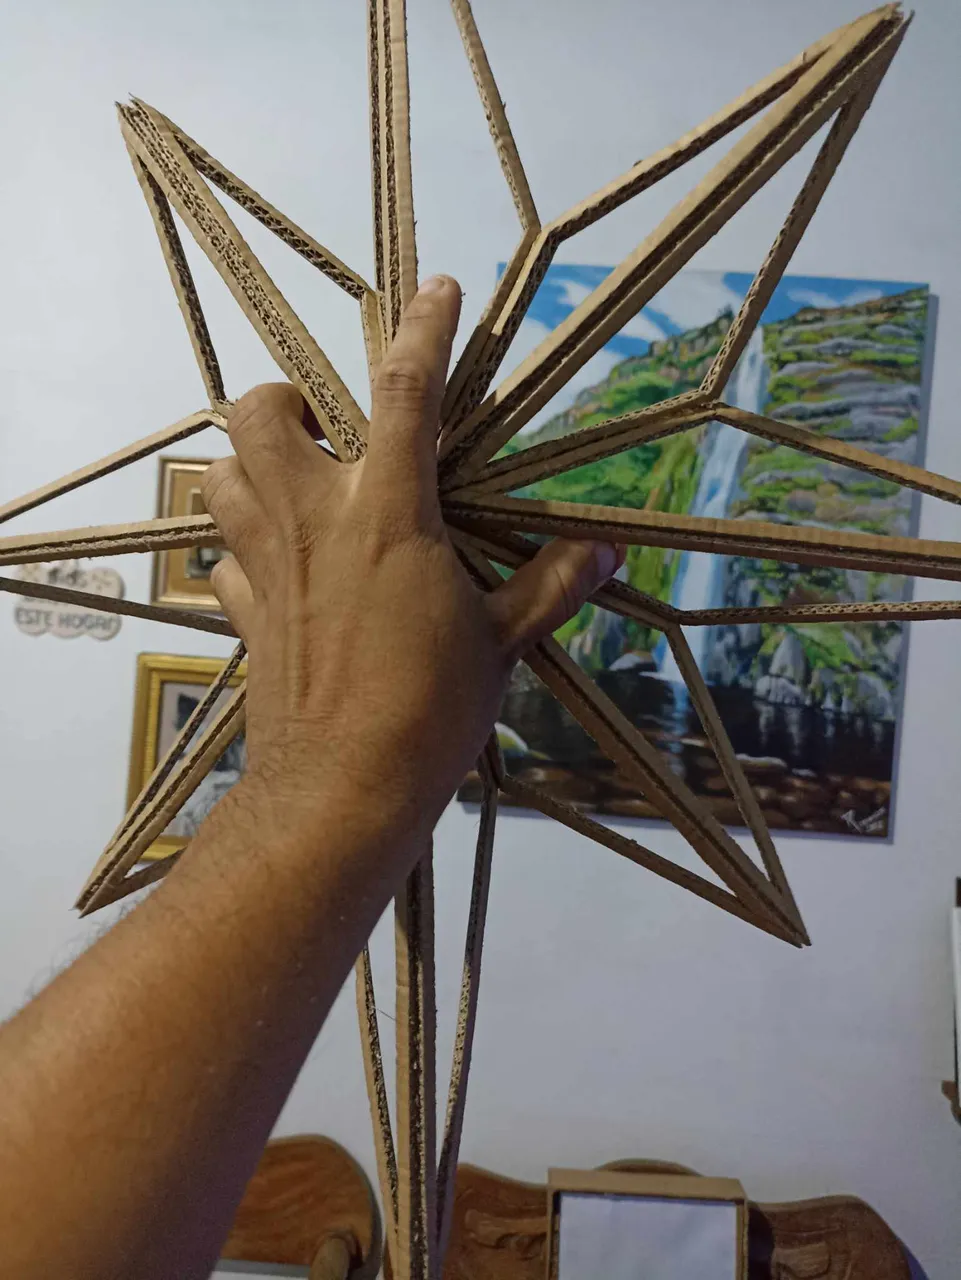
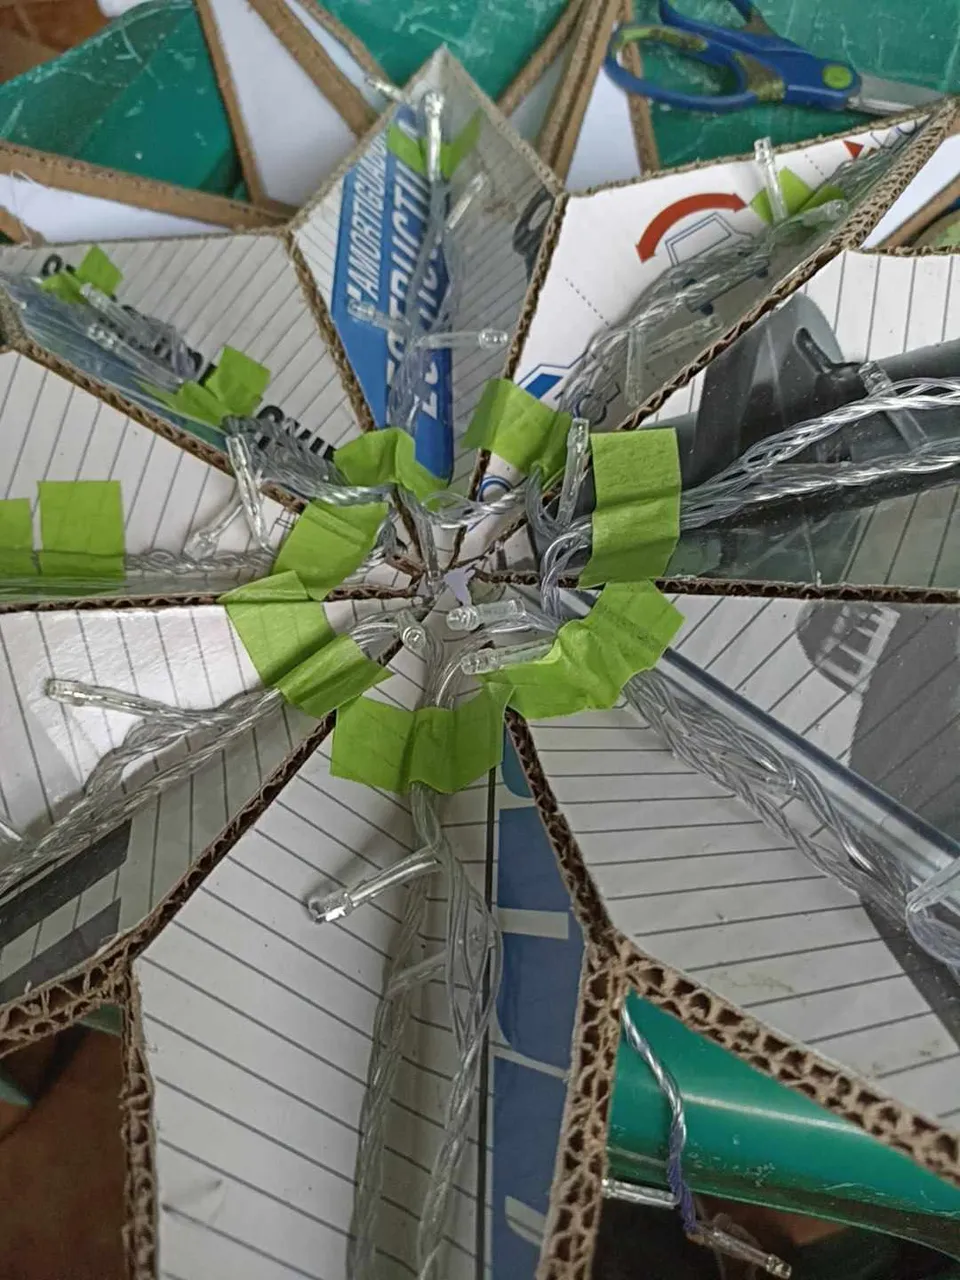
The last step was to put some Christmas lights on it, I used colored ones to give it more life and color, although I was tempted to put some red ones on it, but then I saw that its appearance was better with colors. To finish, I put glue on both sides and joined each of the points part by part until I completed the star.
El último paso fue ponerle unas luces navideñas, utilicé una de colores para darle más vida y color, aunque estaba tentado a ponerle unas de color rojo, pero luego vi que su apariencia era mejor así con colores. Para finalicé puse pegamento en ambas caras y fui uniendo parte por parte cada una de las puntas hasta completar la estrella.
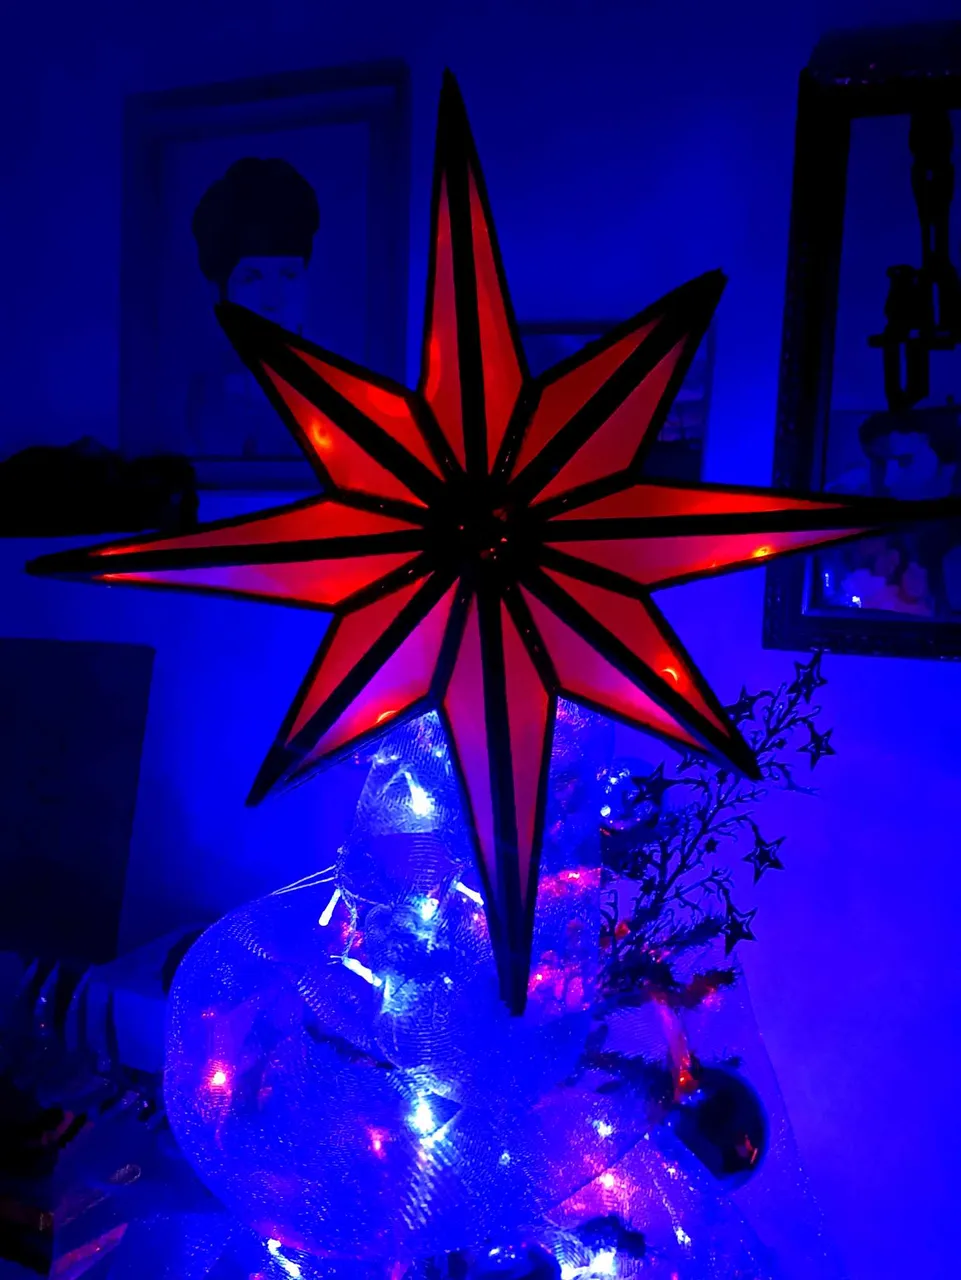
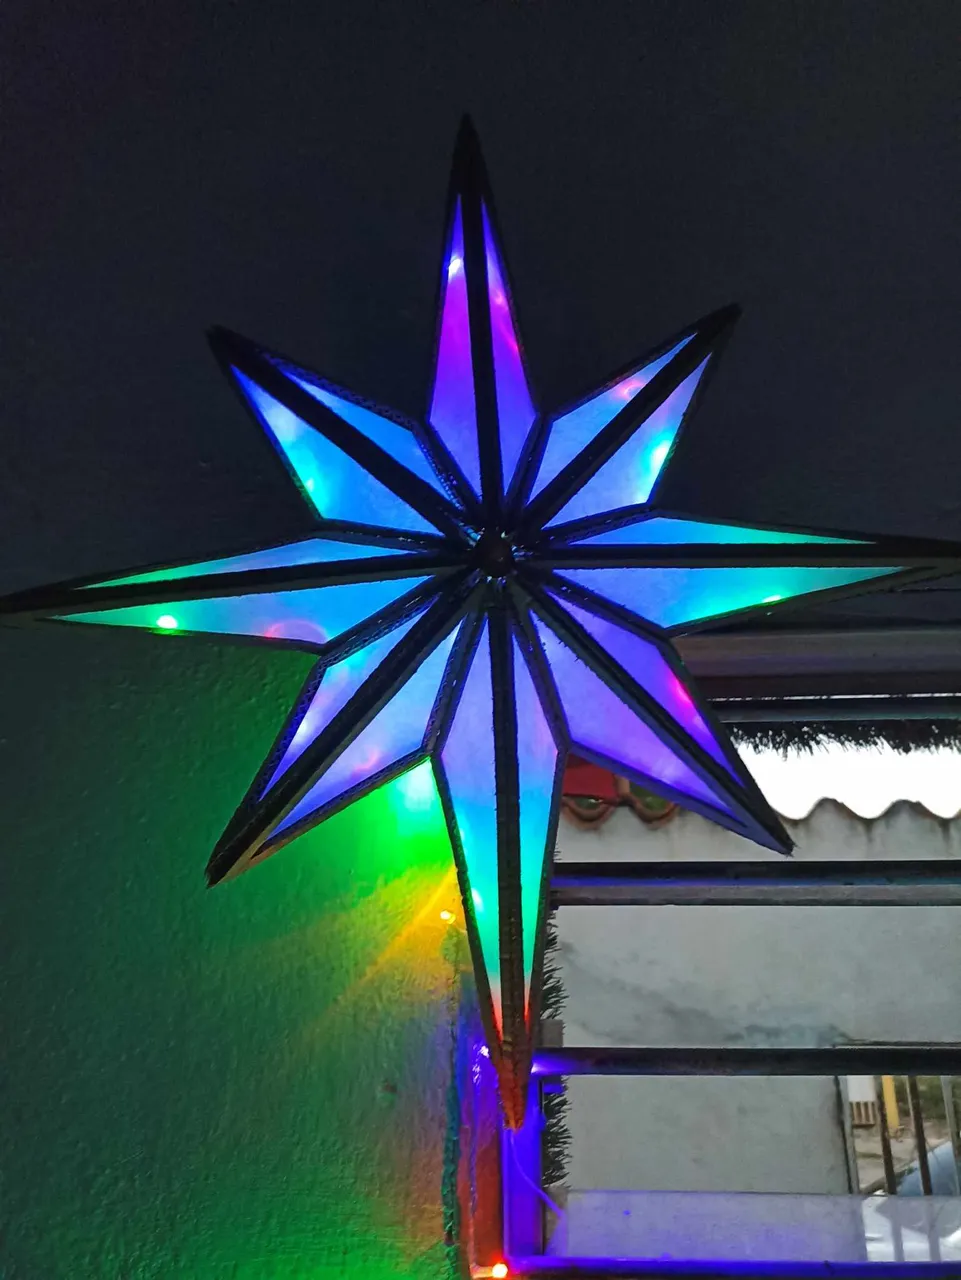
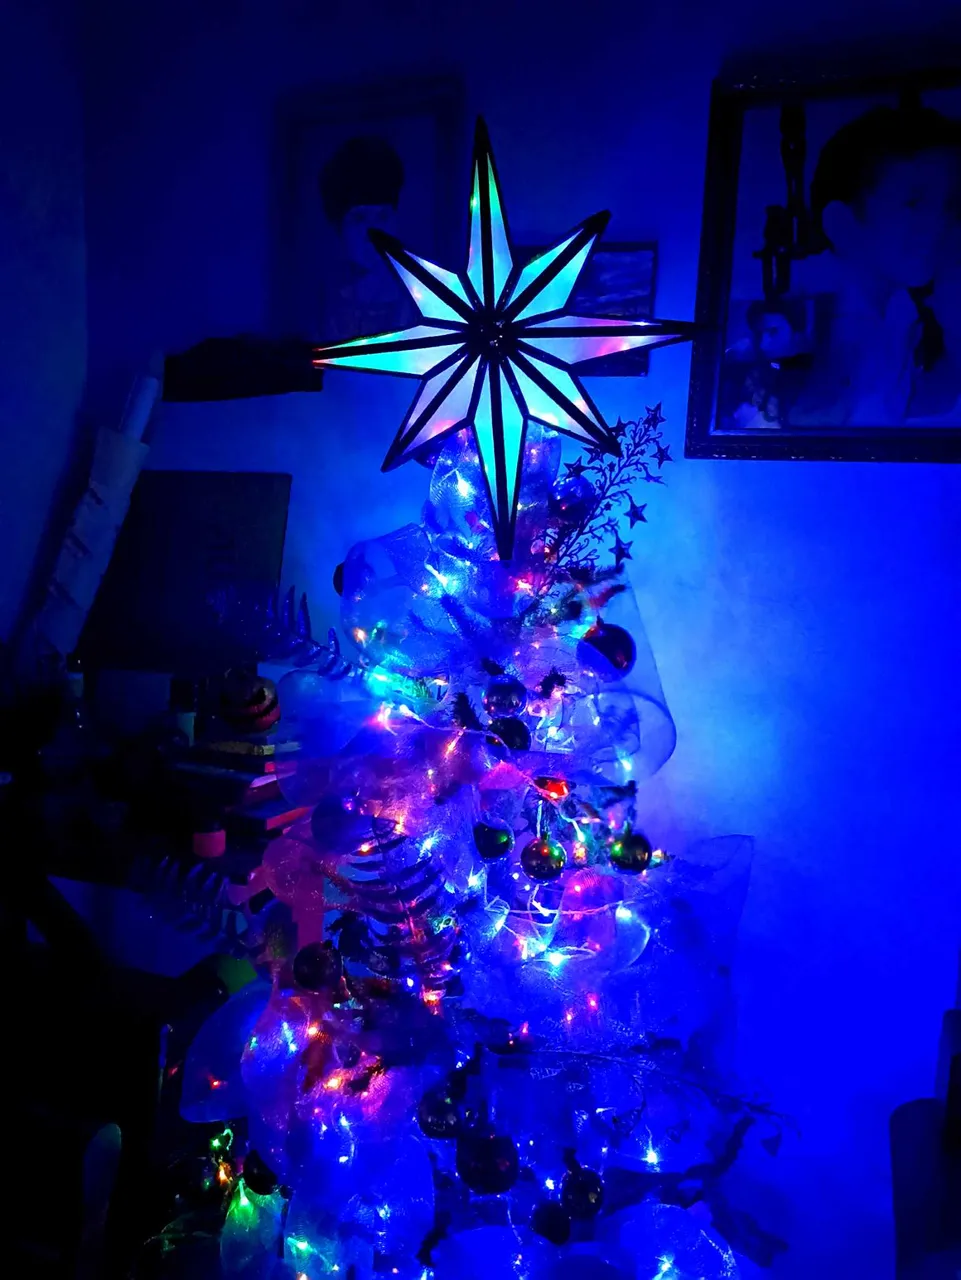
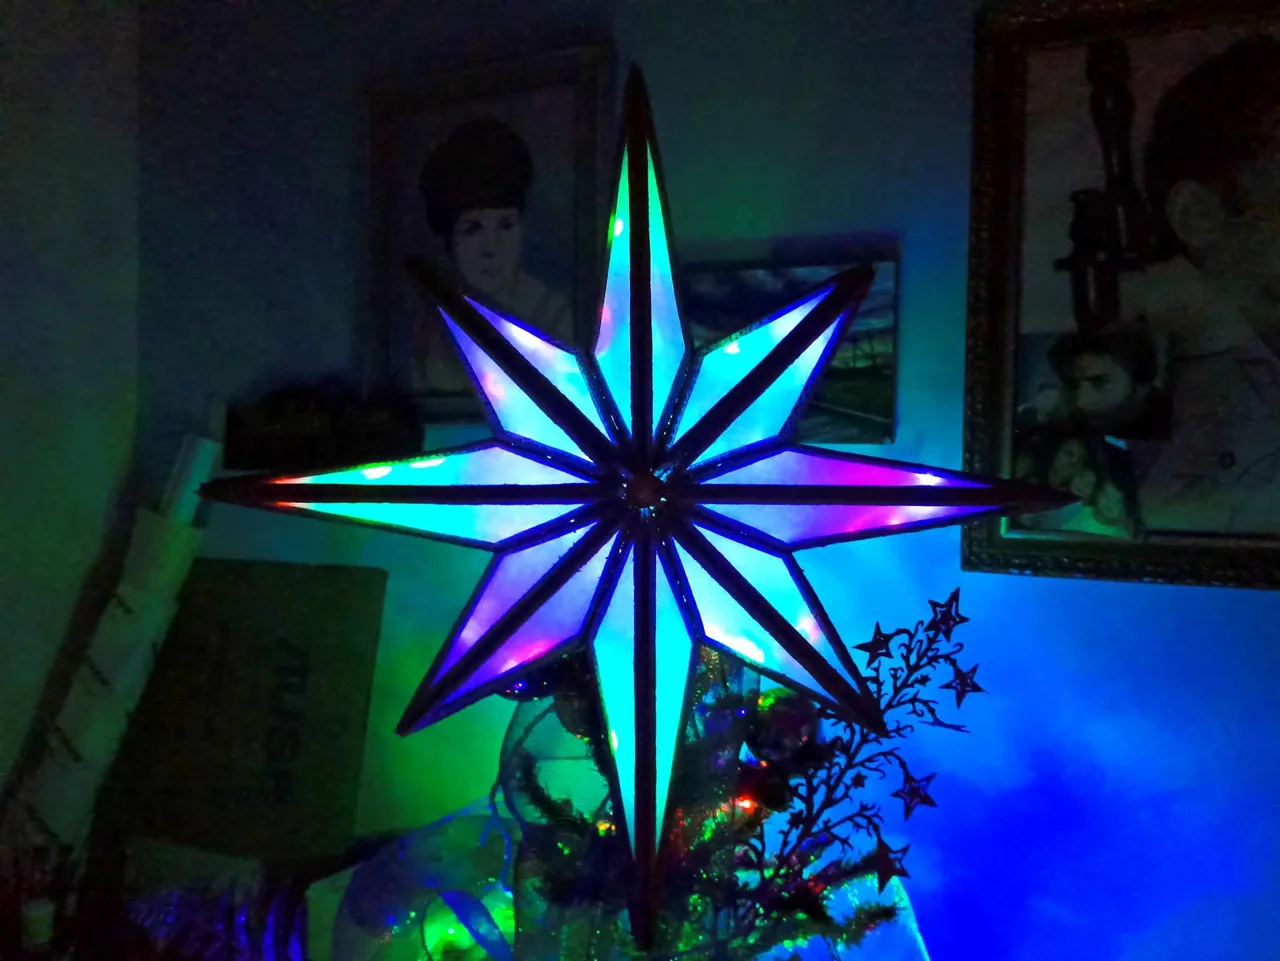
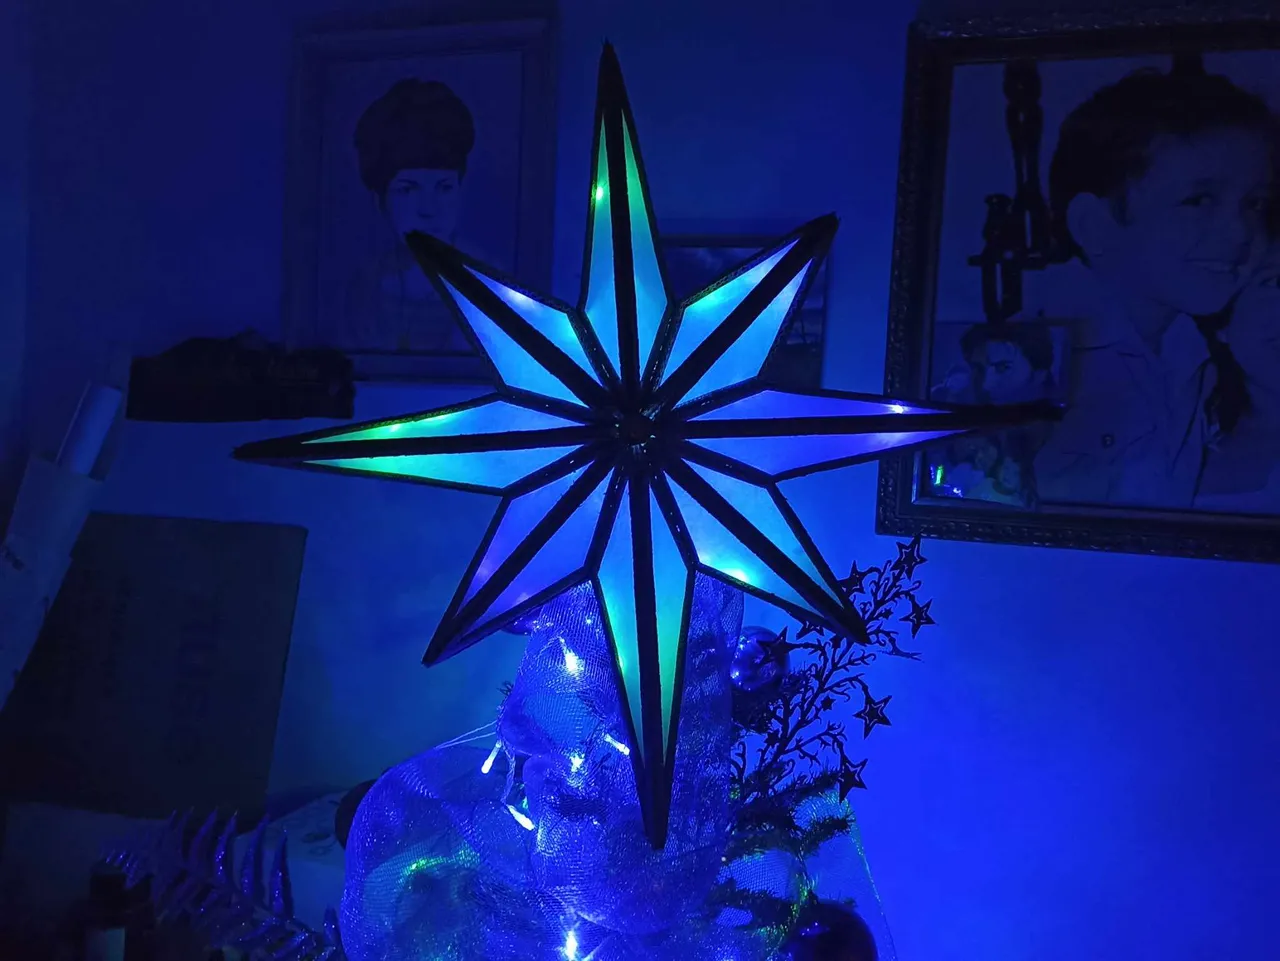
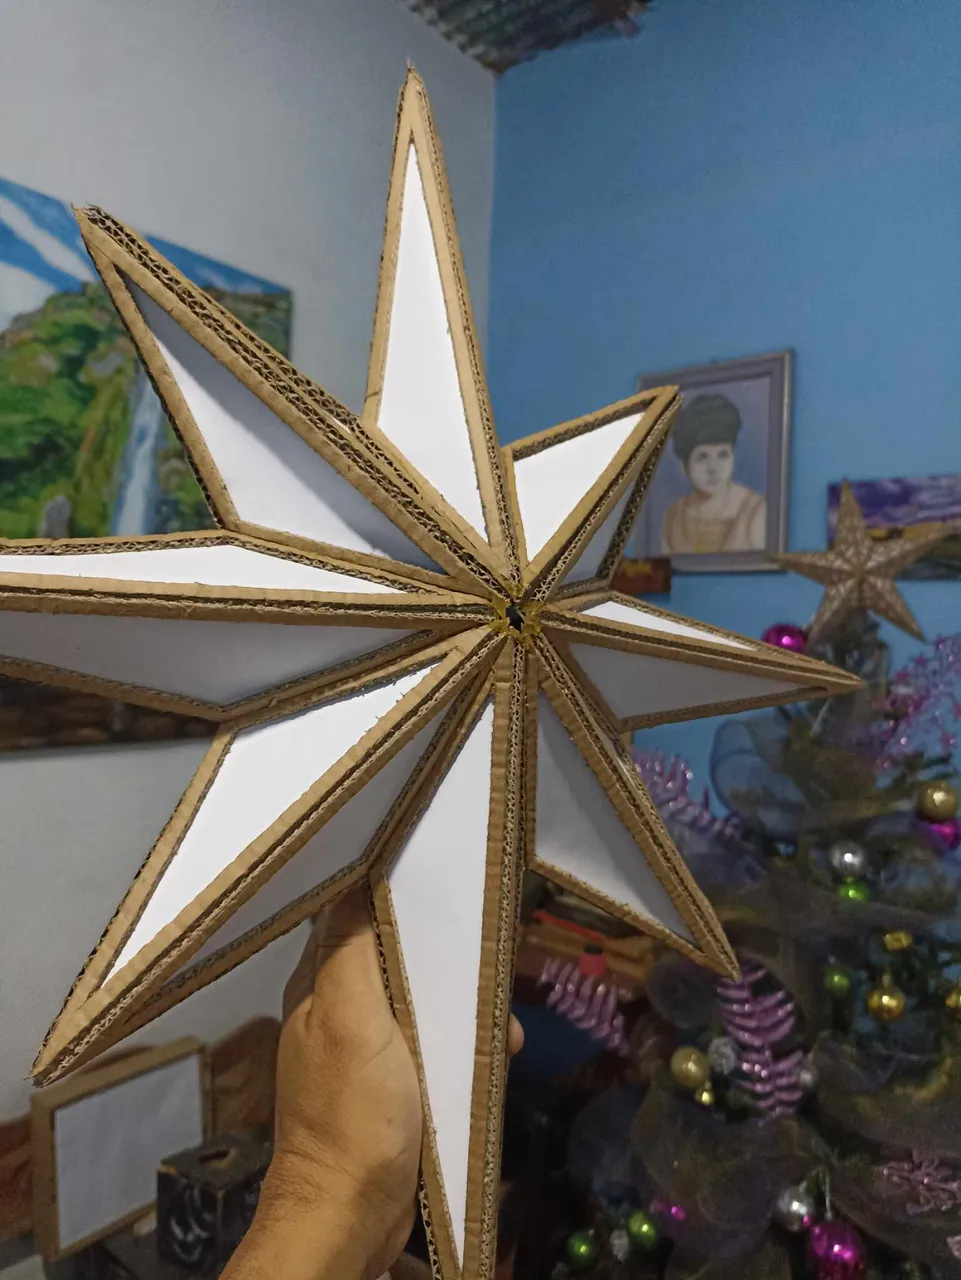
This is how the star of Bethlehem was finished, it measures 55 centimeters long, it was very large, fortunately the Christmas Tree is a little tall so it could support the weight, since the lights inside the star gave it more weight, since cardboard, being very hard, also increases the weight. What did you think? I made it especially for the longest night of the year, I hope you liked it, don't forget to comment if you liked it, I hope to return very soon to continue sharing! See you soon!
Así quedó finalizada la estrella de Belén, tiene una medida de 55 centímetros de largo, quedó muy grande, afortundamente el Árbol de navidad es un poco alto así que pudo soportar el peso, ya que las luces dentro de la estrella le dieron más peso, ya que el cartón al ser muy duro también aumenta el peso. Que les ha parecido? la hice especialmente para la noche más larga del año, espero que les haya gustado, no olviden comentar si les ha gustado, espero volver muy pronto para seguir compartiendo! Hasta pronto!