♥️ Hi!


Hello dear Hive family. I hope you are feeling well! I want to show you the step by step of a corset that I have designed using templates. You can purchase these templates by clicking on the source of this article Source. There you can easily purchase this template, just print it out and paste it on cardboard paper. This size is 38 but you can also adapt it to a larger size by adding a few centimetres around the whole shape of the design.
Materials
- Downloadable patterns
- Elastic fabric 1 metre
- Whales or corset stays (4)
- Sewing machine
- Thread
1
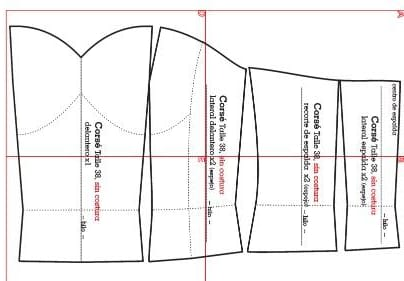
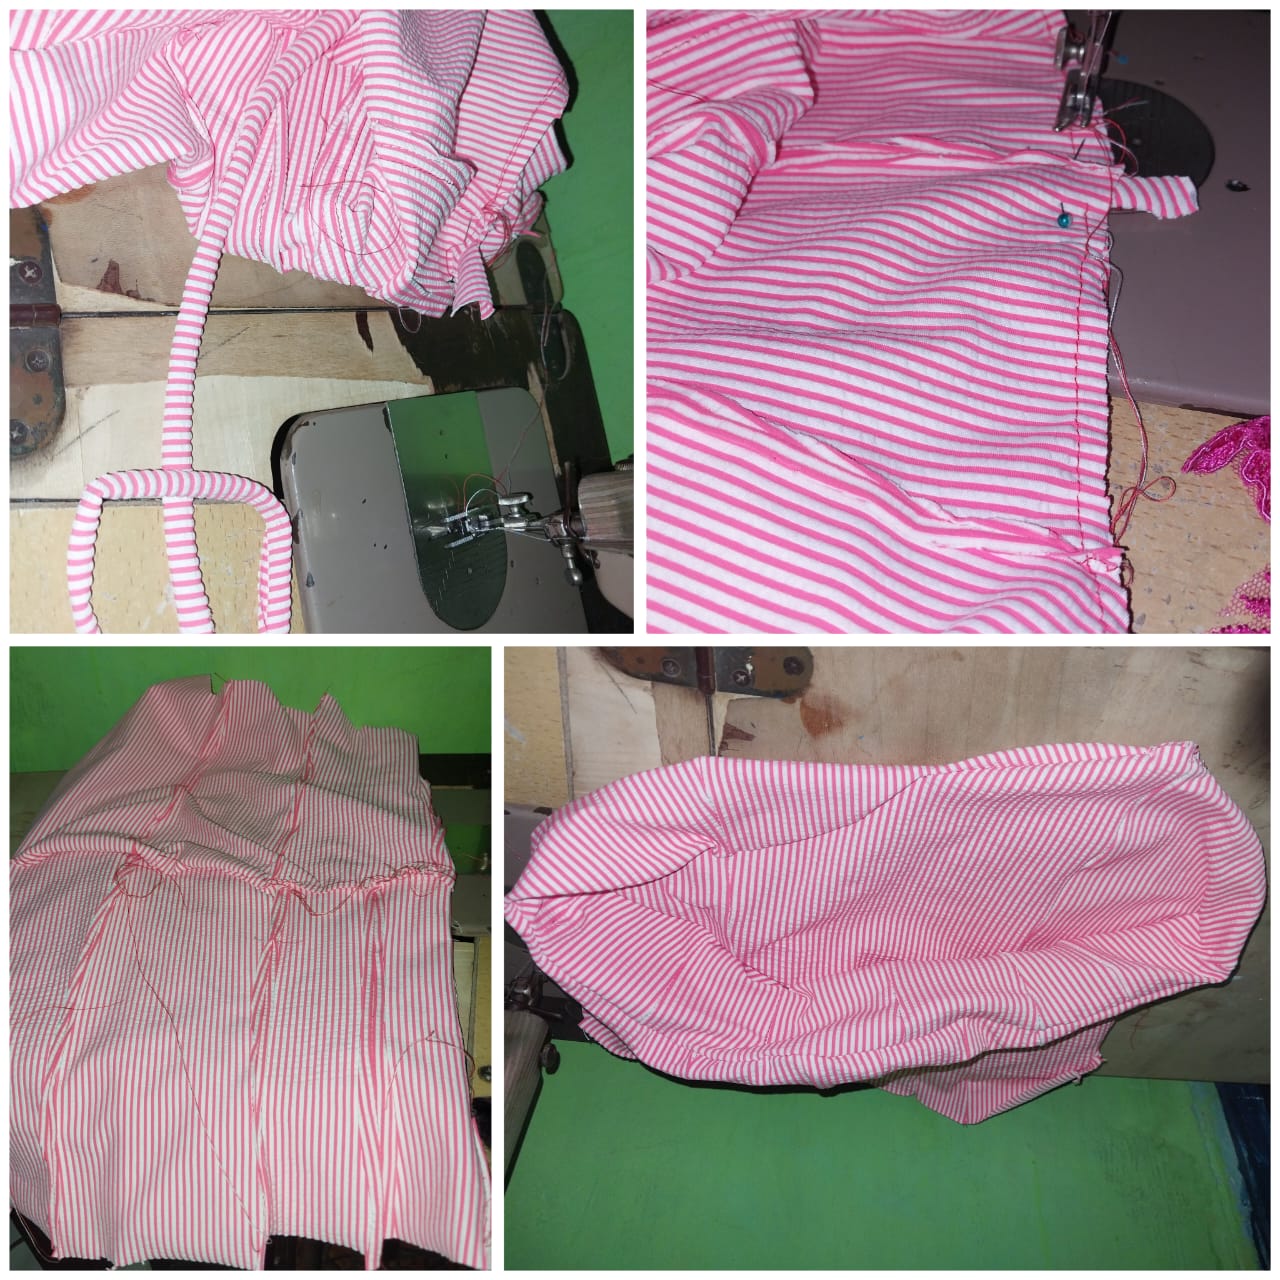
In this way, when we have the moulds 1 - 2 - 3 - 4
- We must obtain 2 pieces from mould 1
- We must obtain 4 pieces from the other moulds (2, 3 and 4).
We must place the patterns on the fabric and then cut them out following the instructions of the pieces to be cut out! As the seam divides the body into two equal sides we must complete the sequence of the silhouettes to complete the design, i.e. complete the left side of the corset to obtain the complete corset.
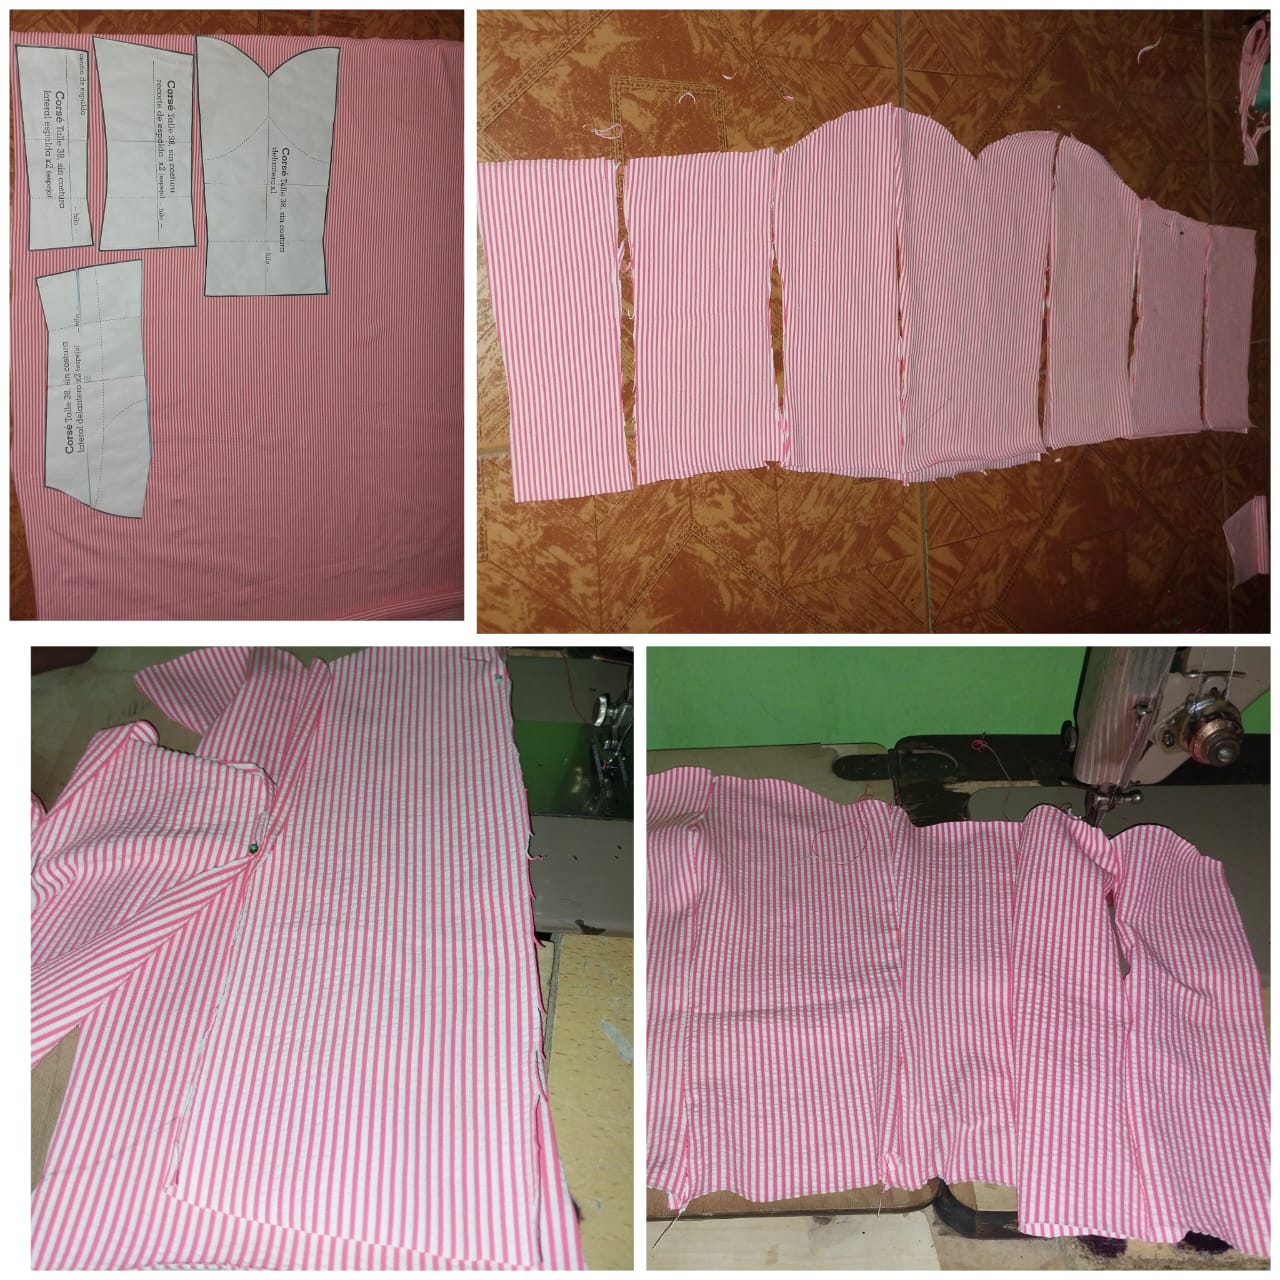
2
Then, following the design, we always pin the pieces together and then go to sewing. Actually, cutting the pieces we are going to get two corsets, so with the same fabric we are going to make the bottom of the corset.
In this way we have two pieces exactly the same.
3

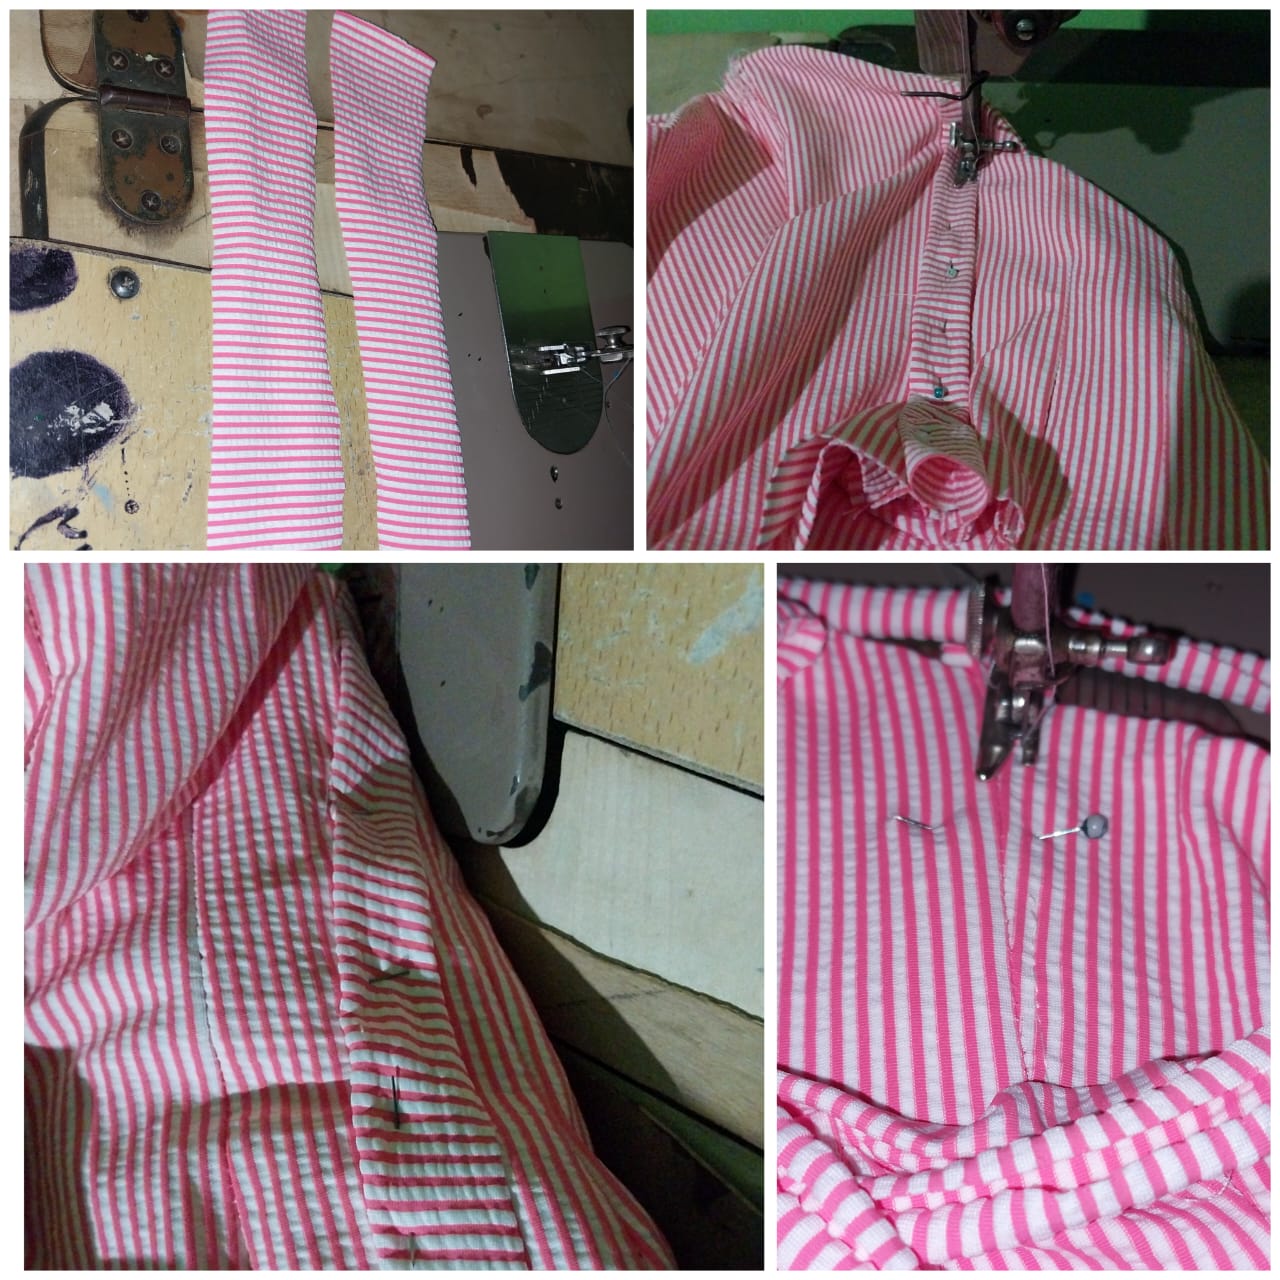
Then we place the fabric face to face, inserting the other corset inside the corset.
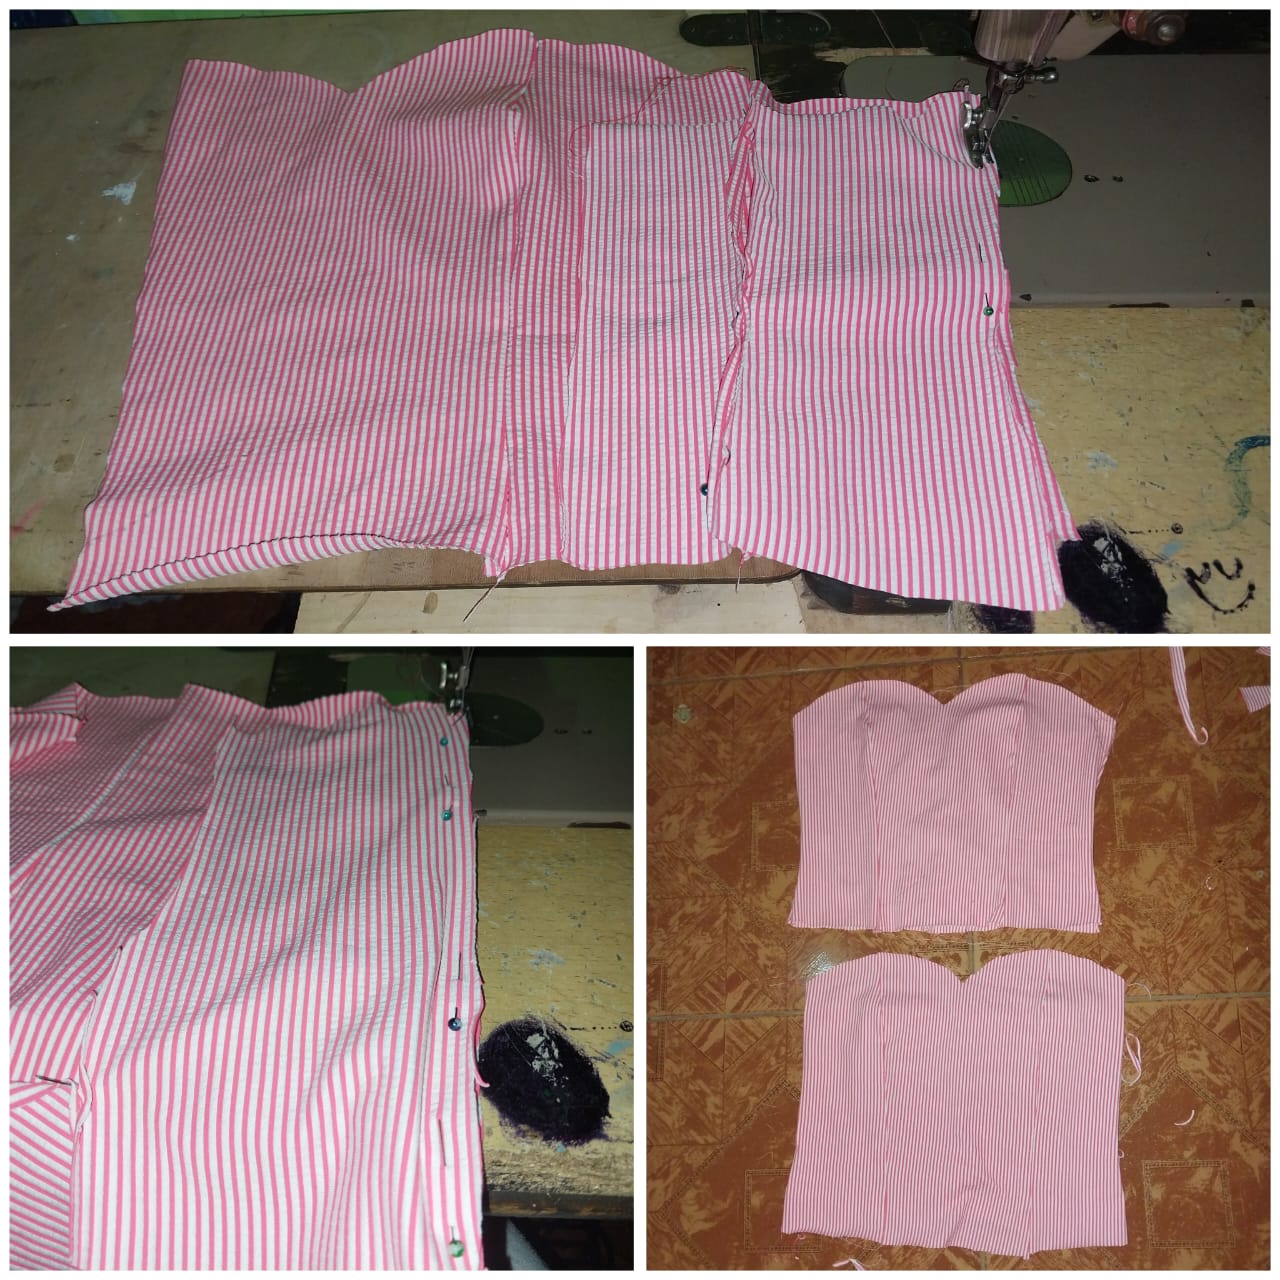
4
Then we cut 4 long ribbons from the same fabric and we fix them inside the lower part just in the centre of the bust. Then we sew the pieces in the upper area and the lower area of the pieces are not sewn and we place the corset on the right side.
5
Then we cut out 4 strips of fabric to form the channels of the whales or rods to shape the corset. This fabric is folded and sewn just in the seam of the joints of the pieces that form the corset, this should be placed on the inner side of the corset.
6
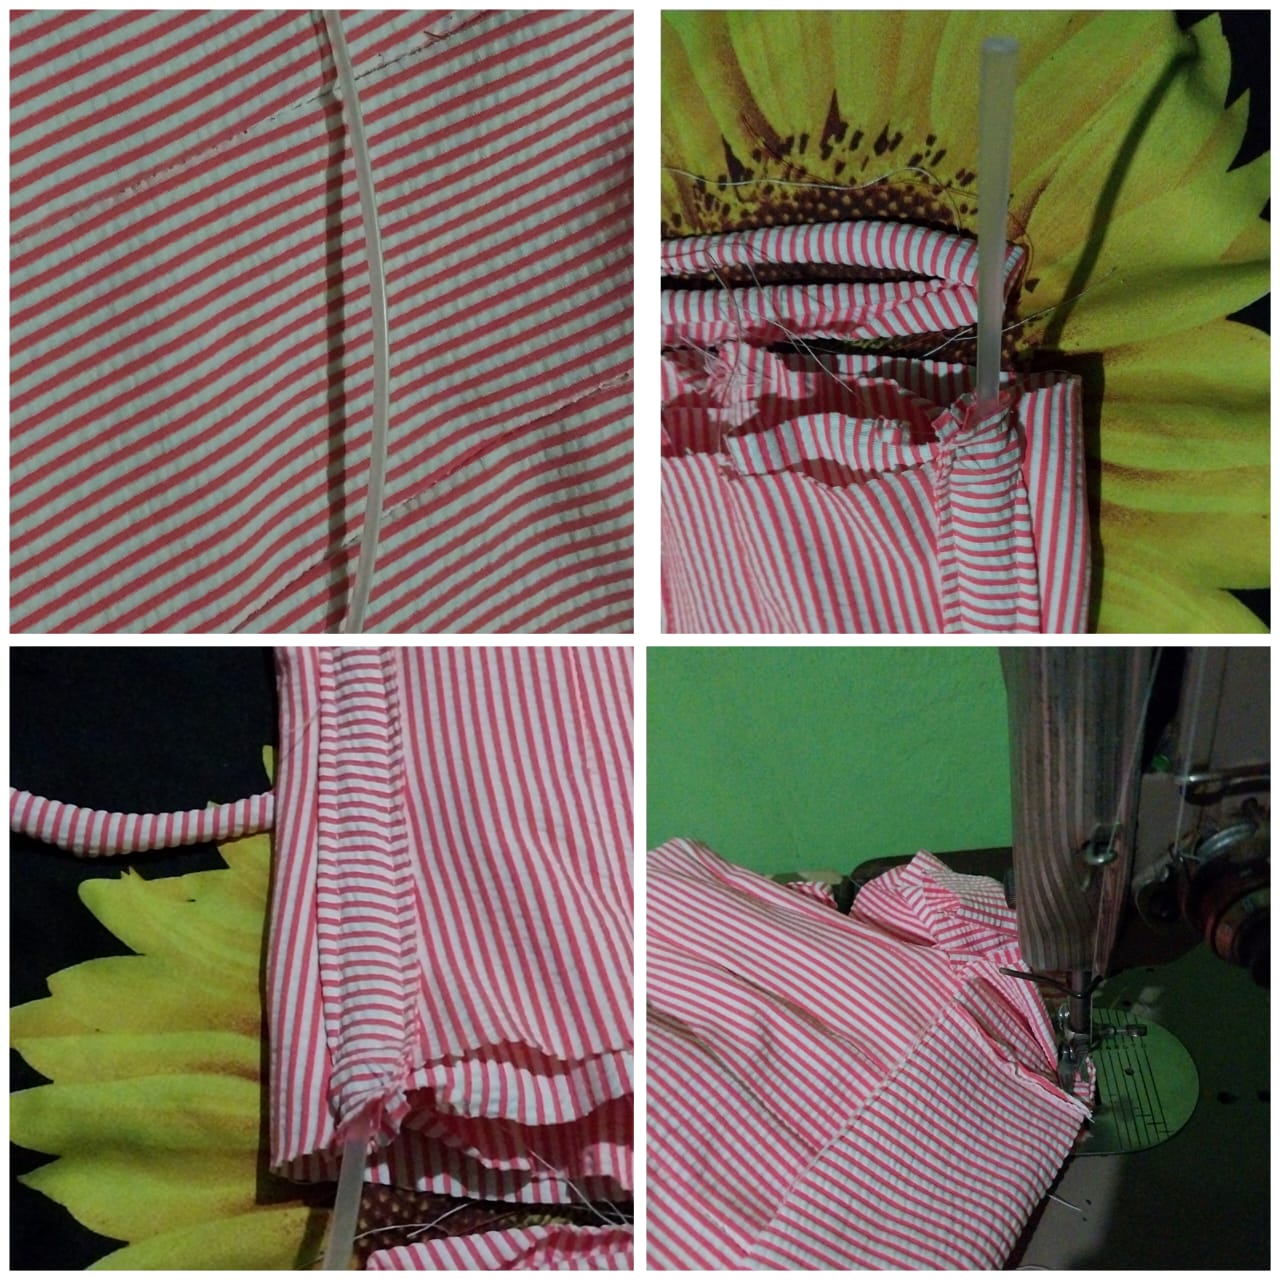
The whales are then inserted into the four channels of the corset.
7
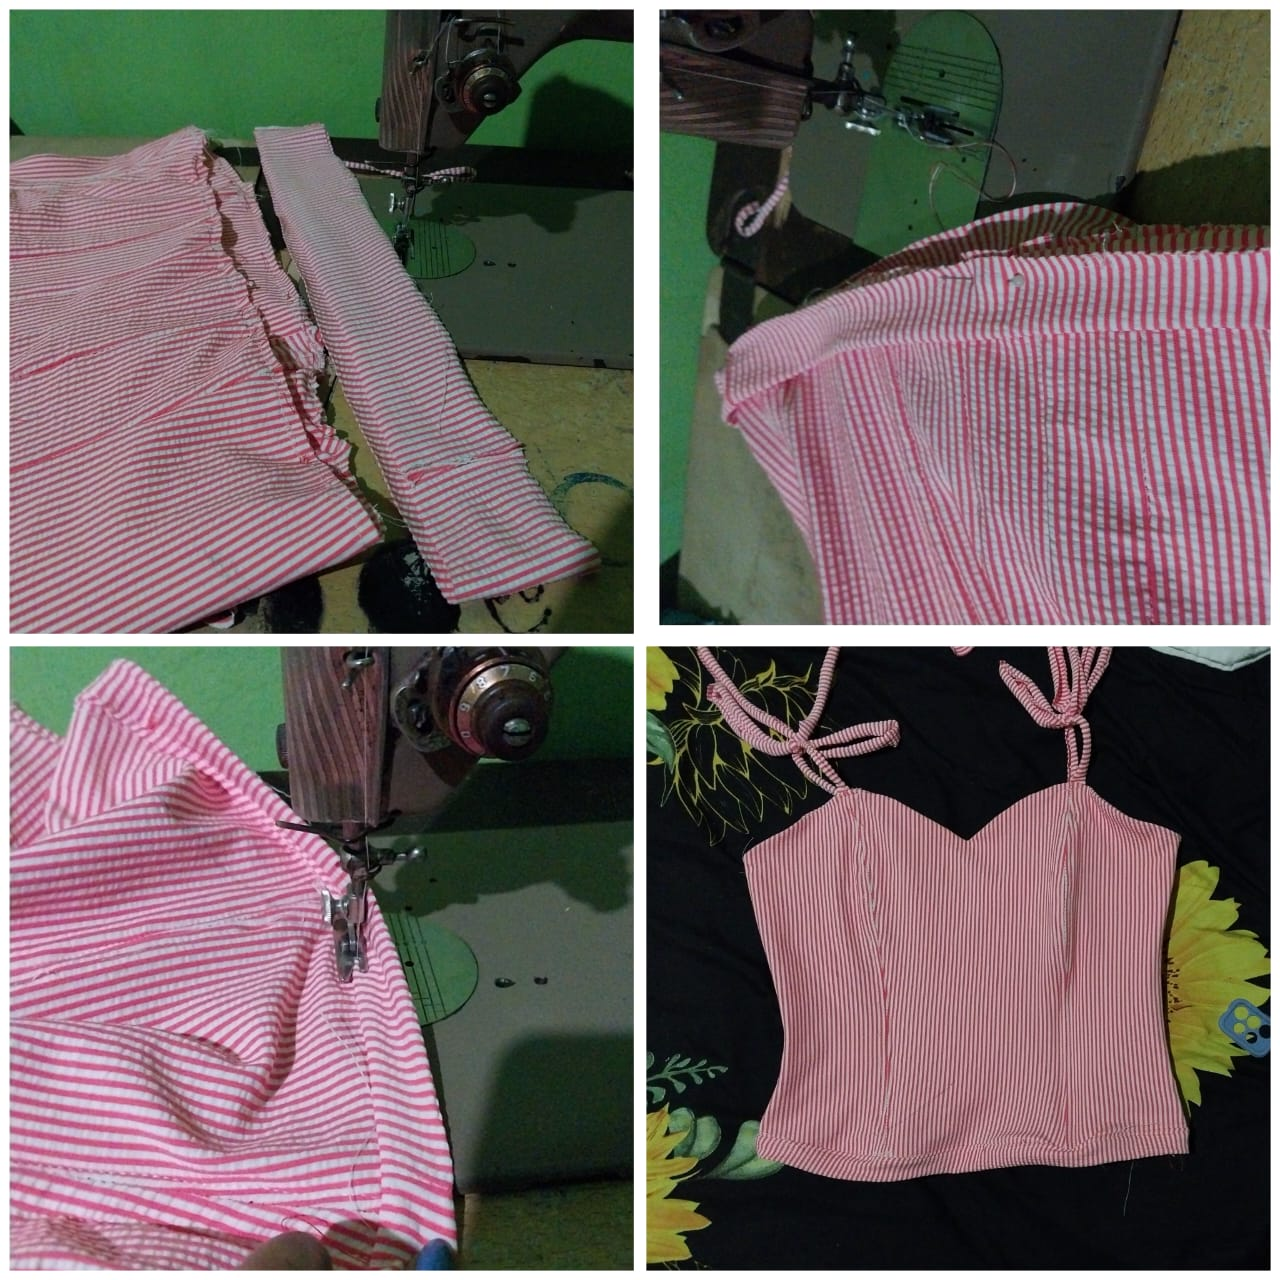
In the lower area of the corset a ribbon should be cut out and this is placed or sewn at the end of the edge of the corset.
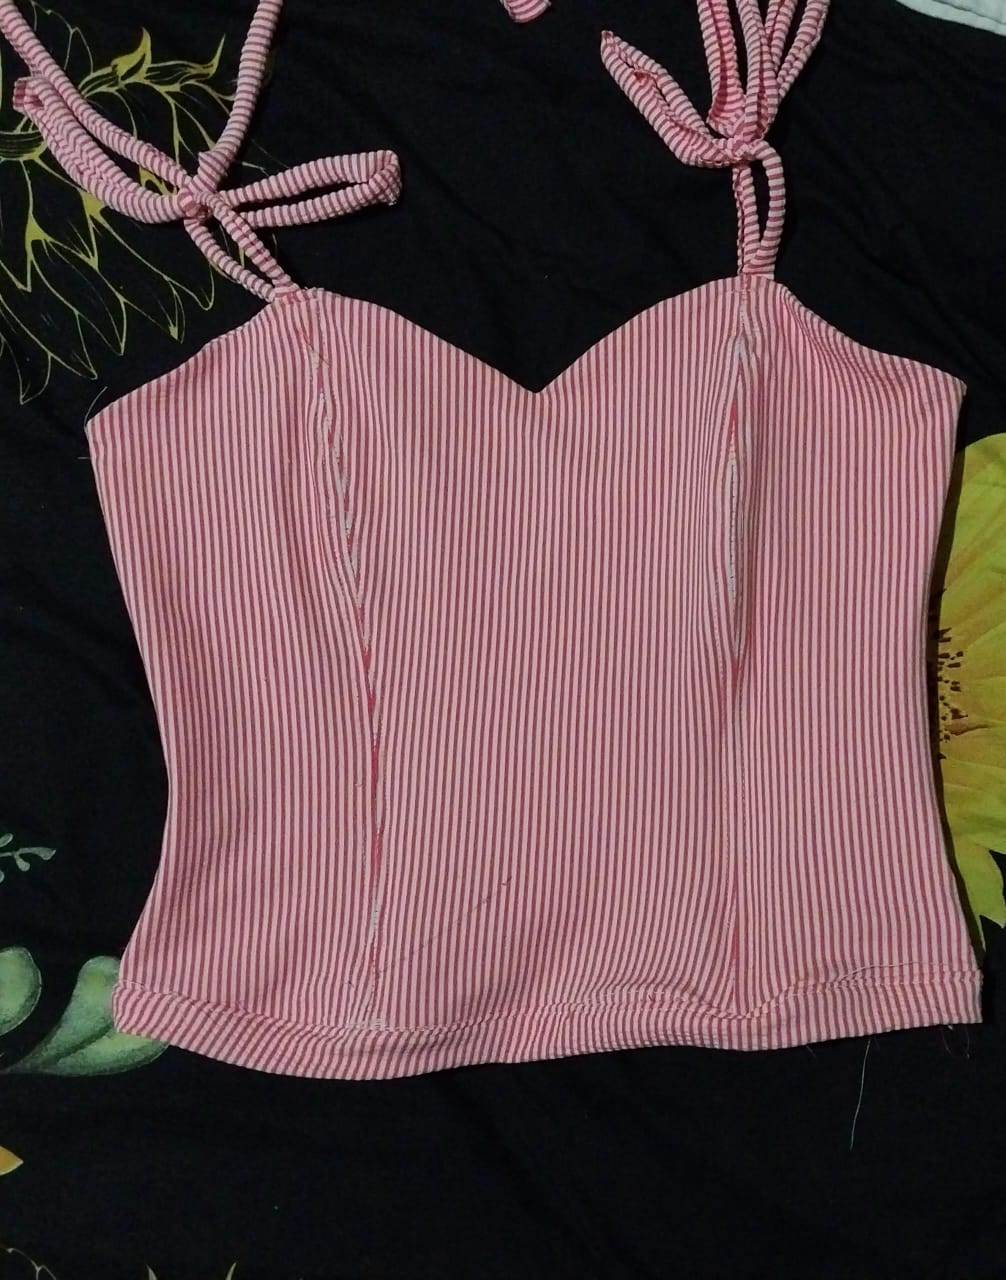
This is the final result, in my case I didn't use bustier cups for this corset! Next time I hope to show you how to make the cups on the corset.
Thank you very much for your visit!
Credits
- Images belong to me
- Translator: Deepl Traslator
- Editing: Canva
♥️ Hola!
Hola querida familia de Hive. Espero se encuentren muy bien! Quiero mostrarles el paso a paso de un corsé que he diseñado partiendo del uso de plantillas. Pueden adquirír estas plantillas haciendo clip en la fuente de este articulo.Fuente. Alli pueden adquirir fácilmente esta plantilla, solo deben imprimir y pegar en papel de cartulina. Esta talla es 38 pero también pueden adaptarla a una talla más grande aumentando unos centímetros alrededor de toda la forma del diseño.
Materiales
- Patrones descargables
- Tela Elástica 1 metro
- Ballenas o varillas de corset (4)
- Maquina de coser
- Hilo
1
De esta manera al tener los moldes 1 - 2 - 3 - 4
- Debemos obtener 2 piezas del molde 1
- Debemos obtener 4 piezas de los otros moldes (2,3 y 4)
Debemos colocar los patrones sobre la tela y luego recortamos siguiendo las instrucciones de las piezas que se deben recortar! Como en la costura se divide el cuerpo en dos lados iguales debemos completar la secuencia de las siluetas para completar el diseño, es decir completar el lado izquierdo del corset para obtener el corset completo.
2
Luego siguiendo el diseño siempre unimos las piezas con alfileres y luego pasamos a costura. En realidad, el corte de las piezas vamos a obtener dos corsé, de manera que con la misma tela vamos hacer el fondo del corset.
De esta manera tenemos dos piezas exactamente iguales.
3
Luego colacamos la tela cara con cara introduciendo por dentro del corse el otro corsé.
4
Luego de la misma tela cortamos 4 cintas largas y las fijamos por dentro de la zona inferior justo en el centro del busto. Seguidamente cosemos las piezas en la zona superior y la zona inferior de las piezas no se cosen y Colocamos del lado derecho el corsé.
5
Luego recortamos 4 cintas de telas para formar los canales de las ballenas o varillas para darle forma al corsé. Esta tela se dobnla y se cose justo en la costura de las uniones de las piezas que forman el corsé, esta se debe colocar por el lado interno del corsé.
6
Seguidamente introducimos las ballenas en los cuatro canales del corsé.
7
En la zona inferior del corset se debe recortar una cinta y esta se coloca o se cose al final del borde del corsé.
Este es el resultado final, en mi caso no utilicé copas para bustier para este corsé! Para la proxima espero mostrarles como se logran armar las copas en el corsé.
Muchas gracias por la visita!
Creditos
- Las imágenes me pertenecen
- Traductor: Deelp traslator
- Edicion: Canva