Hello everyone... 🌞✨
Hello to my dear Hiver and to the dear community of artists @diyhub, as always very pleased and excited to be here to participate in this contest of the month inspired by "The Sun" in conjunction with the community of @needleworkmonday. I invite you to participate, here are the guidelines for the contest. Hurry up, the contest is almost over.
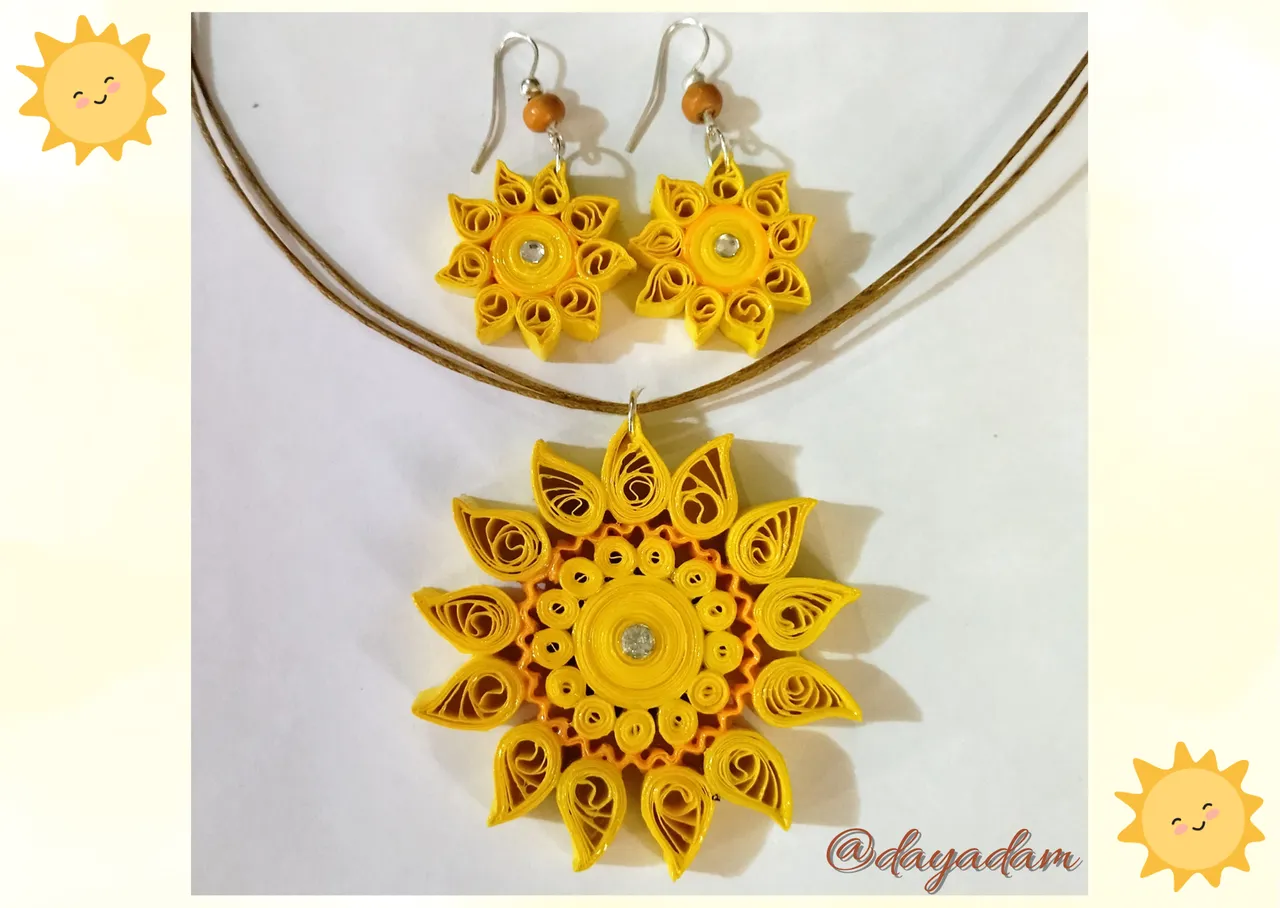
Today I bring you a set of accessories with a design alluding to the sun, in the technique that I usually apply which is quilling. I wanted to make a functional work and that serves to be used frequently by all those lovers of such a wonderful star as it is our sun, much of what I do I love to adapt it to the jewelry and in this case is no different.
I invite @irenenavarroart and @yetsimar to participate in the contest.
So friends, without further ado, I hope you like it, join me in this creative process that I made especially for you.
Let's get started:😃

Hola a todos... 🌞✨
Hola a mis queridos Hiver y a la querida comunidad de artistas
@diyhub, como siempre muy complacida y emocionada de encontrarme por acá para participar en este concurso del mes inspirado en "El Sol" en conjunto con la comunidad de @needleworkmonday. Te invito a participar, por acá te dejo las pautas del concurso. Apúrate, falta poco para que termine el concurso.
Para hoy les traigo un conjunto de accesorios con un diseño alusivo al sol, en la técnica que más suelo aplicar la cual es la de quilling. Quise realizar un trabajo funcional y que sirva para ser utilizado de manera frecuente por todos aquellos amantes de un astro tan maravilloso como lo es nuestro sol, mucho de lo que realizo me encanta adaptarlo a la bisutería y en este caso no es distinto.
Invito a participar en el concurso a @irenenavarroart y a @yetsimar.
Entonces amigos, sin más preámbulos, esperando que sea de su agrado acompáñenme en este proceso creativo que realice especialmente para ustedes.
Comencemos:😃

• Cintas de quilling de 6mm de ancho amarillas y naranja.
• Aguja para quilling.
• Alambre fino.
• Maquina corrugadora de papel.
• Pega blanca extra fuerte (de carpintería).
• Regla con diversas medidas de circunferencia.
• Bases para zarcillos colgante (anzuelos).
• Perlas de madera naranja.
• Argollas medianas de bisutería.
• Tijera.
• Cristales de bisutería.
• Pinza punta fina
• Pincel.
• Collar de tu preferencia.
- Quilling ribbons 6mm wide yellow and orange.
- Quilling needle.
- Fine wire.
- Paper corrugating machine.
- Extra strong white glue (carpentry glue).
- Ruler with different circumference measures.
- Bases for hanging tendrils (hooks).
- Orange wooden beads.
- Medium-sized costume jewelry earrings.
- Scissors.
- Costume jewelry crystals.
- Fine tip tweezers.
- Paintbrush.
- Necklace of your preference.

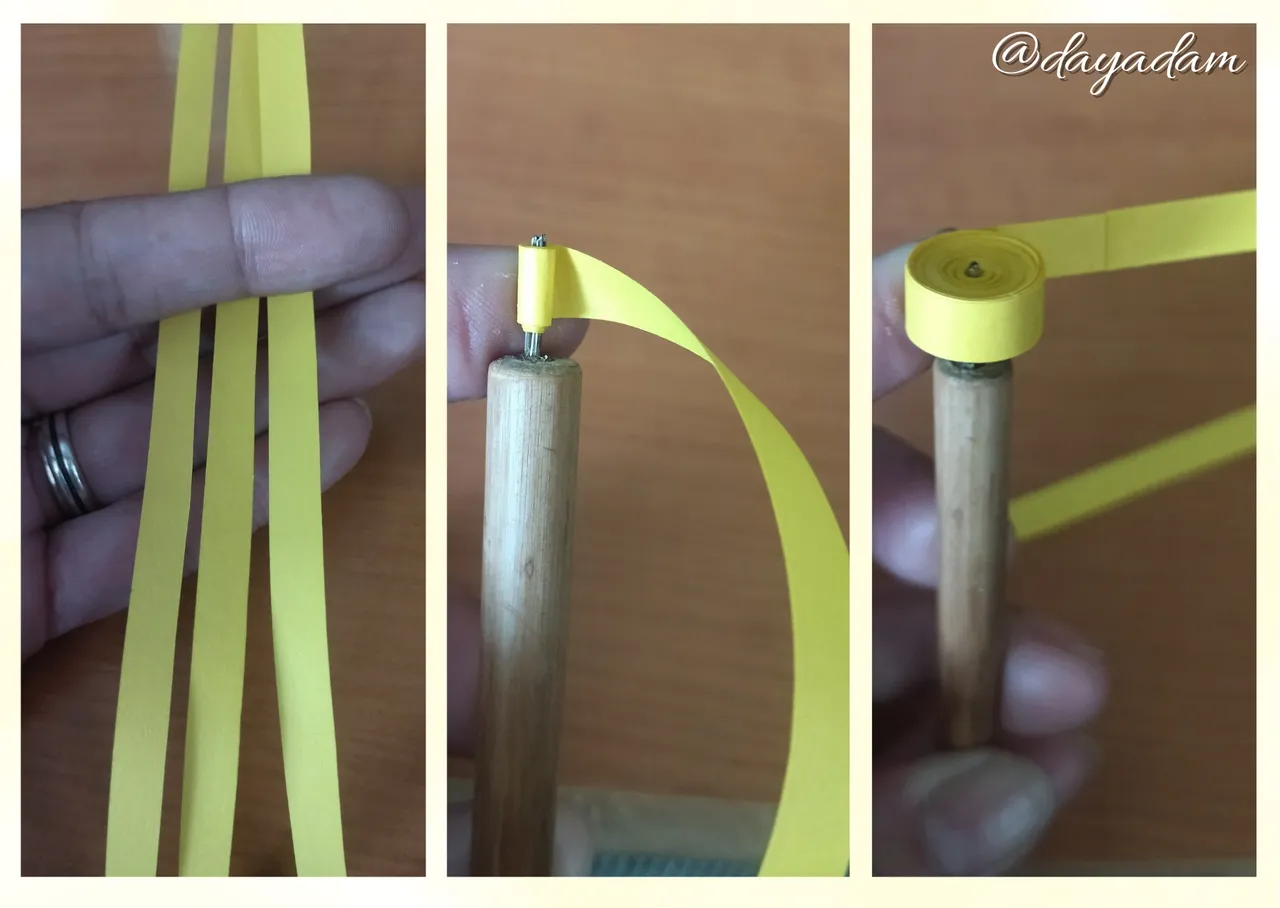
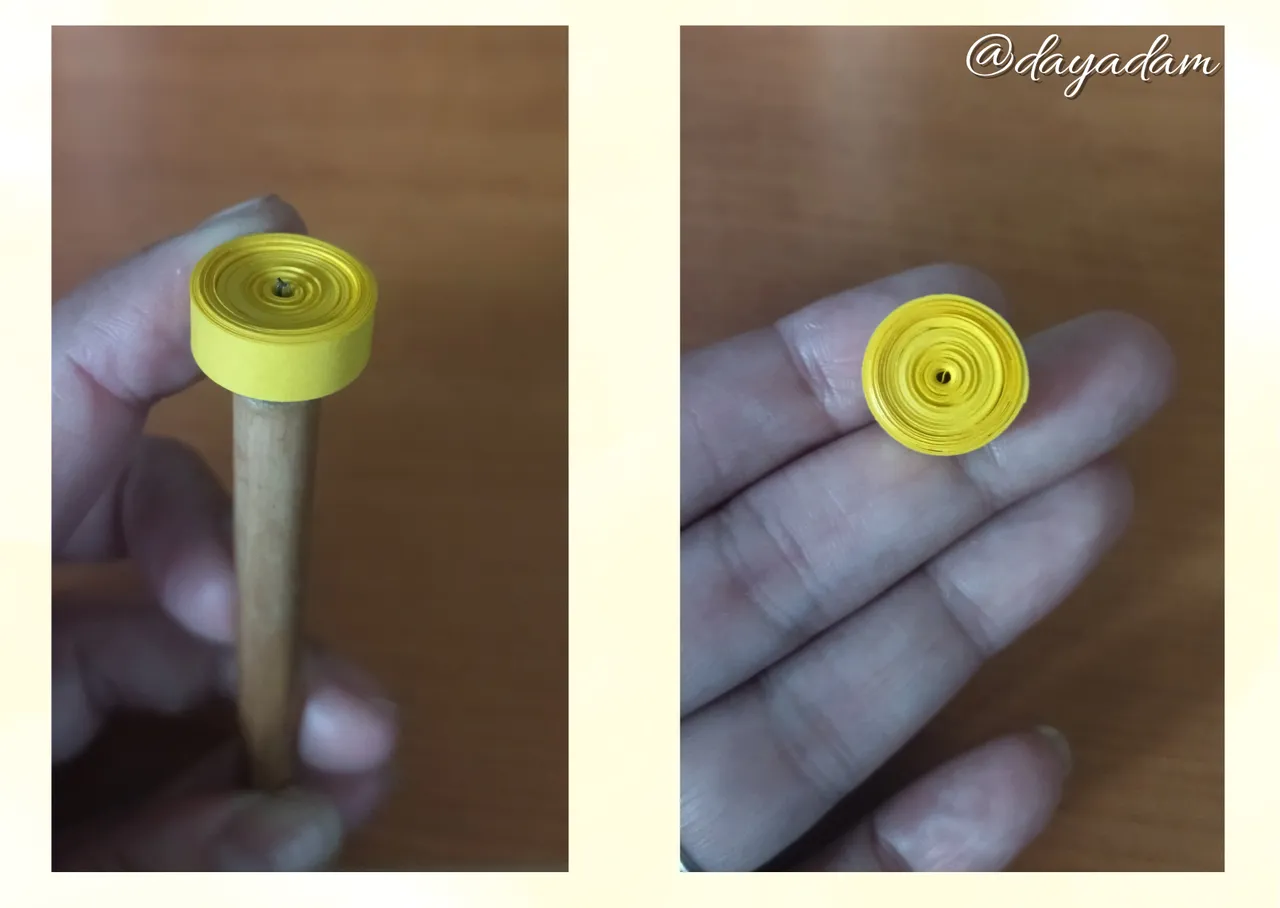
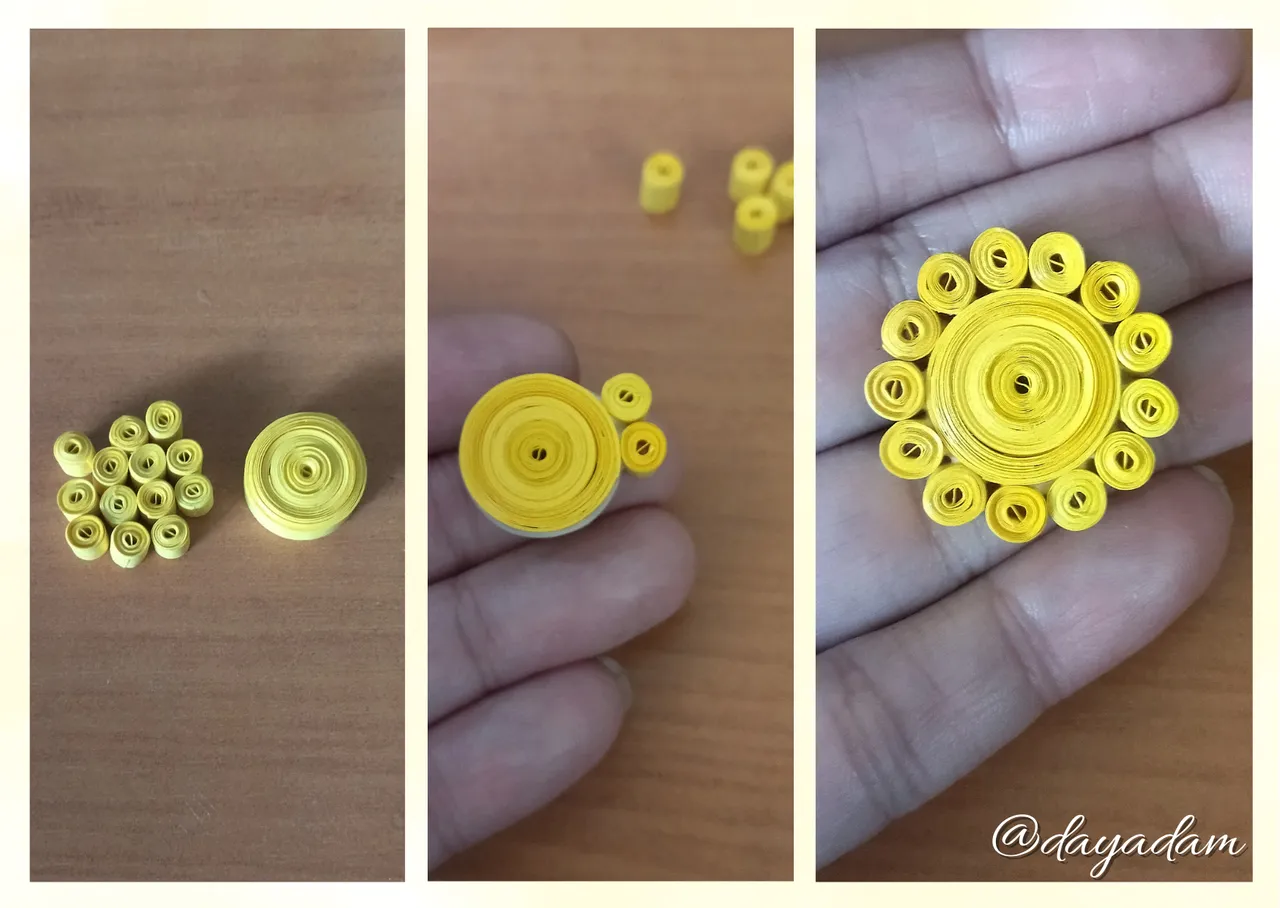
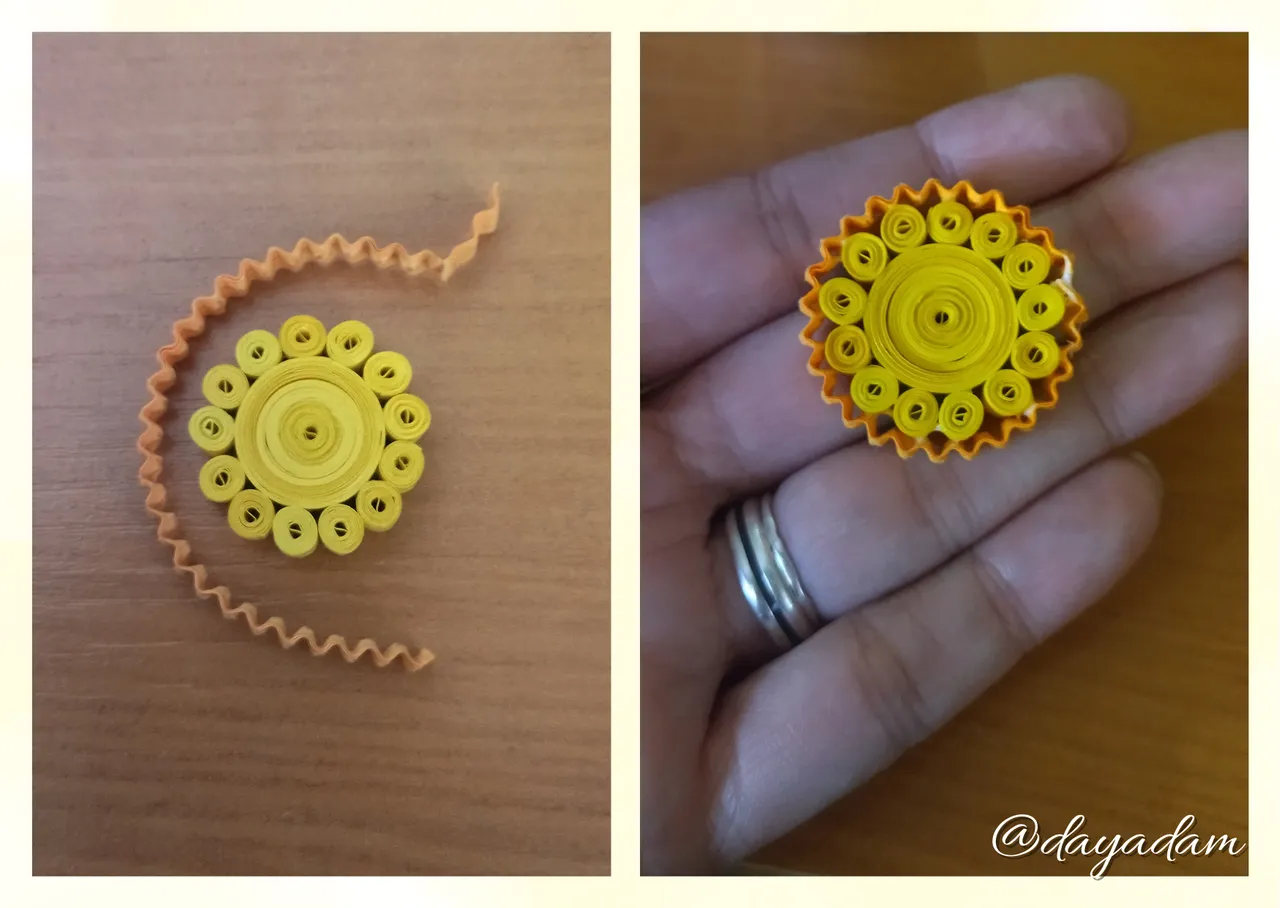
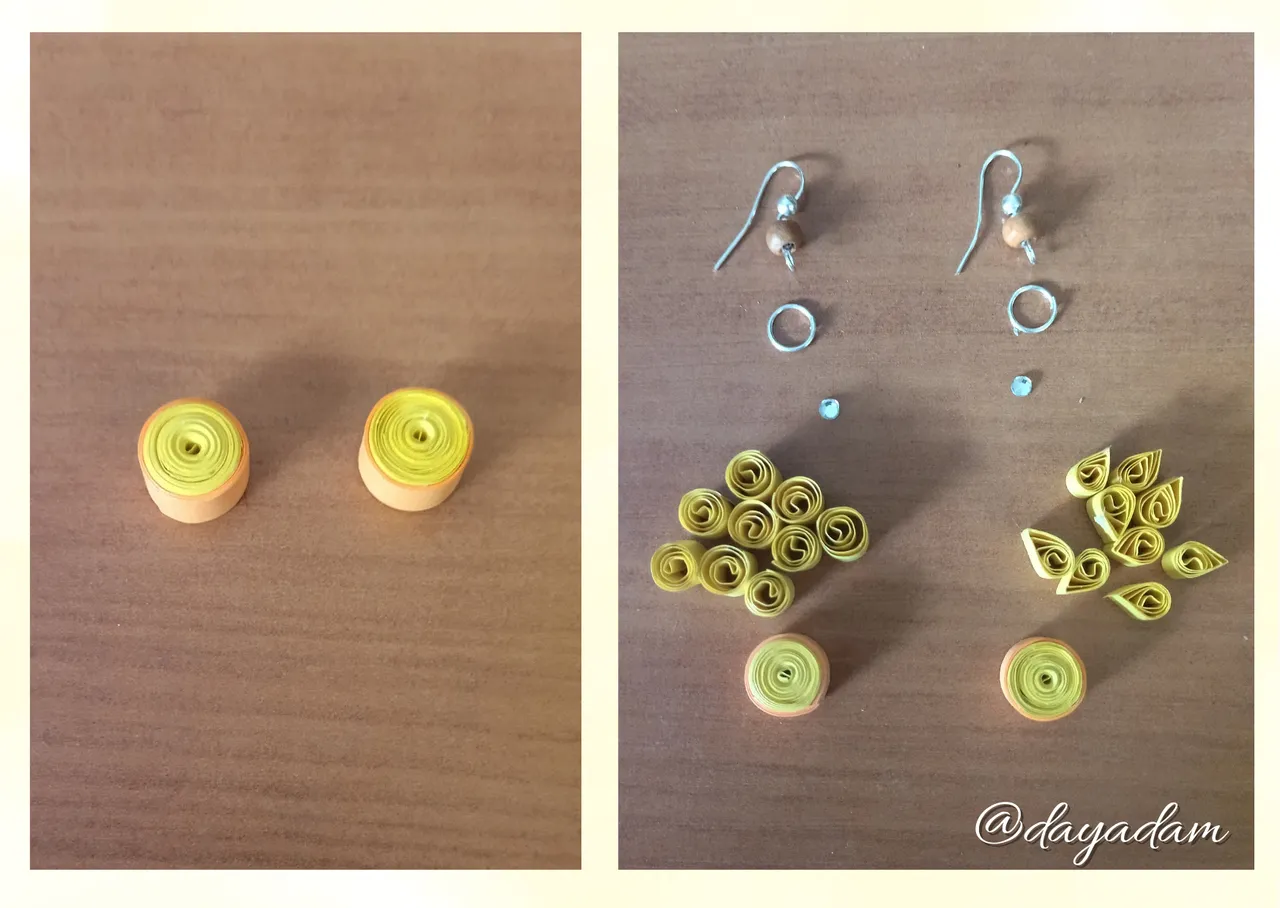
- We are going to take a 6mm wide x 150cms long yellow quilling ribbon, with the help of the quilling needle we will roll it until we reach the end forming a closed circle, this will be the center of our pendant.
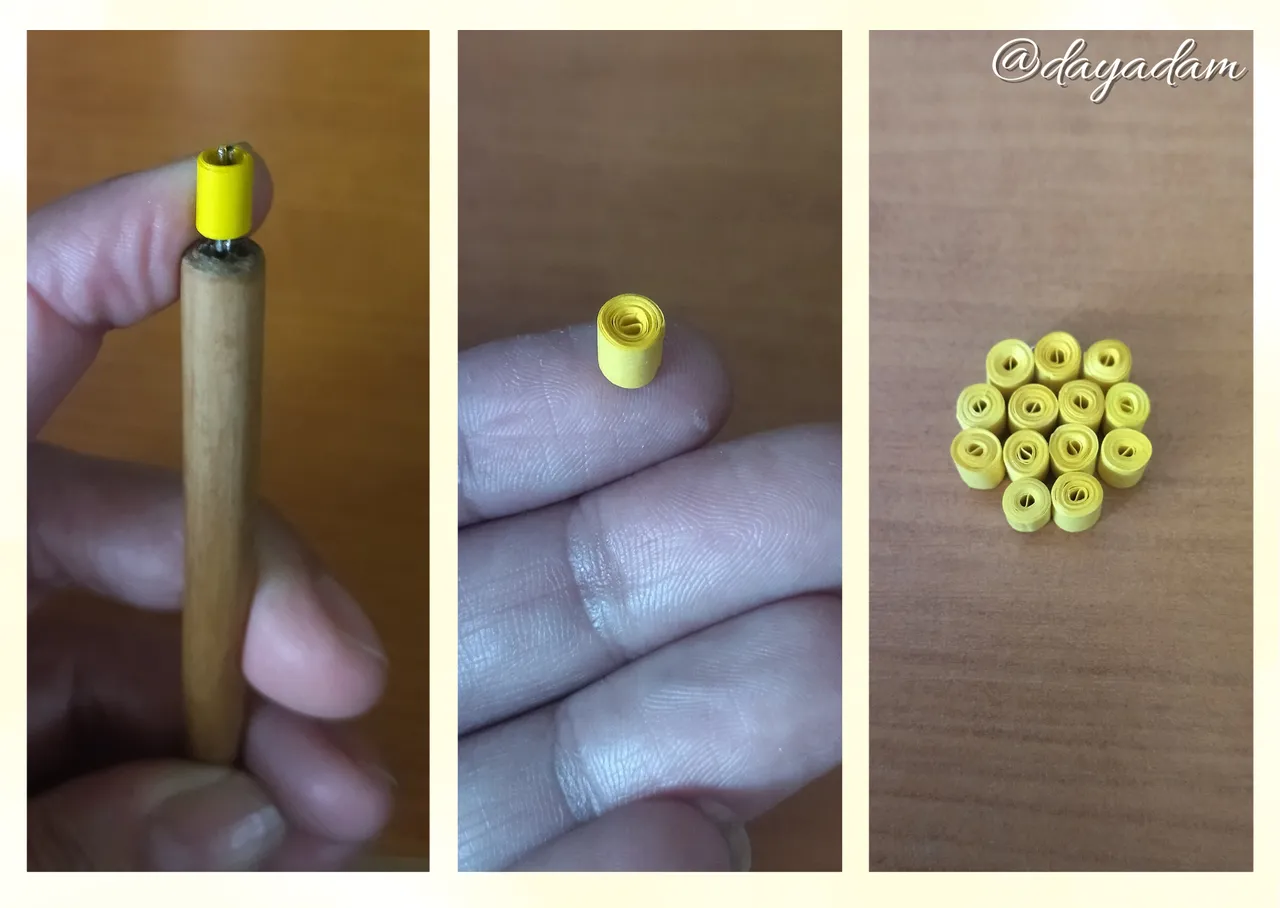
- Then we will take small pieces of yellow ribbon 6mm wide x 14cms long, we will roll with the quilling needle to form a small closed circle, we will repeat the process with 12 pieces of ribbons to complete a total of 13 small closed circles.
- We proceed to glue with extra strong white glue all the small closed circles around the large closed circle.

• Vamos a tomar una cinta de quilling amarilla de 6mm de ancho x 150cms de largo, con la ayuda de la aguja para quilling enrollaremos hasta llegar al final formando un círculo cerrado este será el centro de nuestro dije.
• Luego tomaremos pequeños trozos de cinta amarilla de 6mm de ancho x 14cms de largo, enrollaremos con la aguja para quilling para formar un pequeño círculo cerrado, repetiremos el proceso con 12 trozos de cintas para completar un total de 13 pequeños círculos cerrados.
• Procedemos a pegar con pega blanca extra fuerte todos los círculos cerrados pequeños, alrededor del círculo cerrado grande.
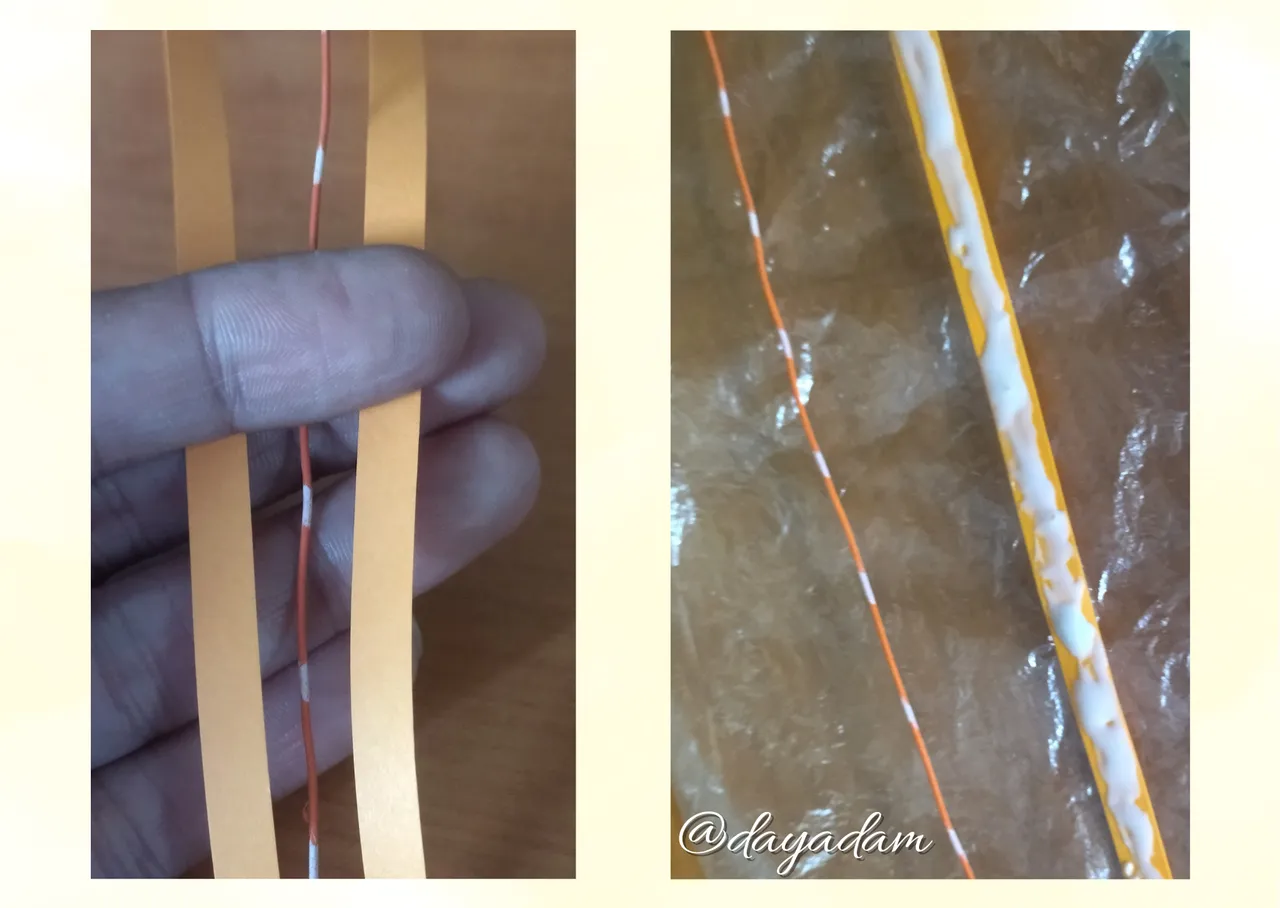
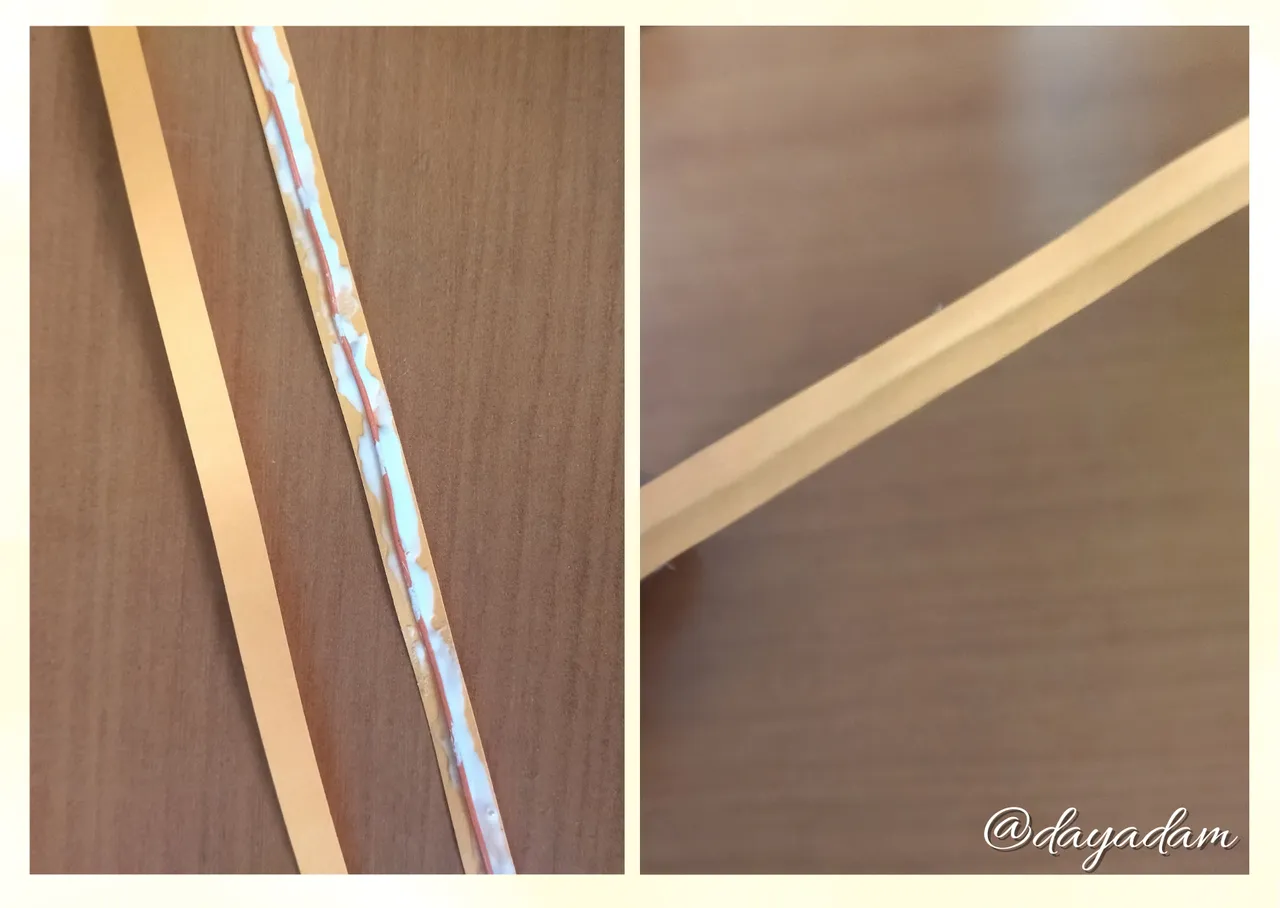
- We will take two 6mm wide orange ribbons and a thin wire can be floral type, apply white glue on one of the ribbons, place the wire and place the other ribbon on top, seal with your fingers so that it is well connected, we must wait for it to dry very well.
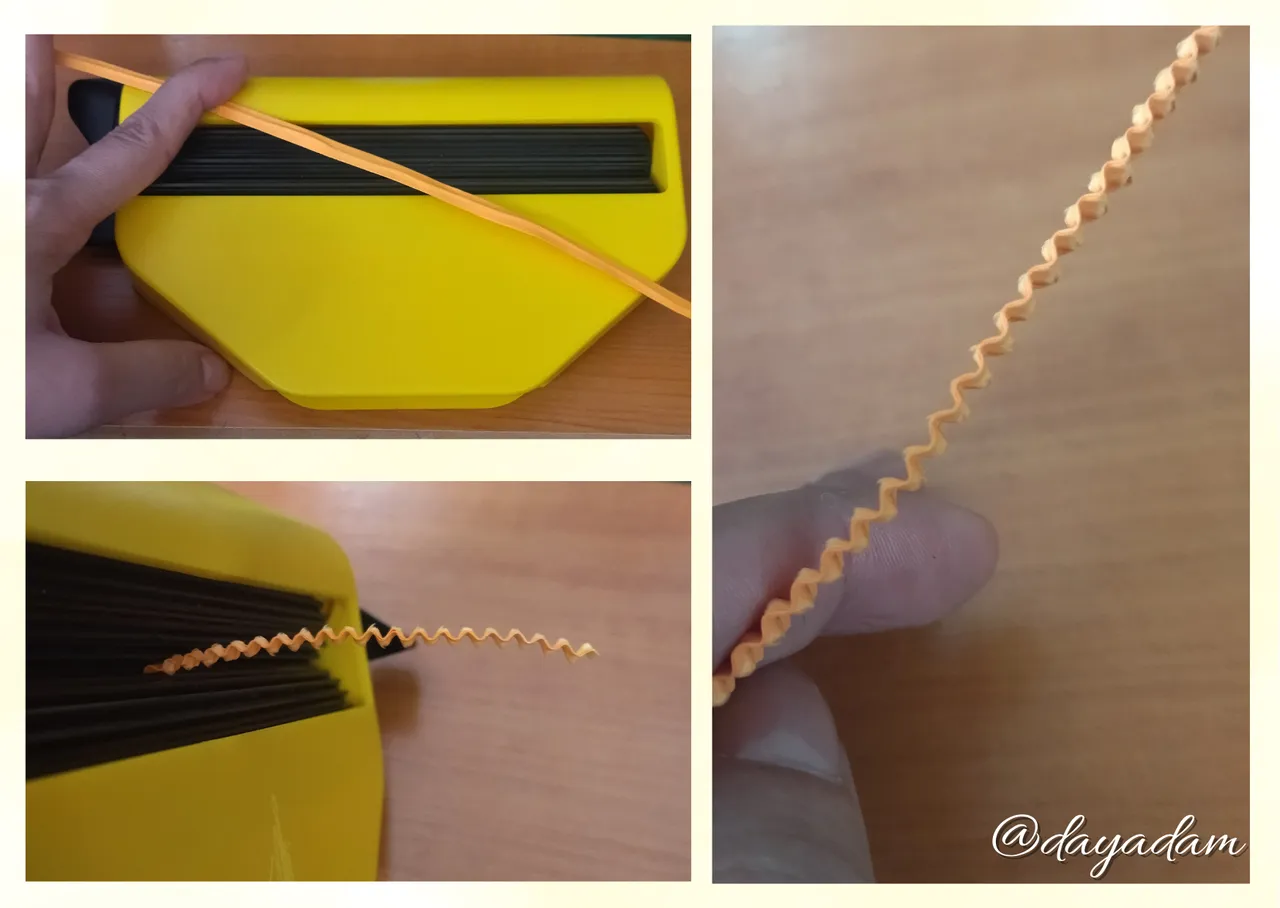
- Once the ribbon with the wire is dry, we will pass it through a corrugating machine, at the end we take the piece that we had made and we will pass our molded ribbon around it, we will seal it with extra strong glue.
• Vamos a tomar dos cintas de 6mm de ancho color naranja y un alambre fino puede ser del tipo floral, aplicamos pega blanca en una de las cintas, colocamos el alambre y colocamos la otra cinta encima, sellamos con los dedos para que quede bien unida, debemos esperar que seque muy bien.
• Bien seca la cinta con el alambre vamos a pasar la misma por una maquina corrugadora, al finalizar tomamos la pieza que habíamos realizado y pasaremos nuestra cinta moldeada alrededor del mismo, sellaremos con pega extra fuerte.
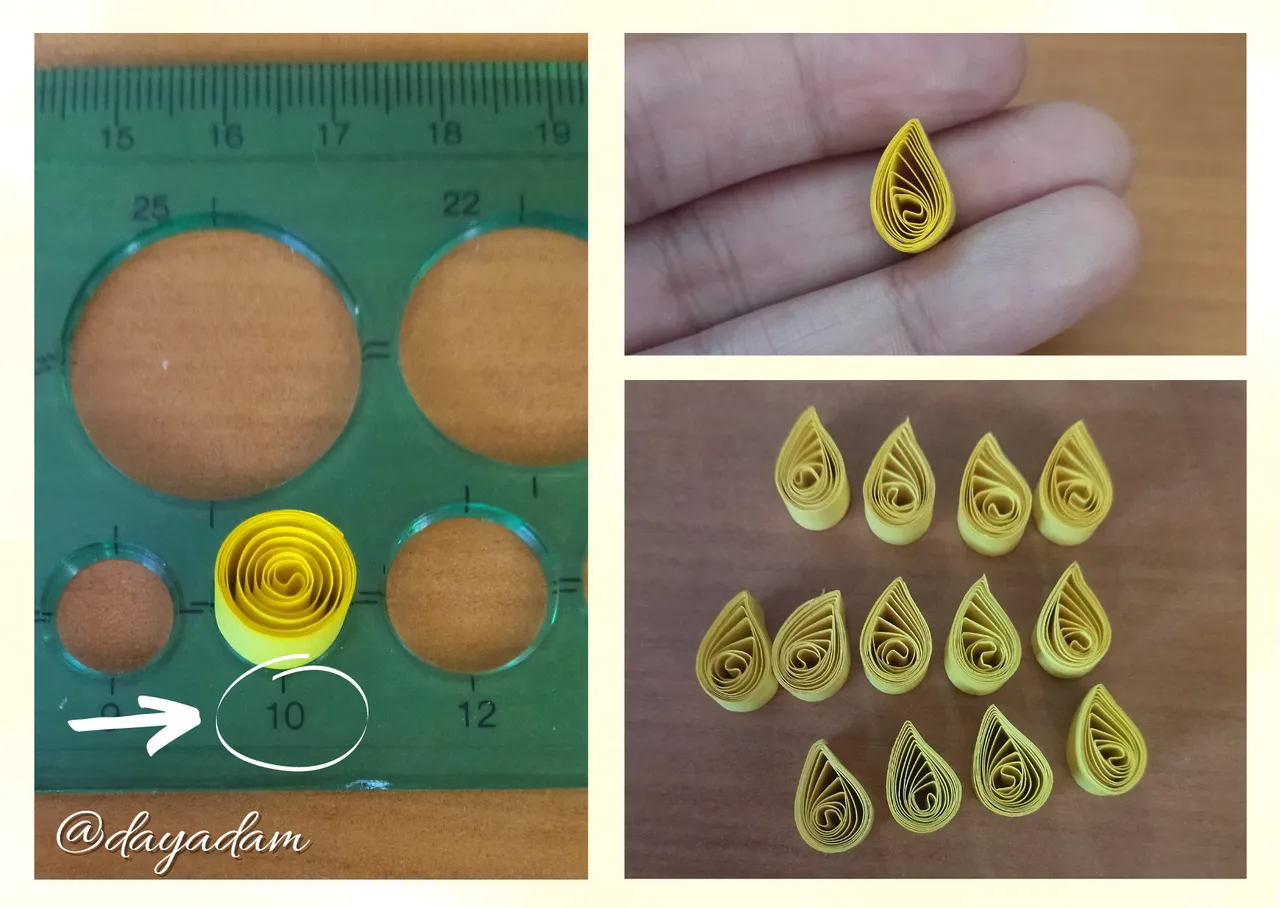
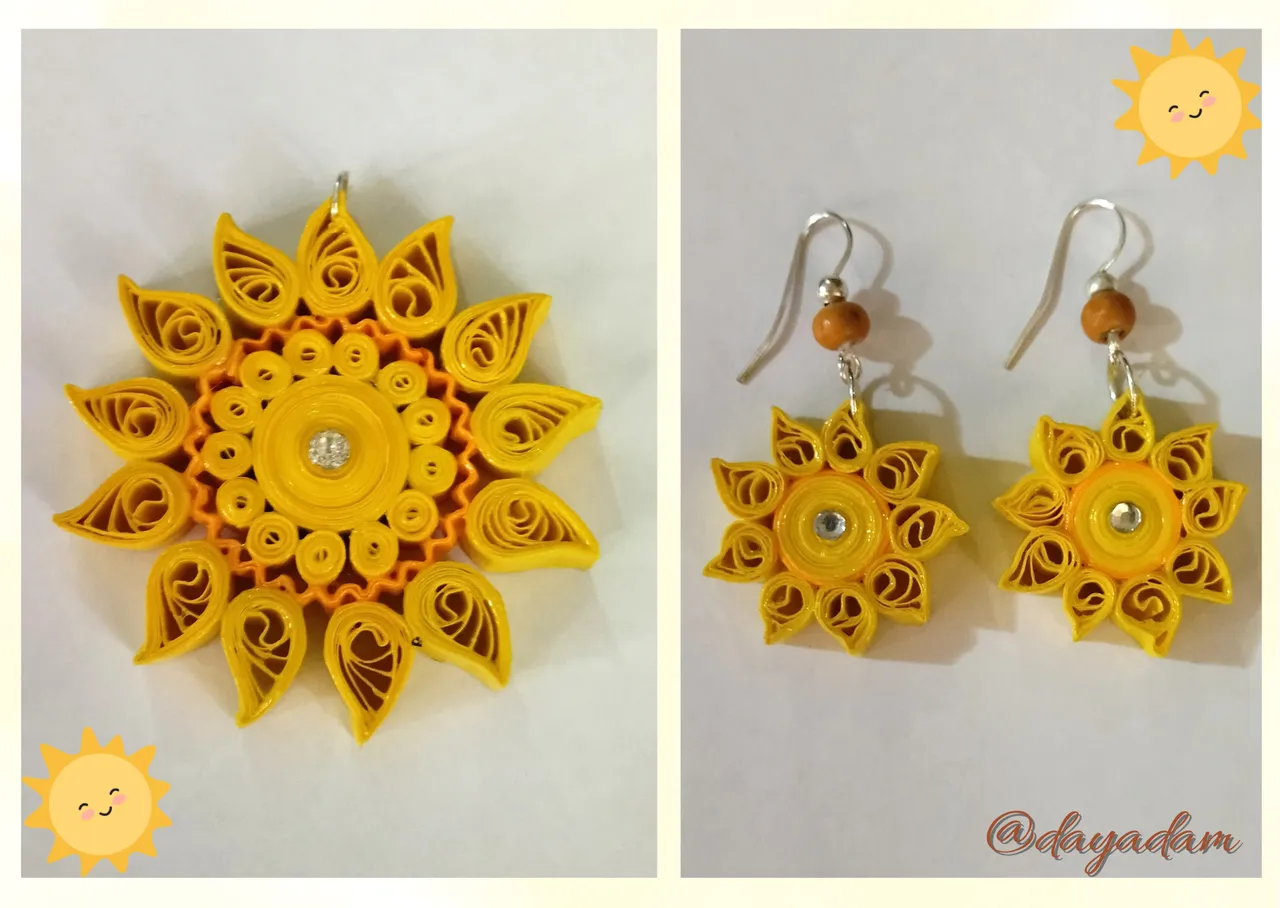
- To get the last pieces we will need to complete the medallion, we will take yellow quilling tape 6mm wide x 25cms long, we will roll with the quilling tape, at the end we will take out and measure on the ruler with different circumference measures in the circle number 10, we take out and seal with extra strong white glue, we will mold in the shape of a drop with a small inclination to one side, as this drop shape we will need 13.
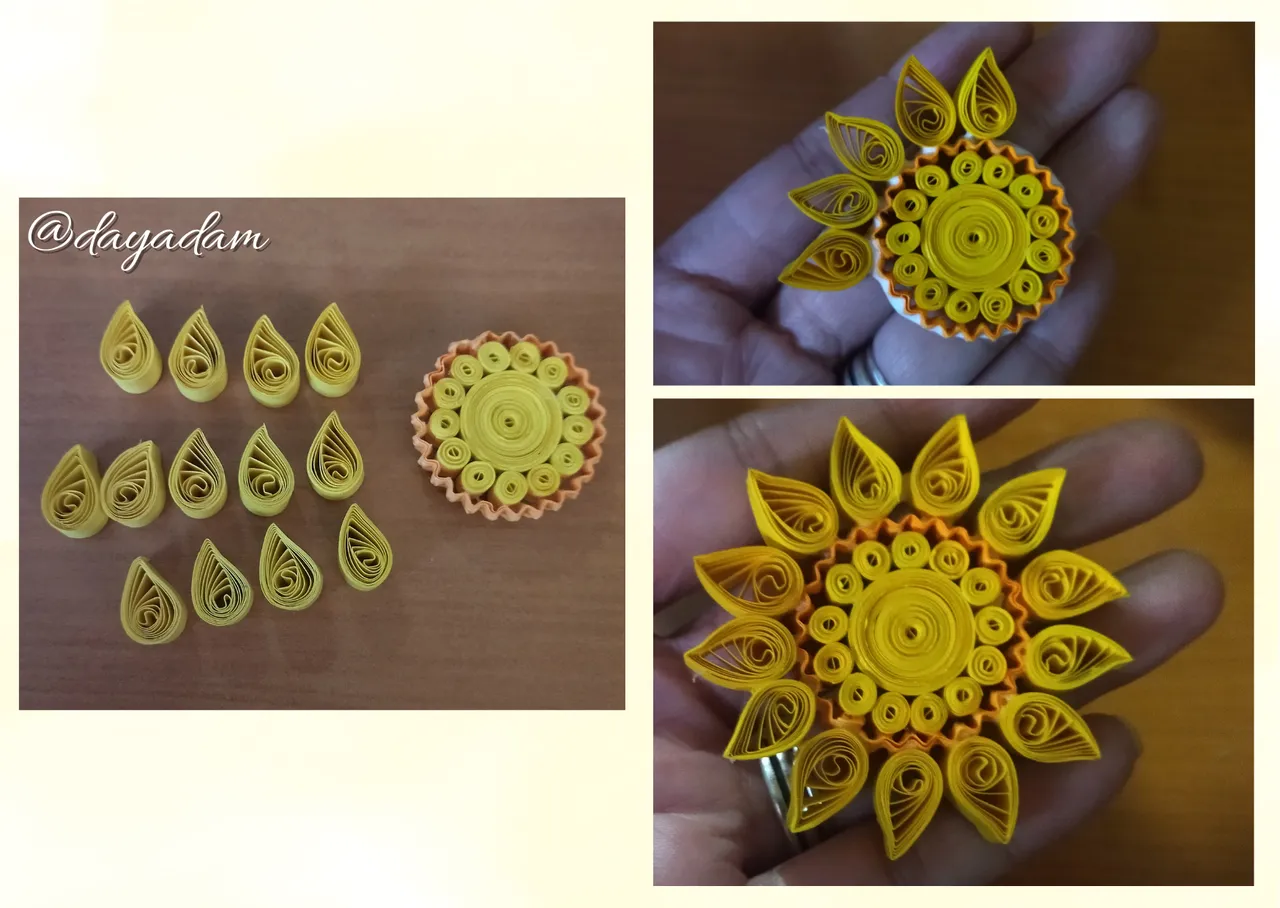
- We take the central piece, and glue all the shaped drops around it in a harmonic way.
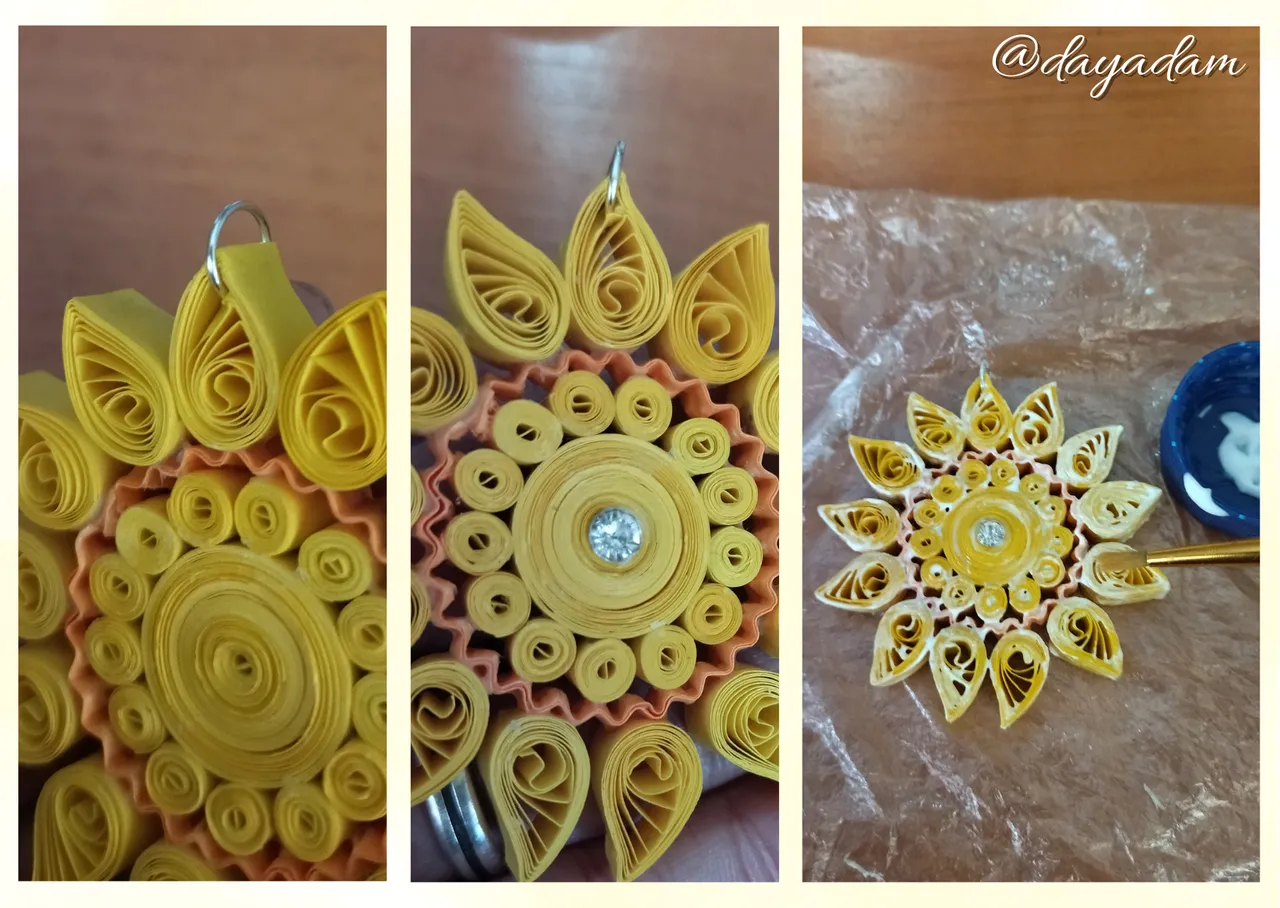
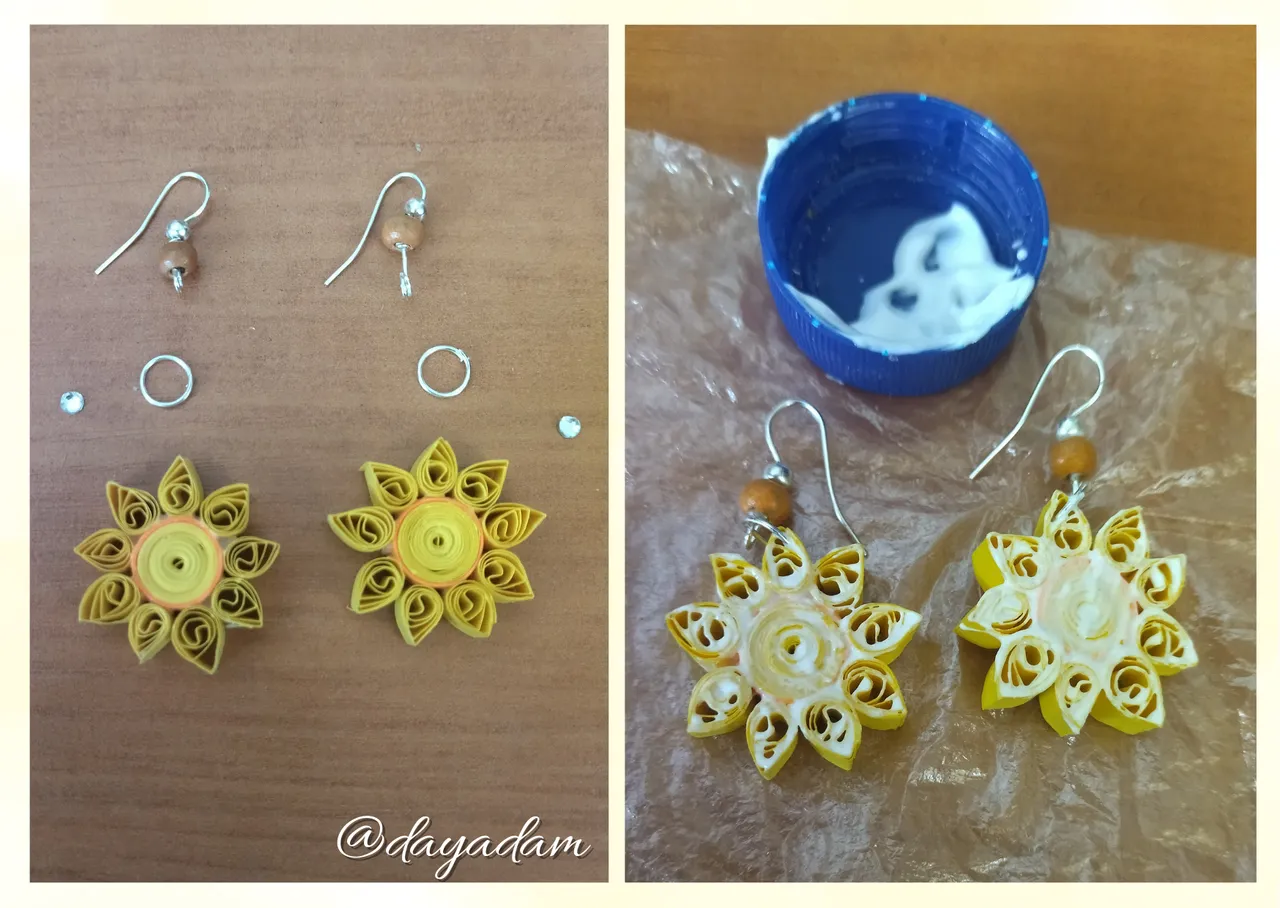
- We place a costume jewelry ring on the top of one of the drops and in the central part to decorate a medium size costume jewelry crystal.
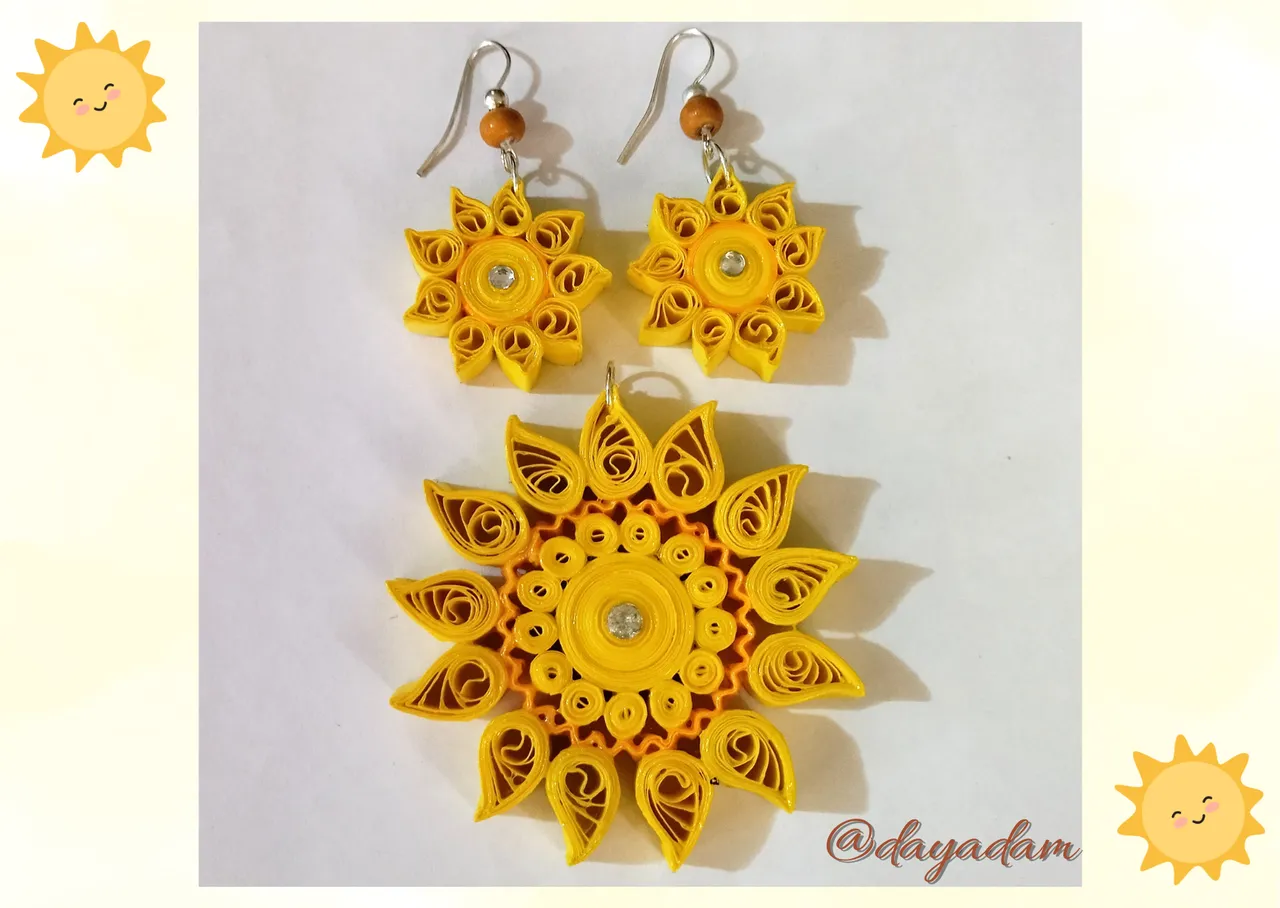
- To finish we apply its liquid protection (plasticized), with a brush we put several layers of extra strong white glue, letting it dry between one layer and another. In this way we will have our medallion with sun motif, ready to use and place on the necklace of our preference.
- En este punto con la ayuda de la aguja para quilling cree, círculos cerrados, abiertos y espirales de diversas formas y colores, para terminar de rellenar a mi gusto la pequeña ballena.
- Para obtener las últimas piezas que necesitaremos para completar el medallón, tomaremos cinta de quilling color amarilla de 6mm de ancho x 25cms de largo, enrollaremos con la cinta para quilling, al finalizar sacaremos y mediremos en la regla con diversas medidas de circunferencia en el círculo número 10, sacamos y sellamos con pega blanca extra fuerte, moldearemos en forma de gota con una pequeña inclinación hacia un lado, como esta gota con forma necesitaremos 13.
- Tomamos la pieza central, y pegaremos todas las gotas con forma alrededor de esta de manera armónica.
- Le colocamos una argolla de bisutería en la parte de arriba de una de las gotas y en la parte central para decorar un cristal mediano de bisutería.
- Para finalizar le aplicamos su protección liquida (plastificado), con un pincel colocamos varias capas de pega blanca extra fuerte dejando secar entre una capa y otra. De esta manera tendremos nuestro medallón con motivo de sol, listo para su uso y colocar en el collar de nuestra preferencia.
- Tendrils:
- To make the tendrils simply use 6mm wide ribbons, make a central circle, yellow with orange, 1 for each tendril, then 9 open circles for each one, which I molded in the shape of a leaf.
- I glued the leaves around the central circle, placed a costume jewelry ring at the top, its respective hook which I previously decorated with an orange wooden bead, applied its liquid protection and to give the tendrils a brightness I placed a glitter in the central circle.
I decided to make these tendrils to complement the medallion with my sun design.
- Zarcillos:
- Para realizar los zarcillos sencillamente use puras cintas de 6mm de ancho, realice un círculo central, amarillo con naranja, 1 para cada zarcillo, luego 9 círculos abiertos para cada uno, los cuales moldee en forma de hoja.
- Las hojas las pegue alrededor del círculo central, le coloque una argolla de bisutería en la parte de arriba, su respectivo anzuelo al que decore previamente con una perla de madera naranja, le aplique su protección liquida y para darle vistosidad a los zarcillos le coloque un brillo en el círculo central.
Decidí realizar estos zarcillos, para complementar el medallón con mi diseño de sol.

What did you think, did you like it?
I hope you did, I hope you liked my explanation, procedure and photos, I made them with love for you.
"Let out that muse that inspires you, and let your imagination fly".
Thank you all, see you next time. 🌞✨
¿Que les pareció, les gustó?
Espero que sí, que les haya gustado mi explicación, procedimiento y fotos, los hice con mucho cariño por y para ustedes.
"Deja salir esa musa que te inspira, y deja volar tu imaginación".
Gracias a todos, nos vemos en la próxima. 🌞✨
Todas las fotos usadas en este post son de mi autoría y han sido sacadas en mi celular personal un Redmi 9T y editadas Canva Banner y separador hecho por mí en Canva Traducido con la ayuda de DeepL
