Hello everyone... 🎃
Hello to my dear Hivers and the community of DIYHub, as always very pleased and excited to be here again, showing you my work made with love and especially for you.
Since we are in the month of October where many celebrate "Halloween ", I will continue with the theme, in the previous post I made a pendant in the shape of a little ghost, if you want to visualize it I invite you to visit my blog, because this time I wanted to make a small pendant in the shape of a little pumpkin in 3D, made in the quilling technique, you will notice that it does not take much material and in turn is a simple process to carry it out.
I also take this opportunity to present this little charm as part of the contest with the theme of the month in partnership with Liketu. If you want to participate here I leave the guidelines of the contest, cheer up and do not stay without participating. I invite @chacald.dcymt, @gaboamc2393 , @elbuhito , @fixie.
Hoping that you like it, and are encouraged to carry it out, without further ado I leave here my creative process.
Let's get started:😃

Hola a Todos... 🎃
Hola a mis queridos Hivers y a la comunidad de DIYHub, como siempre muy complacida y emocionada de encontrarme por acá nuevamente, mostrándole mi trabajo hecho con mucho amor y especialmente para ustedes.
Ya que nos encontramos en el mes de Octubre donde muchos celebran "Halloween", seguiré con la temática, en el post anterior lleve a cabo un dije en forma de fantasmita, si desean visualizarlo los invito a visitar mi blog, pues en esta oportunidad quise realizar un pequeño pendiente en forma de calabacita en 3D, elaborado en la técnica de quilling, van a observar que no lleva mucho material y a su vez es un proceso sencillo para llevarlo a cabo.
También aprovecho para presentar este pequeño dije como parte del concurso con el tema del mes en alianza con Liketu. Si quieres participar por aqui te dejo las pautas del concurso, animate y no te quedes sin participar. Invito a @chacald.dcymt, @gaboamc2393 , @elbuhito , @fixie.
Esperando que sea de su agrado, y se animen a llevarlo a cabo, sin más preámbulos les dejo por acá mi proceso creativo.
Comencemos:😃

• Cintas de quilling de diversas medidas de ancho, naranjas, verdes y negras.
• Aguja para quilling.
• Plantilla para moldear círculos.
• Pega blanca extra fuerte (de carpintería).
• Argolla de bisutería mediana.
• Tijera.
• Pincel.
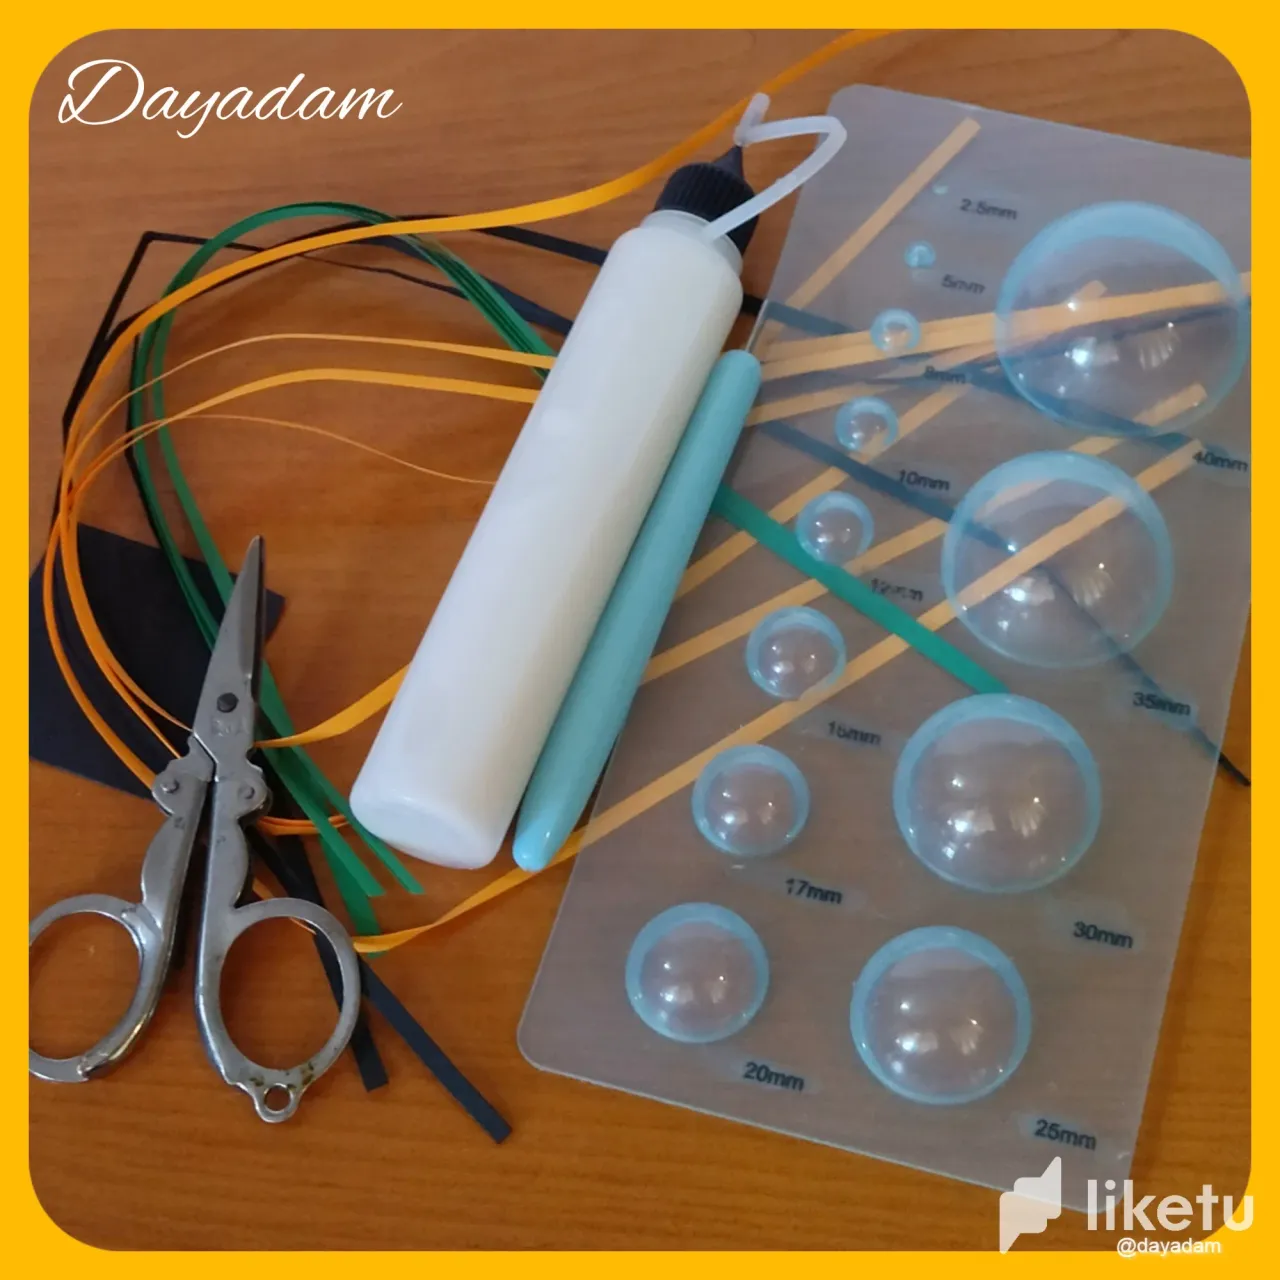
- Quilling ribbons of different widths, orange, green and black.
- Quilling needle.
- Template to mold circles.
- Extra strong white glue (carpentry glue).
- Medium-sized costume jewelry ring.
- Scissors.
- Paintbrush.

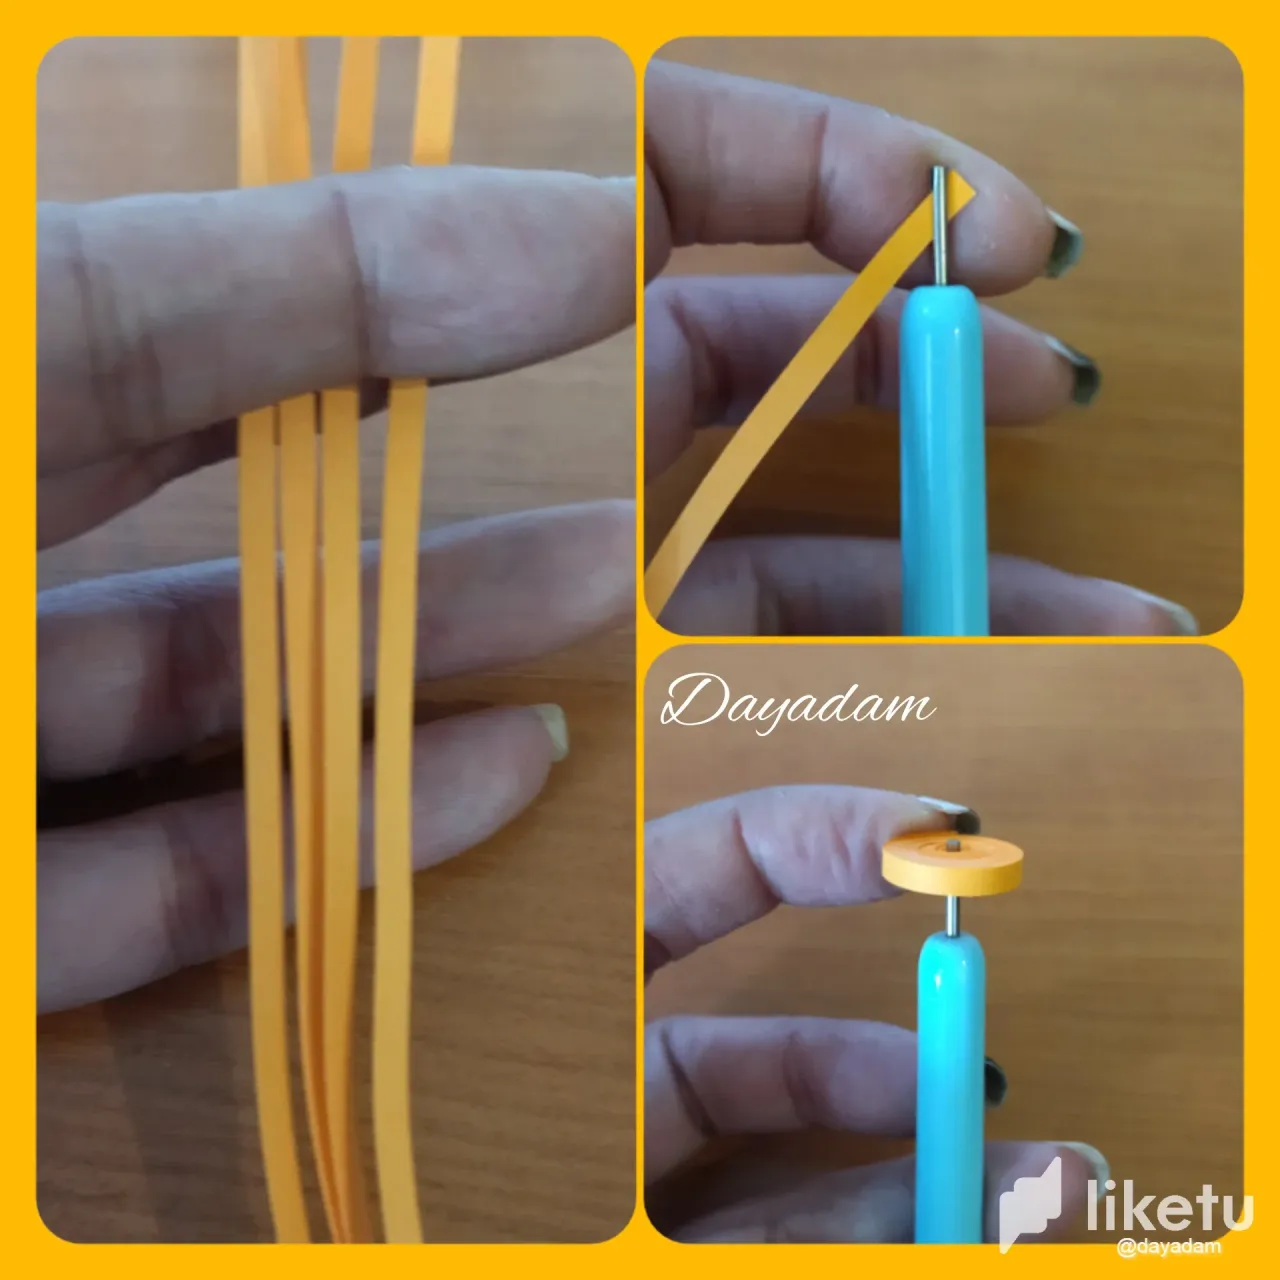
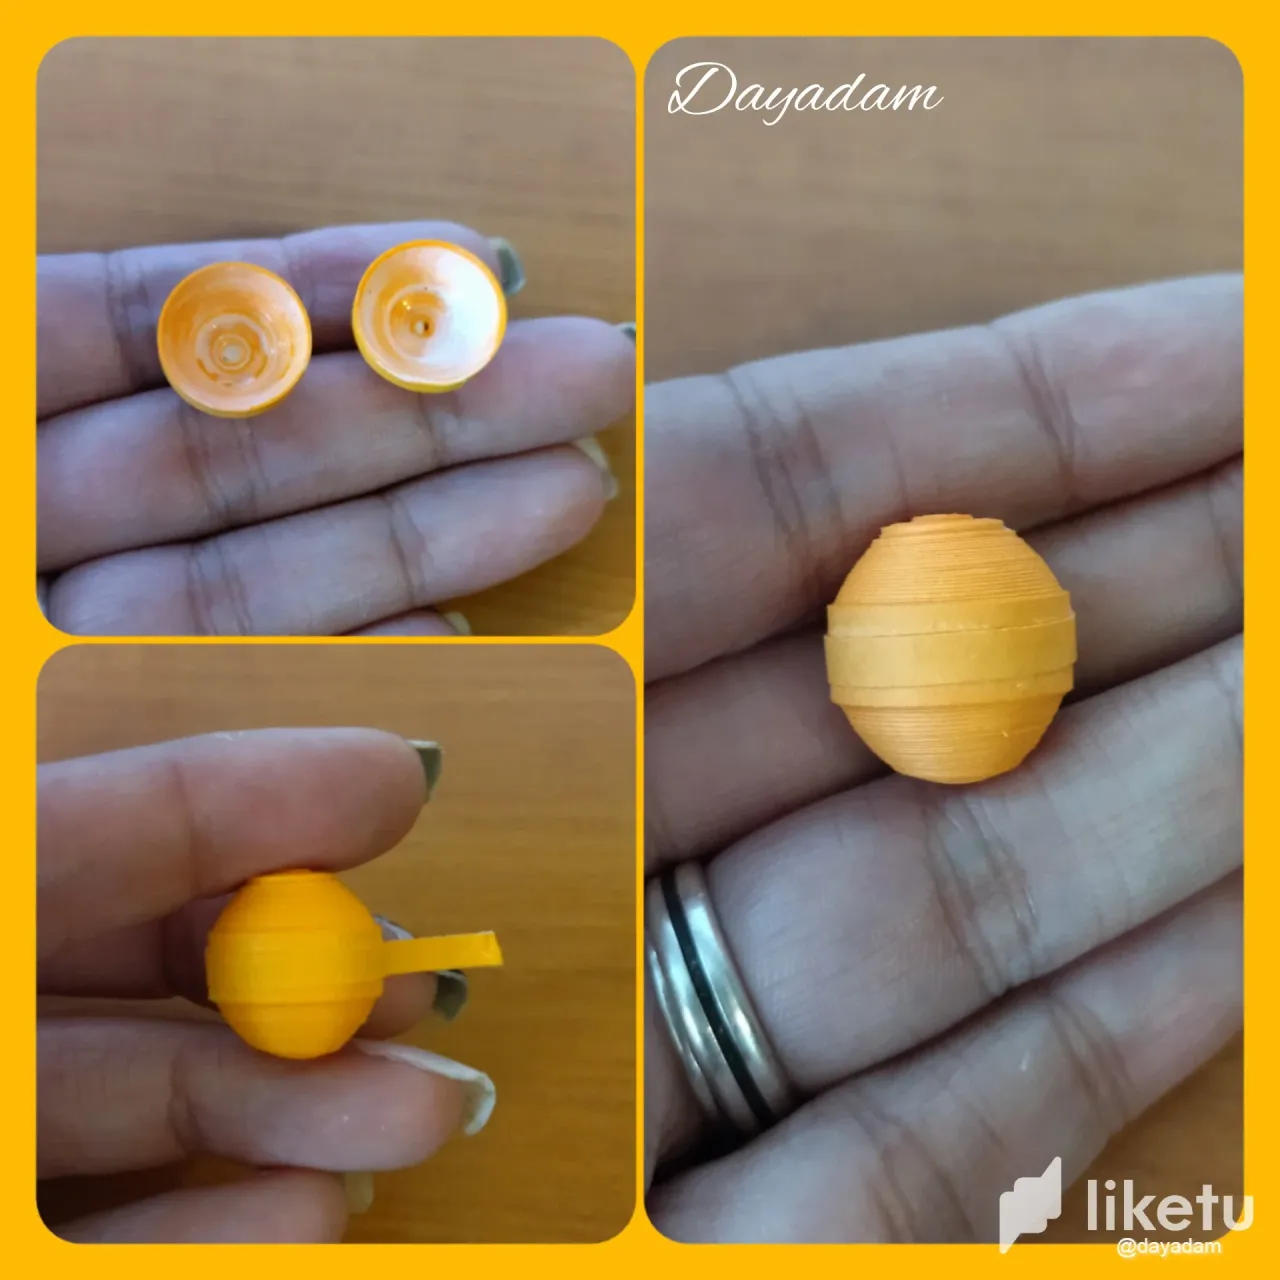
- We start by taking orange quilling tape 3mm wide x 150cms long, we roll it with the quilling needle until we reach the end of the tape, we seal it with extra strong white glue, we take it out of the needle, we will obtain a closed circle. For each pumpkin we are going to make we will need two circles like this one.
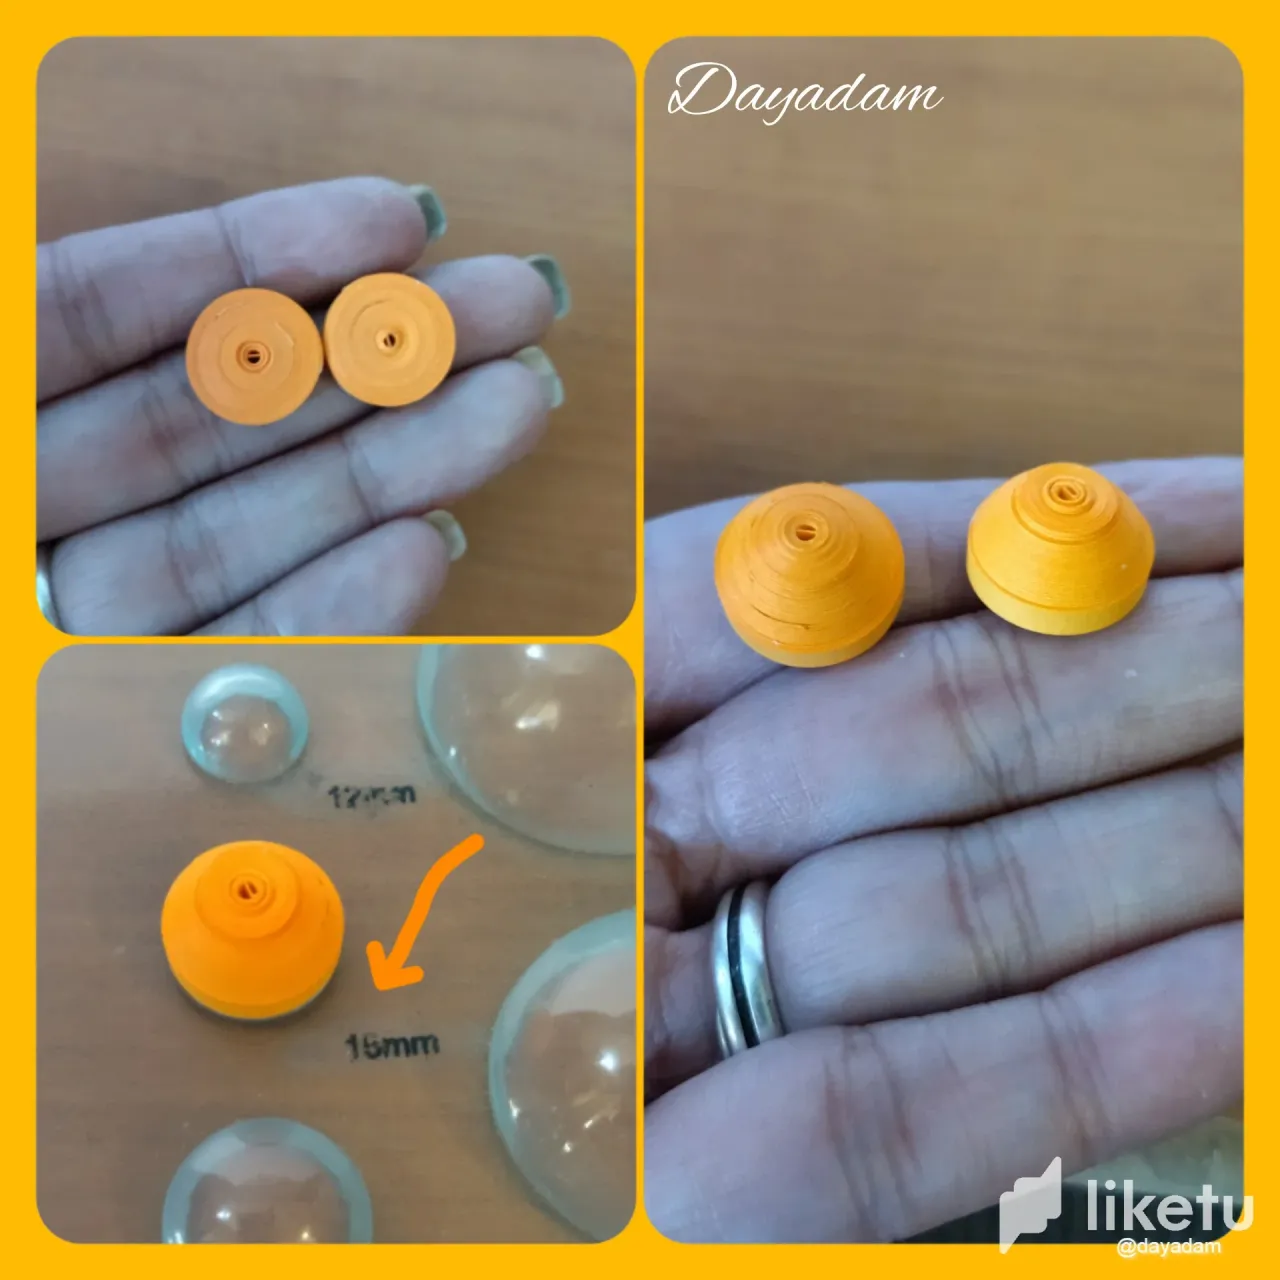
- We are going to mold the circle, placing the piece in the template of circles in the measure 15mm, it is not necessary that it is so round since the pumpkins have an irregular shape, once molded we take out of the template and in the inside we add a little glue, let it dry to prevent the pieces from moving.
- We are going to take a small piece of orange quilling tape, 3mm wide to join the pieces we made, we join both pieces passing the tape through the middle with extra strong white glue (reserve).

• Comenzamos tomando cinta para quilling de color naranja de 3mm de ancho x 150cms de largo, enrollamos con la aguja para quilling hasta llegar al final de la cinta, sellamos con pega blanca extra fuerte, sacamos de la aguja, obtendremos un círculo cerrado. Por cada calabacita que vayamos a realizar necesitaremos dos círculos como este.
• Vamos a moldear el círculo, colocando la pieza en la plantilla de círculos en la medida 15mm, no es necesario que quede tan redonda ya que las calabazas tienen una forma irregular, una vez moldeada sacamos de la plantilla y en la parte de adentro agregamos un poco de pega, dejamos secar para evitar que se muevan las piezas.
• Vamos a tomar un pequeño trozo de cinta de quilling naranja, de 3mm de ancho para unir las piezas que elaboramos, acoplamos ambas pasando la cinta por el medio con pega blanca extra fuerte (reservamos).
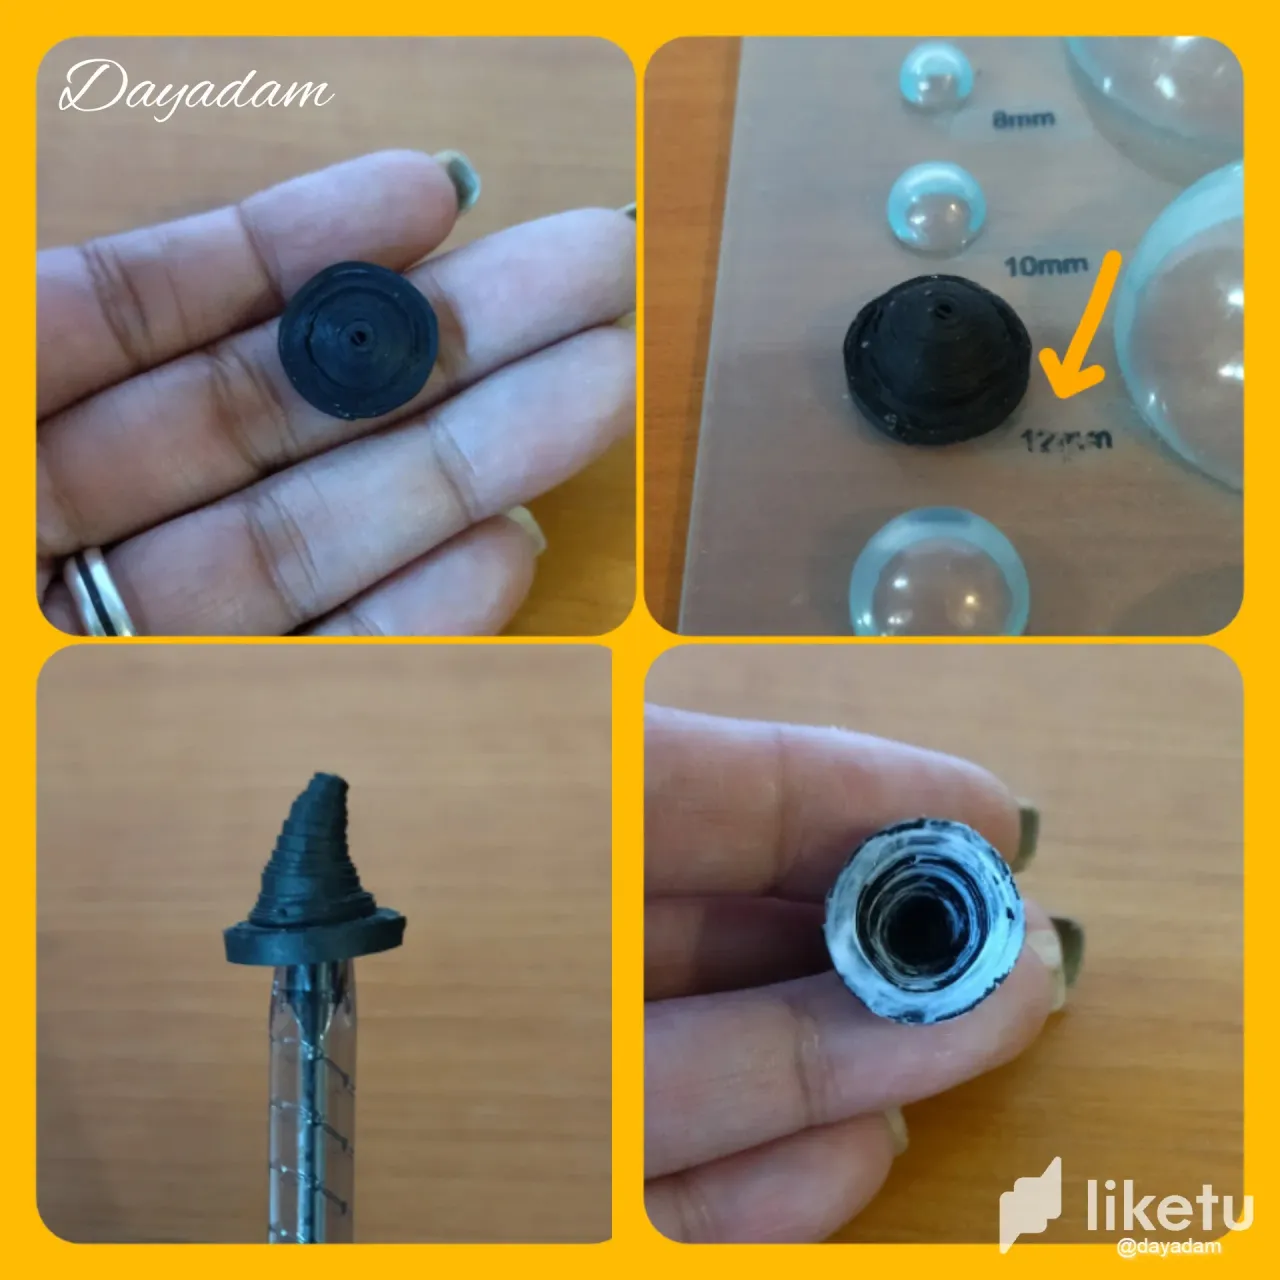
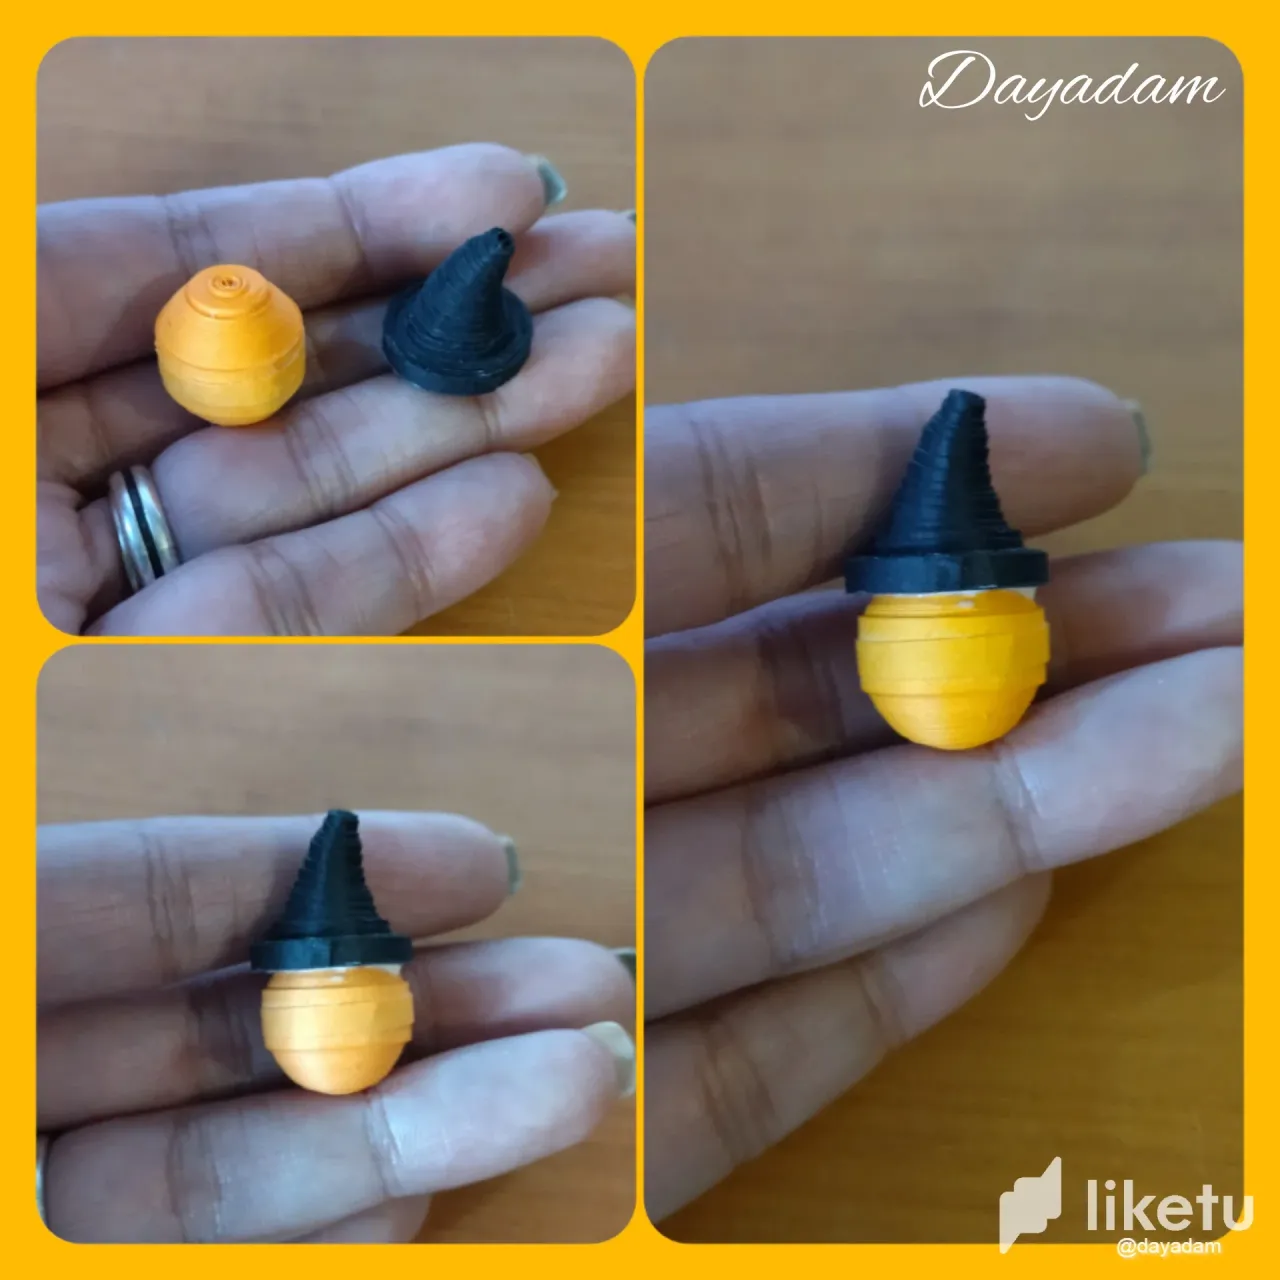
- Under the same previous parameters we are going to make another closed circle but this time in black color, we are going to mold it in the template for circles in the 17mm size, as you can see there will be a border around it, we take it out of the template, we will raise the piece a little more with a more pointed object, and we will try to tilt the paint a little to one side, we apply glue on the inside so that the hat is not deformed. We will glue to the little pumpkin.
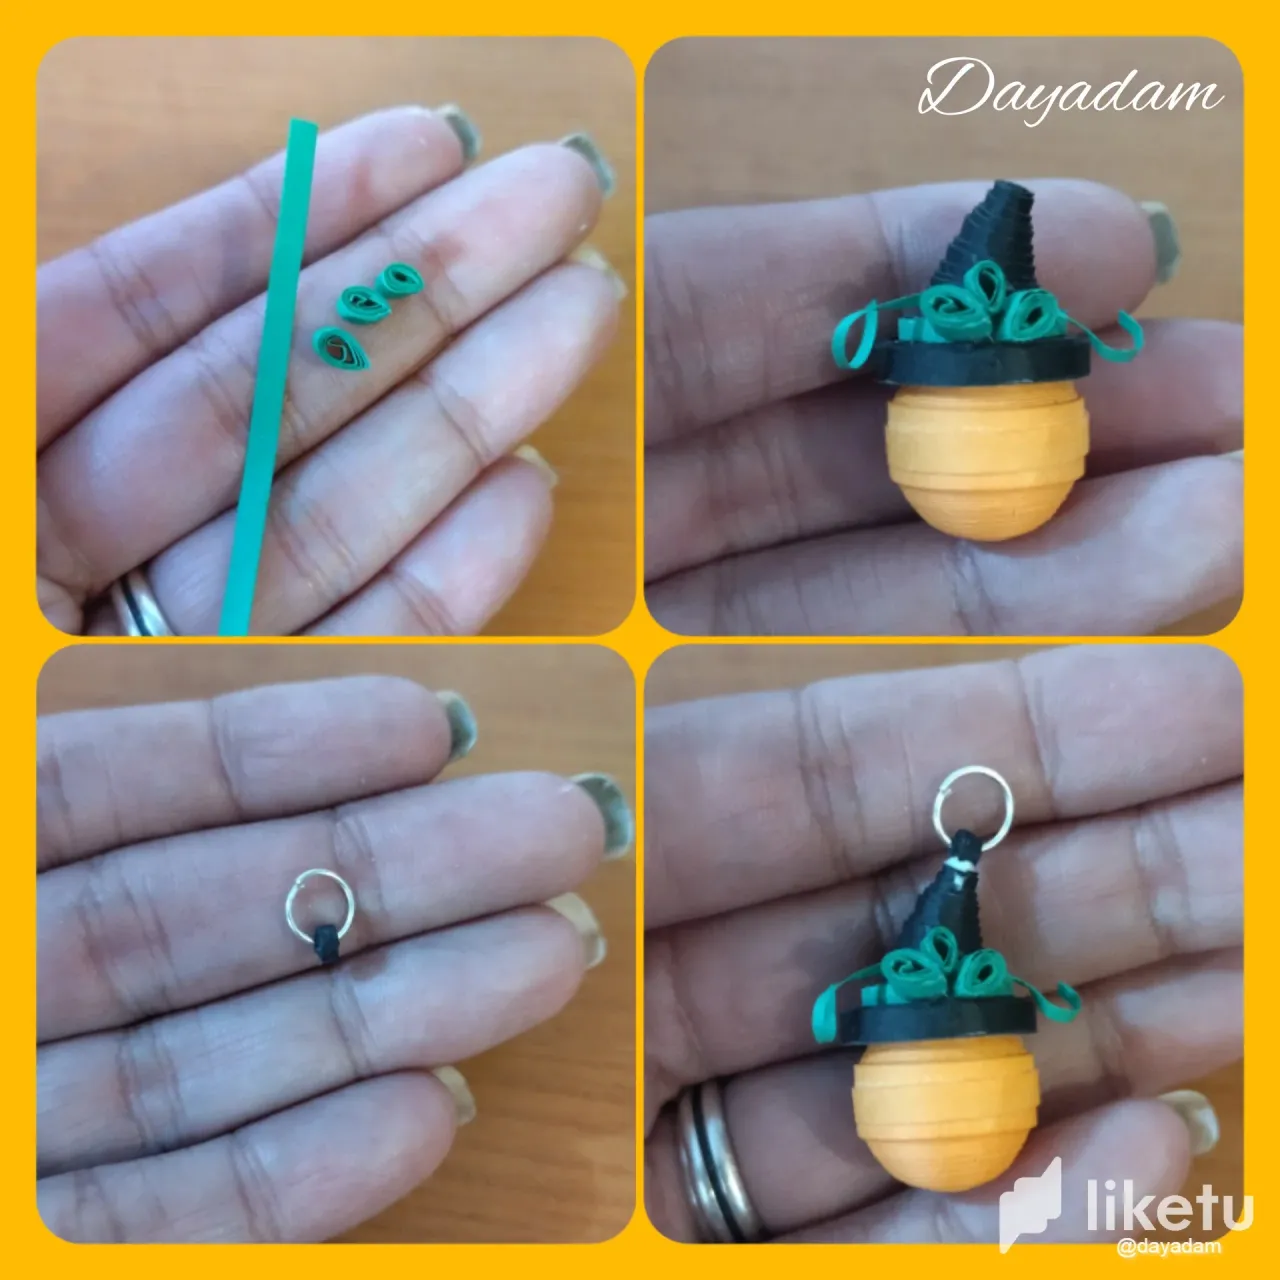
- With green ribbon make some small leaves to decorate the hat, glue a small piece in a linear way around the hat, then place the leaves and other small ribbons.
- With a small piece of black ribbon 3mm wide, we will make a small closed circle to which we will incorporate a costume jewelry ring, we will glue it once to the hat so that it dries.
• Bajo los mismos parámetros anteriores vamos a realizar otro círculo cerrado pero esta vez de color negro, vamos a, moldear en la plantilla para círculos en la medida 17mm, como pueden observar quedara un borde alrededor, sacamos de la plantilla, subiremos un poco más la pieza con un objeto más puntiagudo, y trataremos de inclinar un poco la pinta hacia un lado, aplicamos pega por su parte interna para que no se deforme el sombrero. Pegaremos a la calabacita.
• Con cinta de color verde realice unas pequeñas hojas para decorar el sombrero, pegue un trocito de manera lineal alrededor del mismo, luego coloque las hojas y otras pequeñas cintas.
• Con un pequeño trozo de cinta negra de 3mm de ancho, realizaremos un pequeño círculo cerrado al cual le incorporaremos una argolla de bisutería, pegaremos de una vez al sombrero para que se vaya secando.
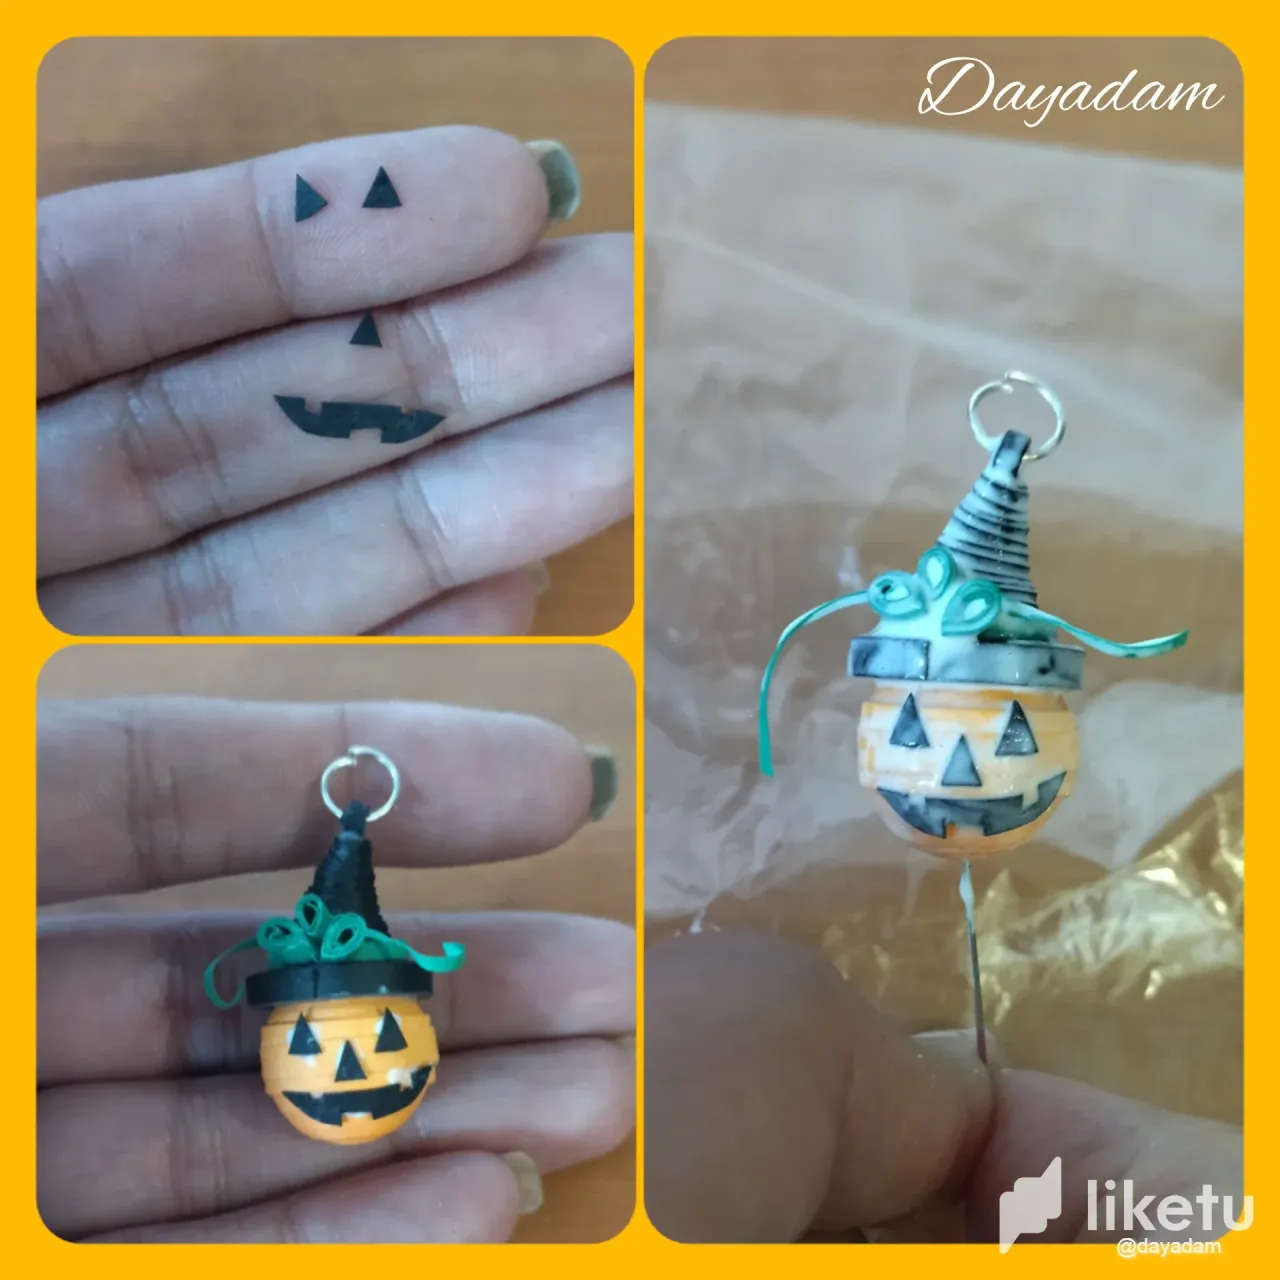
- For the eyes, nose and mouth I cut from a piece of tape some shapes such as triangles and others to my liking and glued them to the face.
- Finally I applied the liquid protection to the little ghost (plasticized), applying several layers of extra strong white glue and letting it dry between one layer and another.
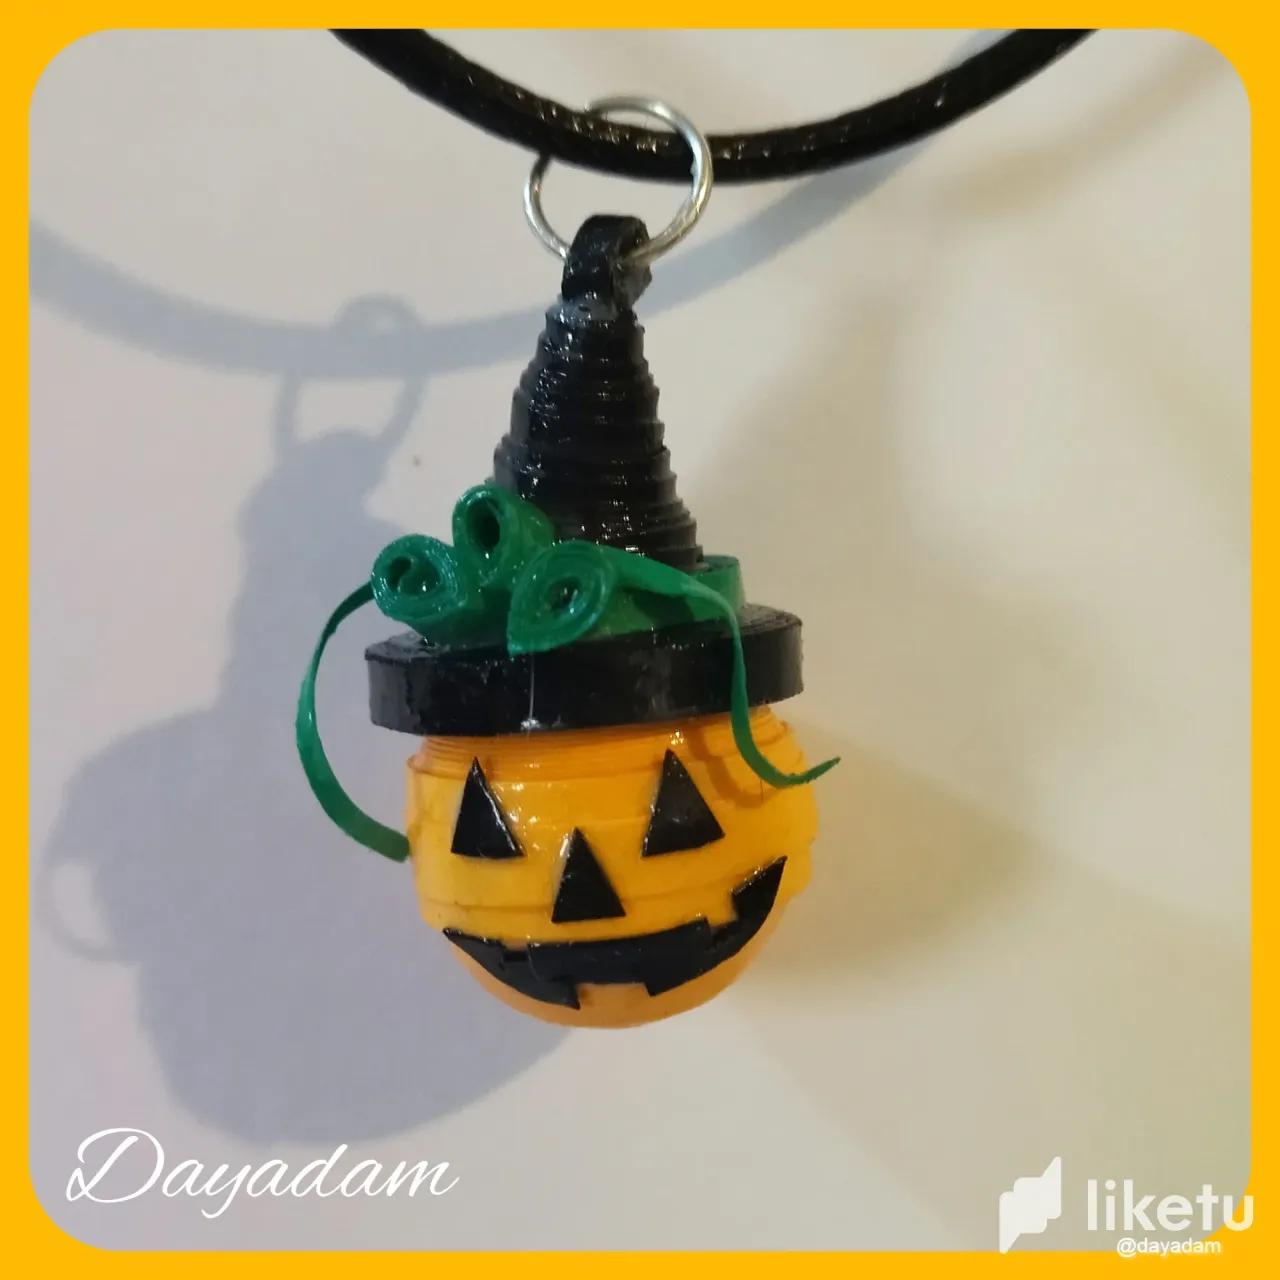
This way we have ready this 3D pumpkin necklace charm, very easy to make to use or to give as a gift this Halloween.🎃
• Para los ojos, nariz y boca recorte de un trozo de cinta algunas figuras como triángulos entre otras a mi gusto y pegue de la cara.
• Para finalizar coloque la protección liquida al fantasmita (plastificado), aplicando varias capas de pega blanca extra fuerte dejando secar entre una capa y otra.
De esta manera tenemos listo este dije para collar en forma de calabaza en 3D, muy sencillo de realizar para usar u obsequiar en este Halloween.🎃

What did you think, did you like it?
I hope you did, I hope you liked my explanation, procedure and photos, I made them with love for you.
"Let out that muse that inspires you, and let your imagination fly".
Thank you all, see you next time.
¿Qué les pareció, les gustó?
Espero que sí, que les haya gustado mi explicación, procedimiento y fotos, los hice con mucho cariño por y para ustedes.
"Deja salir esa musa que te inspira, y deja volar tu imaginación".
Gracias a todos, nos vemos en la próxima.
Todas las fotos usadas en este post son de mi autoría y han sido sacadas en mi celular personal un Redmi 9T y editadas en Canva y en Inshot Banner y separador hecho por mí en Canva Traducido con la ayuda de DeepL
