Hello everyone... 🎁💕
Hello my dear Hiver and the dear community of artists #DiyHub, I am very excited to be here again with you to present you a work made with love and affection.
For today I bring you something very easy to make, and what's the best thing? we will use recycled materials that we have at home, I will use the ones I have at hand, but you can choose no matter what kind of material it is, any that resembles the one I'm showing in the publication.
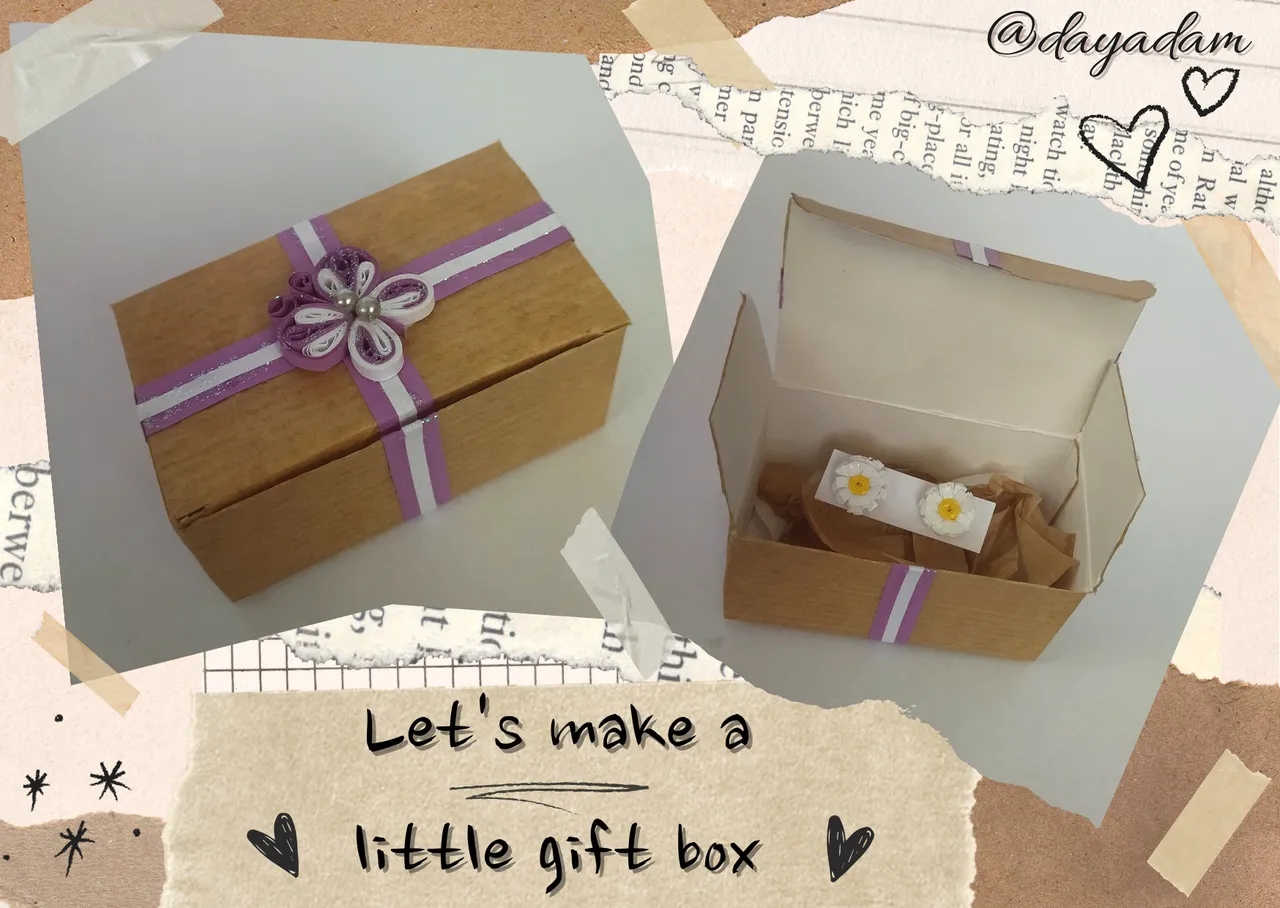
We are going to make a cute little jewelry box type gift box to give a little something to that special person, and since we are in the month of gifts it will be more useful to make it by ourselves without having to spend money on buying a box or bag.
Let's get started:😃

Hola a todos... 🎁💕
Hola a mis queridos Hiver y a la querida comunidad de artistas #DiyHub, estoy muy emocionada es estar por acá nuevamente con ustedes para presentarles un trabajo hecho con mucho amor y cariño.
Para hoy les traigo algo muy fácil de realizar, ¿y qué es lo mejor? que vamos a utilizar materiales de reciclaje que tengamos en casa, yo utilizare los que tengo a la mano, pero ustedes pueden optar no importa el tipo de material que sea, cualquiera que se asemeje al que estoy mostrando en la publicación.
Vamos a realizar una pequeña y bonita cajita de regalo tipo joyero para dar un pequeño detalle a esa persona especial, y como estamos en el mes de los regalos nos va a ser de mayor utilidad hacerla por nosotros mismos sin tener que gastar dinero en comprar una caja o bolsa.
Comencemos:😃

• Caja pequeña de medicamentos o cualquiera que tengas disponible en casa.
• Una bolsa o Trozo de papel kraft.
• Cintas de quilling de 9mm de ancho morada.
• Cintas de quilling de 3mm de ancho blancas.
• Pega blanca extra fuerte (de carpintería).
• Tijera.
• Gel escarchado.
• Pincel.
• Cualquier detalle que tengamos a la mano para decorar la cajita, bien sea un lazo, un dije, lo que ustedes deseen.
• Trozo de papel de seda del color de su preferencia
- Small medicine box or whatever you have available at home.
- A bag or piece of kraft paper.
- 9mm wide purple quilling ribbons.
- 3mm wide white quilling ribbons.
- Extra strong white glue (woodworking glue).
- Scissors.
- Frosted gel.
- Paintbrush.
- Any detail we have at hand to decorate the box, either a bow, a charm, whatever you wish.
- Piece of tissue paper in the color of your choice.

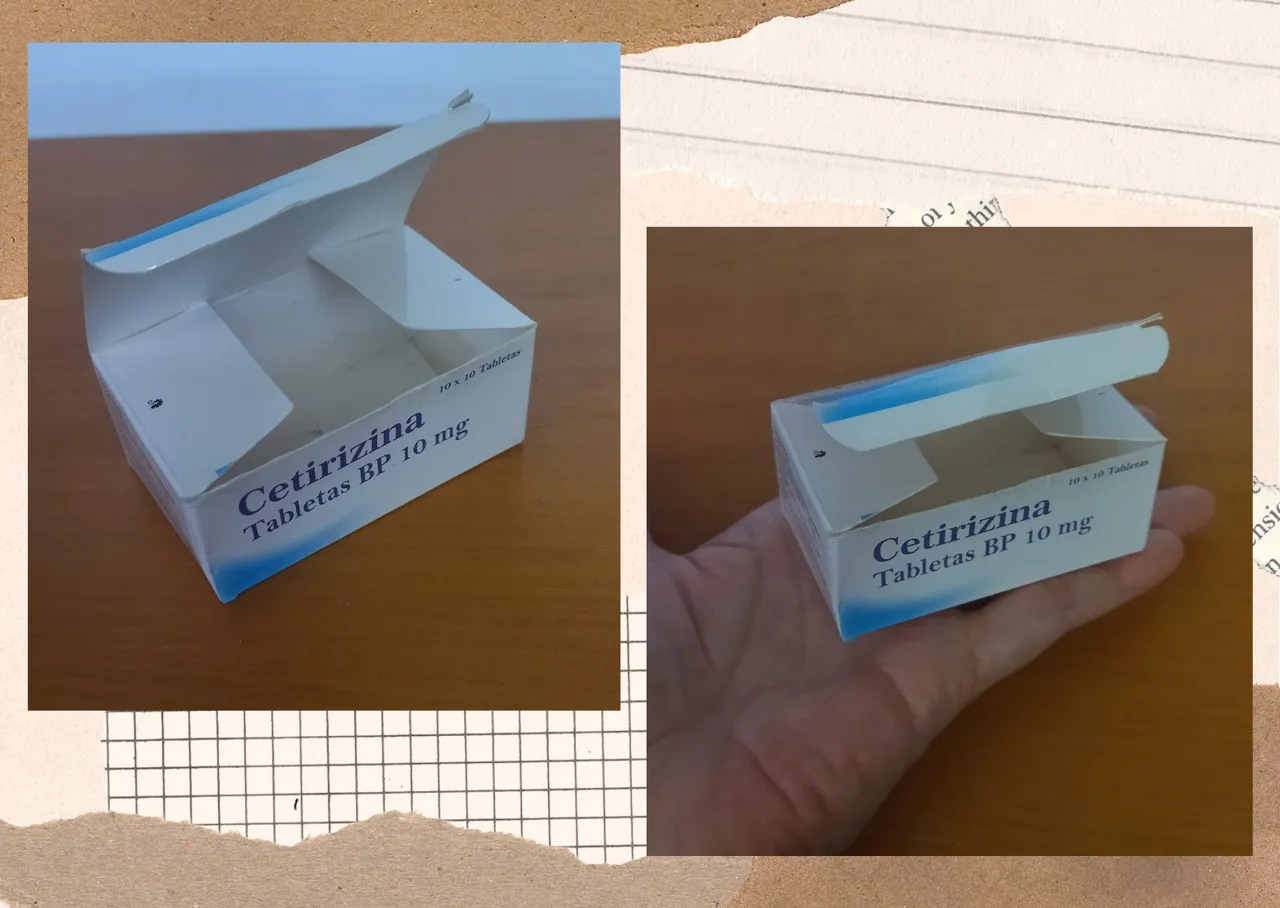
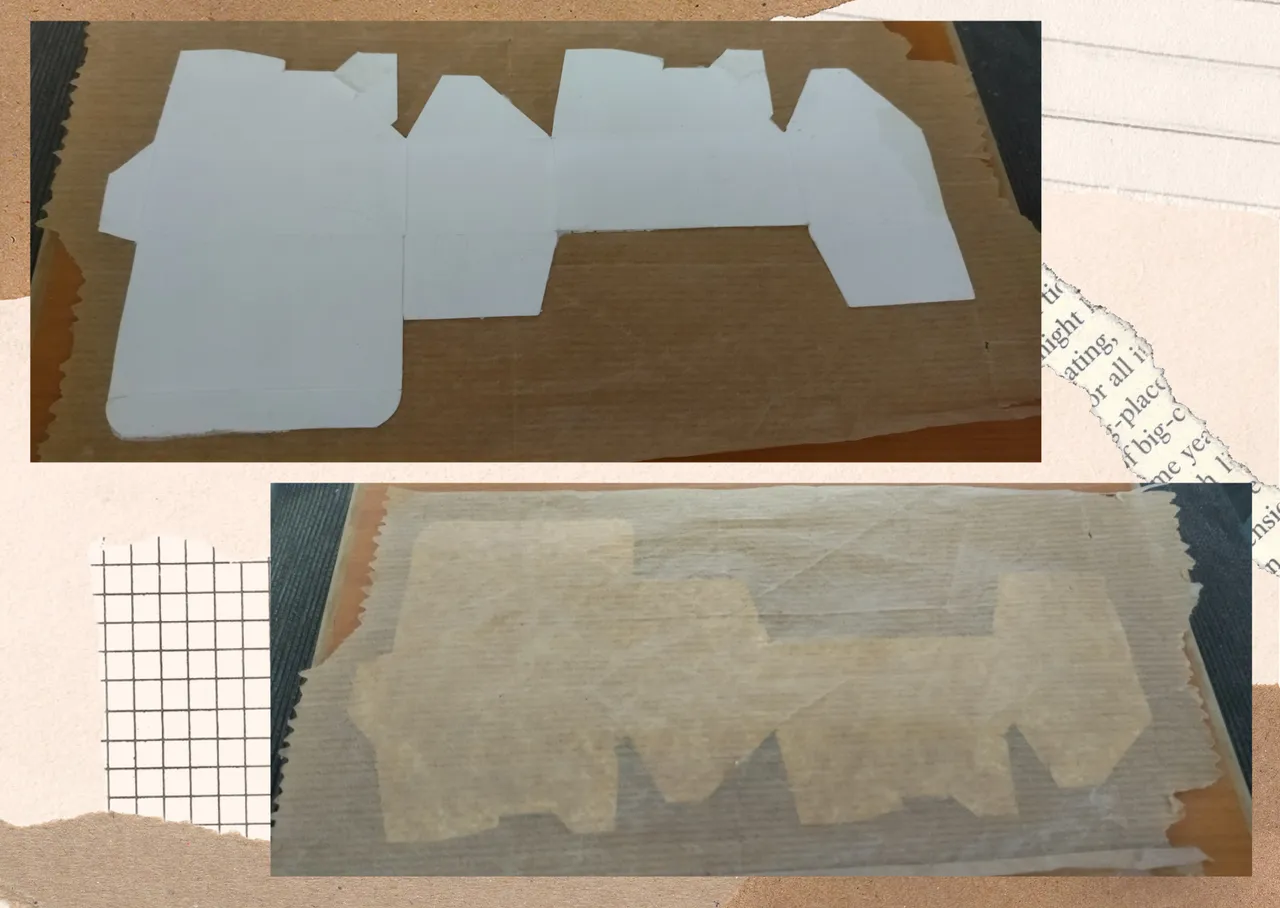
- Let's start by taking a small box of the size you want, in my case I had a small medicine box available, with which I will show you the creative process.
- Very carefully we are going to open the box without breaking it, we will peel it from the places where it was sealed.
- Once the box is opened we are going to line it, I took a kraft paper bag that I had available at home, and proceeded to line the box with it by placing some extra strong white glue around the entire small box, we will try not to place an excessive amount of glue so that it is not noticeable once we fix the box on the kraft paper.

• Vamos a comenzar tomando una cajita del tamaño que deseen, en mi caso tenia disponible una pequeña de medicamentos con la cual les mostrare el proceso creativo.
• Con mucho cuidado vamos a abrir la caja sin romperla, la despegaremos de los sitios donde venía sellada.
• Una vez abierta la caja vamos a forrar, tomé una bolsa de papel kraft que tenía disponible en casa, y procedí a forrar la caja con ella colocando un poco de pega blanca extra fuerte alrededor de toda la pequeña caja, vamos a tratar de no colocar una cantidad excesiva de pega para que no se note la misma una vez que fijemos la caja en el papel kratf.
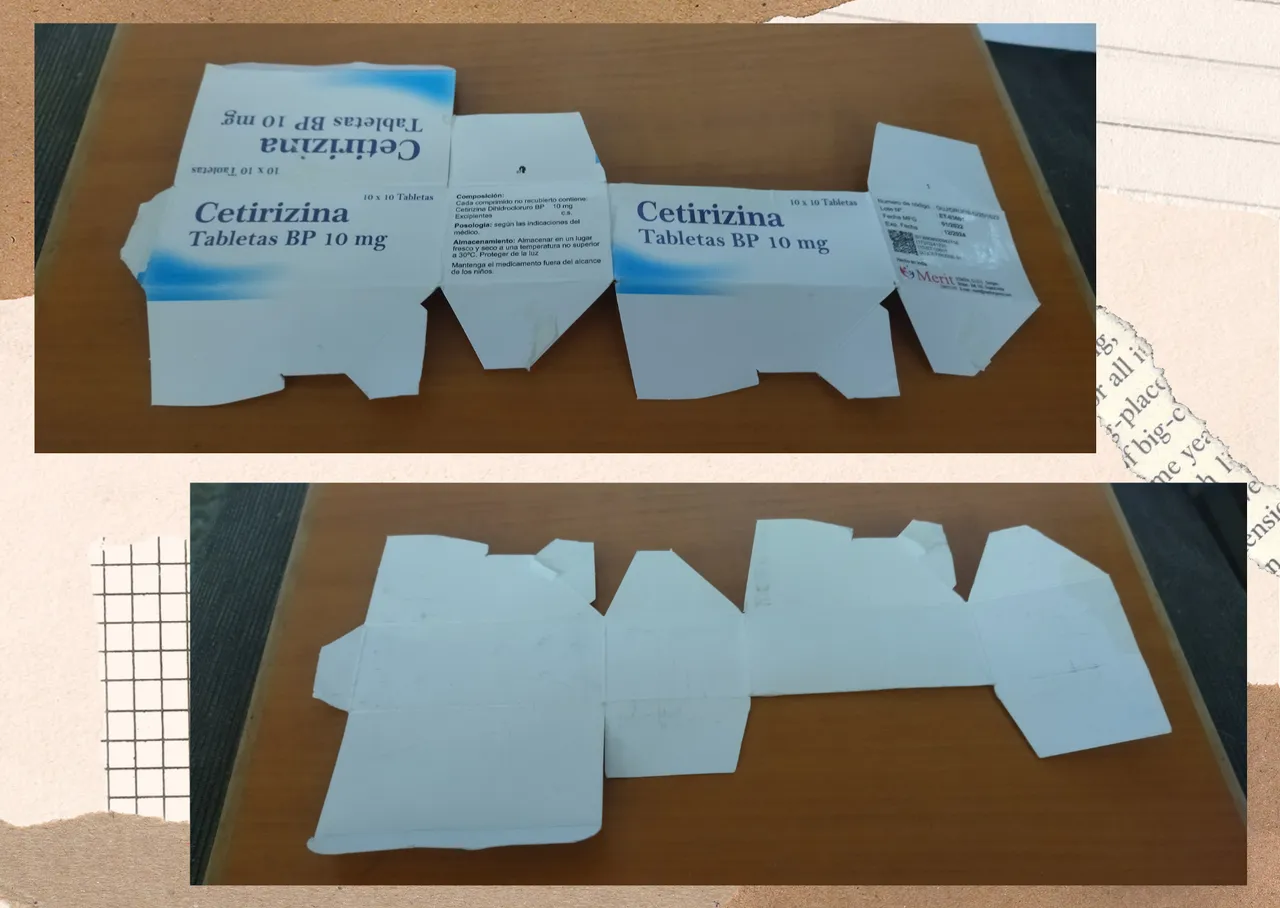
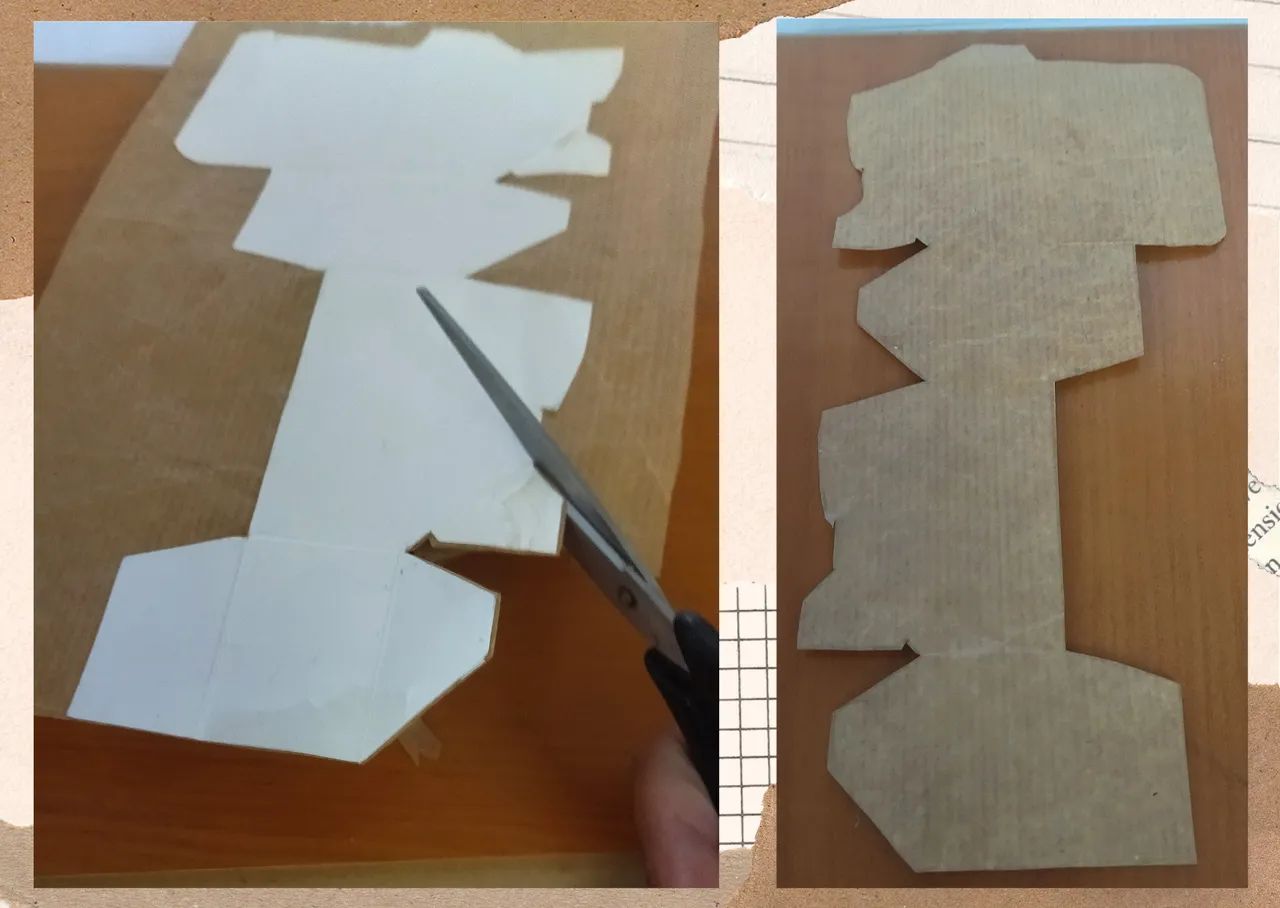
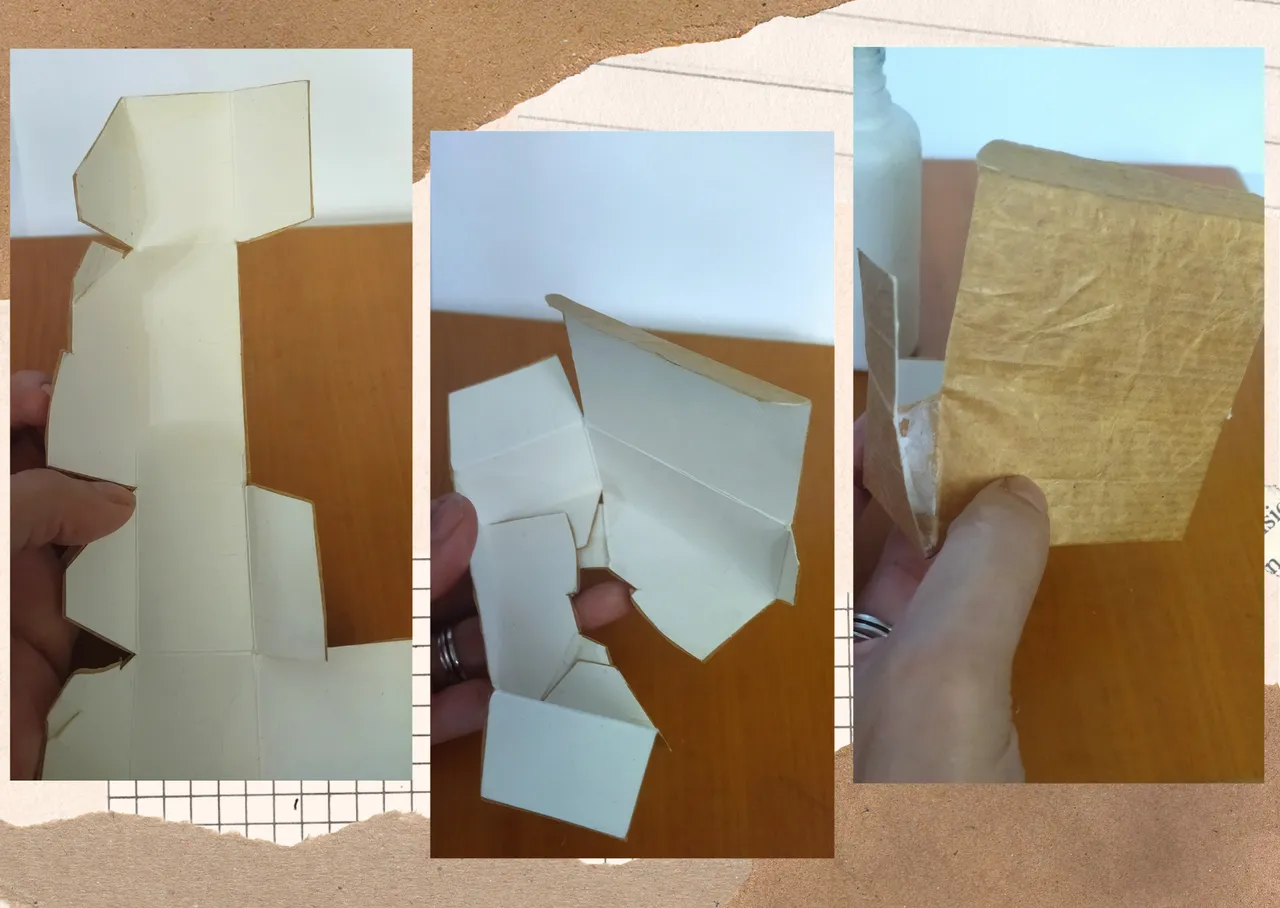
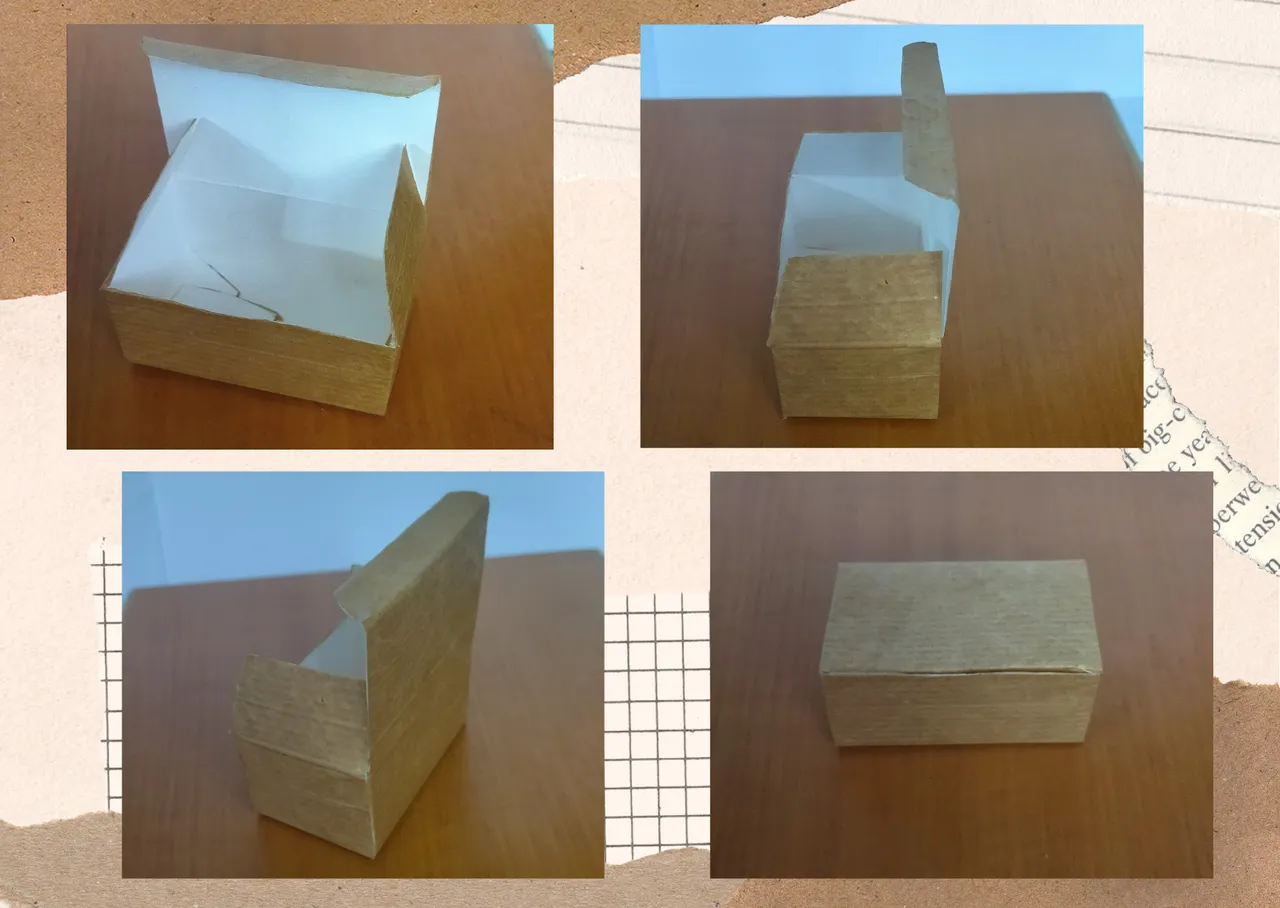
- Once the box has been placed on the kratf paper, we will proceed to cut all the excess, trimming all the edges.
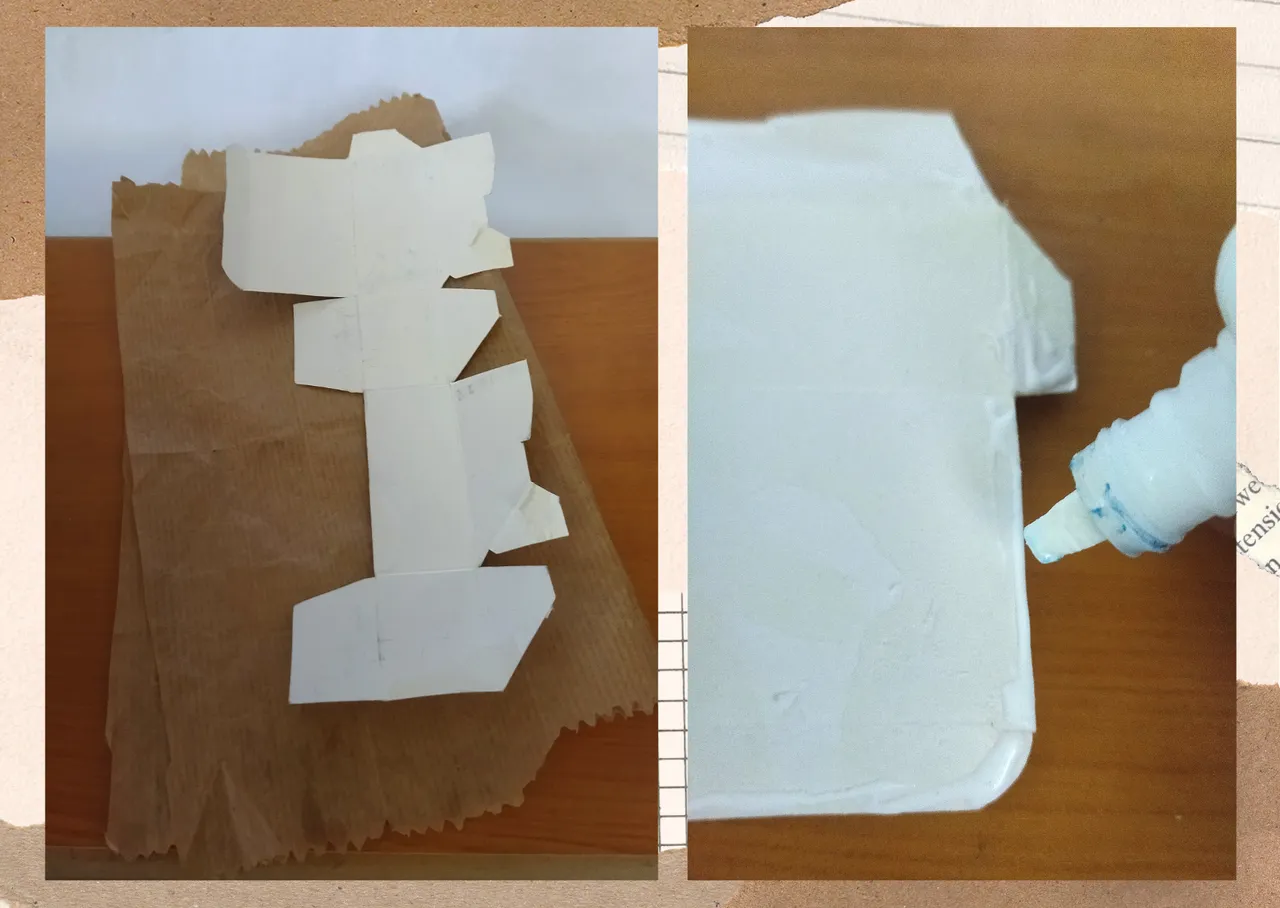
- Next we are going to return the shape that the box had initially, we will be guided by all the folds and we will glue again using white glue, let it dry.
• Ya colocada la caja el papel kratf vamos a proceder a recortar todo el exceso de mismo, recortemos todos los bordes.
• A continuación vamos a devolver la forma que tenía la caja inicialmente, nos guiaremos por todos los dobleces y pegaremos nuevamente usando pega blanca, dejamos secar.
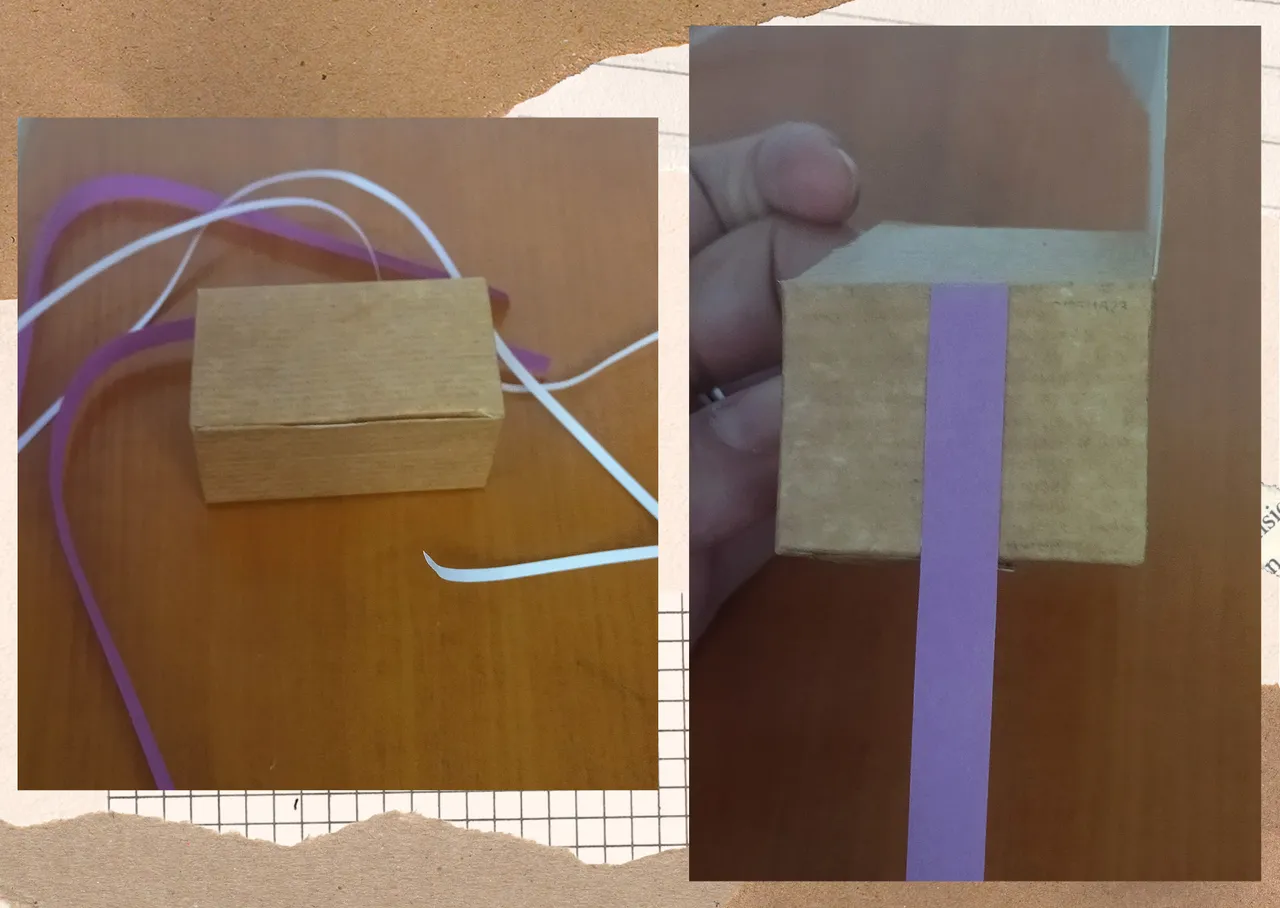
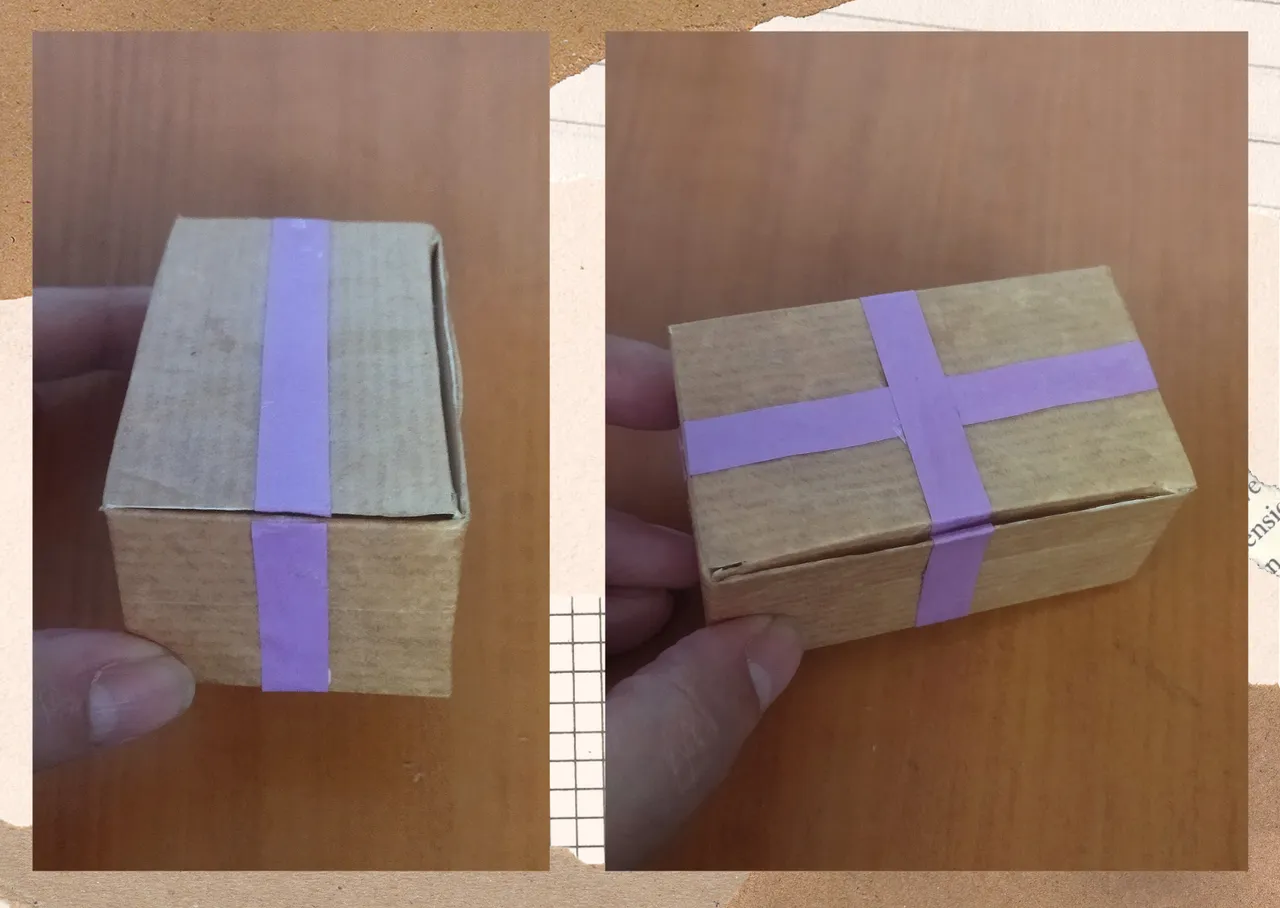
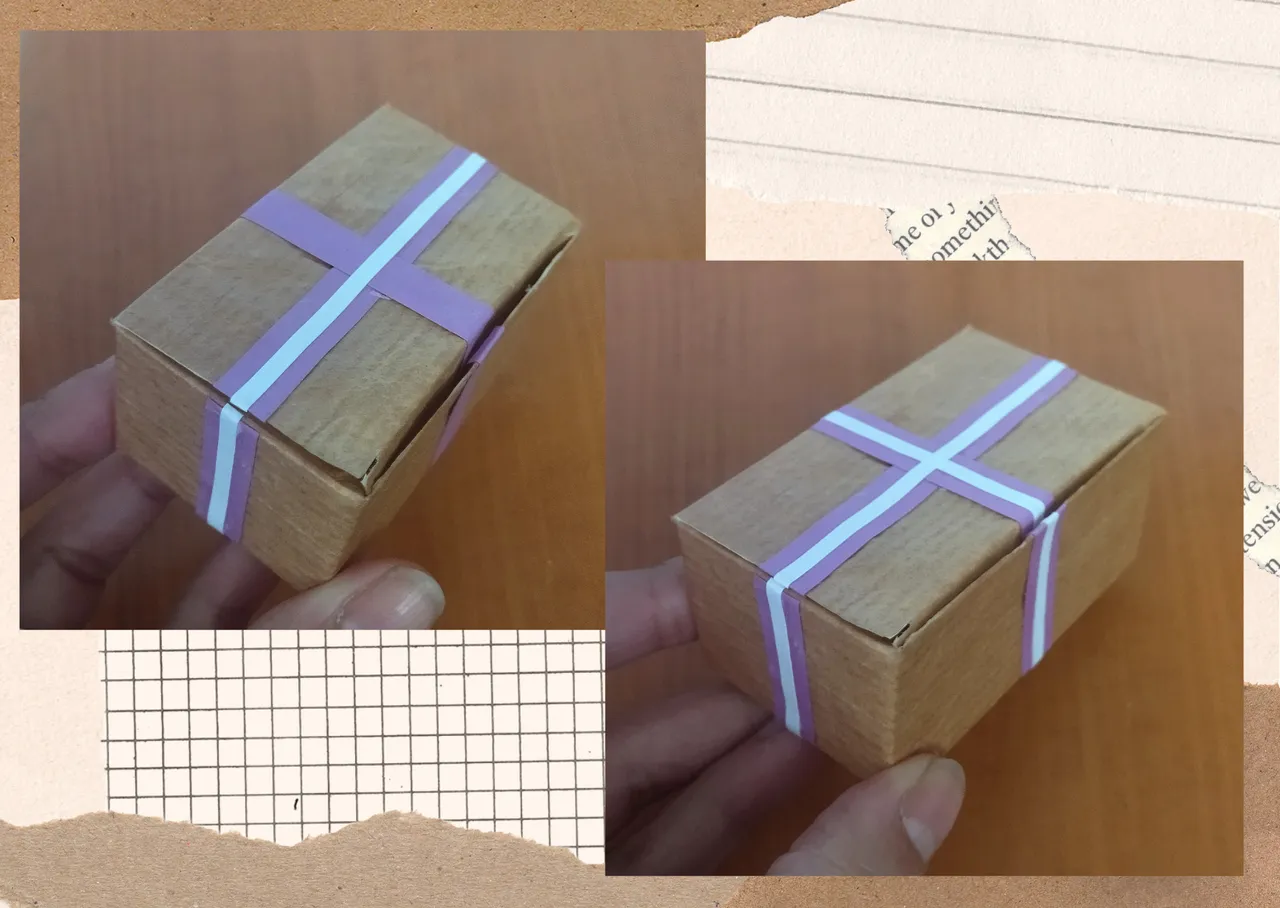
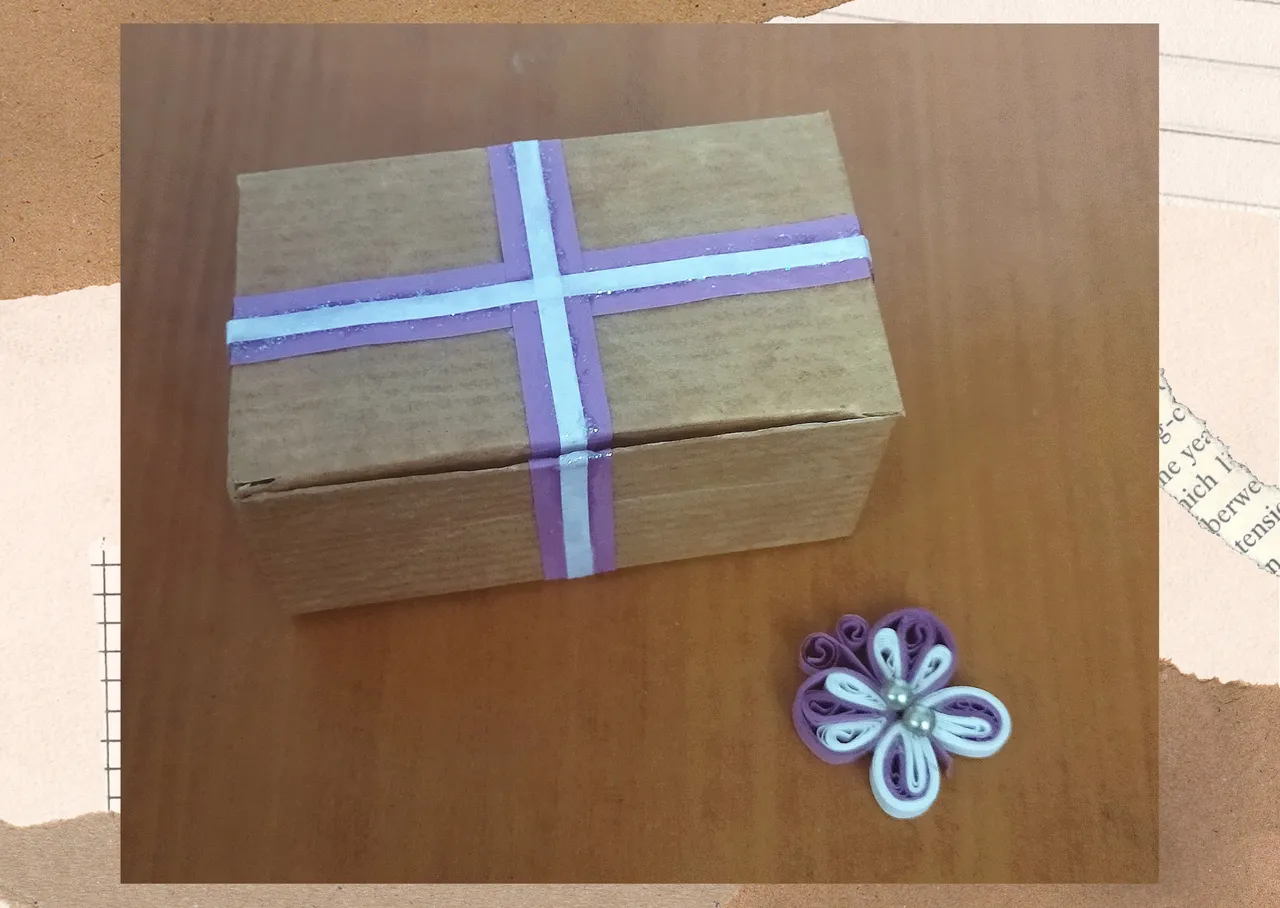
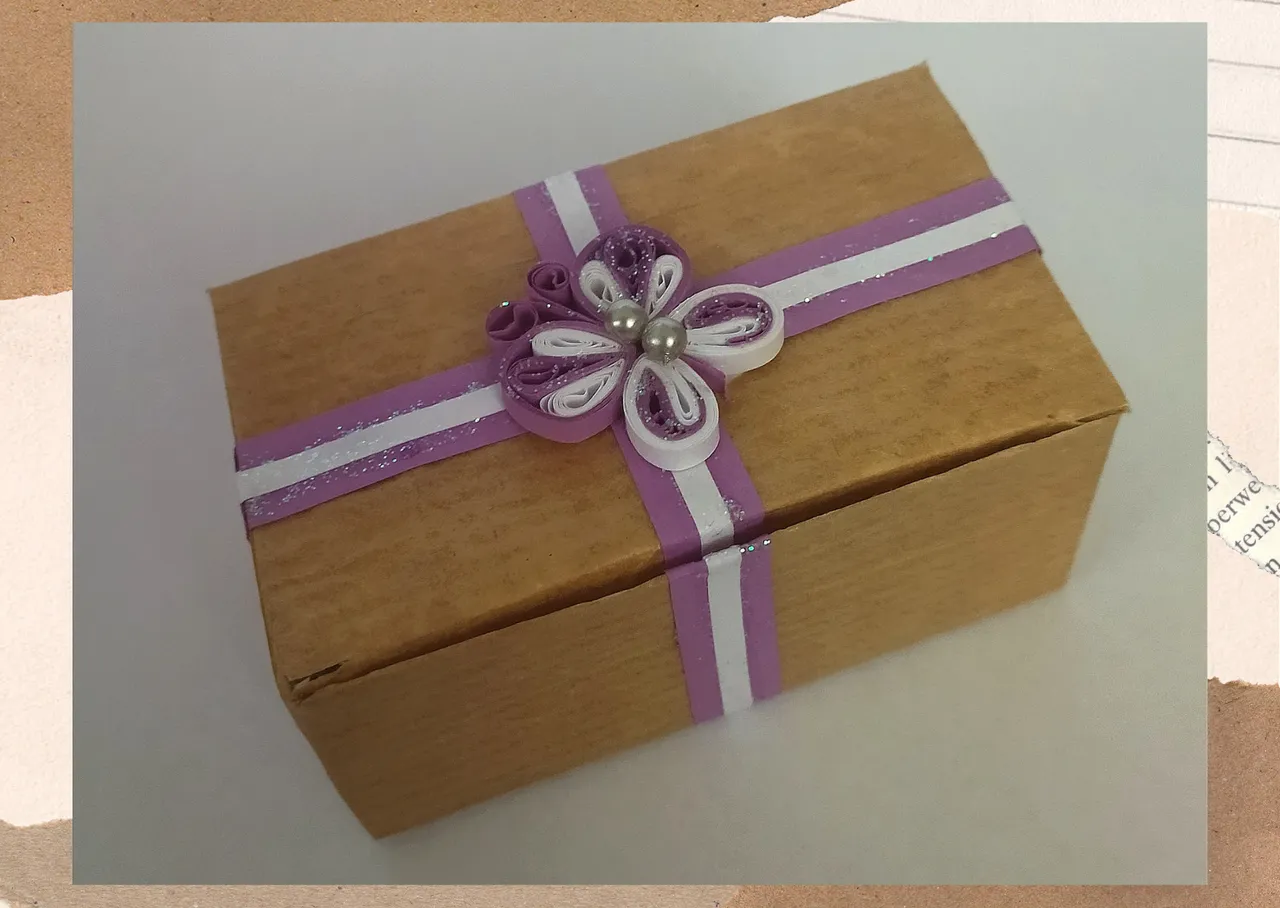
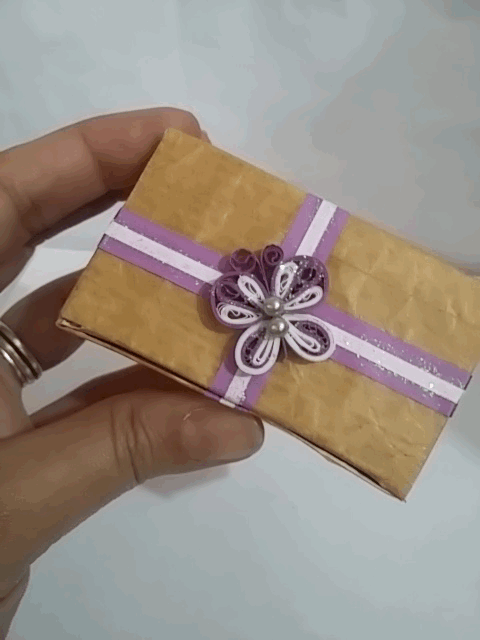
- Lined and assembled the box we will proceed to decorate, take a purple quilling ribbon 9mm wide which will pass around the box crossing the tape on both sides, glue it using white glue, then we will take quilling ribbon 3mm wide and pass around the purple ribbon gluing in the same way with white glue let it dry.
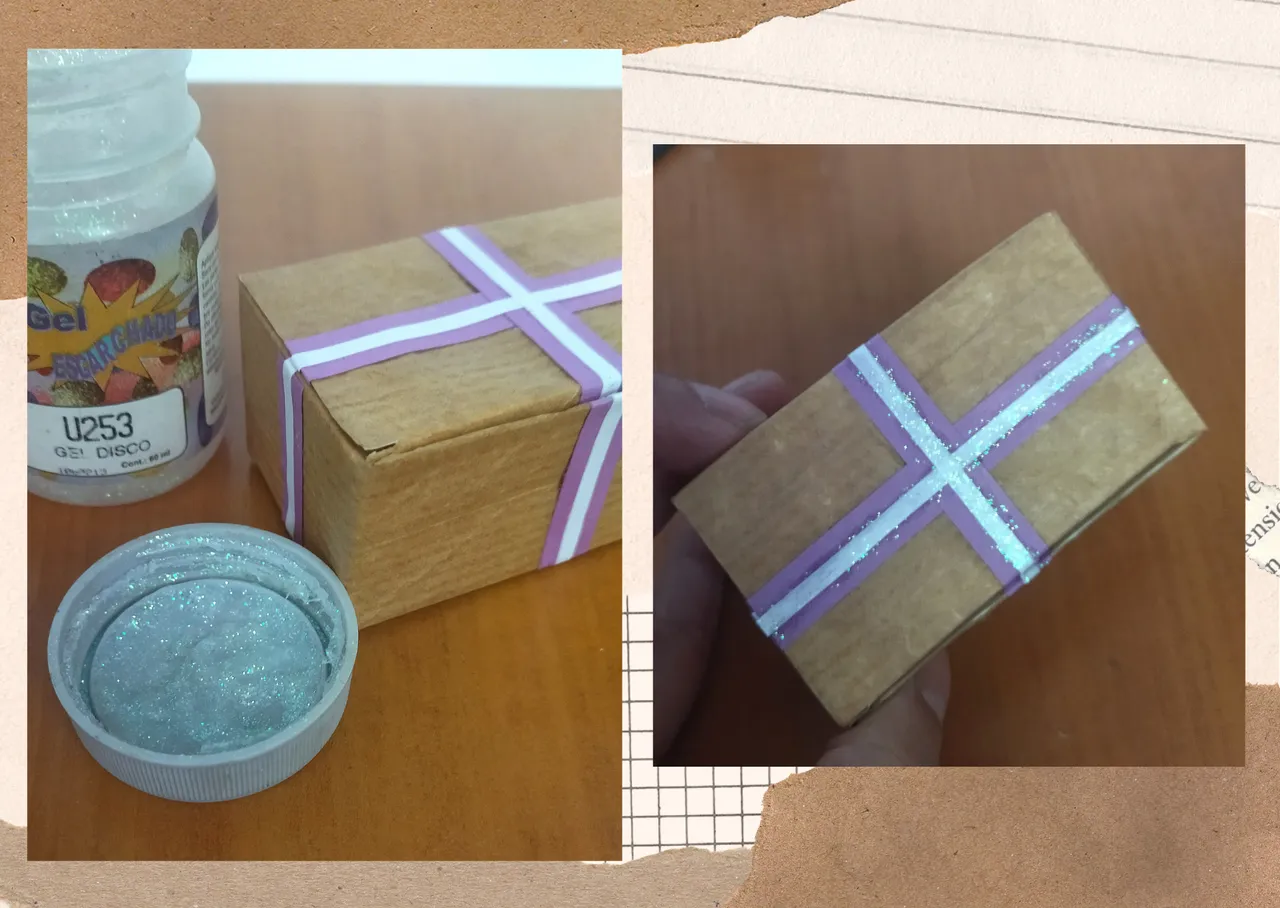
- I wanted to give a touch of shine to the box, I took some frosting gel and with a brush I put some on the white ribbon.
- Finally to give the box a touch of color we add the detail of our preference, in my case I had a quilling butterfly that I had made previously and I put it on the top of the box to give it delicacy, we can use what we have available.
I leave here the link of the elaboration of the decorative butterfly, in case you want to make it and place it on your box, or I invite you to visit my blog in which there are multiple pieces that can be made to decorate everything you want to do.
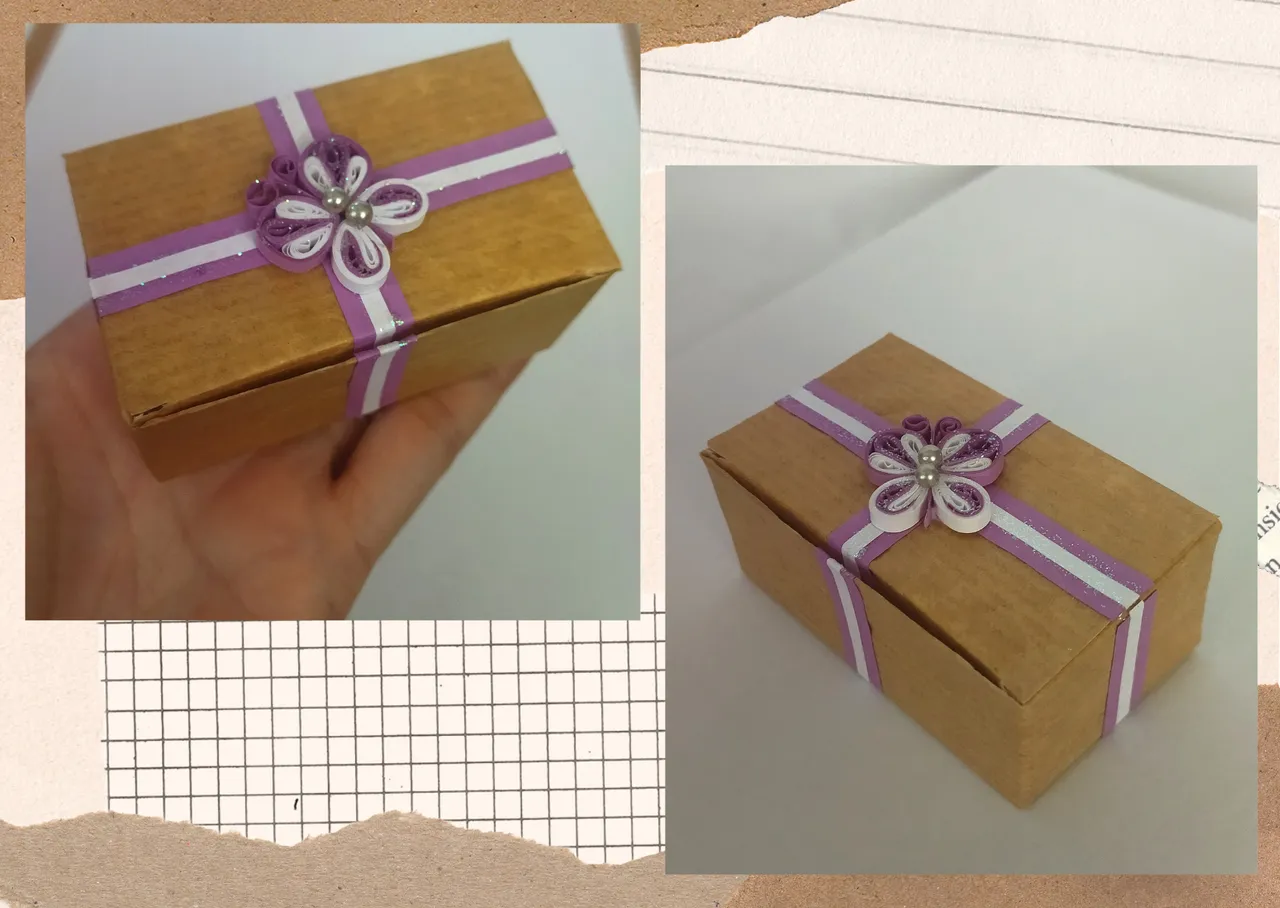
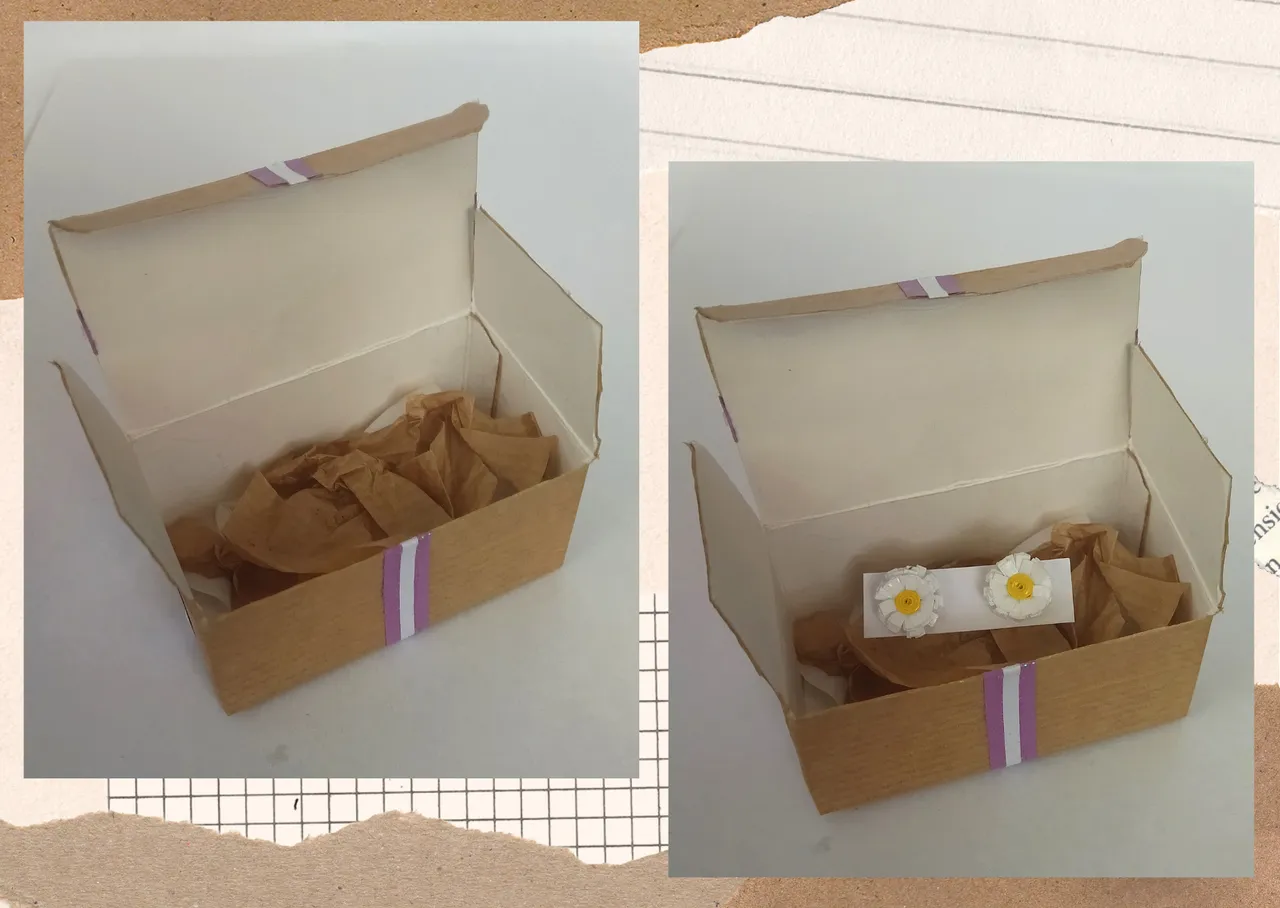
This way we already have a nice little jewelry box easy to make, and ready to give a gift to that special person this Christmas or any other occasion. Before placing the gift or accessory inside the box, I suggest you to place a piece of kratom paper or tissue paper inside the box to make it neater and to highlight more what we are going to place inside it.
See how easy it is to make a beautiful gift box with recyclable materials?🎁💕
• Forrada y armada la caja vamos a proceder a decorar, tome una cinta de quilling color morado de 9mm de ancho la cual la pasare alrededor de la caja cruzando la cinta por ambos lados, la pegue utilizando cola blanca, luego vamos a tomar cinta de quilling de 3mm de ancho y pasaremos alrededor de la cinta morada pegando de la misma manera con pega blanca dejamos secar.
• Quise darle un toque de brillo a la caja tome un poco de gel escarchado y con un pincel le coloque un poco a la cinta blanca.
• Por ultimo para darle vistosidad a la caja le añadimos el detalle de nuestra preferencia, en mi caso tenía una mariposa de quilling que había realizado con anterioridad y se la coloque en la parte de arriba a la caja para darle delicadeza, podemos utilizar lo que tengamos disponible.
Les dejo por acá el link de la elaboración de la mariposa decorativa, por si desean realizarla y colocársela a su caja, o los invito a visitar mi blog en el cual hay múltiples piezas que pueden realizar para decorar todo lo que deseen hacer.
De esta manera ya tenemos una bonita cajita tipo joyero fácil de hacer, y lista para obsequiar un detalle a esa persona especial en estas navidades o en cualquier ocasión. Les sugiero antes de colocar el obsequio, o accesorio dentro de la caja colocar un trozo de papel kratf o papel de seda dentro de ella para que quede mas prolija y resalte mas lo que vamos a colocar dentro de ella.
¿Ves que fácil es resulta hacer una bonita caja de regalo con materiales reciclables?🎁💕

What did you think, did you like it?
I hope you did, I hope you liked my explanation, procedure and photos, I made them with love for you.
"Let out that muse that inspires you, and let your imagination fly".
Thank you all, see you next time. 🐾🐱💕
¿Que les pareció, les gustó?
Espero que sí, que les haya gustado mi explicación, procedimiento y fotos, los hice con mucho cariño por y para ustedes.
"Deja salir esa musa que te inspira, y deja volar tu imaginación".
Gracias a todos, nos vemos en la próxima. 🐾🐱💕
Los invito que apoyen a "La Colmena", dale tu voto ✨
 Vote la-colmena for witness By @ylich
Todas las fotos usadas en este post son de mi autoría y han sido sacadas en mi celular personal un Redmi 9T y editadas Canva Banner y separador hecho por mí en Canva Traducido con la ayuda de DeepL
