Hello everyone... 🐱🐾💕
Hello to my dear Hivers and the dear community of artists #DIYHub, as always very pleased and excited to be here again, showing you my work made with love and especially for you.
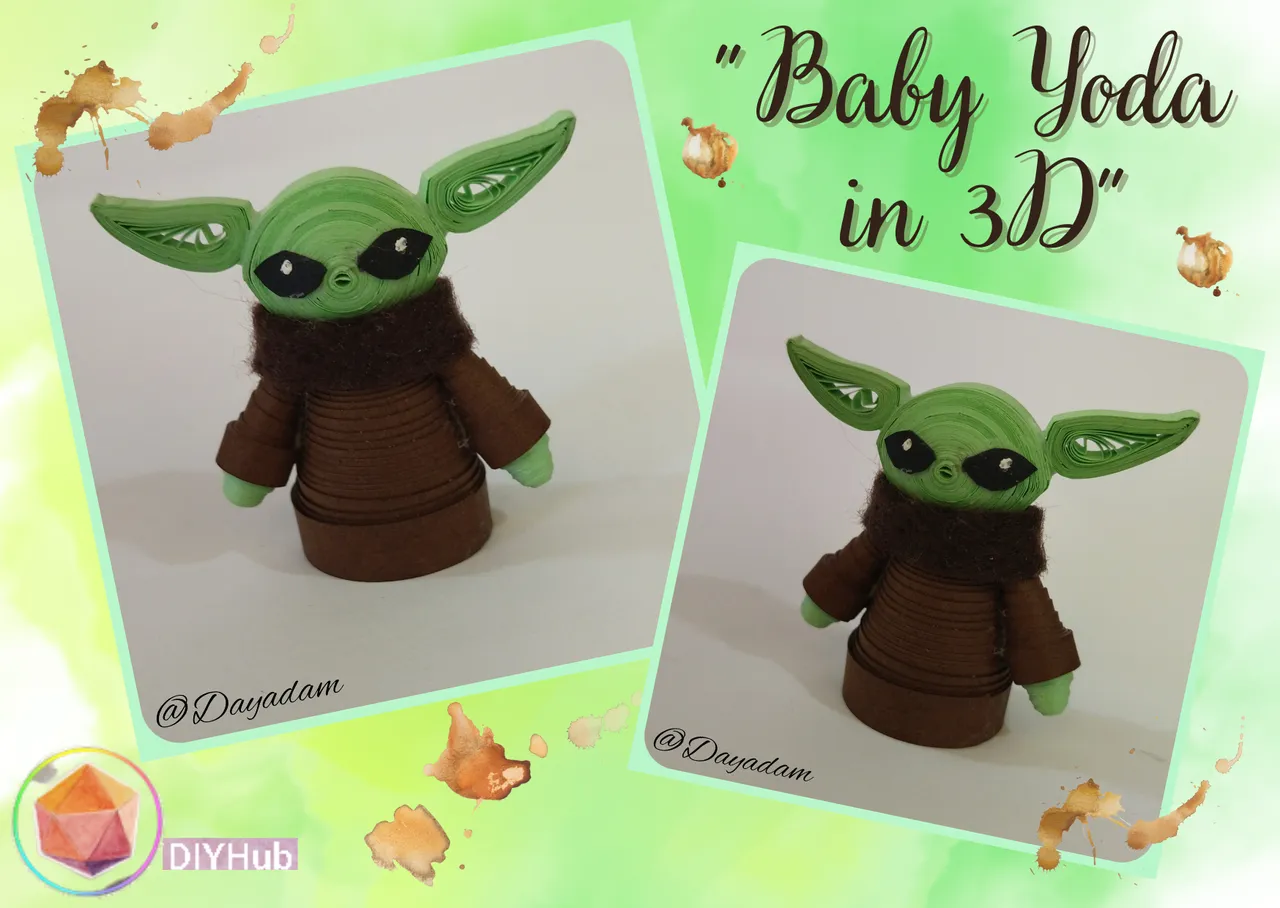
For today I wanted to bring you a small 3D decorative Baby Yoda made in the quilling technique, the truth was a project that I had not planned to do, but as it happens in this creative world suddenly came to my mind this little character from the famous Star Wars saga, and I did not hesitate to carry it out to share with you.
I hope you like the work, join me in this creative process.
Let's begin:😃

Hola a todos... 🐱🐾💕
Hola a mis queridos Hivers y a la querida comunidad de artistas #DIYHub, como siempre muy complacida y emocionada de encontrarme por acá nuevamente, mostrándole mi trabajo hecho con mucho amor y especialmente para ustedes.
Para hoy quise traerles un pequeño Baby Yoda decorativo en 3D elaborado en la técnica de quilling, la verdad fue un proyecto que no tenía previsto realizar, pero así como pasa en este mundo creativo repentinamente me vino a la cabeza este pequeño personaje de la conocida saga de Star Wars, y no dude en llevarla a cabo para compartir con ustedes.
Espero sea de su agrado el trabajo, acompáñenme en este proceso creativo.
Comencemos:😃

• Cintas de quilling de diversos mm de ancho verde, marrón, negra.
• Cartulina negra, roja, marrón, amarilla.
• Trocito de tela o fieltro marrón.
• Aguja para quilling.
• Lápiz de color blanco.
• Pega blanca extra fuerte (de carpintería).
• Tijera.
• Pintura blanca al frio.
• Palito de altura.
• Pincel.
• Alicate punta fina.
- Quilling ribbons of different widths of green, brown, black.
- Black, red, brown, brown, yellow cardboard.
- Piece of fabric or brown felt.
- Quilling needle.
- White pencil.
- Extra strong white glue (carpentry glue).
- Scissors.
- White cold paint.
- Height stick.
- Paintbrush.
- Fine-nosed pliers.

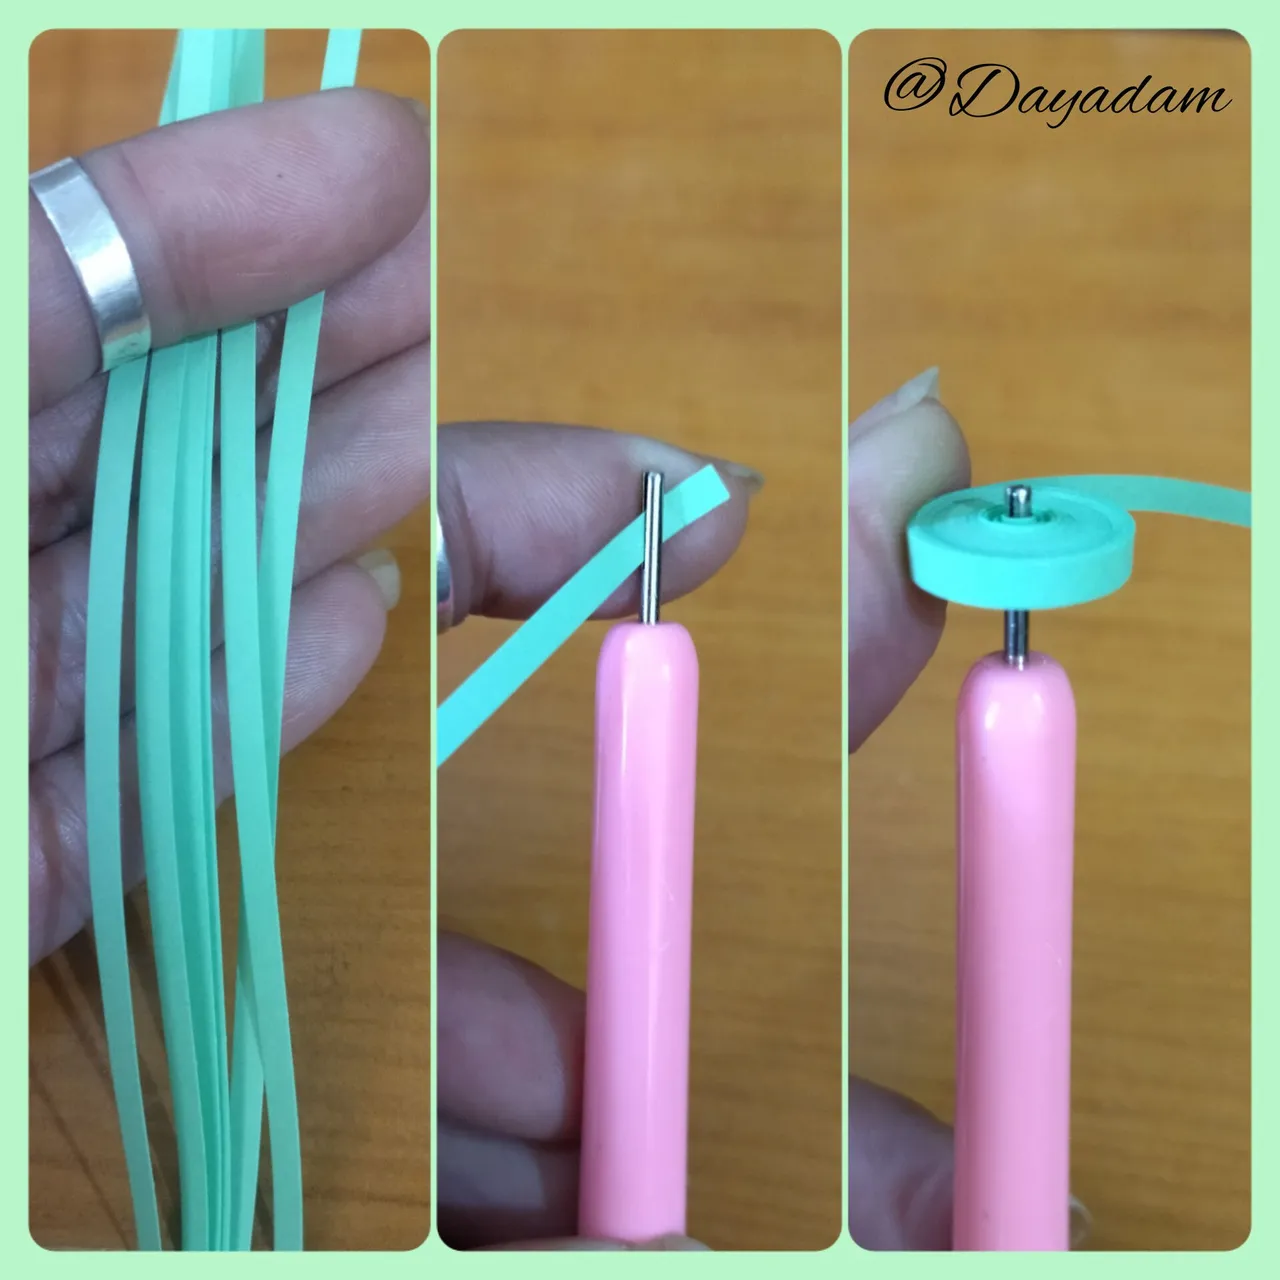
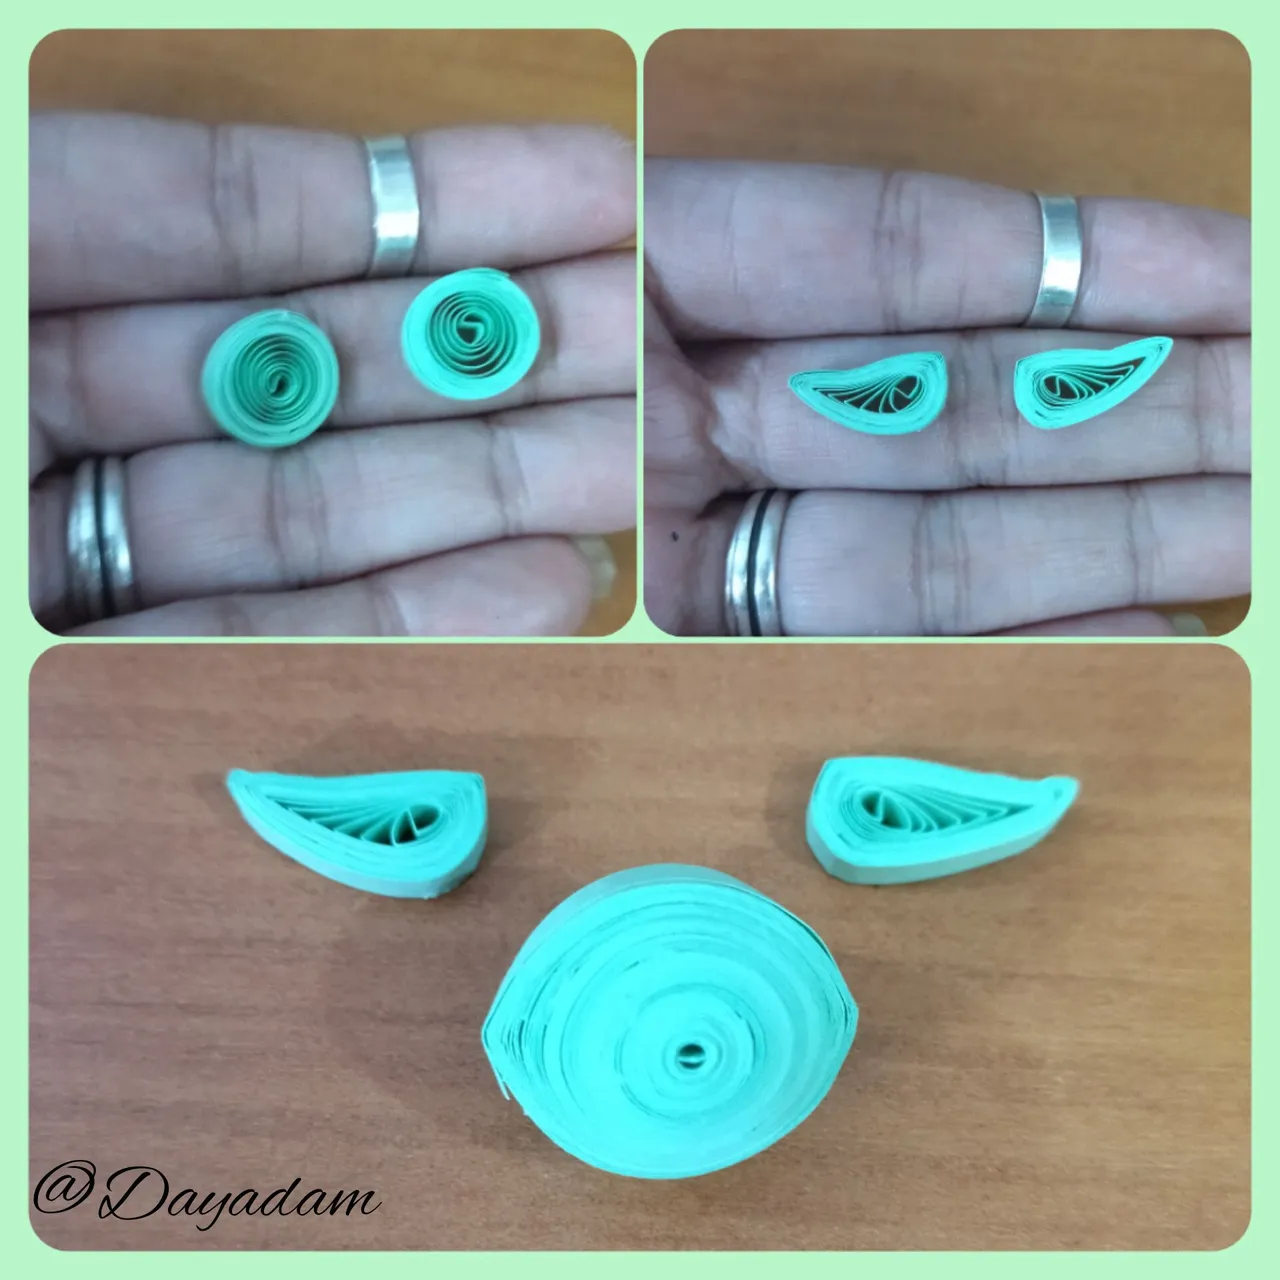
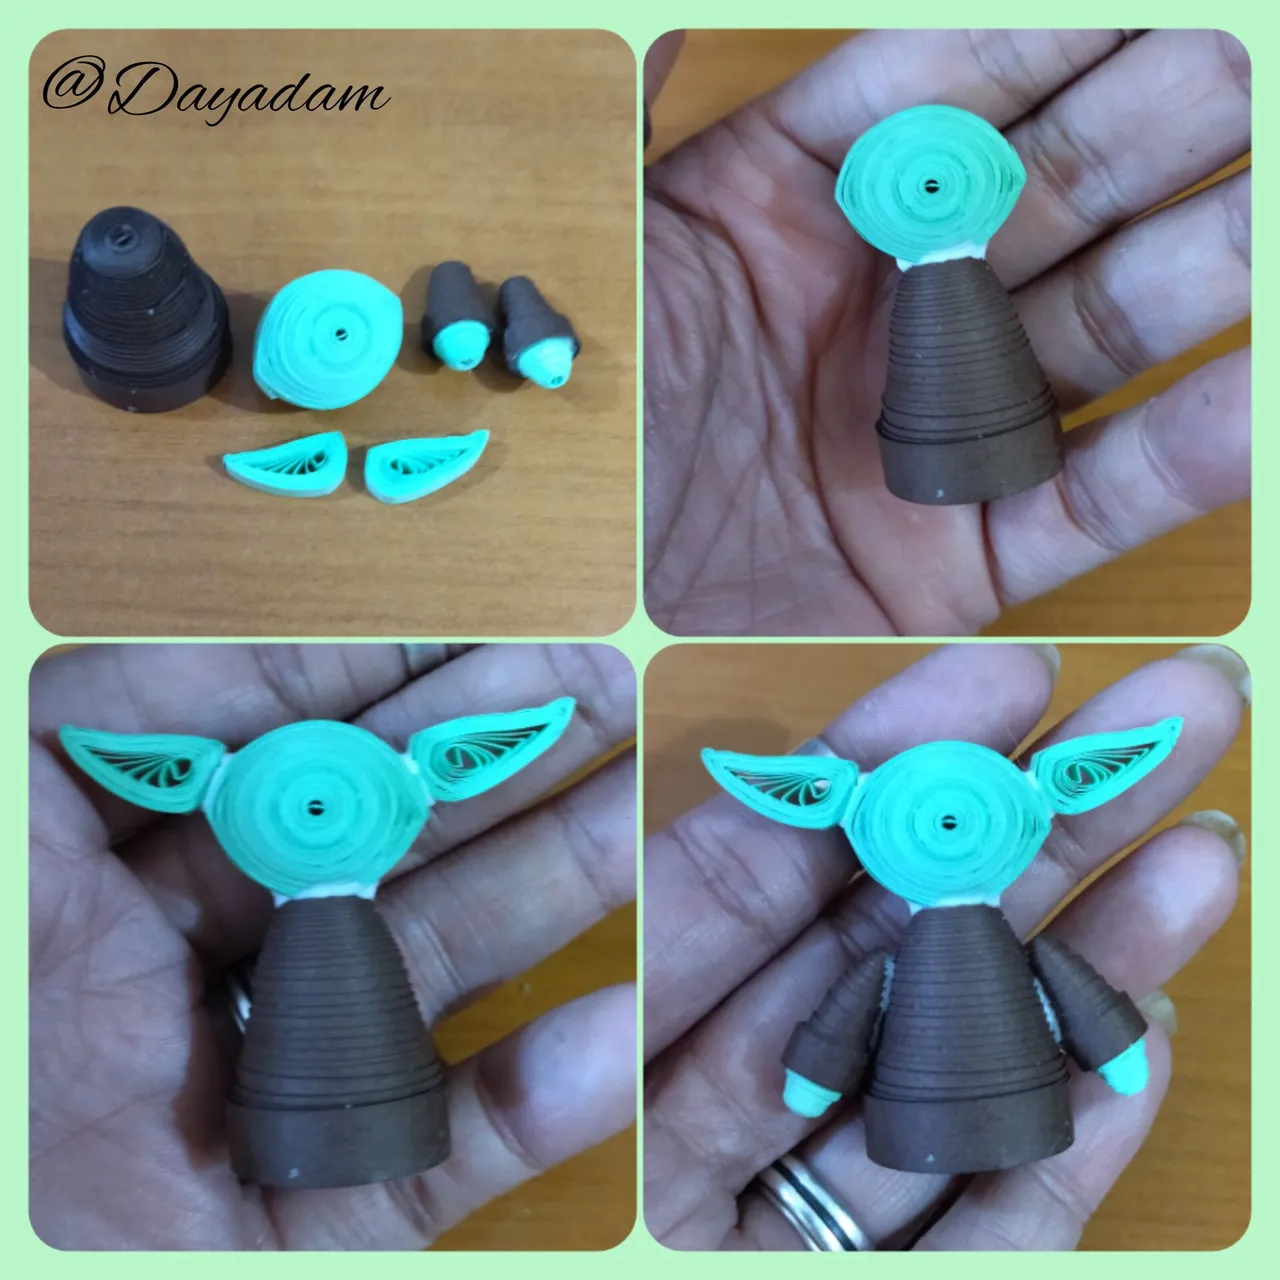
- We start by taking quilling tape of approximately 5mm wide light green color x 150cms long, we roll with the help of the quilling needle until we reach the end of the tape, we remove the needle and seal with extra strong white glue, we will obtain a closed circle, we will need 1 more like it. For each doll we want to make we will repeat the same process.
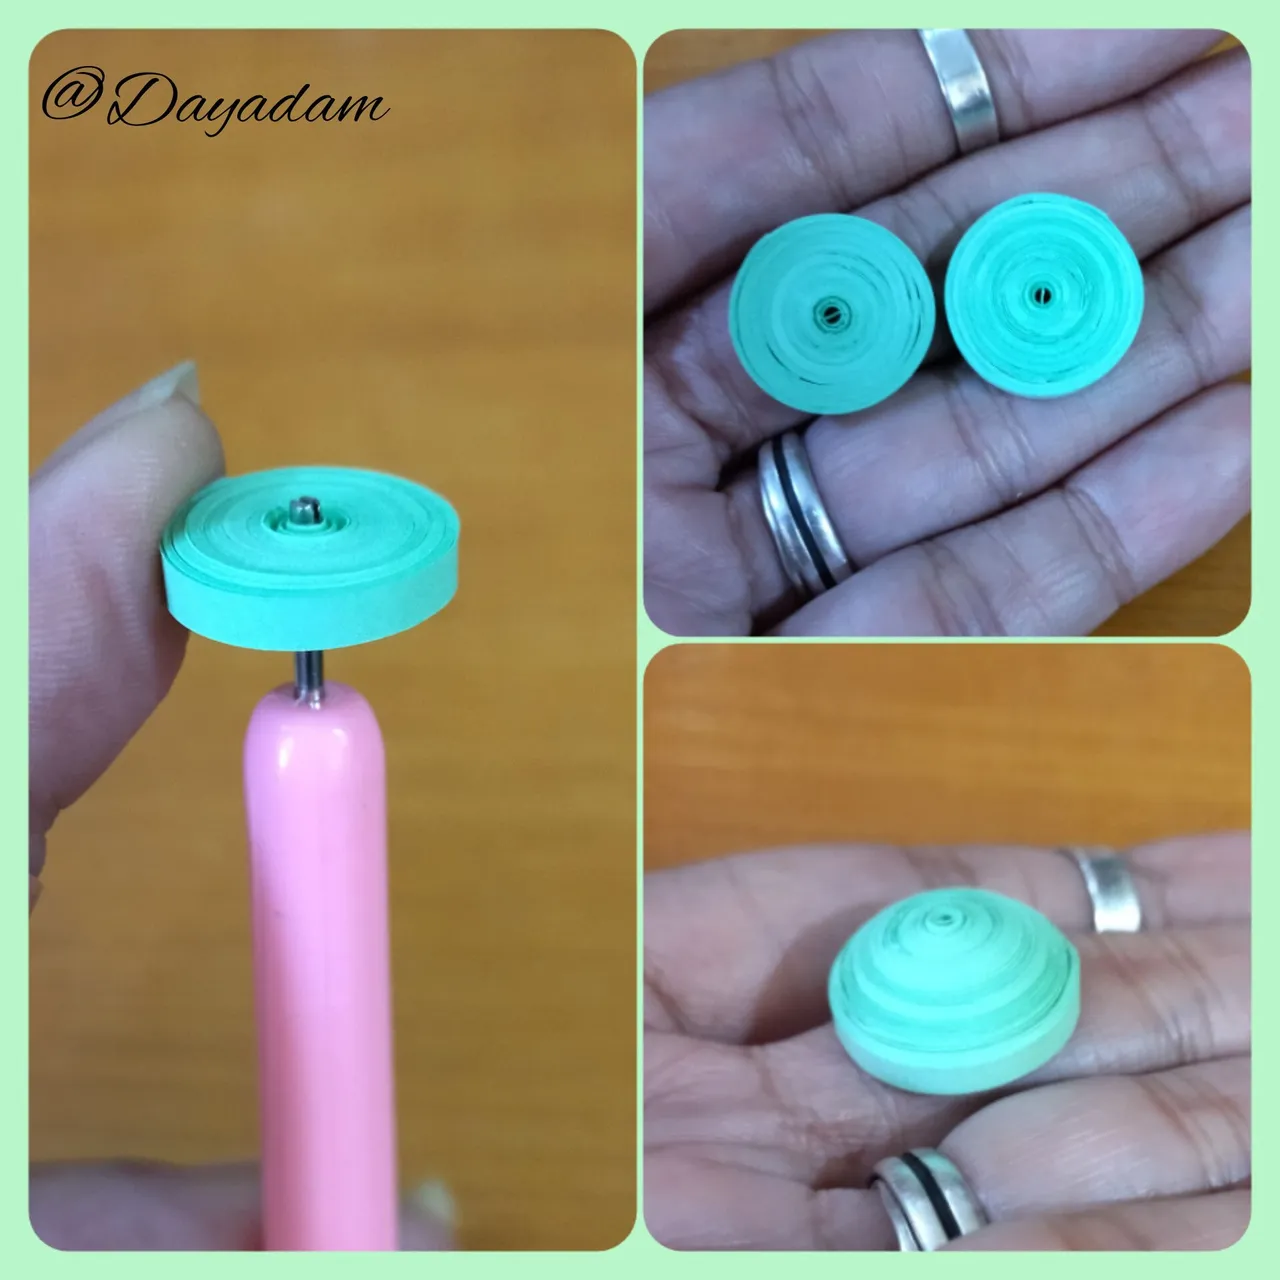
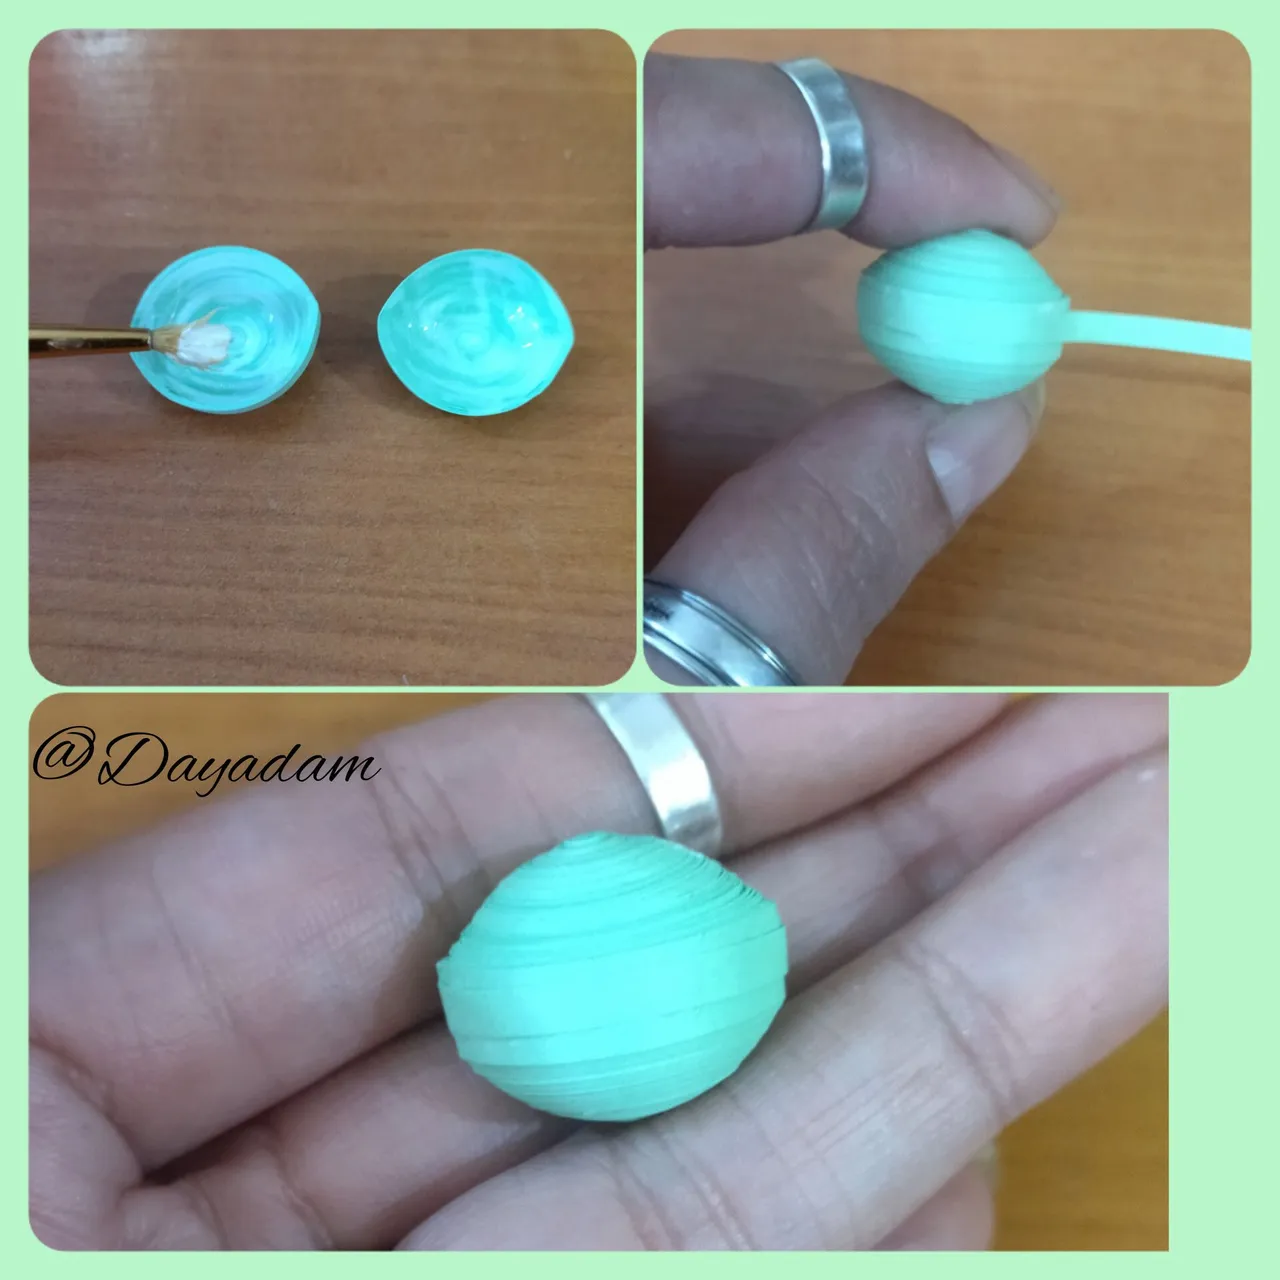
- We will mold the circles, with the help of our fingers we will push outwards and then we will make a kind of oval shape until we get the necessary shape for the baby yoda's head, at the end we will add some glue on the inside and let it dry to prevent the pieces from moving.
- We are going to take a piece of green quilling tape, 3mm wide to join the pieces we made, we couple both passing the tape through the middle with extra strong white glue.

• Comenzamos tomando cinta para quilling de aproximadamente 5mm de ancho color verde claro x 150cms de largo, enrollamos con la ayuda de la aguja para quilling hasta llegar al final de la cinta, sacamos de la aguja y sellamos con pega blanca extra fuerte, obtendremos un círculo cerrado, vamos a necesitar 1 más igual. Por cada muñeco que queramos hacer vamos a repetir el mismo proceso.
• Vamos a moldear los círculos, con la ayuda de los dedos vamos a empujar hacia afuera y luego le haremos una especie de forma ovalada hasta conseguir la forma necesaria para la cabeza del baby yoda, al finalizar en la parte de adentro agregamos un poco de pega y dejamos secar para evitar que se muevan las piezas.
• Vamos a tomar un trozo de cinta de quilling verde, de 3mm de ancho para unir las piezas que elaboramos, acoplamos ambas pasando la cinta por el medio con pega blanca extra fuerte.
- For the ears we will take green ribbon 3mm wide x 50cms long, we will roll it with the quilling needle until we reach the end, we take it out of the needle and loosen the circle to form an open circle, we seal it with glue, then we will mold it to form the ears as shown in the image. We will need 2 of the same size.
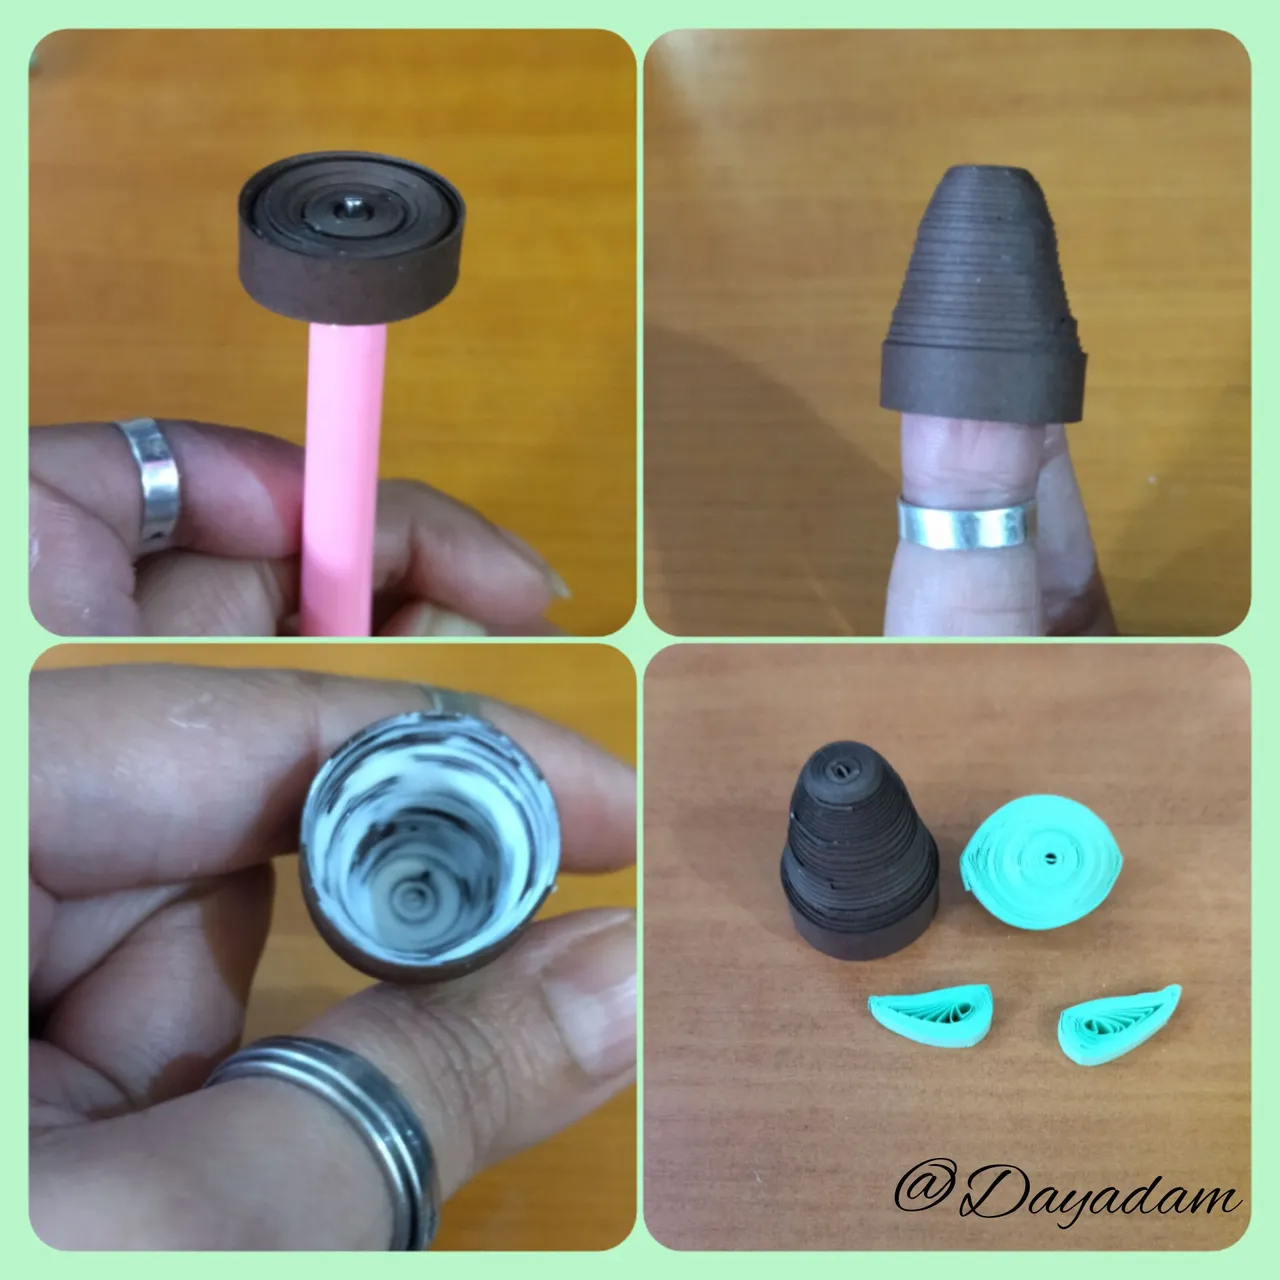
- To make the body we will take a brown ribbon of 5mm wide x 200cms long, we roll it with the quilling needle until we reach the end, we take it out of the needle, seal it with glue and we will mold taking out the circle to form a cone a little flattened at the tip, we put glue on the inside so that it does not deform.
- To make the arms we will take a piece of brown quilling tape 3mm wide x 25cms long, we will roll it with the quilling needle to form a closed circle, we will seal it at the end with glue, we will mold it in the shape of a cone taking it out with a brush or a high stick, we will also put glue on the inside so that the piece does not deform. We will need 2 pieces like this one.
• Para las orejas tomaremos cinta verde de 3mm de ancho x 50cms de largo, enrollaremos con la aguja para quilling hasta llegar al final, sacamos de la aguja y soltamos y poco el circulo para formar un circulo abierto, sellamos con pega, luego moldearemos para formar las orejas tal como muestra la imagen. Necesitaremos 2 iguales.
• Para realizar el cuerpo tomaremos una cinta color marrón de 5mm de ancho x 200cms de largo, enrollamos con la aguja para quilling hasta llegar al final, sacamos de la aguja, sellamos con pega y moldearemos sacando hacia afuera el circulo para formar un cono un poco aplanado en la punta, le colocamos pega por la parte de adentro para que el mismo no se deforme.
• Para realizar los brazos tomaremos un trozo de cinta de quilling marrón de 3mm de ancho x 25cms de largo enrollaremos con la aguja para quilling para formar un círculo cerrado, sellamos al finalizar con pega, moldearemos en forma de cono sacando hacia afuera con un pincel o palito de altura, en la parte de adentro también colocaremos pega para que la pieza no se deforme. Necesitaremos 2 piezas como esta.
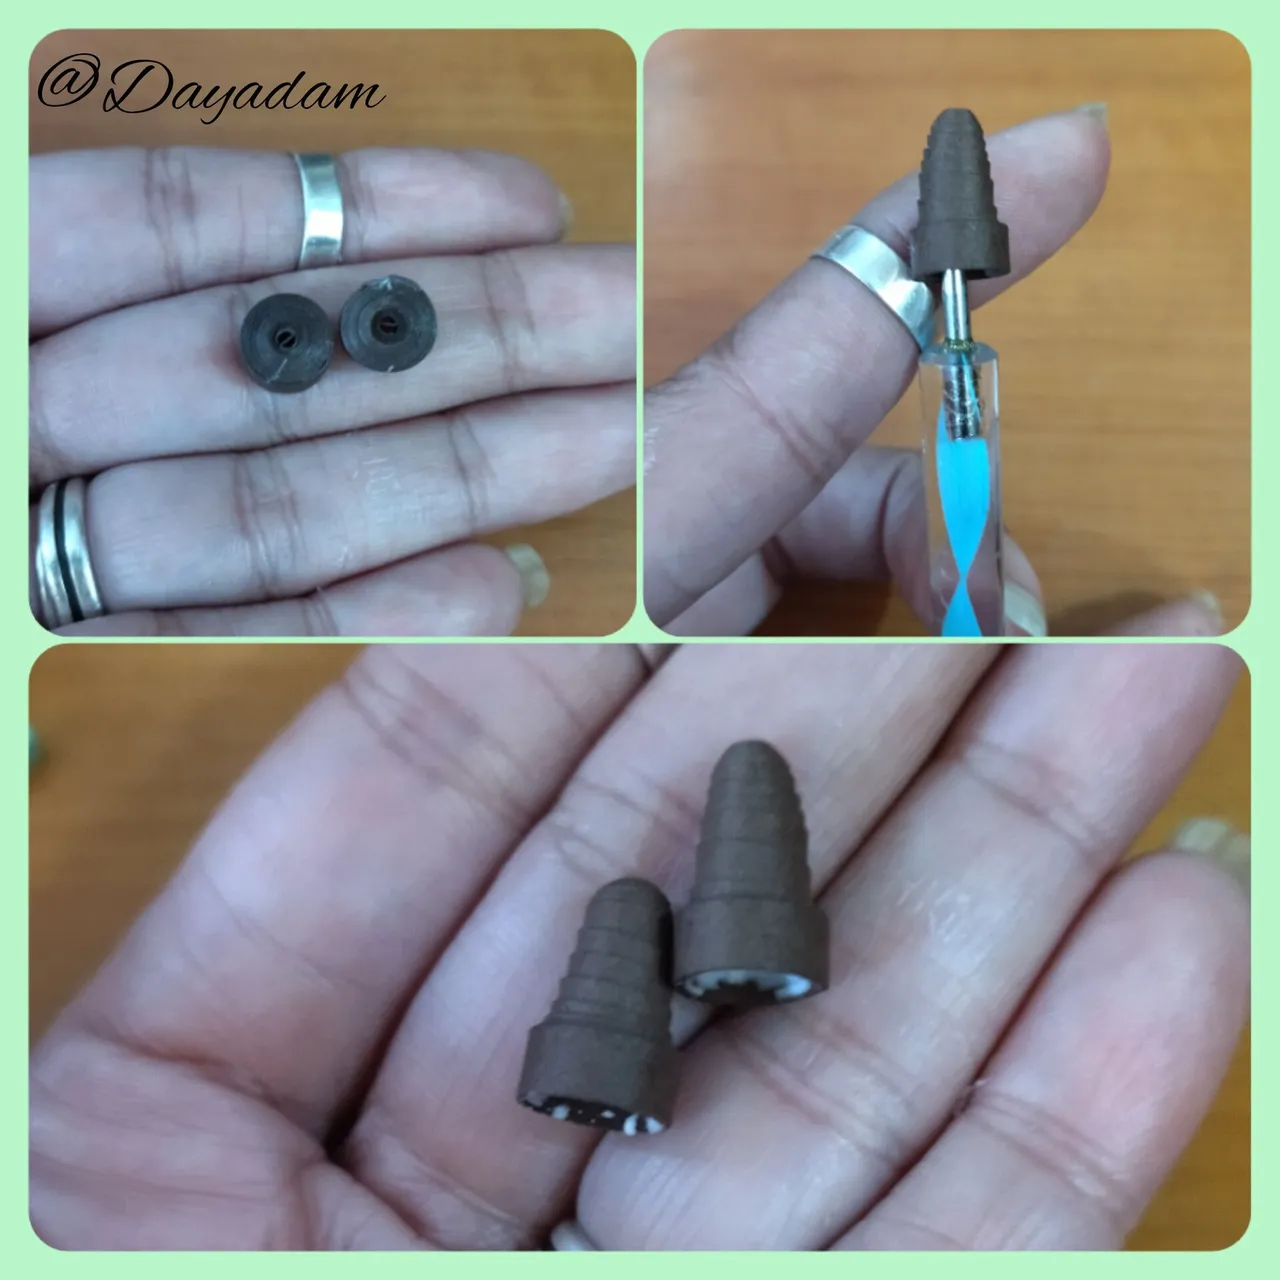
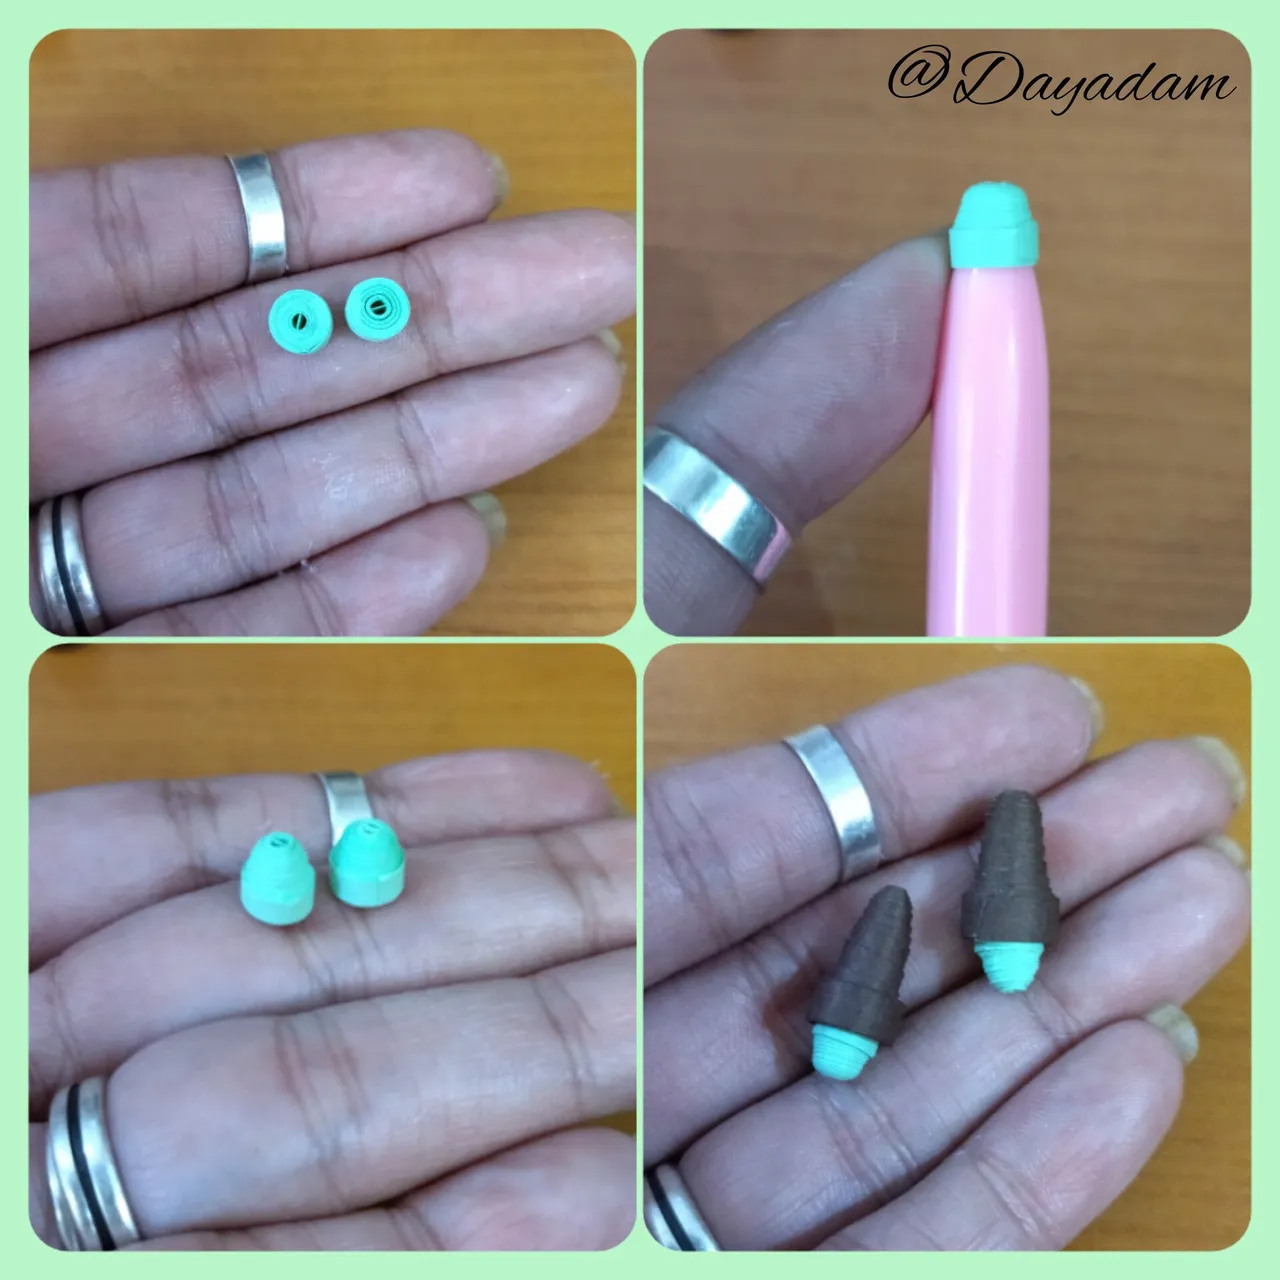
- The hands will be made by rolling a piece of green ribbon 3mm wide x 25cms long, we form a closed circle, we take a little out, apply a little glue on the inside, and glue the arm we made previously, we will need 2 pieces like this.
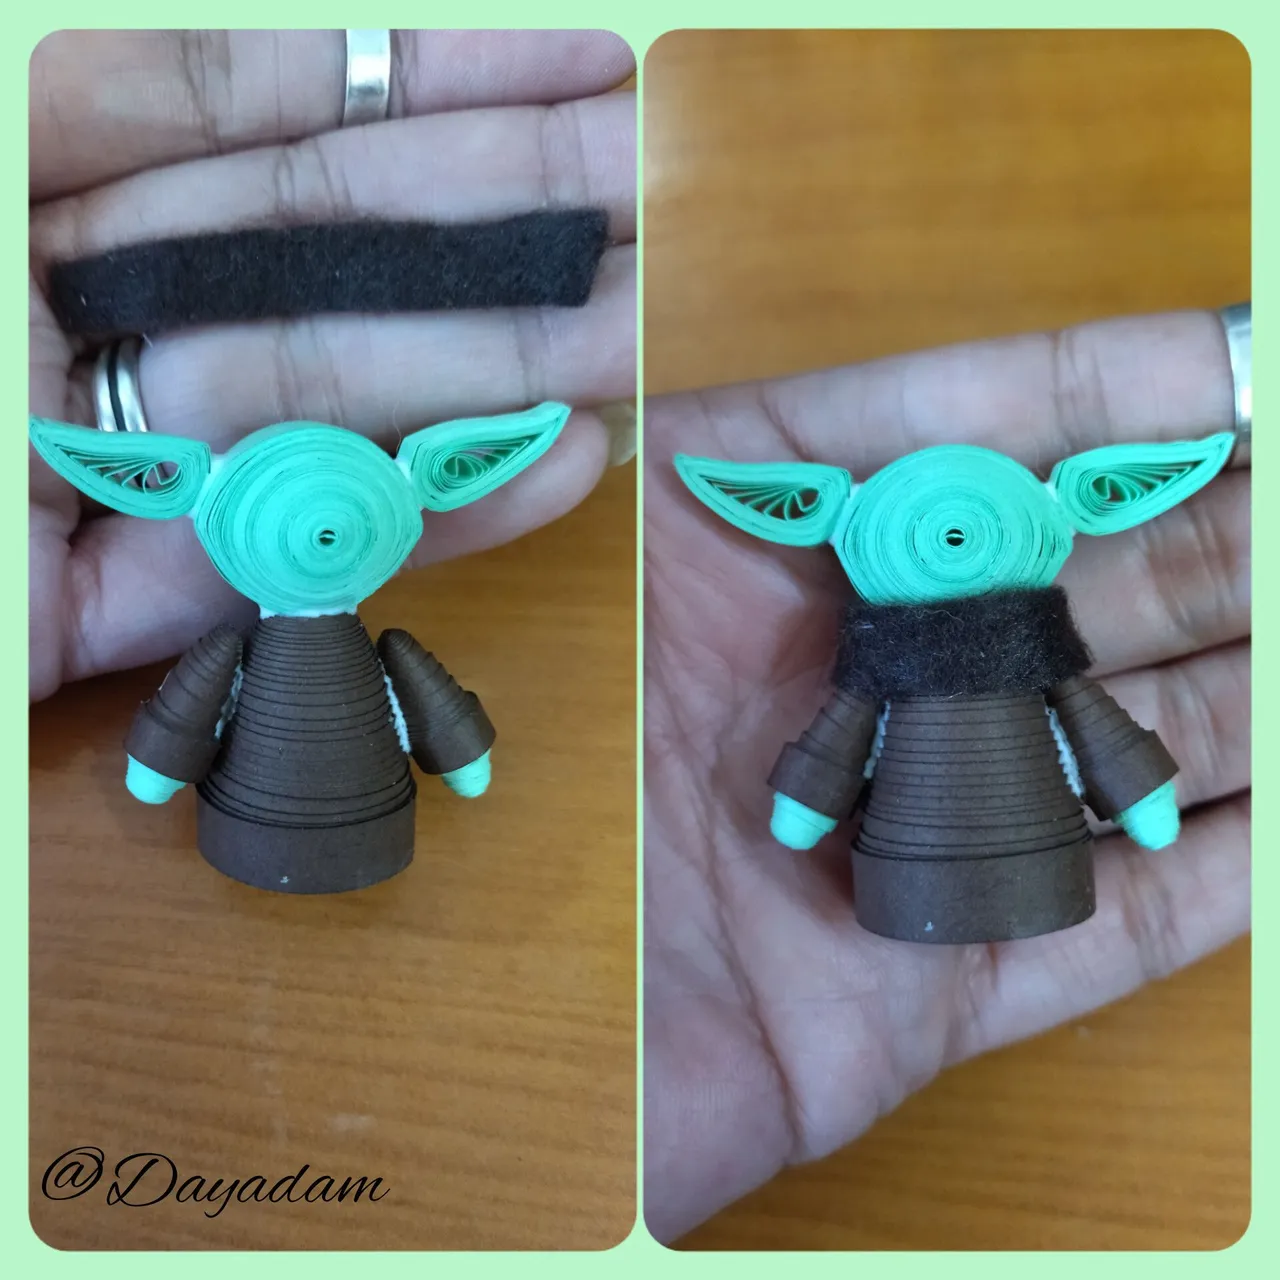
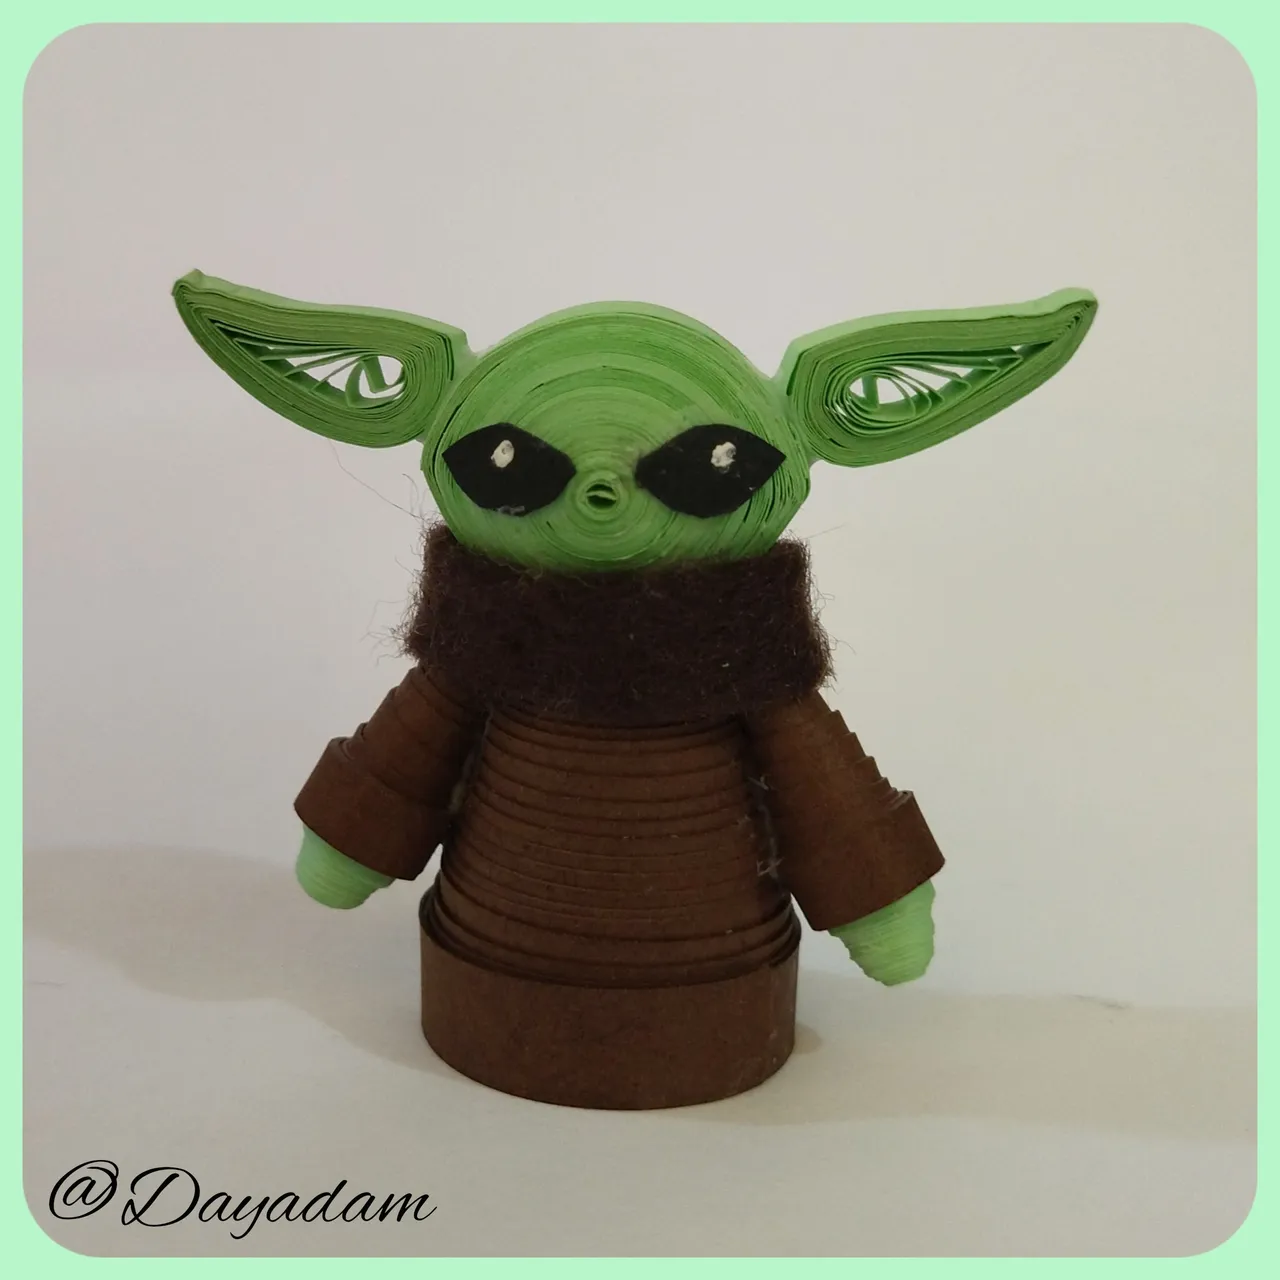
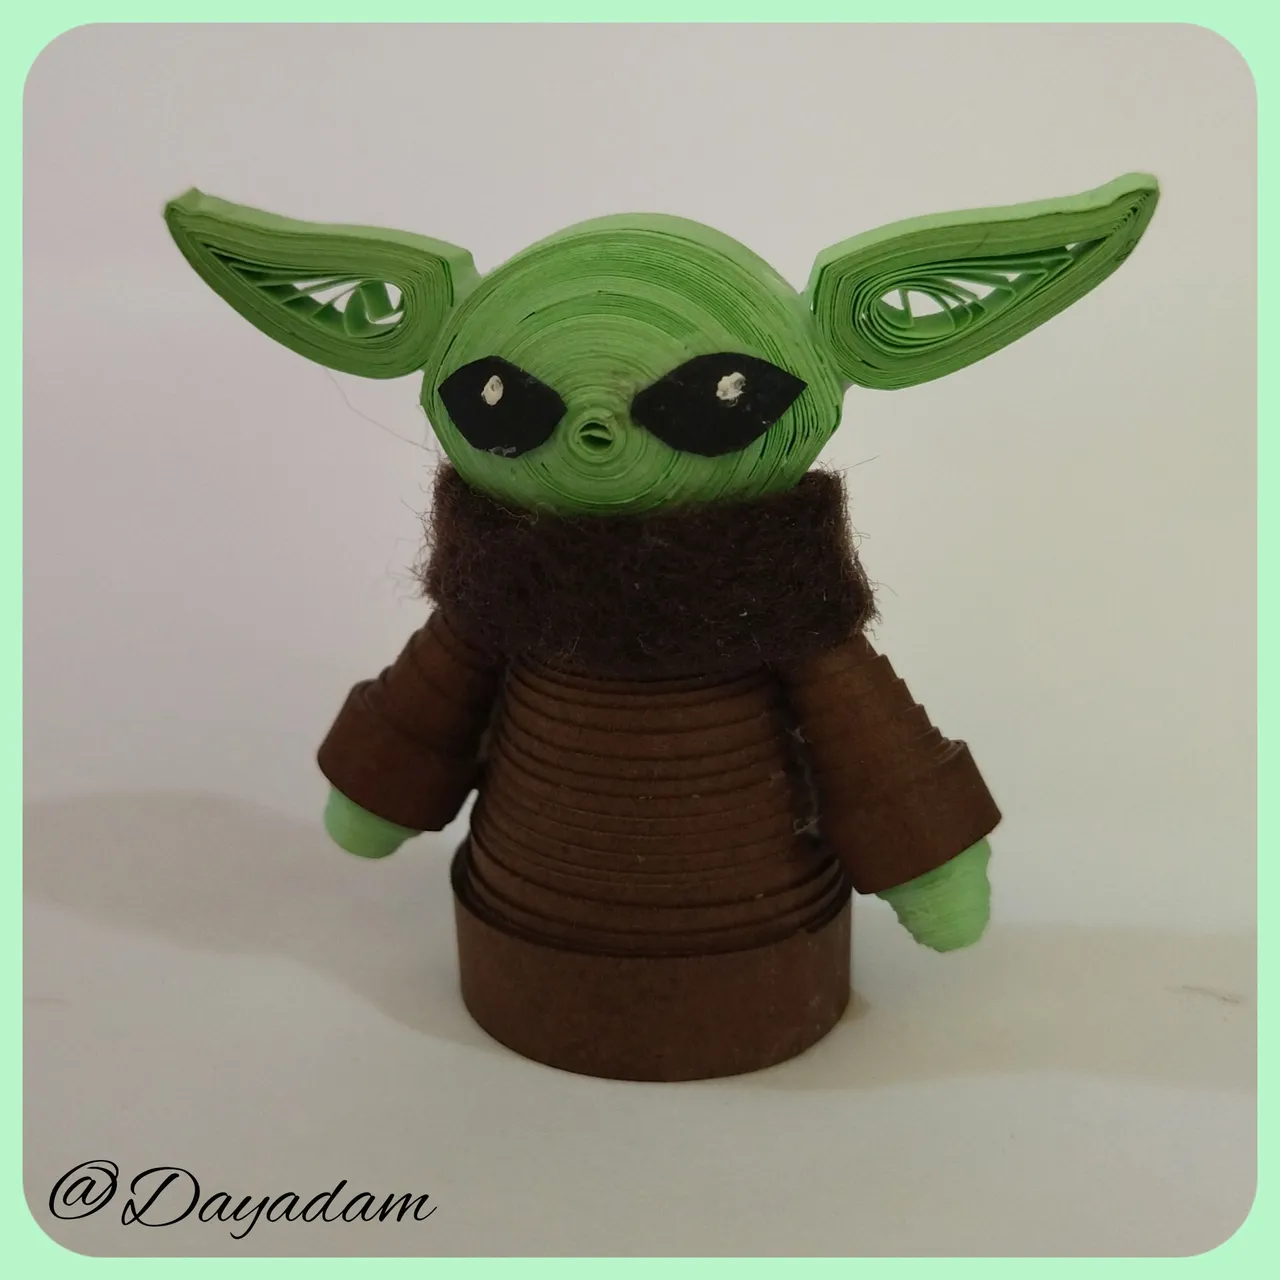
- We are going to assemble our pieces and the last place we will make the eyes. We will join the pieces one by one in a harmonic way as shown in the pictures. Then we will take a piece of beige fabric and place it around the neck to resemble a kind of scarf.
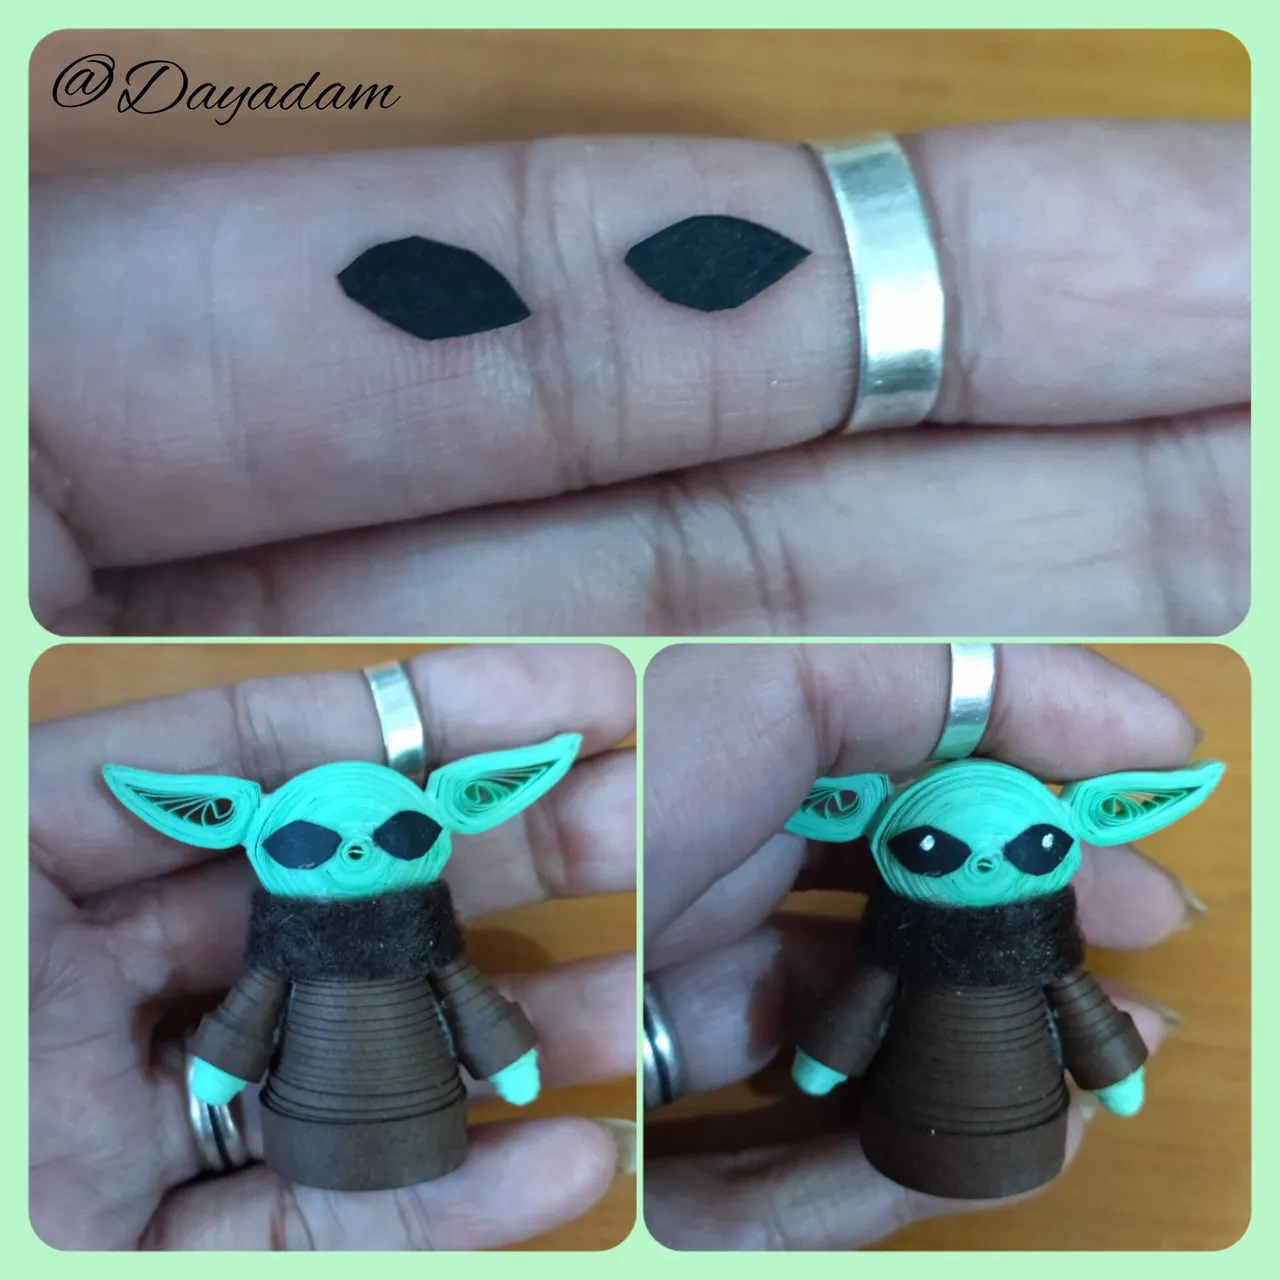
- Finally, cut two small drop-shaped pieces of black cardboard to form the eyes, glue them to the face and add some small white glitters with cold white paint.
Optionally you can add a layer of white glue to give it shine, but in this case I loved the matte color and I wanted to leave it that way.
This way we have this decorative Baby Joda ready.
• Las manos las elaboraremos enrollando un trozo de cinta verde de 3mm de ancho x 25cms de largo, formamos un círculo cerrado, sacamos un poco hacia afuera, aplicamos un poco de pega por la parte interna, y pegamos del brazo que ya realizamos previamente, necesitaremos 2 piezas como esta.
• Vamos a armar nuestras piezas y el último lugar hare los ojos. Uniremos las piezas una a una de manera armónica como indican las imágenes. Luego tomaremos un trozo de tela beige y colocaremos alrededor del cuello para asemejar una especie de bufanda.
• Por ultimo pique dos pequeñas piezas en forma de gota de una cartulina negra para formar los ojos, los pegue de la cara y agregue unos pequeños brillitos blancos con pintura blanca al frio.
De manera opcional puedes agregar una capa de pega blanca para darle brillo, pero a mí en este caso me encanto como quedo de color mate y lo quise dejar así.
De esta manera tenemos este Baby Joda decorativo listo.

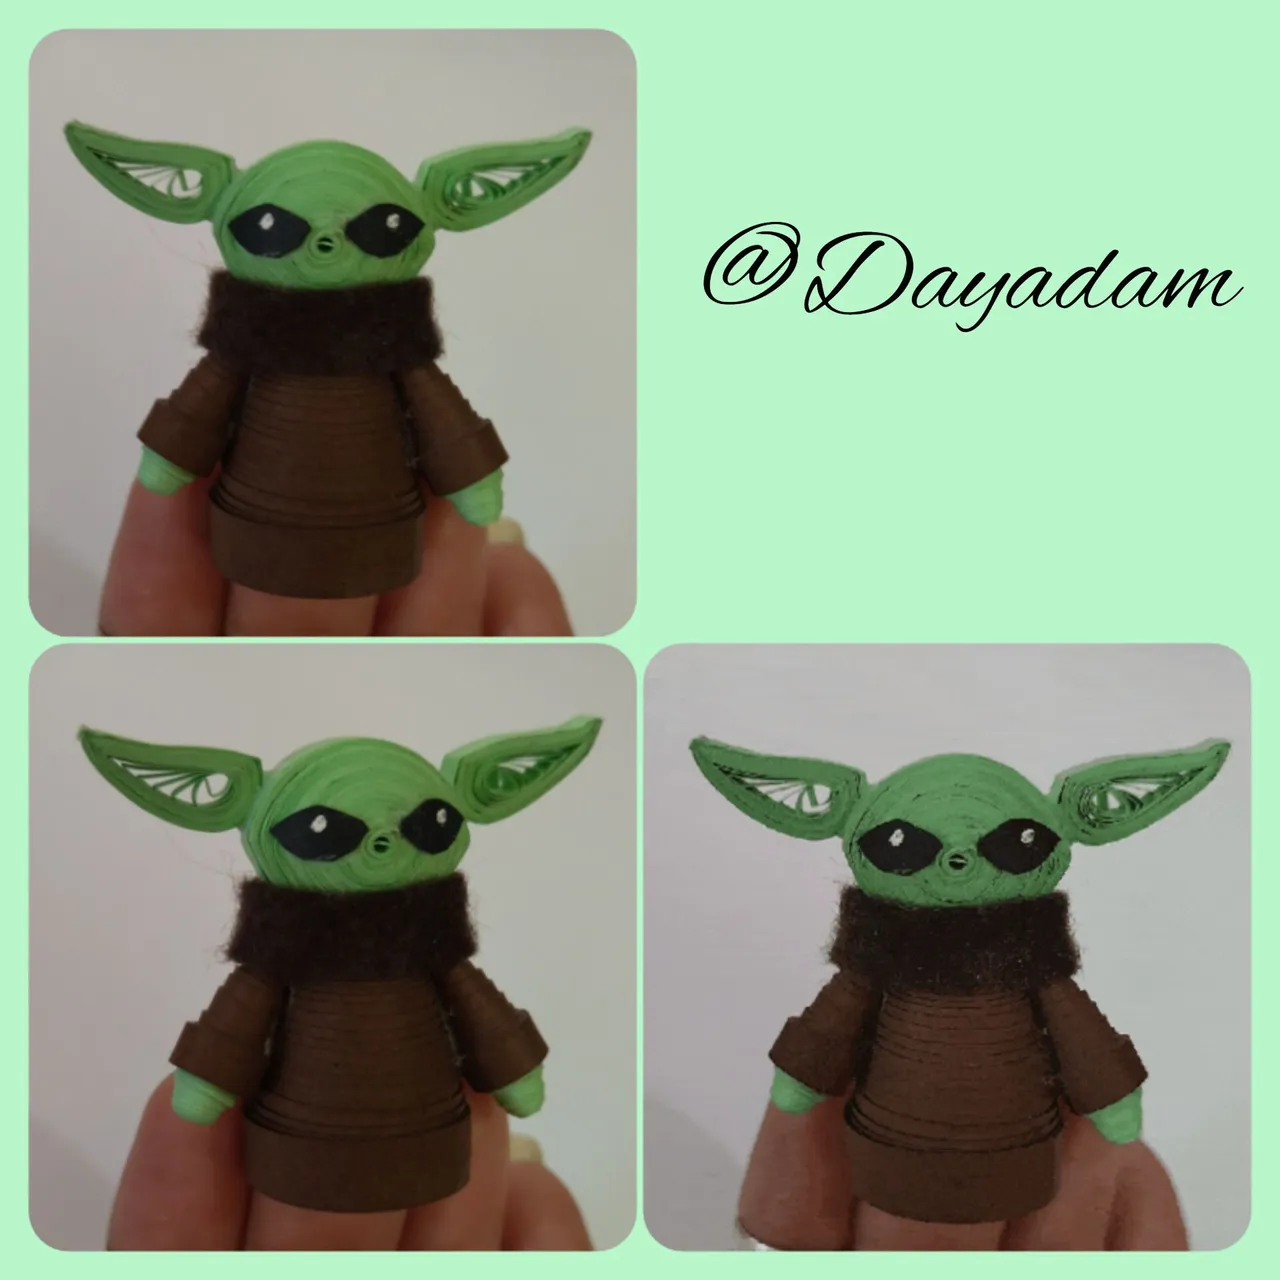


What did you think, did you like it?
I hope you did, I hope you liked my explanation, procedure and photos, I made them with love for you.
"Let out that muse that inspires you, and let your imagination fly".
Thank you all, see you next time.
¿Que les pareció, les gustó?
Espero que sí, que les haya gustado mi explicación, procedimiento y fotos, los hice con mucho cariño por y para ustedes.
"Deja salir esa musa que te inspira, y deja volar tu imaginación".
Gracias a todos, nos vemos en la próxima.
Todas las fotos usadas en este post son de mi autoría y han sido sacadas en mi celular personal un Redmi 9T y editadas en Canva y en Inshot Banner y separador hecho por mí en Canva Traducido con la ayuda de DeepL
