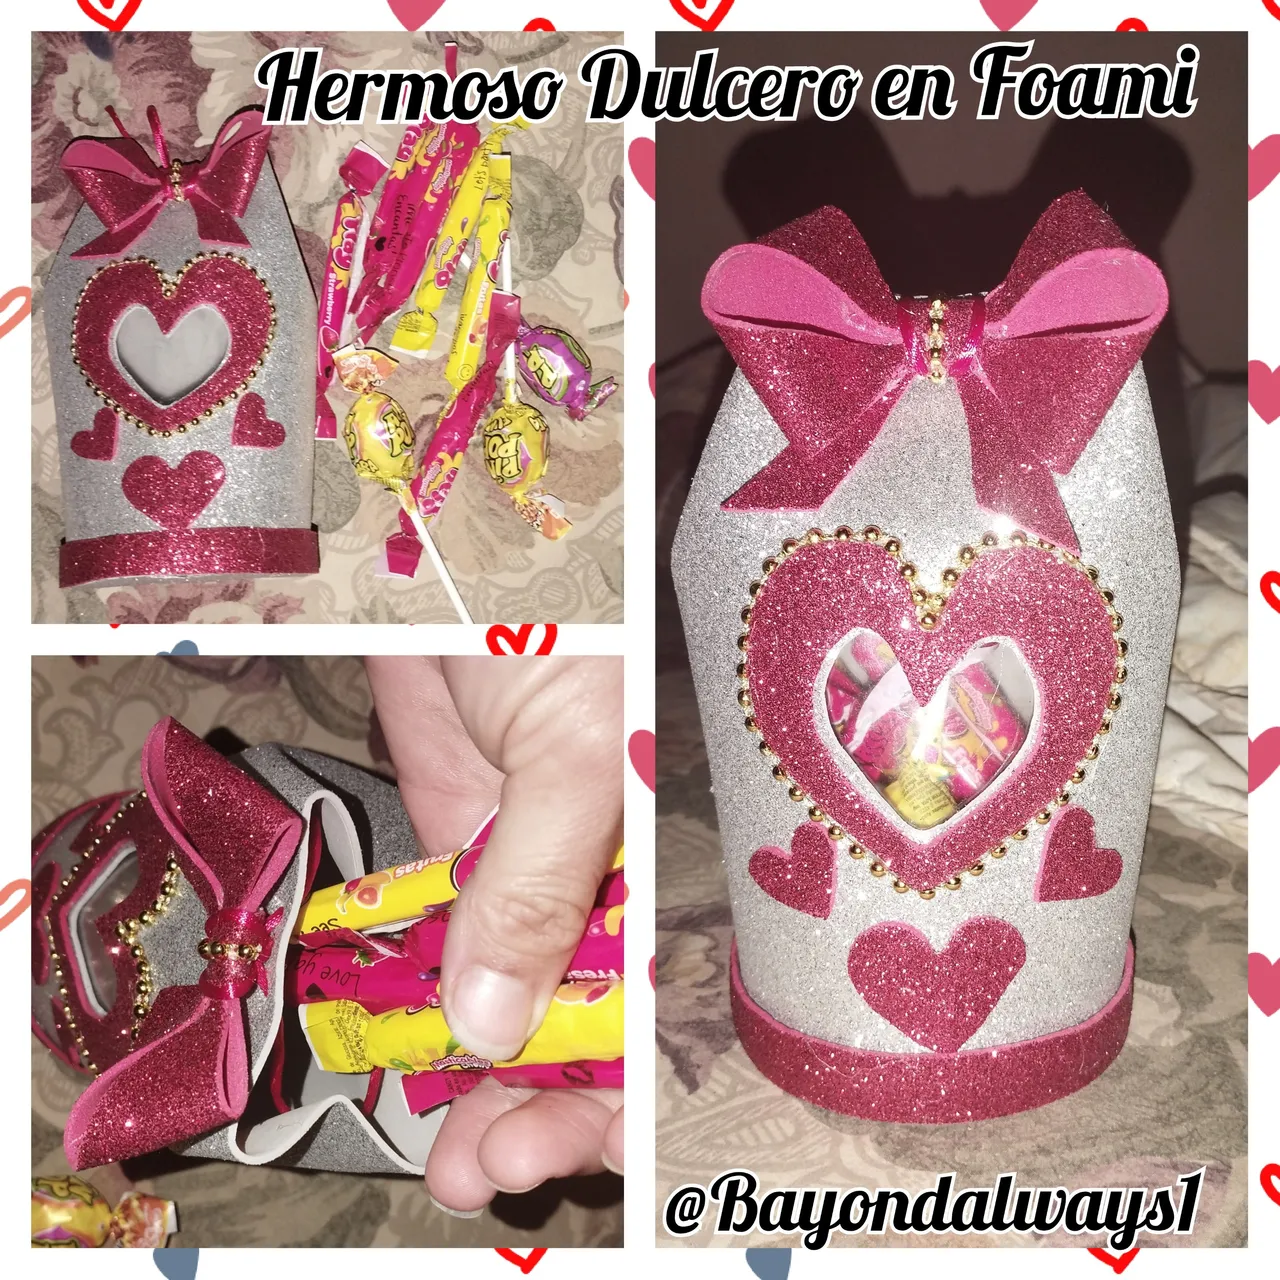
Un gran saludo queridos amigos creativos de @diyhub y de @hive, saludos y bendiciones en este día de reyes, ya apenas pasando la navidad y yo ya pensando en el día del amor y la amistad jajaja, pero bueno como dicen por ahí es mejor andar prevenidos, en esta oportunidad elabore un hermoso Dulcero de Foami, con algunos materiales Reciclados. Cómo saben me gusta mucho, cuidar el ambiente y siempre que pueda recuperar algo o trabajar con materiales de provecho así lo hago. Y si supieran que las cosas que menos piensas en utilizar son muy provechosas.
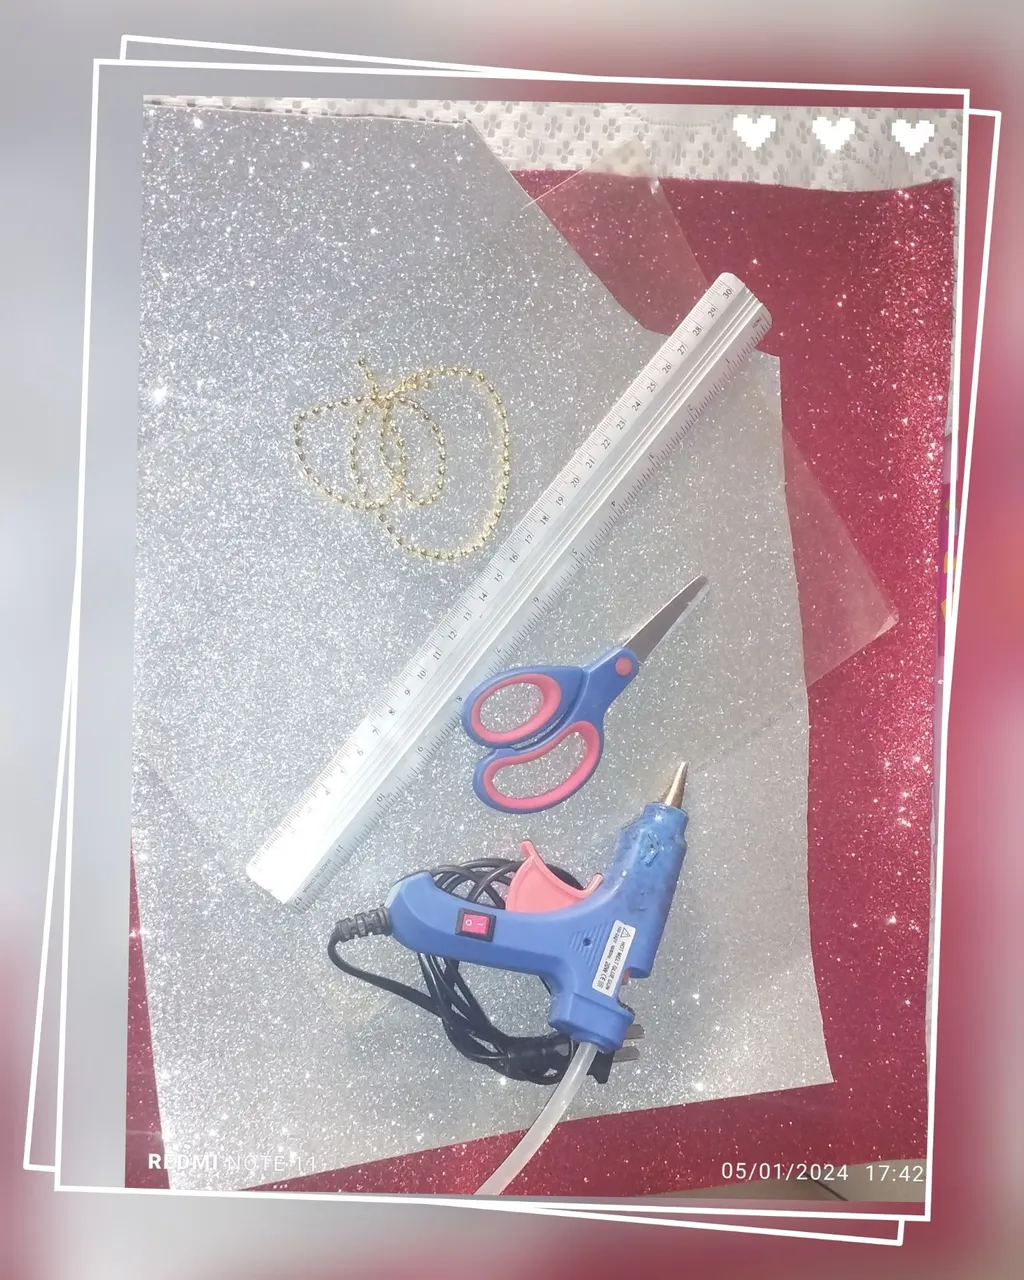
Los materiales que utilice en esta oportunidad fueron los siguientes:
Materiales:
✓ Foami escarchado: Color Plateado y Rojo.
✓ Cartón Reciclado.
✓ Carpeta transparente.
✓ Silicón caliente.
✓ Decoración Dorada.
✓ Dulces.
Paso a Paso:
Paso 1:
Medimos un rectángulo de 17 centímetros de ancho por 28 de largo, aquí tendremos nuestro cuerpo del dulcero o cotillon como también es reconocido.
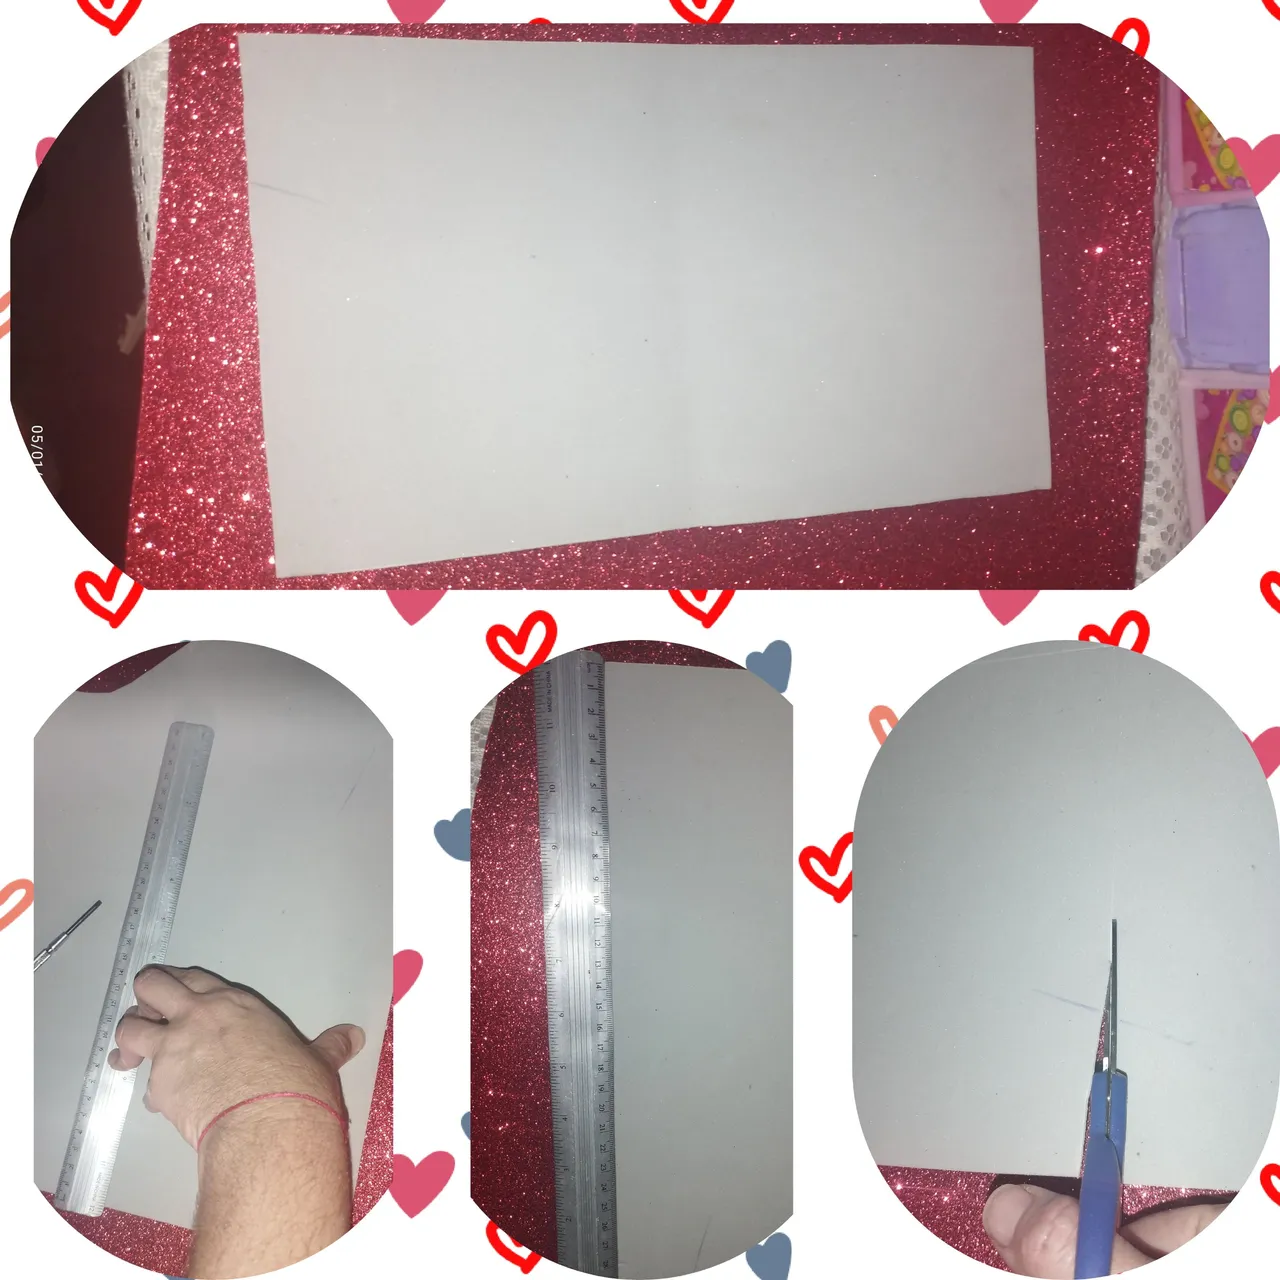
Paso 2:
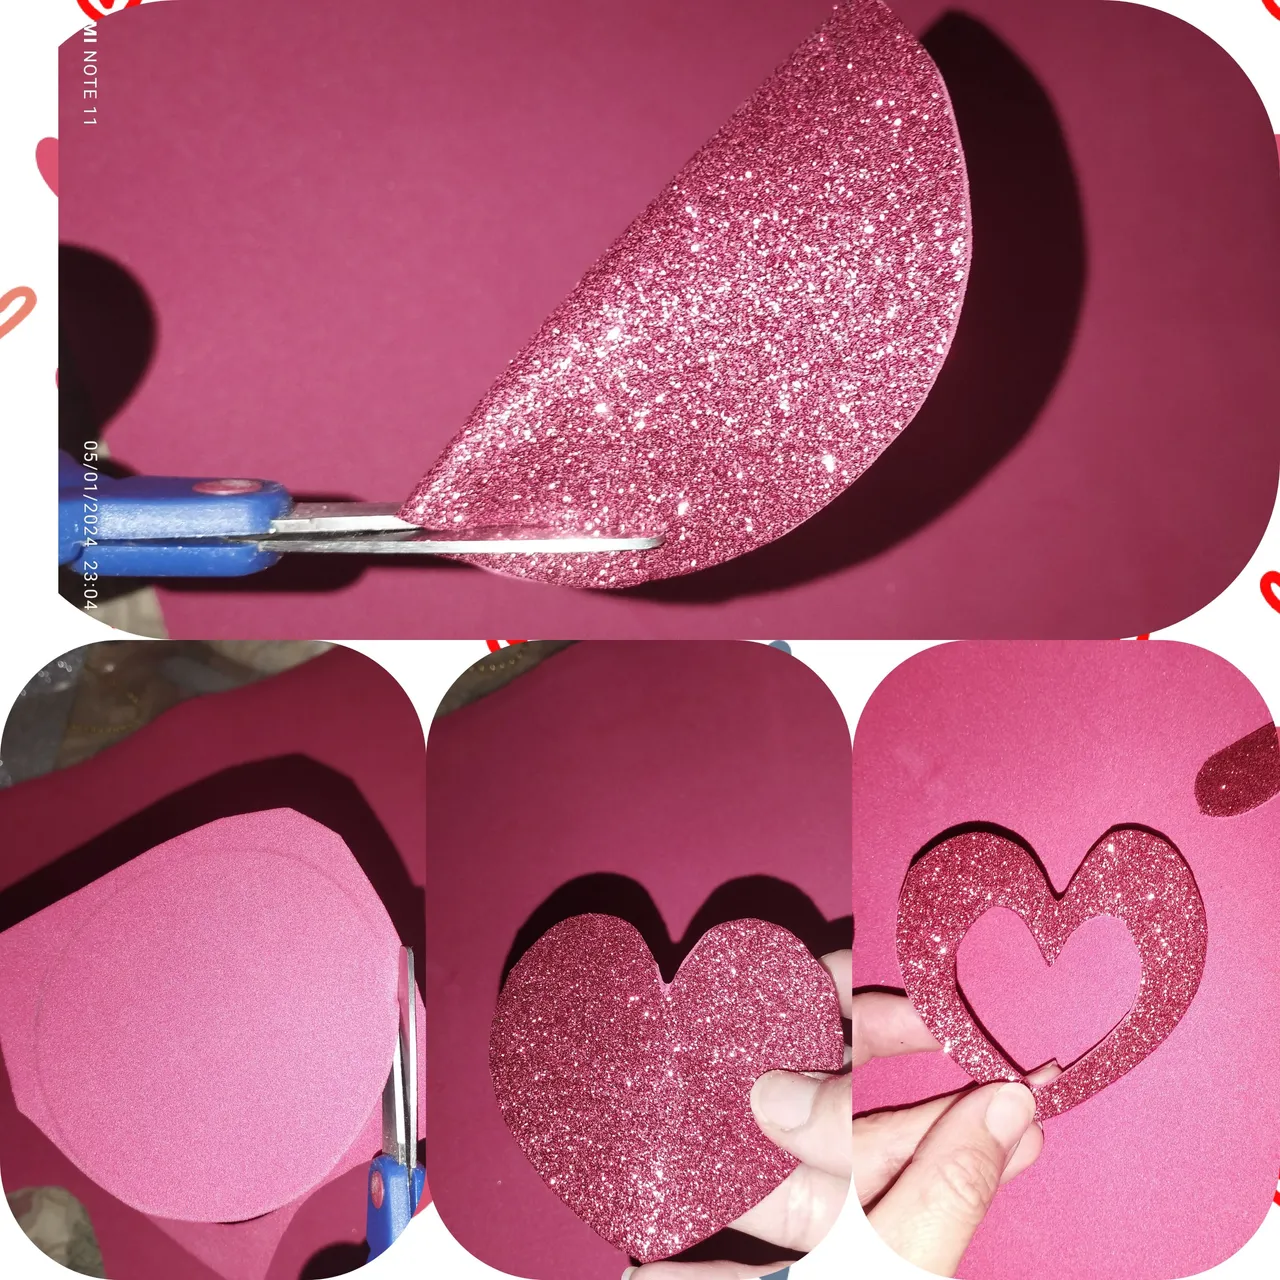
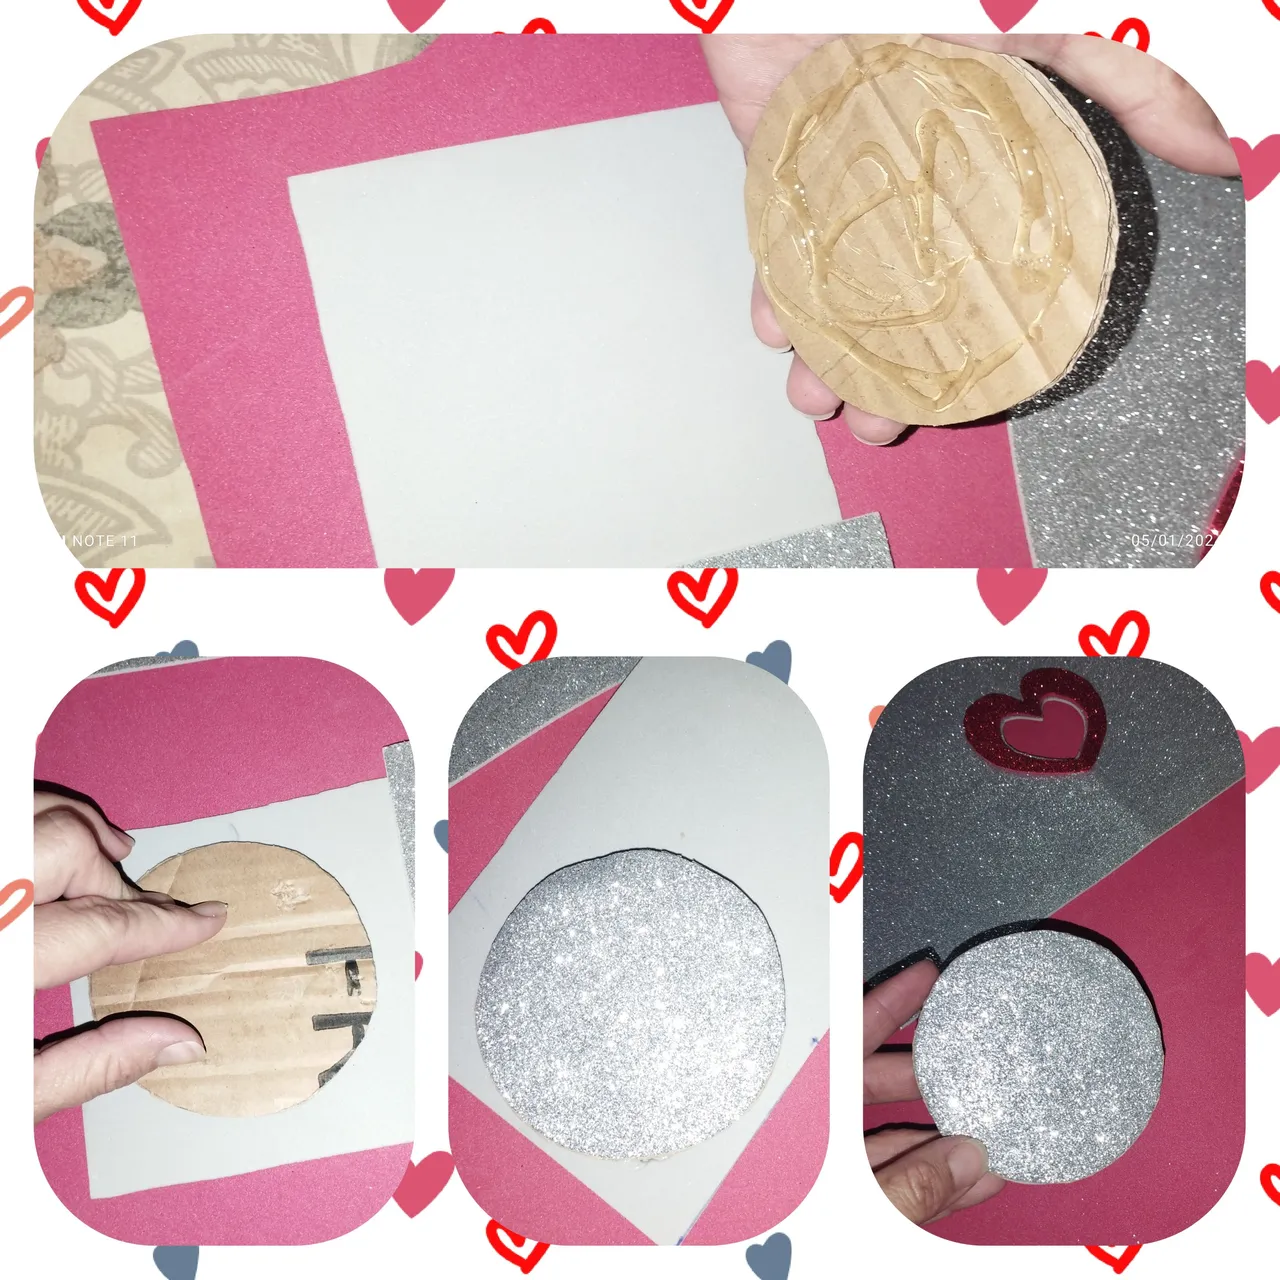
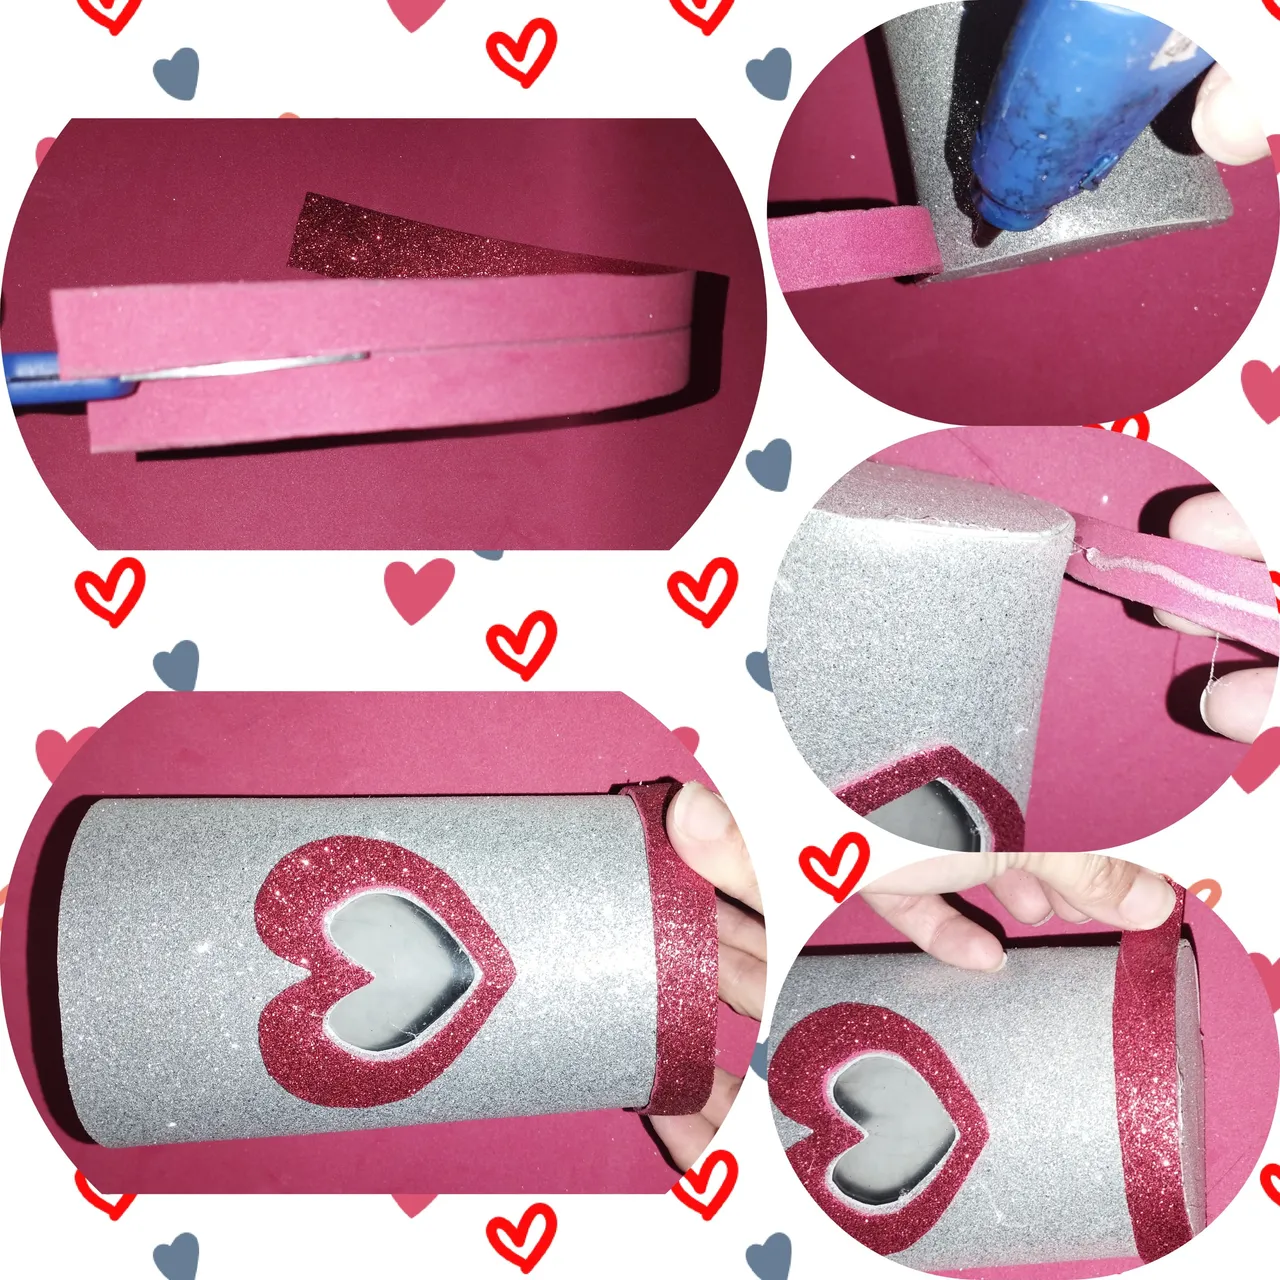
En un pedazo de cartón marcamos un circulo de 8 centímetros. El cartón será la base y también los círculos rojos y plateado que se utilizarán más adelante.
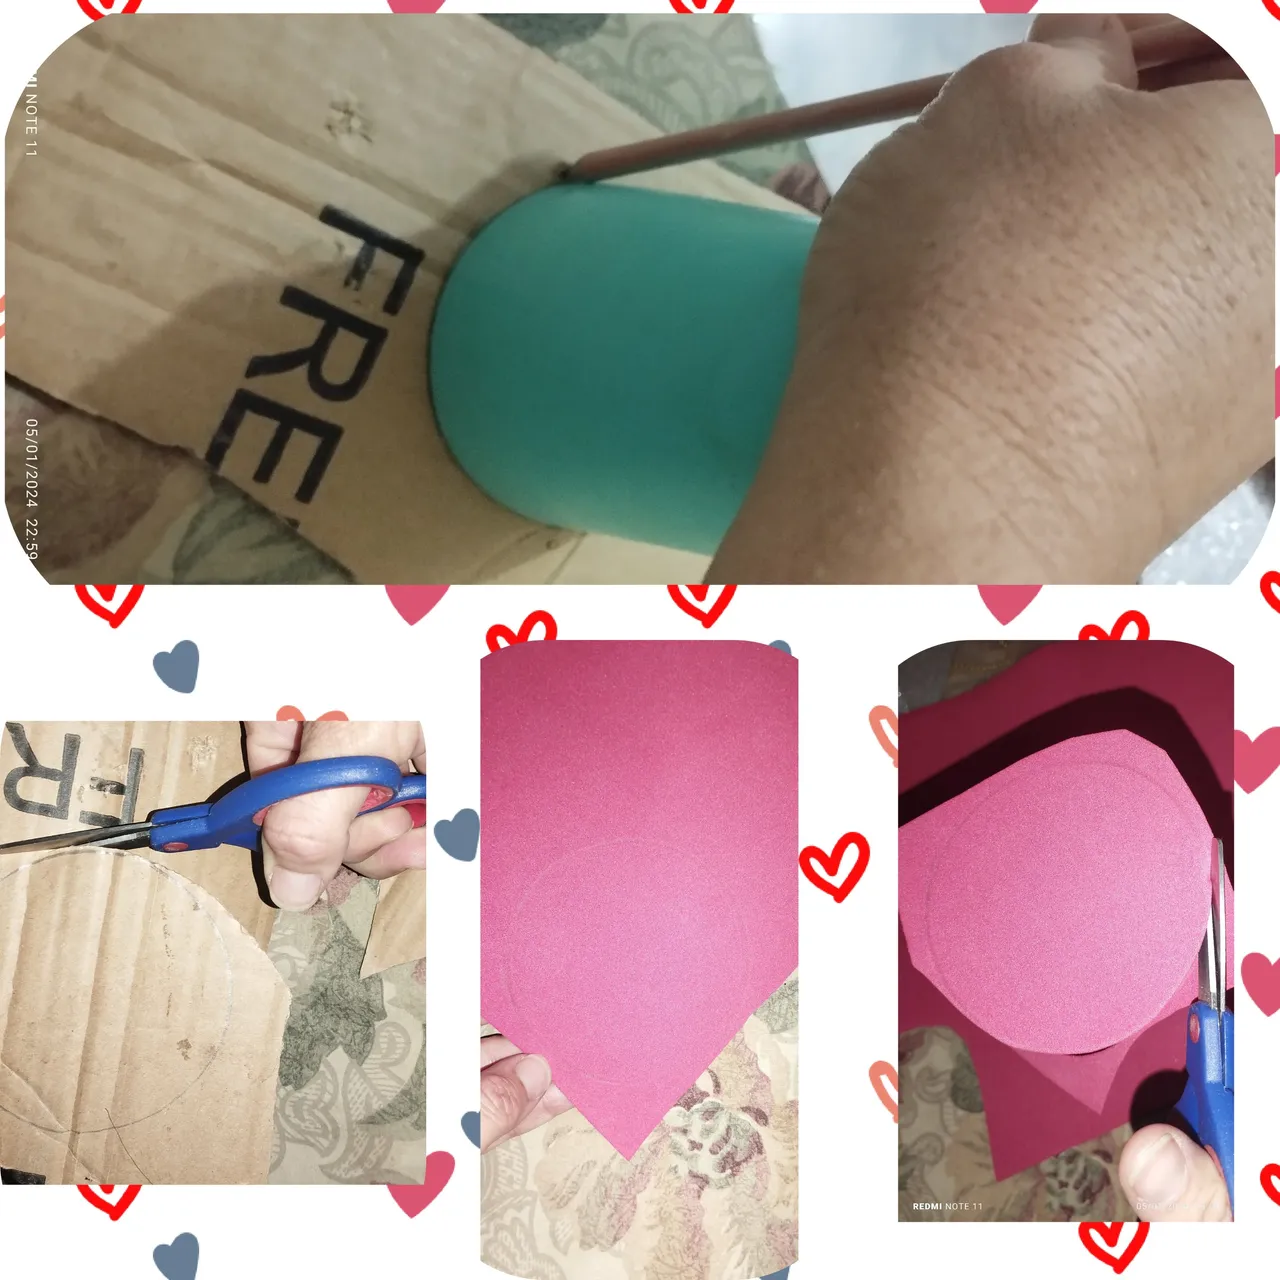
Paso 3:
recortaremos el circulo rojo de 8 centímetros también dónde sacaremos el corazón, doblamos a la mitad y recortamos la forma o también la podemos dibujar y cortar las líneas.
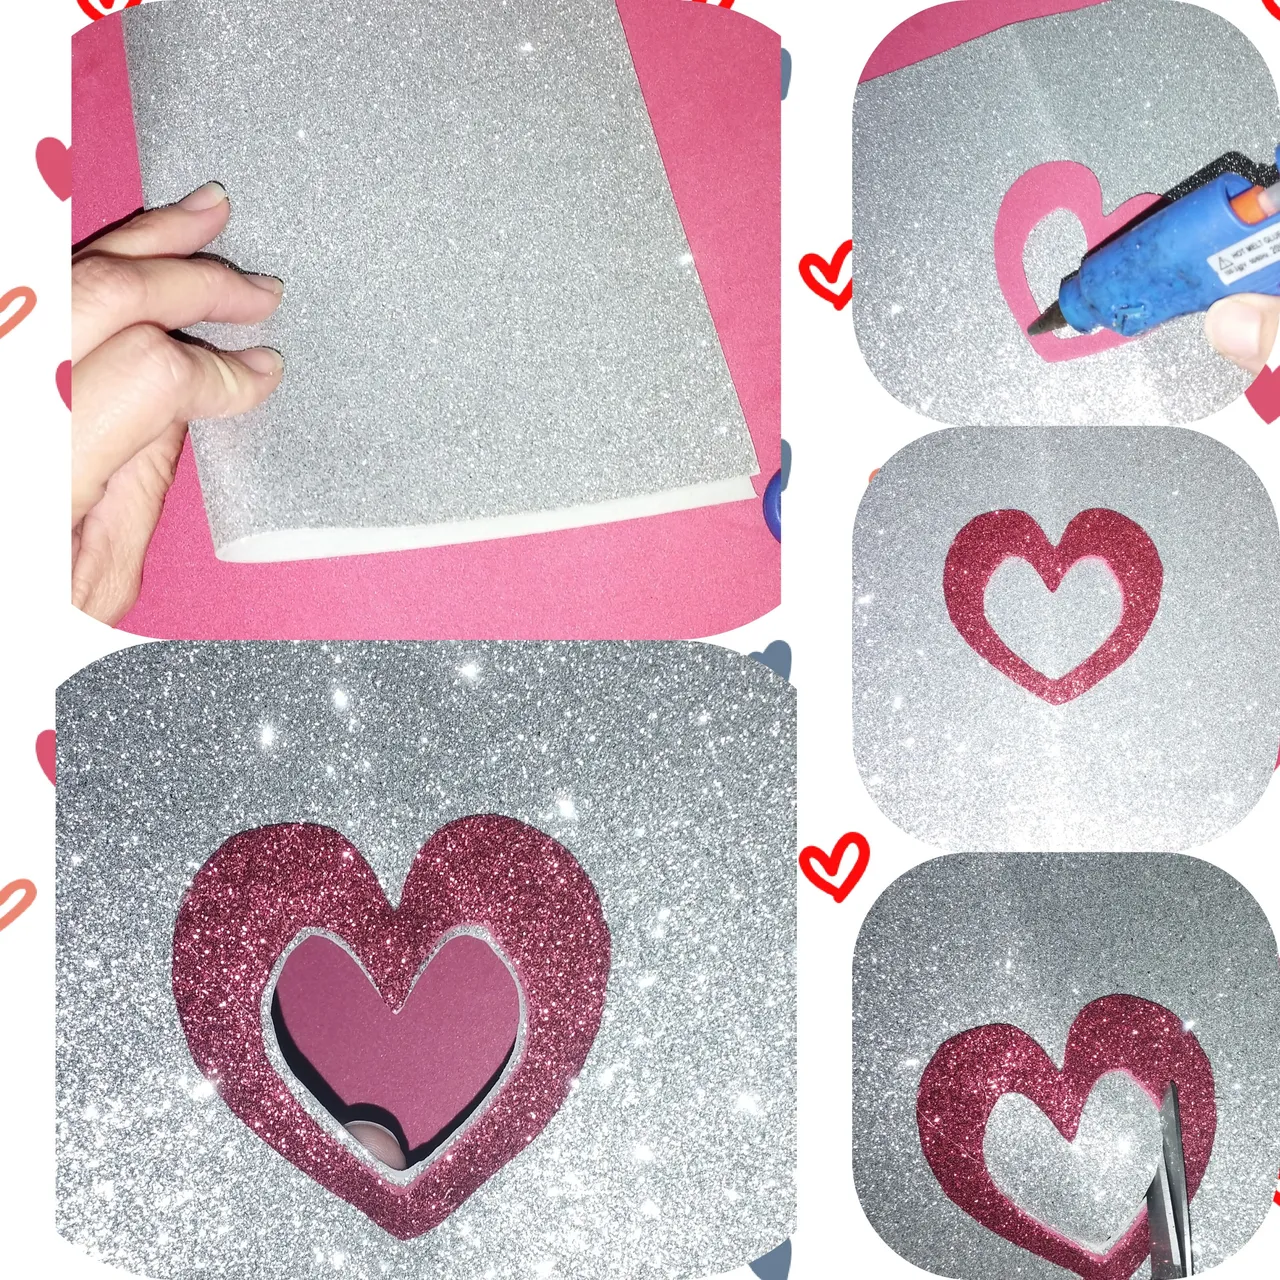
Paso 4:
Una vez listo doblamos el rectángulo a la mitad, en medio pegamos el corazón brevemente cortado y luego cortamos el centro del corazón. Vamos a sacar el corazón del corazón literalmente.
Paso 5:
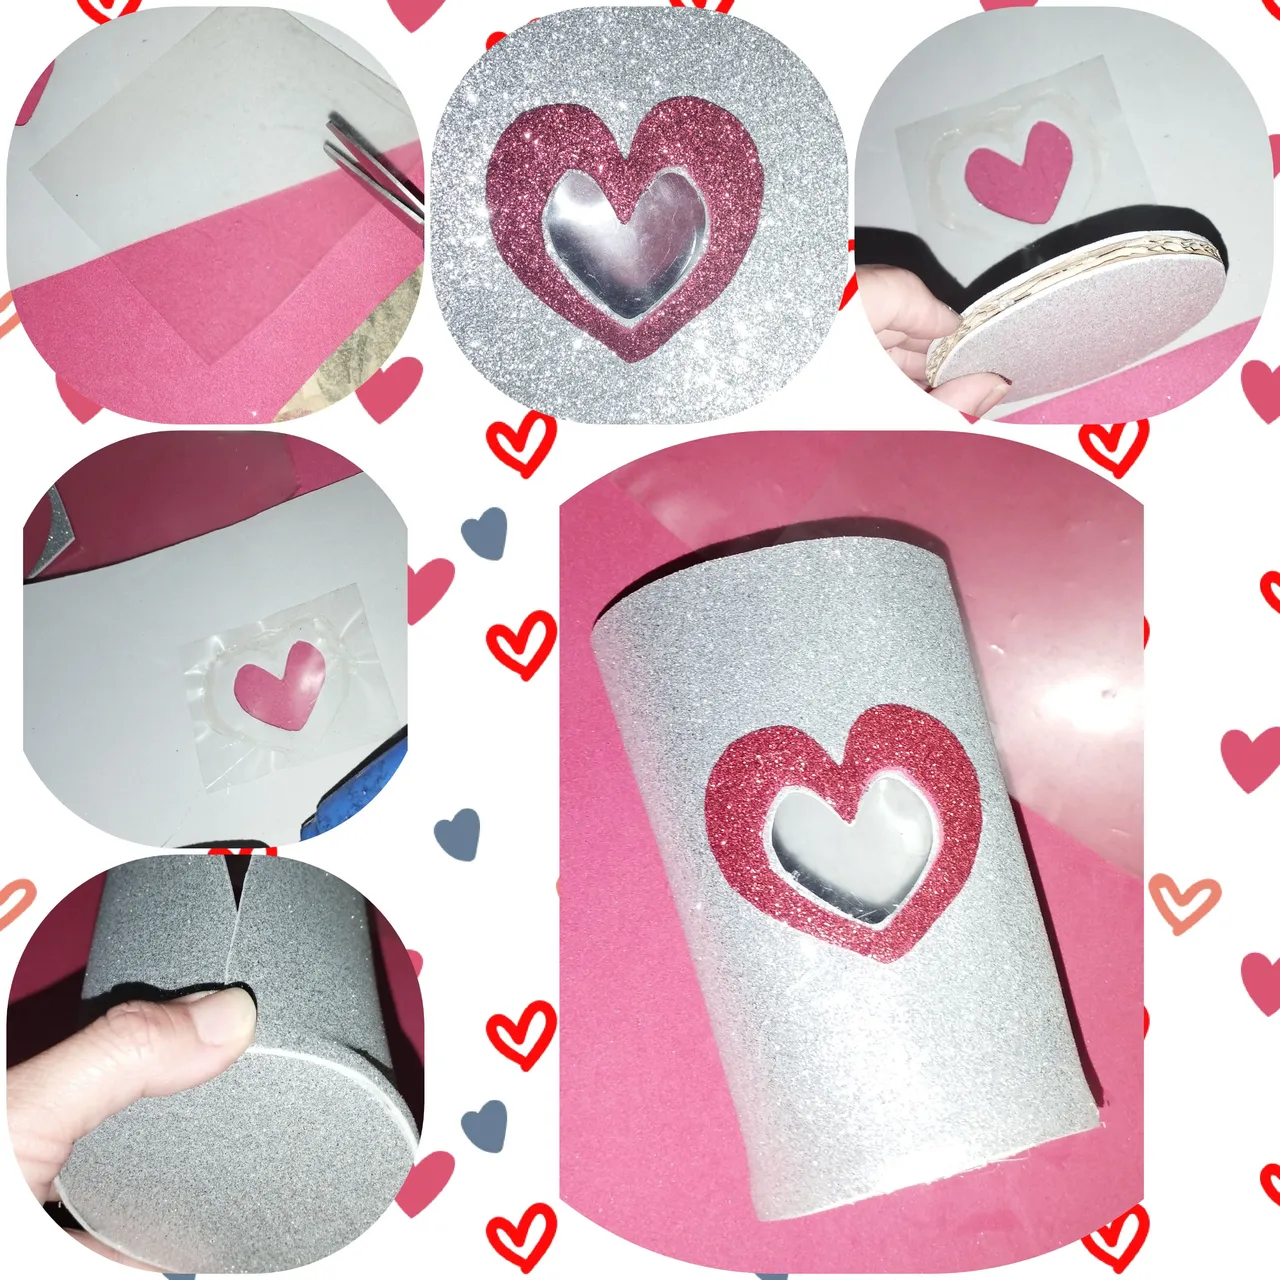
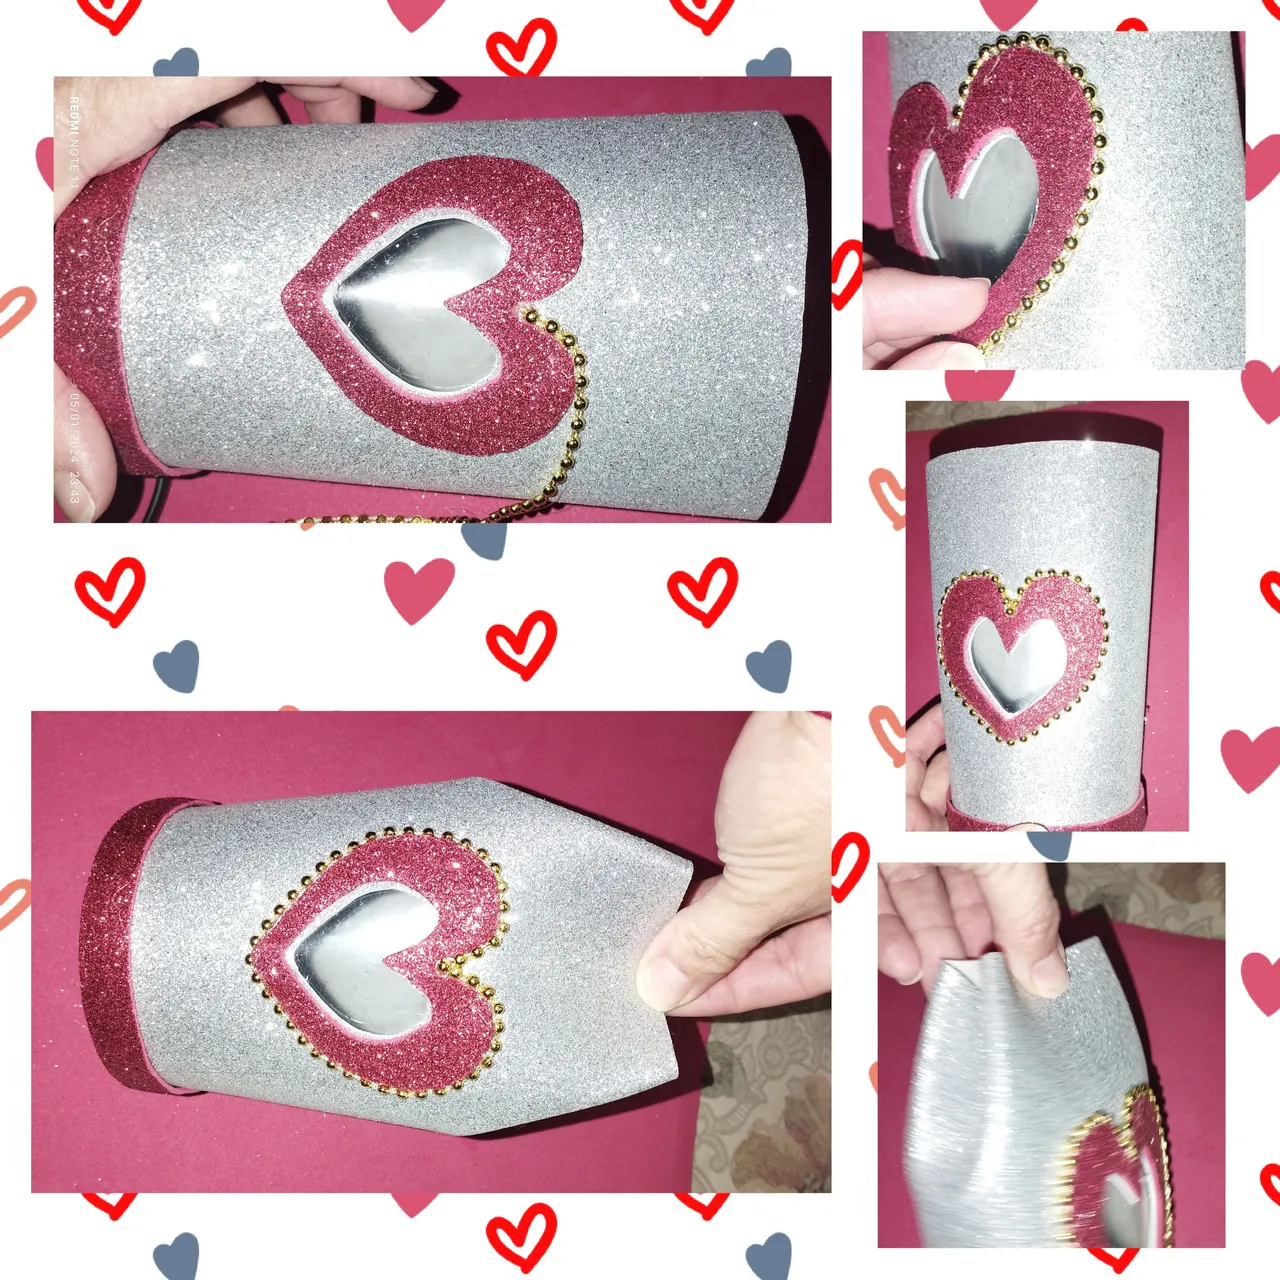
El circulo de cartón de 8 centímetros se va a colocar sobre el foami plateado o si lo deseas puedes recortar lao círculos plateados y los pegas uno de cada cara del cartón. También se cortara de la carpeta transparente un cuadro aproximadamente de 4 centímetros este se colocaran en la zona del corazón para que el quede sellado, yo utilice una carpeta pero también se puede utilizar acetato.
Paso 6:
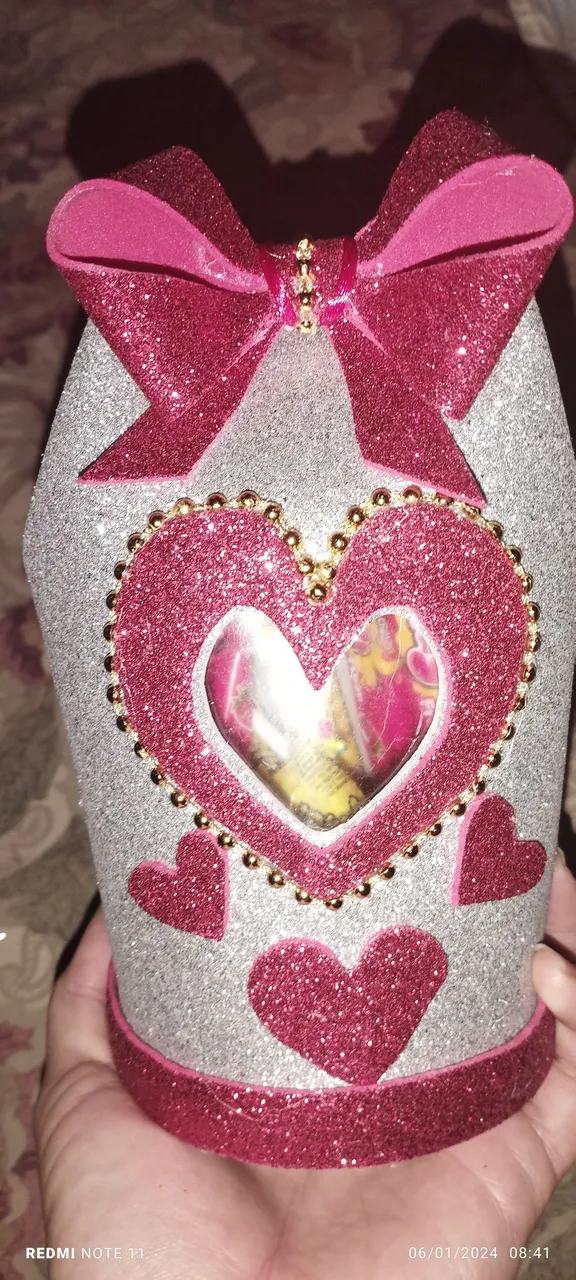
Una vez terminamos el circulo procedemos a pegar el rectángulo al rededor del círculo plateado y luego lo pegamos a finalizar las dos uniones, cortamos un listón de 5 centimetros de ancho y se va colocando en la parte baja del cotillon, este para una linda vista, le coloque una decoración dorada al rededor del corazón para que de un toque delicado también. Hacemos un dobles en la 0arte superior y le abrimos unos orificios dónde se colocaran la cinta con un lazo para cerrar y abrir.
Paso 7:
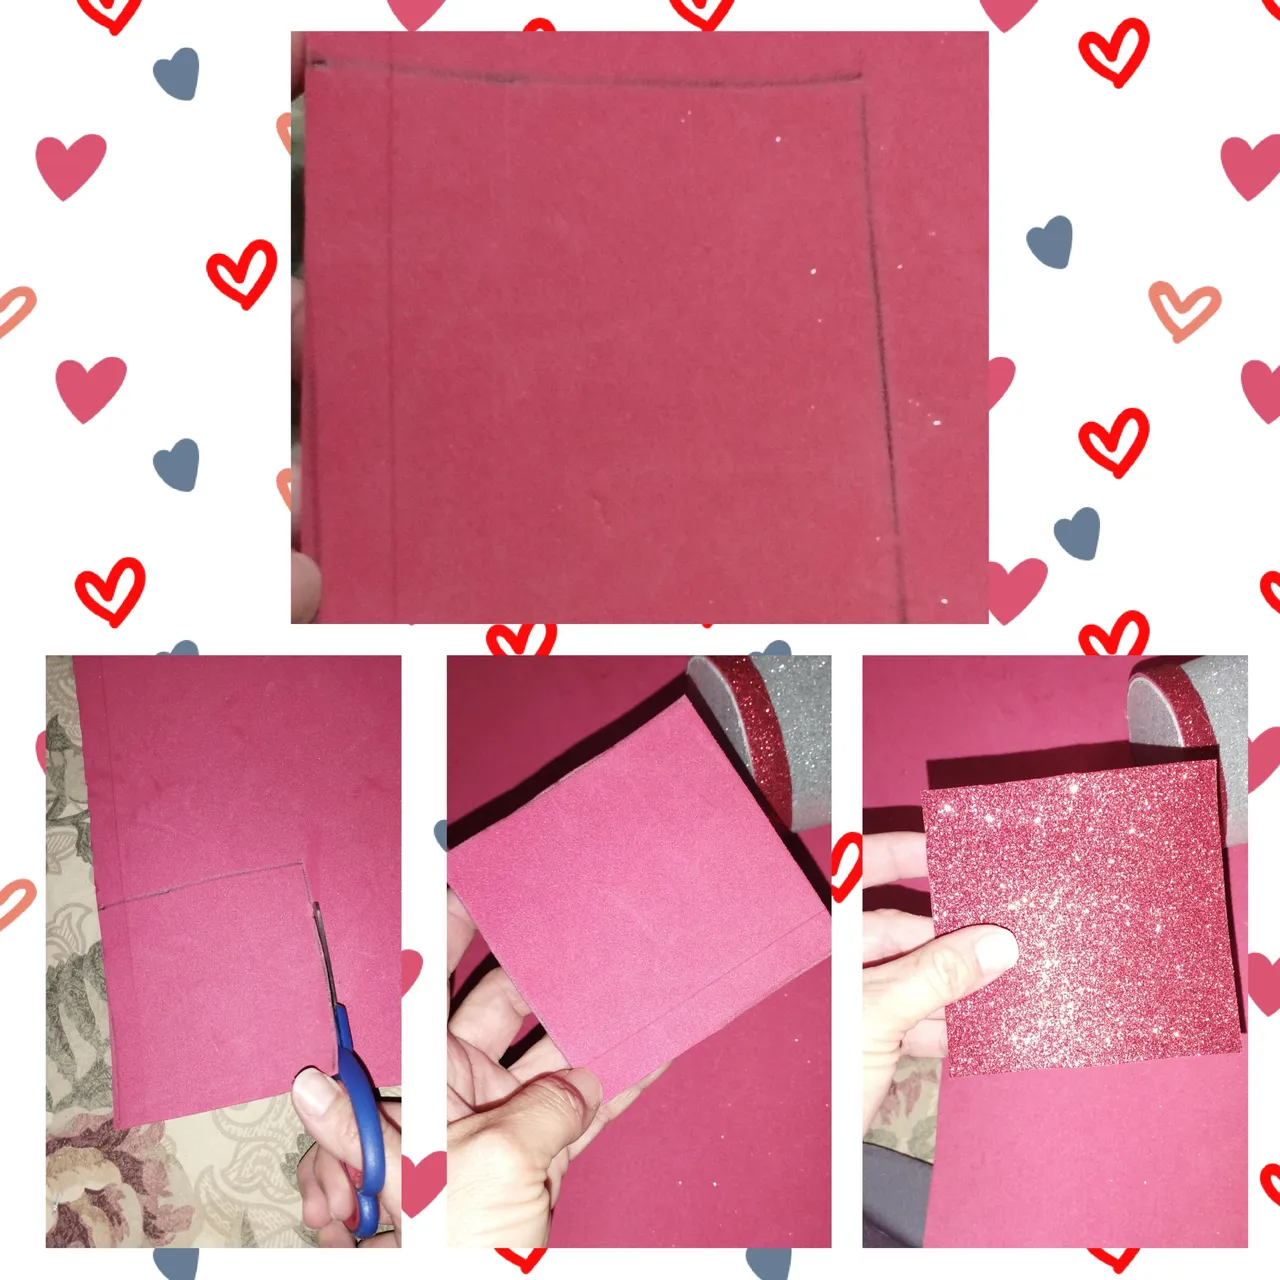
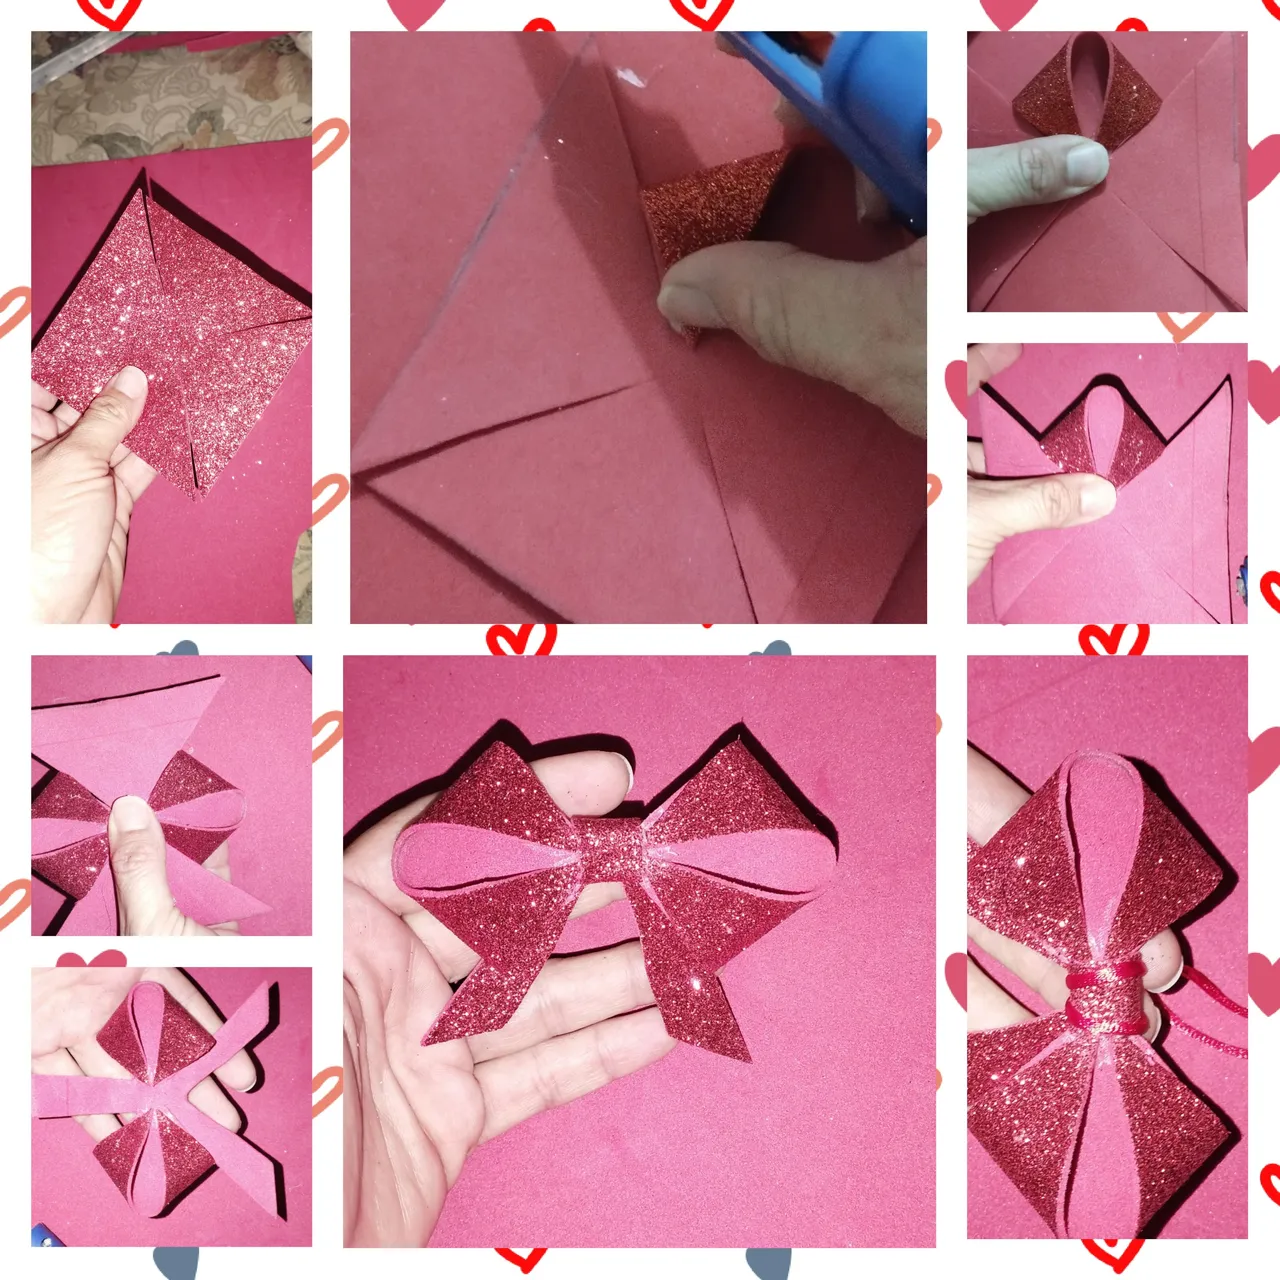
En un cuadrado de 10 centimetro de largo por 10 de ancho vamos a realizar un lazo para darle el último toque al dulcero.
Lo vamos a doblar y luego lo vamos a cortar cada lado en forma espiral en la imagen se dará cuenta como es la forma del lazo.
Ya al tener todo esto está listo nuestro dulcero añadimos algunos detalles yo le.coleque algunos corazones a los lados, esto es opcional si lo desean está bien y si no también es válido.
Hasta una próxima oportunidad amigos hivers. Bendiciones infinitas desde el universo y que sea un año prospero para todos.
¡Saludos!
Las imagenes me pertenecen, fueron tomadas de mi teléfono Redmi Note 11.
Las imágenes fueron editadas por programa de editor de fotos Polish.
traductor: Deepl Traslator.
English
A big greeting dear creative friends of @diyhub and @hive, greetings and blessings on this day of kings, just past Christmas and I'm already thinking about the day of love and friendship hahaha, but as they say it is better to be forewarned, this time I made a beautiful Foami Candy Box, with some recycled materials. As you know I really like to take care of the environment and whenever I can recover something or work with useful materials I do so. And if you knew that the things you least think about using are very useful.
The materials I used this time were the following:
Materials:
Frosted Foami: Silver and Red color.
Recycled cardboard.
✓ Transparent folder.
✓ Hot glue.
✓ Gold Decoration.
✓ Candy.
.
Step by Step:
Step 1:
We measure a rectangle 17 centimeters wide by 28 centimeters long, here we will have our body of the candy box or cotillion as it is also known.
Step 2:
On a piece of cardboard we mark a circle of 8 centimeters. The cardboard will be the base and also the red and silver circles that will be used later.
Step 3:
We will cut out the red circle of 8 centimeters also where we will draw the heart, fold in half and cut out the shape or we can also draw it and cut the lines.
Step 4:
Once ready we fold the rectangle in half, in the middle we glue the briefly cut heart and then cut out the center of the heart. We are going to take the heart out of the heart literally.
Step 5:
The 8 cm cardboard circle will be placed on the silver foami or if you wish you can cut out the silver circles and glue one on each side of the cardboard. Also cut from the transparent folder a square of approximately 4 centimeters this will be placed in the area of the heart so that it is sealed, I used a folder but you can also use acetate.
Step 6:
Once we finished the circle proceed to glue the rectangle around the silver circle and then glue it to finish the two joints, cut a ribbon 5 inches wide and is placed at the bottom of the cotillion, this for a nice view, I put a gold decoration around the heart to give a delicate touch too. We make a double in the upper part and we open some holes where the ribbon will be placed with a bow to close and open.
Step 7:
In a square 10 centimeters long and 10 centimeters wide we are going to make a bow to give the final touch to the candy box. We are going to fold it and then we are going to cut each side in a spiral shape in the image you will see the shape of the bow.
Once we have all this ready, our candy maker adds some details and I add some hearts to the sides, this is optional if you wish, it is fine and if not it is also valid.
Until next time, winter friends. Infinite blessings from the universe and may it be a prosperous year for everyone.
Greetings!
The images belong to me, they were taken from my Redmi Note 11 phone.
Images were edited by Polish photo editor program.
translator: Deepl Traslator.