Mi versión español.
¡Bienvenido a mi blog!
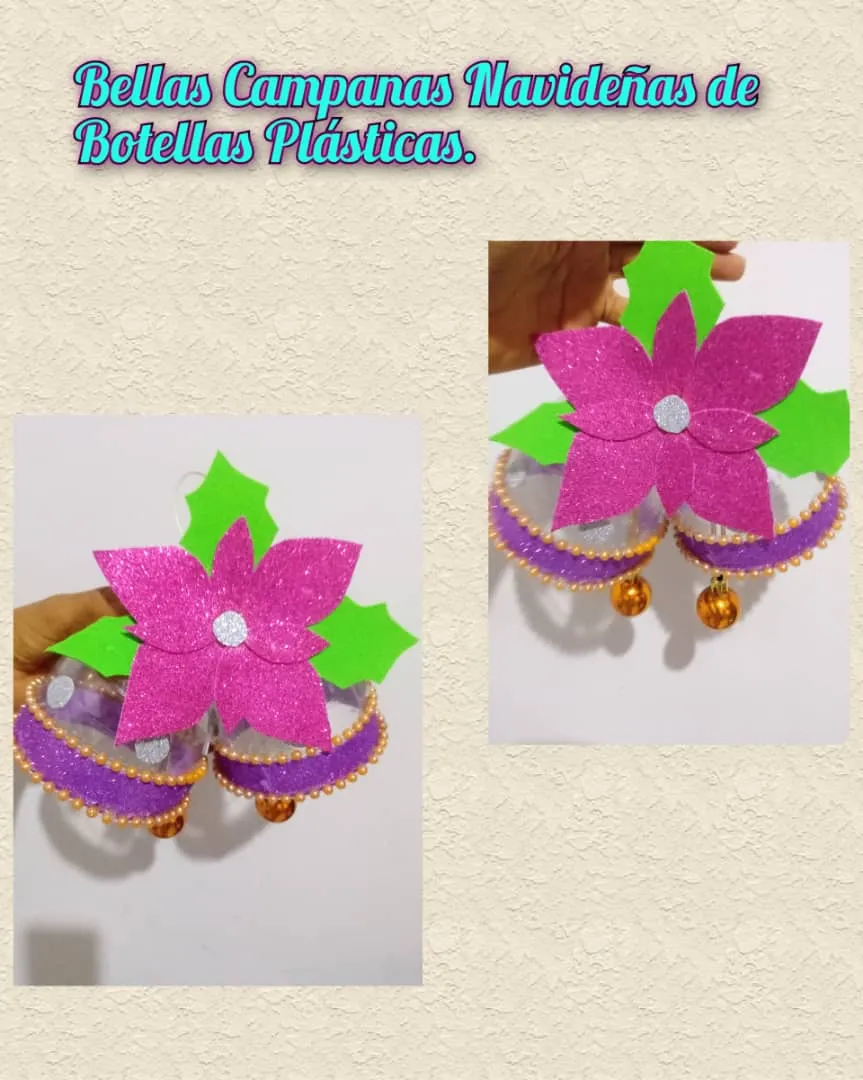
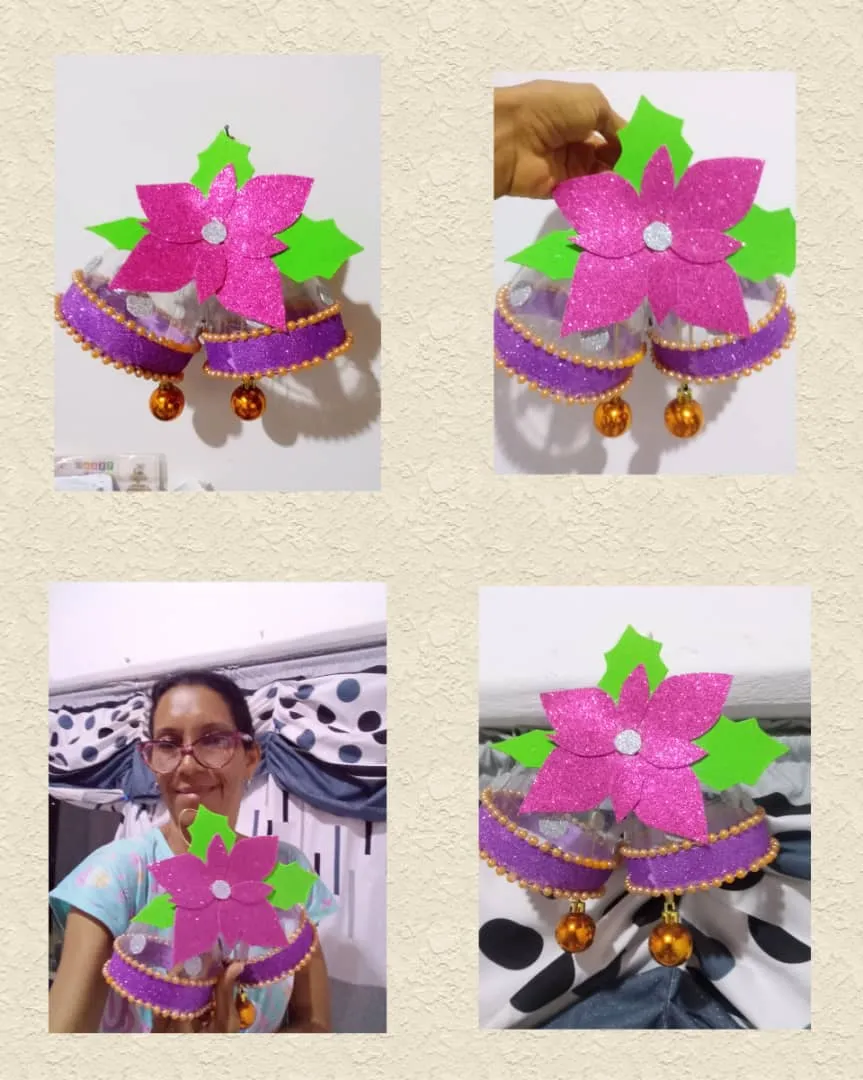
Hola a toda mi gente de esta comunidad, @DIYHub, es un placer regresar a esta linda comunidad, hoy le traigo como hacer unas bellas campanas navideñas de botellas plásticas. Estas bellas campanas navideñas se utilizaron los siguientes materiales, botellas plásticas, vacía de reciclada, foami escarchado de varios colores, cadena corrida de perla, tijera, exalto, 2 esferas de color dorado, cinta dorada, silicona. La idea de diseñar están lindas campanas navideñas es porque se acerca la temporada de navideña y me voy organizando donde la voy a colocar este caso, la utilizares en la entrada de la puerta, ellas se ven muy linda, la puede colocar en el arbolito o en la esquina de la ventada donde la ponga se ven muy linda, además son fácil de hacer lo mejor que esto adorno son económico porque se realiza con materiales reciclaje.
Vamos a mostrarle los materiales a utilizar y el paso a paso.
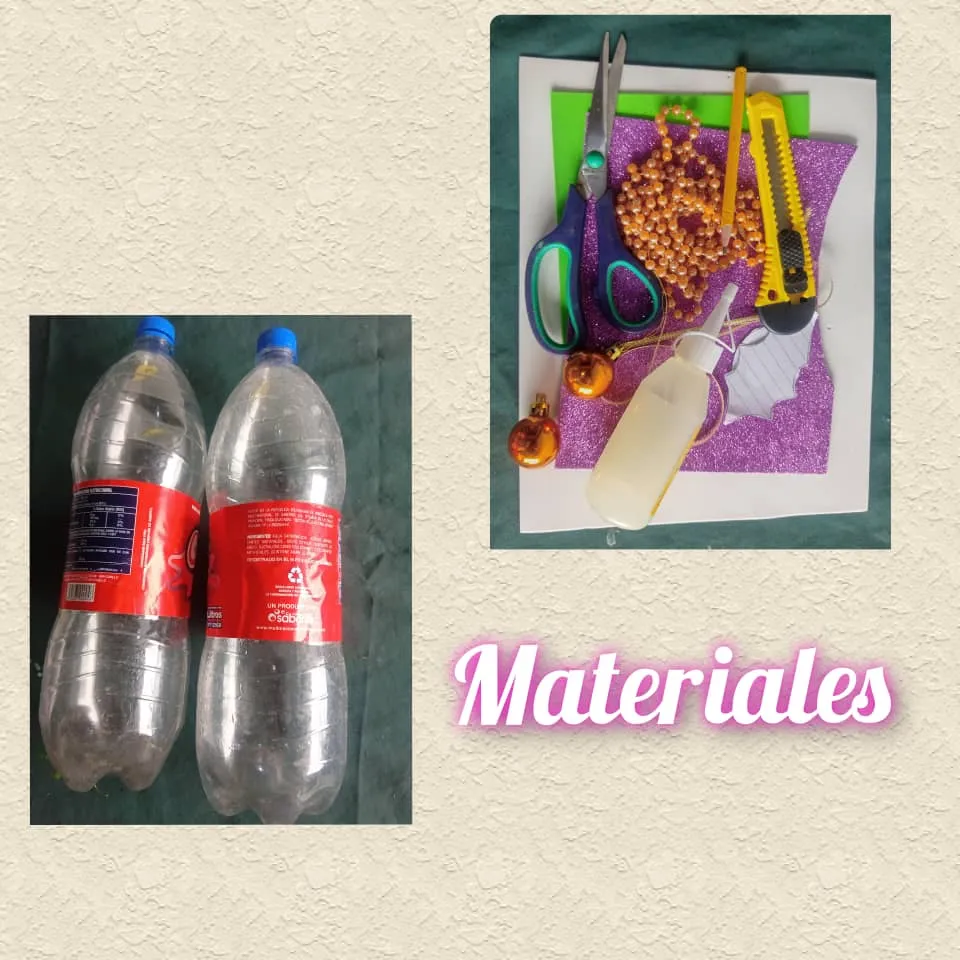
Materiales.
- 2 botellas plásticas.
- 2 esferas pequeña de color dorado.
- 4 pedazo de Foami de color fucsia, verde, color lila y plateado.
- 1 tijera.
- 1 exalto.
- 1 silicona
- 50 centímetro cadena corrida de perla de color dorada.
- 30 centímetro de cinta dorada.
Paso.
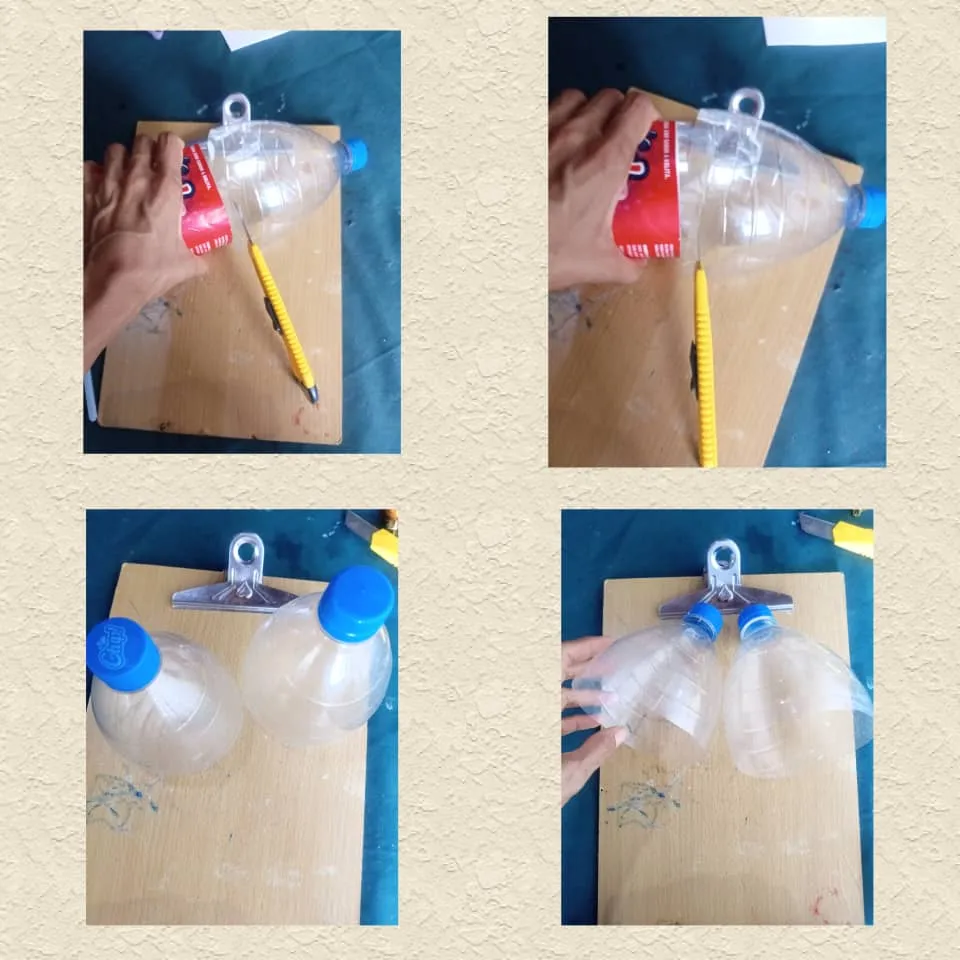
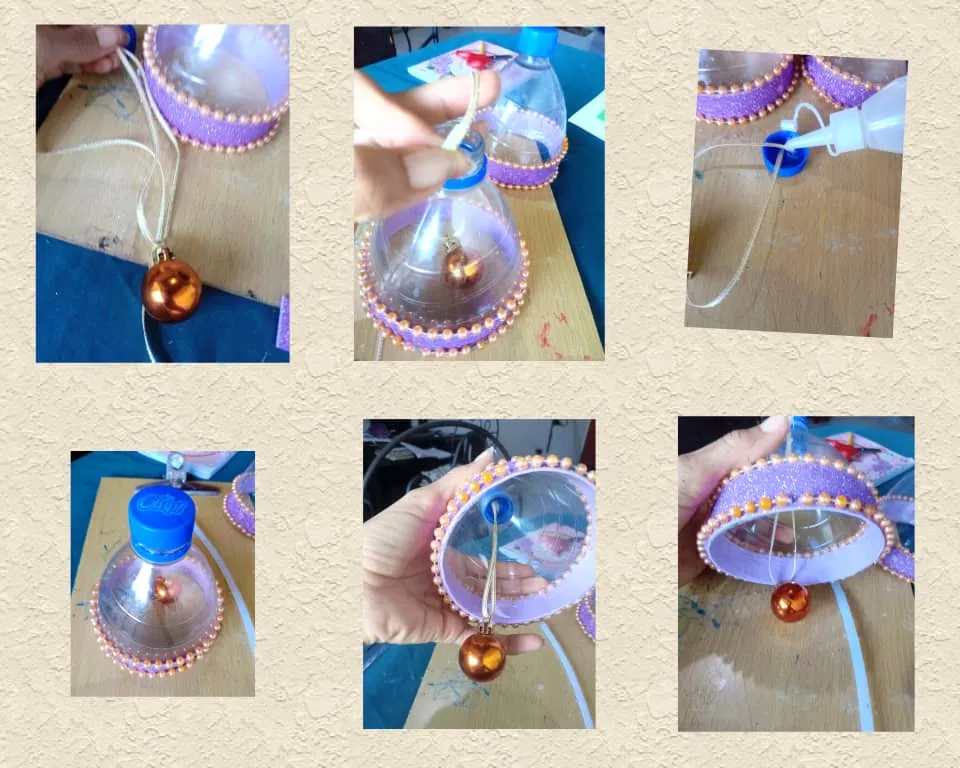
- Picamos la parte superior de las dos botellas.
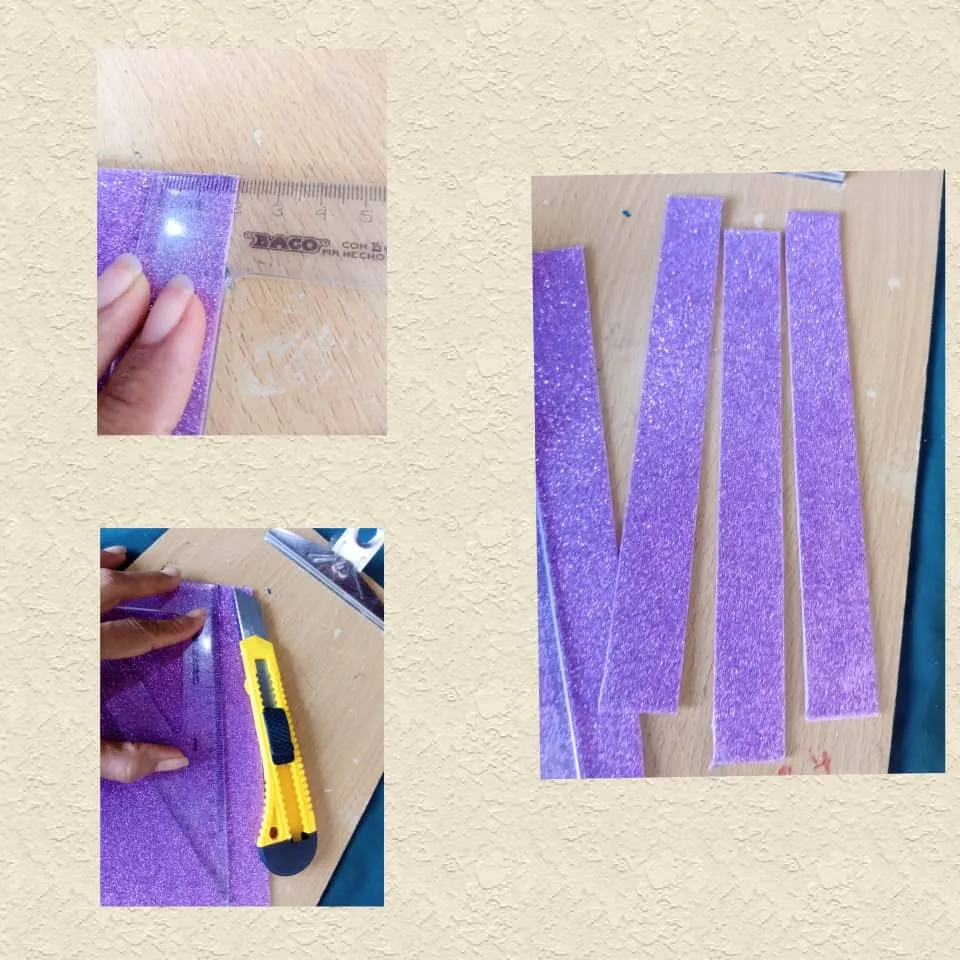
- Después recortamos 4 tiras de foami que mida 2 centímetro de ancho por 20 centímetro de largo.
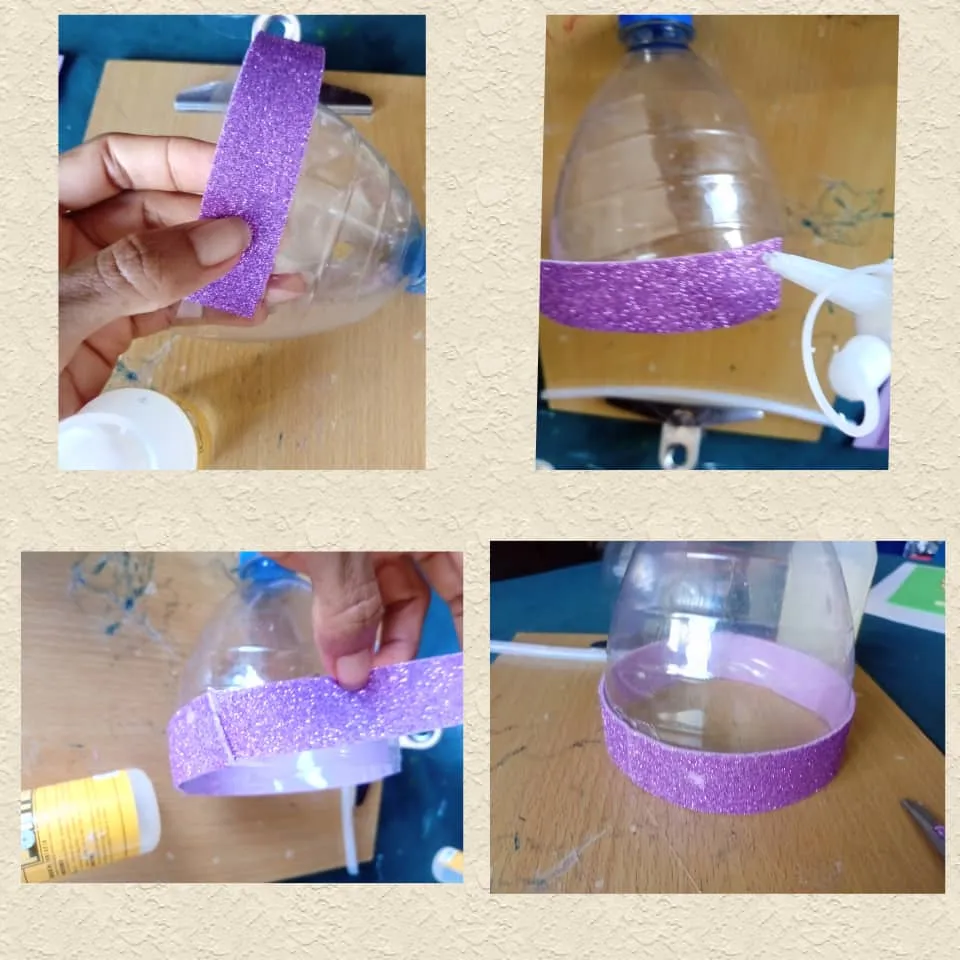
Ahora pegamos por toda la orilla de la botella con la tira del foami de color lila.
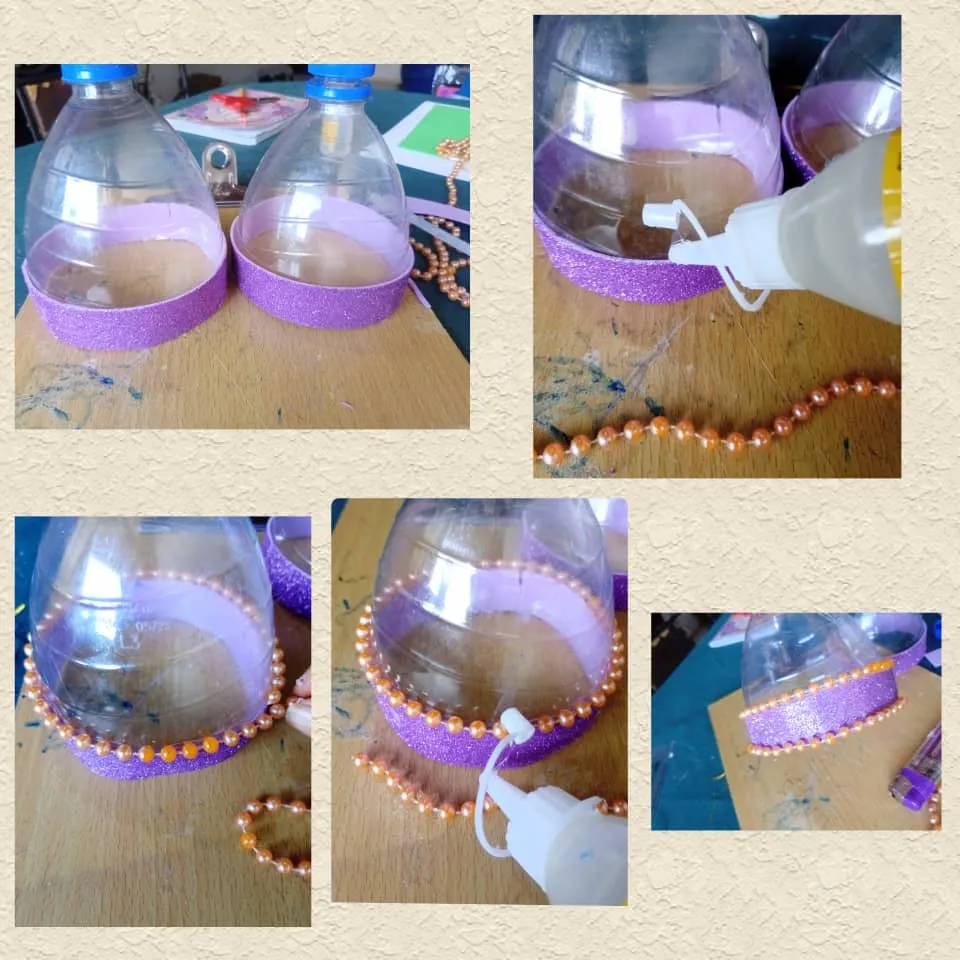
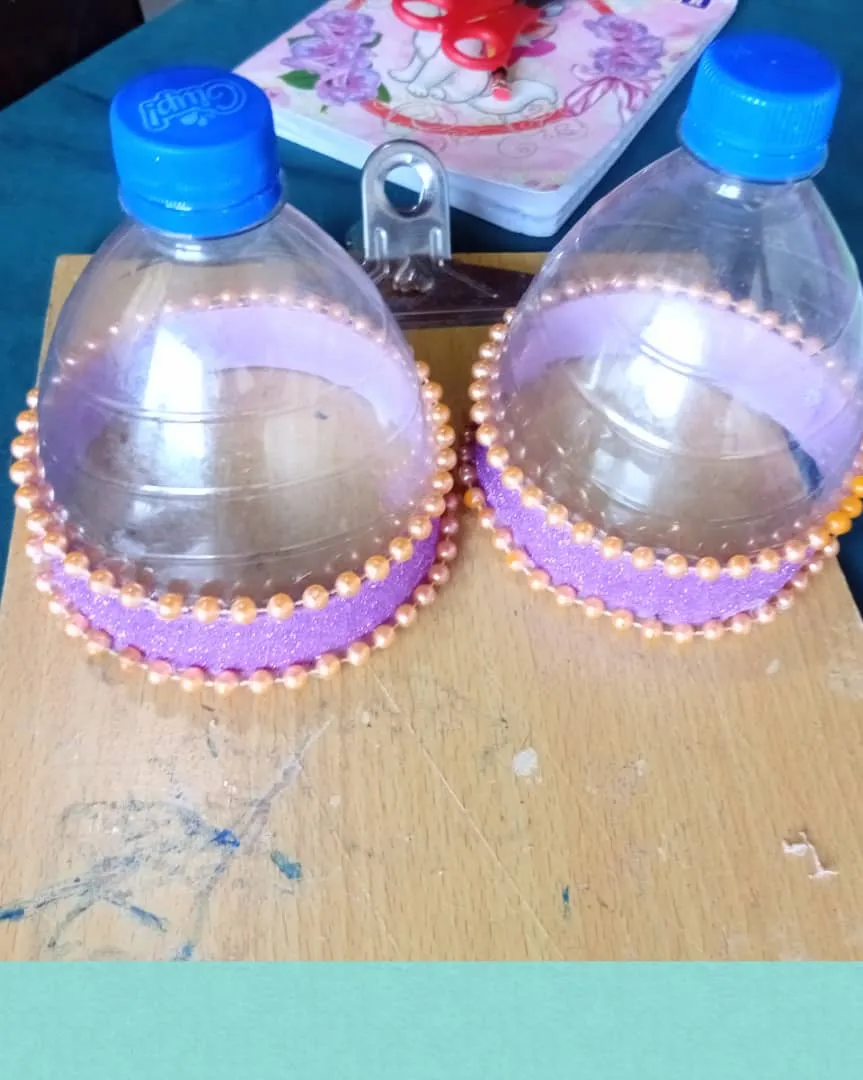
Ya pegada las tiras en ambas botellas, vamos pegando la perla corrida por todo el alrededor de las tiras del foami en ambas botellas.
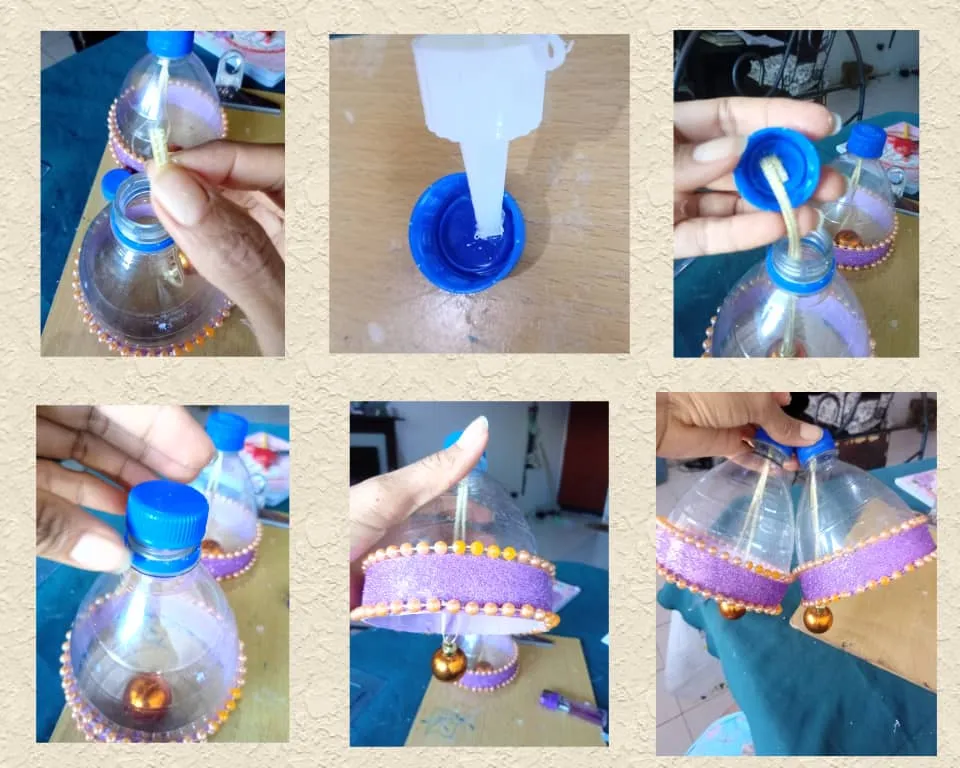
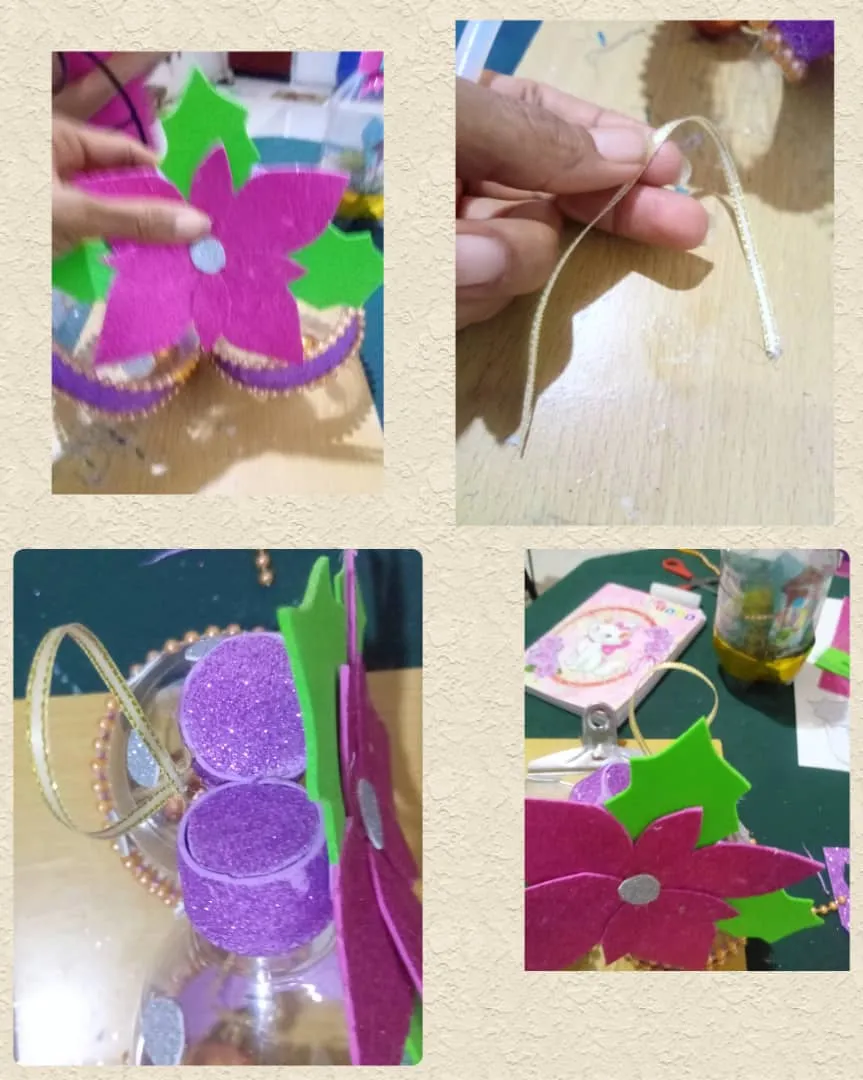
- Procedemos a colocar la esfera dorada en el medio de la botella, picamos 15 centímetro de cinta y la pegamos en la tapa de la botella, luego colocamos la tapa en la botella y la cerramos, vea que no queda en el medio de la botella y se va formando la campana, el mismos procedimiento lo aplicamos en segunda botella y tenemos ambas botellas lista.
Tomo un pedazo de foami de color plateado y hacemos varios círculos lo recortamos con la tijera y luego lo pegamos por toda las partes de la botella vea que va agarrando forma.
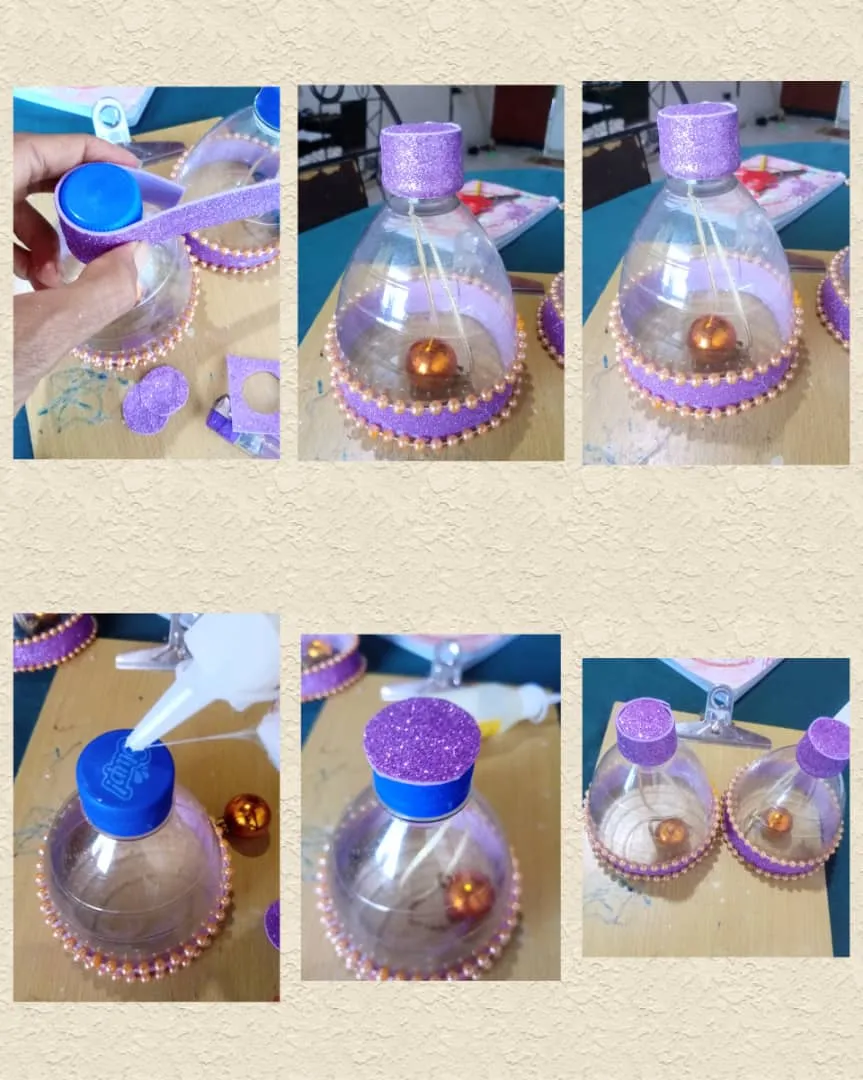
Luego forramos la punta de la tapa de la botella con foami de color lila, recortamos 2 tiras de 8 centímetro de largo por 2 centímetro de ancho y dos tapas redonda recortada de foami la pego en la tapa y pegamos la tiras por alrededor.
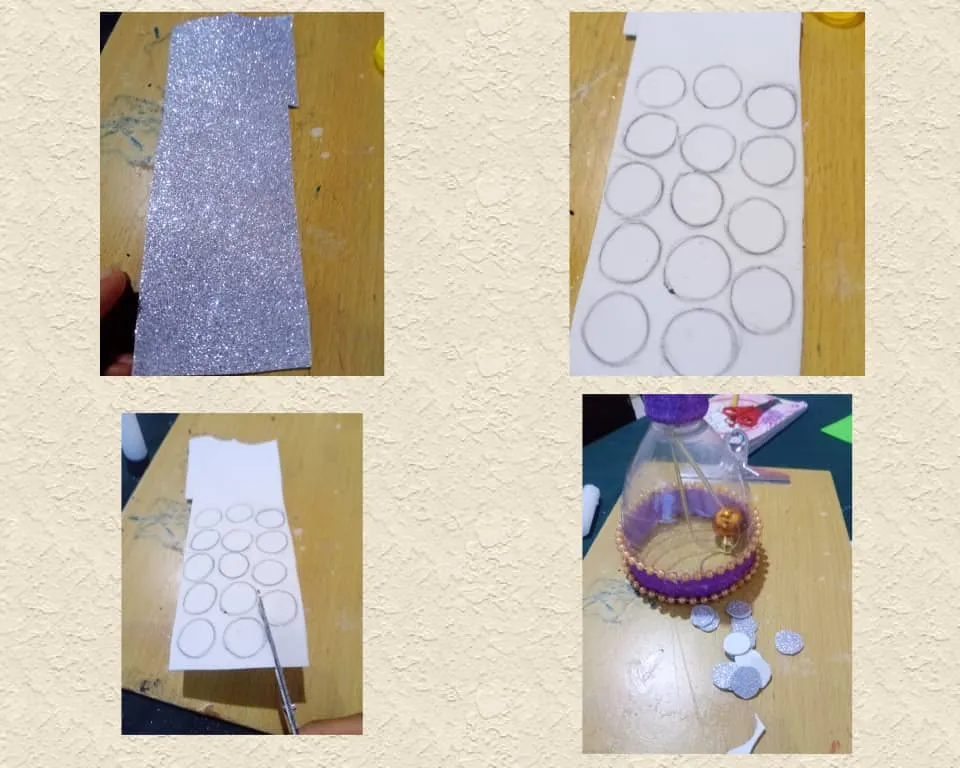
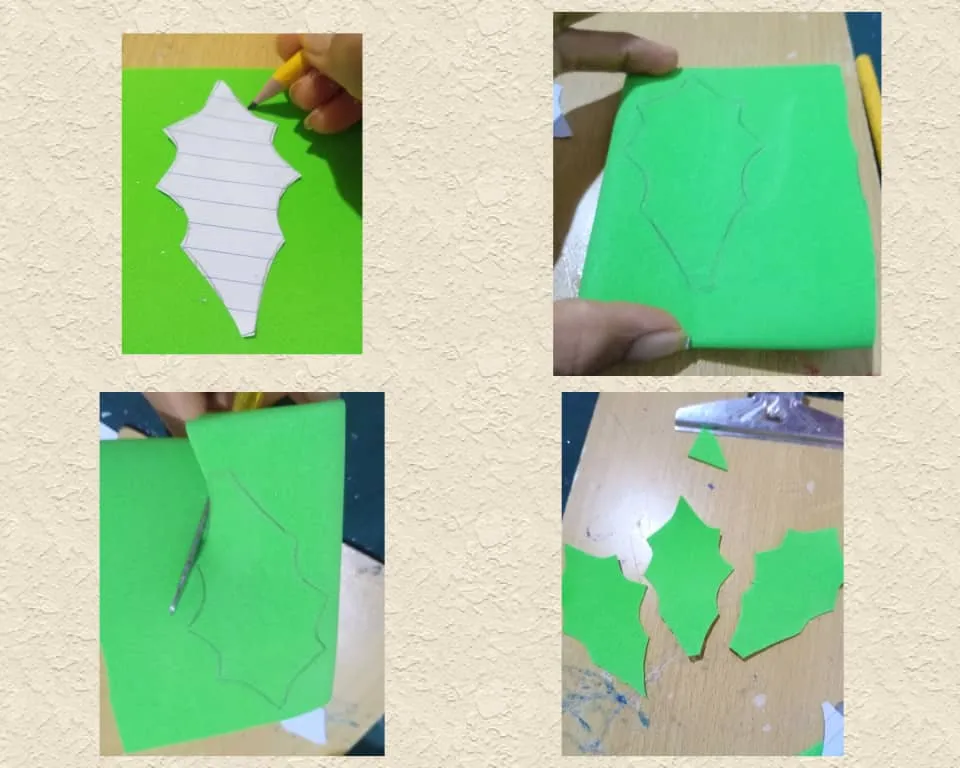
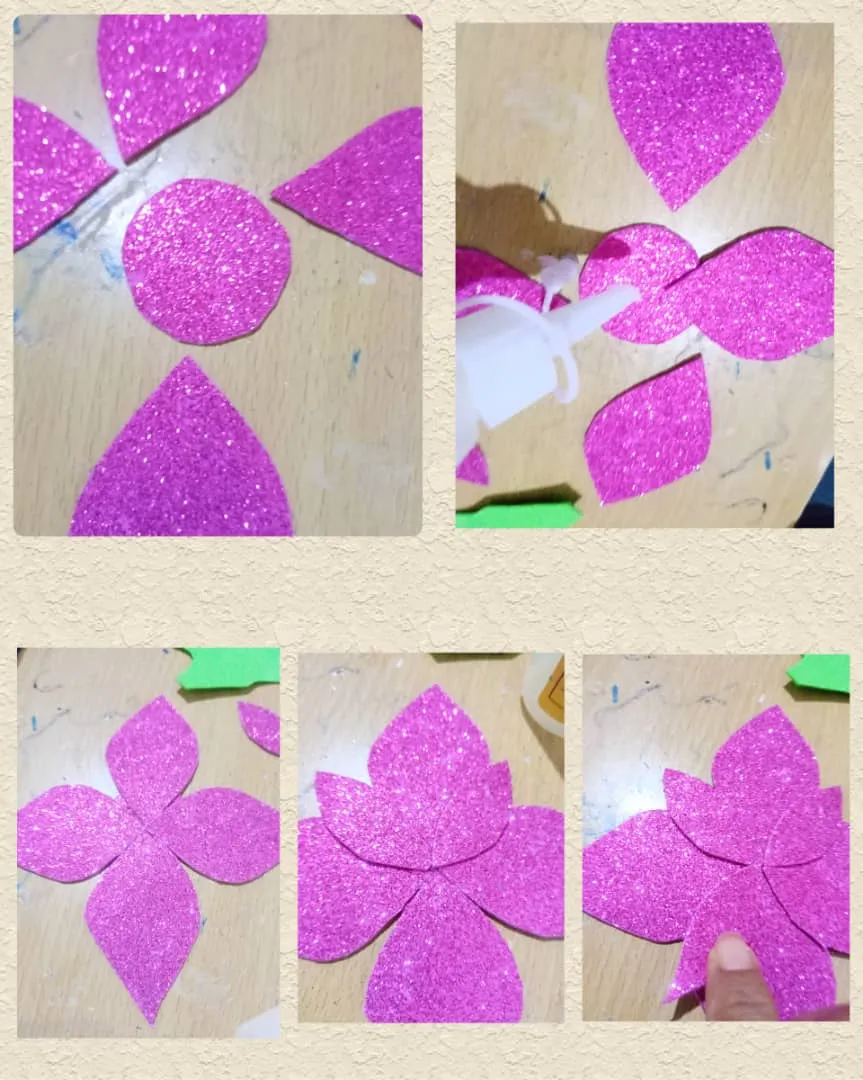
Comienzamos hacer una flor de navidad, marcamos en el foami las 3 hojas de navidad y los 4, pétalo grande y 4 pequeño, los recortamos hacemos un círculos donde vamos diseñando la flor de navidad hasta tenerla lista.
Ahora juntamos las dos botellas y la pegamos con silicona y después pegamos la flor en el medio de la botella , le pegamos una cinta en la parte de atrás para guidar las campanas navideñas. Tengo mi campana lista.

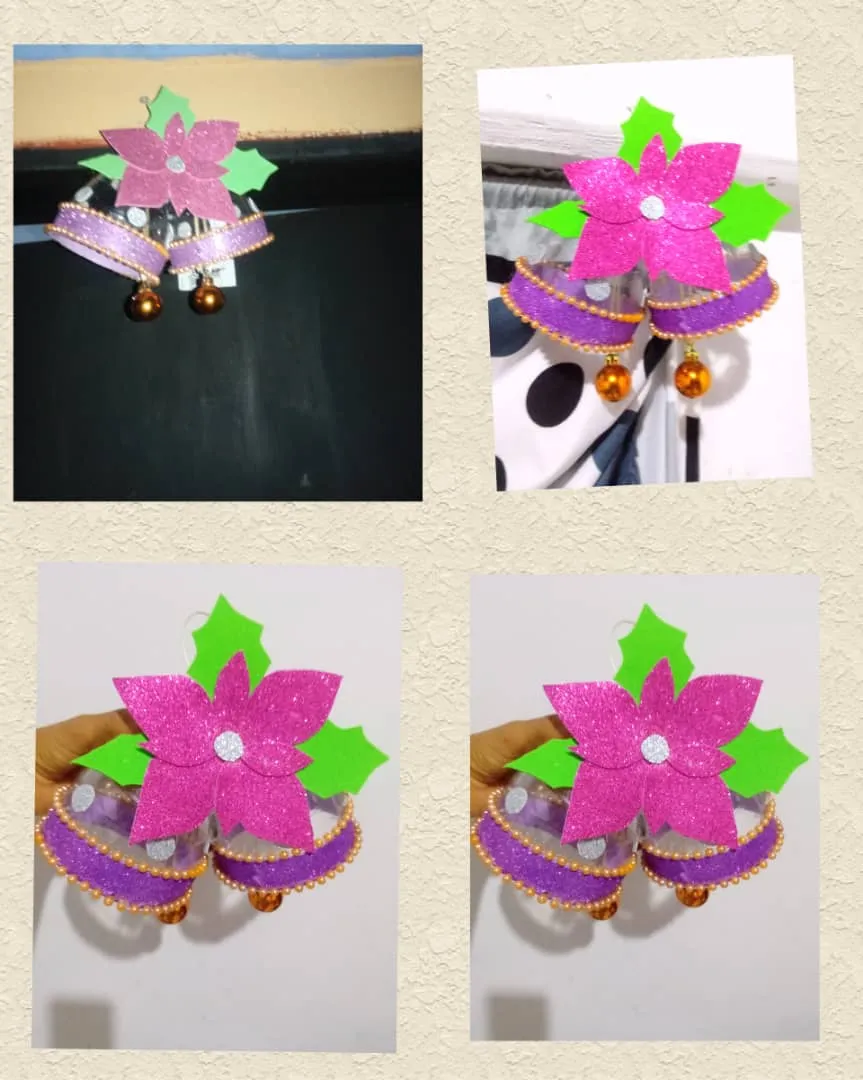
- Vea el proceso final, me quedo muy lida la colocares en la entrada de la puerta.
Tenga un feliz días y bendecidos para todos muchas gracias por leer mi post.

Las fotos son mías, tomadas con teléfono alcatel , editadas con incollage y traducidas con Deepl.
Mi versión inglesa.
¡Bienvenido a mi blog!
Hello to all my people of this community, @DIYHub, it is a pleasure to return to this nice community, today I bring you how to make some beautiful Christmas bells from plastic bottles. These beautiful Christmas bells were used the following materials, plastic bottles, recycled empty, frosted foami of various colors, pearl chain, scissors, exalto, 2 gold colored spheres, gold ribbon, silicone. The idea of designing these beautiful Christmas bells is because the Christmas season is approaching and I am organizing where I am going to place them in this case, I will use them at the entrance of the door, they look very nice, you can place them on the tree or in the corner of the window where you put them, they look very nice, they are also easy to make and the best thing about this ornament is that they are economical because they are made with recycled materials.
Let's show you the materials to use and the step by step.
Materials.
- 2 plastic bottles.
- 2 small golden spheres.
- 4 pieces of Foami of fuchsia, green, lilac and silver color.
- 1 scissors.
- 1 exalt.
- 1 silicone
- 50 centimeters of gold-colored pearl chain.
- 30 centimeter of golden ribbon.
Step.
- We chop the top of the two bottles.
- Then we cut out 4 strips of foami measuring 2 centimeters wide by 20 centimeters long.
Now we glue all around the edge of the bottle with the lilac colored foami strip.
Once the strips are glued on both bottles, we glue the pearl all around the foami strips on both bottles.
- We proceed to place the golden sphere in the middle of the bottle, we chop 15 centimeter of tape and stick it on the bottle cap, then we place the cap on the bottle and close it, see that it does not remain in the middle of the bottle and the bell is forming, the same procedure we apply it in second bottle and we have both bottles ready.
I take a piece of silver-colored foami and make several circles cut it out with the scissors and then glue it all over the parts of the bottle to see that it takes shape.
Then we cover the tip of the bottle cap with foami lilac color, cut 2 strips of 8 centimeters long by 2 centimeters wide and two round tops cut out of foami I glue it on the lid and glue the strips around.
- We start making a Christmas flower, we mark on the foami the 3 Christmas leaves and the 4, big and 4 small petals, we cut them out, we make a circle where we design the Christmas flower until we have it ready.
- Now we put the two bottles together and glue it with silicone and then glue the flower in the middle of the bottle, we glue a ribbon on the back to guide the Christmas bells. I have my bell ready.
- See the final process, I got a very nice placement at the entrance of the door.
Have a happy day and blessed to all thank you very much for reading my post.
The photos are mine, taken with alcatel phone , edited with incollage and translated with Deepl.