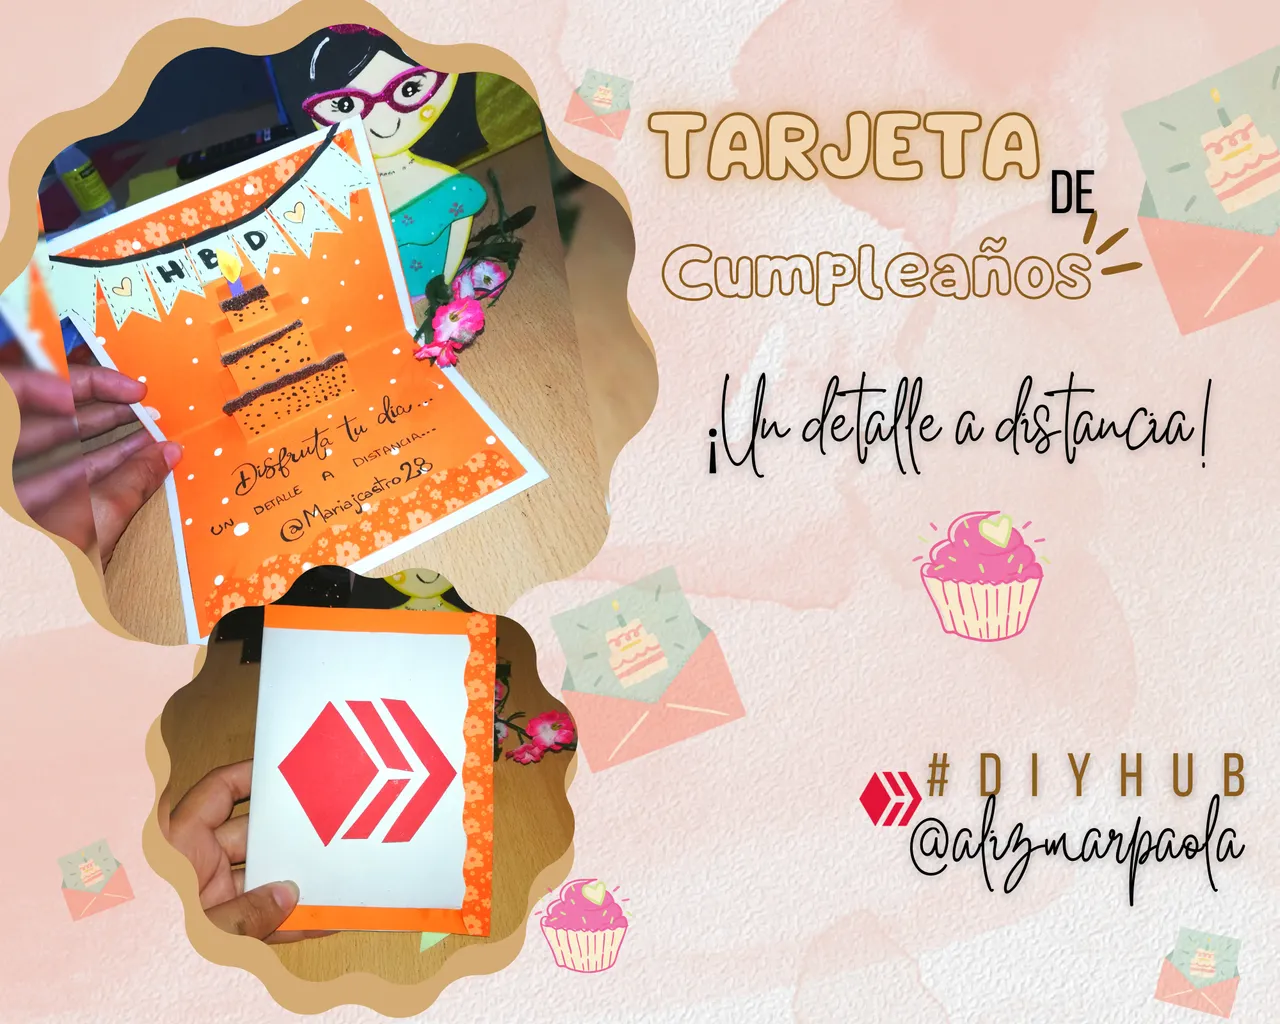
Ahora bien, pienso que Hive es tan grande y magnífico que nos regala la oportunidad de conocer así sea de forma virtual a personas increíbles, capaz de brindar apoyo en cualquier momento y más aun brindar una amistad. El dia de ayer, estuvo de cumpleaños mi querida amiga hiver @mariajcastro28, y aunque no nos conocemos personalmente siento como si la conociera de años jaja, y no quise pasar desapercibido su día y aún en la distancia le realice un detalle especial..
Espero les guste, aquí les comparto el proceso..✨
I hope you have a Happy and Beautiful Sunday✨! full of good energy and health, for my part I feel fine.
Now, I think that Hive is so great and magnificent that gives us the opportunity to meet incredible people, even in a virtual way, able to provide support at any time and even more to provide a friendship. Yesterday, my dear friend hiver @mariajcastro28 had her birthday, and although we don't know each other personally I feel like I've known her for years haha, and I didn't want to pass unnoticed her day and even in the distance I made her a special detail...
I hope you like it, here I share with you the process...✨

Pará esta tarjeta de cumpleaños, utilice lo siguiente:
- Cartulinas de colores
- Silicón
- Marcador negro
- Regla y tijeras
For this birthday card, please use the following:
- Colored card stock
- Silicone
- Black marker
- Ruler and scissors
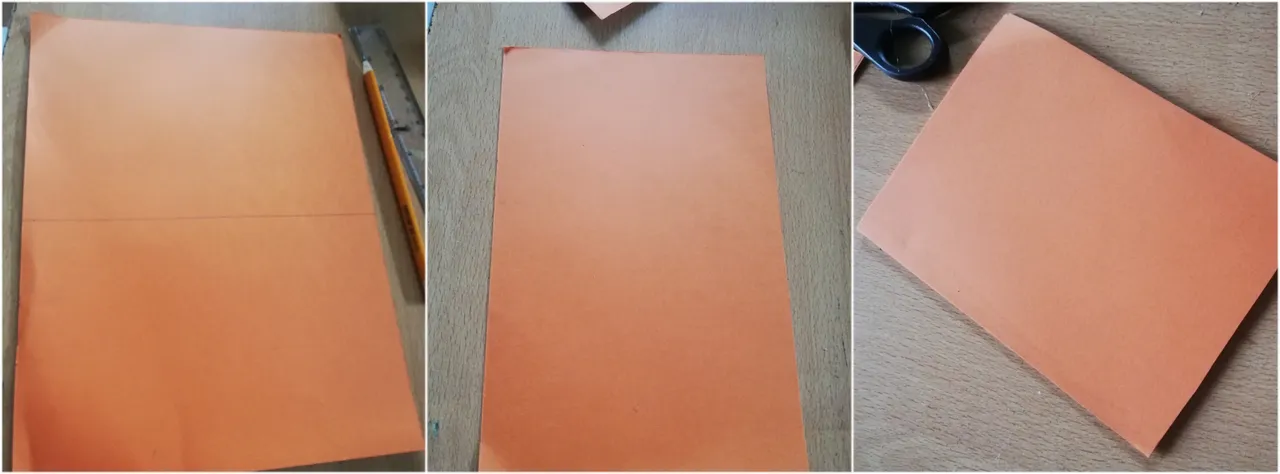
✨1- En una hoja de cartulina de 28cm verticalmente, medi la mitad, es decir 14cm y recorté, para luego doblar nuevamente esta a la mitad.
✨1- On a 28cm sheet of cardstock vertically, I measured half, i.e. 14cm and cut out, then folded this in half again.
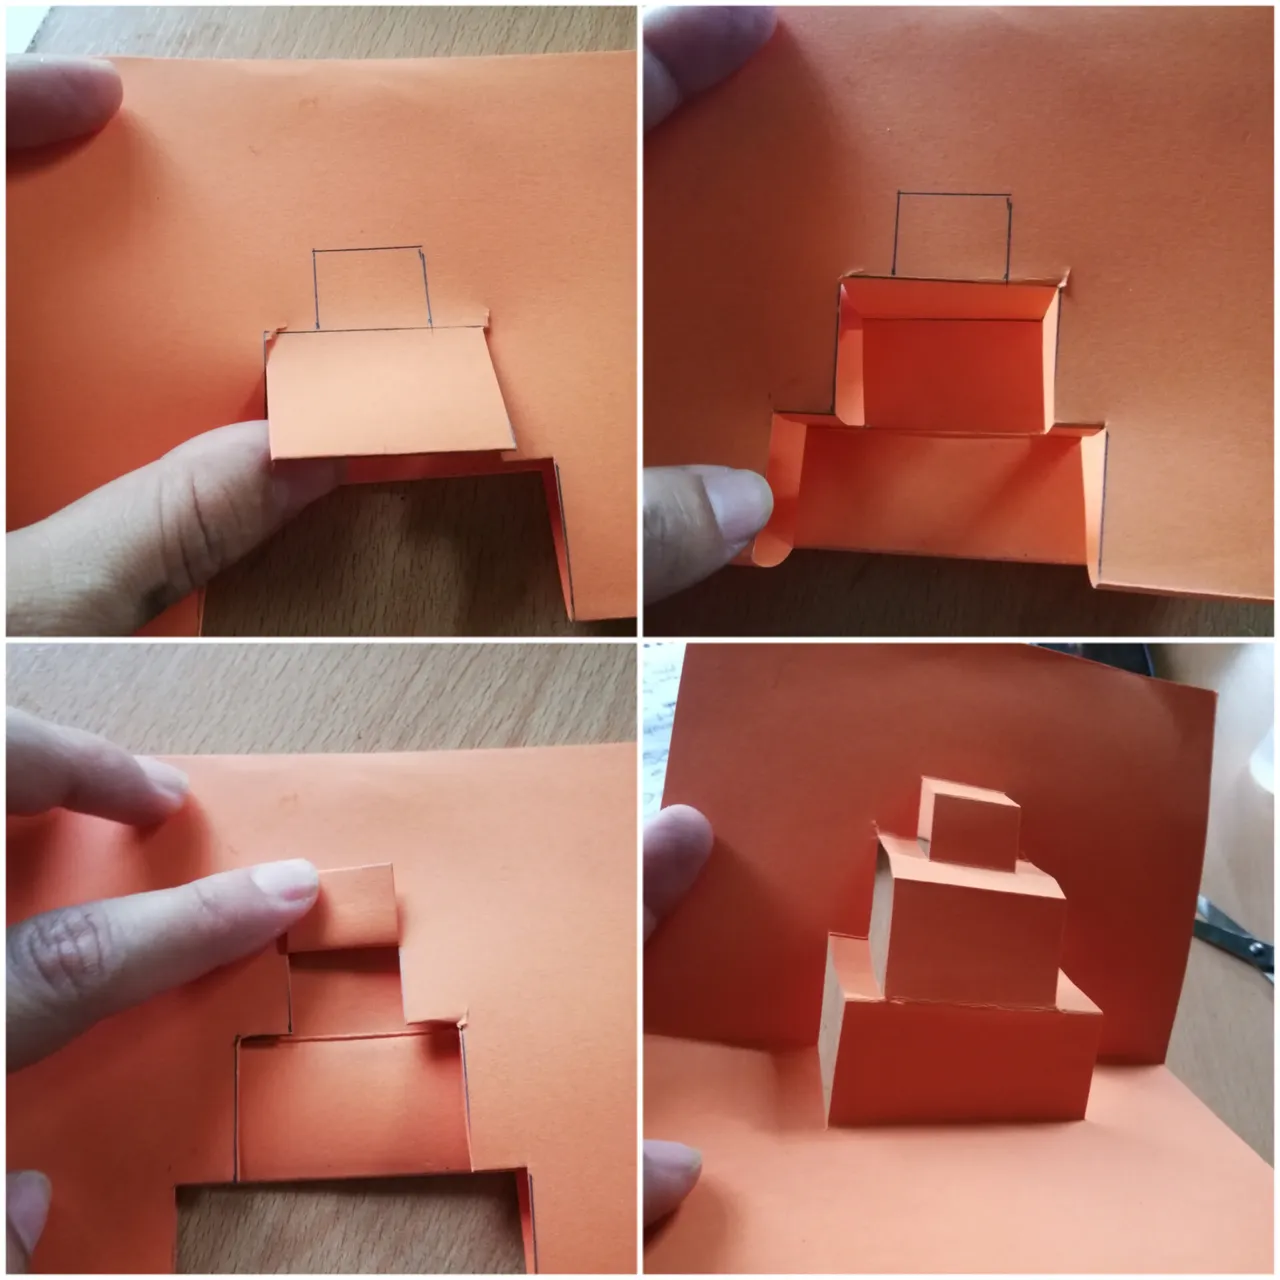
✨2- Seguí trabajando en el costado del doblez, y allí tomé medidas a los 4cm, 6cm y restando 4cm. Luego comencé a trabajar en la medida de 6cm midiendo 2,5cm en forma horizontal y formando un pequeño rectangulo. Luego hice lo mismo pero un rectangulo más pequeño, así como lo aprecian en la imagen (con sus medidas)
✨2- I continued working on the side of the fold, and there I took measurements at 4cm, 6cm and subtracting 4cm. Then I started working on the 6cm measurement by measuring 2.5cm horizontally and forming a small rectangle. Then I did the same but a smaller rectangle, as you can see in the image (with its measurements).
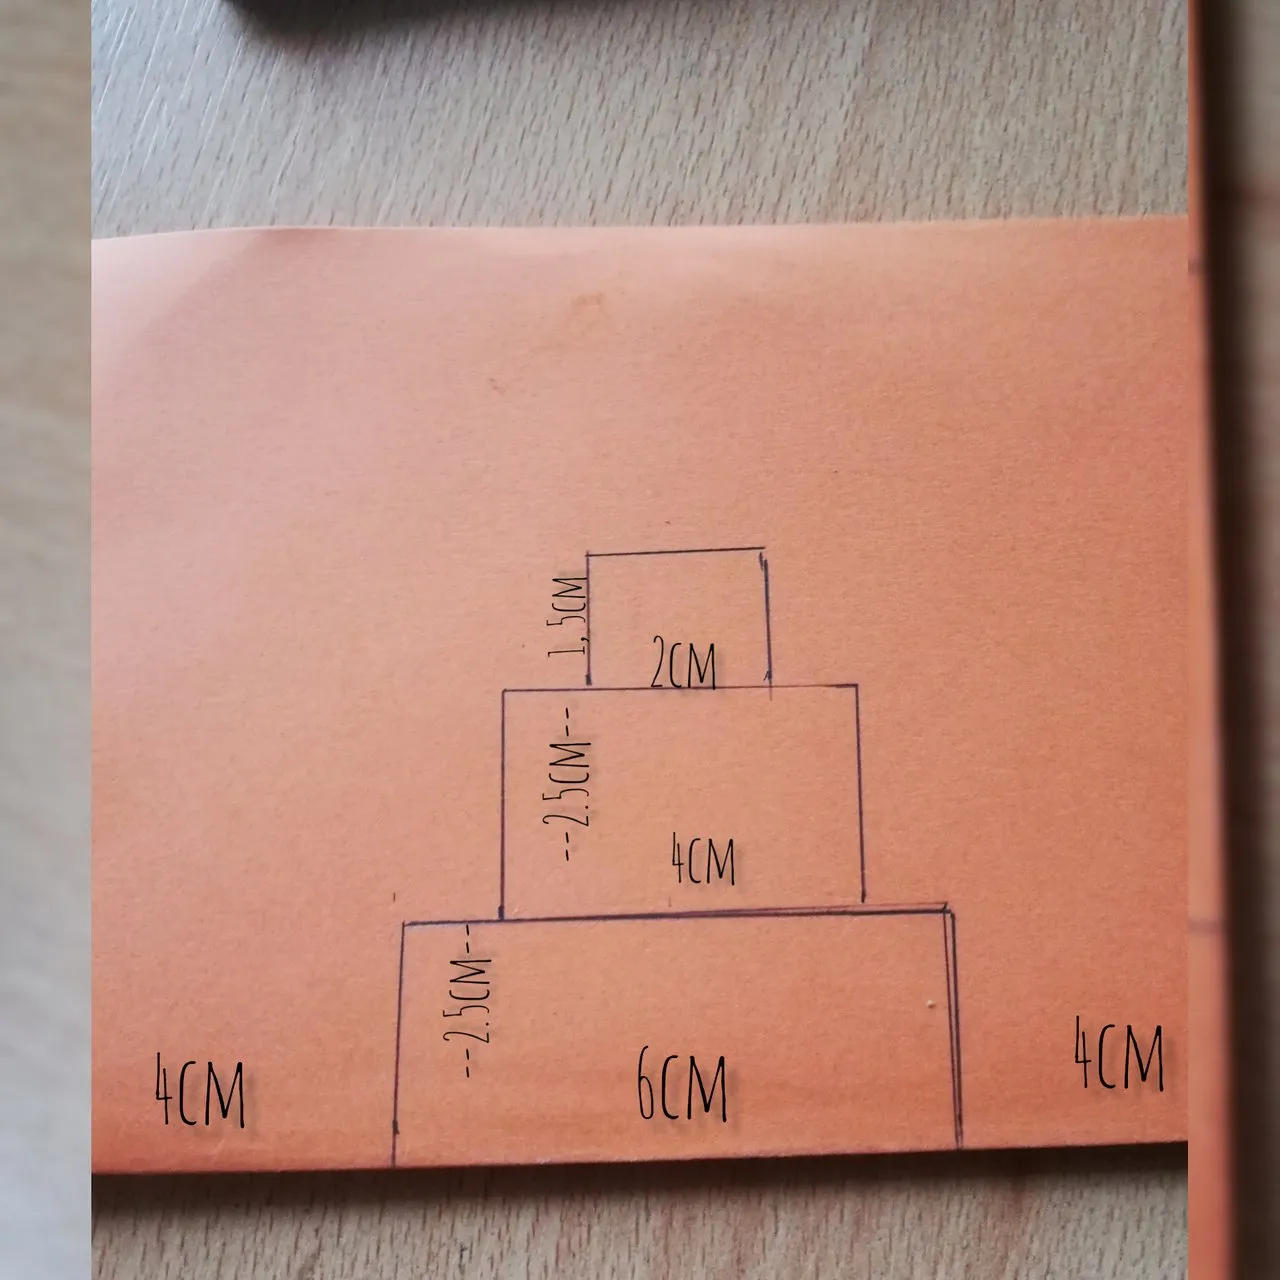
✨3- Una vez listos los rectangulos, corte las líneas horizontal de 2,5cm y marque bien el doblez ayudandome con una regla, luego desdoble haciendo este hacia dentro, para repetír el proceso con los dos rectangulos restantes, los cuales al momento de abrir la tarjeta se apreciararian en forma 3D como lo muestra la imagen.
✨3- Once the rectangles are ready, cut the horizontal lines of 2,5cm and mark well the fold with the help of a ruler, then unfold it inwards, to repeat the process with the two remaining rectangles, which at the moment of opening the card will be appreciated in a 3D shape as shown in the image.

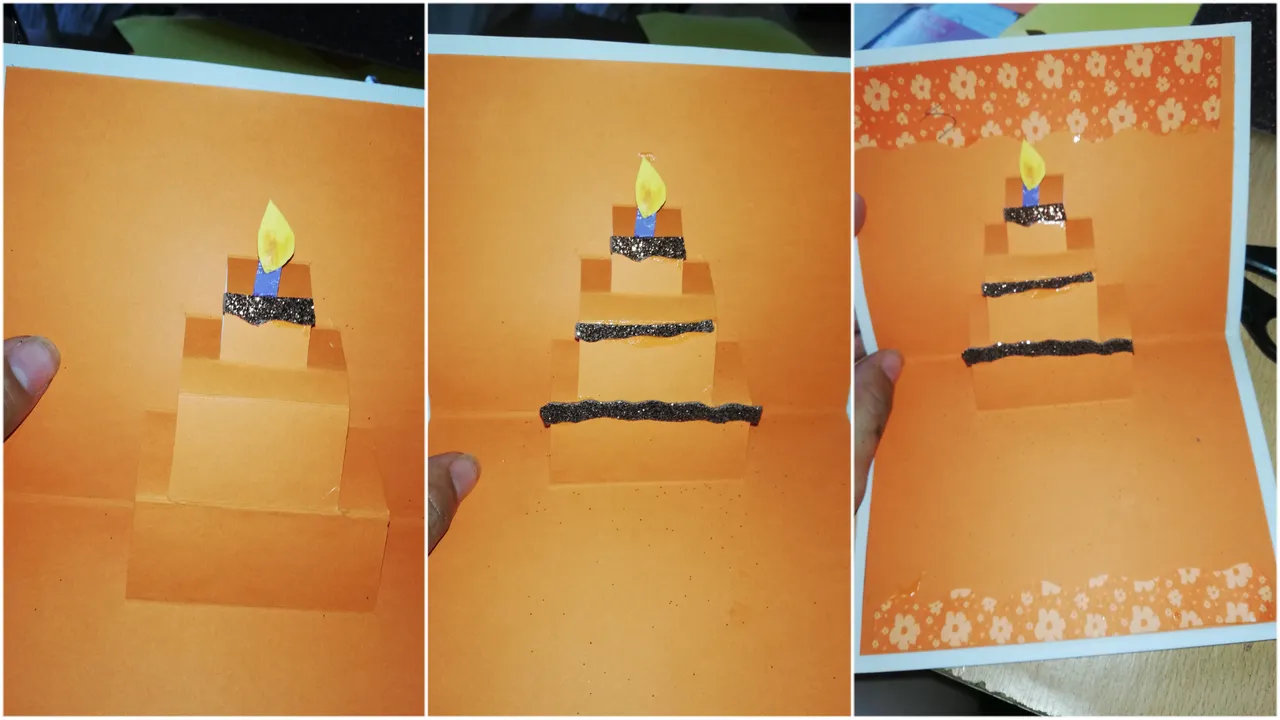
✨4- Luego pegue esta tarjeta sobre una cartulina blanca y recorte dejando un pequeño borde.
✨4- Then glue this card onto a white cardstock and cut out leaving a small border.

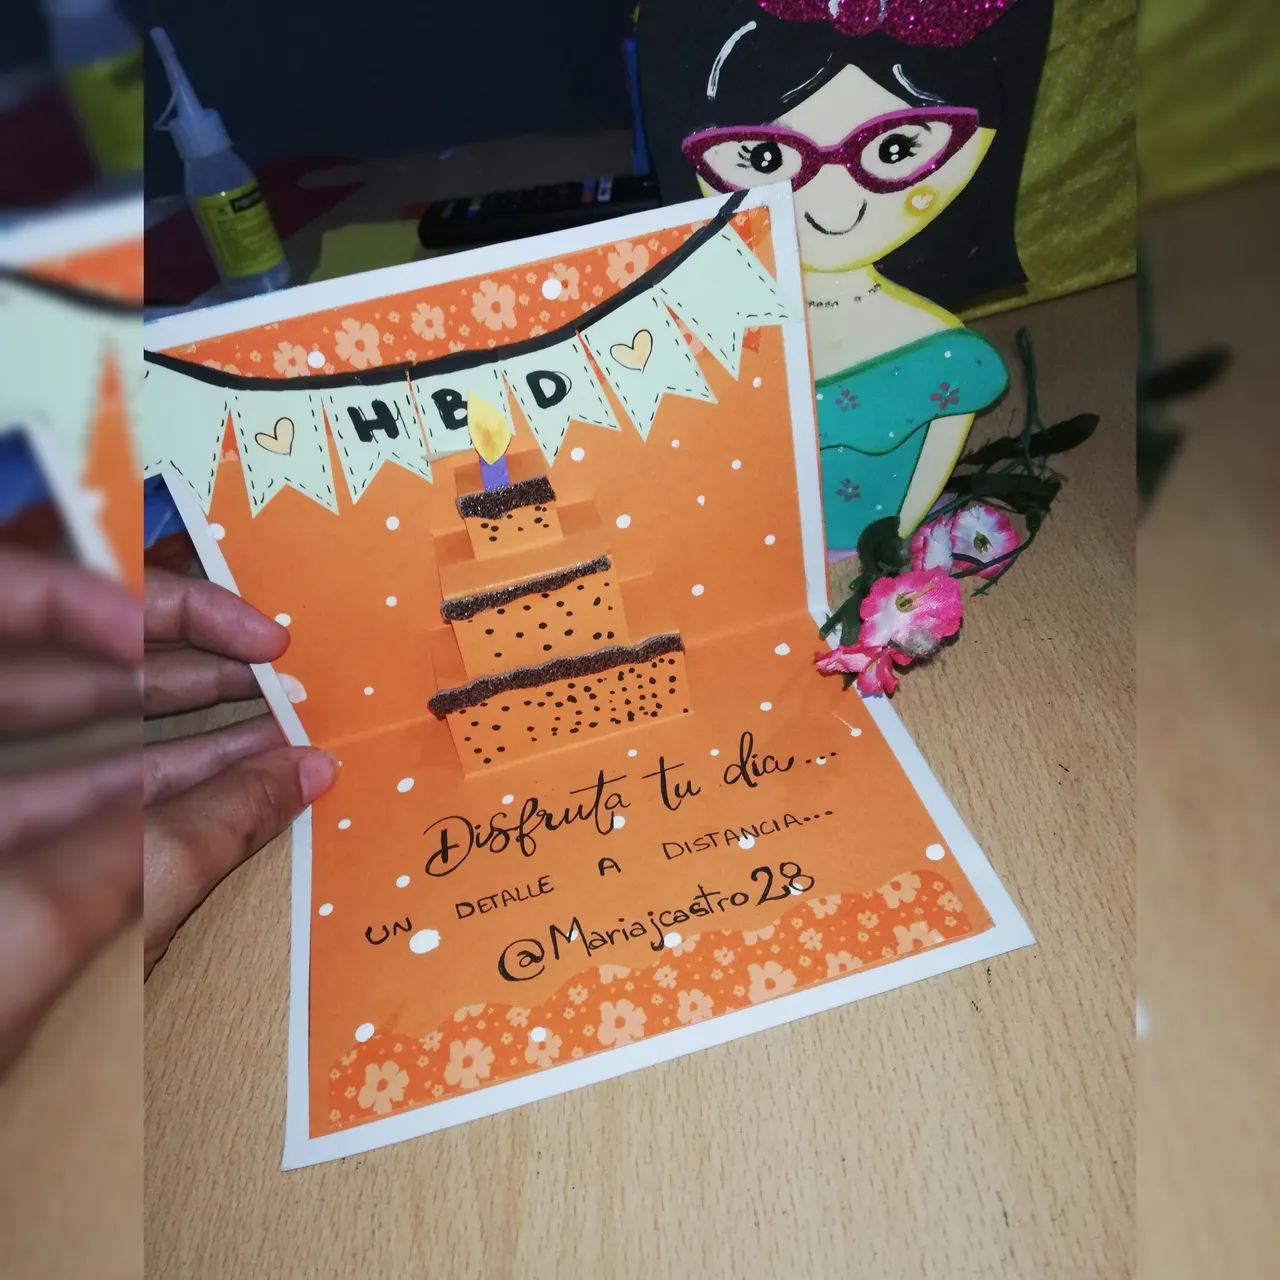
✨5- Pará decorar el interior, hice con retazos mínimos lo que sería una vela y pegue en el rectangulo más pequeño, luego pegue algunas tiras de foami escarchado para simular el glaseado de chocolate de la torta🤭. Veía esto muy simple así que corte dos tiras en cartiluna naranja estampada y pegue al inicio y al final de la tarjeta.
✨5- To decorate the inside, I made with minimal scraps what would be a candle and glued it in the smallest rectangle, then glued some strips of frosted foami to simulate the chocolate frosting on the cake🤭. I saw this as very simple so I cut two strips of stamped orange cartiluna and glued at the beginning and end of the card.
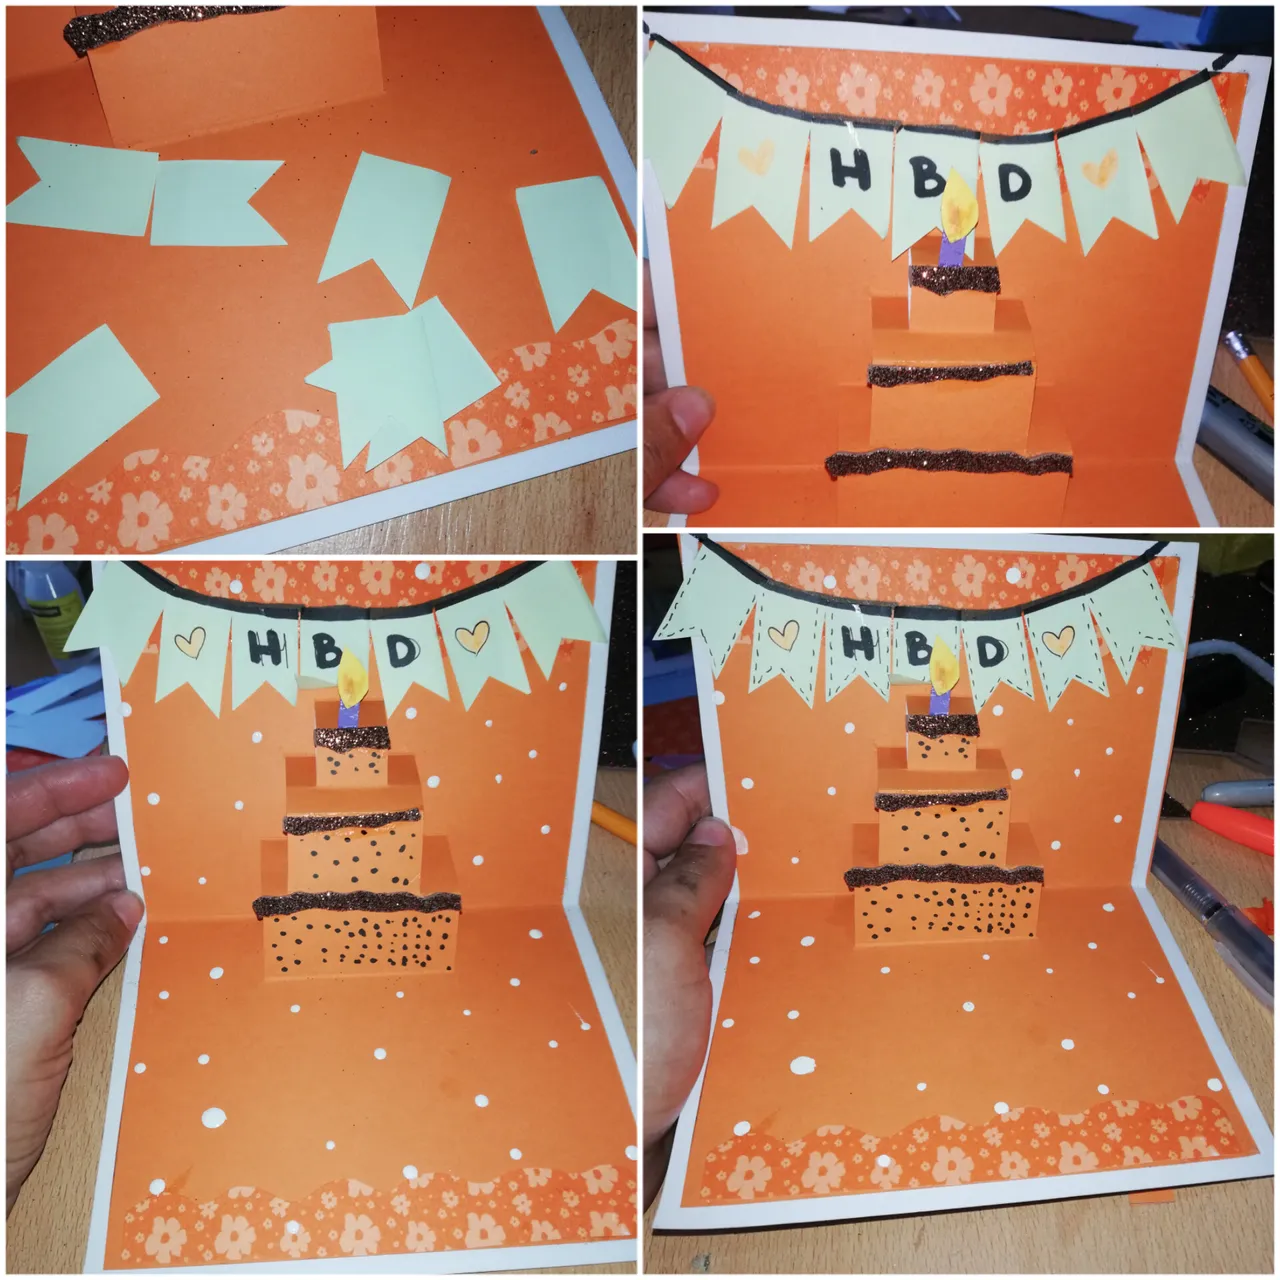
✨6- Con una hoja de color, corte una tira e hice un mini banderin el cual pegue en forma arqueada justo arriba de la torta, para el cordón utilice marcador negro y escribí HBD lo que sería Happy Birthday, también utilicé un marcador punta extra fina para hacer un marco de líneas al banderin, con un pincel hice pequeños puntos blancos por toda la tarjeta, al estos secar agregue un mensaje escrito.
✨6- With a colored sheet, I cut a strip and made a mini banner which I glued in an arched shape just above the cake, for the string I used black marker and wrote HBD which would be Happy Birthday, I also used an extra fine tip marker to make a line frame to the banner, with a brush I made small white dots all over the card, when these dried I added a written message.
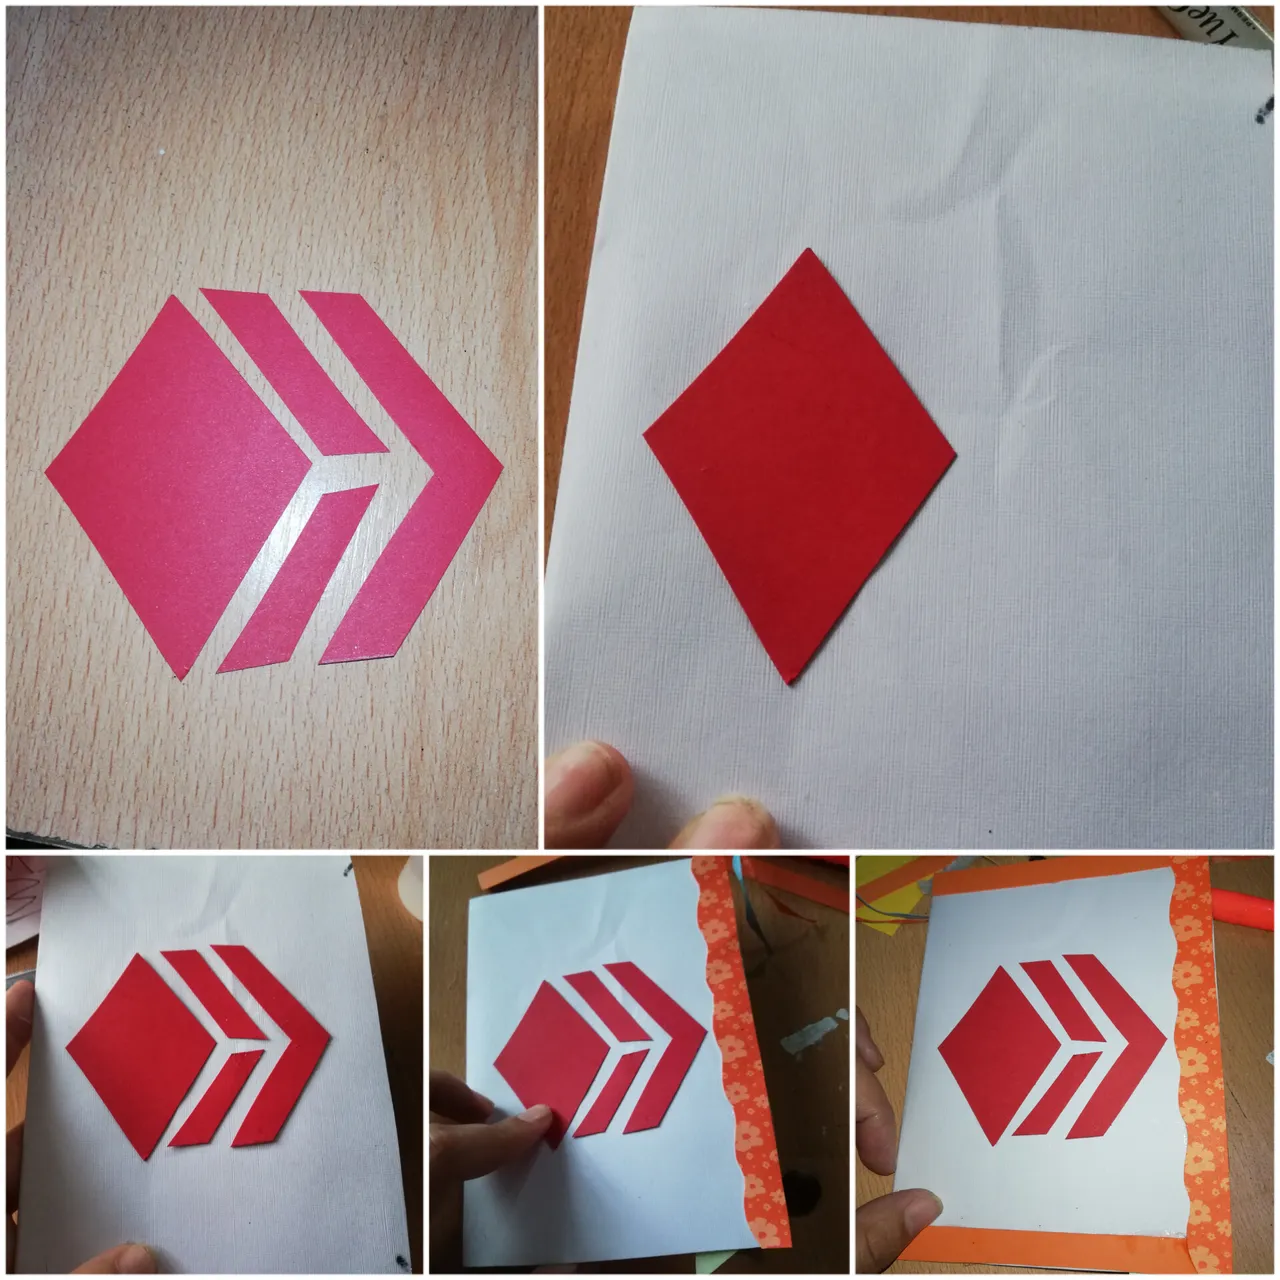
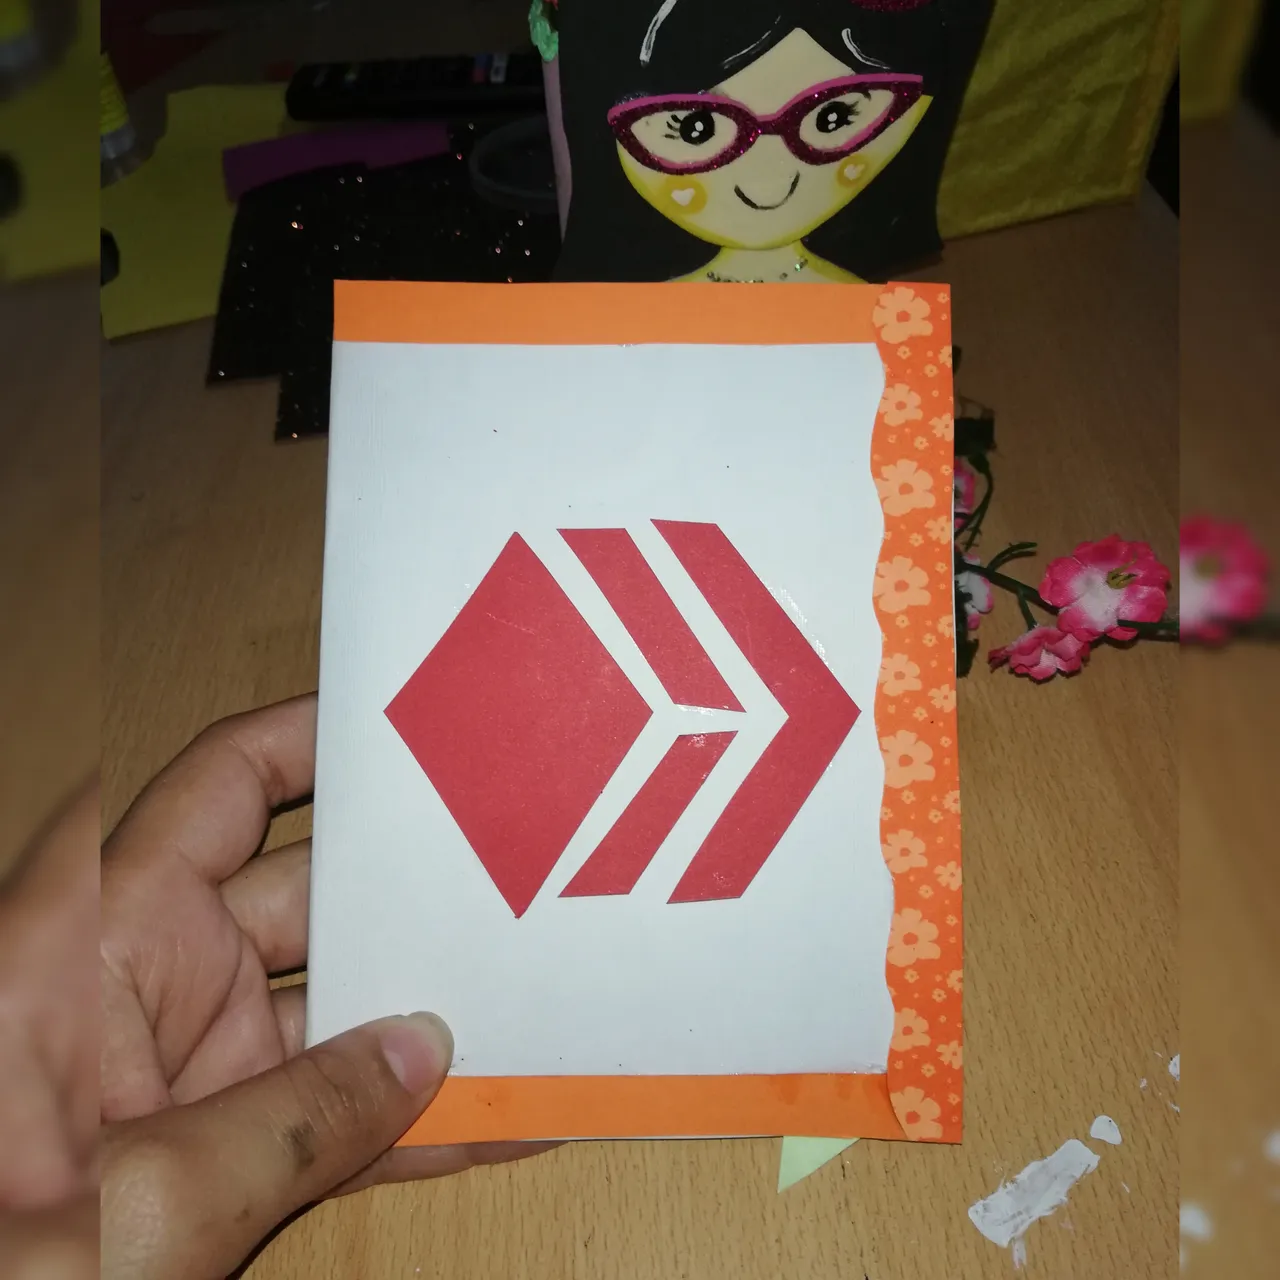
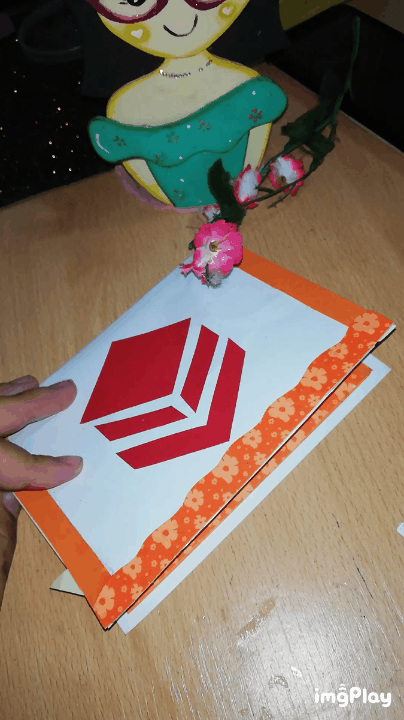
✨7- Pará el exterior de la tarjeta, en cartulina roja dibuje y recorte el logo de Hive, el cual pegue en el centro de la misma y para combinar con el interior, recorté tiras de cartulina naranja y pegue haciendo un borde. Y culminando así este detalle!
✨7- For the outside of the card, I drew and cut out the Hive logo on red cardboard, which I glued in the center of the card and to match the inside, I cut out strips of orange cardboard and glued them together to make a border. And thus culminating this detail!
Resultado | Result
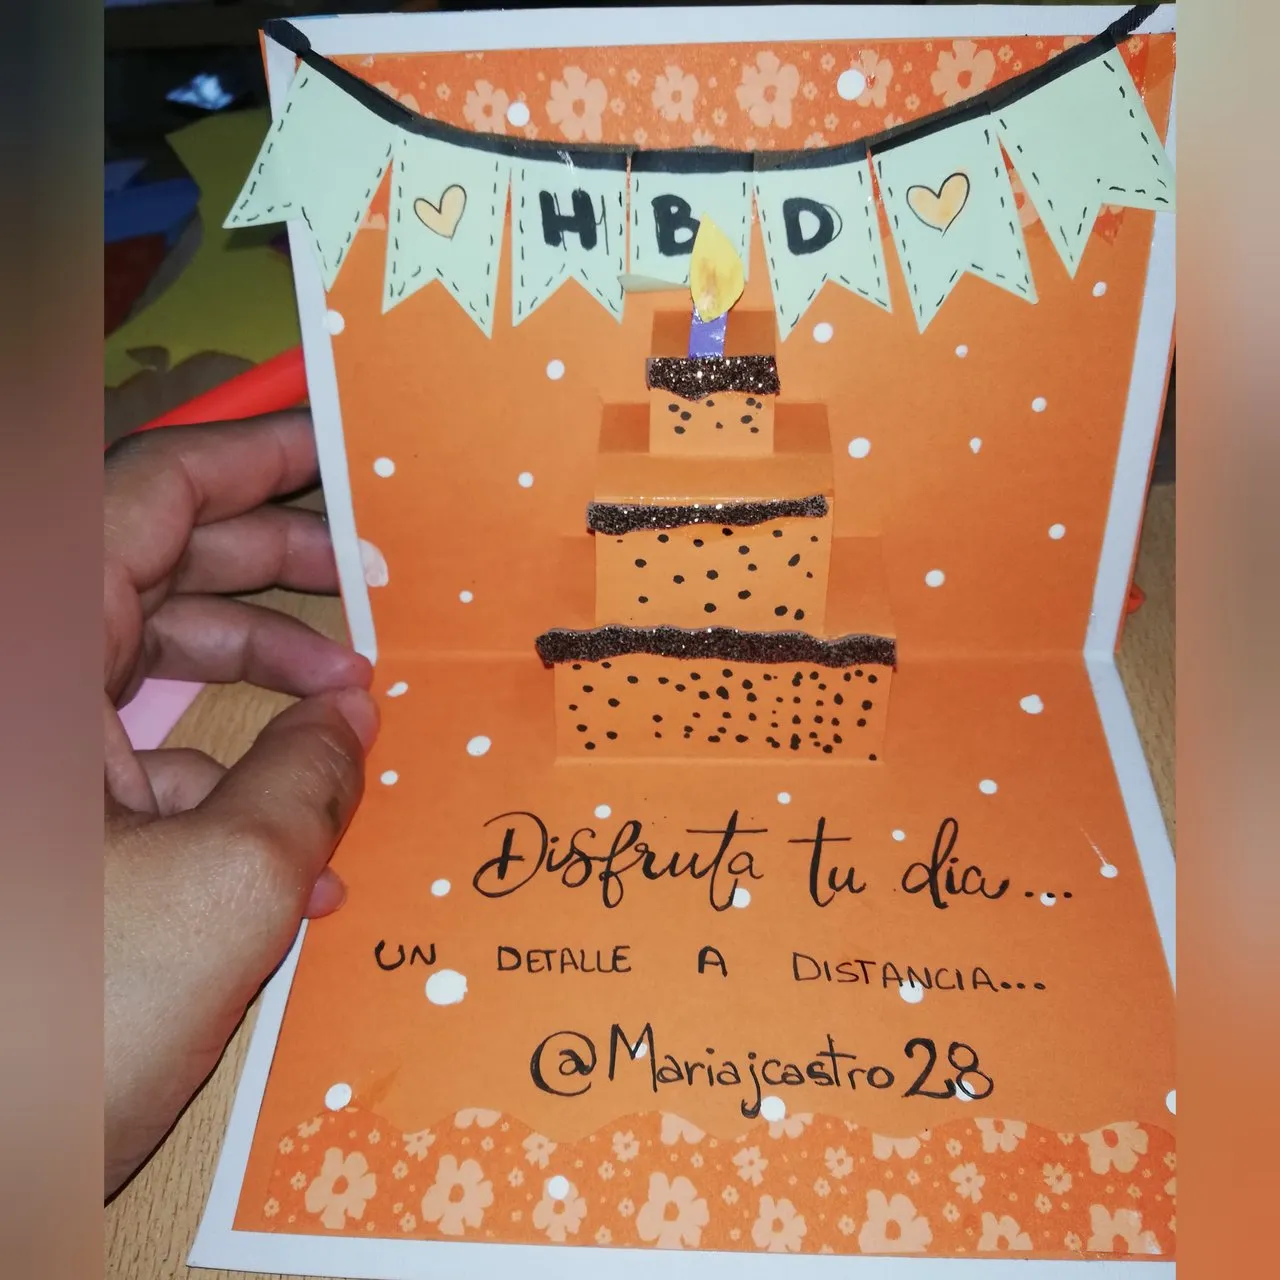
Bueno amigos, sin mas que decir espero les guste esta publicación al igual como espero que sea del agrado de @mariajcastro28, que la distancia no sea impedimento para festejar los buenos amigos ¡Feliz Cumpleaños💗!
Well friends, without more to say I hope you like this publication as I hope it is to the liking of @mariajcastro28, that the distance is not an impediment to celebrate good friends Happy Birthday💗!
Ediciones en Canva y Picstar | Editing in Canva and Picstar
Traducciones en Deepl.com | Translations in Deepl.com