Hey, beautiful people! 💗
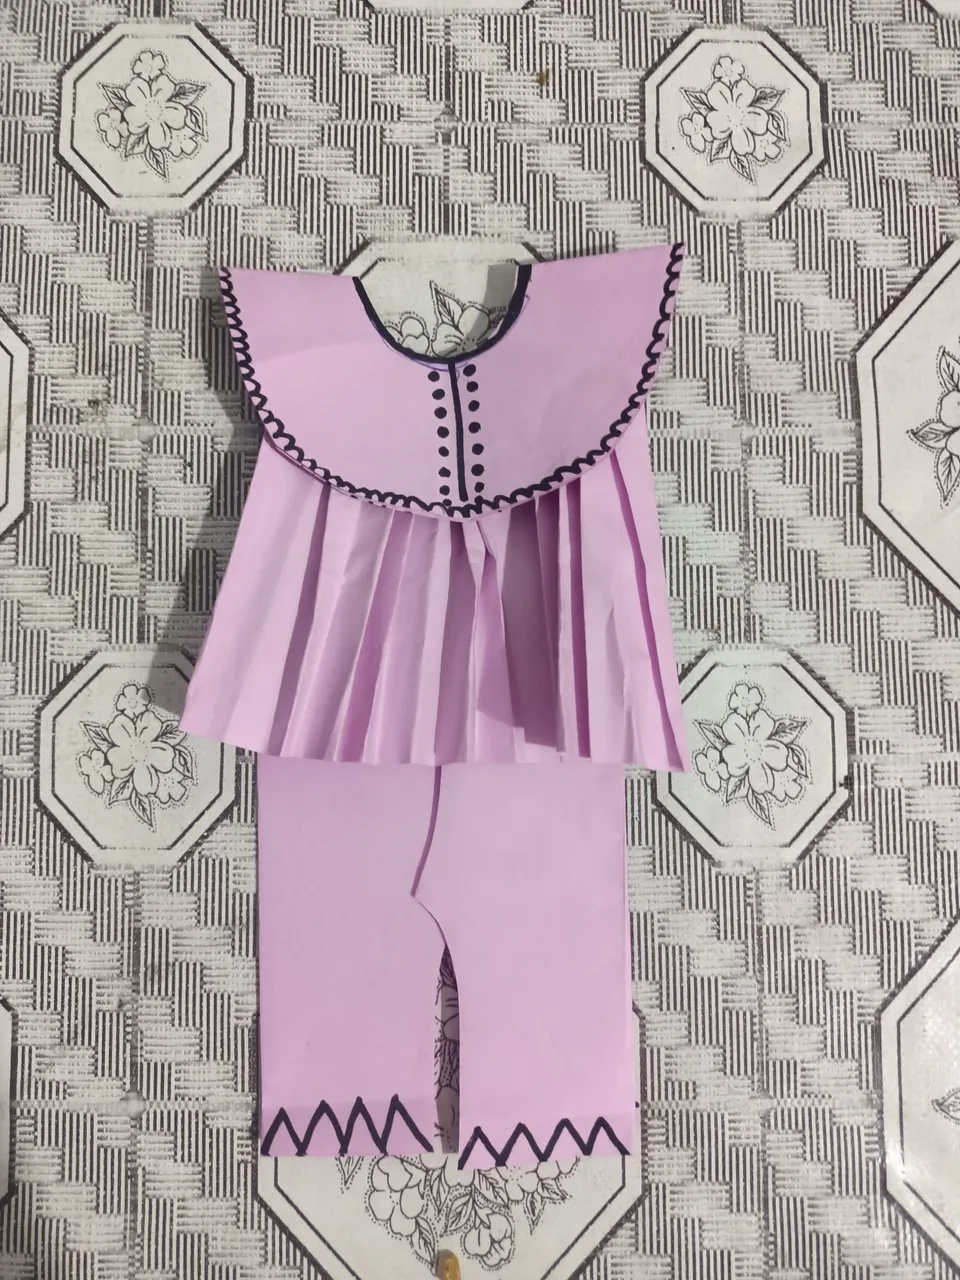
Can you guess what I came up with today? It's a paper frock! 🙌🙌🙌
A couple of days ago, I was sitting and wondering what fun thing I could do to make my free time more enjoyable. Then, an idea struck me—I decided to create a paper craft and turned it into a cute, summery doll paper frock! 👗🎎

Material Used
- Paper
- Scissors
- Round cap
- Marker
Procedure
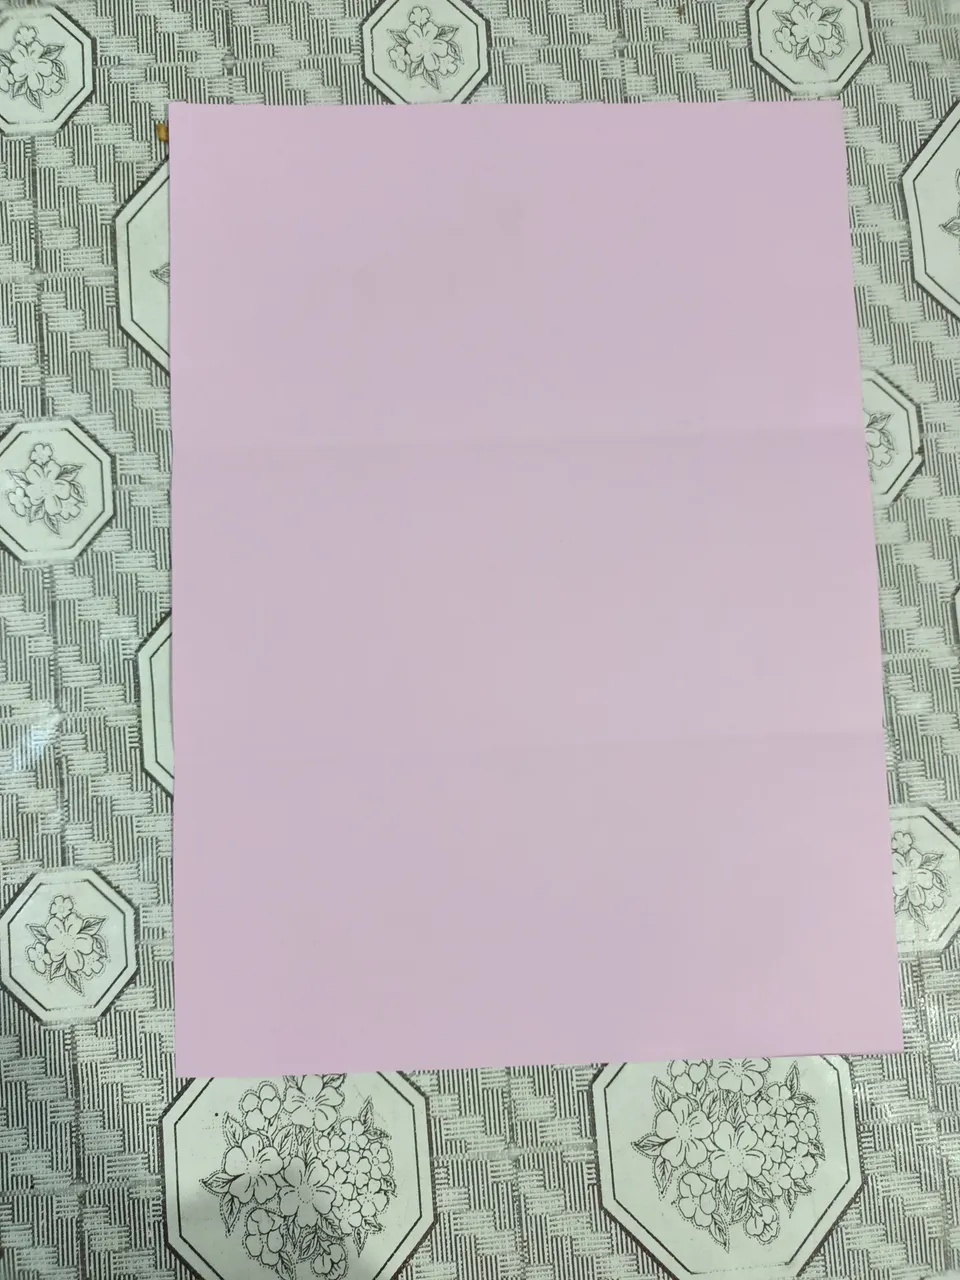
Step 1: Preparing the Paper
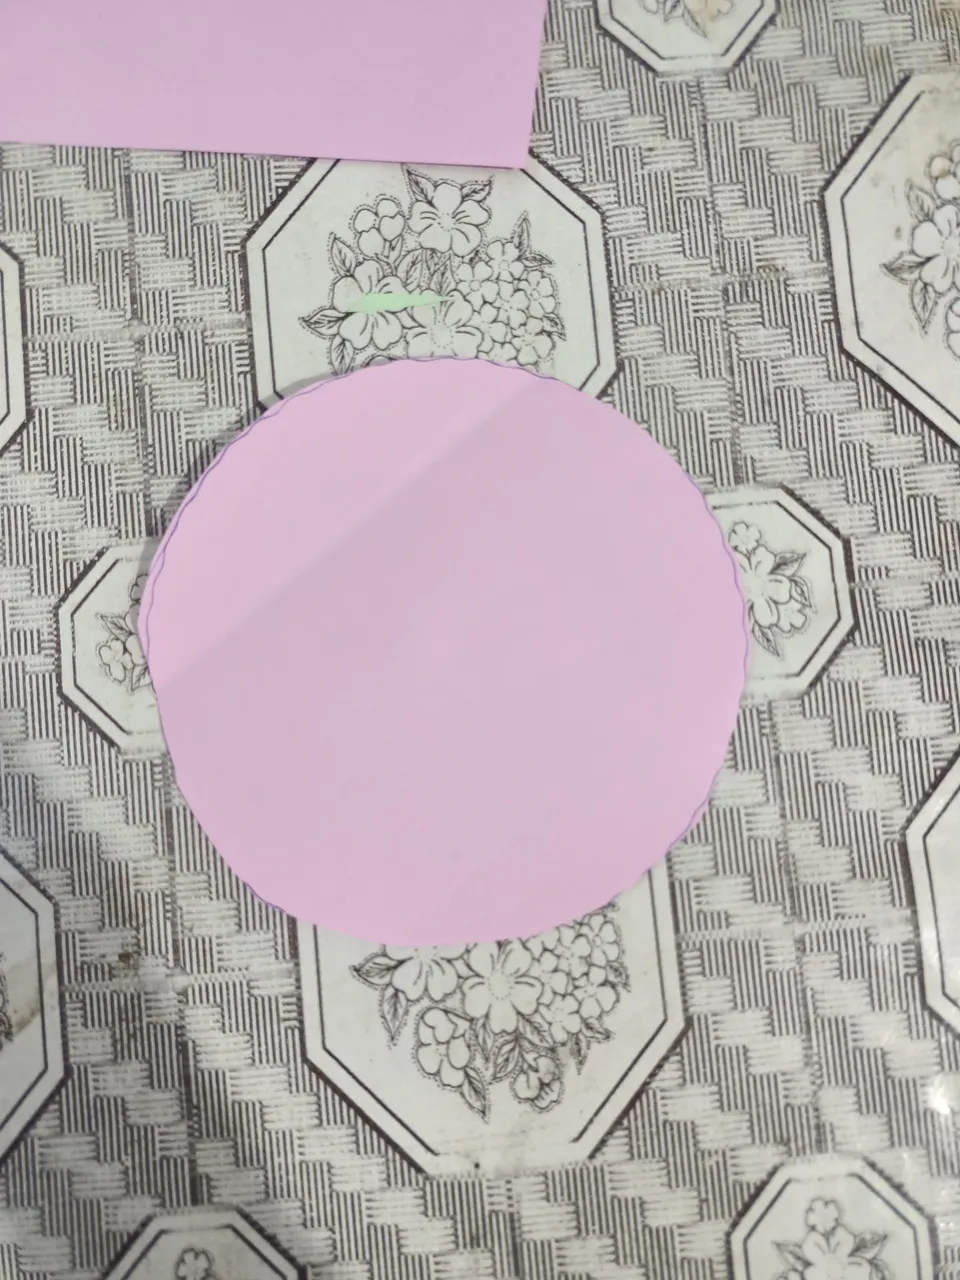
I started by taking a purple sheet of plain computer paper. It had some wrinkles, so I ironed it with a cloth over it to smooth it out.
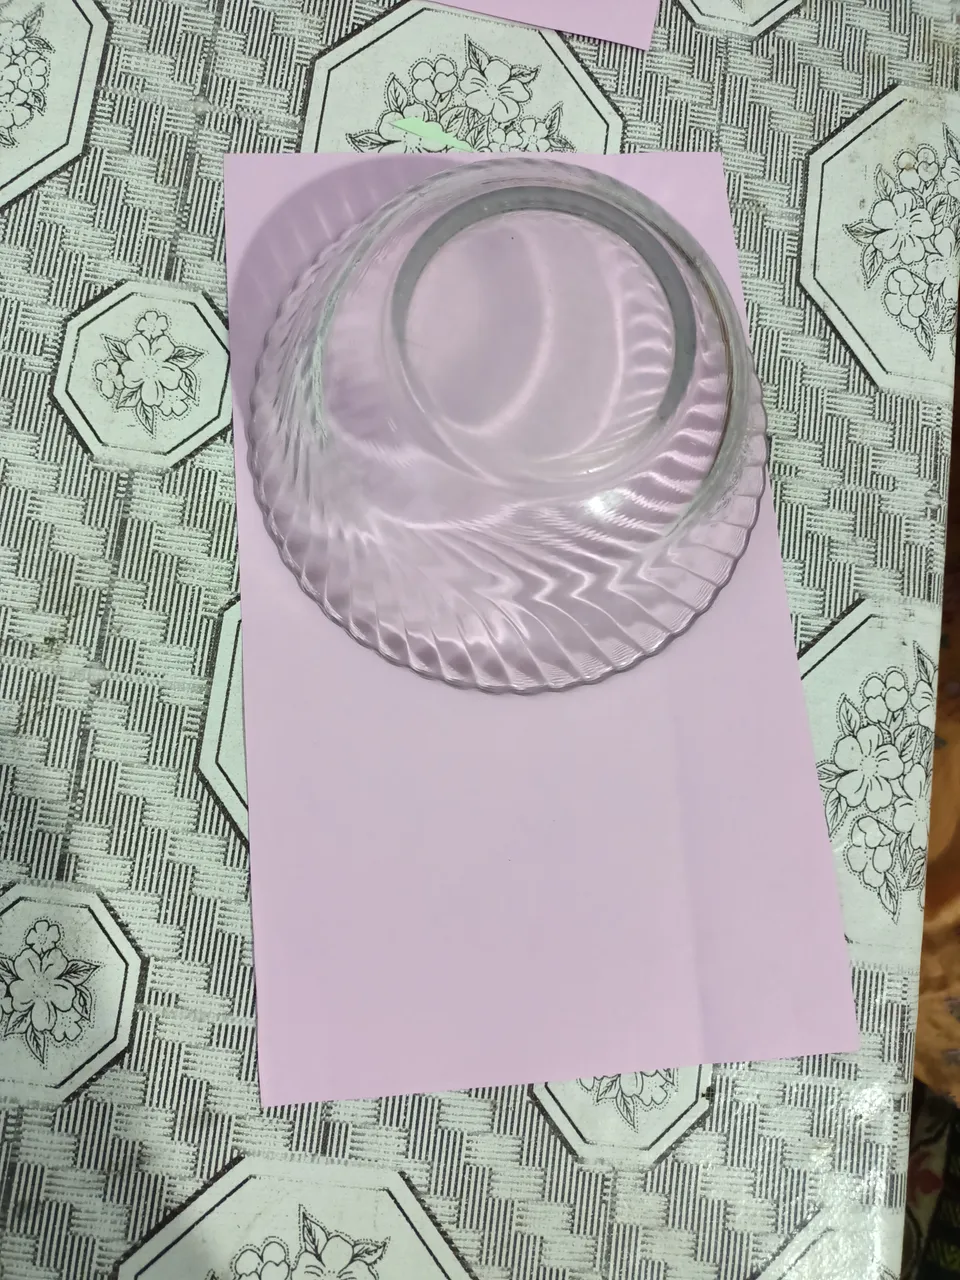
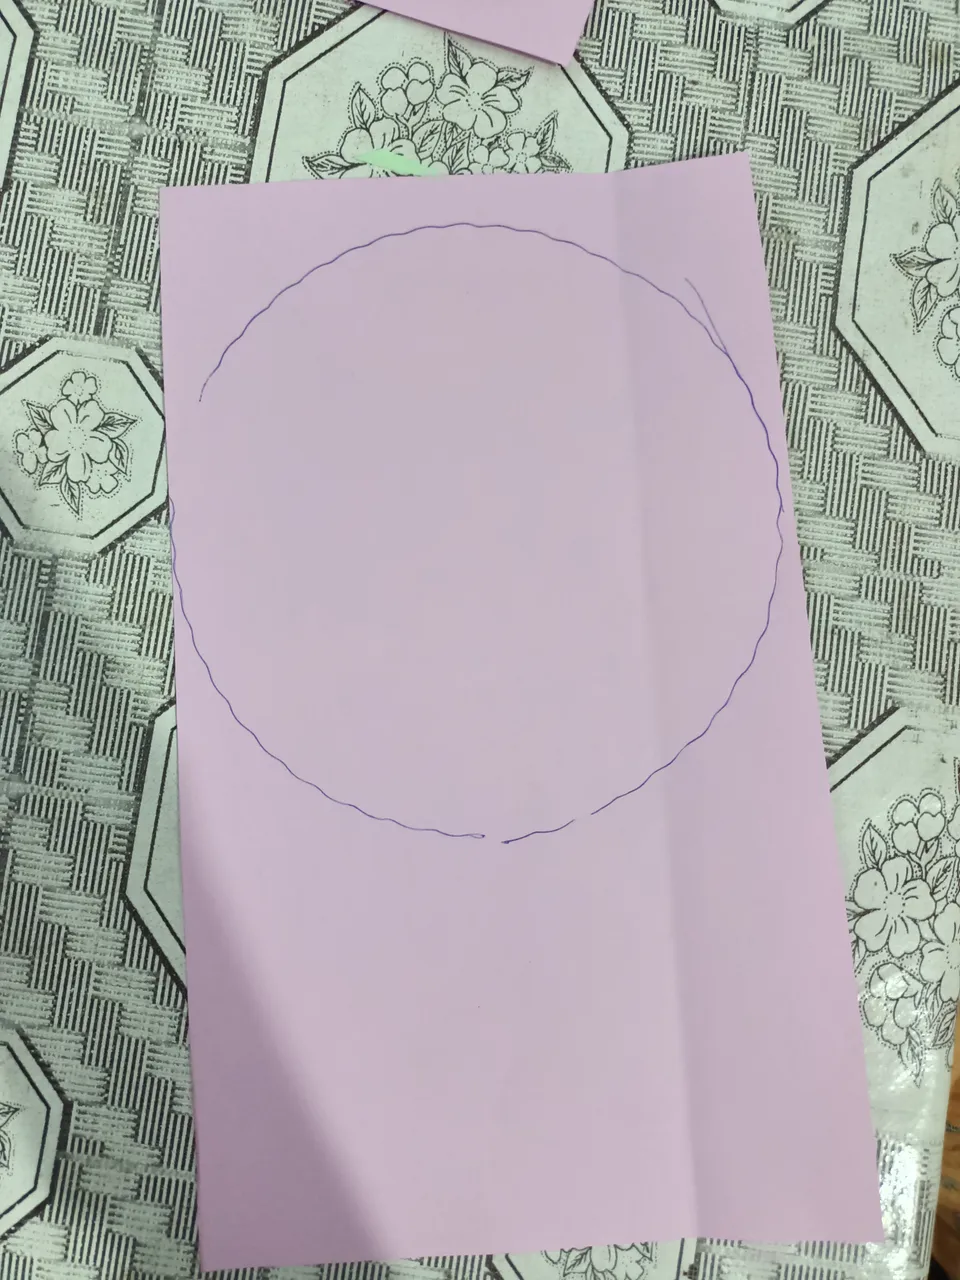
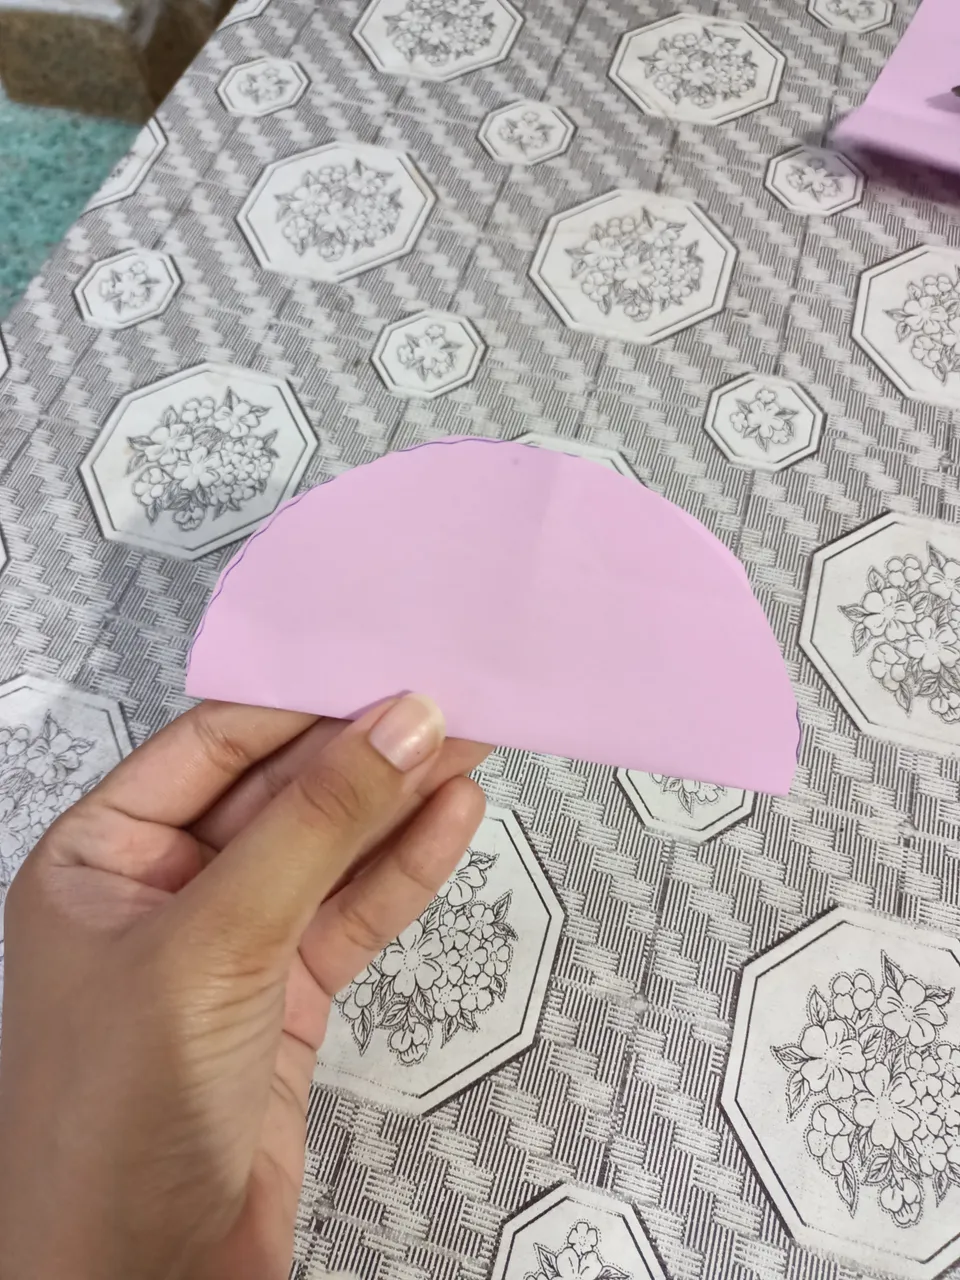
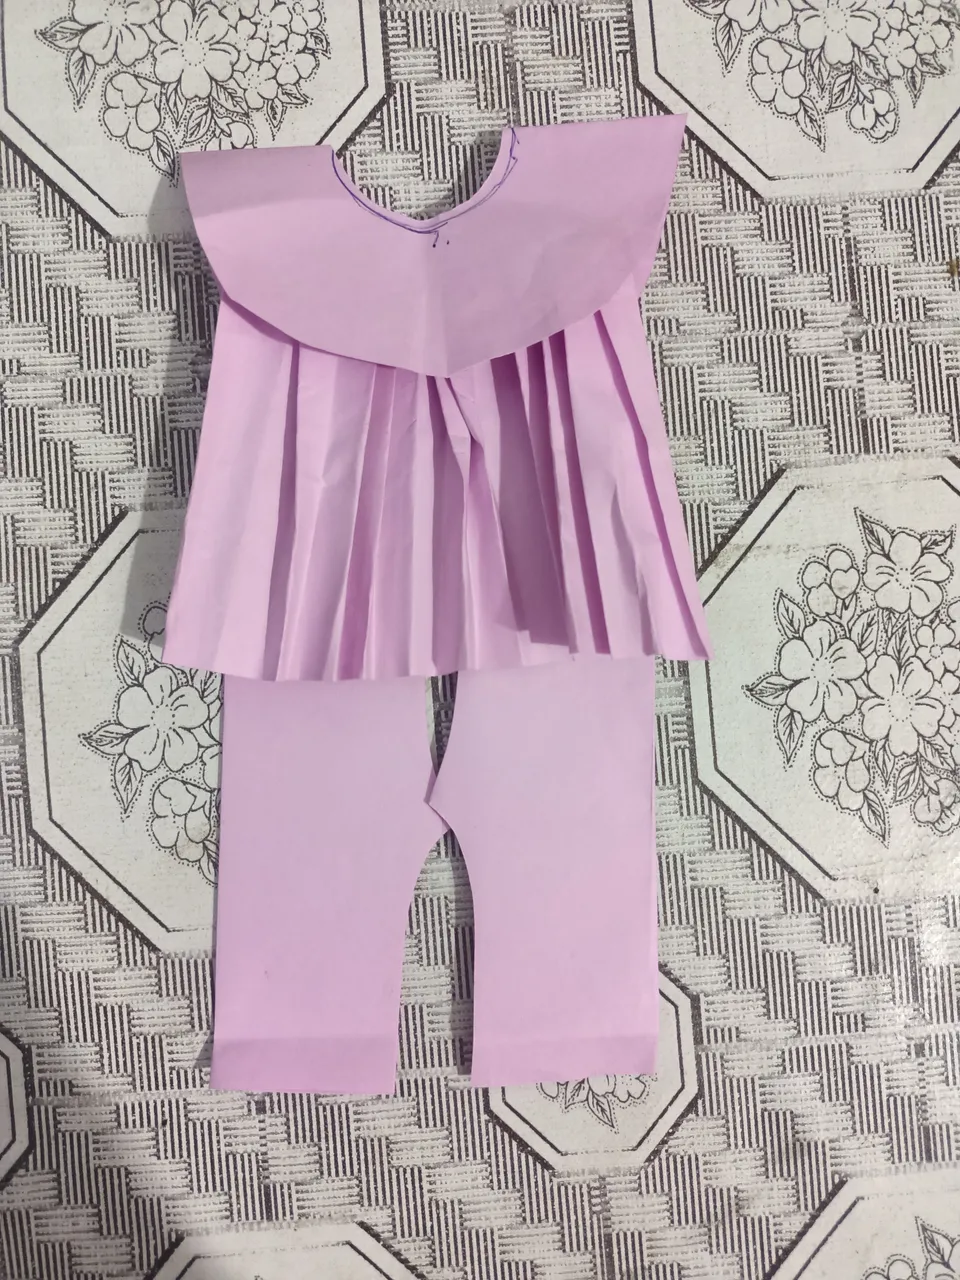
Next, I cut the paper into a square shape.To get the perfect shape, I placed a round plate on the paper to trace a circle and cut it accordingly.
Neckline
Easy Tip:
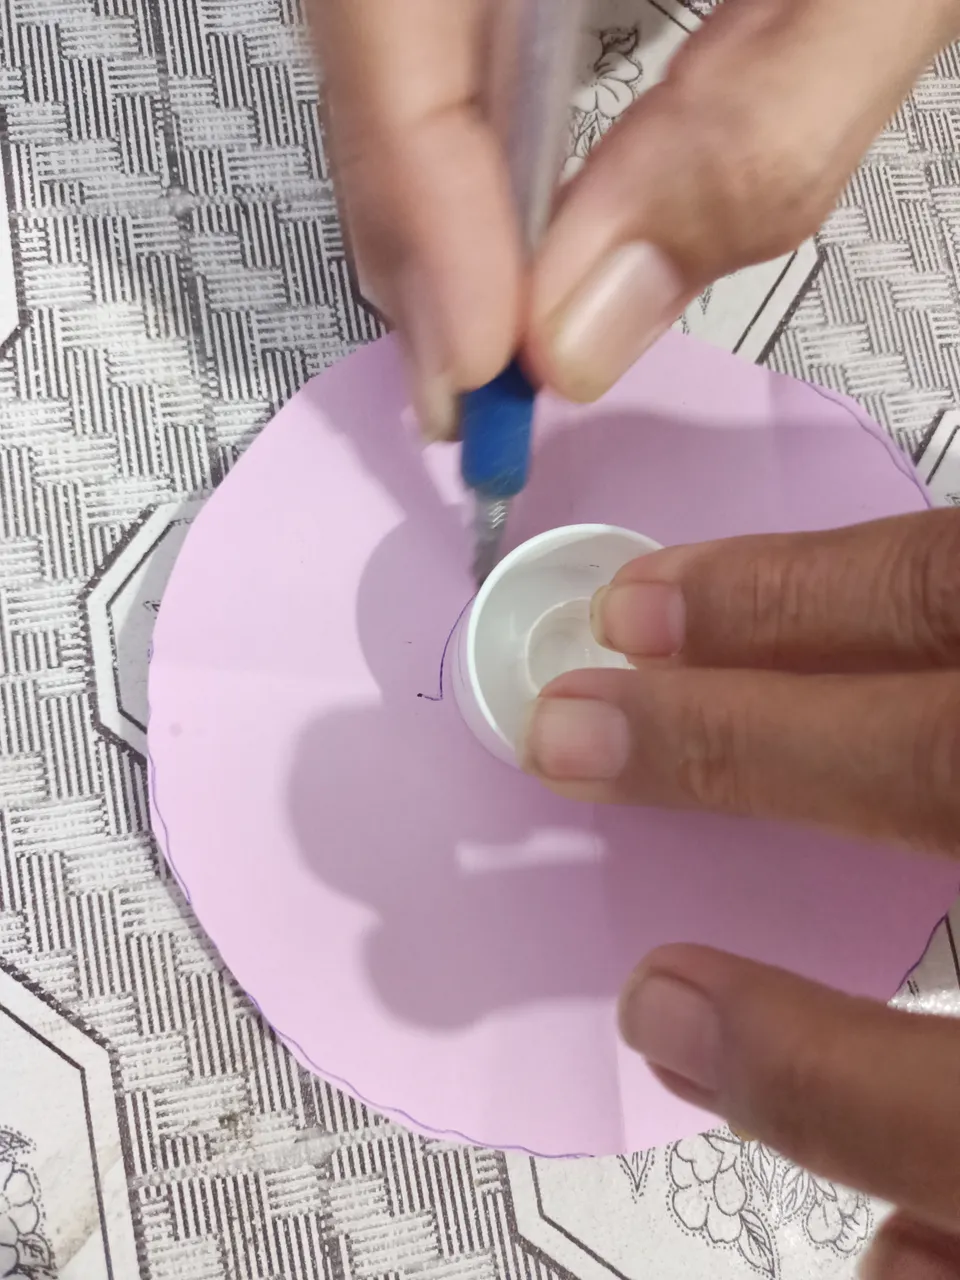
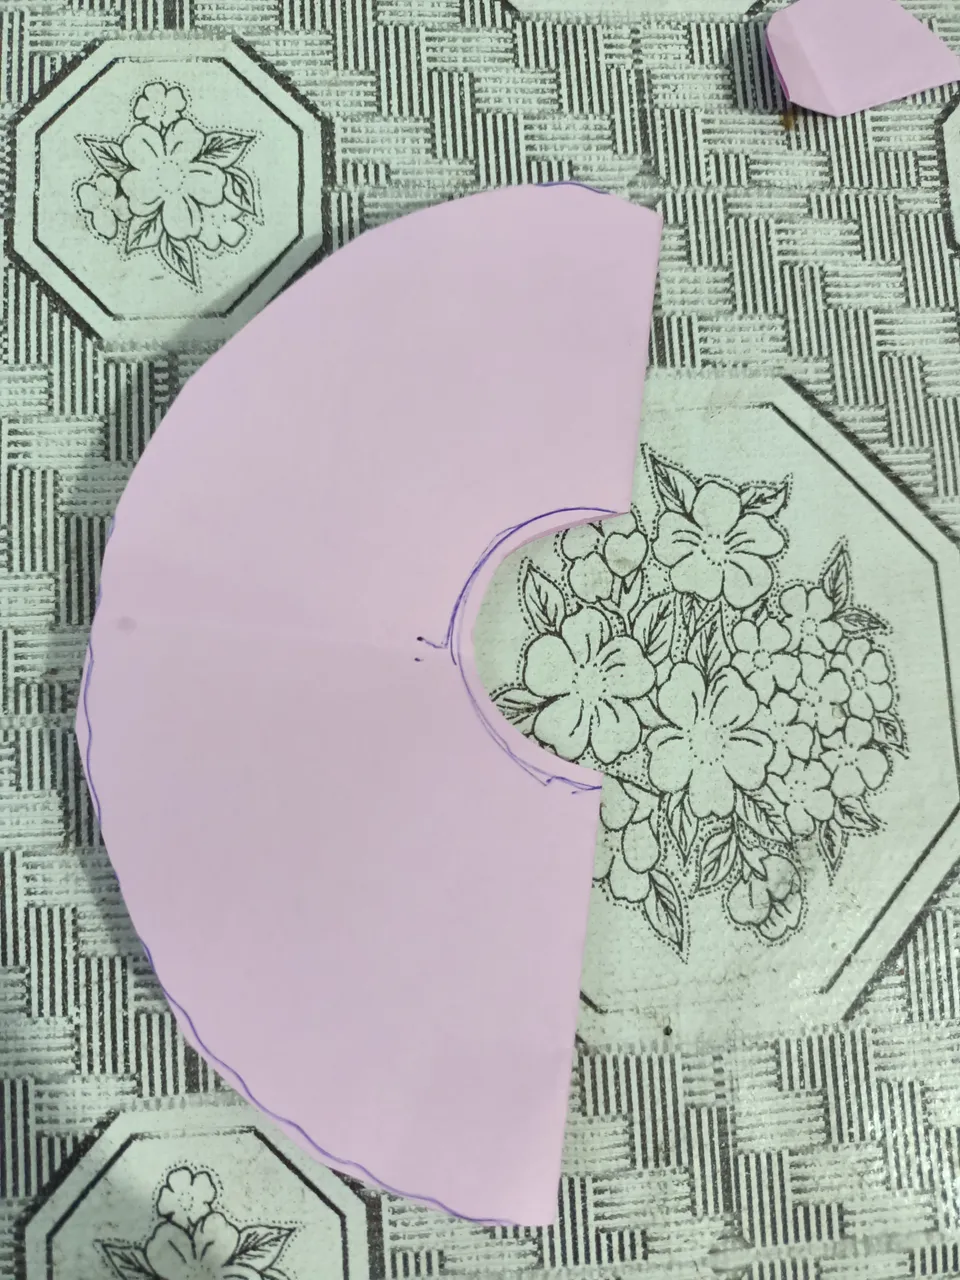
To create a smaller hole in the center (for the neckline), I searched for something round but small. I couldn’t find anything suitable, so I used a toothpaste cap! 😀 This became the neckline, which I carefully cut into an oval shape. It turned out super neat and precise.
I also cut a small half-inch strip from the outer edge of the paper to give the illusion of arms.
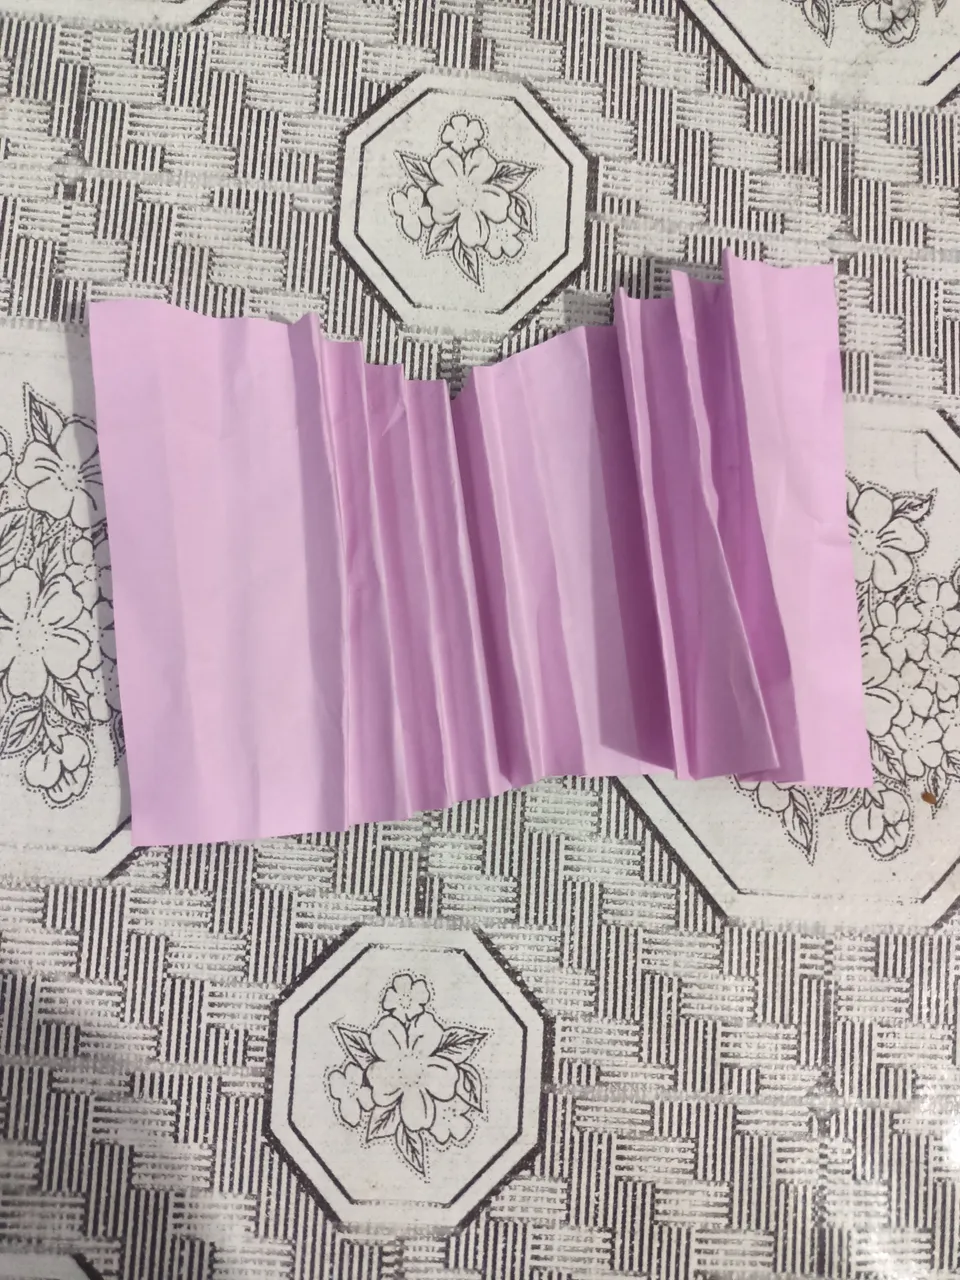
Crimping the Paper
(The Fun Part!)
Now comes the most exciting part—crimping the paper! I cut another square piece to match the length of the upper chest and crimped it finely to create a pleated effect, giving the frock a beautiful, gathered look. And as you can see below, it turned out amazing!

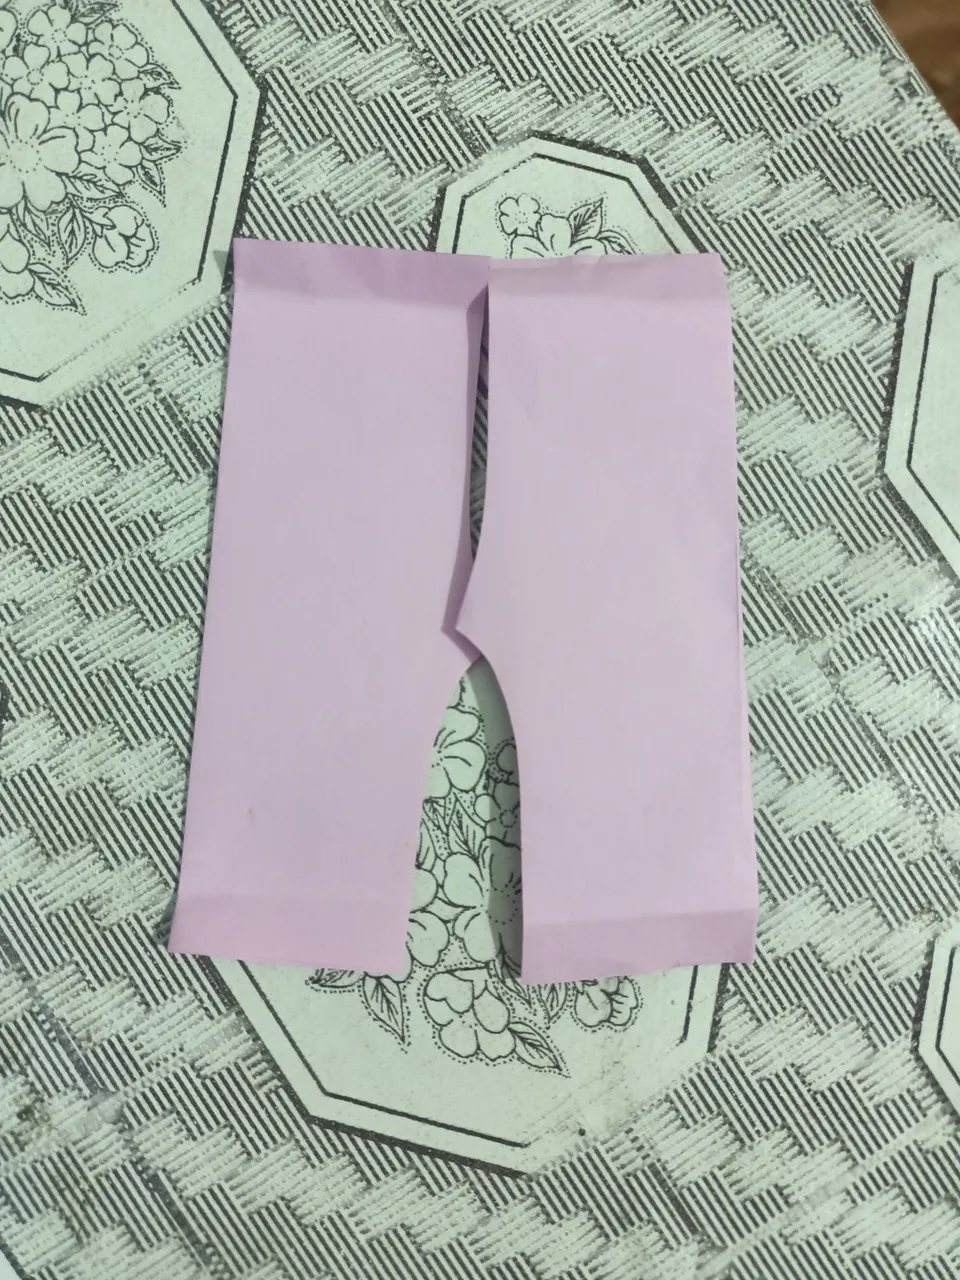
Making the Trousers
Additionally, I made paper trousers. I took two sheets, folded them equally, and cut them into a curved shape. I then folded the top and bottom to give them a balloon-style effect. Tadaaa, here’s the final look!

Adding Glamour
To add some extra flair, I used a black marker to draw a neat border and buttons down the front of the frock. I also added some curved lines to the edges of the top and zigzag patterns at the bottom of the trousers.
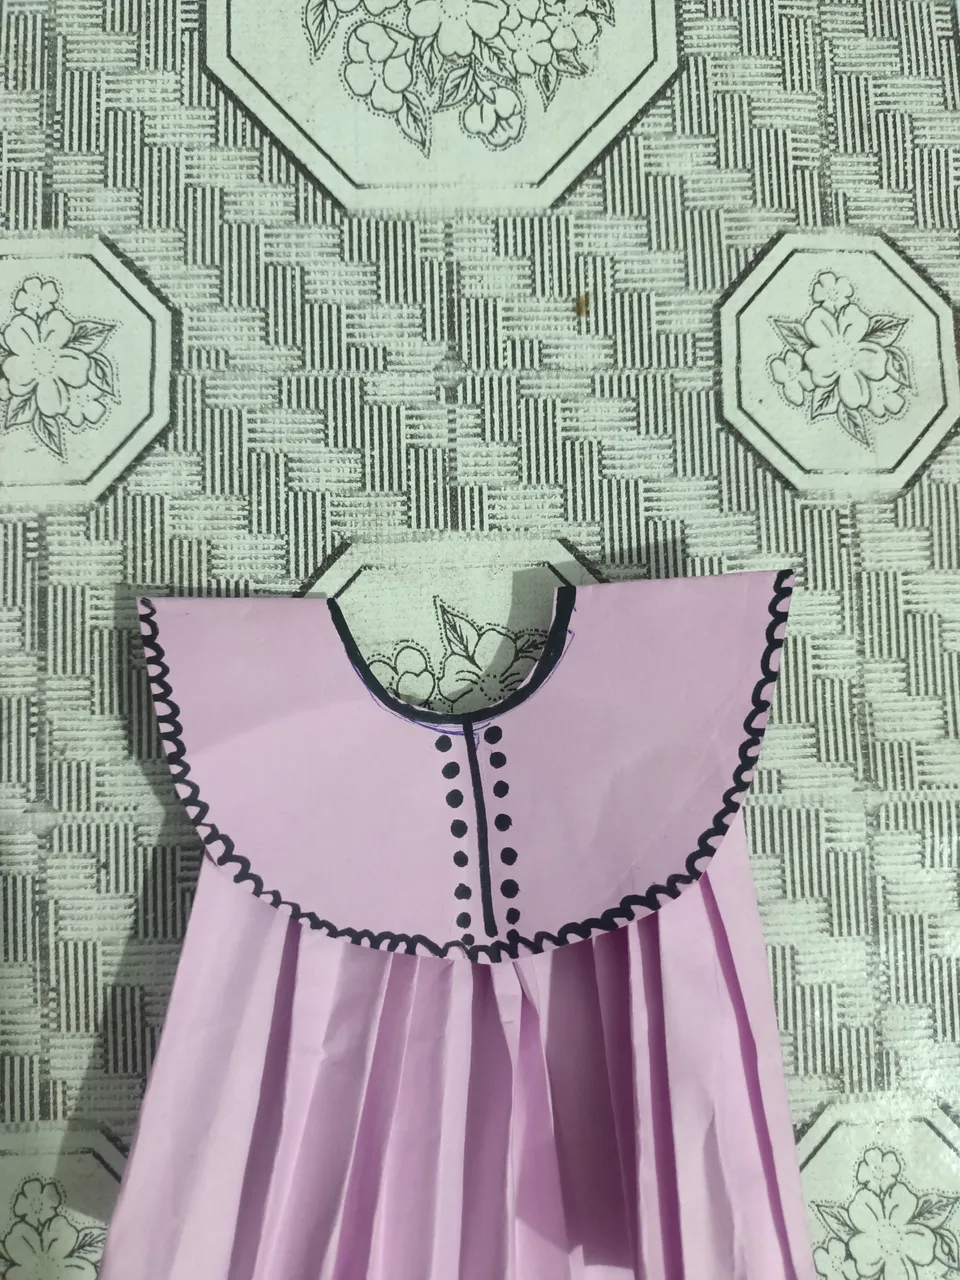

Final Look

I hope you liked it! If you did, please show some love by commenting below.❤️ For a better visual understanding, go check out my video where I share the full tutorial.
Catch you in my next blog! Until then, goodbye, beautiful people! 🌹
Credit
- A big thank you to my mama for helping me out!
- Video edited by CapCut
- Music by CapCut .