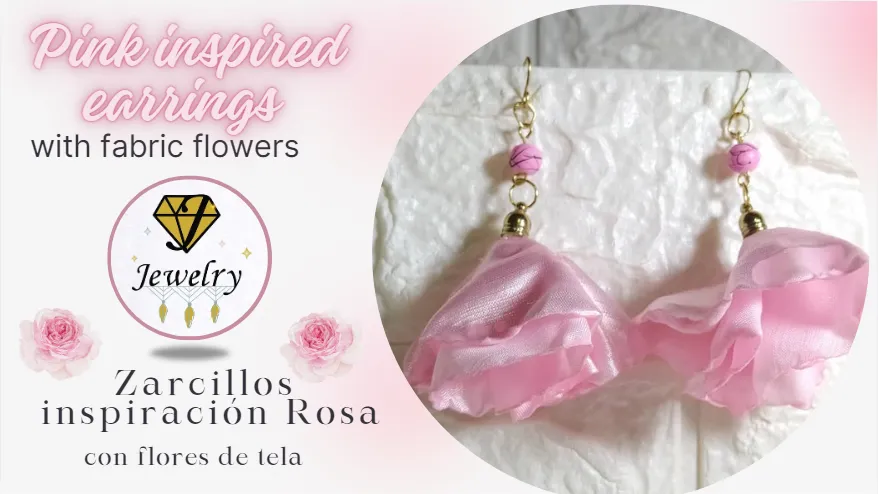
Greetings beautiful Jewelry Community I am very excited to make a post in the niche specialized in Jewelry in Hive. Fabric earrings are a very striking accessory, since it is interesting to use combinations of materials and among them the type of "fabric" with which we can take advantage of the volume that their designs provide, and the lightness of their weight.
I had this design in mind for a long time, and I imagine it very combinable both with party outfits, as well as simply being the protagonist with good jeans and a white shirt. I want to present this Tutorial, inspired by roses.
Saludos hermosa Comunidad Jewelry estoy muy emocionada de realizar un post en el nicho especializado en Joyería en Hive. Los zarcillos de tela son un accesorio muy llamativo, ya que resulta interesante utilizar combinaciones de materiales y entre ello el género de "tela" con el que podemos aprovechar el volumen que aportan sus diseños, y lo ligero de su peso.
Este diseño lo tenía pensado hace mucho tiempo, y lo imagino muy combinable tanto con outfits de fiesta, como simplemente siendo el protagonista con un buen jeans y una camisa blanca. Quiero presentarles este Tutorial, inspirado en las rosas.

The fabric I used I have been saving for years, and it is a good scrap that was left over from a circular skirt my daughter wore for a party. I don't remember its name well, but I think it was a ribbed satin. Fabrics are constantly being renewed and surely if I look for this same one at the Textile Factory it won't be there anymore, but I think that was its name. Very beautiful and fashionable at the time.
For these flowers, what we need is for it to be synthetic, or with a large synthetic part in its texture, since we are going to burn its edges to form the flowers. We can use all the fabrics that look like satin.
La tela que utilicé la tengo guardada desde hace años, y es un buen retazo que sobró de una falda circular de mi hija para una fiesta. No recuerdo bien su nombre, pero creo que era un raso acanalado, las telas se van renovando y seguramente si busco esta misma en la Textilera ya no estará, pero creo que era así su nombre. Muy hermosa y de moda en su momento.
Para estas flores, lo que necesitamos es que sea sintético, o con una gran parte sintética en su textura, ya que vamos a quemar sus bordes para formar las flores. Podemos usar todas las telas que se parezcan al raso.

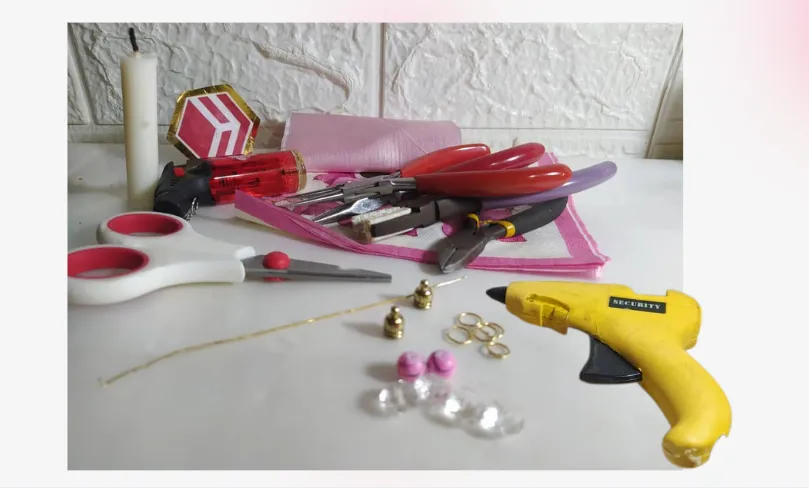
- Scrap of satin fabric.
- Jewelry pliers and scissors.
- Lighter and candle.
- Two jewelry caps.
- Round stones of your choice.
- Gold wire.
- Rings.
- Hot glue gun.
- Needle and thread, Pen and file.
- Retazo de tela raso.
- Pinzas de bisutería y tijera.
- Encendedor y vela.
- Dos capuchones de bisutería.
- Piedras redondas de su gusto.
- Alambre dorado.
- Argollas.
- Pistola de silicón caliente.
- Aguja e hilo, Bolígrafo y lima.

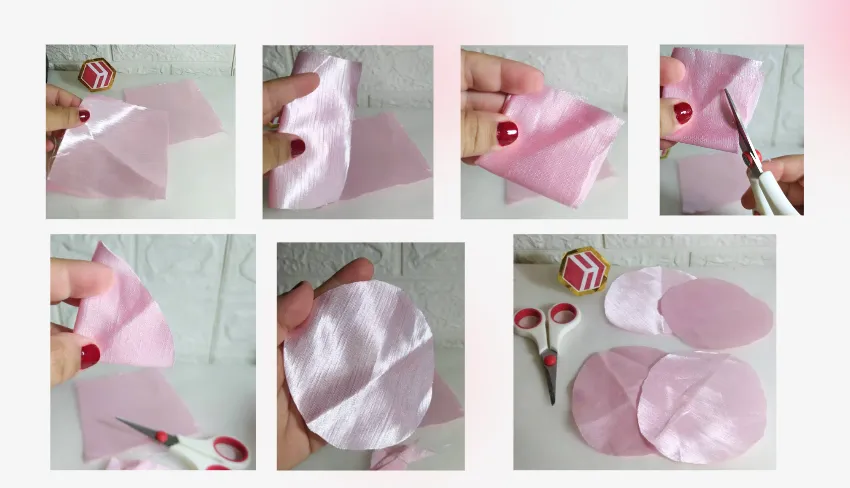
I will only use four squares of fabric measuring 11cm by 11cm.
I fold it twice and cut it into a circle with scissors. When I open it, I will have a circle. I do this for each square.
Solo utilizaré cuatro cuadros de tela de 11cms por 11cms.
Doblo dos veces y corto con la tijera en forma circular. Al abrir tendré formado el círculo, esto lo hago en cada cuadro.
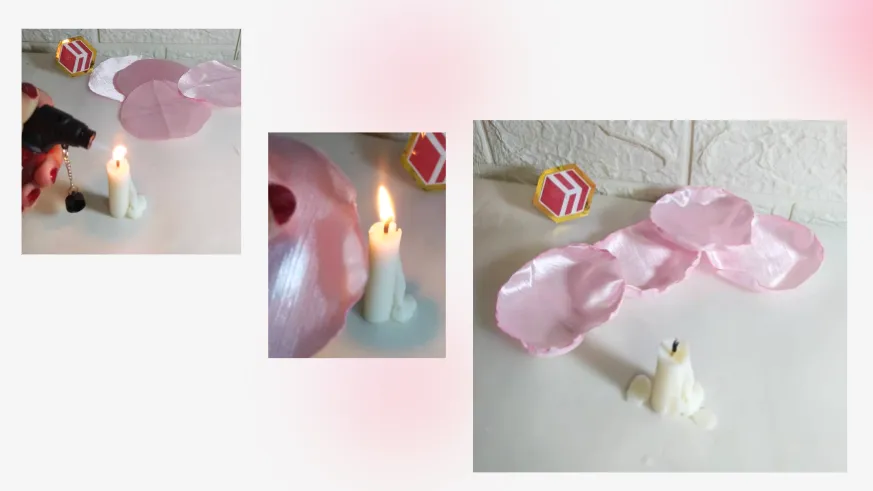
Now I light the candle with the lighter. By the way, my son gave me this lighter. It's shaped like a blowtorch and its flame comes out horizontally. I really liked it. I'll only use it for my crafts.
I bring the edge of each circle of fabric, one by one, close to the candle to burn the edge, forming a slight irregular shape that will add interest and also prevent the fabric from fraying. So we have the four pieces of fabric ready.
Ahora enciendo la vela con el encendedor, por cierto este encendedor me lo regaló mi hijo, es como forma de soplete y su llama sale horizontal, me gustó mucho lo usaré solo para mis manualidades.
Acerco el borde de cada círculo de tela, uno por uno, a la vela para quemar el borde formando una ligera forma irregular que le aportará interés y además evitaremos que se deshilache la tela. Así tenemos listos las cuatro piezas de tela.
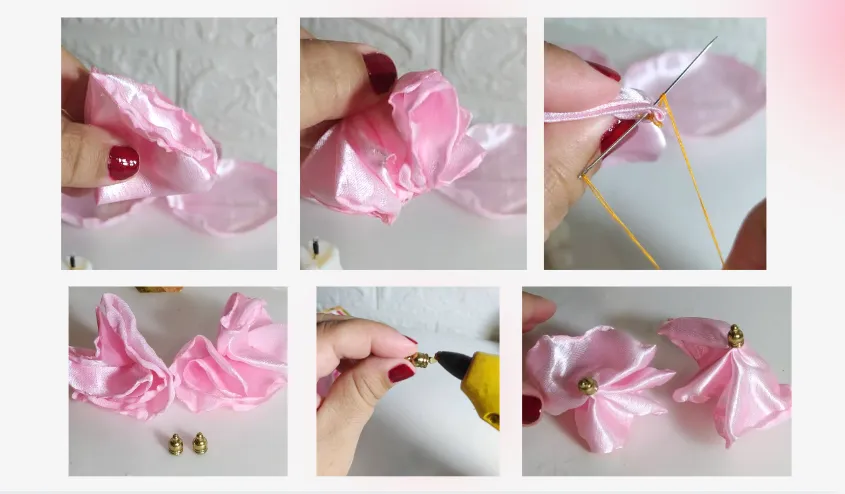
I take a circle and fold it twice, I do the same with another circle. I make a very simple stitch just to keep the two pieces together and to make the next step easier, which is to put a little hot silicone on the jewelry cap and insert these two pieces of fabric.
I repeat to get the two fabric flowers ready in their golden caps, which already look super cute.
Tomo un círculo y lo doblo dos veces, hago lo mismo con otro círculo. le hago una puntada muy simple solo para tener juntas las dos piezas y facilitar el siguiente paso que es colocar un poco de silicón caliente en el capuchón de bisutería e introducir estas dos piezas de tela.
Repito para obtener las dos flores de tela preparadas en sus capuchones dorados, que desde ya se ven súper lindas.
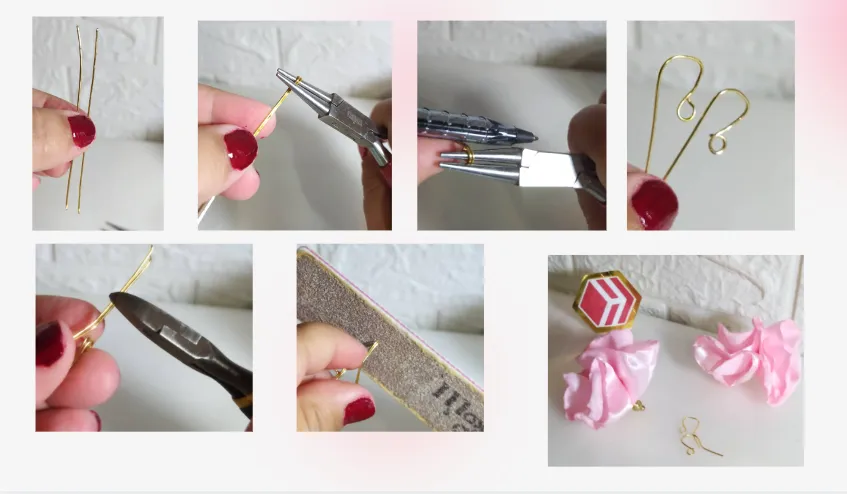
The earring hooks I made are the simplest and easiest to make. I take two 7cm pieces of jewelry wire.
Using the circular pliers, I take both wires at the same time so that they are equal, and make a small loop by turning it around.
Then, I go back in the opposite direction on a pen or pencil. Using the cutting pliers, I cut it leaving this part a little longer. I like to file the tips with an old file that I use for crafts, to ensure that it does not get in the way when using it. The hooks are now ready.
Los ganchos para los zarcillos que realicé son los más sencillos y fáciles de hacer. Tomo dos alambres de bisutería de 7cms cada uno.
Con la pinza circular, tomo ambos alambres al mismo tiempo para que queden iguales, realizo un aro pequeño dando una vuelta.
Luego, devuelvo en sentido contrario sobre un bolígrafo o lápiz. Con la pinza de corte, corto dejando esta parte un poco más larga. Me gusta limar las puntas con una lima vieja que uso para manualidades, para garantizar que no moleste al usar. Ya están listos los ganchos.
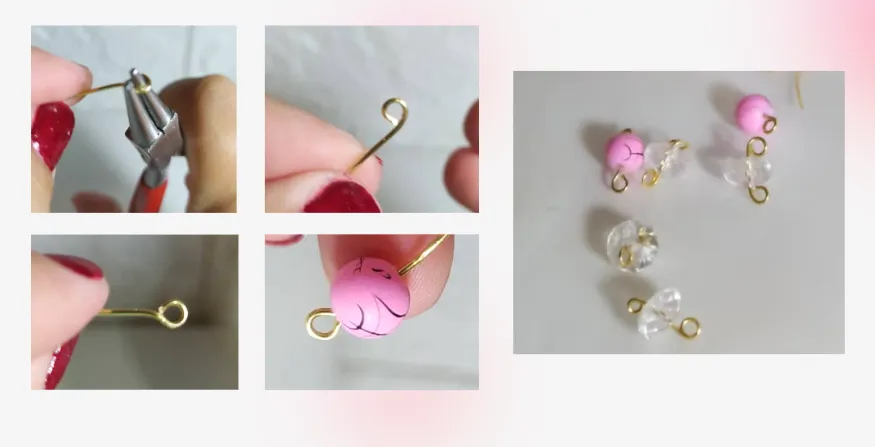
All that remains is to prepare the beads that we want to use. I do this with a small piece of wire, form a ring with the circular jewelry pliers, then I make a movement back, so that the ring is formed well in the center of the wire.
I insert the bead or crystal that I am going to prepare, and repeat the ring at the other end. This way I have each piece ready.
Solo falta preparar las cuentas que queremos usar. Esto lo hacemos con un pedacito de alambre, formo un aro con la pinza de bisutería circular, luego hago un movimiento devolviéndome, para que quede formado bien el aro en el centro del alambre.
Introduzco la cuenta o cristal que voy a preparar, y repito el aro en el otro extremo. Así dejo preparado cada pieza.
Once all the pieces are ready, the most fun part comes, which is making the combinations we want with the materials we want to use in the design. I open a ring with the pliers to connect pieces to my liking.
Note that I first tried with a transparent bead for the design, and it turned out very nice, as you can see in the following photo. However, I was not completely convinced.
Ya con todas las piezas listas, viene lo más divertido que es realizar las combinaciones que queremos con los materiales que queremos usar en el diseño. Abro una argolla con las pinza para conectar piezas a mi gusto.
Fíjense que yo probé primero con una cuenta transparente para el diseño, y quedó muy lindo, como se ve en la siguiente foto. Sin embargo, no estuve convencida del todo.
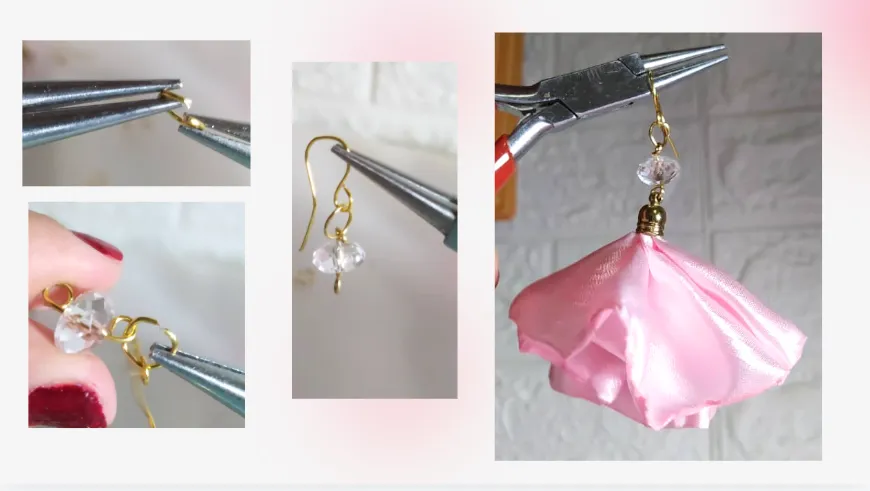
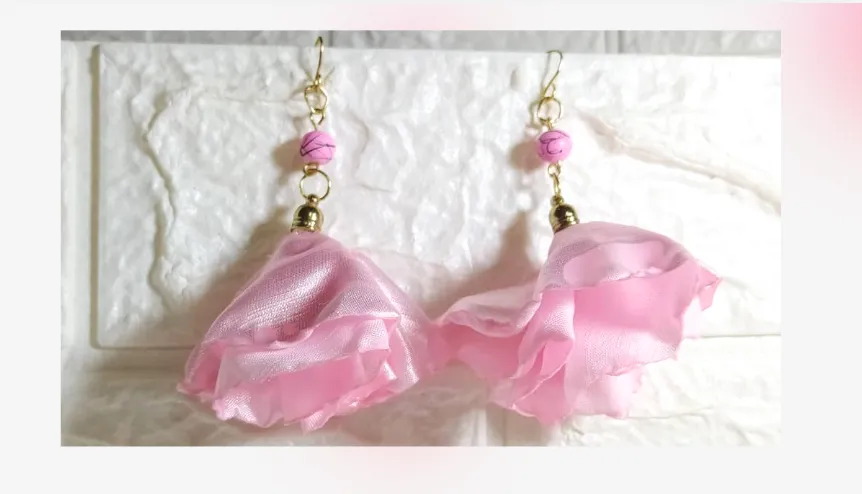
I opened the rings again and now I tried these pink beads with little black lines, and I liked this design better. I think it gives more interest and it stands out more because it is a combination of not only materials, but also beautiful colors.
Abrí nuevamente las argollas y ahora probé con estas cuentas rosadas con pequeñas líneas negras, y este diseño me gustó más. Creo que le da más interés y se destaca más que es una combinación no solo de materiales, sino también de colores hermosos.
I always have beads or crystals ready in my jewelry box, and when I make another piece I will have them ready.
I hope you liked the step-by-step instructions and the final product, and that you are encouraged to make your own earrings with fabric flowers, to brighten up any outfit.
Les cuento que siempre tengo cuentas o cristales preparados en mi caja de materiales de bisutería, y ya cuando vaya a realizar otra pieza las tendré adelantas.
Deseo que les haya gustado el paso a paso, y el producto final; y que se animen a realizar sus Zarcillos con flores de tela, para alegrar cualquier outfit.

I took the photos with my phone Redmi Note 8
Apps I used:
Canva Pro for Cover, Collage and Banners
I used Deepl Translator
My social networks:
Discord: YennysYaneth#0189
Twitter: @yennysferm
Instagram: @yennysyaneth

Las fotos las tomé con mi teléfono Redmi Note 8
Apps que utilicé:
Canva Pro para la Portada, Collage y Banners
Utilicé el Traductor Deepl
Mi redes sociales:
Discord: YennysYaneth#0189
Twitter: @yennysferm
Instagram: @yennysyaneth