| Esp | Eng |
|---|---|
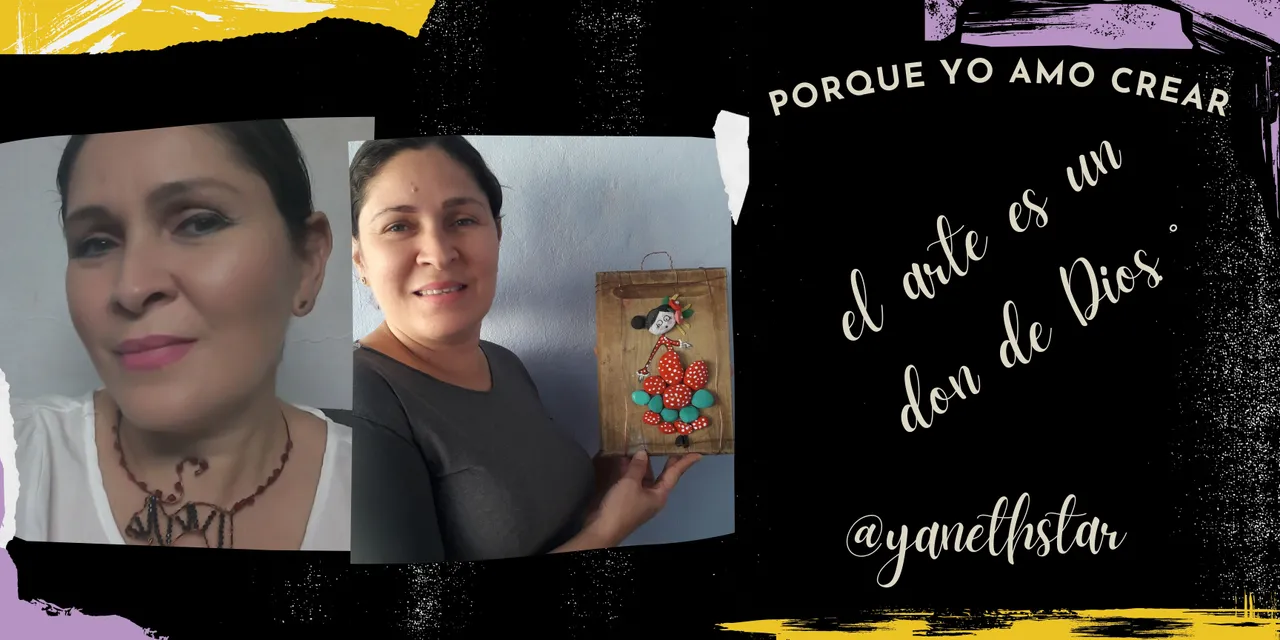
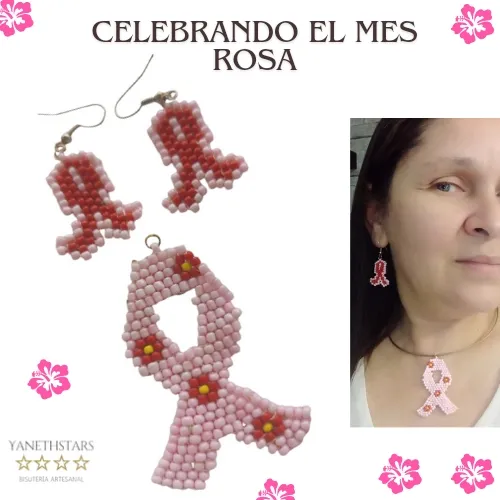
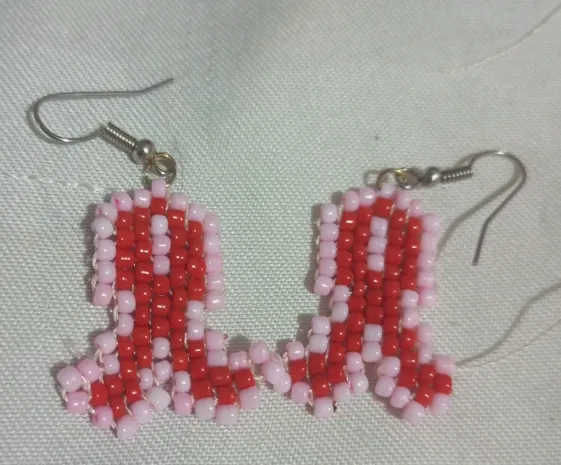
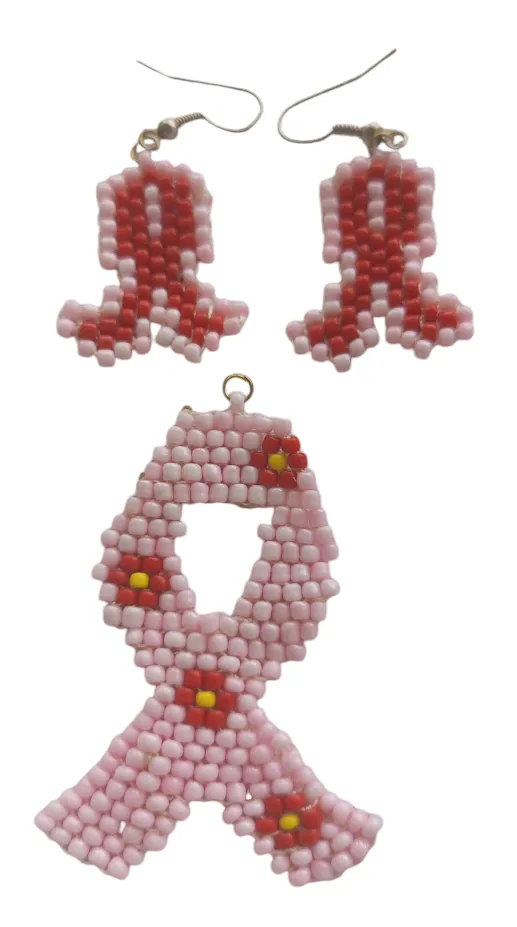
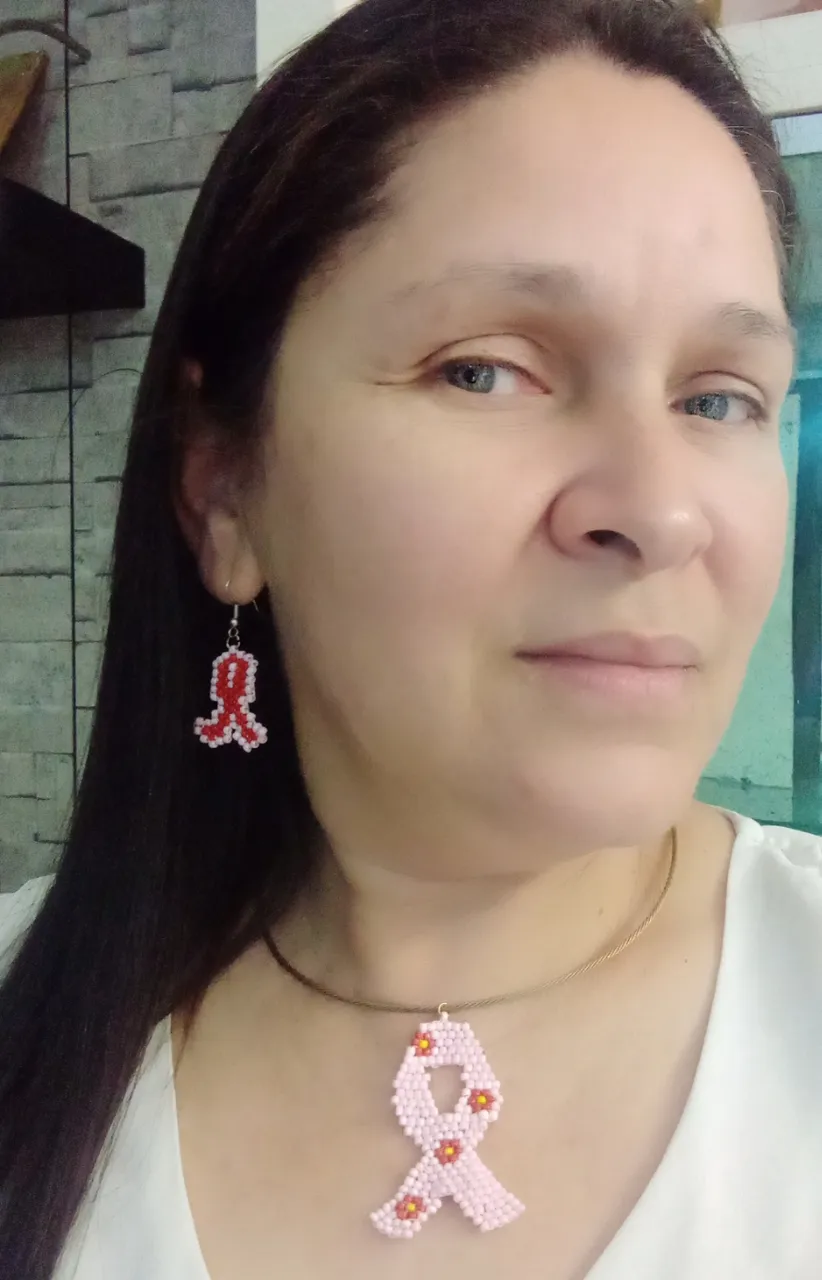
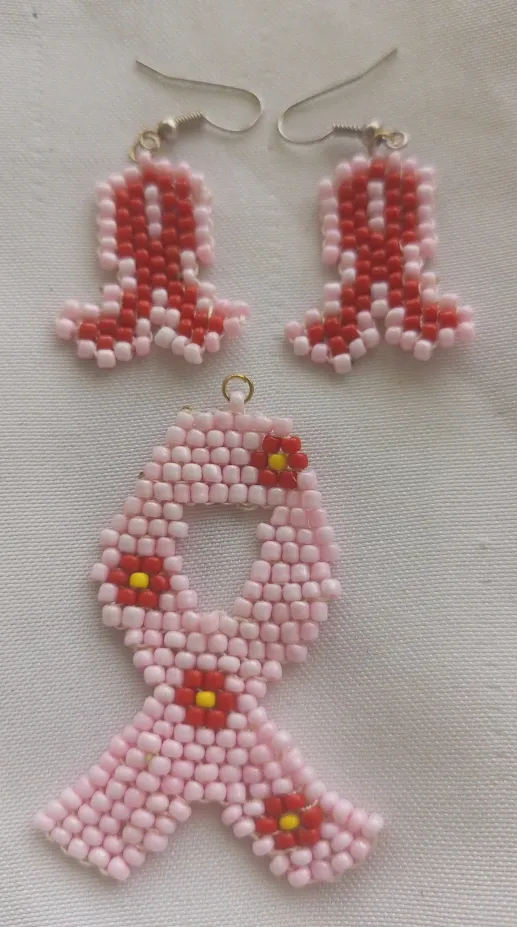
| Hola amigos creativos, el día de hoy les traigo mi participación para celebrar el MES ROSA y atender la invitación de nuestra linda comunidad de JEWELRY de celebrar esté mes realizando lo que nos gusta hacer, crear accesorios. Mii participación son estos LINDOS ARETES Y DIJE DE MOSTACILLAS LISTÓN ROSA. Esté listón es representativo de todas las mujeres, y de la lucha y concientización contra el cancer de seno, que no debería ser solo un mes, sino una lucha diaria y constante. A continuación la lista de materiales y el procedimiento. | Hello creative friends, today I bring you my participation to celebrate PINK MONTH and attend the invitation of our beautiful JEWELRY community to celebrate this month doing what we love to do, create accessories. My participation are these PINK LISTON MOSTACILLAS ROSES AND DIJE DE MOSTACILLAS LISTON PINK. This ribbon is representative of all women, and the fight and awareness against breast cancer, which should not be just one month, but a daily and constant fight. Below is the list of materials and the procedure. |

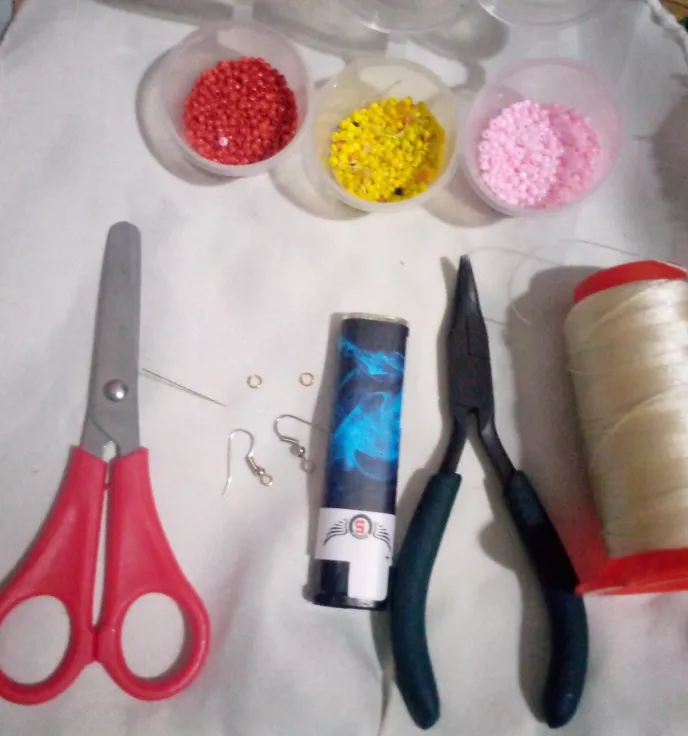
| Materiales: | Materials: |
|---|---|
| Mostacillas: rojas, rosadas, amarillas, aguja mostacillera, 2 aretes, 3 aros pequeños, tijeras, yesquero, pinzas de bisutería, hilo mostacillero beige. | Beads: red, pink, yellow, beige beads, beige bead needle, 2 earrings, 3 small earrings, scissors, tinder, jewelry tweezers, beige bead bead thread. |
| Instrucciones: | Instructions: |
|---|

| Paso 1 | Step 1 |
|---|---|
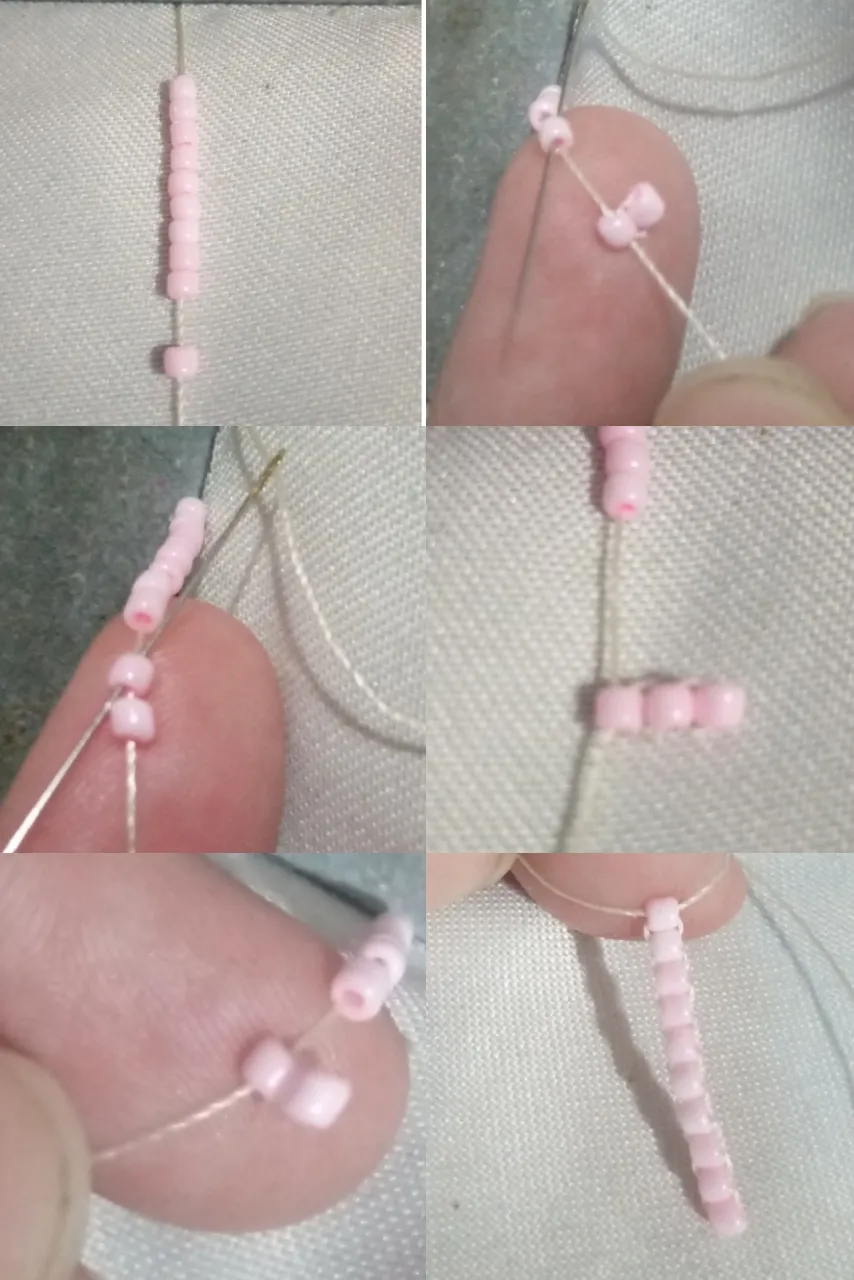
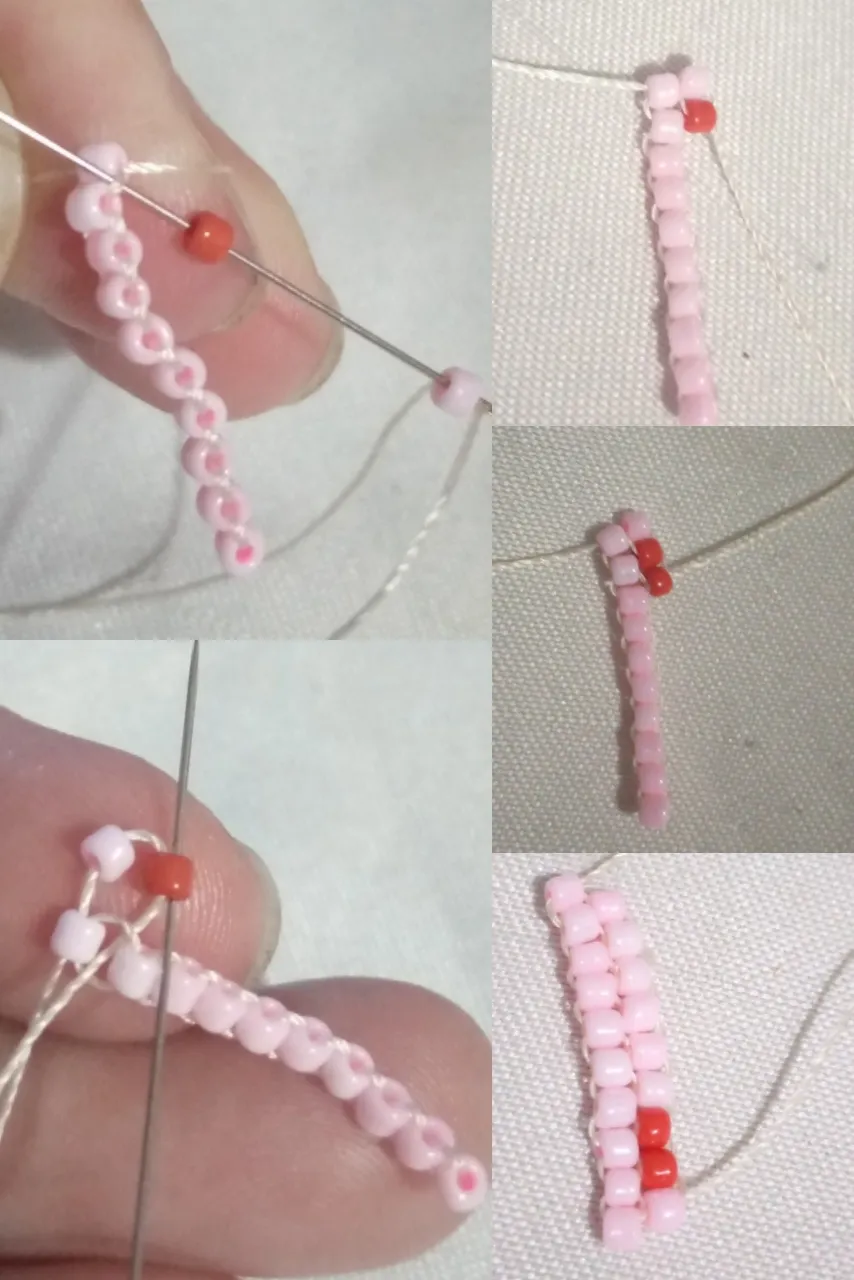
| Enhebre en la aguja 1 metro y medio (1/2) de hilo para comenzar a construir el dije y disponemos 10 mostacillas rosadas. | Thread the needle with 1.5 meters (1/2) of thread to start building the charm and place 10 pink beads. |

| Paso 2 | Step 2 |
|---|---|
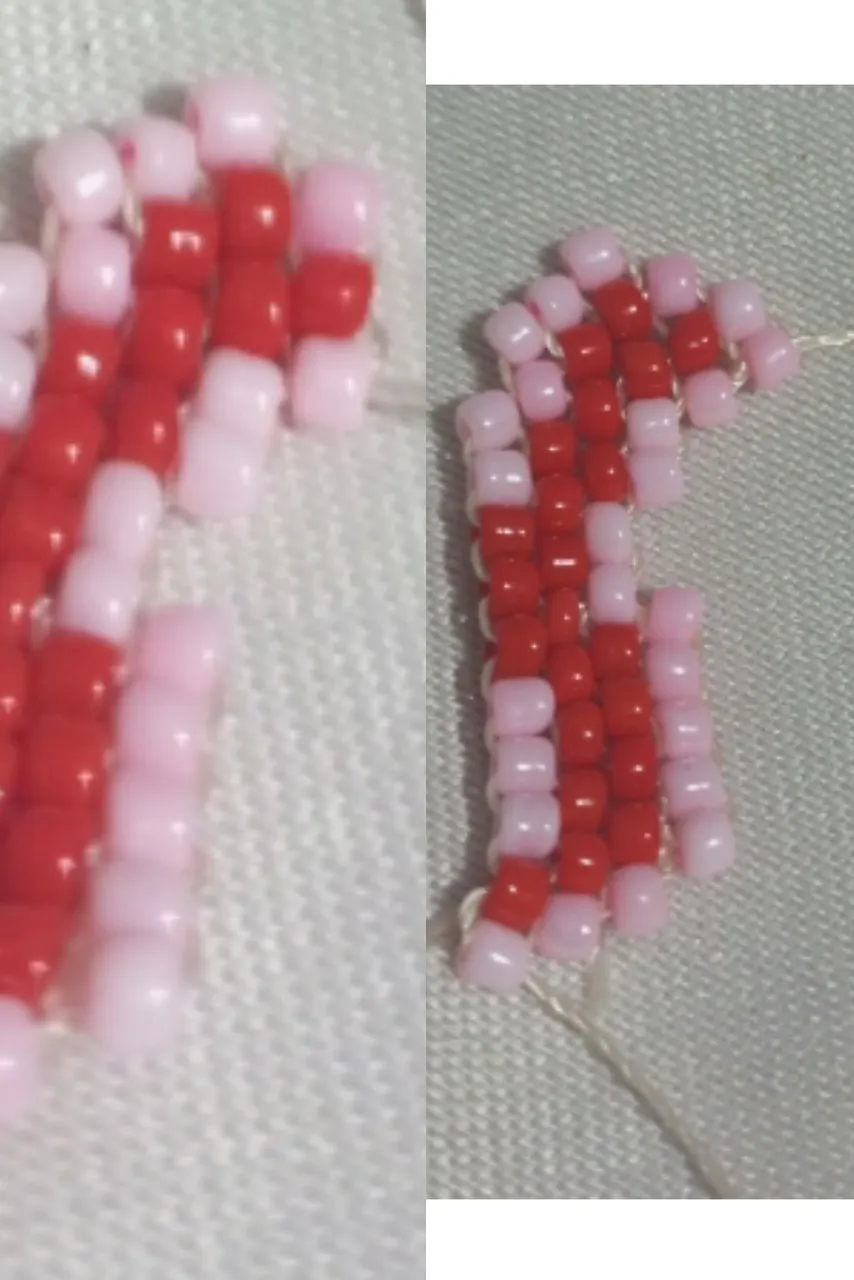
| Comenzamos a realizar la columna principal de nuestra figura. En la imágen observamos la elaboración de la primera columna. Para iniciar esta primera columna conenzamos introduciendo la aguja en la segunda mostacilla y luego seguimos de a una hasta culminar con las 10 mostacillas. | We begin to make the main column of our figure. In the image we can see the elaboration of the first column. To start this first column we begin by inserting the needle in the second bead and then we continue one by one until we finish with the 10 beads. |
| Paso 3 | Step 3 |
|---|---|
| Se construye la segunda linea y hacemos una reducción en está línea usamos 9 mostacillas. | The second line is constructed and we make a reduction in this line using 9 beads. |
| Paso 4 | Step 4 |
|---|---|
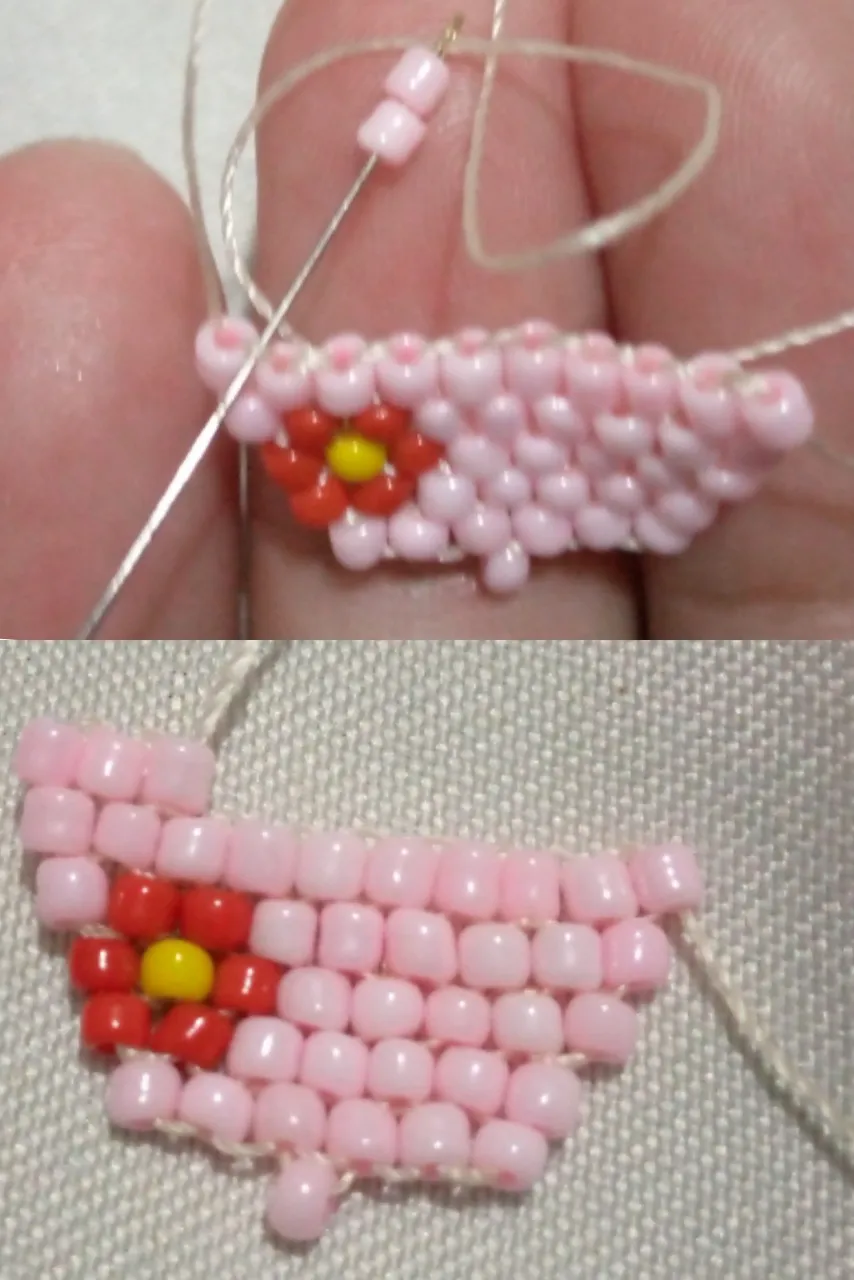
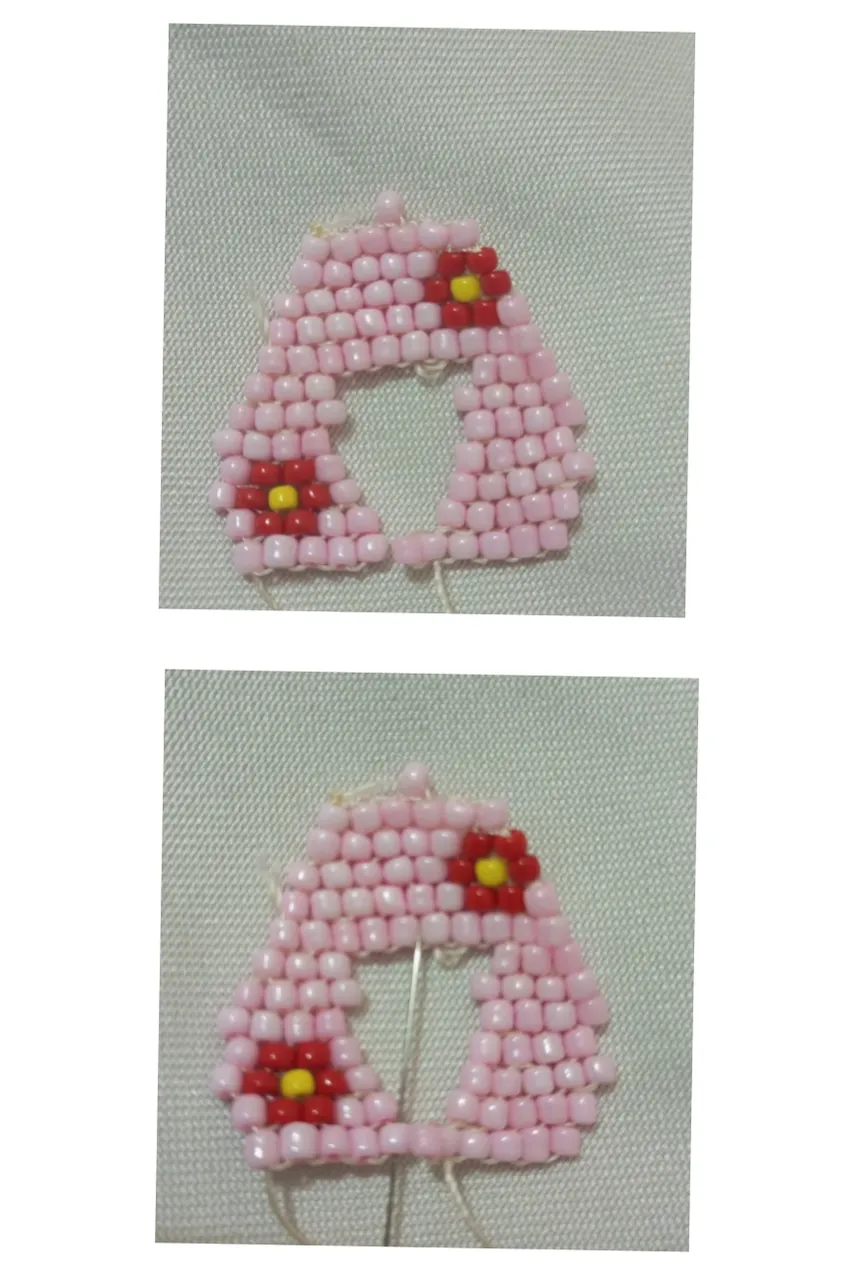
| En las siguientes imágenes obsevamos la construcción de las 5 primeras filas, que corresponde a la parte superior del listón, siempre con una reducción en cada fila. | In the following images we can see the construction of the first 5 rows, which corresponds to the upper part of the ribbon, always with a reduction in each row. |

| Paso 5 | Step 5 |
|---|---|
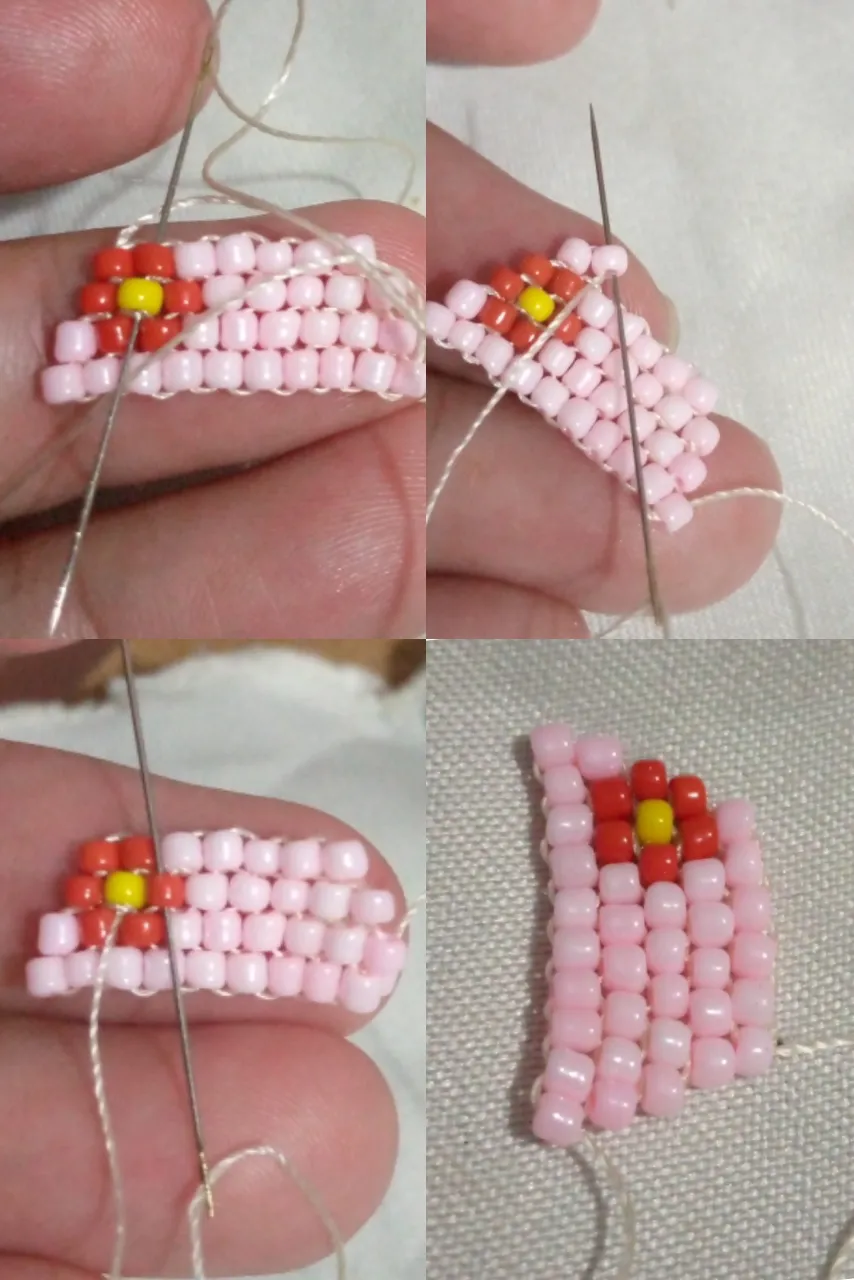
| En éste paso colocaremos una mostacilla en el centro que será para colocar la argolla y poder guindar el dije en el collar. Para eso colocamos la aguja en la posicion de la tercera mostacilla para sacar la aguja allí y colocar la mostacilla. | In this step we will place a bead in the center that will be used to place the ring to attach the pendant to the necklace. To do this we place the needle in the position of the third bead to remove the needle there and place the bead. |
| Paso 6 | Step 6 |
|---|---|
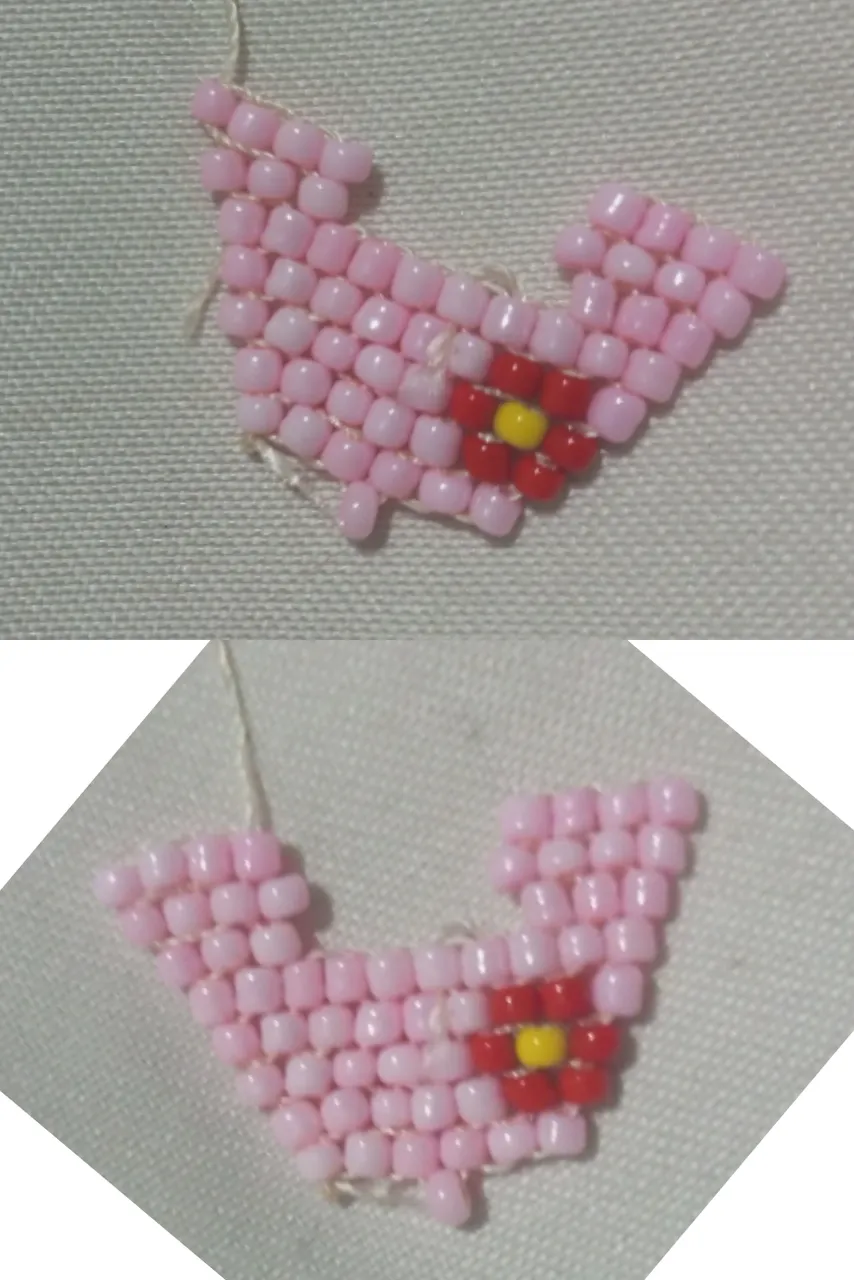
| Posicionamos la aguja que salga en la primera mostacilla superior no importa de que lado, y comenzamos a construir 3 filas hacia abajo. La primera fila es de 3 mostacillas y la 3 y 4 fila de 4 mostacilas cada una. | We position the needle that comes out in the first upper stitch no matter which side, and we start to build 3 rows downwards. The first row is of 3 beads and the 3rd and 4th rows are of 4 beads each. |


| Paso 7 | Step 7 |
|---|---|
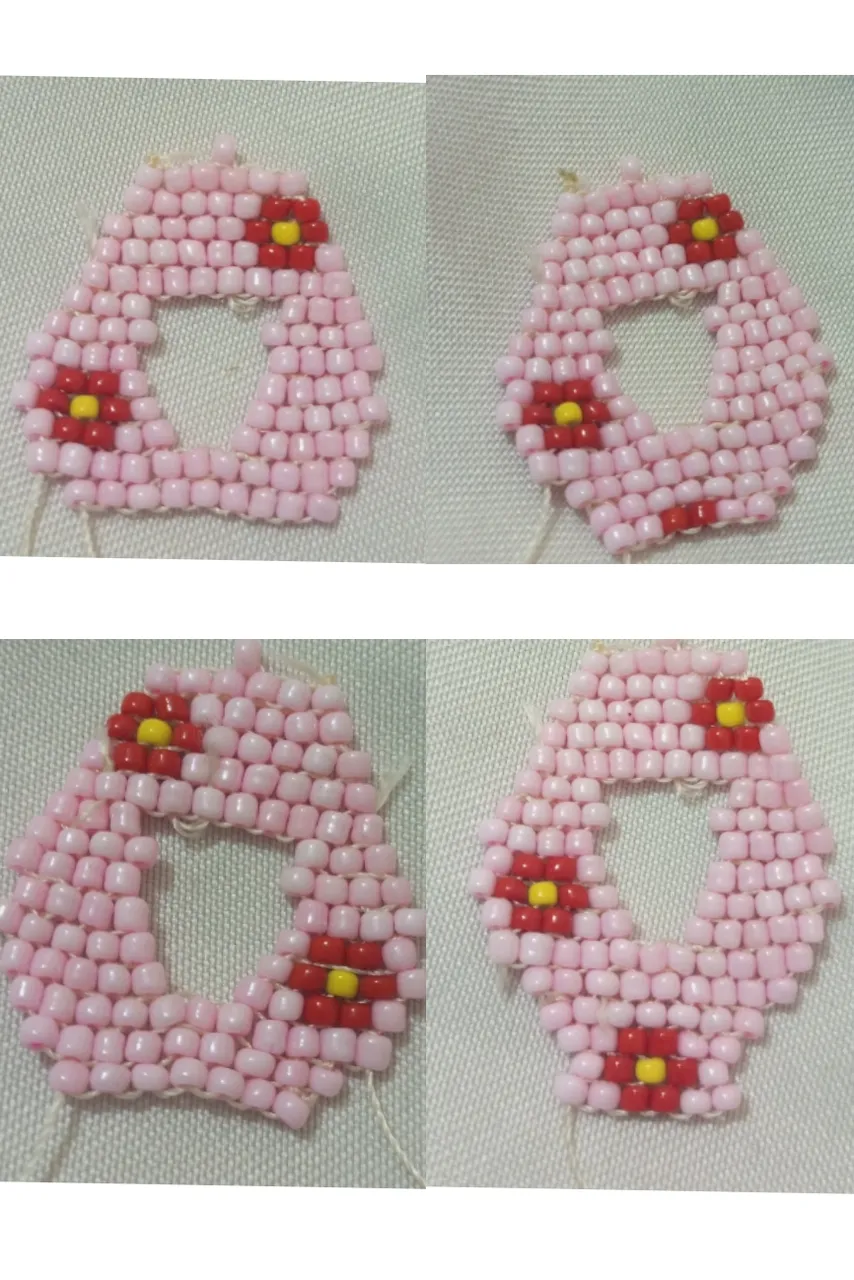
| Repetimos el proceso en el otro lado del listón, son tres filas más. | Repeat the process on the other side of the ribbon, three more rows. |
| Paso 8 | Step 8 |
|---|---|
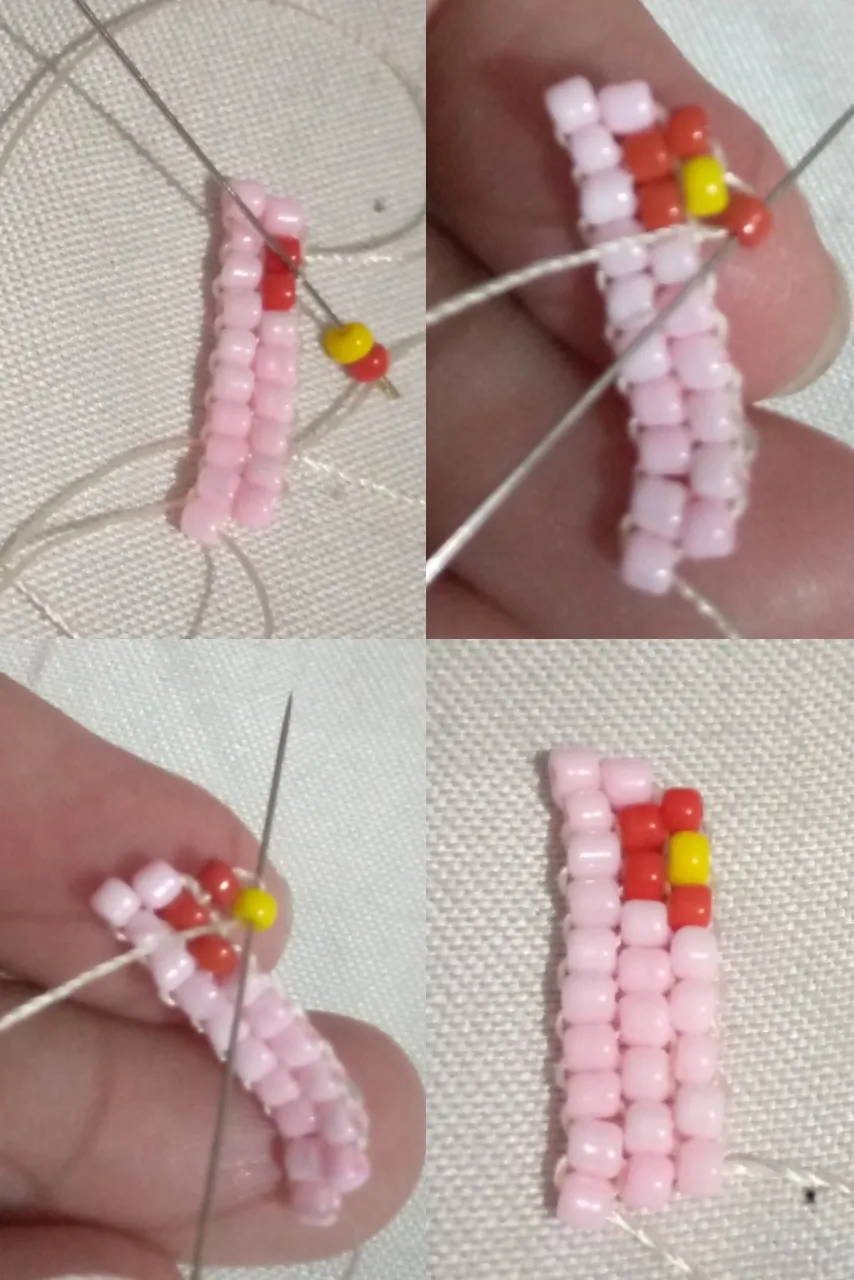
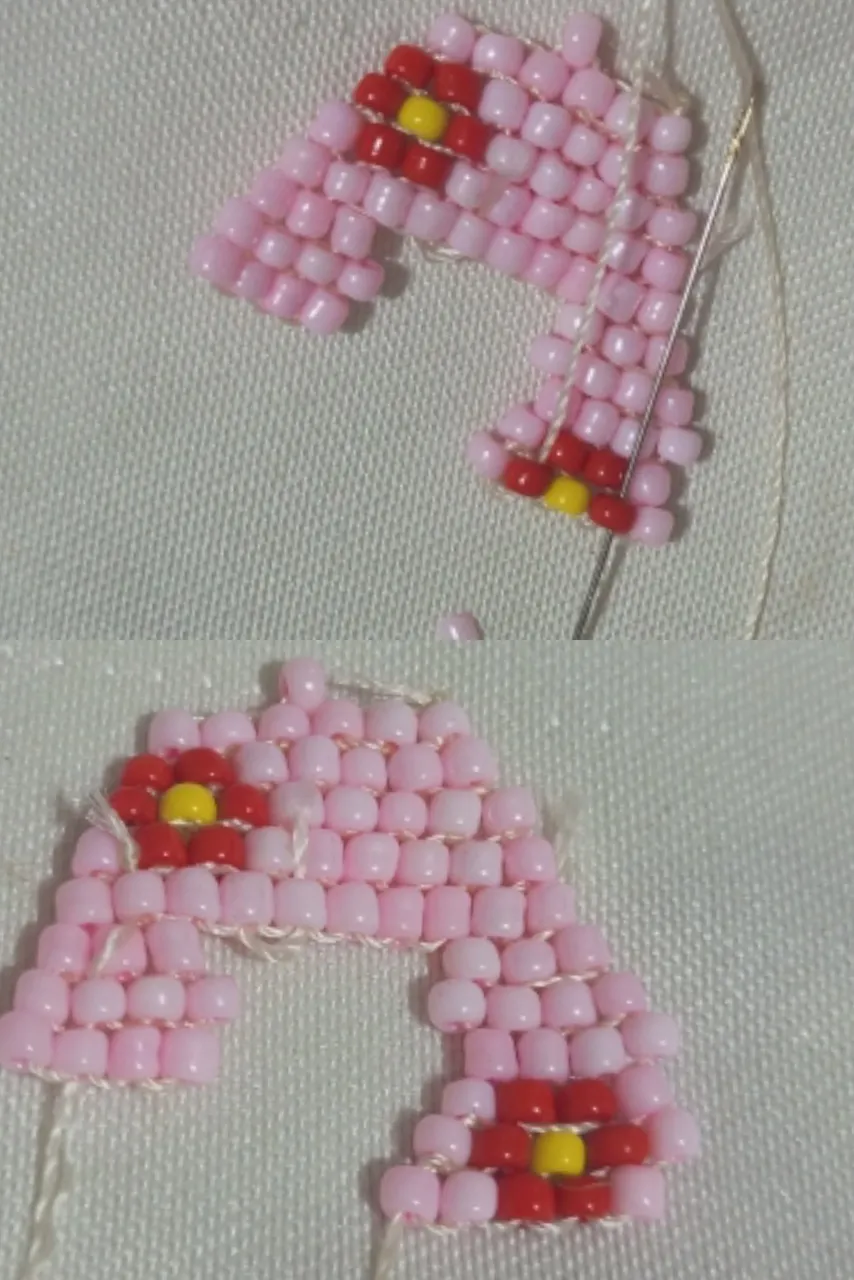
| Añadimos 3 filas más para darle un poco mas de largo al listón. En ese espacio construimos una flor. | We add 3 more rows to give a little more length to the ribbon. In that space we build a flower. |

| Paso 9 | Step 9 |
|---|---|
| Construimos la misma cantidad de filas del otro lado pero la hacemos solo en el tono rosado. | We build the same number of rows on the other side but we make it only in the pink tone. |
| Paso 10 | Step 10 |
|---|---|
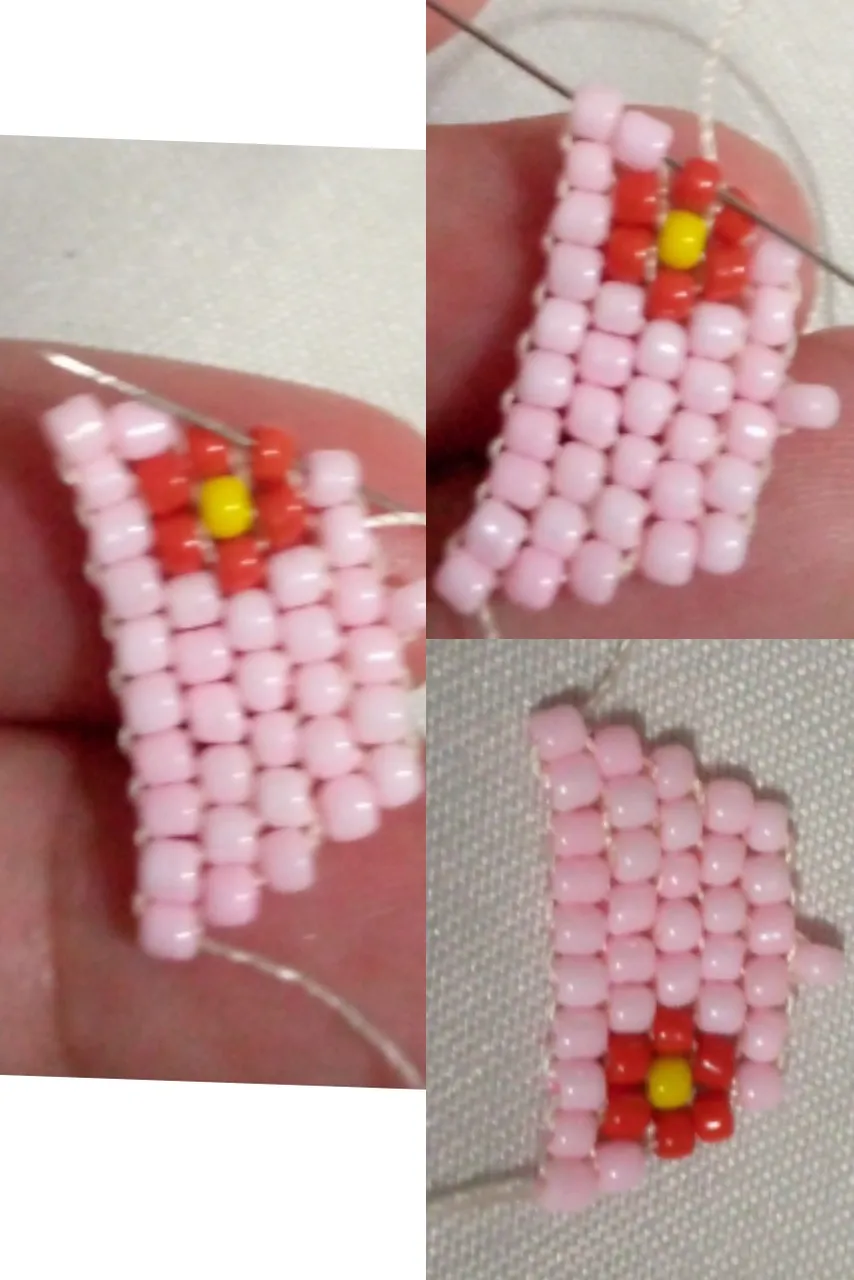
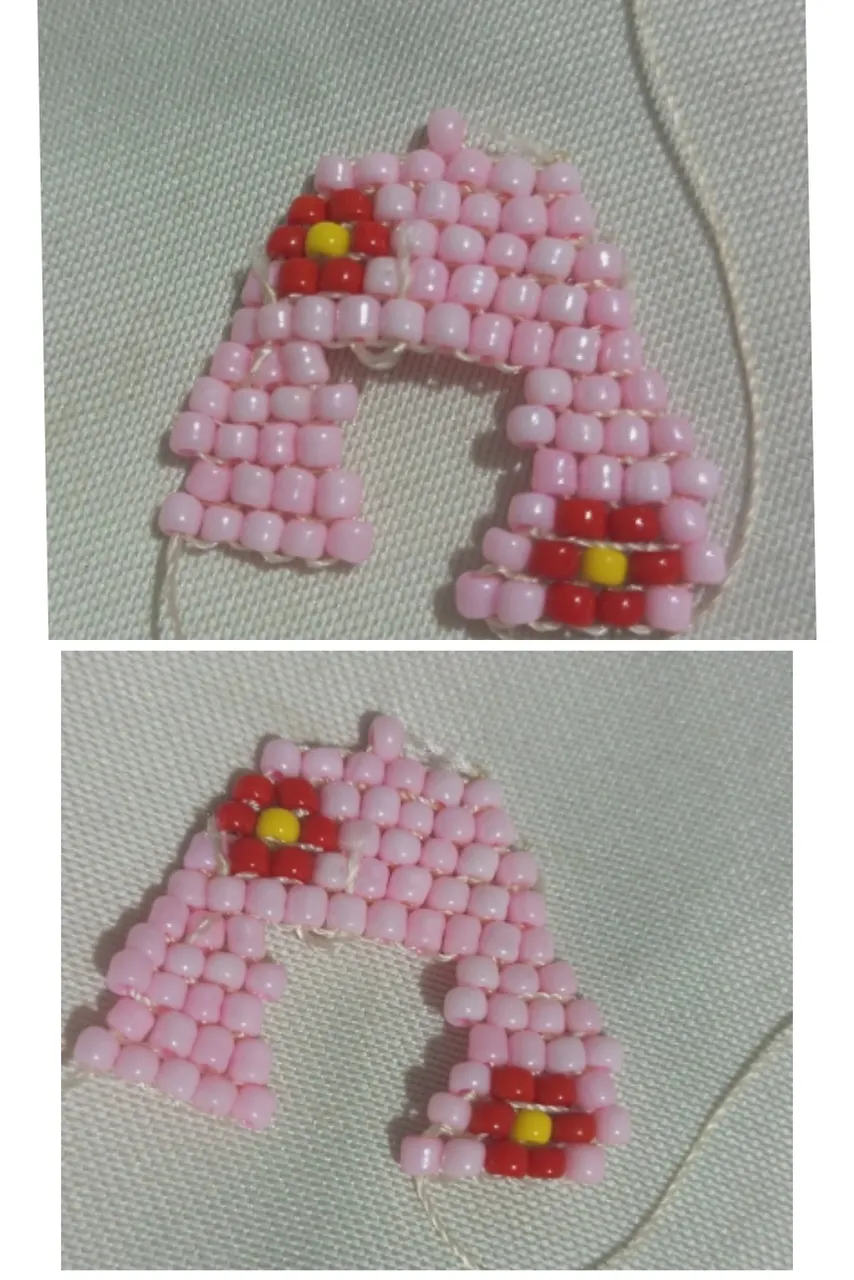
| Está fila de 11 mostacillas es para hacer la unión de los dos lados del listón. | This row of 11 beads is for joining the two sides of the ribbon. |
| Paso 11 | Step 11 |
|---|---|
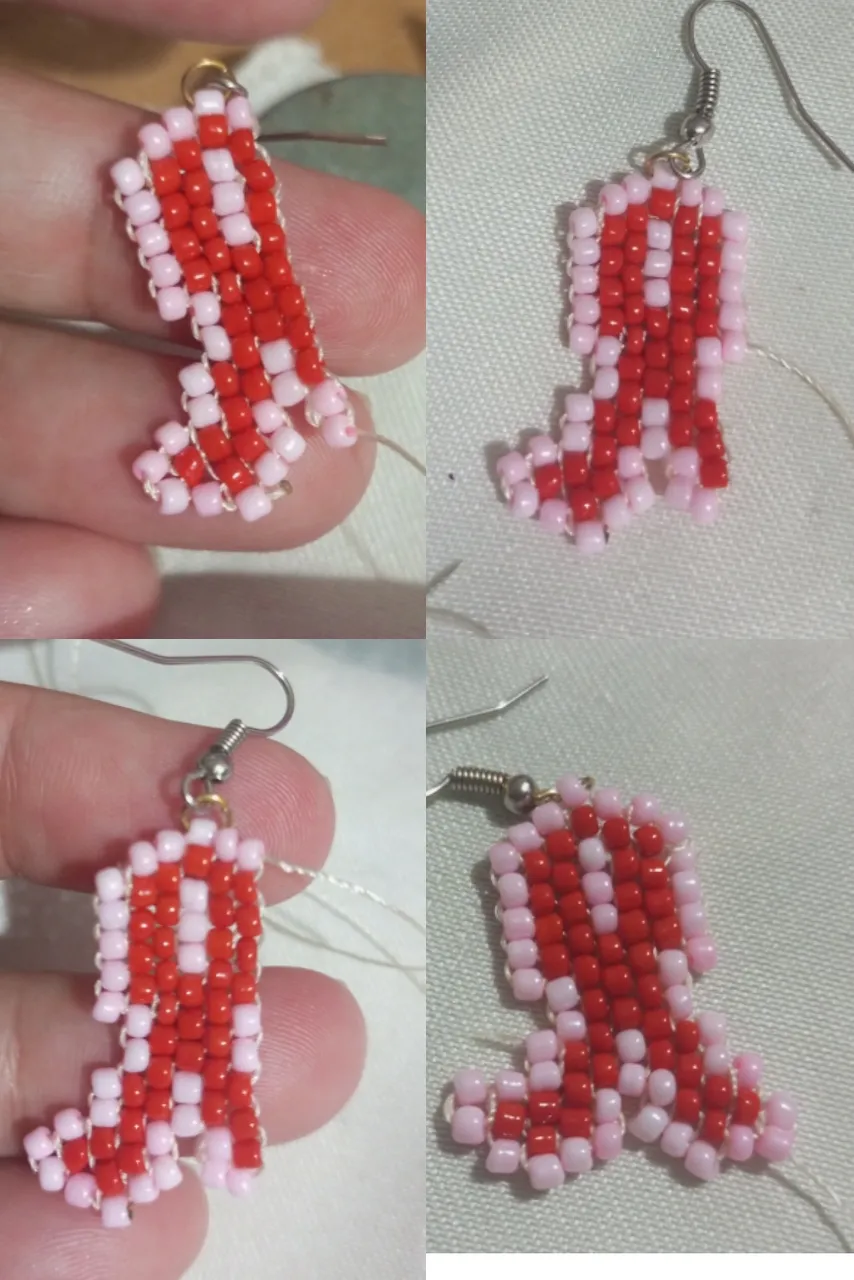
| En la imagen obsevamos la unión de los lados del listón, realizando reducciones 1 de cada lado, por lo que progresamos con 9 mostacillas, luego 7 y llegamos a 5 mostacillas. | In the image we can see the union of the sides of the ribbon, making reductions 1 on each side, so we progress with 9 beads, then 7 and we arrive at 5 beads. |
| Paso 12 | Step 12 |
|---|---|
| El centro de la unión para iniciar con los lados la comenzamos con 6 mostacillas y de alli realizamos ampliaciones de a una mostacillas hasta completar las 5 líneas del centro. También en la imágen obsevamos el trabajo de los lados del listón de 5 filas cada lado. Y para darle forma se realizan reducciones del lado de adentro y ampliaciones en la parte de afuera. | The center of the joint to start with the sides we start with 6 beads and from there we make enlargements of one bead at a time until we complete the 5 rows of the center. Also in the image we can see the work of the sides of the ribbon of 5 rows each side. And to give it shape we make reductions on the inside and enlargements on the outside. |

| Paso 13 | Step 13 |
|---|---|
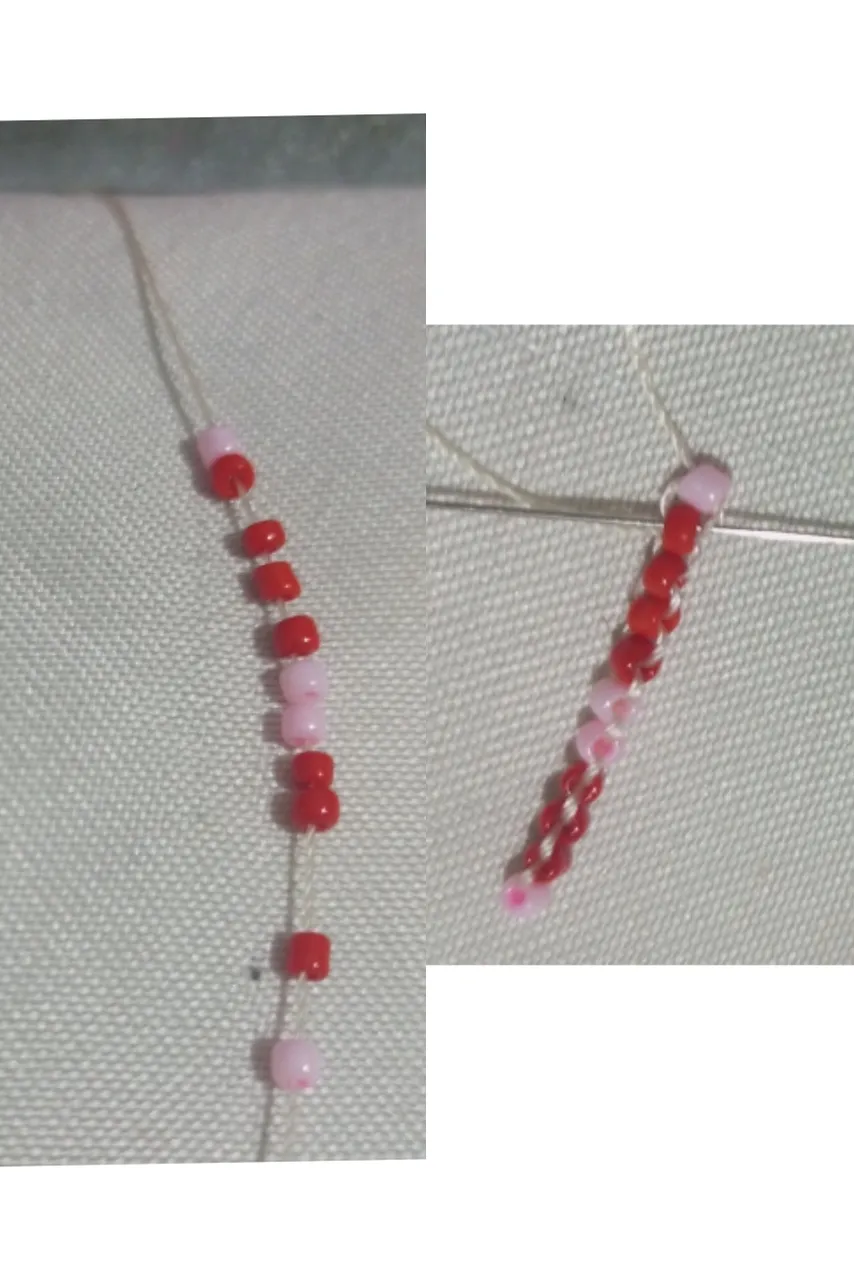
| Para el arete comenzamos construyendo una fila de 10 mostacillas, iniciamos en la mitad del arete. | For the earring we start by building a row of 10 beads, starting in the middle of the earring. |
| Paso 14 | Step 14 |
|---|---|
| Para la segunda línea iniciamos con una reducción y dos ampliaciones. | For the second line, we started with one reduction and two extensions. |
| Paso 15 | Step 15 |
|---|---|
| La tecera fila son 11 mostacillas igual que la primera fila. | The third row is 11 beads as in the first row. |

| Paso 16 | Step 16 |
|---|---|
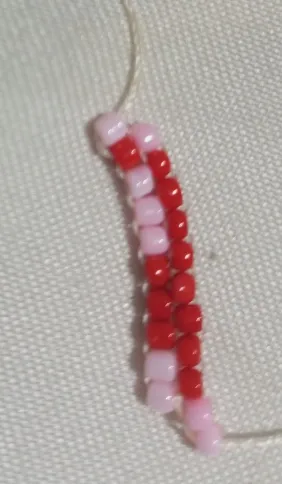
| Para la cuarta fila iniciamos con ampliación y en la quinta mostacilla dejamos dos espacios para continuar con 5 mostacillas más hasta culminar la fila con reducción. | For the fourth row we start with enlargement and in the fifth bead we leave two spaces to continue with 5 more beads until we finish the row with reduction. |

| Paso 17 | Step 17 |
|---|---|
| Culminamos en esa punta con una fila de 3 y 2 mostacilas. Y con ella culminamos el primer lado del arete. | We finish at that end with a row of 3 and 2 mostacilas. And with it we finish the first side of the earring. |
| Paso 18 | Step 18 |
|---|---|
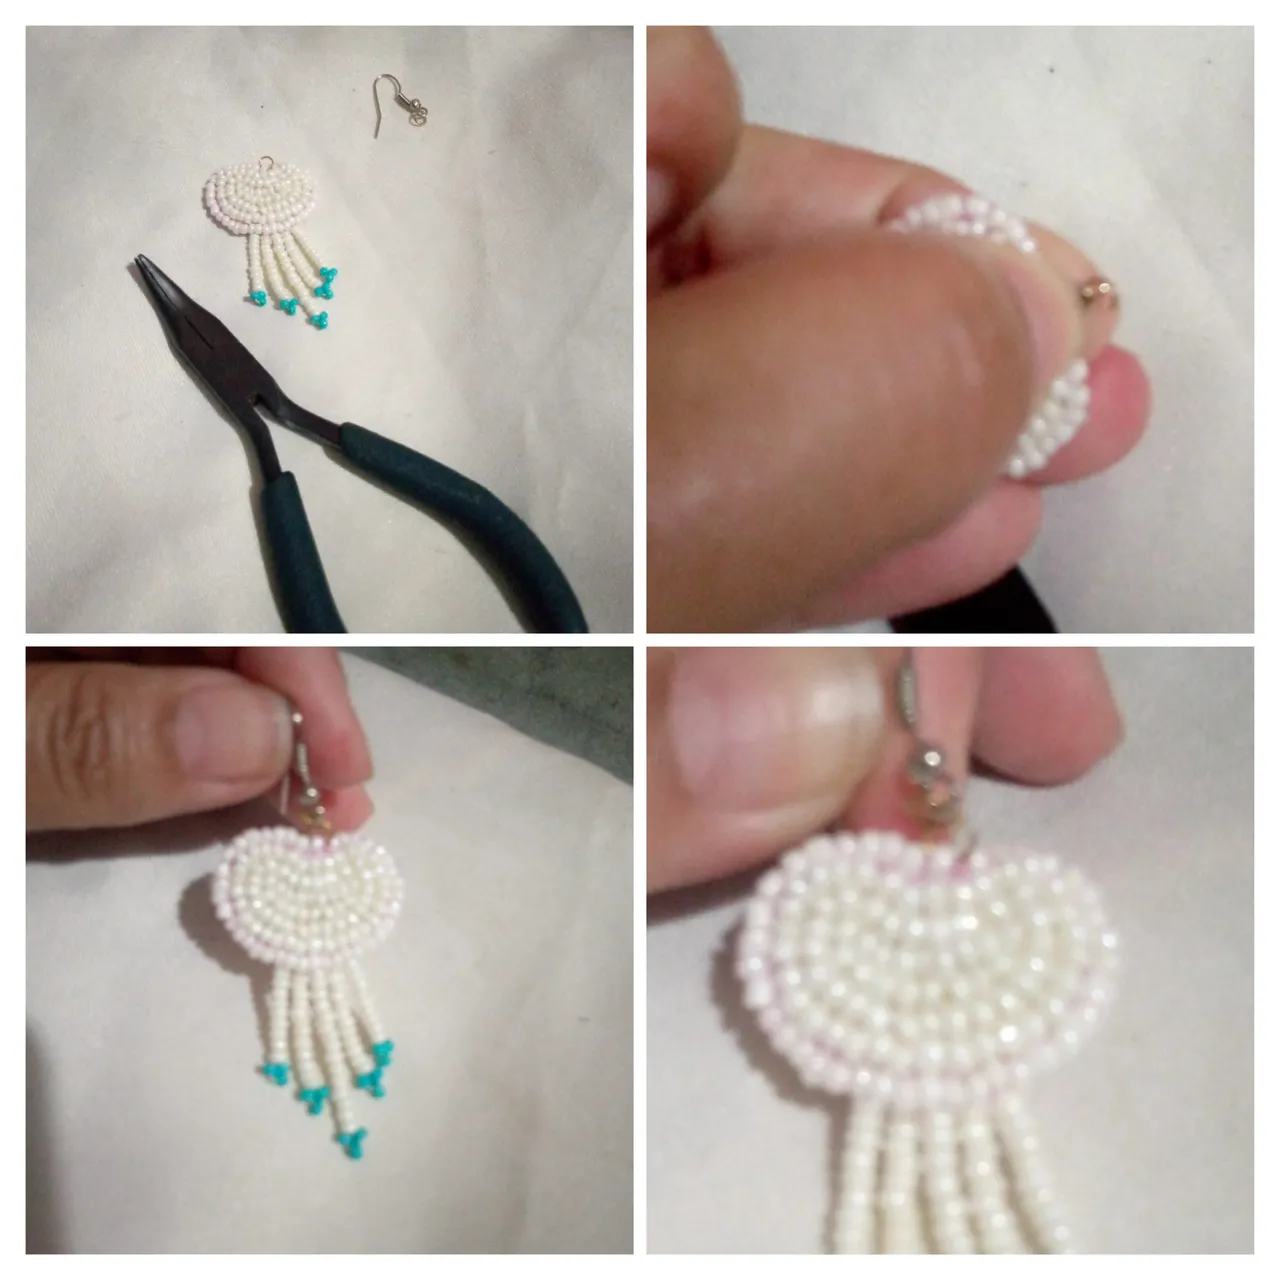
| Colocamos el arete ayudándonos de las pinzas en el arito del medio. | We place the earring using the tweezers in the middle earring. |
| Paso 19 | Step 19 |
|---|---|
| Coloqué el arito en la mostacillas de arriba. Y se repite el mismo procedimiento para el otro lado. | I placed the earring on the top bead. And repeat the same procedure for the other side. |

| Paso 19 | Step 19 |
|---|---|
| Repetimos el mlsmo proceso para el otro arete. | Repeat the same process for the other earring. |
| Despedida | Farewell |
|---|---|
| Y esté es mi post para participar en la propuedta para el MES ROSA invitándo a todos a tomar conciencia. Invitando a las amigas @carmaria, @mariflower, @cargus a que participen en está linda propuesta. Saludos y espero les guste mi post. | And this is my post to participate in the proposal for PINK MONTH inviting everyone to become aware. Inviting my friends @carmaria, @mariflower, @cargus to participate in this beautiful proposal. Greetings and I hope you like my post |
| Créditos | Credits |
|---|---|
| Traductor: www.DeepL.com/Translator (free version).Las fotos fueron tomadas con mi Celular Tecno Sport 7T. Foto de portada editada con Canva y PhotoRoom. Banner:https://images.app.goo.gl/5N3pujMb9u2AePz87. | Translator: www.DeepL.com/Translator (free version). The photos were taken with my Tecno Sport 7T cell phone. Cover photo edited es Canva and PhotoRoom. Banner:https://images.app.goo.gl/5N3pujMb9u2AePz87. |