Bienvenidos a mi blog!
Un saludo a todos los creativos y creativas que nos encontramos en esta comunidad para compartir manualidades, accesorios, etc.
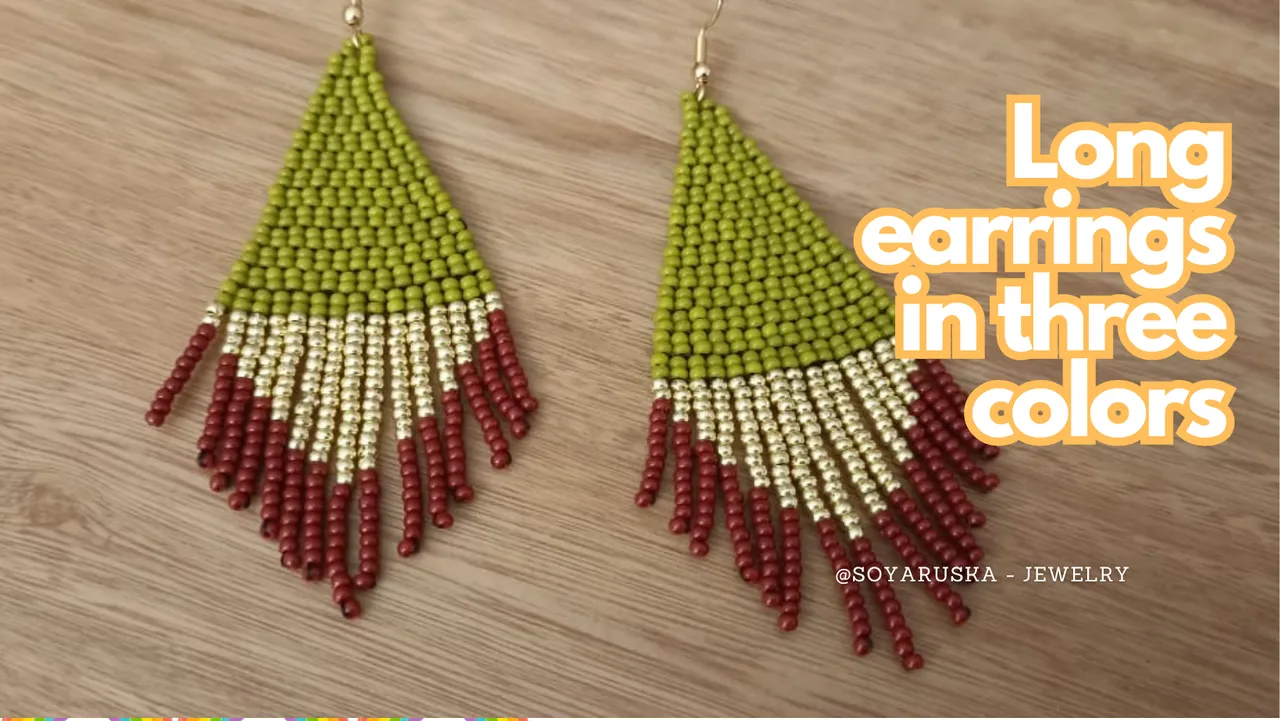
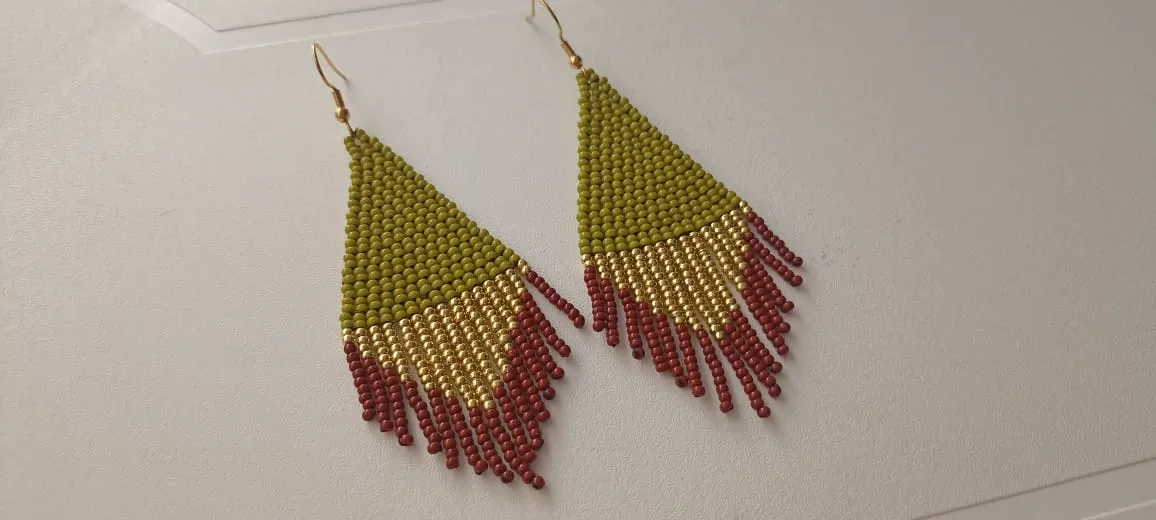
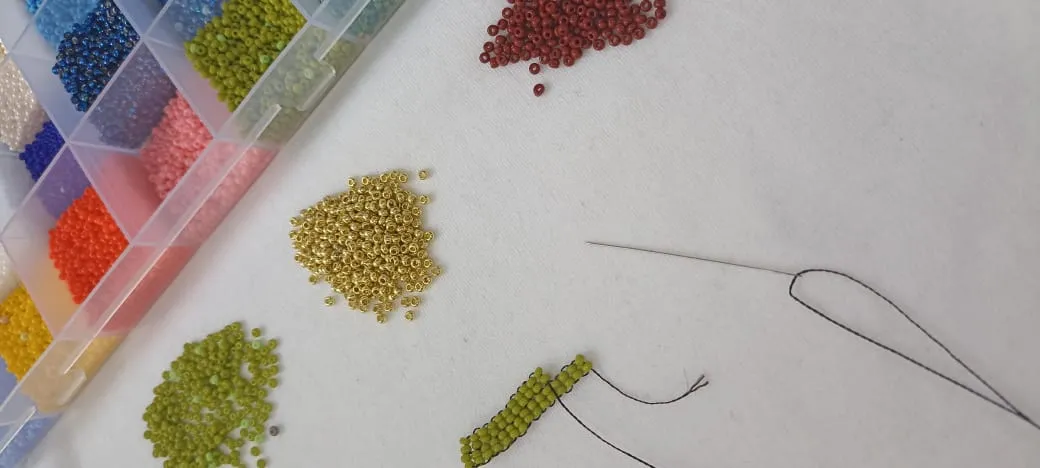
Hoy estuve haciendo unos zarcillos largos tejidos a mano con mostacillas de tres colores.
Estos zarcillos los hice para una amiga que va a cumplir años, y quería hacerle algo con color pero que se vea a la vez elegante. Así que usé verde oliva, dorado y un tono café, que sea versatil para usar con varios looks.
Welcome to my blog!
Greetings to all the creative people that we meet in this community to share crafts, accessories, etc.
Today I was making some long tendrils hand woven with beads of three colors.
I made these tendrils for a friend who is having a birthday, and I wanted to make her something colorful but elegant at the same time. So I used olive green, gold and a brown tone, which is versatile to wear with various looks.
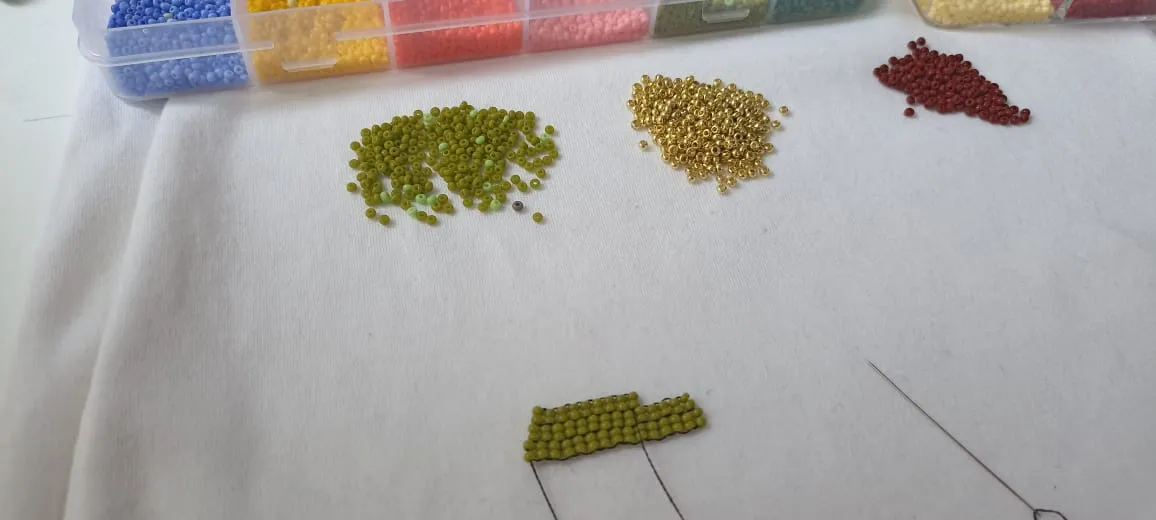
Materiales que utilicé:
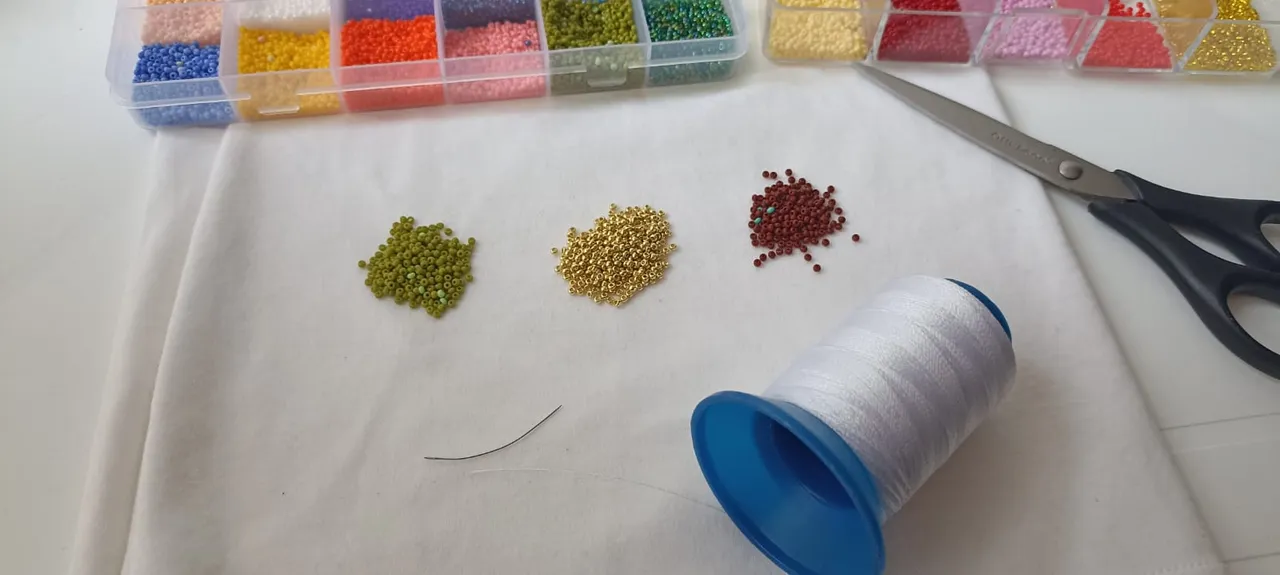
- Mostacillas #8 (verde, dorado,café)
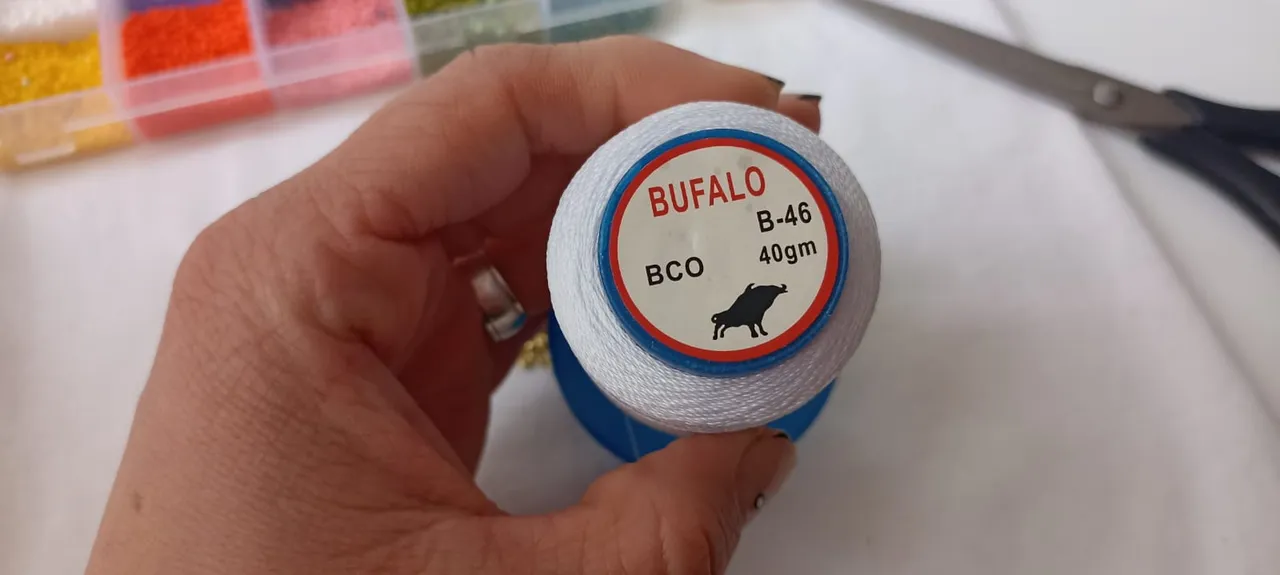
- Hilo encerado negro
- Ganchos colgantes para aretes
- Tijera.
Materials I used:
- #8 beads (green, gold, brown)
- Black waxed thread
- Hanging earring hooks
- Scissors.
Lo primero que haré es ponerle a la aguja dos metros de hilo, luego hacemos una línea con punto peyote con las mostacillas verde, esta línea base tendrá 13 columnas de mostacillas.
Luego en la segunda fila vamo a empezar a bordar en lasegunda para ir reduciendo el ancho y formar un triángulo o pirámide.
The first thing I will do is to put two meters of thread on the needle, then we will make a line with peyote stitch with the green beads, this base line will have 13 columns of beads.
Then in the second row we are going to start embroidering in the second row to reduce the width and form a triangle or pyramid.
Voy tejiendo siempre acortando una mostacilla al
comienzo para ir formando mi parte superior que es un triángulo.
Este tejido es muy sencillo una vez que lo dominamos, la práctica es importante.
I weave always shortening a stitch at the beginning to form the
the beginning to form my upper part, which is a triangle.
This weaving is very simple once you master it, practice is important.

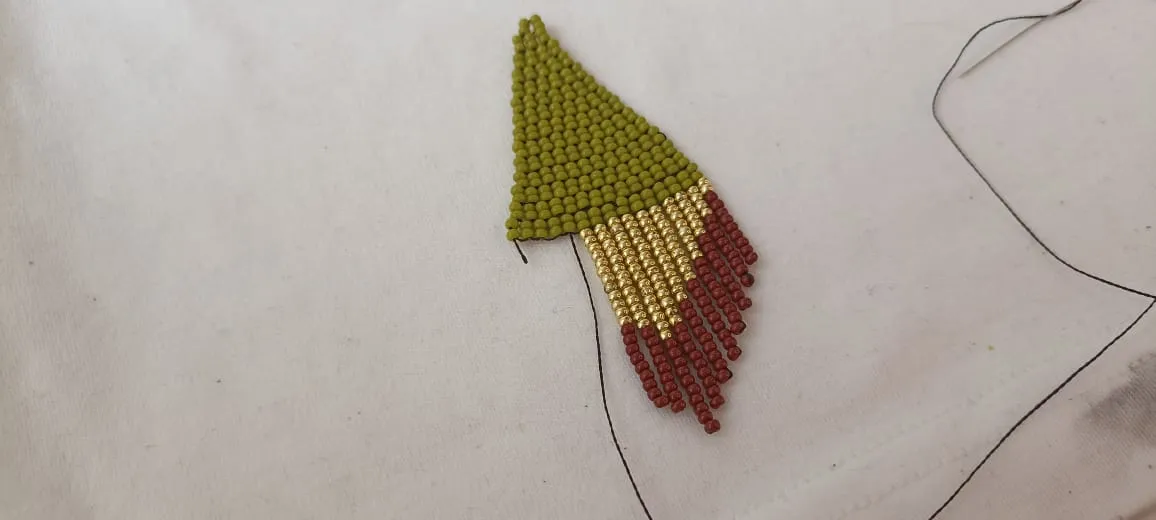
Cuando llegó a la parte alta del triángulo solo quedan dos columnas de mostacillas, una especie de cuadrado. Más adelante ahí pondremos el colgante.
Cuando ya término,bajo la aguja junto con el hilo a la parte de abajo donde iniciamos quedando con el hilo en unos de los inicios.
When you reached the top of the triangle there are only two columns of beads left, a kind of square. Later we will put the pendant there.
When finished, I lower the needle along with the thread to the bottom of the triangle where we started, leaving the thread in one of the beginnings.


Ahora vamos llenando las mostacillas de la parte superior,como haré puras figuras de triángulo, vamos a ir llenando de menor a mayor y las mostacillas de abajo serán siempre nueve. A medida que sumemos doradas, dará la apariencia que las de color café también es más largo.
Now we are going to fill the beads at the top, as I will make pure triangle shapes, we are going to fill from smallest to largest and the bottom beads will always be nine. As we add golden ones, it will give the appearance that the brown ones are also longer.
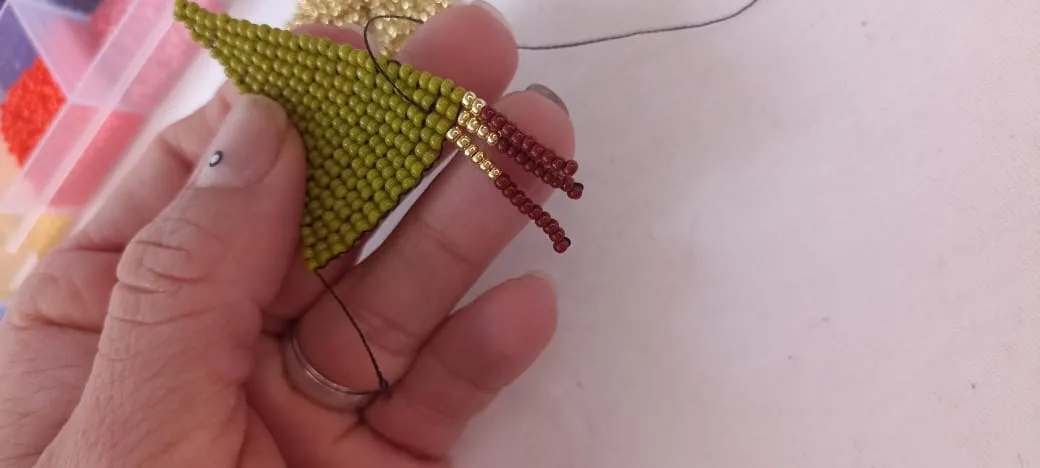
Si éstas aprendiendo esta técnica puedes buscar modelos que te gusten y simplemente ir contando las mostacillas para construir la figura.
Comenzamos con dos mostacillas doradas y vamos sumando de dos en dos en cada tira.
Esta elección de colores queda muy bella, tu puedes elegir los colores de tu preferencia,incluso ayudarte con un círculo cromático para elegir tonos diferentes que hagan contraste.
If you are learning this technique you can look for models that you like and simply count the beads to build the figure.
We start with two golden beads and add two by two on each strip.
This choice of colors looks very beautiful, you can choose the colors of your preference, even help you with a chromatic circle to choose different tones that make contrast.


Cuando ya terminamos,cerramos con un nudito y vamos a colocar el colgante en la parte superior.
When we are finished, we close with a knot and we will place the pendant on the upper part.
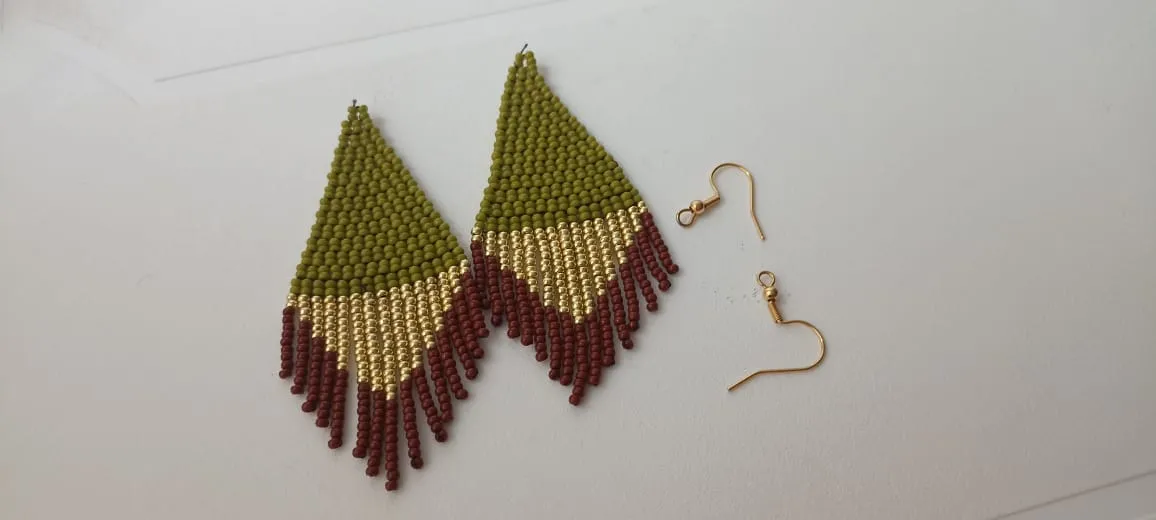
Abrimos el gancho y metemos las mostacillas en la parte superior, cerramos el gancho haciendo presión para que no se salga, y así tenemos unos bellos zarcillos listos.
We open the hook and put the beads in the upper part, close the hook pressing it so that it does not come out, and we have beautiful tendrils ready.
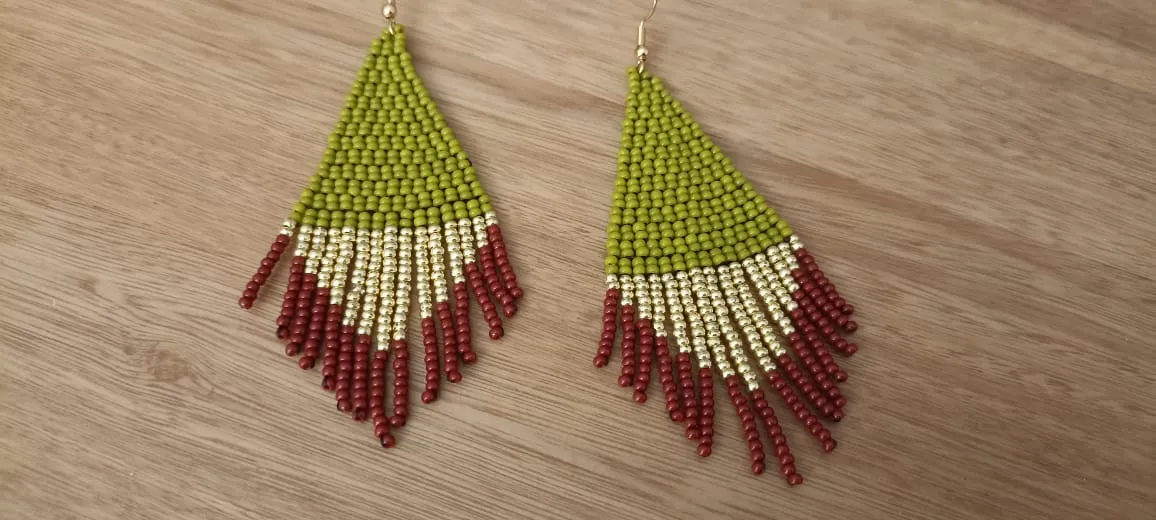
Este diseño es muy hermoso y fácil de combinar lo cual siempre le suma puntos a cualquier accesorio porque siempre queremos vernos bien sin necesidad de tener miles de aretes de todos los colores.
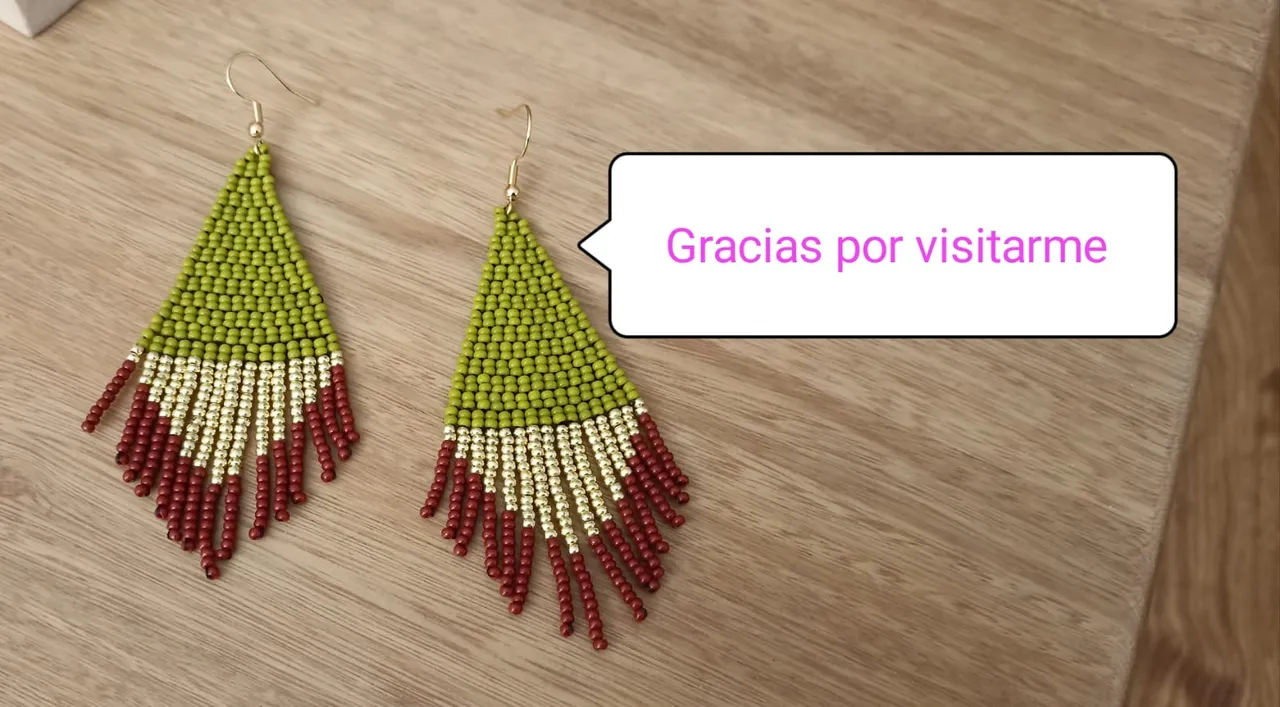
Déjame saber en los comentarios si te gustó este tutorial y anímate a ponerlo en práctica en casa.
This design is very beautiful and easy to combine which always adds points to any accessory because we always want to look good without having thousands of earrings of all colors. Let me know in the comments if you liked this tutorial and encourage you to put it into practice at home.
Fotografías y texto de mi autoría
diseños en Canva
Traducción con Deepl, (versión gratuita)
Photographs and text by me
designs in Canva
Translation with Deepl, (free version)