Being a mom I receive many details from my children that have a special place in my heart and many of them are Mother's Day gifts, like this bracelet that I show you today and that I decided to update.

Happy day #jewerly friends, I hope you are feeling great! Today I'm happy to share with you an update I made to a very special gift I received from my kids about 5 years ago for Mother's Day.
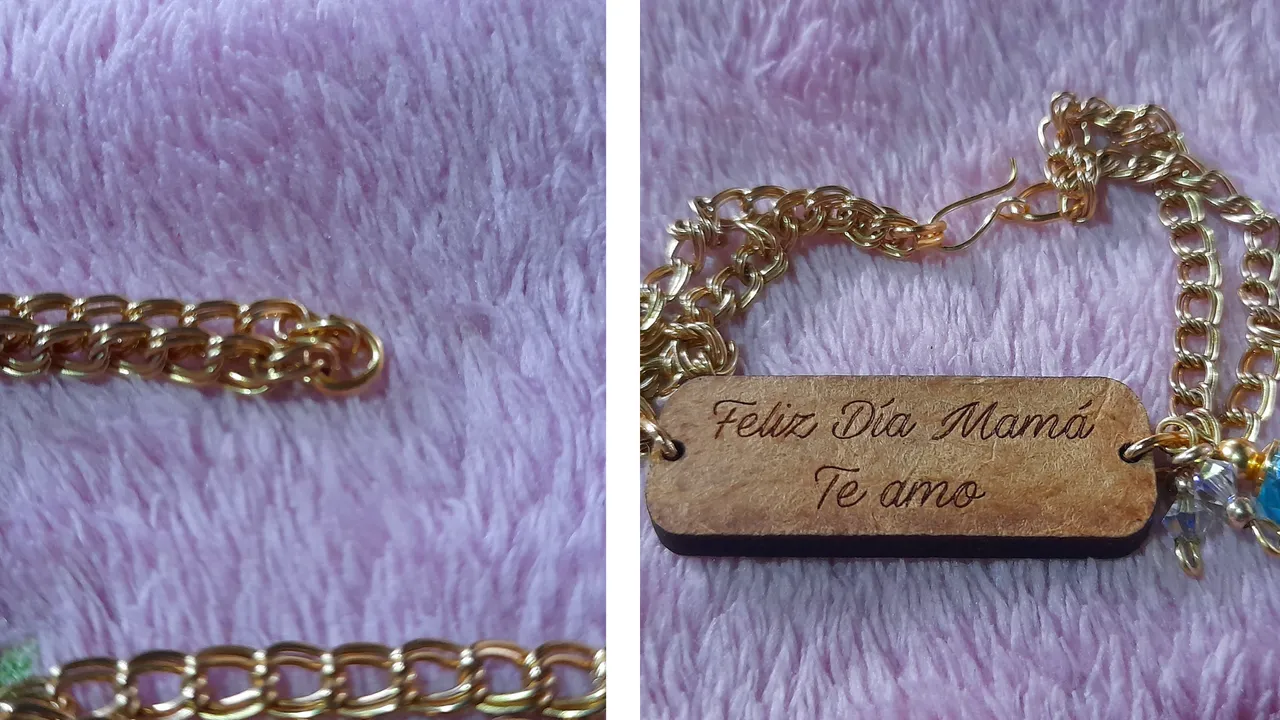
It is a bracelet with a wooden plate with the phrase "Happy Mother's Day.... I love you", which as I told you was a gift for Mother's Day at their school, so I had two of the same; one for Matias and another for Miranda, so I decided to use only one and keep the other as a souvenir, but a little while ago I found it in my drawer and I wanted to give a new look to it.


For this project it occurred to me that I could give it a little glam touch by replacing the cord with some golden chains, besides adding a small pendant on one of its sides which has a very special meaning for me.
As you can see I decided to use crystals of different colors for the pendant, which is composed of three pieces. One with a blue and pink crystal that represent my children and the other two represent my husband and me, so more than an accessory it is a piece with a lot of sentimental value and that inspires me a lot of tenderness, not only for the inscription on the plate but for the meaning of the whole set.
The truth was a very simple update to perform but with a completely incredible result because the change was from the earth to the moon. And without further ado, here are the materials and the step by step.
Engraved plate
Golden rings
Golden chain
Crystals of different colors and sizes
Small pellets
Small golden rings
Golden caps
Golden wire
Closers
Scissors
Tweezers
Pliers

Arrange the necessary materials for the work.

Cut the cord to free the wooden plate.

Pass a ring through one of the holes on each side of the plate.

Cut two pieces of chain according to the size of your wrist, taking into consideration that each of them should only cover half of the wrist.
In my case I thought it looked very simple with only one, so I decided to use two for each side and it seemed perfect.

Then I passed the two pieces of chain through the golden ring and with the help of the flat clip I proceeded to close it.

I repeated the procedure with the other end of the plate and at this point I only had to place the clasps to close it and the pendant that gave it the special touch.

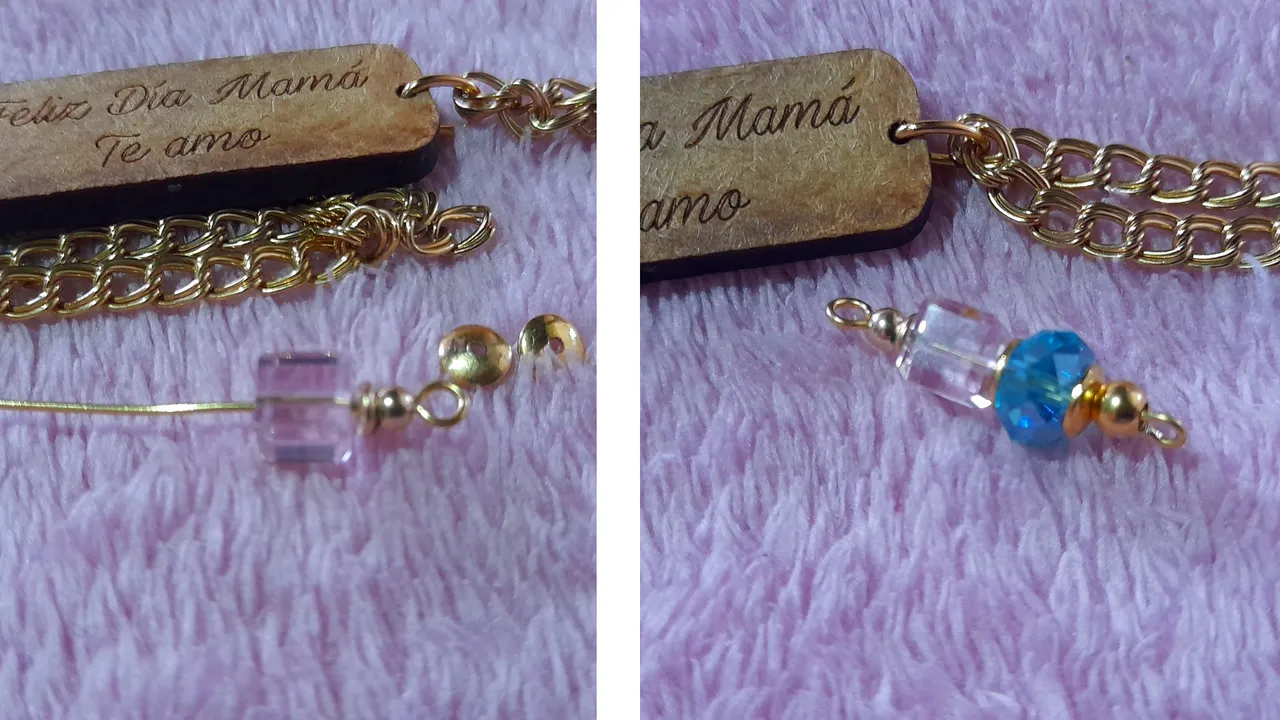
For the elaboration of the pendant, specifically the central piece, I used a blue and a pink crystal, some balins, rings and caps that were placed in the order I show in the images.
The first thing I did was to cut a piece of wire and close one of its ends with the round pliers and insert a ball, a ring and the pink piece.
Then a cap, the blue crystal, another cap and a ball, and finally we closed it. And I placed it in the ring located on the left end of the wooden plate.

Now all that was left was to make the two small pieces for the pendant, which would have a small swarosky crystal, balls and a ring.
If you look closely, each one is different because one represents me and the other one represents my husband.
Once they were ready I attached them to the central pendant which are our children. So there is our family. Matias and Miranda as we always want them to be and the two of us always next to them.


Now all that was left were the clasps, and for that I placed a ring at the end of one of the chains and on the other side a ring and the hook clasp, and with this I was ready to update my Mother's Day bracelet.

And as you know that I start a piece and then I make others, I made a necklace and some matching earrings that I will show you in another opportunity.
In the meantime, I hope you liked this little renovation and that it can serve as a guide to apply it to any accessory you have at home. I was really happy with the result and now it has much more value than before.
And with this I say goodbye for today guys. Kisses and blessings!

Al ser mamá recibo muchos detalles de mis niños que tienen un lugar especial en mi corazón y muchos de ellos son regalos del día de la madre, como éste brazalete que les muestro hoy y al que decidí hacerle un update.
Feliz día amigos de #jewerly, espero se encuentren súper bien! El día de hoy estoy feliz de compartir con ustedes un update que realicé a un detalle muy especial que recibí de mis niños hace unos 5 años aproximadamente para el día de las madres.
Se trata de una pulsera con una plaquita de madera con la frase "Feliz Día Mamá... te amo", que como les dije fue un regalo por el día de las madres que dieron en su colegio, por lo que tuve dos iguales; una por Matías y otra por Miranda, así que decidí darle uso sólo a una y guardar la otra de recuerdo, pero hace poquito ordenando mi gavetero me encontré con ella y quise darle un nuevo aire.
Para este proyecto se me ocurrió que podía darle un toquecito glam sustituyendo el cordón por unas cadenas doradas, además de agregarle un pequeño colgante en uno de sus lados el cual tiene un significado muy especial para mí.
Como pueden ver decidí usar cristales de diferentes colores para el colgante, que está compuesto por tres piezas. Una con un cristal azul y rosado que representan a mis hijos y los otros dos a mi esposo y a mi, por lo que más que un accesorio es una pieza de mucho valor sentimental y que me inspira mucha ternura, no sólo por la inscripción en la placa sino por el significado de todo el conjunto.
La verdad fue un update muy sencillo de realizar pero con un resultado completamente increíble pues el cambio fué de la tierra a la luna. Y sin más vueltas les dejo los materiales y el paso a paso.
Placa grabada
Argollas doradas
Cadena dorada
Cristales de diferentes colores y tamaños
Balines pequeños
Aros dorados pequeños
Tapitas doradas
Alambre dorado
Cerradores
Tijera
Pinzas
Tenaza
Disponer los materiales necesarios para el trabajo.
Cortar el cordón para liberar la placa de madera.
Pasar una argolla por uno de los orificios dispuestos a cada lado de la plaquita.
Cortar dos piezas de cadena según la medida de su muñeca, tomando en consideración que cada una de ellas sólo debe cubrir la mitad de la muñeca.
En mi caso me parecía se veía muy sencilla sólo con una, por lo que decidí utilizar dos para cada lado y así me pareció perfecta.
Seguidamente hice pasar las dos piezas de cadena por la argolla dorada y con ayuda de la pinza plana procedí a cerrarla.
Repetí el procedimiento con el otro extremo de la placa y ya en éste punto sólo faltaría colocar los broches para cerrar y el colgante que le dió el toque especial.
Para la elaboración del colgante, específicamente la pieza central, utilicé un cristal azul y uno rosado, algunos balines aritos y tapas que fueron ubicados en el orden que muestro en las imágenes.
Lo primero que hice fue cortar una pieza de alambre y cerrar una de sus puntas con la pinza redonda e introducir un balin, un aro y la pieza rosada.
Seguidamente un tapita, el cristal azul, otra tapita y un balín y finalmente cerramos. Y la coloqué en la argolla ubicada en el extremo izquierdo de la placa de madera.
Ya sólo quedaba elaborar las dos piezas pequeñas para el colgante, las cuales llevarían un cristal de swarosky pequeño, balines y un aro.
Si se fijan bien, cada uno es diferente pues uno me representa a mí y el otro a mi esposo.
Una vez listos los uní al dije central que son nuestros niños. Así que ahí está nuestra familia. Matías y Miranda como queremos que siempre estén y nosotros dos siempre al ladito de ellos.
Ahora ya sólo quedaban los cerradores, y para eso coloqué una argolla al final de una de las cadenas y del otro lado una argolla y el cerrador tipo anzuelo y ya con ésto estaba listo el update de mi pulsera del día de las madres.
Y como ustedes saben que yo comienzo una pieza y luego me provoca hacer otras, me hice un collar y unos zarcillos que hacen juego y que les estaré mostrando en otra oportunidad.
Por lo pronto espero les haya gustado esta pequeña renovación y les pueda servir de guía para aplicarla con algún accesorio que tengan en casa. Yo la verdad quedé súper feliz con el resultado y justo ahora tiene muchísimo más valor que antes.
Y con ésto me despido por hoy chicos. Besitos y bendiciones!
Photography by|Fotografía por:
@rlathulerie, Samsung Galaxy M12
Cover created in | Portada Creada en Canva
Edtion by| Edición por:
@rlathulerie on Canva
Separators created in| Separadores creados en Canva
Translated with www.DeepL.com/Translator (free version)