
FULL VERSION ESPAÑOL

Saludos a toda la gente linda que hace la bisutería más hermosa en la Comunidad de #Jewelry. Hace unos días atrás me invitaron para participar en la iniciativa de Concurso de Joyas del País y pues hoy les traigo el paso a paso de un Llavero de Corazón usando la Técnica Miyuki.


Si se lo preguntan, la Técnica Miyuki consiste en utilizar mostacillas de vidrio específicamente, para crear diseños intrincados con patrones y de manera más detallada. Por supuesto, de más está decirles que es una técnica japonesa, de ahí su nombre.
Y bueno, la verdad es que no sabía qué hacer para participar en esta iniciativa, así que me tomé algunos días para investigar y me topé con esto del Miyuki, sin embargo, nunca lo había hecho, fue mi primera vez y vaya que fue complicado. En total hice esta pieza como 15 veces y no pasaba de la tercera línea porque siempre conseguía un error.

Si pudiera clasificar dicha técnica a nivel de dificultad, le daría sin pensarlo un 7/10. Aunque en mi infancia inicié por corto tiempo en el arte de la bisutería con mostacillas sencillas y económicas, definitivamente este arte del Miyuki es otro nivel ya que si o si necesitas una aguja, un hilo especial y la clave de todo, las mostacillas peculiares para hacer esto.
Esas mostacillas son diferentes y únicas porque vienen de un tamaño exacto y uniforme, así como con un hueco lo suficientemente ancho para que entre el hilo especial con la aguja fina. Como la técnica es medio complicada, intentaré explicarlo con fotos lo mejor que pueda, y al final dejaré el video del cual me fijé por YouTube.
𝙴𝚕𝚎𝚖𝚎𝚗𝚝𝚘𝚜 𝚊 𝚄𝚝𝚒𝚕𝚒𝚣𝚊𝚛
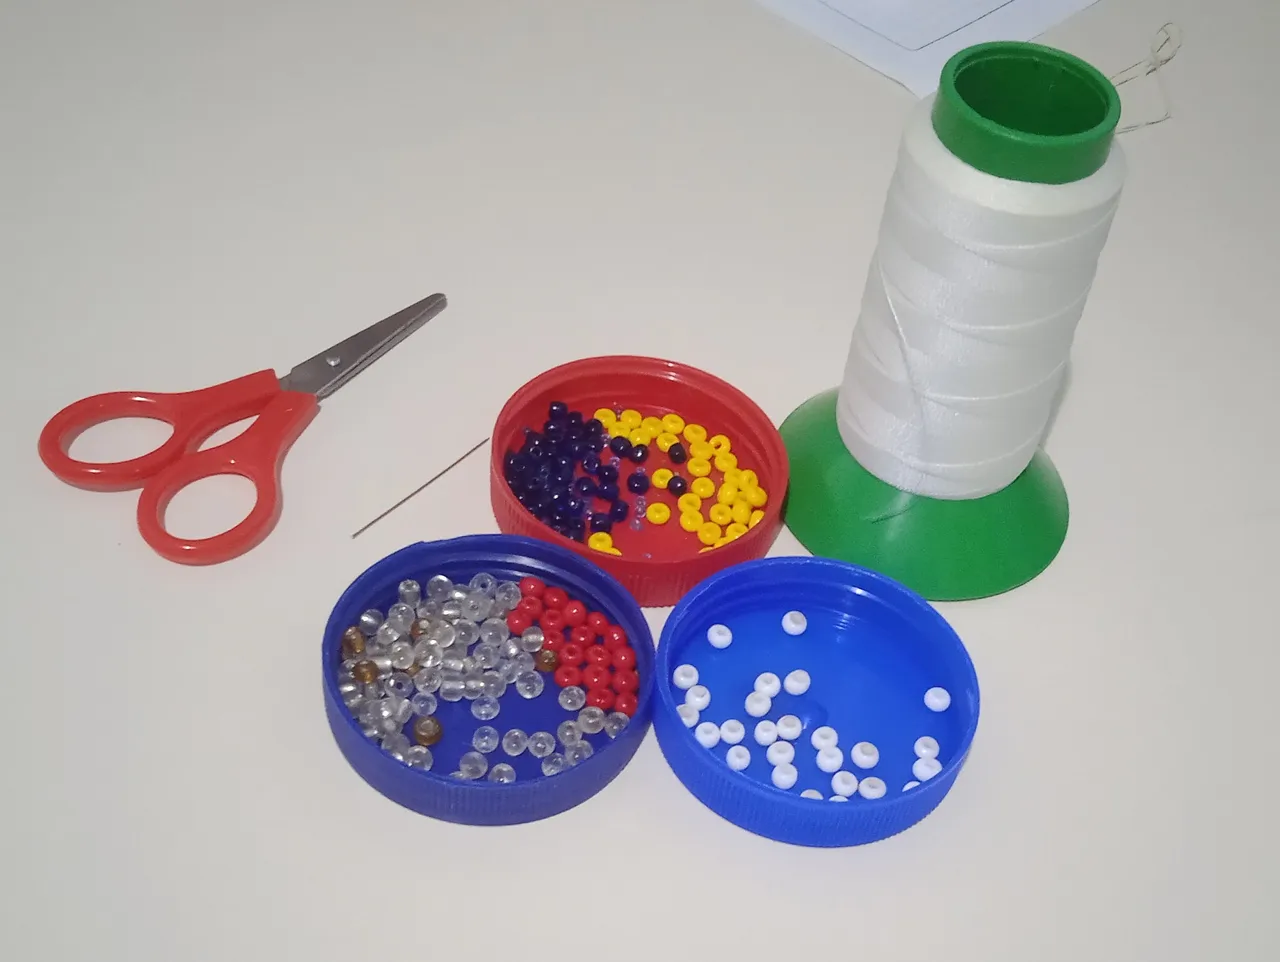
Los elementos que utilicé fueron:
- Tijera
- Aguja Fina
- Hilo Resistente o Hilo Chino (el que usé es como de nylon)
- Mostacillas grandes de color Amarillo (27 unidades), Azul (32 unidades), Blanco (8 unidades) y Rojo (14 unidades). Las mostacillas transparentes que se ven la foto, no las usé.
- Aro pequeño de un llavero viejo.
- Cadena de algún llavero viejo.
𝙿𝚊𝚜𝚘 𝚊 𝙿𝚊𝚜𝚘
| Paso 1 | Paso 2 | Paso 3 |
|---|---|---|
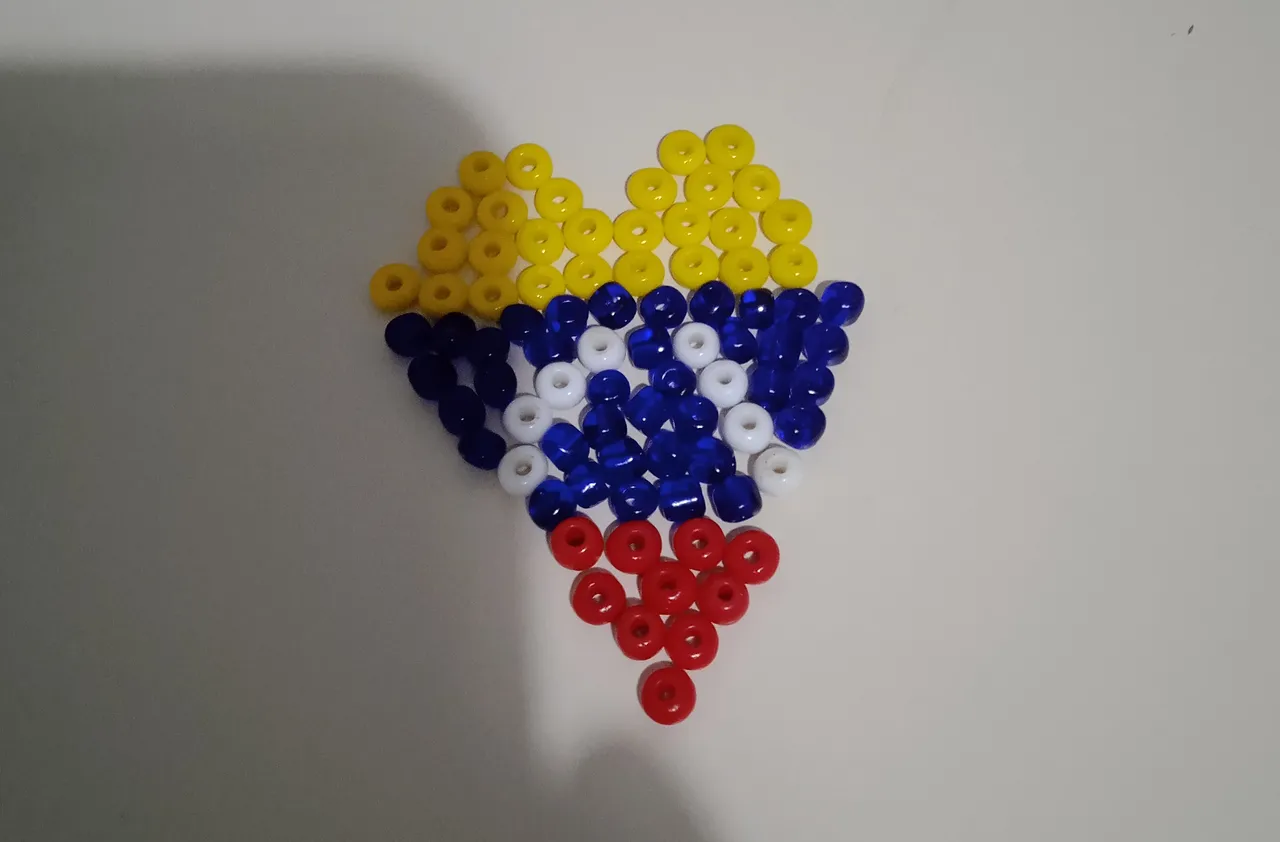 |  |  |
- Paso 1: Lo primero que hice fue armar el patrón que quería hacer, tomando en cuenta las sugerencias del video tutorial que estaba viendo.
Lo dejé armado en la mesa, a un lado para tener una idea de lo que hacía a medida que iba avanzando. Hacer esto me sirvió de mucho ya que en las primeras oportunidades que lo hice sin hacer este paso, desarmaba mi trabajo por no visualizar bien lo que quería hacer.
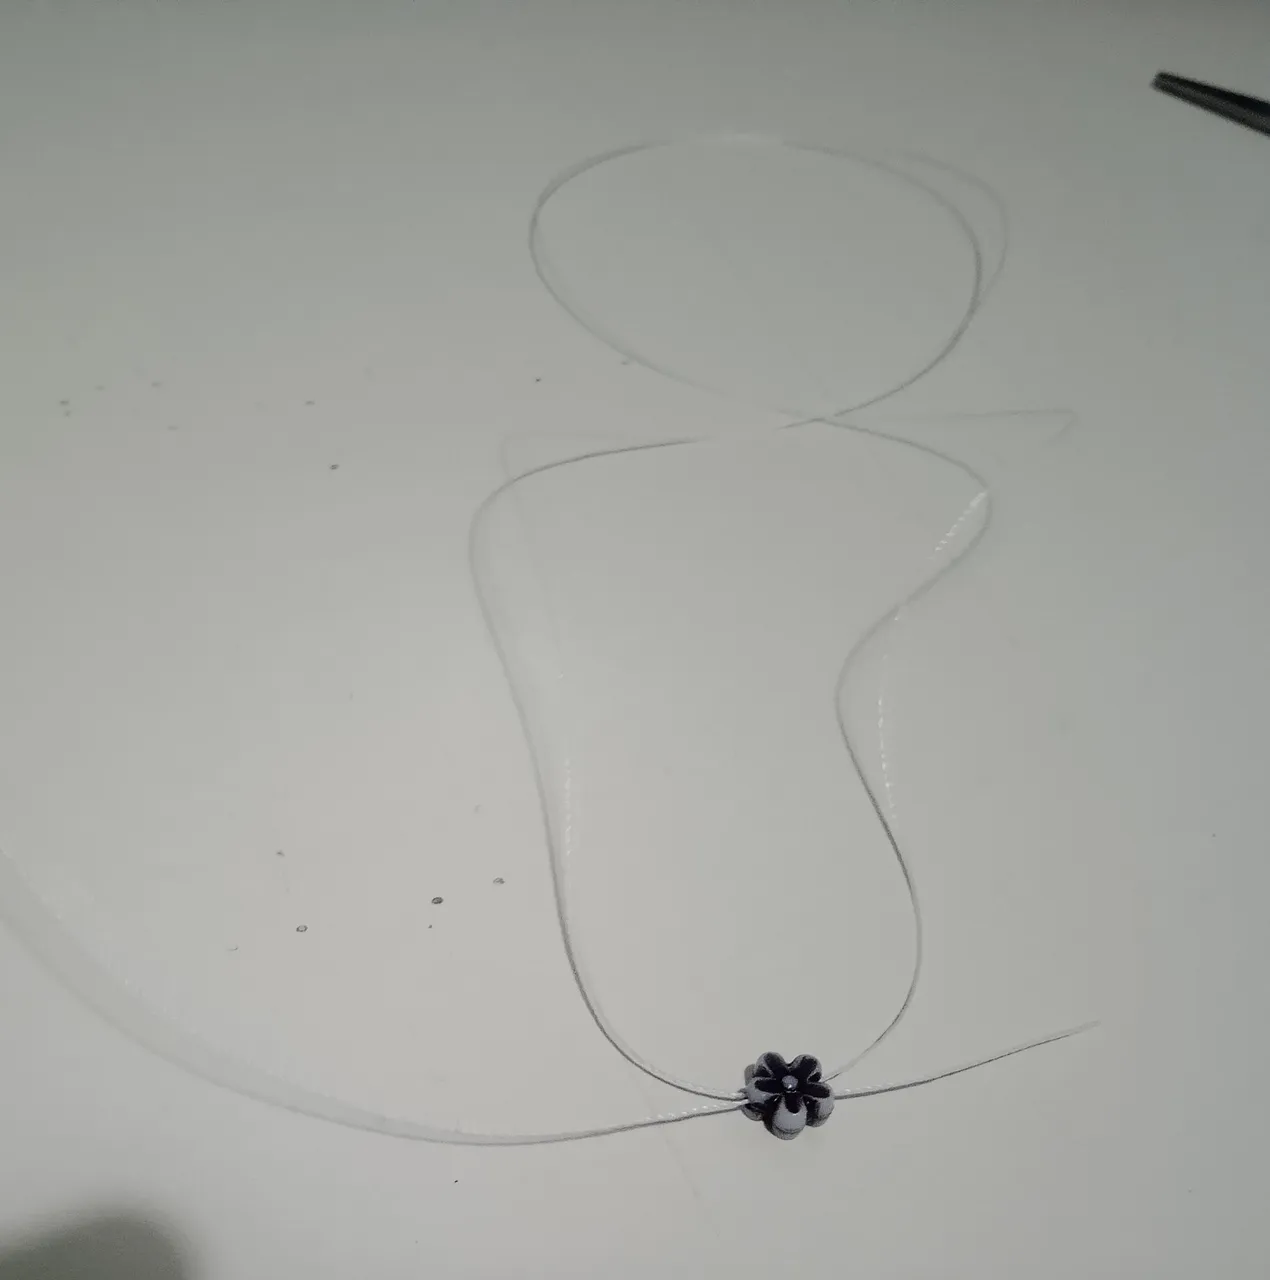
- Paso 2: Lo siguiente que hice fue tomar una mostacilla random para dejarla de apoyo y no se me salieran las demás mostacillas que iba a ir agregando. Como ven, la metí en el hilo y luego volví a insertar el hilo por el lado de la entrada para hacer un nudo.
- Paso 3: Aquí muestro cómo queda el nudo luego de apretar el hilo.
| Paso 4 | Paso 5 | Paso 6 |
|---|---|---|
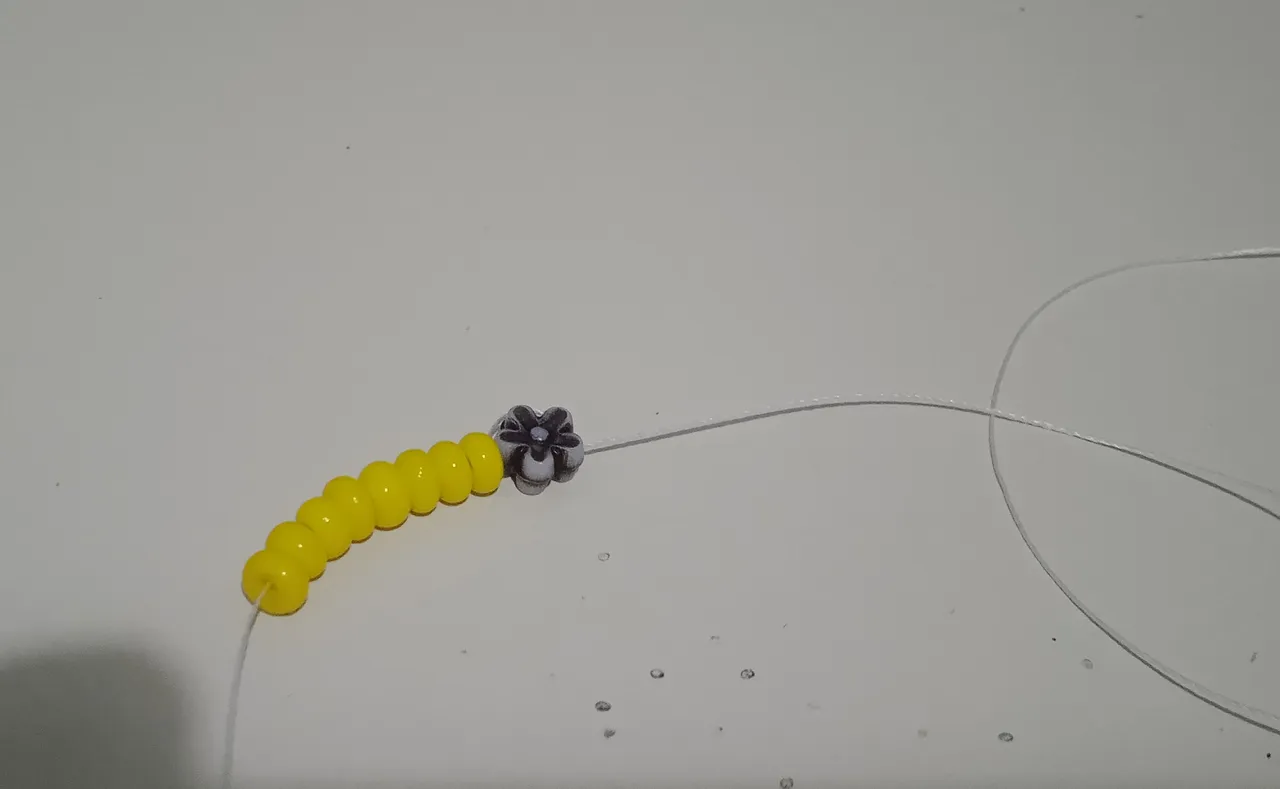 | 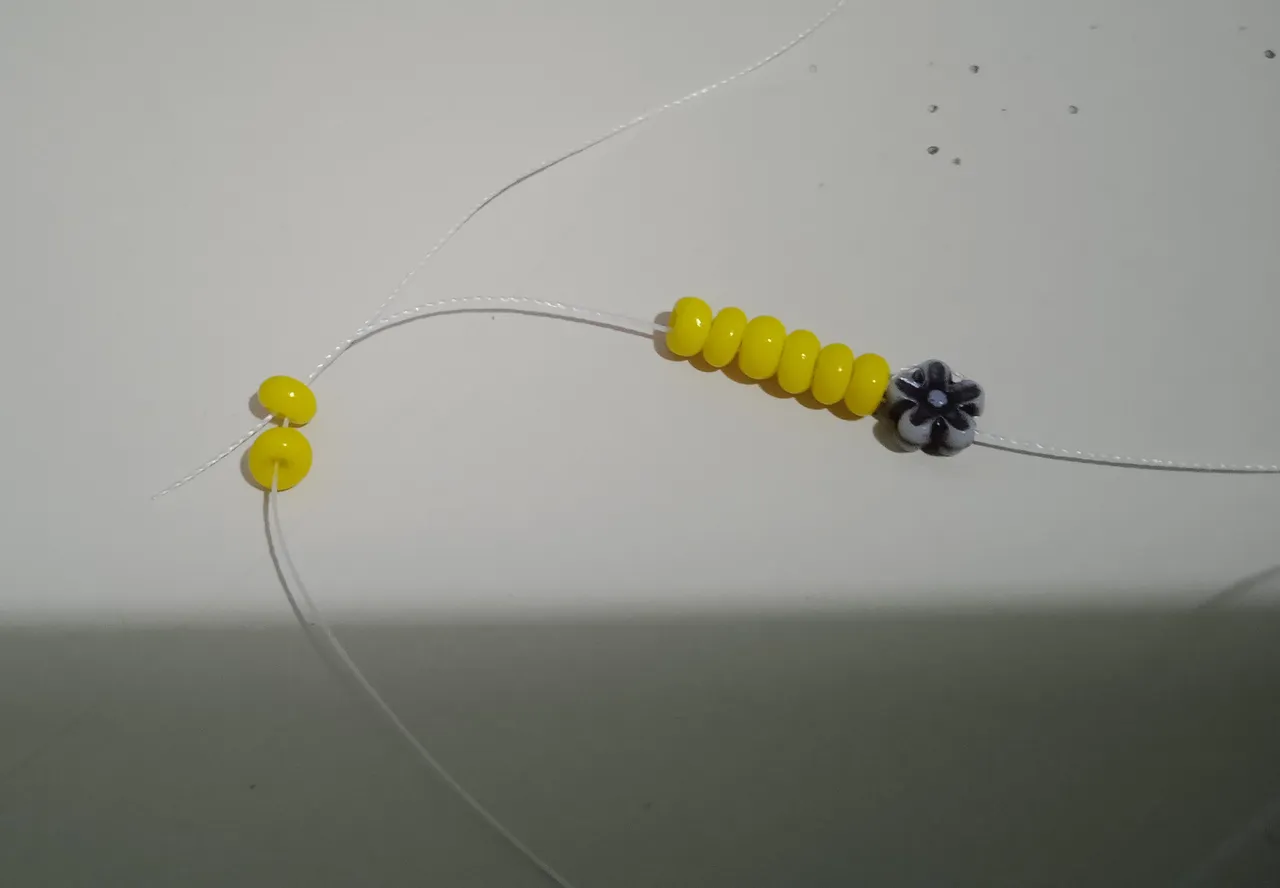 |  |
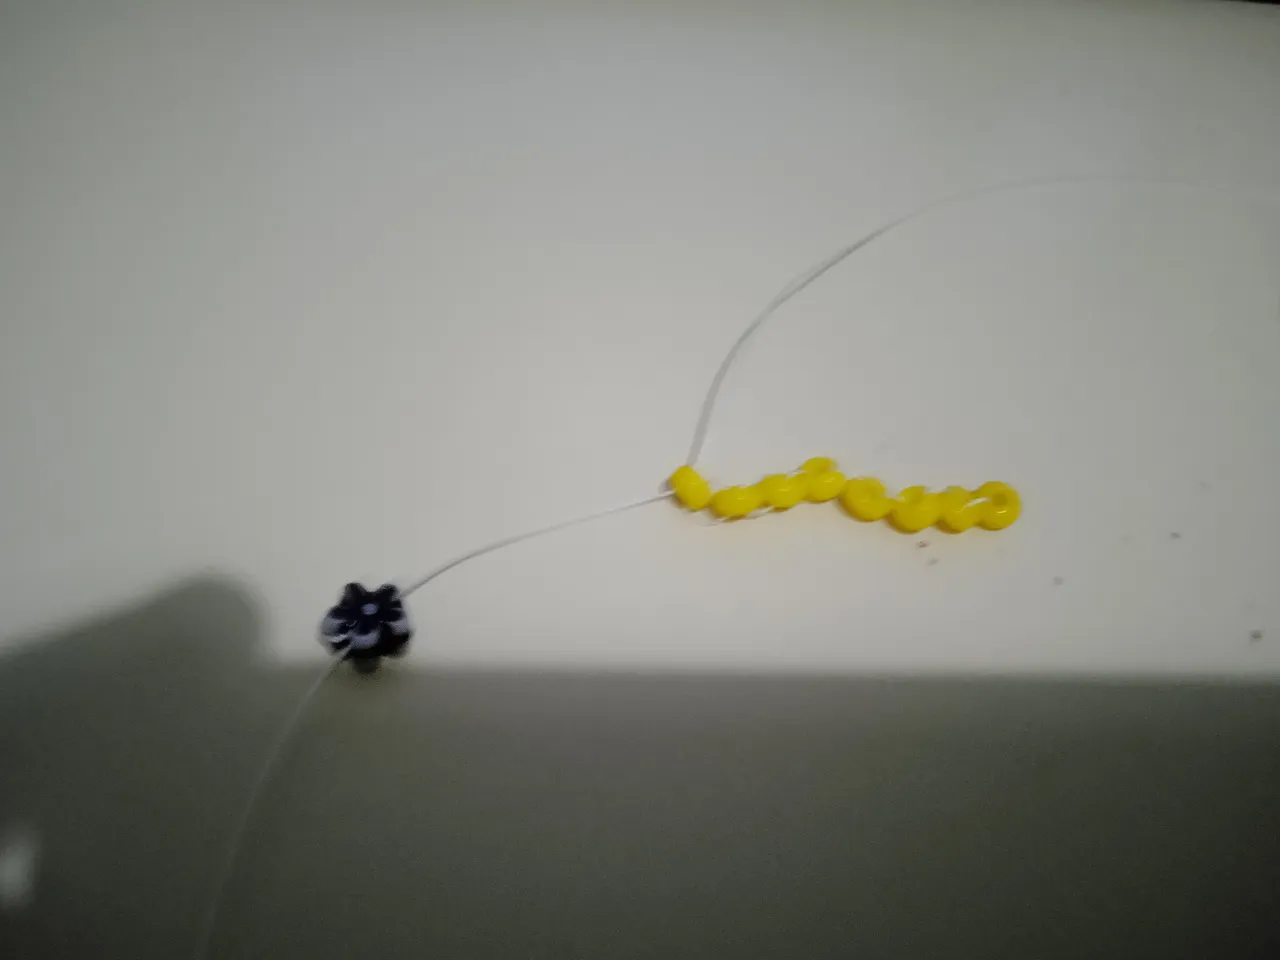
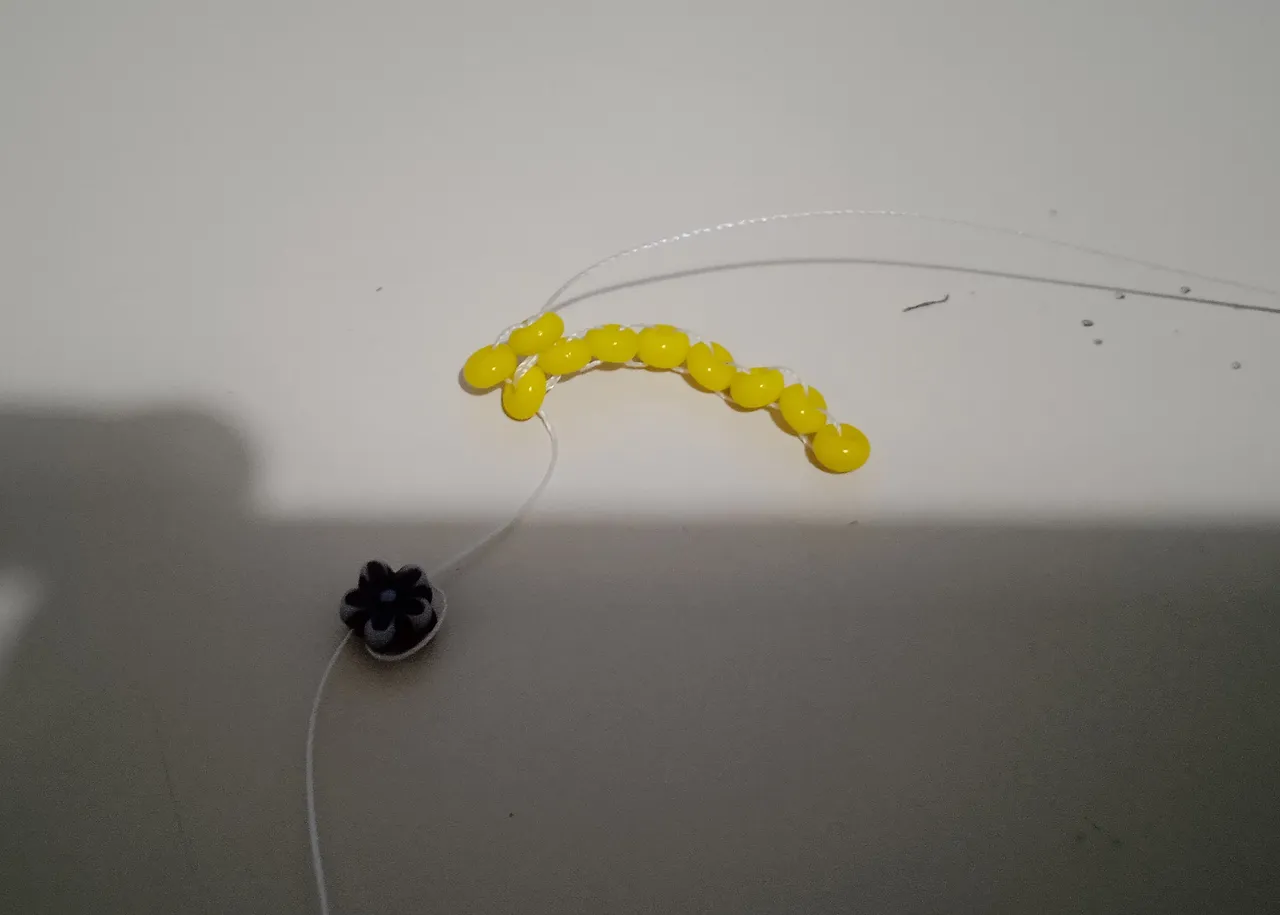
- Paso 4: Empiezo a agregar las mostacillas de la tercera línea, que serían 8 amarillas.
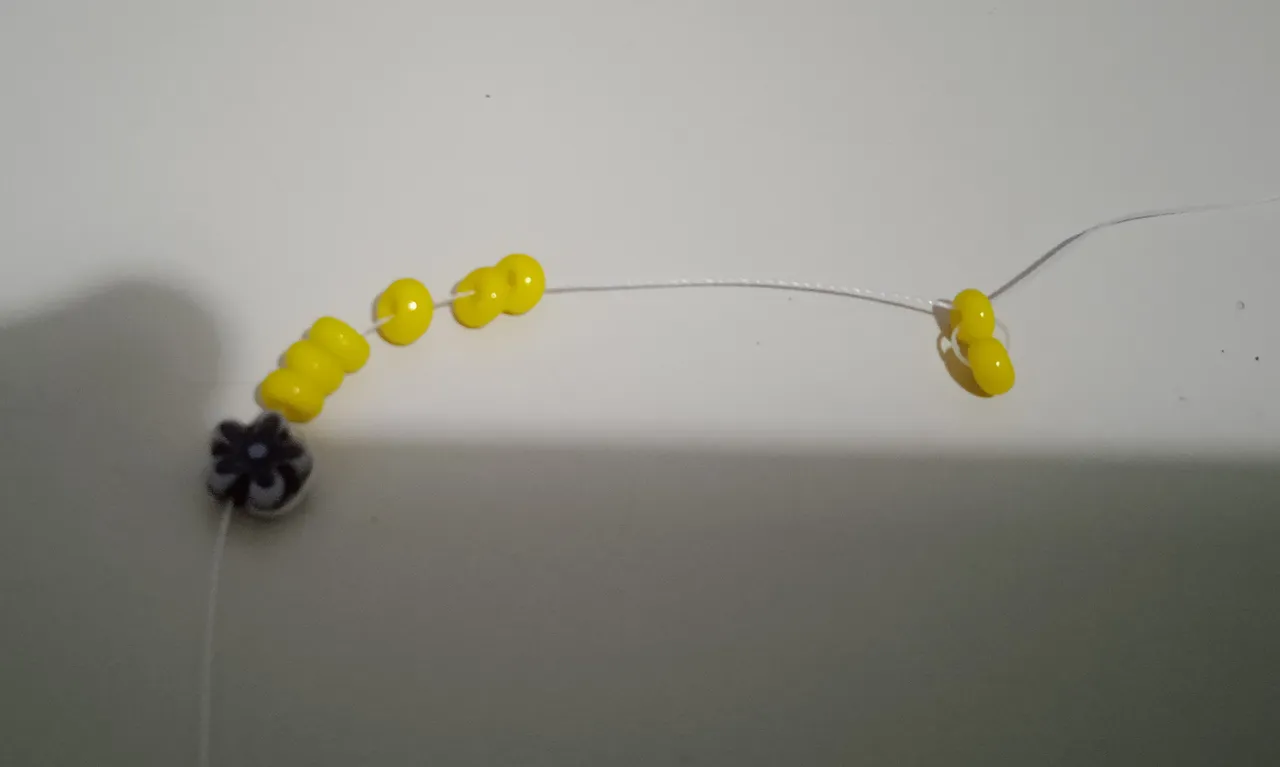
- Paso 5: Tomo las dos primeras y a partir de la segunda inserto el hilo de abajo hacia arriba para hacer un nudo.
- Paso 6: Aquí muestro cómo quedan las dos primeras mostacillas ya hecho el nudo.
| Paso 7 | Paso 8 | Paso 9 |
|---|---|---|
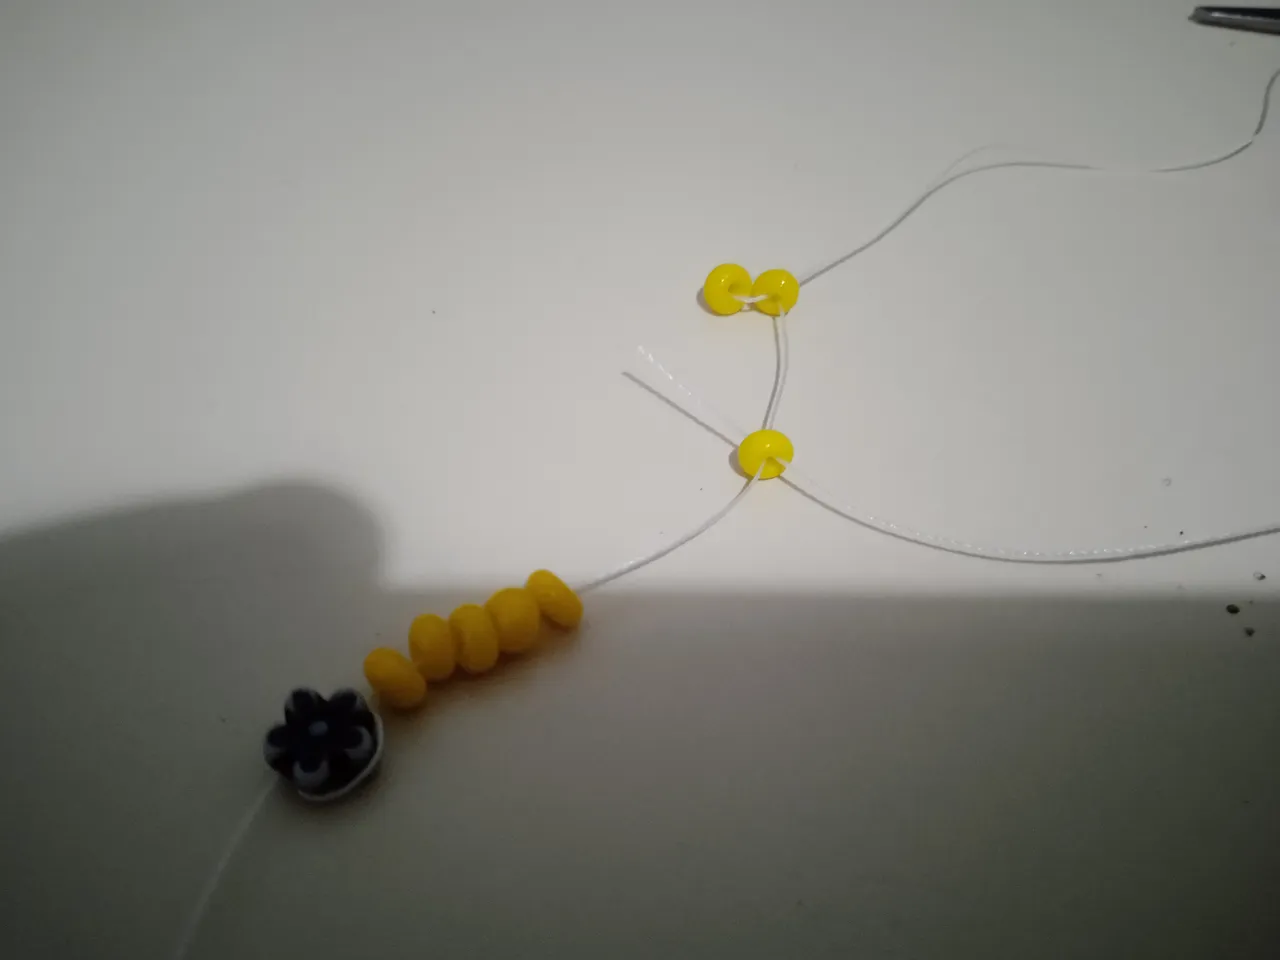 |  |  |
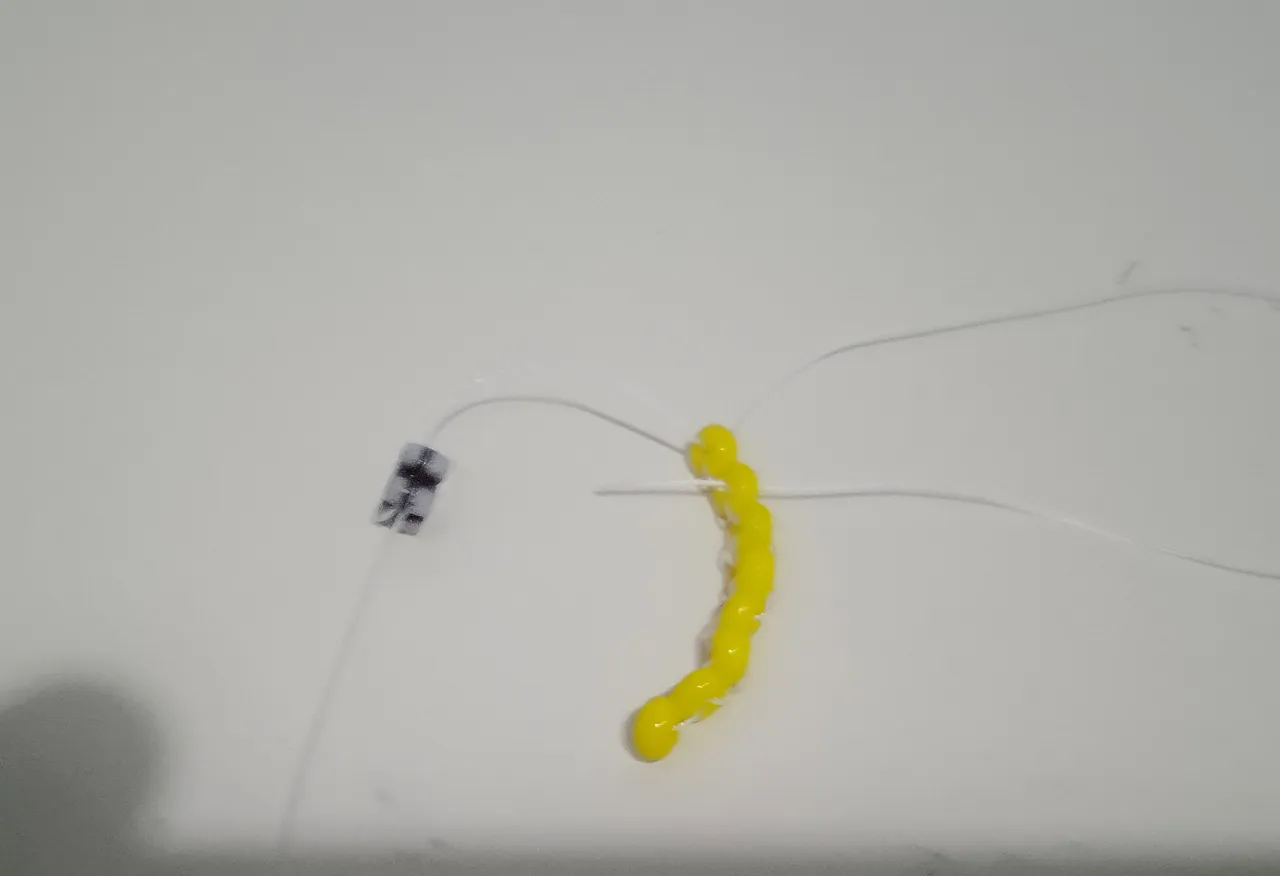
- Paso 7: Repito el mismo proceso con la tercera mostacilla. Inserto el hilo de abajo hacia arriba.
- Paso 8: Aprieto para hacer el nudo.
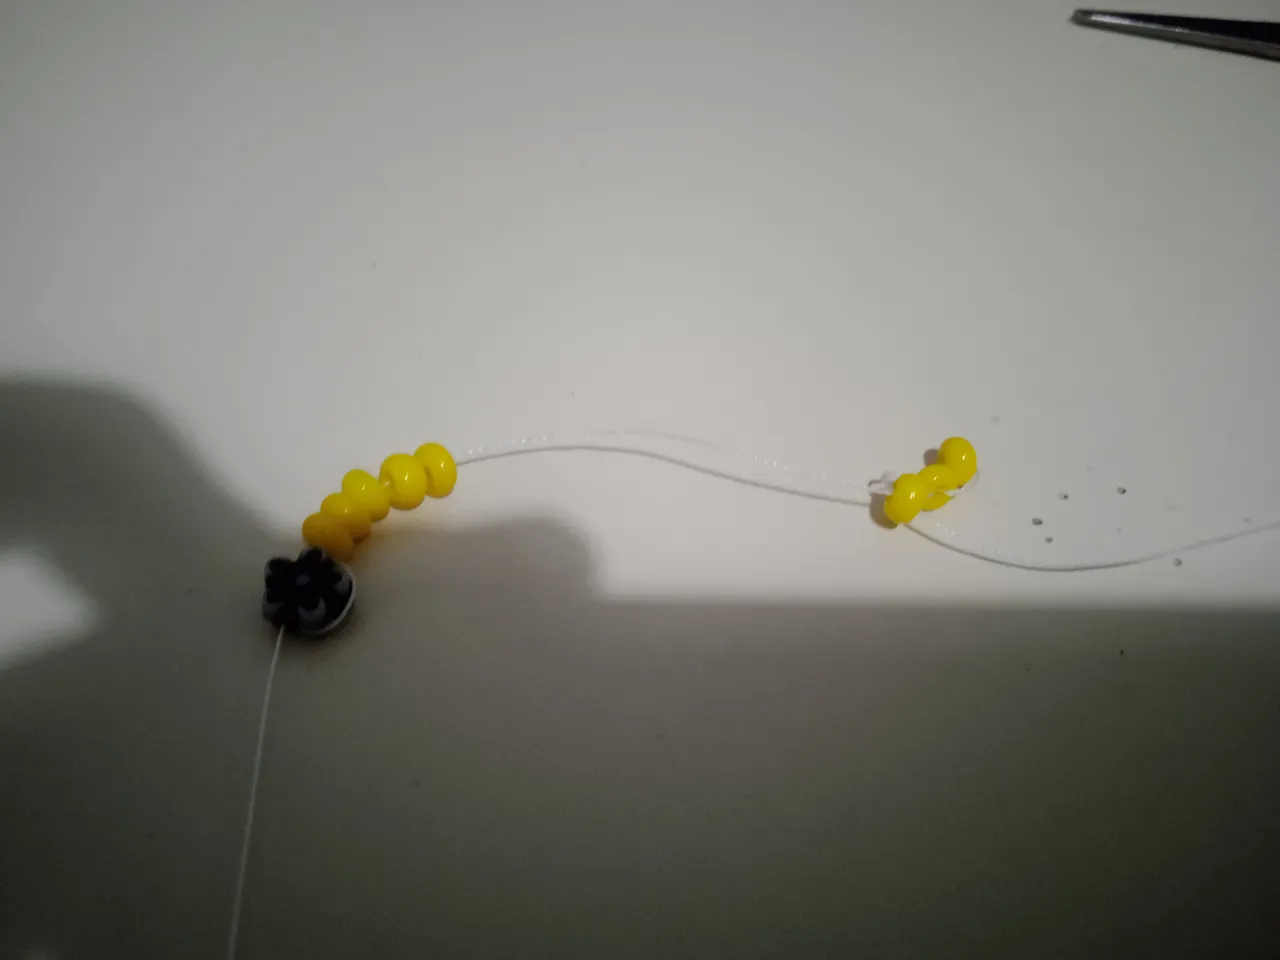
- Paso 9: Hago lo mismo con todas las mostacillas hasta la última.
| Paso 10 | Paso 11 | Paso 12 |
|---|---|---|
| | |
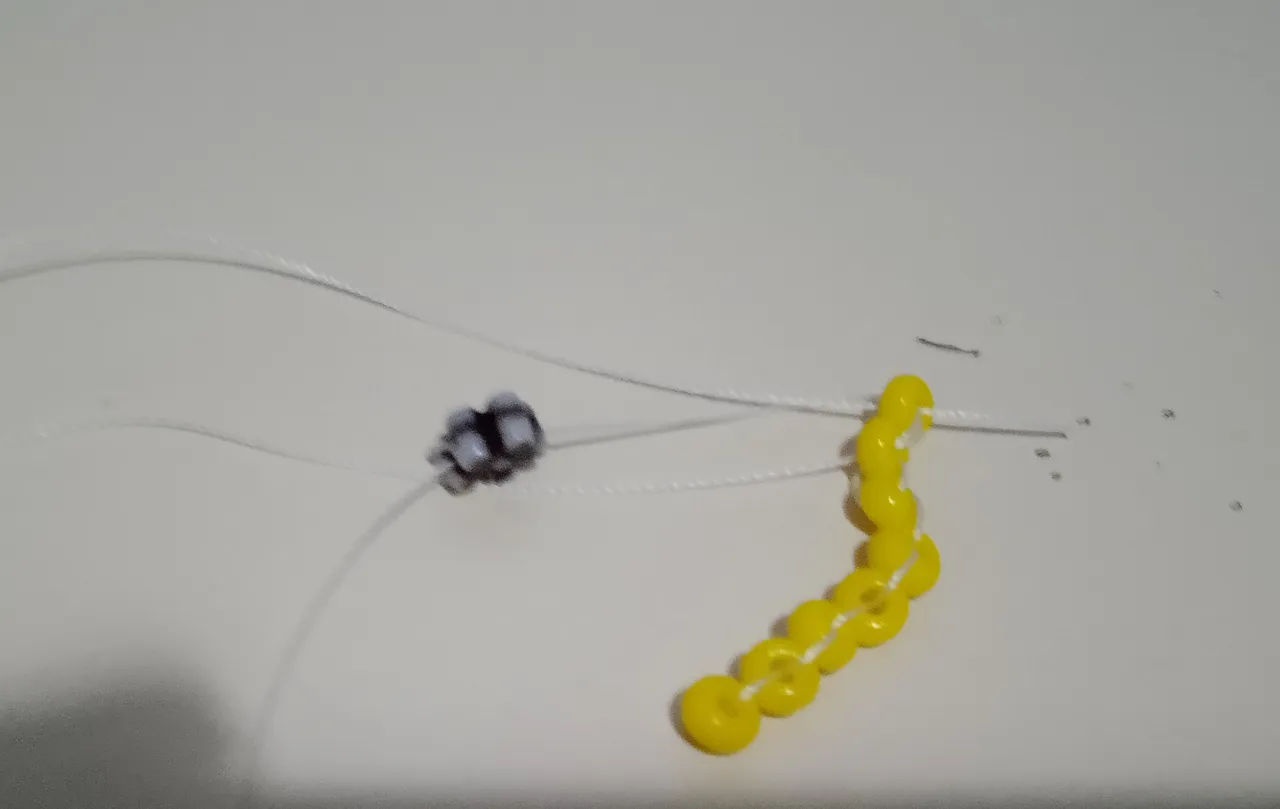
- Paso 10: Repito el mismo proceso con la tercera mostacilla. Inserto el hilo de abajo hacia arriba.
- Paso 11: Aprieto para hacer el nudo.
- Paso 12: Hago lo mismo con todas las mostacillas hasta la última.
| Paso 13 | Paso 14 |
|---|---|
 |  |
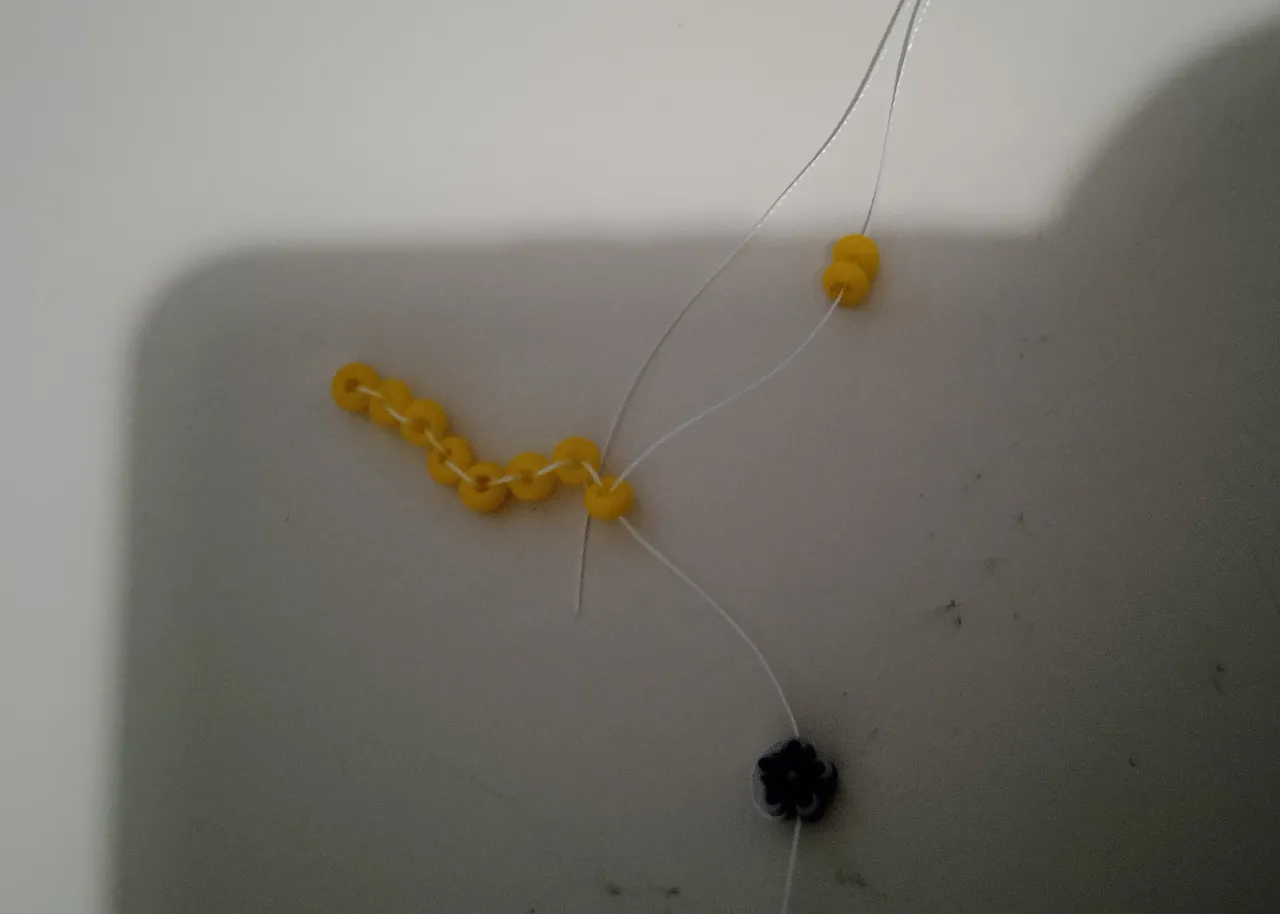
- Paso 13: Antes de iniciar la segunda línea, hago un nudo para que no se desarme el trabajo. Inserto el hilo por la penúltima mostacilla.
- Paso 14: Luego de regreso, inserto el hilo por la última mostacilla para empezar sin problemas la segunda línea.
| Paso 15 | Paso 16 | Paso 17 |
|---|---|---|
 |  |  |
- Paso 15: Para iniciar la segunda línea agrego 2 mostacillas amarillas e inserto el hilo entre la unión de las dos primeras mostacillas como se ve en la foto.
- Paso 16: Aprieto y luego inserto el hilo por la segunda mostacilla.
- Paso 17: Vuelvo a apretar y voy agregando de una en una mostacilla, repitiendo el mismo nudo hasta completar la segunda fila.
𝚁𝚎𝚍𝚞𝚌𝚌𝚒ó𝚗 𝚍𝚎 𝚕𝚊𝚜 𝙻í𝚗𝚎𝚊𝚜
Para no hacer el proceso tan largo y mucho menos el post, de manera resumida voy a agregar las fotos de cómo hice la parte de reducción de la línea, ya que por ser un corazón su tamaño disminuye en la parte de abajo.
Hago esto ya que el detalle está en la primera y la segunda línea, ya lo demás se repite a lo largo de todo el Miyuki y sería redundar de información, salvo la parte de reducir el tamaño de la línea.
| Paso 1 | Paso 2 | Paso 3 |
|---|---|---|
 |  |  |
Aunque sé coser y sé usar la aguja/hilo, soy neófita en esta técnica, por loque me daba miedo usar la aguja, pero llegado este punto, noté que era justo y necesario hacer el uso de la aguja.
- Paso 1: Para hacer la reducción de la línea, se debe meter el hilo (una vez terminada la línea), por la segunda cuenta en forma de triángulo. Como ven en la imagen es la segunda cuenta de la primera fila y la tercera de la segunda. Sólo esas dos, ni más ni menos. Jalan el hilo hasta el final cuando hagan este paso.
- Paso 2: Para regresar, de abajo hacia arriba, se inserta el hilo en la segunda mostacilla de la segunda fila y la segunda mostacilla de la primera fila, así como se muestra en la foto. Jalas el hilo hasta el final para que quede todo apretado.
- Paso 3: Y este sería el resultado. Se vuelven a insertar dos mostacillas más y se sigue repitiendo el proceso hasta terminar.
𝚁𝚎𝚜𝚞𝚕𝚝𝚊𝚍𝚘 𝙵𝚒𝚗𝚊𝚕
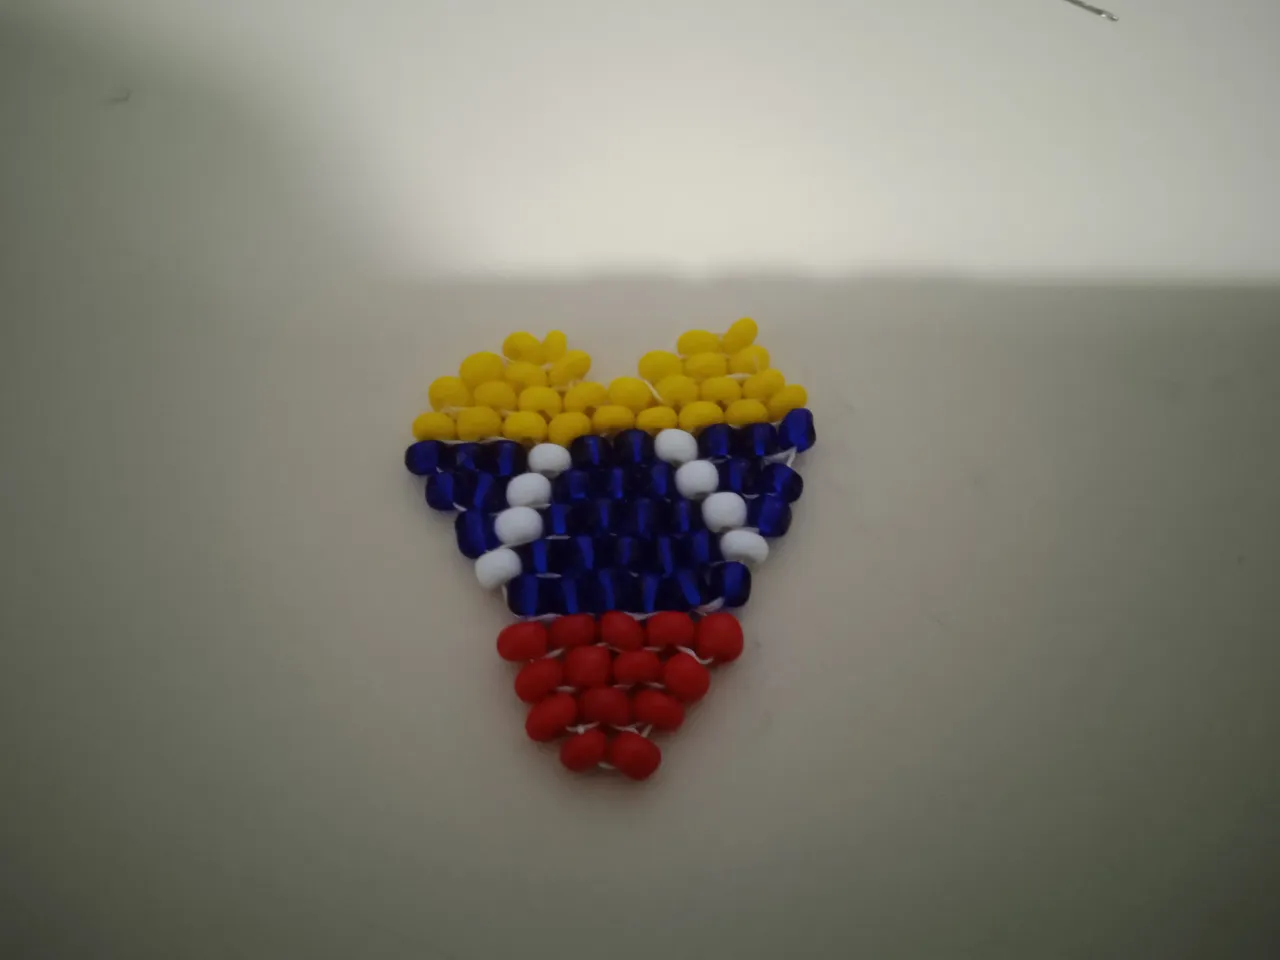
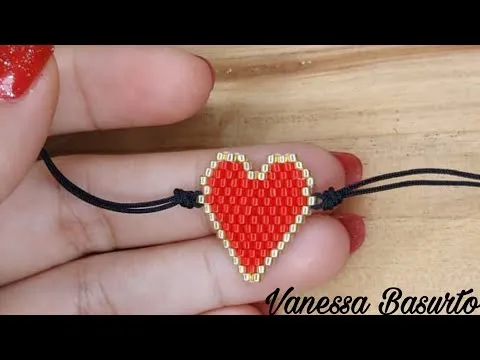
Así quedó luego de anudar el hilo manualmente y darle varias vueltas entre mostacilla y mostacilla. Ya luego lo que hice fue agregarle un pequeño aro de un viejo llavero, así como la tira del mismo. De esta manera, el resultado total de esto quedó así:
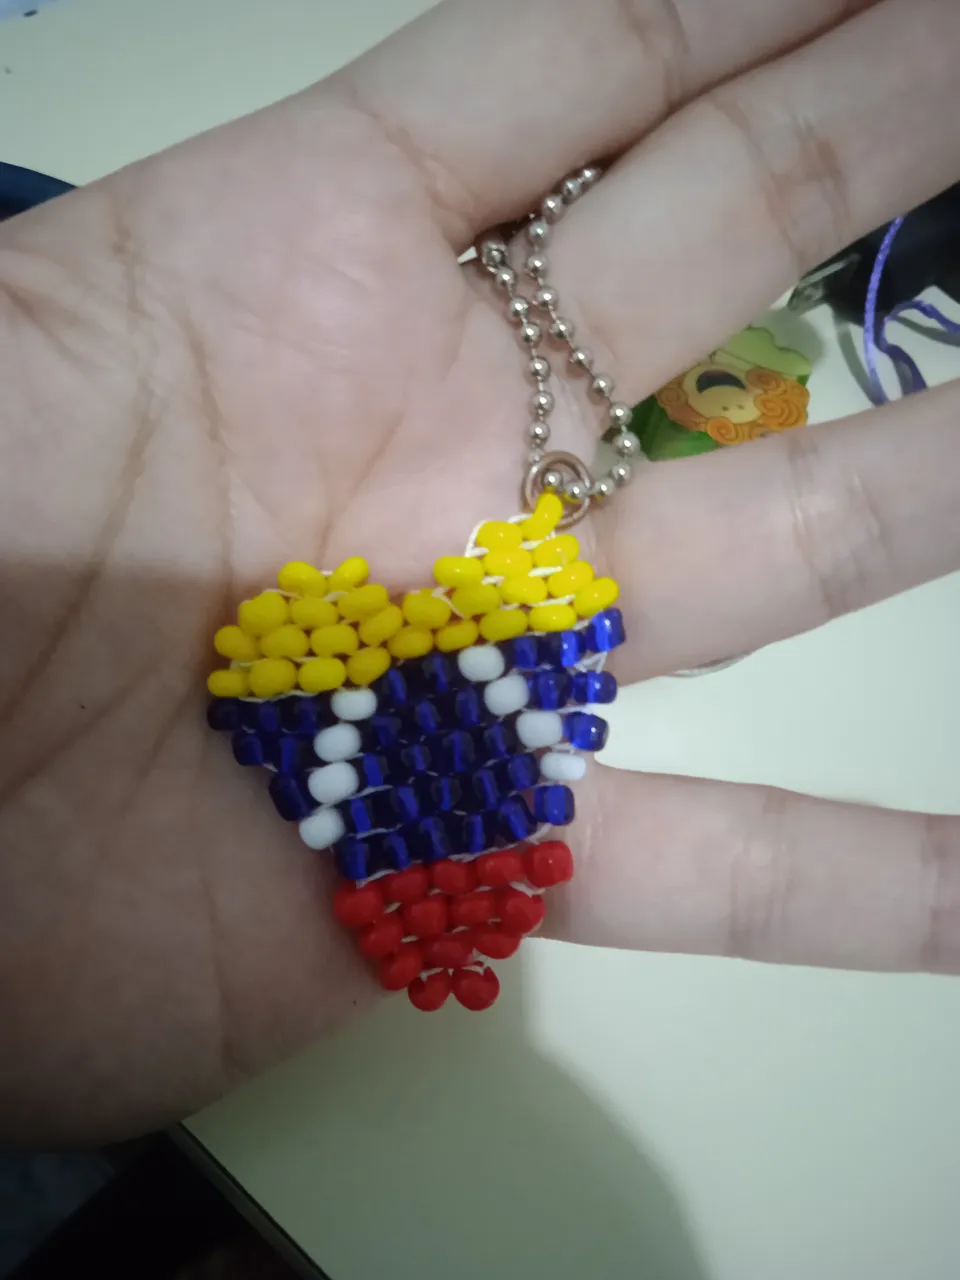
Por más duro que era el hilo, tipo nylon, me daba miedo que por el tiempo en algún momento se fuera a romper por usarlo como llavero, por lo que colocar la argolla dentro de la propia mostacilla me resultó lo más lógico y duradero. Igual pienso usarlo con delicadeza y para decorar mi cartera.
Para ser mi primera vez, aunque el resultado se ve burrero (como dicen en mi país), a mí me gustó cómo quedó. Y me siento orgullosa de mí misma que luego de 15 intentos logré terminarlo 🤣. También quiero destacar que este es mi primer post hecho en esta comunidad.
Agradezco a @lismarcarolina2 por haberme invitado a participar y de mi parte extiendo la invitación a @edittasc86, @divergente1 y @bayondalways1 a ver si se animan a participar, aún hay chance. Y como lo prometí, aquí les dejo el video guía para que detallen mejor la Técnica Miyuki. Les deseo a todos un hermoso día. ¡Saludos! 💕
Click AQUI para ver el Video Tutorial
¿𝚀𝚞𝚎 𝚙𝚒𝚎𝚗𝚜𝚊𝚜 𝚊𝚌𝚎𝚛𝚌𝚊 𝚍𝚎 𝚎𝚜𝚝𝚘?
𝙼𝚎 𝚎𝚗𝚌𝚊𝚗𝚝𝚊𝚛í𝚊 𝚕𝚎𝚎𝚛𝚝𝚎!
𝙷𝚊𝚜𝚝𝚊 𝚕𝚊 𝚙𝚛𝚘𝚡𝚒𝚖𝚊!

| 𝙴𝚕𝚎𝚖𝚎𝚗𝚝𝚘𝚜 𝚄𝚜𝚊𝚍𝚘𝚜 | 𝙷𝚎𝚛𝚛𝚊𝚖𝚒𝚎𝚗𝚝𝚊𝚜 |
|---|---|
| Cada Foto Usada en el Post me Pertenece | Cámara del Redmi Note 9A |
| Contenido y Texto Original de mi Autoría | Traductor DeepL |
| CANVA | |
| Grammarly para correcciones en inglés | |
| Microsoft 365 Word para correcciones en español |
| 𝙼𝚒𝚜 𝚁𝚎𝚍𝚎𝚜 𝚂𝚘𝚌𝚒𝚊𝚕𝚎𝚜 |
|---|
 Instagram Instagram |
 X X |
 TikTok TikTok |
 Threads Threads |
 Discord Discord |
 Pinterest Pinterest |
 Spotify Spotify |
English
Greetings to all the beautiful people who make the most beautiful costume jewelry in the Community of #Jewelry. A few days ago, I was invited to participate in the initiative of Country Jewelry Contest and so today I bring you the step by step of a Heart Keychain using the Miyuki Technique.
If you're wondering, the Miyuki Technique uses glass beads specifically, to create intricate designs with patterns and more detail. It is a Japanese technique, hence the name.
And well, the truth is that I did not know what to do to participate in this initiative, so I took a few days to investigate and I came across this Miyuki, however, I had never done it before, it was my first time and it was complicated. In total, I did this piece about 15 times and never got past the third line because I always got an error.
If I could classify this technique in terms of difficulty, I would give it a 7/10 without thinking about it. Although in my childhood I started for a short time in the art of costume jewelry with simple and inexpensive beads, definitely this art of Miyuki is at another level because if or if you need a needle, a special thread, and the key to everything, the peculiar beads to do this.
These beads are different and unique because they come in an exact and uniform size, as well as with a hole wide enough to fit the special thread with the fine needle. As the technique is a bit complicated, I'll try to explain it with pictures as best I can, and at the end, I'll leave the video which I checked on YouTube.
𝙴𝚕𝚎𝚖𝚎𝚗𝚝𝚜 𝚝𝚘 𝙱𝚎 𝚄𝚜𝚎𝚍
The elements I used were:
- Scissors
- Fine needle
- Resistant thread or Chinese thread (the one I used is like nylon thread).
- Large Yellow (27 pieces), Blue (32 pieces), White (8 pieces) and Red (14 pieces) beads. I did not use the transparent ones in the photo.
- Small ring from an old key ring.
- Chain from an old keychain.
𝚂𝚝𝚎𝚙-𝚋𝚢-𝚂𝚝𝚎𝚙
| Step 1 | Step 2 | Step 3 |
|---|---|---|
| | |
- Step 1: The first thing I did was to put together the pattern I wanted to make, taking into account the suggestions in the video tutorial I was watching.
I left it assembled on the table, to one side to have an idea of what I was doing as I went along. Doing this helped me a lot because the first few times I did it without doing this step, I would take my work apart because I didn't visualize well what I wanted to do.
- Step 2: The next thing I did was to take a random bead to leave it as a support so that the other beads I was going to add wouldn't slip off. As you can see, I tucked it into the yarn and then reinserted the yarn on the entry side to tie a knot.
- Step 3: Here I show how the knot looks after tightening the thread.
| Step 4 | Step 5 | Step 6 |
|---|---|---|
| | |
- Step 4: I start adding the beads of the third line, which would be 8 yellow ones.
- Step 5: I take the first two and from the second one I insert the thread from the bottom up to make a knot.
- Step 6: Here I show how the first two beads look once the knot is tied.
| Step 7 | Step 8 | Step 9 |
|---|---|---|
| | |
- Step 7: I repeat the same process with the third bead. I insert the thread from the bottom to the top.
- Step 8: I tighten to tie the knot.
- Step 9: I do the same with all the beads until the last one.
| Step 10 | Step 11 | Step 12 |
|---|---|---|
| | |
- Paso 10: I repeat the same process with the third bead. I insert the thread from the bottom to the top.
- Paso 11: I tighten to tie the knot.
- Paso 12: I do the same with all the beads until the last one.
| Step 13 | Step 14 |
|---|---|
| |
- Paso 13: Before starting the second row, I tie a knot to prevent the work from unraveling. I insert the yarn through the second to last stitch.
- Paso 14: After returning, I insert the thread through the last stitch to start the second row without any problems.
| Step 15 | Step 16 | Step 17 |
|---|---|---|
| | |
- Step 15: To start the second row I add 2 yellow beads and insert the thread between the union of the first two beads as shown in the photo.
- Step 16: I tighten and then insert the thread through the second bead.
- Step 17: Tighten again and add one by one, repeating the same knot until the second row is completed.
𝙻𝚒𝚗𝚎 𝚁𝚎𝚍𝚞𝚌𝚝𝚒𝚘𝚗
In order not to make the process so long and much less the post, in a summarized way I will add the photos of how I made the reduction part of the line, since it is a heart, its size decreases at the bottom.
I do this since the detail is in the first and second line since the rest is repeated throughout the whole Miyuki and it would be redundant information, except for the part about reducing the size of the line.
| Step 1 | Step 2 | Step 3 |
|---|---|---|
| | |
Although I know how to sew and I know how to use the needle/thread, I am a neophyte in this technique, so I was afraid to use the needle, but at this point, I realized that it was right and necessary to use the needle.
- Step 1: To reduce the row, you must put the yarn (once the row is finished), through the second bead in the form of a triangle. As you can see in the picture, it is the second bead of the first row and the third bead of the second row. Just those two, no more, no less. Pull the yarn to the end when you do this step.
- Step 2: To return, from the bottom up, insert the thread into the second stitch of the second row and the second stitch of the first row, as shown in the photo. You pull the yarn all the way through so that it is tight.
- Step 3: And this would be the result. Two more beads are inserted again and the process is repeated until the end.
𝙵𝚒𝚗𝚊𝚕 𝚁𝚎𝚜𝚞𝚕𝚝
This is what it looked like after knotting the thread manually and giving it several turns between beads. Then what I did was to add a small ring from an old keychain, as well as the strip of the same. Thus, the total result of this was like this:
As hard as the nylon-like thread was, I was afraid that it would break over time if I used it as a keychain, so placing the ring inside the bead itself was the most logical and durable thing to do. I still plan to use it delicately and to decorate my purse.
For my first time, although the result looks rough, I liked how it turned out. And I feel proud of myself that after 15 attempts I managed to finish it 🤣. I also want to point out that this is my first post made in this community.
I thank @lismarcarolina2 for inviting me to participate and I extend the invitation to @edittasc86, @divergente1, and @bayondalways1 to see if they dare to participate, there is still a chance. As promised, here I leave the video guide to better detail the Miyuki Technique. I wish you all a beautiful day, greetings! 💕
𝚆𝚑𝚊𝚝 𝚍𝚒𝚍 𝚢𝚘𝚞 𝚝𝚑𝚒𝚗𝚔 𝚊𝚋𝚘𝚞𝚝 𝚝𝚑𝚒𝚜?
𝙸 𝚠𝚘𝚞𝚕𝚍 𝚕𝚘𝚟𝚎 𝚝𝚘 𝚛𝚎𝚊𝚍 𝚢𝚘𝚞!
𝚂𝚎𝚎 𝚢𝚘𝚞 𝚗𝚎𝚡𝚝 𝚝𝚒𝚖𝚎!

| 𝙴𝚕𝚎𝚖𝚎𝚗𝚝𝚜 | 𝚃𝚘𝚘𝚕𝚜 |
|---|---|
| Each Photo Used in the Post Belongs to Me | Camera of the Redmi Note 9A |
| Content and Original Text of my Authorship | Translator DeepL |
| CANVA | |
| Grammarly for English corrections | |
| Microsoft 365 Word for corrections in Spanish |
| 𝙼𝚢 𝚂𝚘𝚌𝚒𝚊𝚕 𝙼𝚎𝚍𝚒𝚊 |
|---|
| Instagram |
| X |
| TikTok |
| Threads |
| Discord |
| Pinterest |
| Spotify |