Saluditos mis Artistas Creativos de las Manualidades y la Joyería, como se encuentran todos, además de bien? Espero que con mucha alegría preparándose para el disfrute de este fin de semana largo.
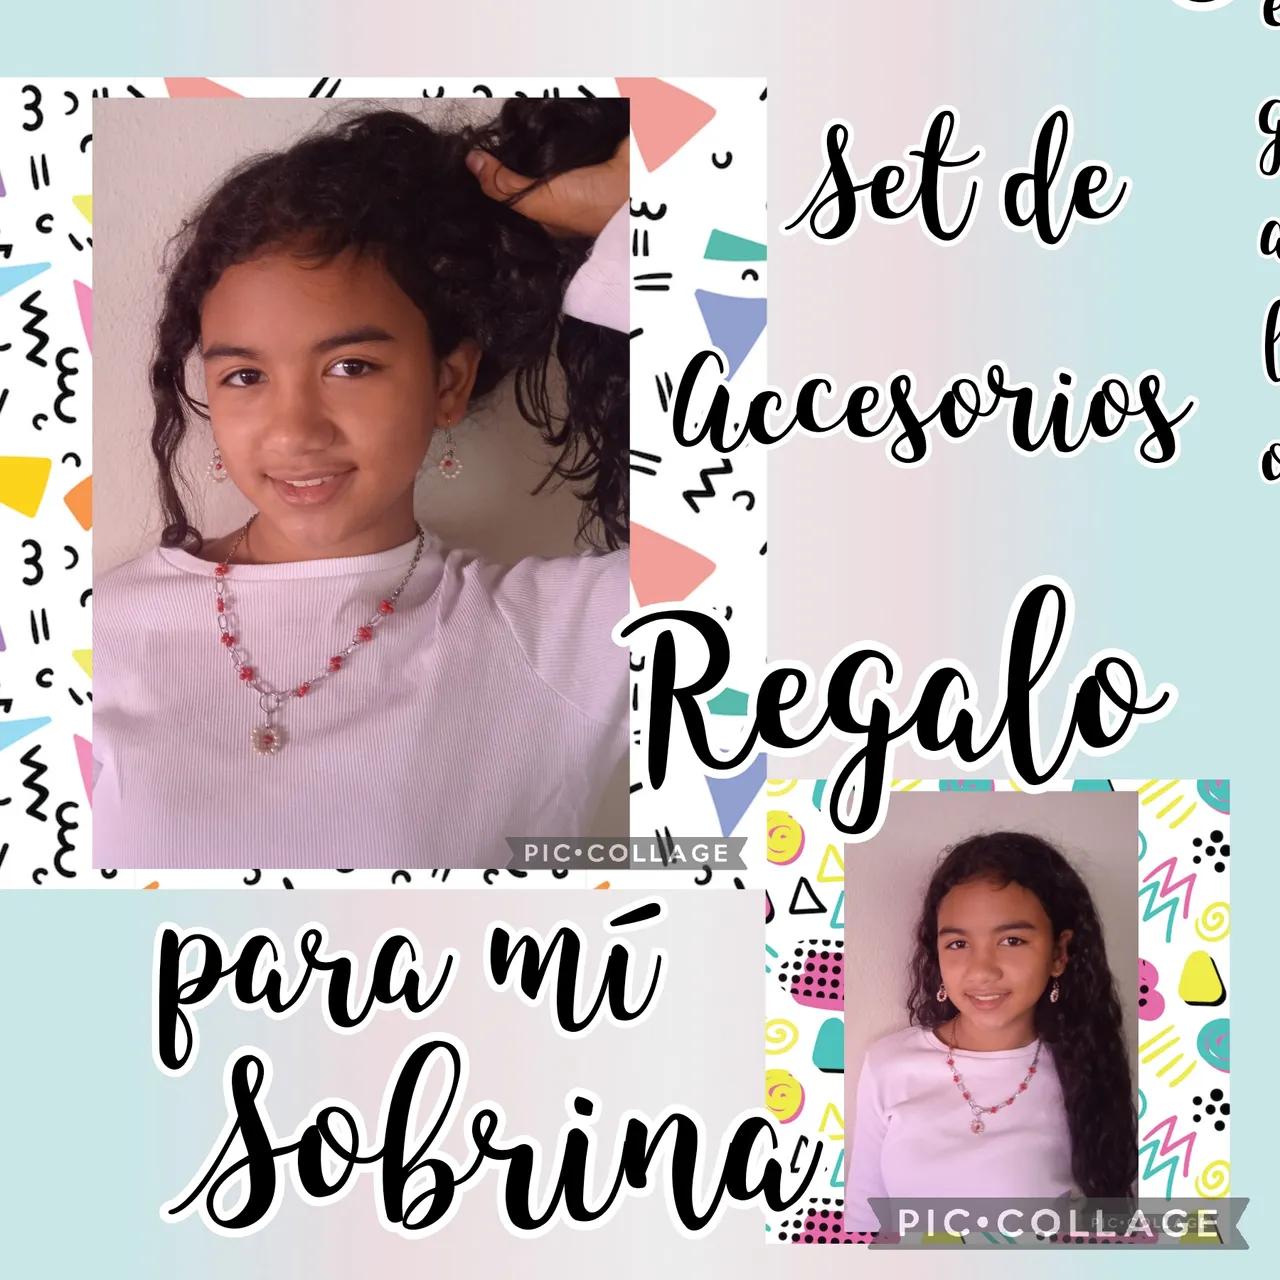
Les voy a contar que las lluvias siguen haciendo estragos en las comunicaciones por estos lados, y casi a diario estamos incomunicados; pero no todo es malo para mí , los cumpleaños familiares se tomaron los meses de junio y julio para celebrarlos , y uno de los más festejados por mi es el de mañana mi Sobrina y Modelo de mis creaciones será la anfitriona.
Uno de los colores que actualmente está en la moda es el rojo, uno de sus favoritos, ella me pidió que le hiciera un Juego de accesorios con cadena de plata y mostacillones de ese color para su outfit , por supuesto que escogí la forma de complacerla como supe que quería: Un Sencillo y Juvenil Set de Accesorios, que con su coquetería lucirá espectacular.
Sigan leyendo el pasó a paso para que vean como lo hice.
Greetings my Creative Artists of Crafts and Jewelry, how are you all, besides well? I hope that with great joy you are preparing to enjoy this long weekend.
I'm going to tell you that the rains continue to wreak havoc on communications in these parts, and we are cut off almost daily; but not everything is bad for me, family birthdays took the months of June and July to celebrate them, and one of the most celebrated for me is tomorrow, my niece and model of my creations will be the host.
One of the colors that is currently in fashion is red, one of her favorites, she asked me to make her a set of accessories with a silver chain and beads of that color for her outfit, of course I chose the way to please her how I knew I wanted: A Simple and Youthful Set of Accessories, which with its flirtatiousness will look spectacular.
Keep reading step by step to see how I did it.
MATERIALES USADOS EN LA ELABORACIÓN DE ESTE PROYECTO:
✓ Cadena de plata.
✓ Cuatro argollas grandes.
✓ Veinte argollas pequeñas.
✓ Mostacillones rojos.
✓ Perlas pequeñas blancas.
✓ Eslabones de plata.
✓ Hilo de nailon.
✓ Dos anzuelos para aretes.
✓ Tijeras.
✓ Pinza de corte.
✓ Pinza punta redonda.
✓ Pinza plana.
MATERIALS USED IN THE PREPARATION OF THIS PROJECT:
✓ Silver chain.
✓ Four large rings.
✓ Twenty small rings.
✓ Red mustacillons.
✓ Small white pearls.
✓ Silver links.
✓ Nylon thread.
✓ Two earring hooks.
✓ Scissors.
✓ Cutting clamp.
✓ Round tip tweezers.
✓ Flat clamp.

CON ESTOS SENCILLOS PASOS REALICÉ SU ELABORACIÓN:
PRIMER PASO:
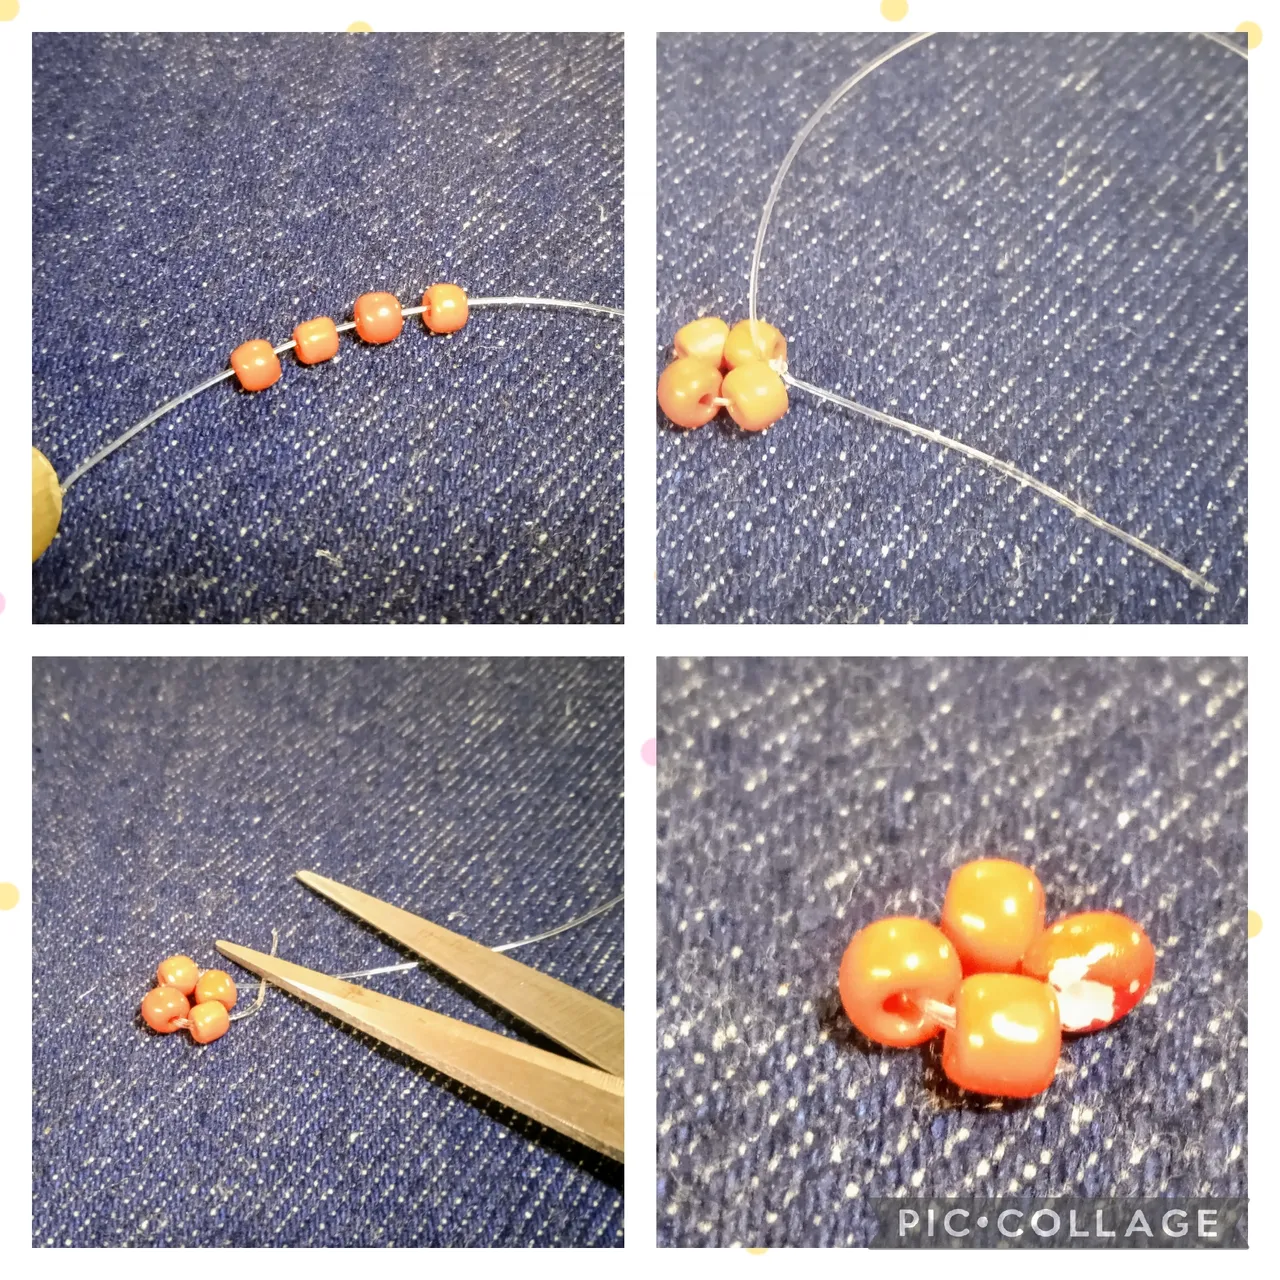
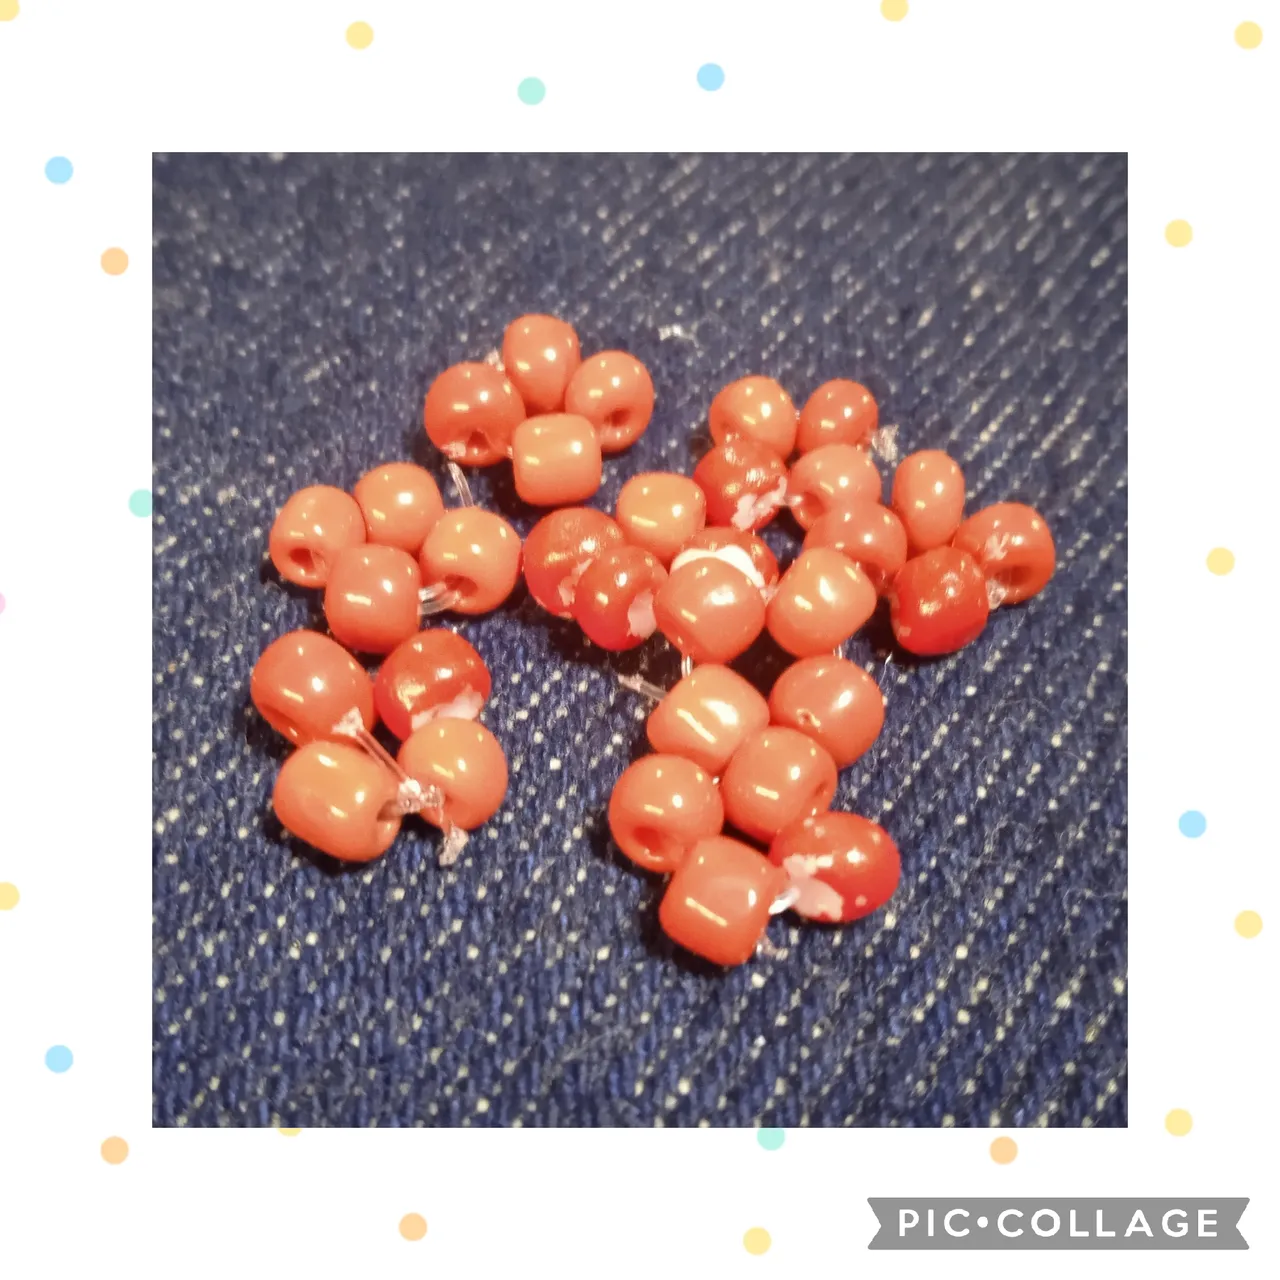
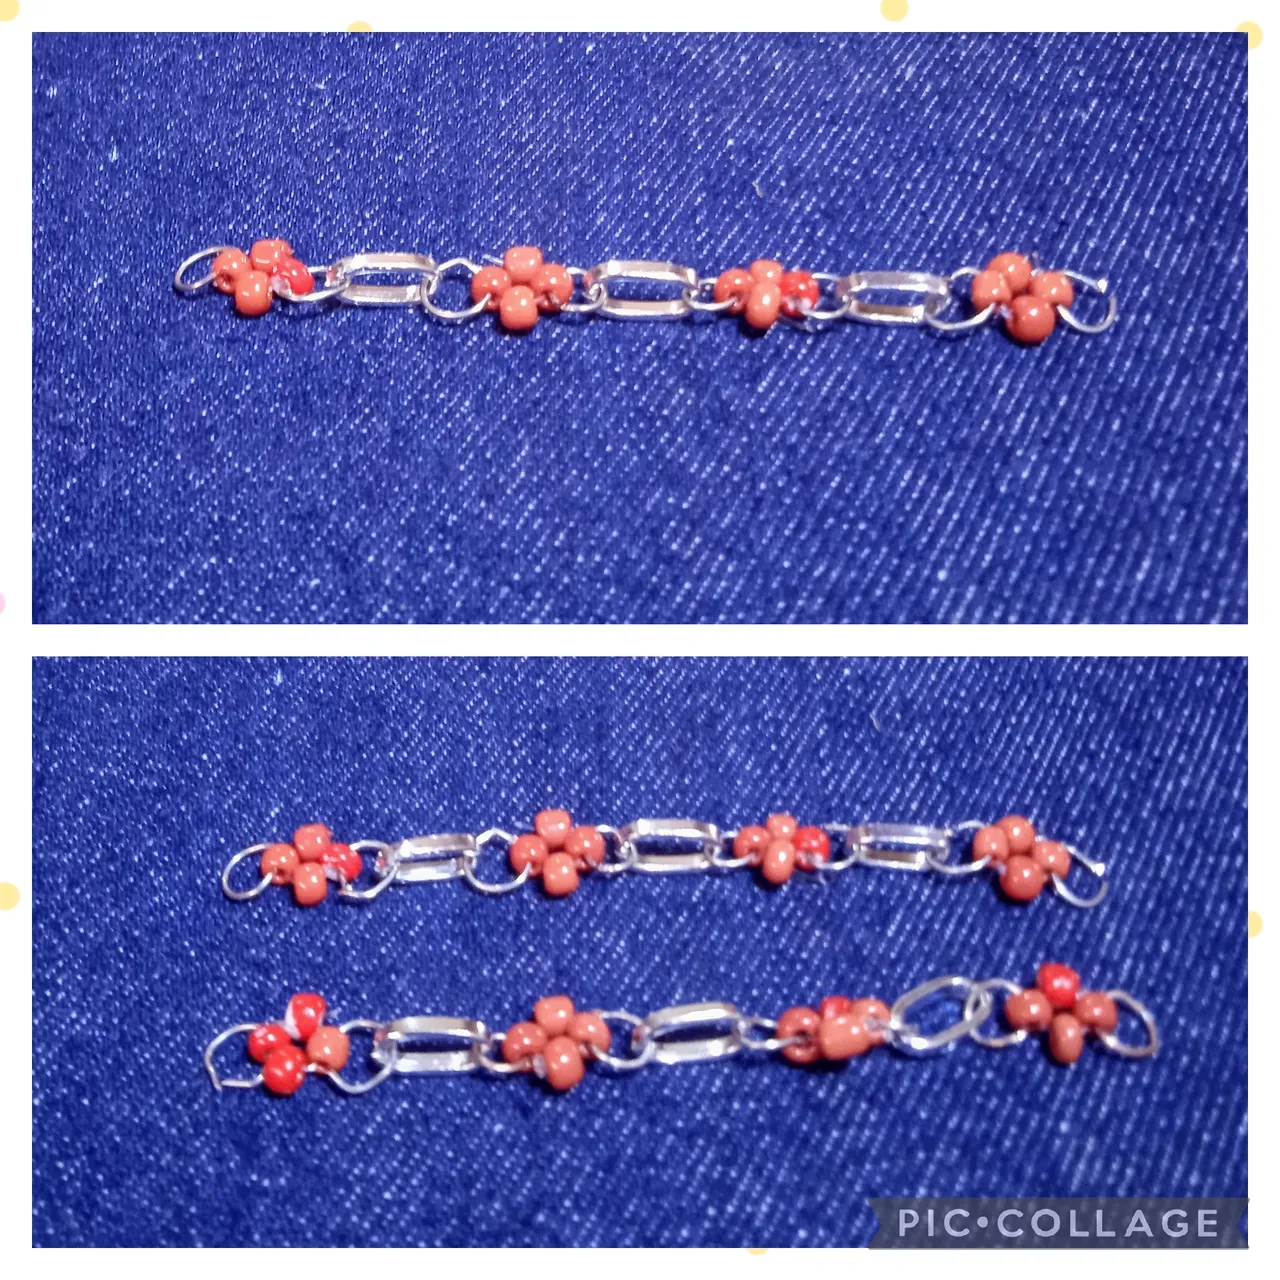
Voy a comenzar realizando ocho pequeñas florecitas rojas que formaran parte en la elaboración de mi Gargantilla:
Uso cinco centímetros de hilo de nailon, inserto cuatro mostacillones rojos por un extremo y hago un nudo simple con el otro extremo para formar la pequeña flor de cuatro pétalos, uso las tijeras ✂️ y corto el excedente así queda, ver la imágen.
WITH THESE SIMPLE STEPS I MADE IT:
FIRST STEP:
I am going to start by making eight small red flowers that will be part of the making of my Choker:
I use five centimeters of nylon thread, insert four red beads at one end and make a simple knot with the other end to form the small flower with four petals, use the scissors ✂️ and cut the excess like this, see the image.
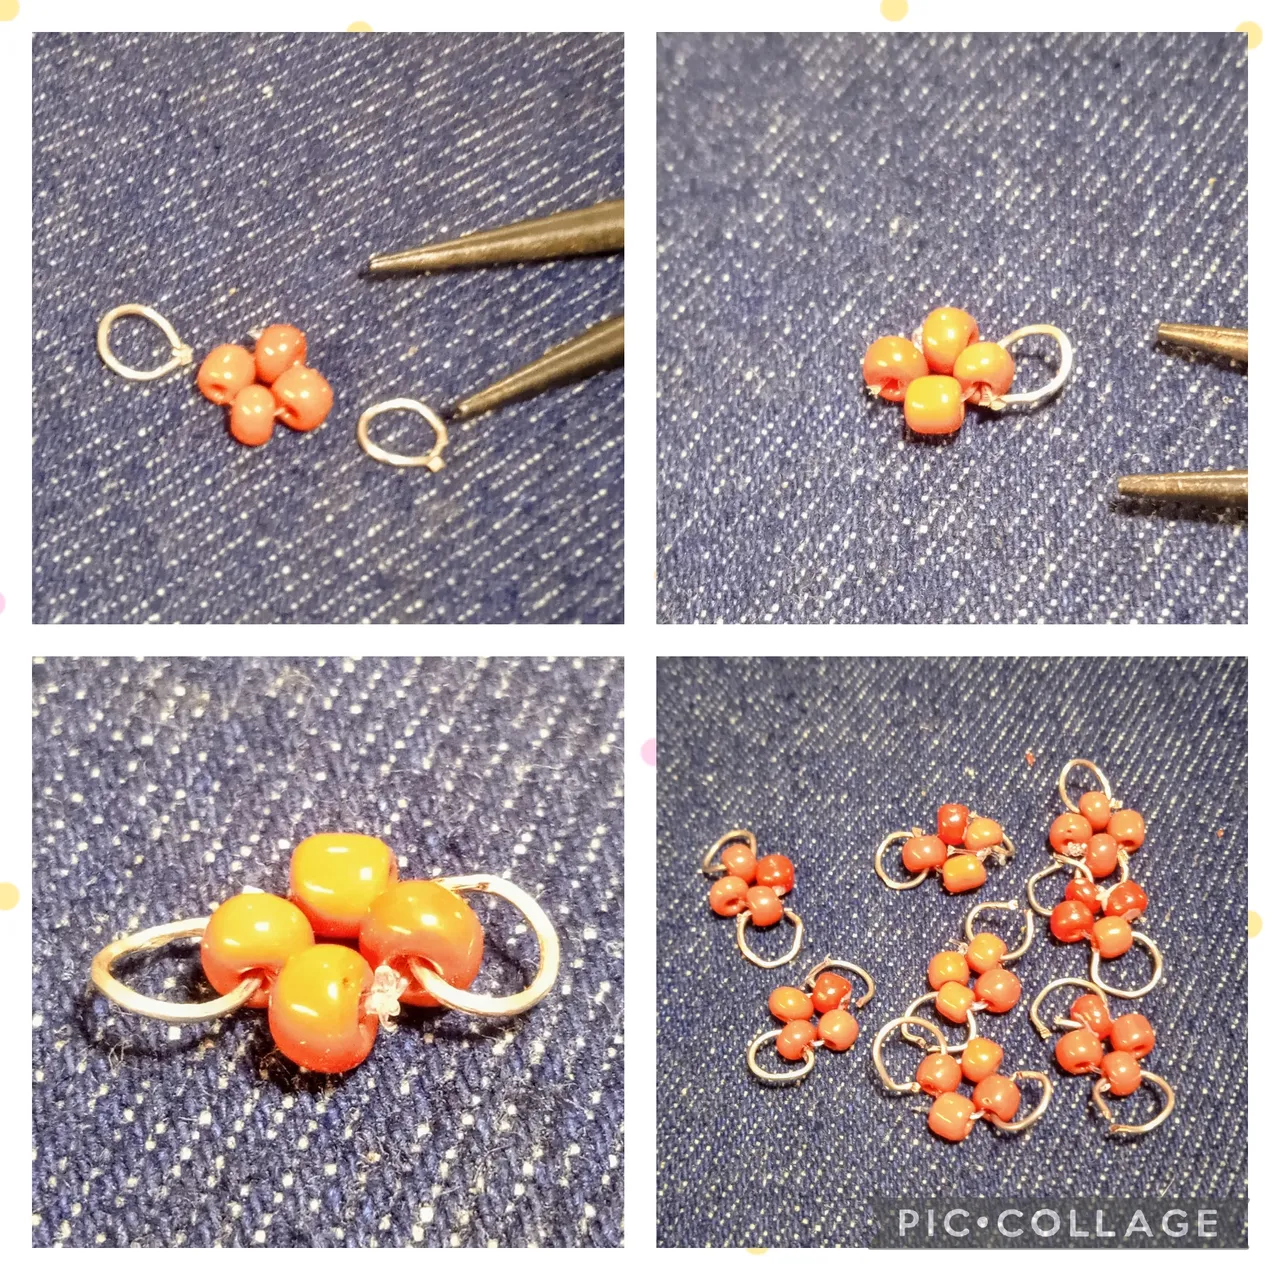
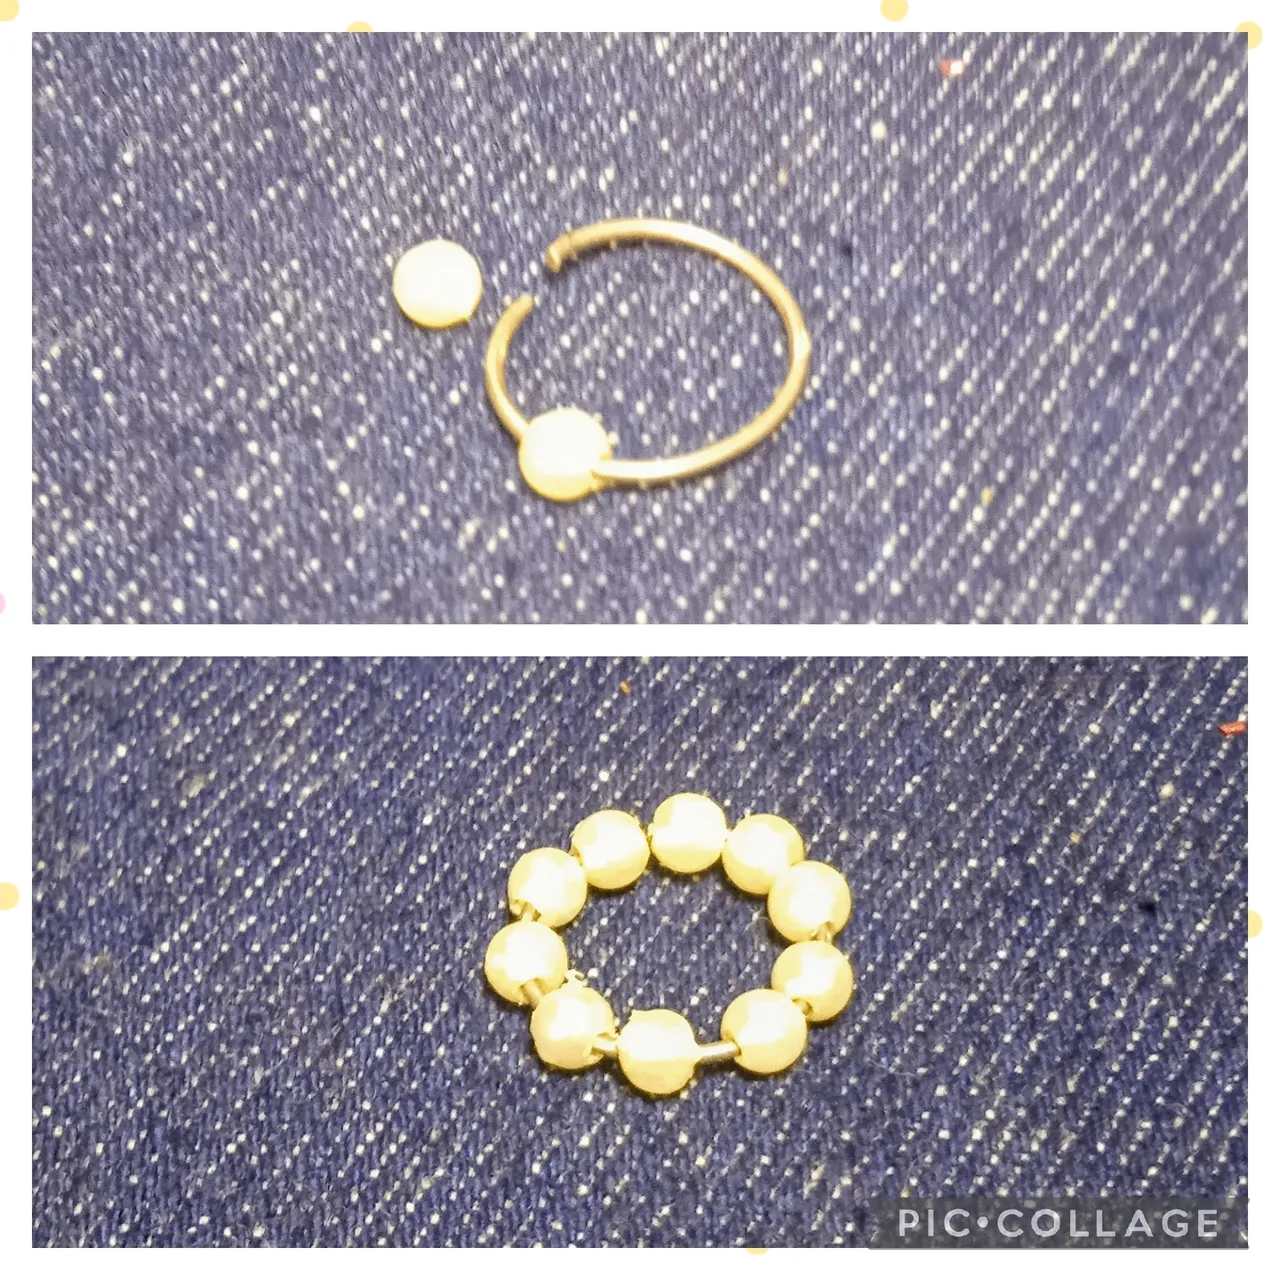
PASO DOS:
Ahora para continuar con la elaboración de la Gargantilla a cada florecita le voy a colocar una argolla pequeña en uno de los pétalos, luego coloco otra argolla en el pétalo de abajo, usando la pinza de punta redonda y ajustando con la pinza plana como muestro en la imagen .
STEP TWO:
Now to continue with the making of the Choker, I am going to place a small ring on one of the petals on each flower, then I will place another ring on the petal below, using the round-tipped tweezers and adjusting with the flat tweezers as shown in the picture .
PASO TRES:
En este paso voy a unir cuatro de las florecitas entre si usando un eslabón plateado, y así hago dos iguales como en la foto
STEP THREE:
In this step I am going to join four of the little flowers together using a silver link, and thus make two identical ones as in the photo
PASO CUATRO:
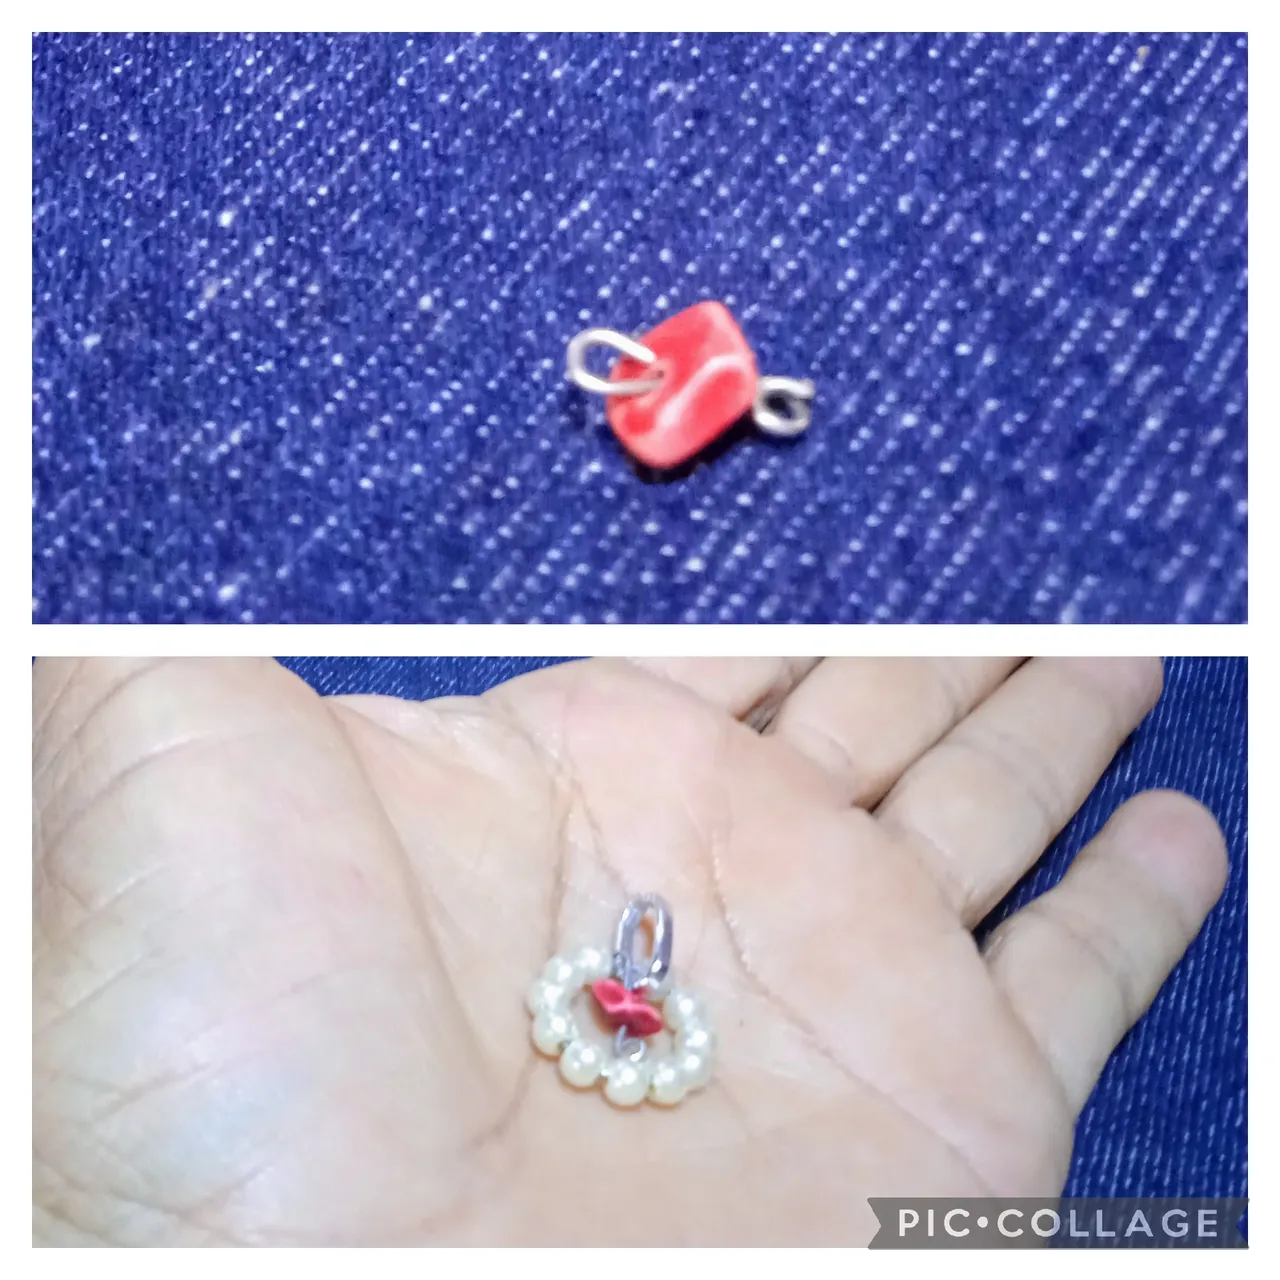
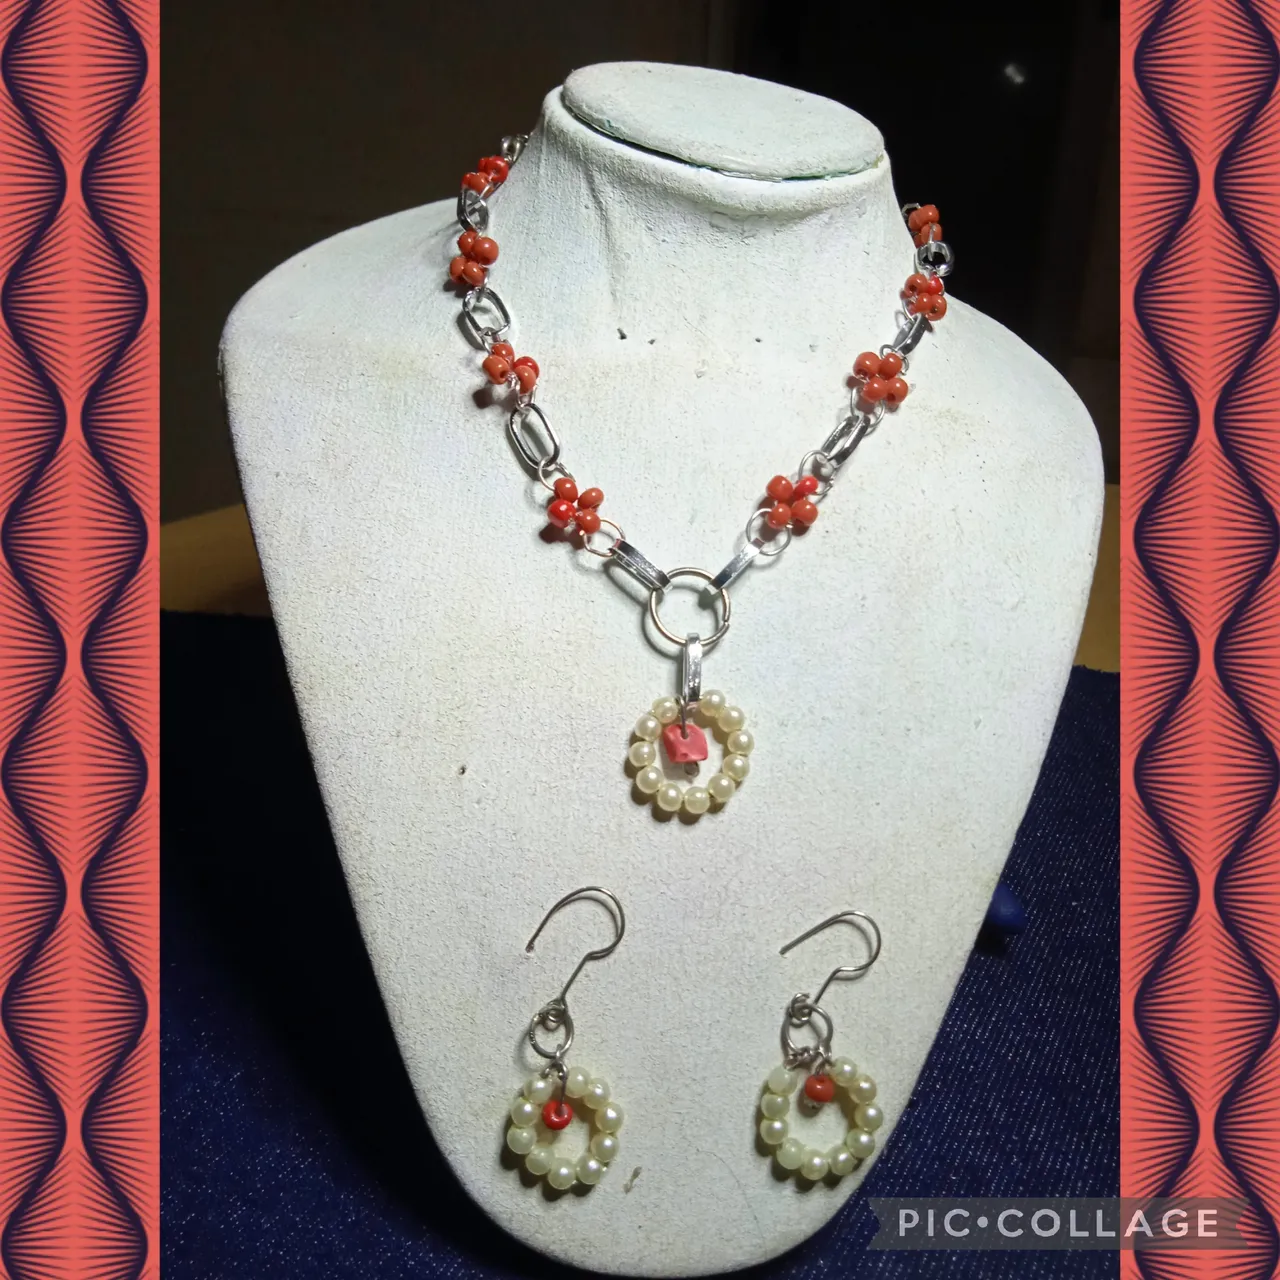
En este paso voy a realizar un dije para colgar en el centro de la Gargantilla, tomo una argolla grande e inserto doce perlas blancas, cierro la argolla hago otro dije con una piedra roja y lo coloco en el centro de la argolla pongo un eslabón plateado en el centro para colgar y asi queda.
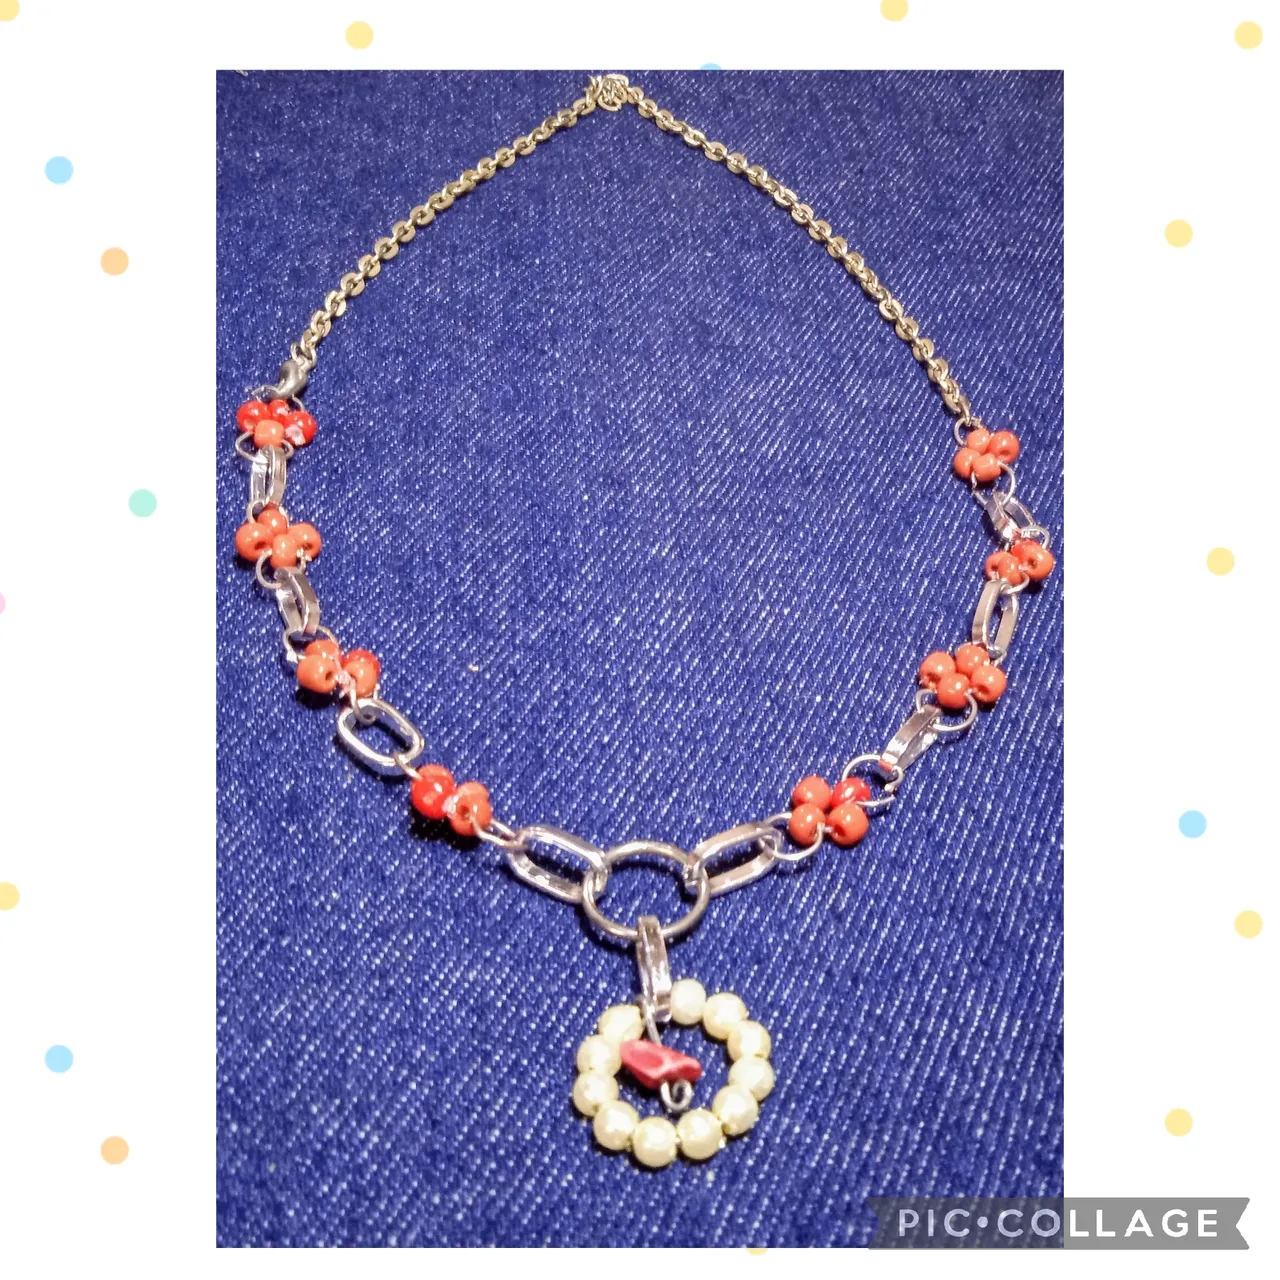
Ahora uno las piezas colocando en una argolla grande las dos líneas de flores, en la misma argolla inserto el dije como se ve en las imágenes, para finalizar la Gargantilla pongo una cadena de extensión plateada así.
STEP FOUR:
In this step I am going to make a pendant to hang in the center of the Choker, I take a large ring and insert twelve white pearls, I close the ring I make another pendant with a red stone and I place it in the center of the ring I put a silver link in the center to hang and that's how it looks.
Now I join the pieces by placing the two lines of flowers in a large ring, in the same ring I insert the pendant as seen in the images, to finish the Choker I put a silver extension chain like this.
QUINTO PASO:
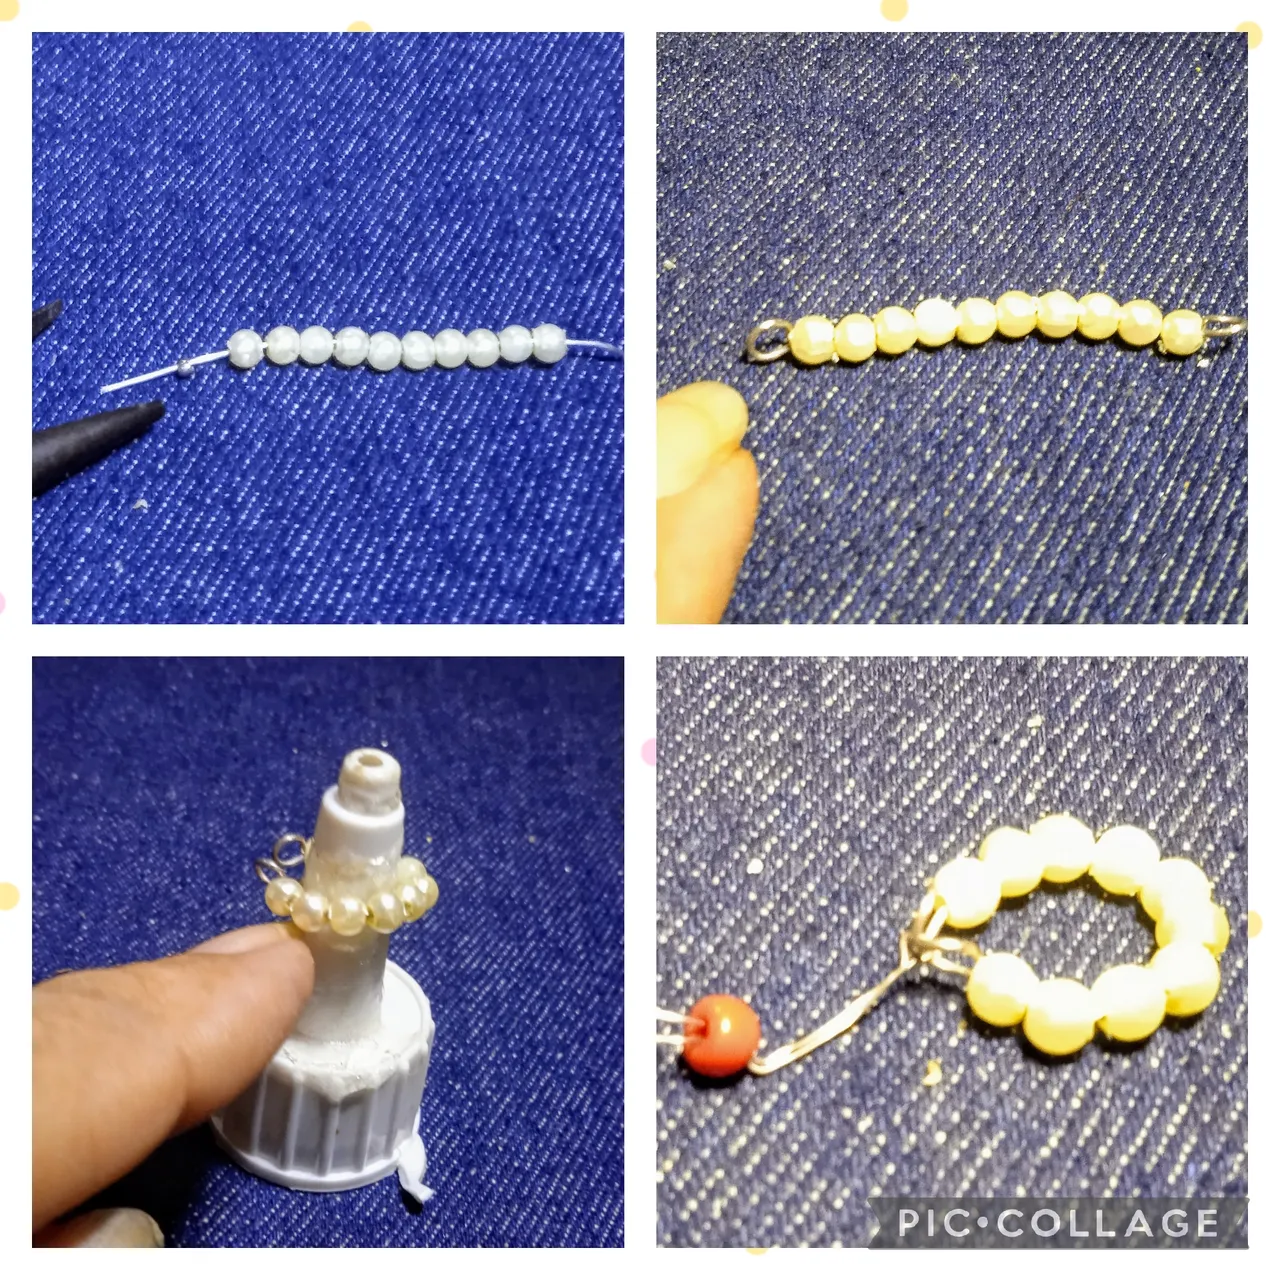
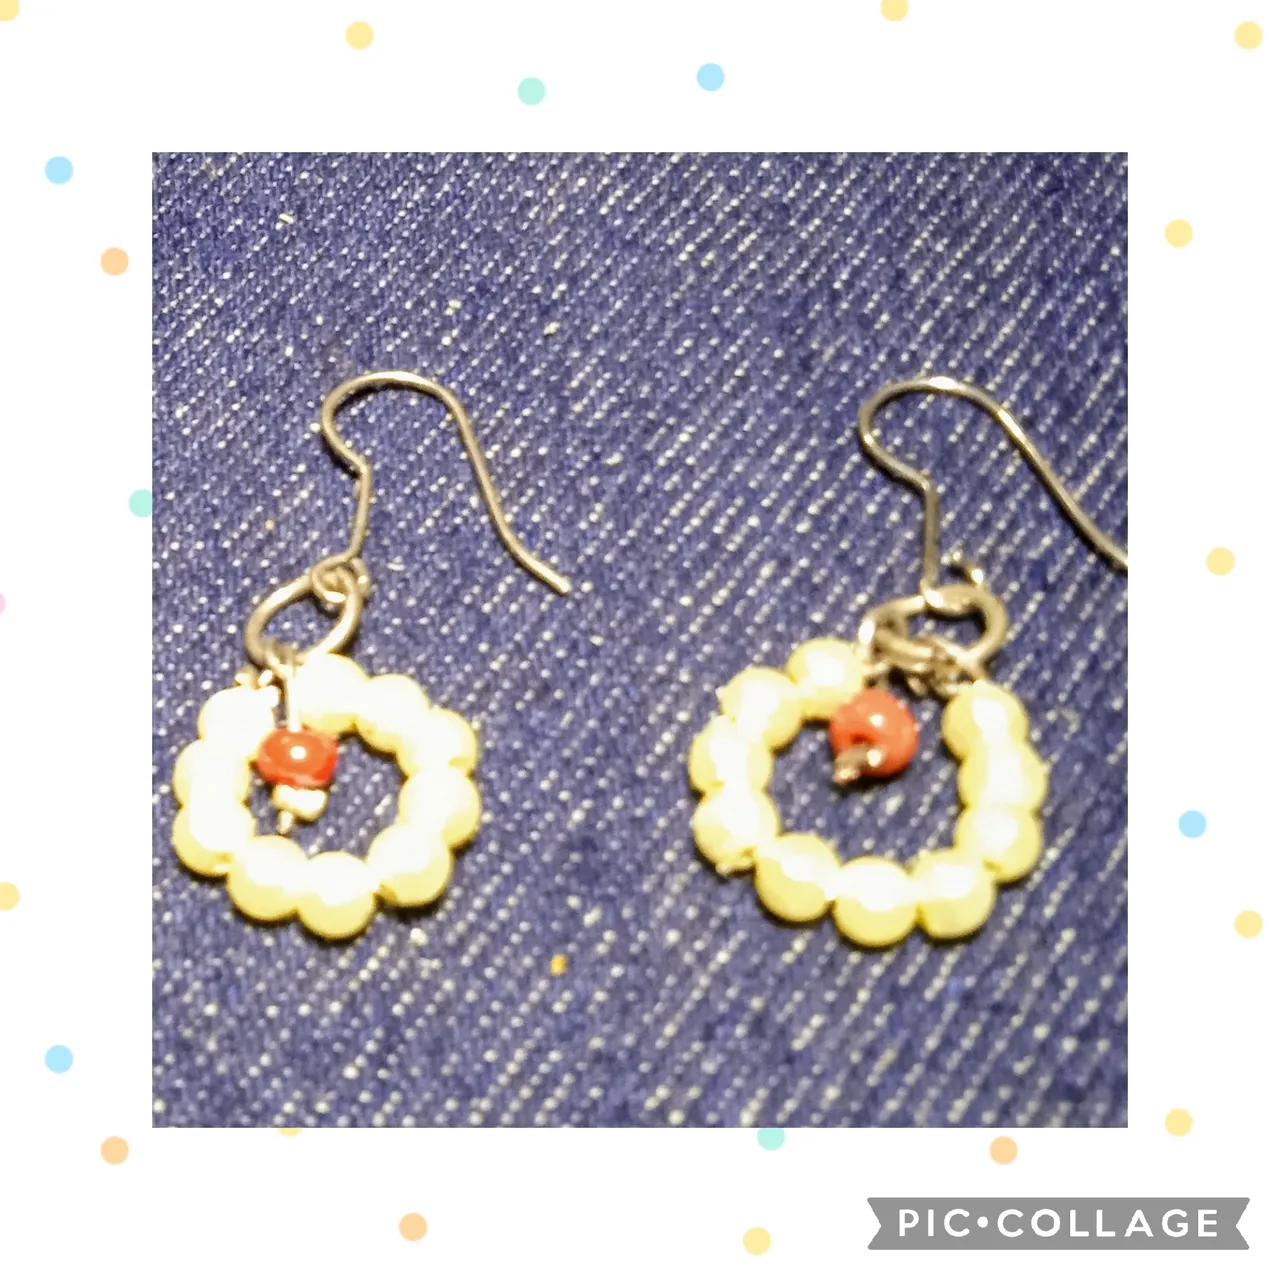
Una vez realizada la Gargantilla, ahora paso a elaborar estos bonitos Aretes de esta manera: corto un trozo de alambre de plata de seis centímetros, con la pinza de punta redonda en uno de los extremos realizó un anillo, inserto por el otro lado diez perlitas blancas y hago otro arito en el extremo para fijar, con la tapa de un bote de silicón le doy forma redonda, ahora en un trozo de alambre de cinco centímetros pongo un mostacillón rojo y lo fijo con una grapa , lo coloco en el centro de los aritos y entorcho dos veces para asegurar, corto el excedente , paso una argollita por los aritos y pongo el anzuelo para asi terminar el Arete, uso un procedimiento igual para realizar el otro y formar el par, muestro las imágenes.
FIFTH STEP:
Once the Choker is made, I now proceed to make these beautiful Earrings in this way: I cut a six-centimeter piece of silver wire, with the round-tipped pliers at one end I made a ring, I inserted ten little pearls on the other side whites and I make another ring at the end to fix it, with the lid of a silicone jar I shape it into a round shape, now on a five centimeter piece of wire I put a red bead and fix it with a staple, I place it in the center of the earrings and twist them twice to secure, I cut the excess, I pass a small ring through the earrings and put the hook to finish the Earring, I use the same procedure to make the other one and form the pair, I show the images.
Artistas Creativos de las Manualidades y la Joyería, este es el resultado final de mi bonito y juvenil Set de Accesorios realizado muy especial para mí preciosa princesa, no quiso mostrar sus galas para modelarlo pues dice que será mañana cuando luzca esplendorosa con el, a mi me pareció ideal para ella pues es muy sencilla, espero que les guste como a mi, de antemano muchas gracias a todos por leer y ver mis publicaciones apoyándome con sus comentarios, excelente fin de semana y nos vemos en la próxima manualidad, bye bye
Creative Artists of Crafts and Jewelry, this is the final result of my beautiful and youthful Accessory Set made very special for my beautiful princess, she did not want to show her finery to model it because she says that it will be tomorrow when she will look splendid with it, to me I thought it was ideal for her because it is very simple, I hope you like it as much as I do, thank you all in advance for reading and seeing my publications and supporting me with your comments, excellent weekend and see you in the next craft, bye bye
Las imágenes y redacción de este tutorial son de mi propiedad las fotos fueron tomadas con mi teléfono celular redmi 9,y las edité con una aplicación gratis del mismo.
Para traducir texto use Google traductor.
The images and writing in this tutorial are my property. The photos were taken with my Redmi 9 cell phone, and I edited them with a free application.
To edit text use Google translator.