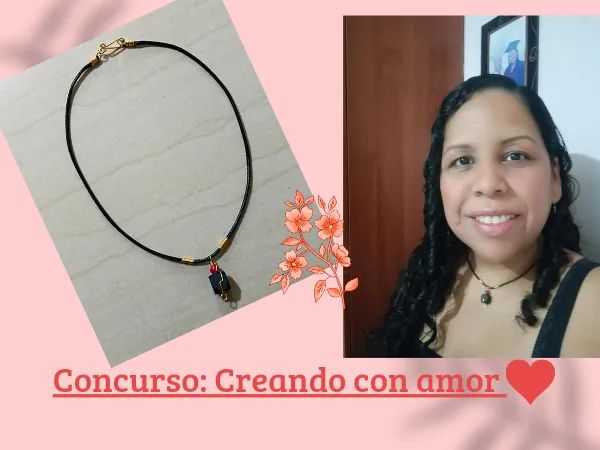
Hello #hive friends especially to this beautiful #jewelry community, thanks to the initiative of the administrators I decided to participate in the contest, creating with love.
When thinking about a necklace for me the first thing I imagined was something minimalist, I am a person who likes simplicity, that's why I focused on designing a choker necklace with only one pendant and, as in my creations can not miss the jet we will use this stone to make the pendant, this material can be seen very often in my designs, perhaps combined with other materials, but always him as the protagonist.
Hola amigos de #hive especialmente a esta linda comunidad de #jewelry, gracias a la iniciativa de los administradores decidí participar en concurso, creando con amor.
Al pensar en un collar para mí lo primero que imagine fue algo minimalista, soy una persona que le gusta la simplicidad, es por ello que me enfoque en diseñar un collar tipo choker con solo un colgante y, como en mis creaciones no puede faltar el azabache vamos utilizar esta piedra para hacer el dije, este material lo podrán ver muy a menudo en mis diseños, tal vez combinado con otros materiales, pero siempre él como protagonista.
I confess that I don't wear many necklaces, earrings and bracelets are my thing, however, if I like a necklace I wear it frequently, I almost always wear a rosary as a necklace.
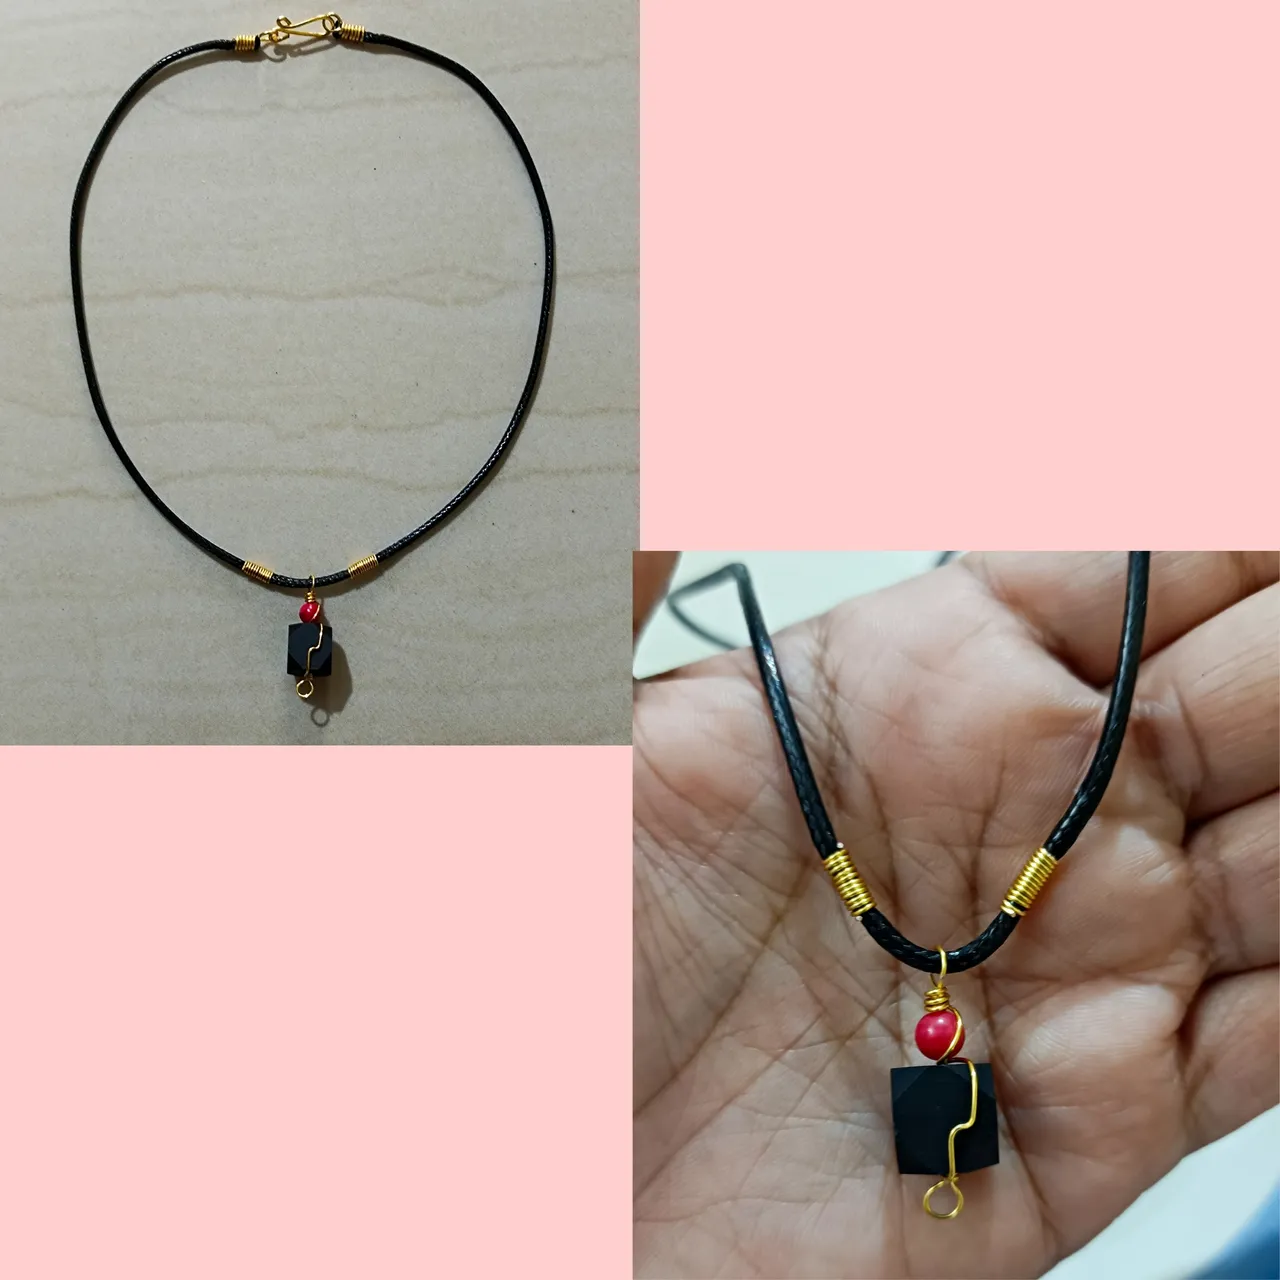
Regarding the necklace I have called simplicity and life, we will need the following.
Confieso que no uso muchos collares, los pendientes y las pulseras es lo mío, sin embargo, si me gusta un collar lo uso con frecuencia, casi siempre uso un rosario como collar.
Con respeto al collar que he llamado simplicidad y vida, vamos a necesitar lo siguiente.
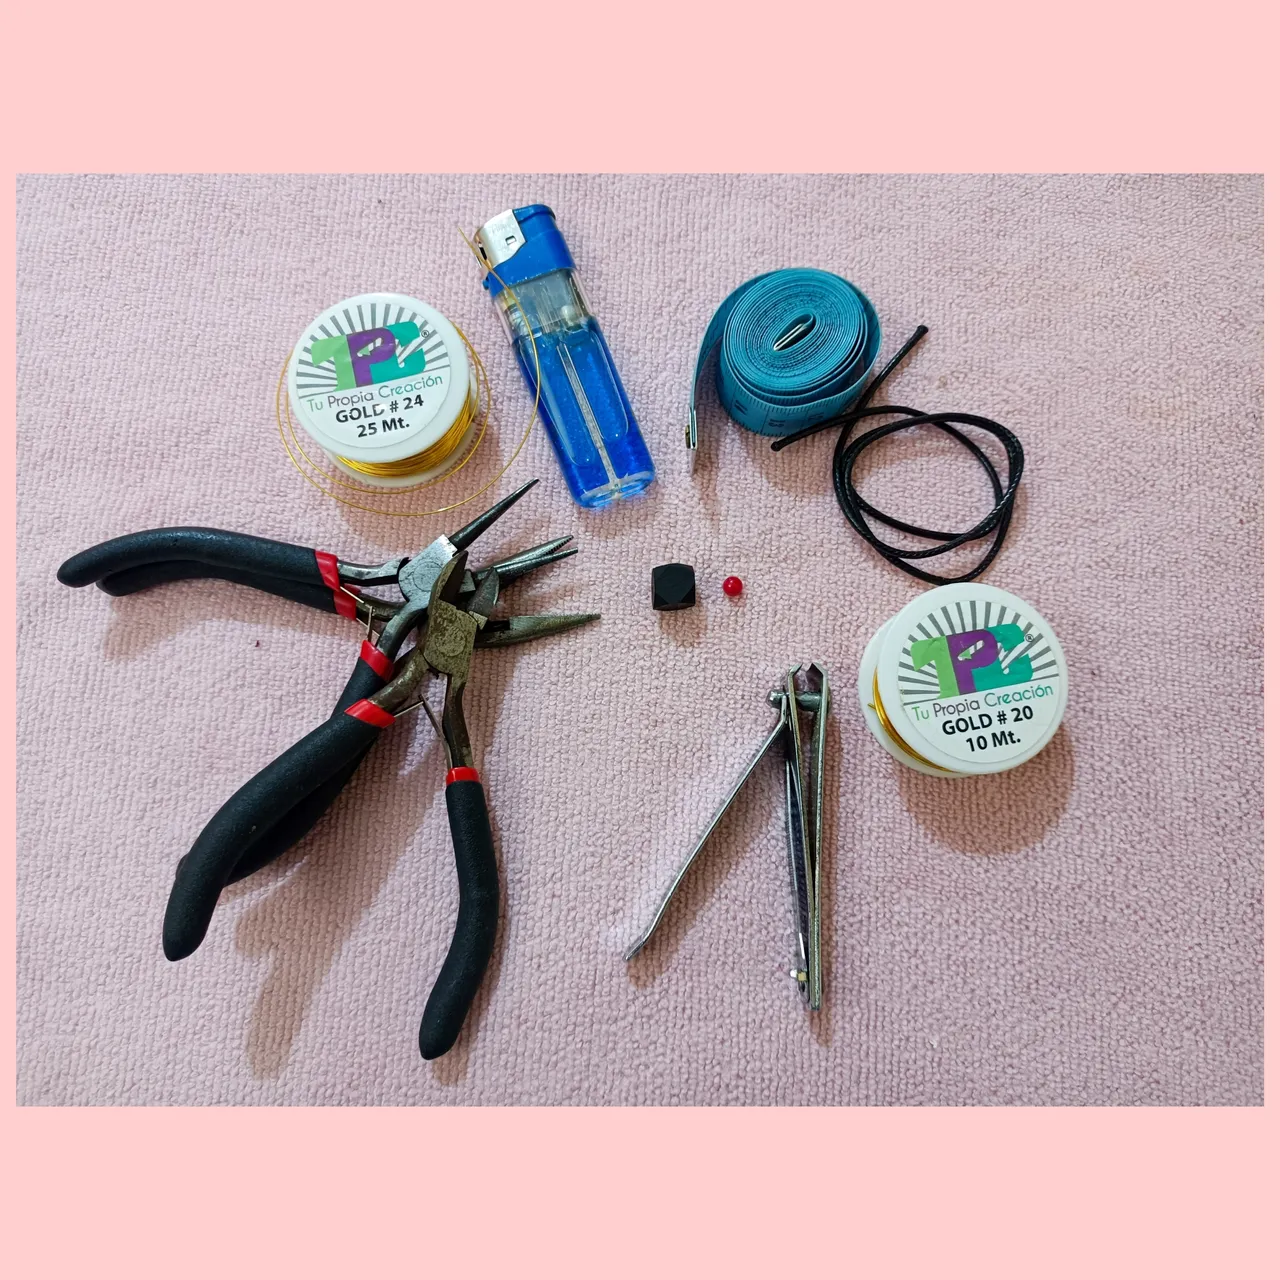
Materials:
Materials:
- 💎#20 and #22 gauge gold wire.
- 💎Bead of your choice, I am using (jet and red coral).
- 💎Snakeskin ribbon approximately 35cm
- 💎Scissors
- 💎Tweezers
- 💎Lighter
- 💎Tape measure
Materiales:
- 💎Alambre dorado calibre #20 y #22
- 💎Cuenta de tu preferencia yo estoy utilizando (azabache y coral rojo)
- 💎Cinta piel de serpiente aproximadamente 35cm
- 💎Tijeras
- 💎Pinzas
- 💎Encendedor
- 💎Cinta métrica
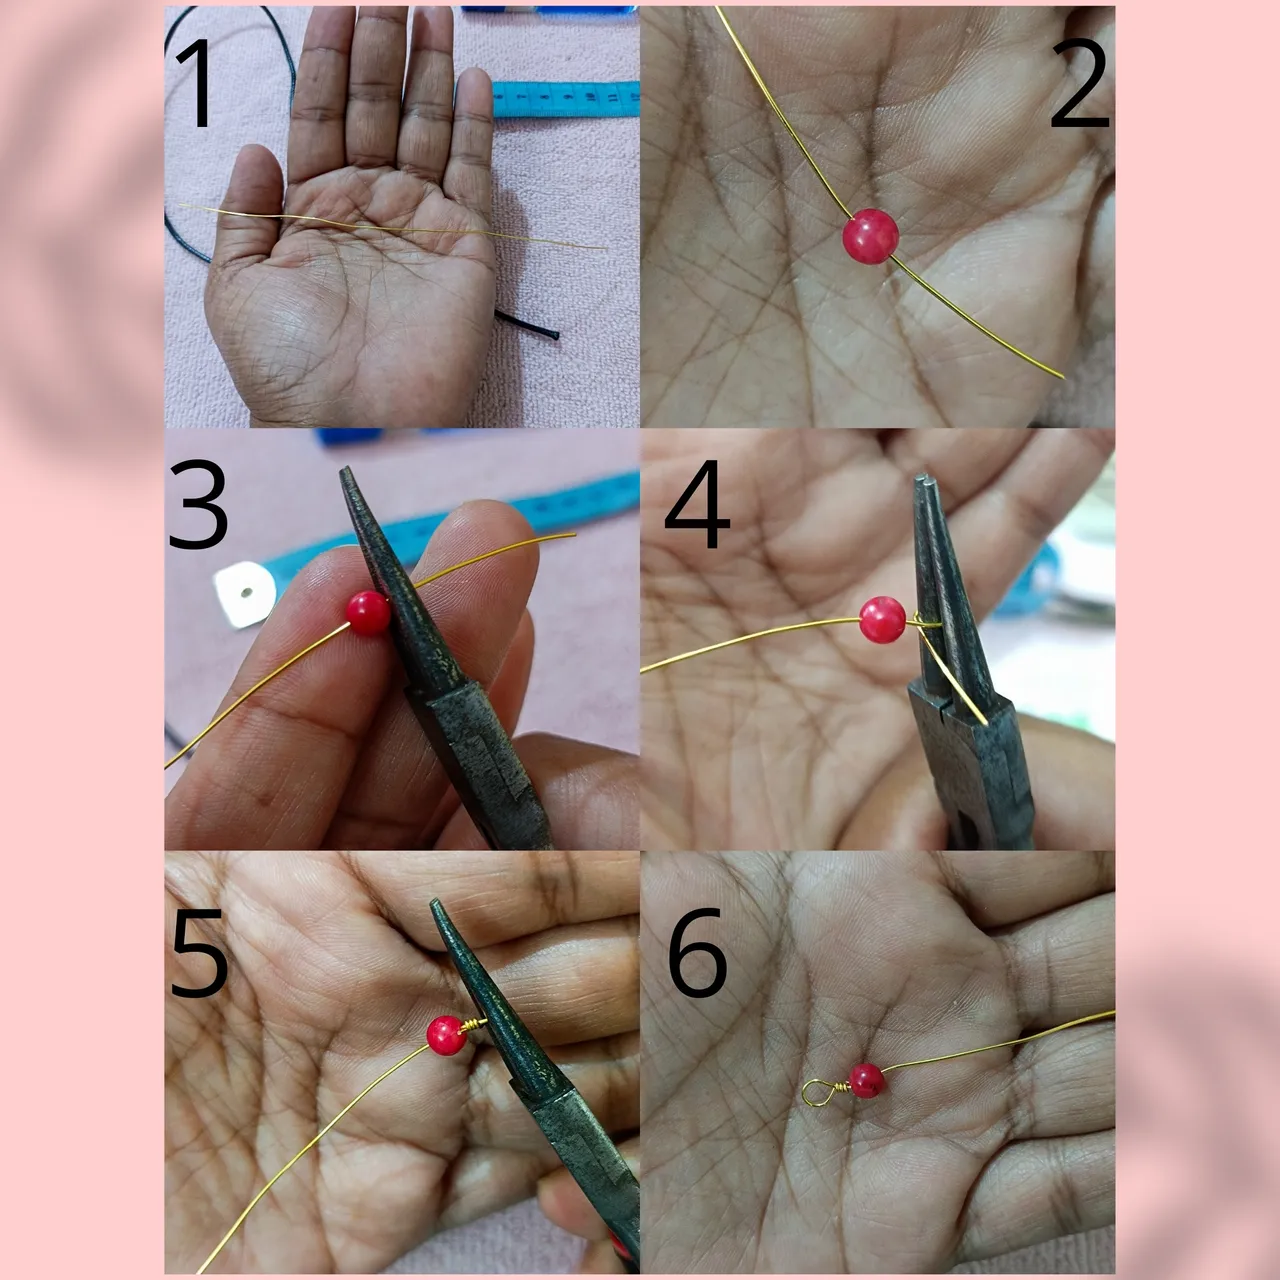
Step by step
First:
We cut approximately 16 cm of #22 Caliber wire we pass through coral bead, we leave 3 cm and we make a rosary knot, we introduce the jet bead and we carry out a second rosary knot.
Paso a paso
Primero:
Cortamos aproximadamente 16 cm de alambre Calibre #22 pasamos a través de cuenta de coral, dejamos 3 cm y realizamos un nudo rosario, introducimos la cuenta de azabache y llevamos a cabo un segundo nudo de rosario.
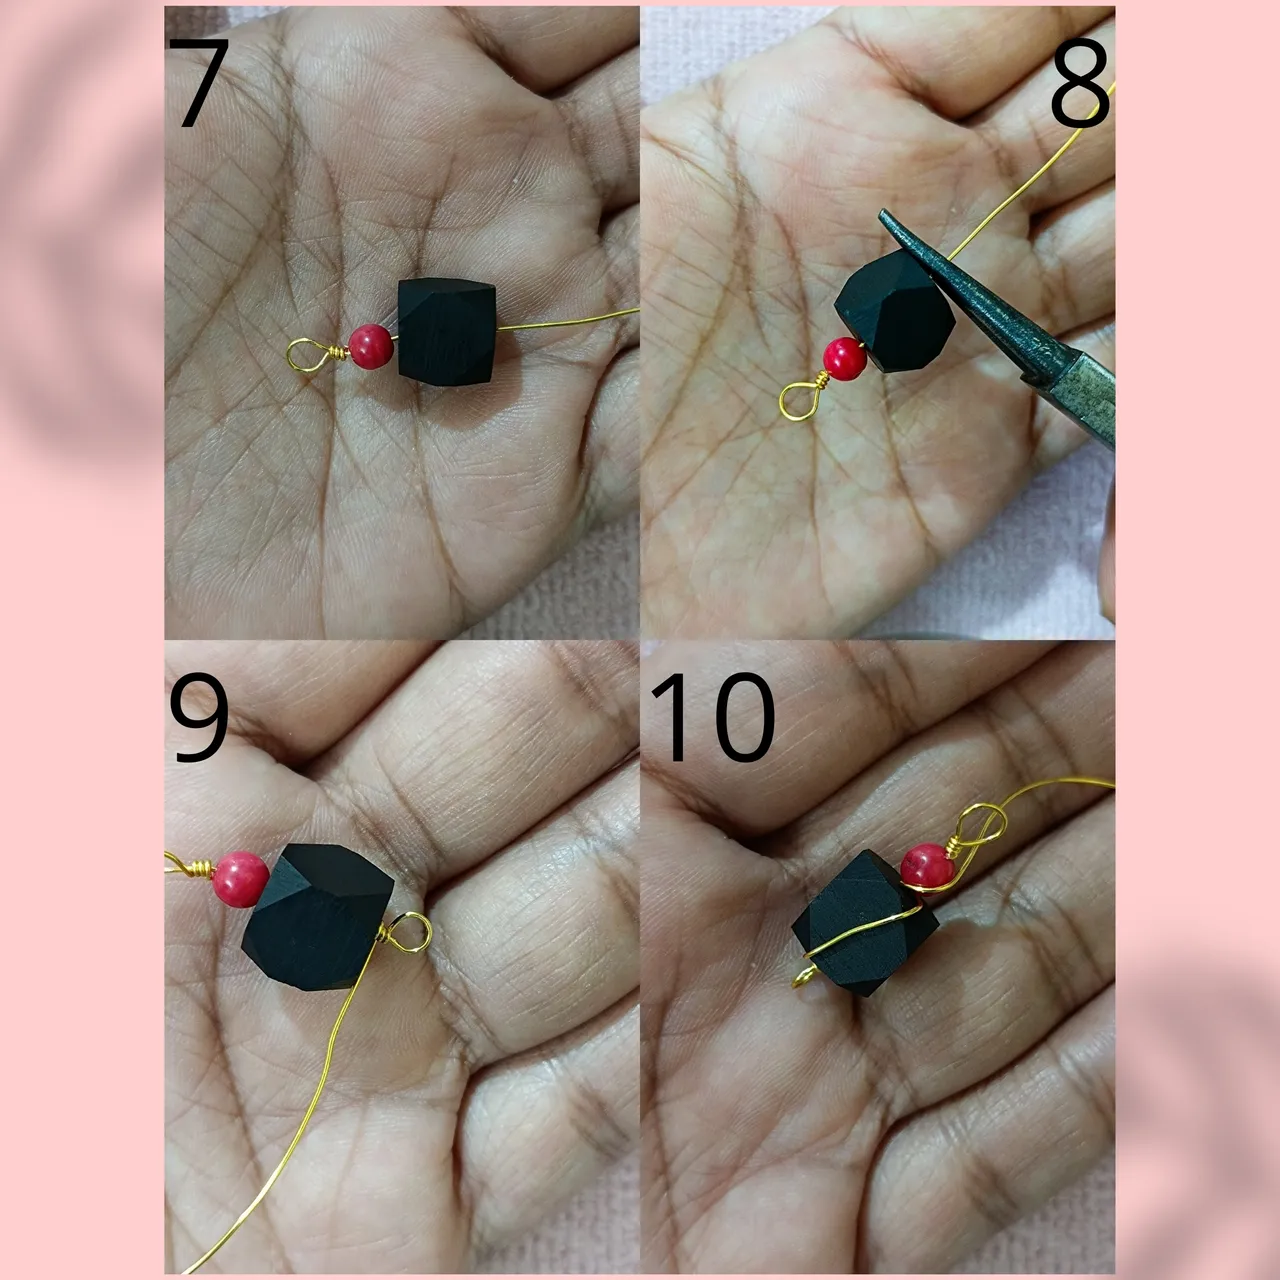
Then we pass the wire around the jet bead and the coral bead, finally we close by making three turns of the wire just in the rosary knot that we made first.
Seguidamente pasamos el alambre rodeando la cuenta de azabache y la de coral, finalmente cerramos realizando tres vueltas del alambre justo en el nudo rosario que hicimos primero.
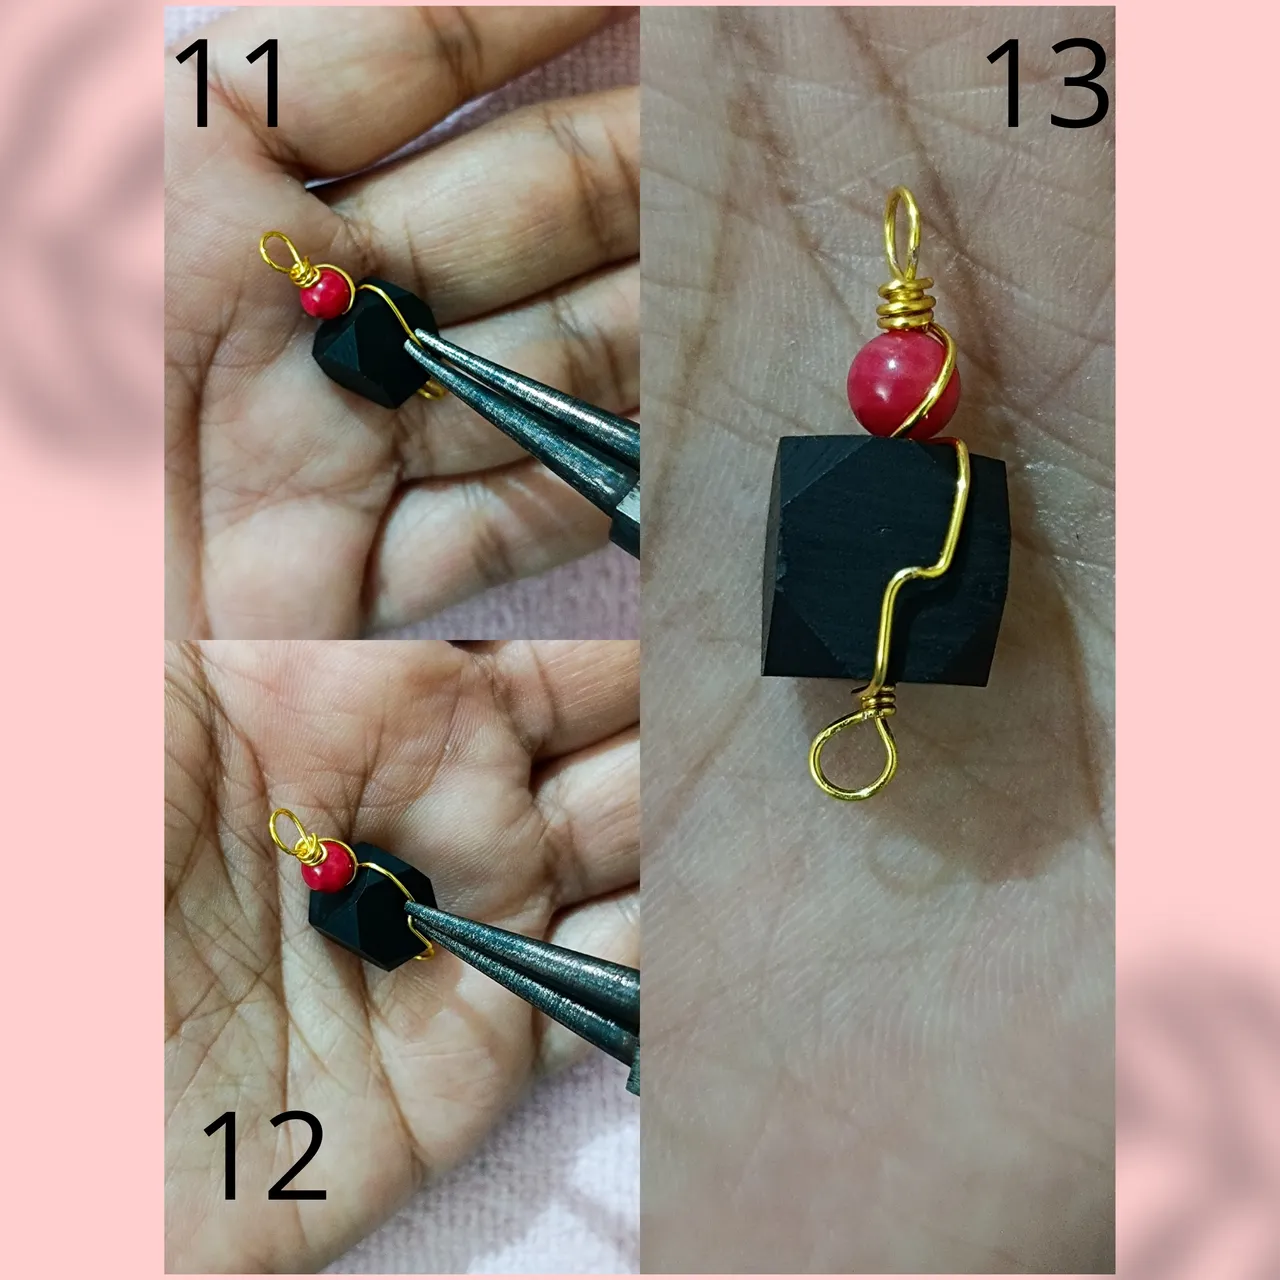
We take the conical pliers and make a small bend in the wire that surrounds the jet bead (finished image N°13).
Tomamos la pinza cónica y hacemos un pequeño dobles en el alambre que rodea la cuenta de azabache (acabado imagen N°13)
Second:
We take the snakeskin ribbon (or the one of your preference) for this necklace that is made to my measure I use 35 cm of ribbon.
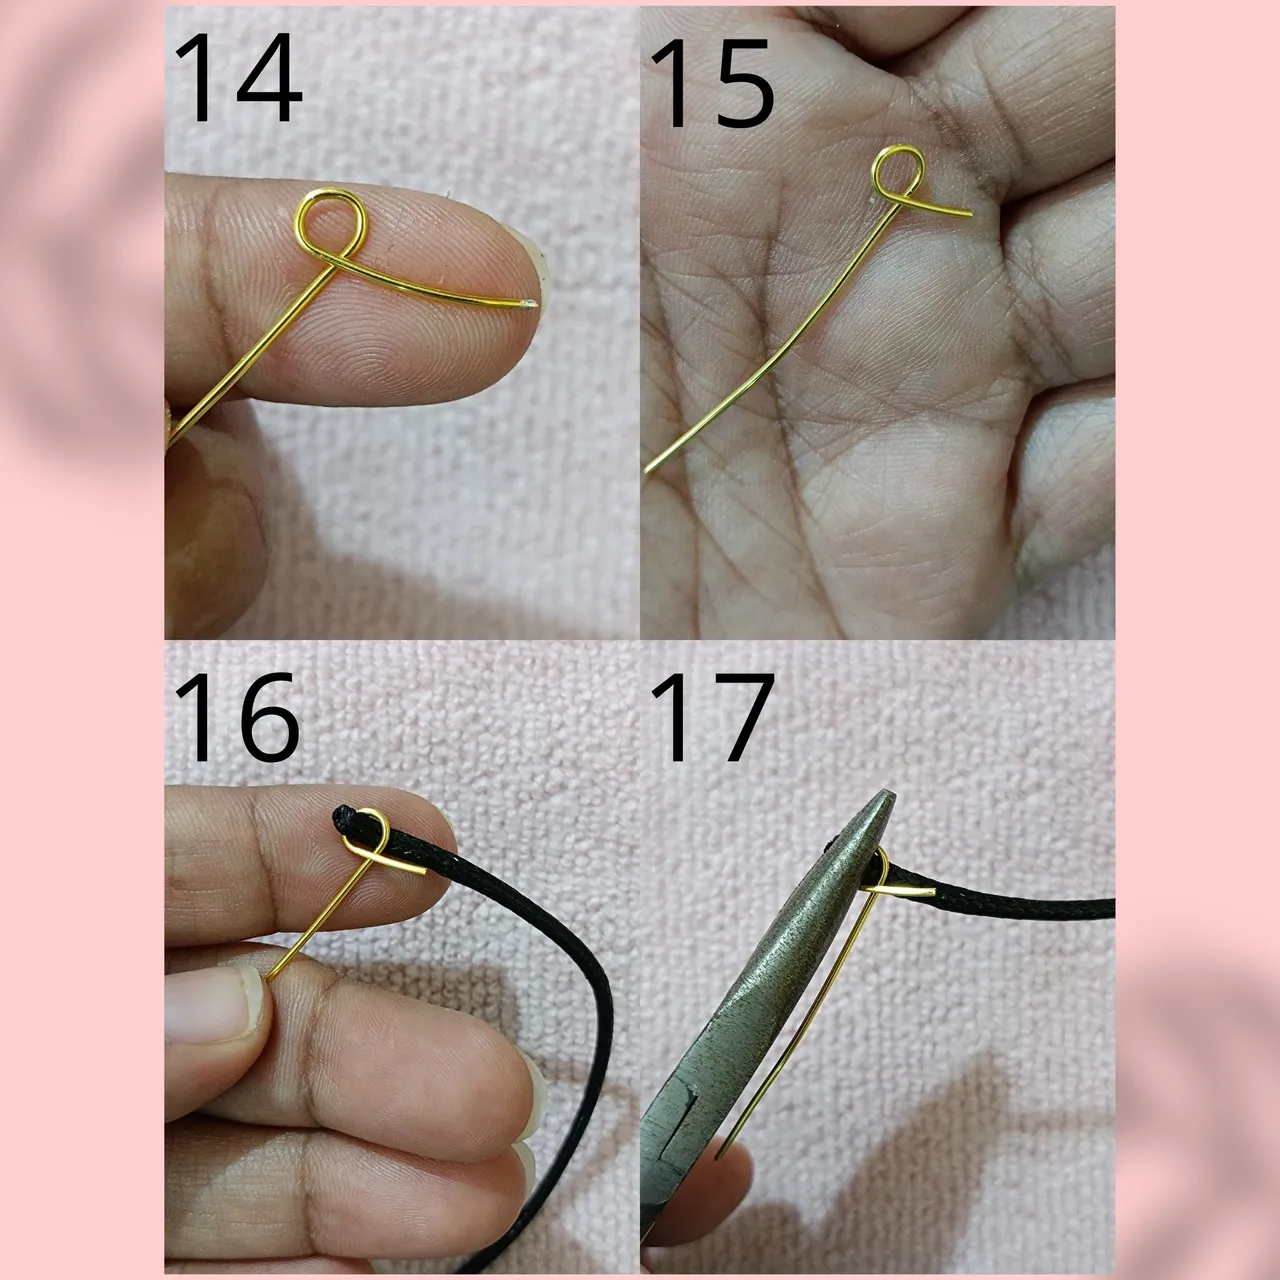
Continuing with the order of ideas we proceed to cut 7 cm of 20 gauge wire and make a circle leaving half a centimeter of it, as shown in the image N° 15.
Through the circle we pass the tip of the snakeskin ribbon, image N°16 with the help of the flat pliers we hold the circle together with the ribbon, image N°17 we turn the wire over it making a rosary crimp, finally, we cut all the excess of both wire and ribbon.
Segundo:
Tomamos la cinta piel de serpiente (o la de tu preferencia) para este collar que está hecho a mi medida utilizo 35 cm de cinta.
Siguiendo con el orden de ideas procedemos a cortar 7 cm de alambre calibre 20 y realizamos un circulo dejando medio centímetro del mismo, como se observa en la imagen N° 15.
A través del círculo pasamos la punta de la cinta piel de serpiente, imagen N°16 con la ayuda de la pinza plana sujetamos el círculo junto con la cinta imagen N°17 damos vuelta al alambre sobre misma haciendo un engaste rosario, por último, cortamos todos los excedentes tanto de alambre como de cinta.
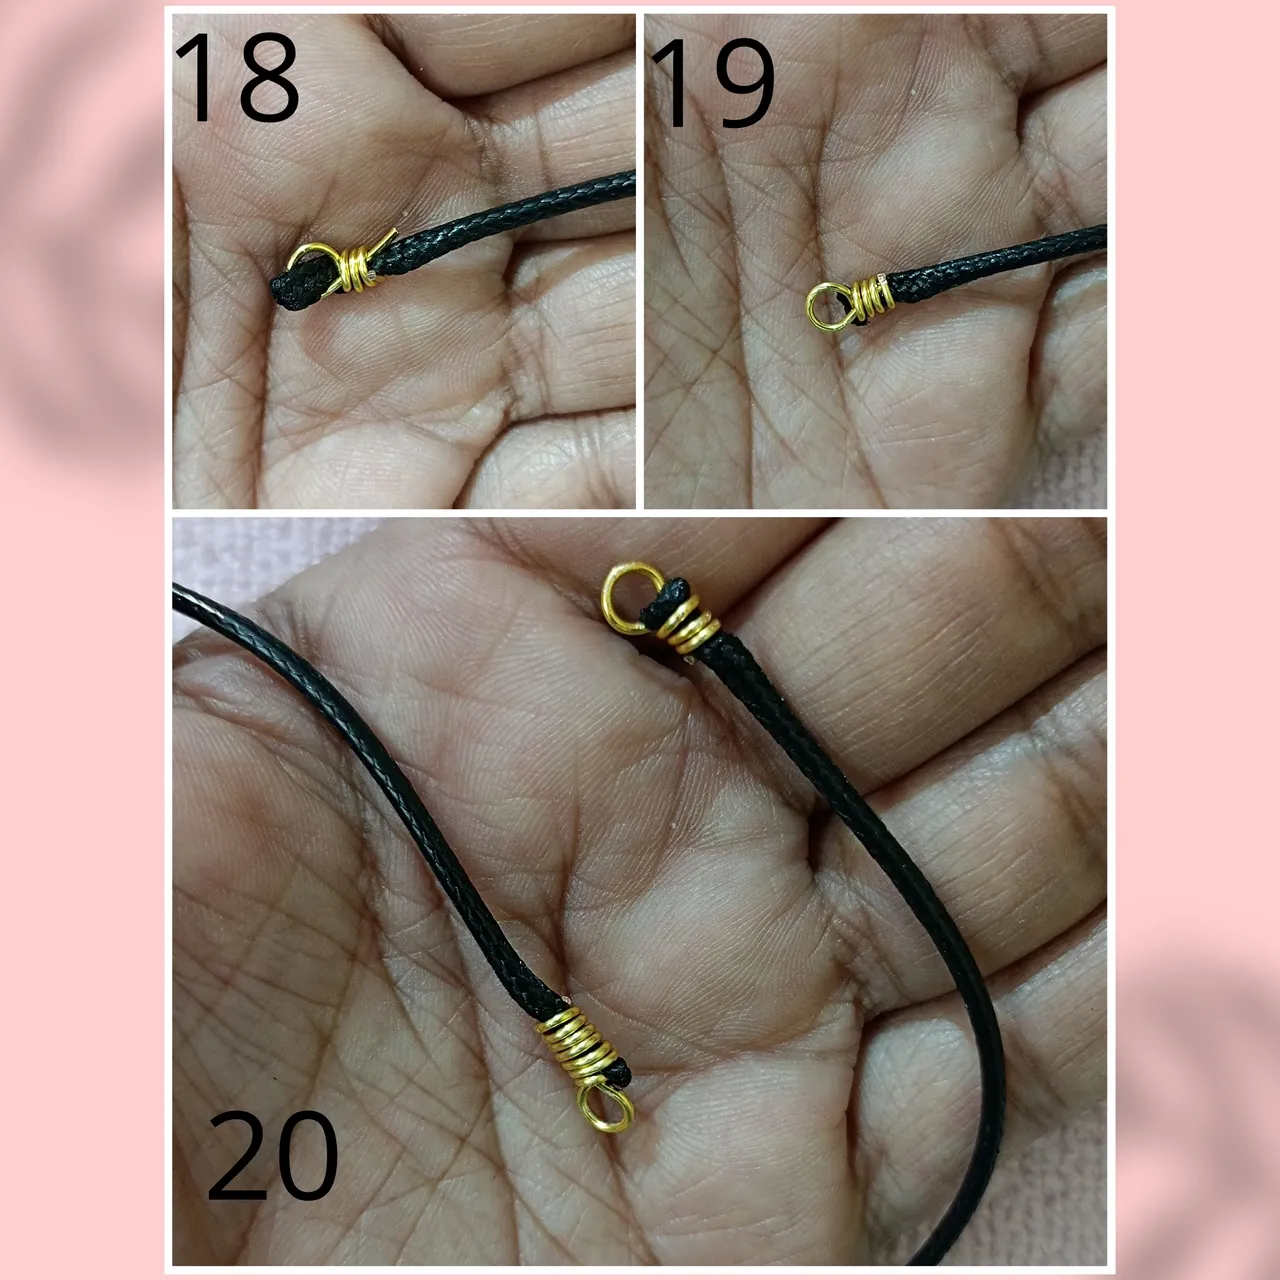
We do the same procedure on the other end of the snakeskin ribbon, but first we must place the jet pendant, then if we do the second terminal, I tell you something ....
At the end of both terminals I noticed that I forgot to insert the jet pendant, when I was going to place it did not happen because the ring of it is smaller than the ring of the closing terminal, I had to disassemble and reassemble the terminal JAJAJAJA, things that happen when you design and also you act as a photographer.
Realizamos el mismo procedimiento en el otro extremo la cinta piel de serpiente, pero antes se debe colocar el dije de azabache, para luego si realizar el segundo terminal, les cuento algo....
Al finalizar ambos terminales note que se me olvido insertar el dije de azabache, cuando lo iba a colocar no pasaba ya que la argolla del mismo es más pequeña que la argolla del terminal de cierre, tuve que desarmar y volver armar el terminal JAJAJAJA, cosas que pasan cuando diseñas y además heces las veces de fotógrafo.

Third:
We make a hook for the clasp with 5 cm of wire 20 we bend the tip of the wire image N°21 and with the thickest part of the conical clamp we make a U shape, then we make a small circle at the other end of the wire, we link it with the terminal. Image N°25
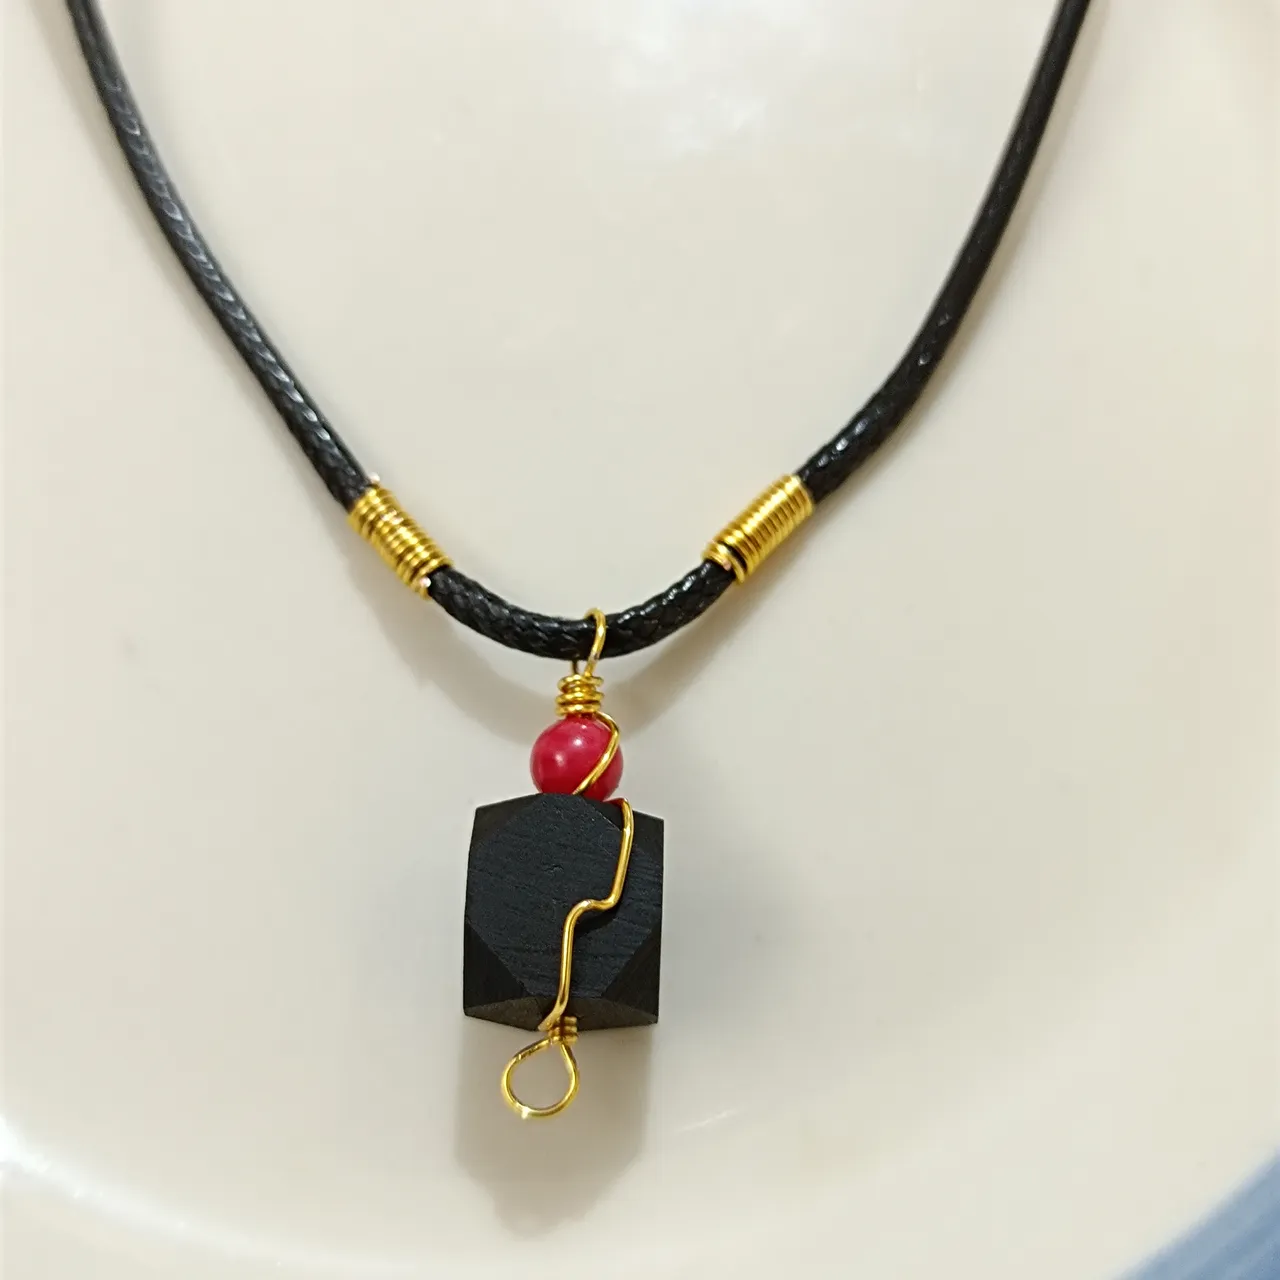
To decorate decide to wind the 22 gauge wire around the snake skin as shown in this picture and ready we have our necklace.
Tercero
Elaboramos un gancho para el cierre con 5 cm de alambre 20 doblamos la punta del mismo imagen N°21 y con la parte más gruesa de la pinza cónica hacemos una U luego hacemos un pequeño círculo al otro extremo del alambre, enlazamos con el terminal. Imagen N°25.
Pará decorar decide enrollar alambre Calibre 22 la piel de serpiente como se muestra en esta imagen y listo tenemos nuestro collar.


I invite @carlaruz and @danaltuve to participate.
My Twitter post I will leave it in the comments

Canva Photo Editing
Fotografía y Diseños de mi autoría
Edición de fotos Canva
