
Bienvenidos || Welcome
Feliz martes querida familia de Hive y Jewelry que mejor manera que iniciar el día que en este gran espacio creativo lleno de artesanos talentosos con el cual es un placer y un honor compartir, ✨👏 en esta ocasión decidí realizar unos zarcillos con mostacillas... 😅 si continúa mi fiebre por continuar creando accesorios con ellas, no sabía que iba a disfruta mucho trabajar y aprender a trabajar con mostacillas 😍✨ sin más preámbulos acompañenme a ver el paso a paso para crear estos hermosos zarcillos.
Happy Tuesday dear family of Hive and Jewelry what better way to start the day than in this great creative space full of talented artisans with whom it is a pleasure and an honor to share, ✨👏 this time I decided to make some tendrils with beads.... 😅 if you continue my fever to continue creating accessories with them, I did not know that I would really enjoy working and learning to work with beads 😍✨✨ without further ado join me to see the step by step to create these beautiful earrings.
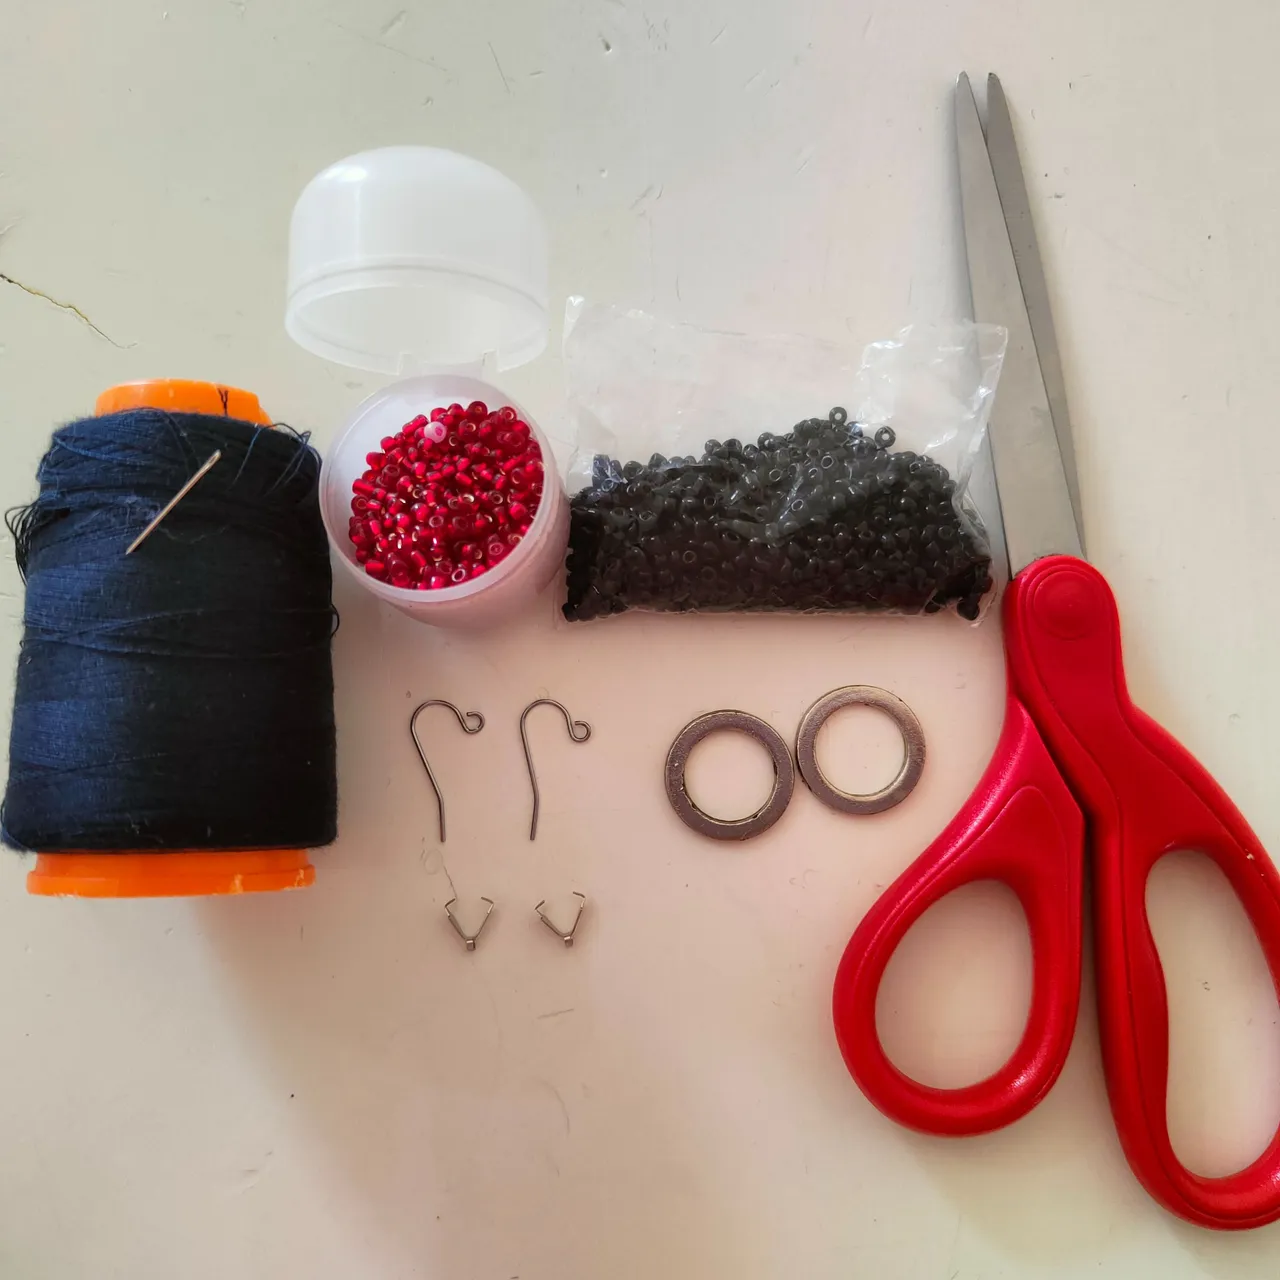
Materiales || Materials
✨ 2 aros.
✨ Mostacillas color rojo.
✨ Mostacillas color negro.
✨ Hilo.
✨ Aguja
✨ Tijera.
✨ 2 Anzuelos.
✨ 2 earrings.
✨ Red beads.
✨ Black beads.
✨ Thread.
✨ Needle
✨ Scissors.
✨ 2 hooks.
Pasos ||Steps
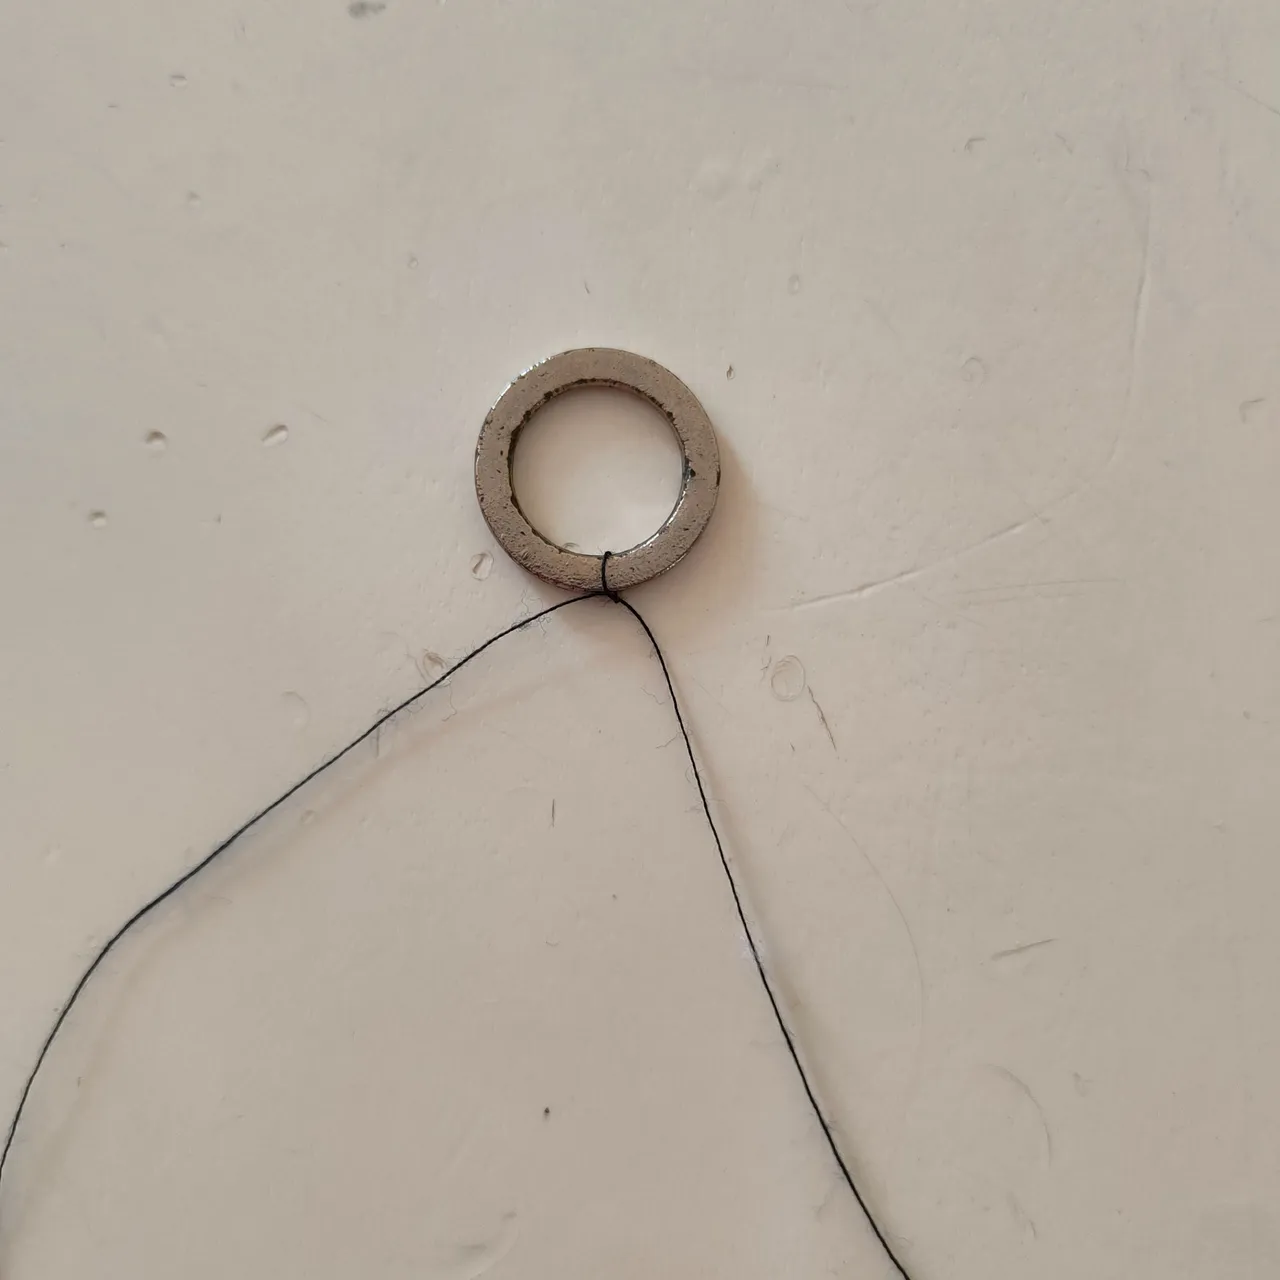
✨ Paso 1.| iniciaremos tomando 2 metros de hilo y procederemos a realizar un nudo con el en nuestro aro, dejando un extremo de 15 centímetros y en otro extremo el resto del hilo, vamos ensartar la aguja en el extremo largo.
✨ Step 1.| we will start by taking 2 meters of thread and proceed to tie a knot with it in our hoop, leaving one end of 15 centimeters and at the other end the rest of the thread, we will thread the needle at the long end.
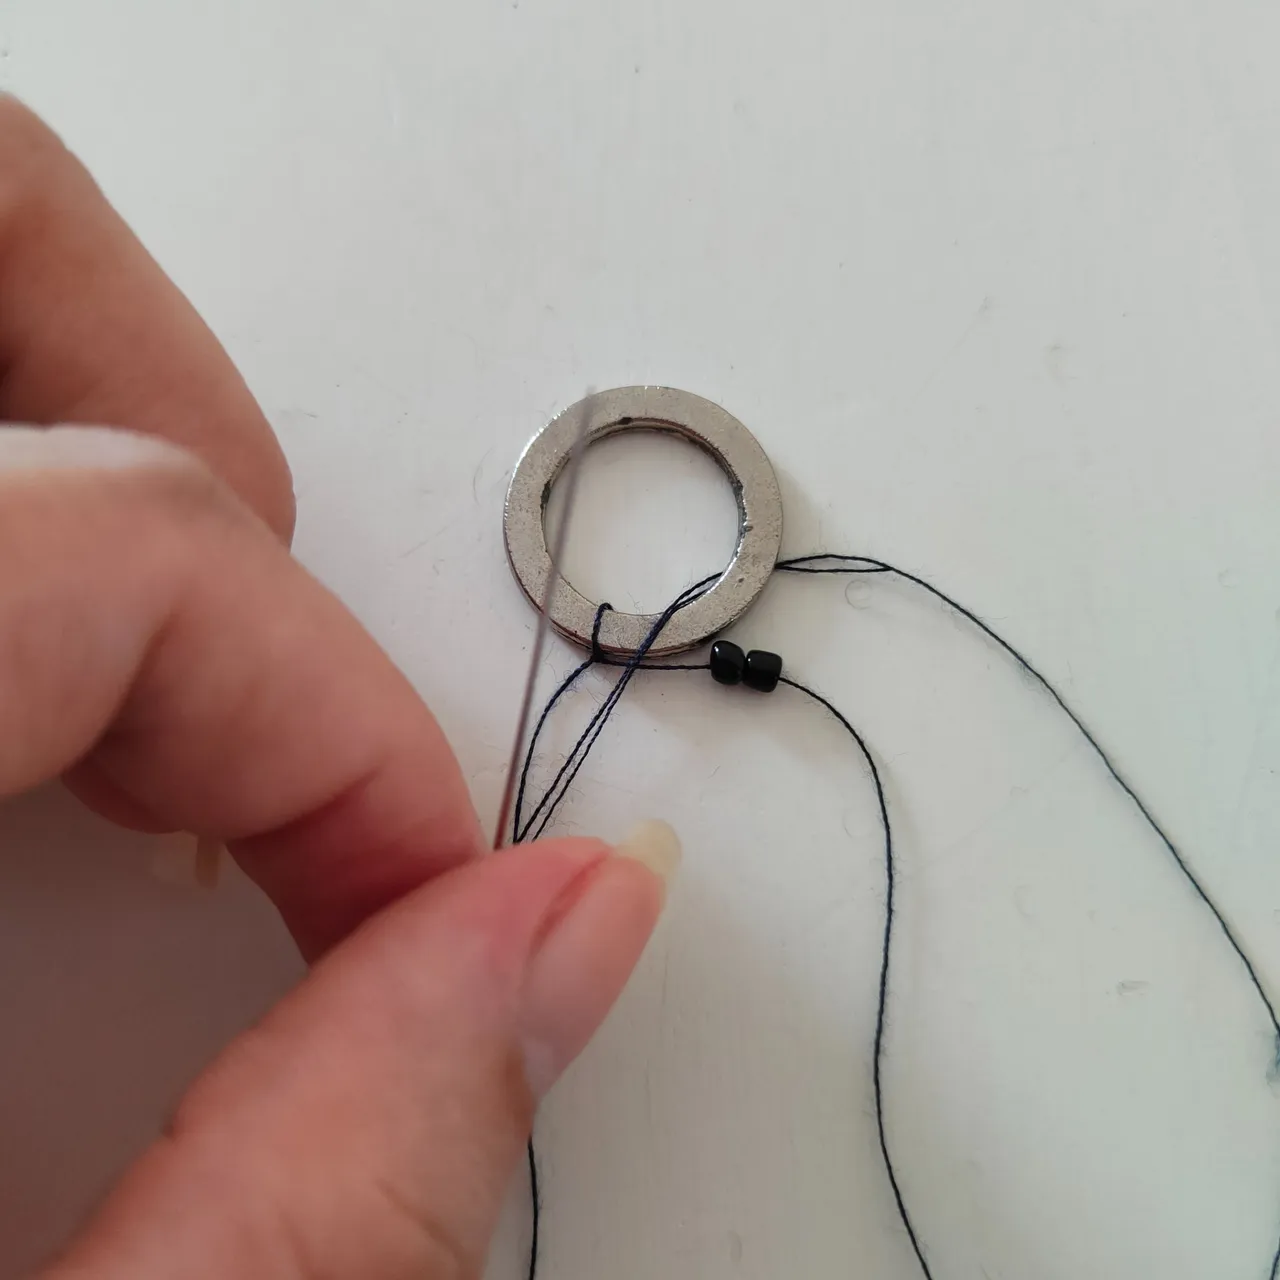
✨ Paso 2.| Ahora vamos introducir 2 mostacillas negras en nuestra aguja e hilo y llevaremos al final, es decir hasta el aro.
✨ Step 2.| Now we are going to insert 2 black beads into our needle and thread and bring to the end, i.e. to the hoop.
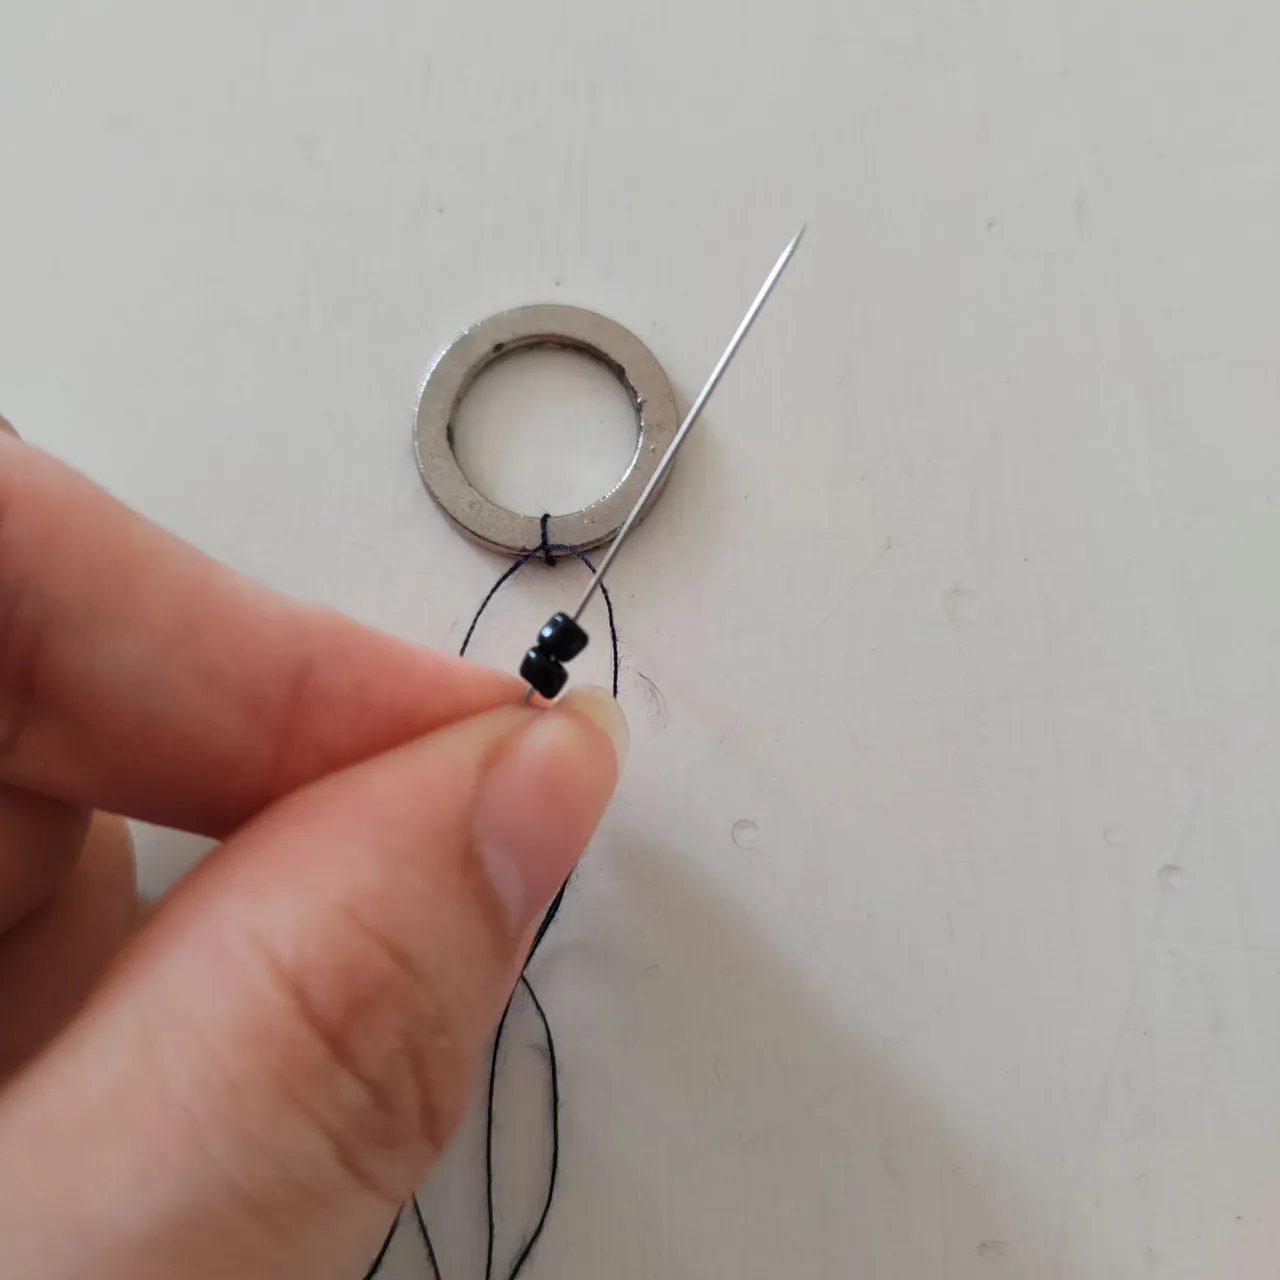
✨ Paso 3.| Ahora pasaremos nuestra aguja e hilo por atrás del aro, bordeando para así desde atrás introducir la aguja a través del aro
✨ Step 3.| Now we pass our needle and thread through the back of the hoop, skirting it so that from the back we can insert the needle through the hoop.
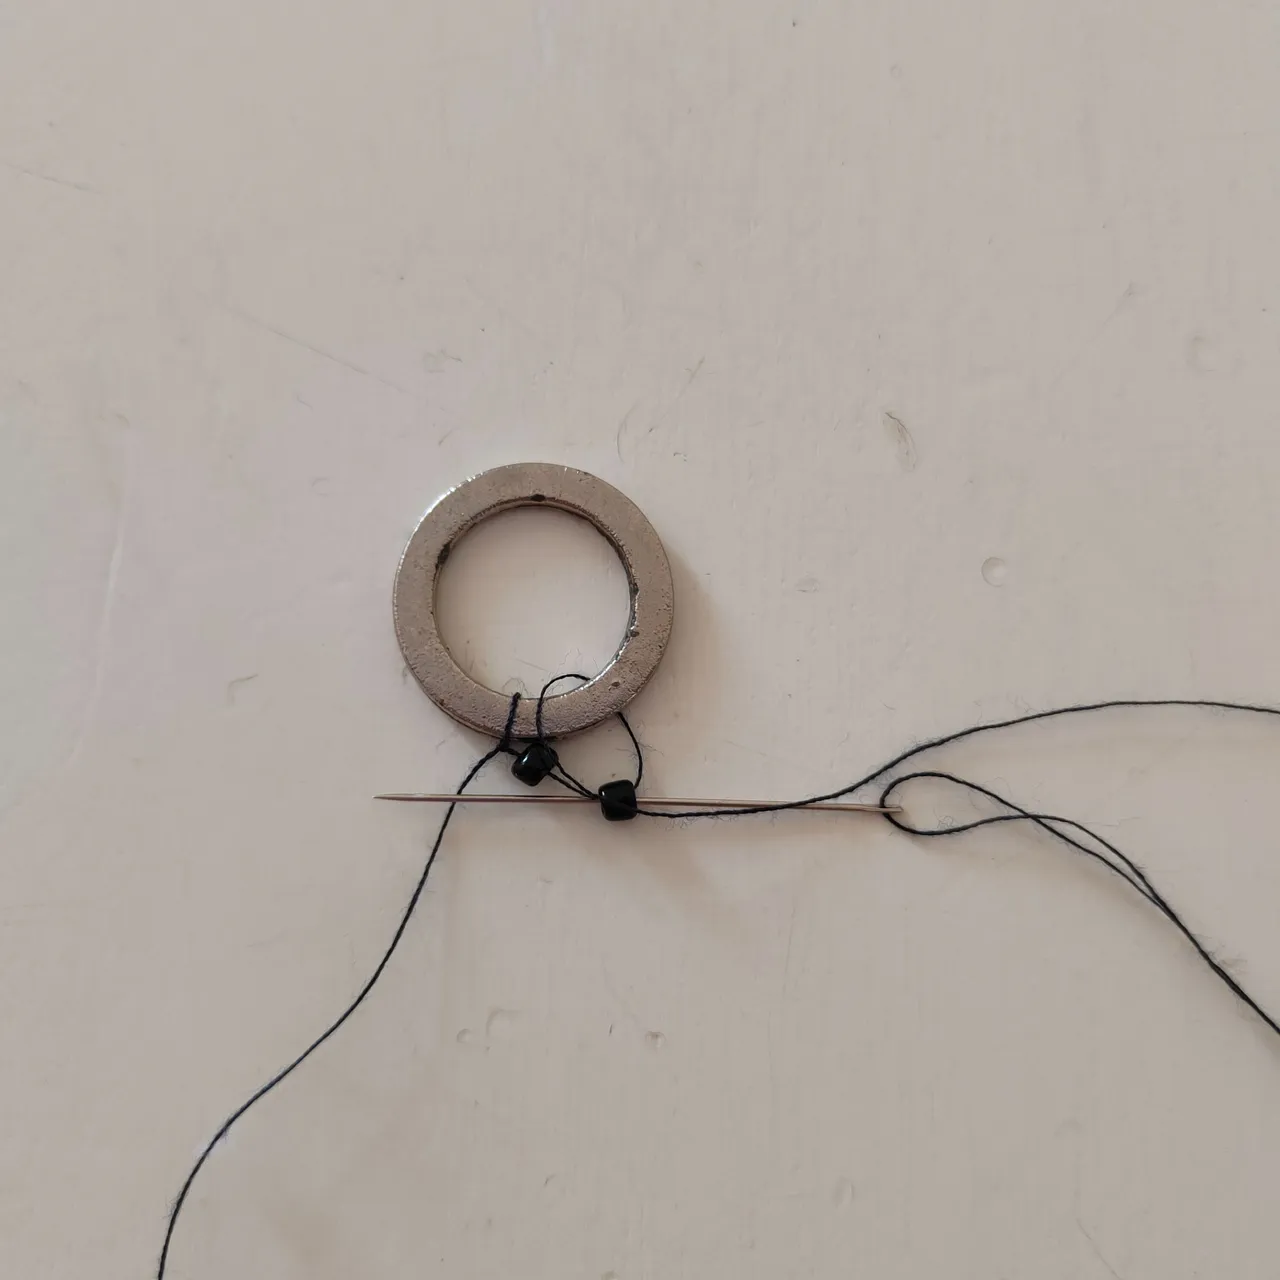
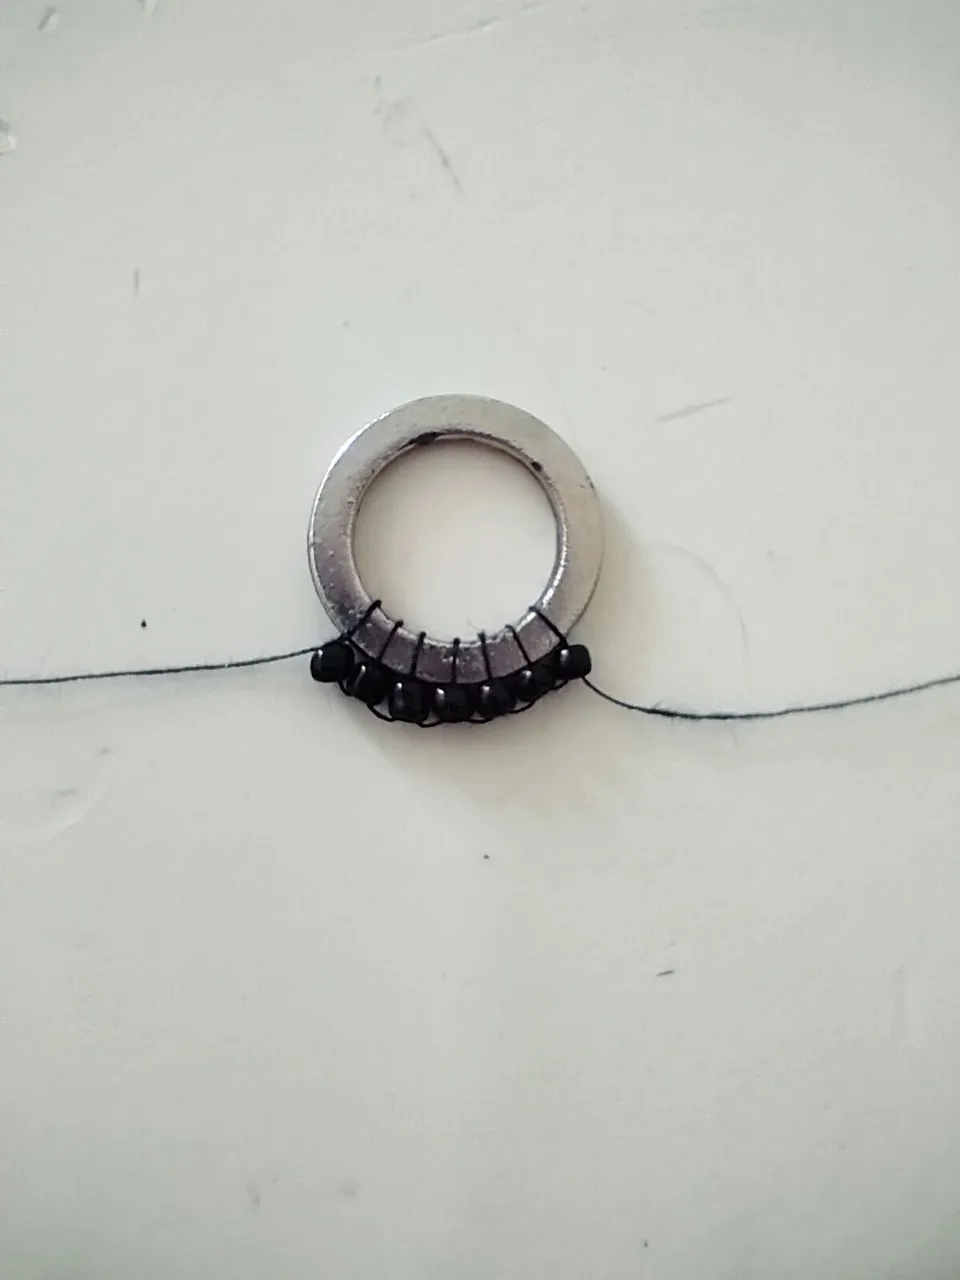
✨ Paso 4.| Ahora vamos a pasar la aguja de derecha a izquierda por la Mostacilla, ajustamos e introducimos otra mostacilla y volvemos a repetir este paso, hasta tener 7 mostacillas en el aro, Ahora vamos a ensartar la aguja en el extremo del hilo de 15 centímetros y vamos introducirlo en la mostacilla que tiene alado y en ese tramo de hilo entre ambas mostacilas vamos realizar un nudo de manera que podamos cortar esté extremo.
✨ Step 4.| Now we are going to pass the needle from right to left through the beads, adjust and introduce another bead and repeat this step again, until we have 7 beads in the ring. Now we are going to thread the needle on the end of the 15 centimeters thread and introduce it in the bead that has the side and in that stretch of thread between both beads we are going to make a knot so that we can cut this end.
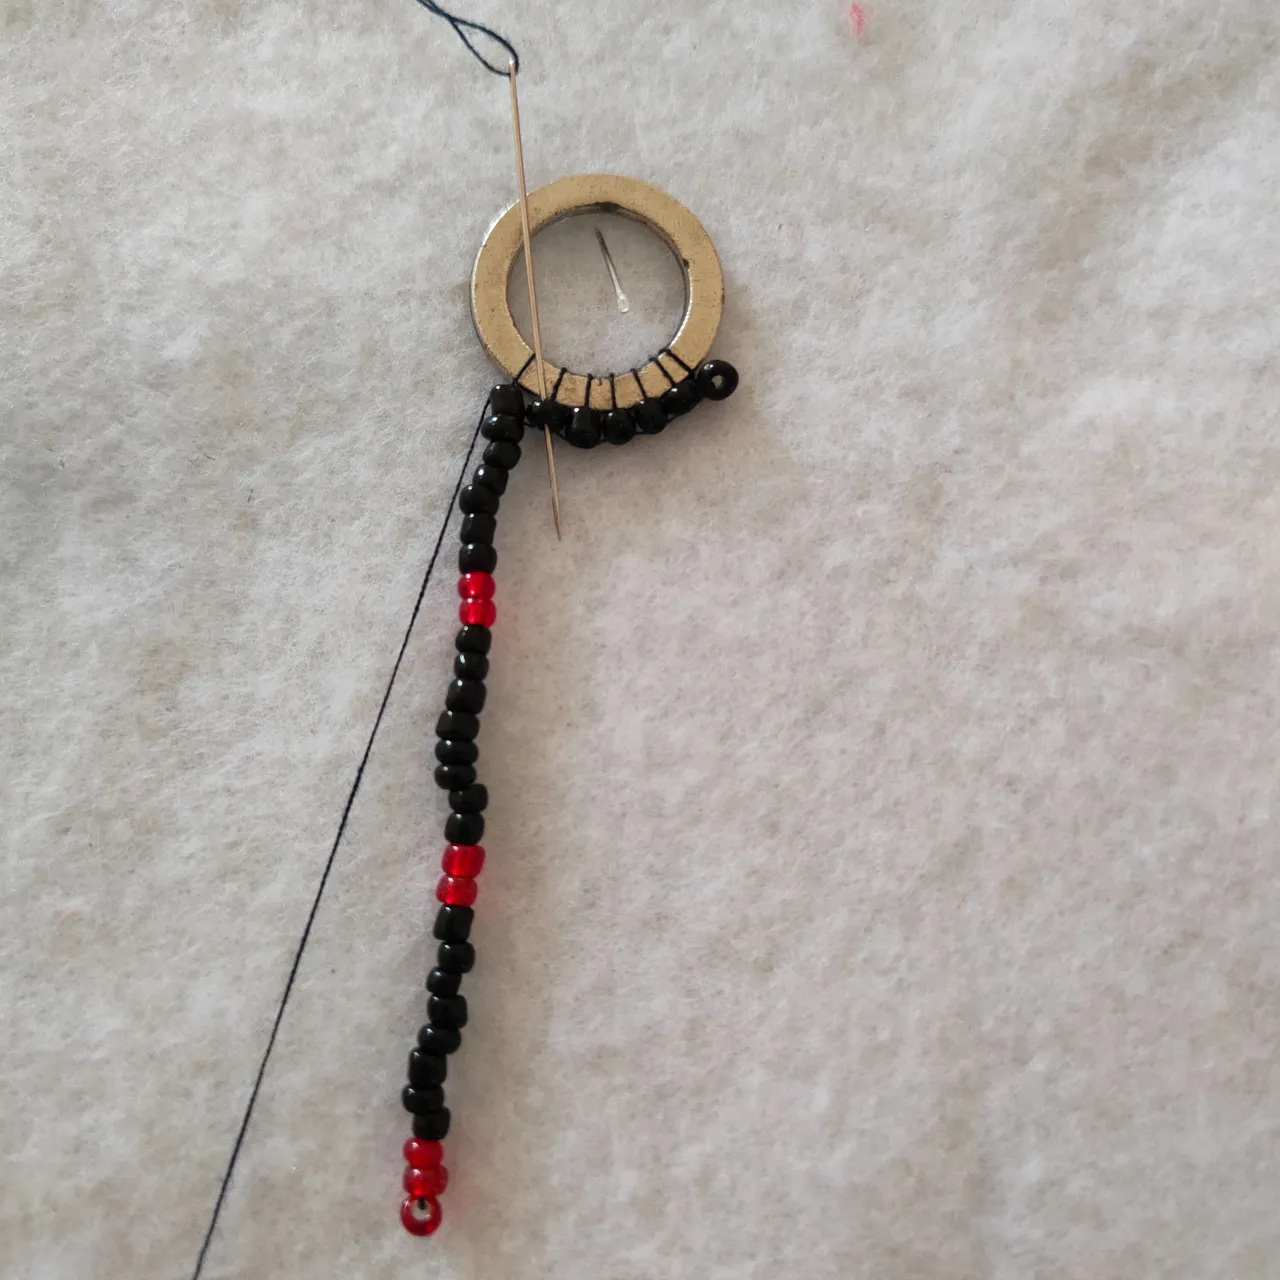
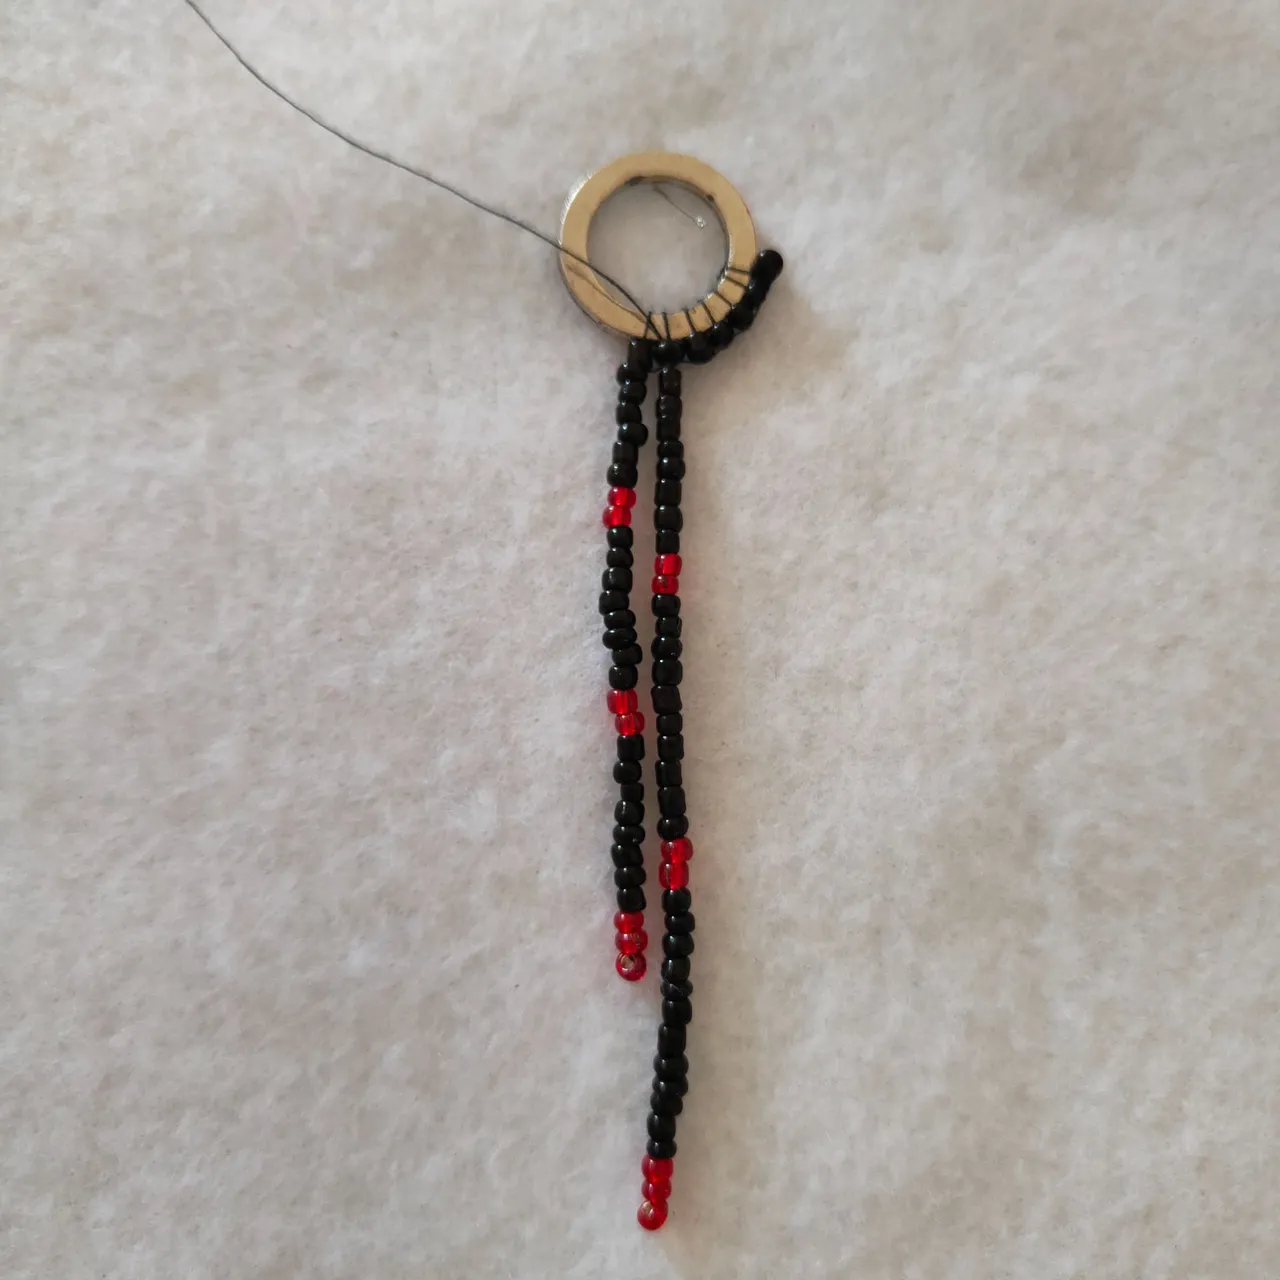
✨ Paso 5.| volvemos ensartar la aguja en nuestro hilo restante y que es el más largo y con la aguja vamos a insertar la mostacillas que tiene al lado, ahora comenzaremos a introducir las mostacillas que conformarán el largo de nuestro zarcillos y nuestra primera hilera, comenzamos agregando 10 mostacillas negras, seguidas de 2 rojas, 8 negra de nuevo 2 rojas más, 8 negras más y finalmente 3 rojas, así finalizamos está primera hilera, ahora vamos a introducir la aguja en la segunda mostacilla roja que está en la punta y continuaremos así hasta llegar a la parte superior del zarcillo pero a través de las mostacillas que conforman está hilera.
✨ Step 5.| We return to thread the needle in our remaining thread and that is the longest and with the needle we will insert the beads that has next to it, now we will begin to introduce the beads that will form the length of our tendrils and our first row, we start adding 10 black beads, followed by 2 red beads, 8 black again 2 more red ones, 8 more black ones and finally 3 red ones, this way we finish this first row, now we are going to introduce the needle in the second red bead that is in the tip and we will continue this way until arriving to the top of the tendril but through the beads that conform this row.
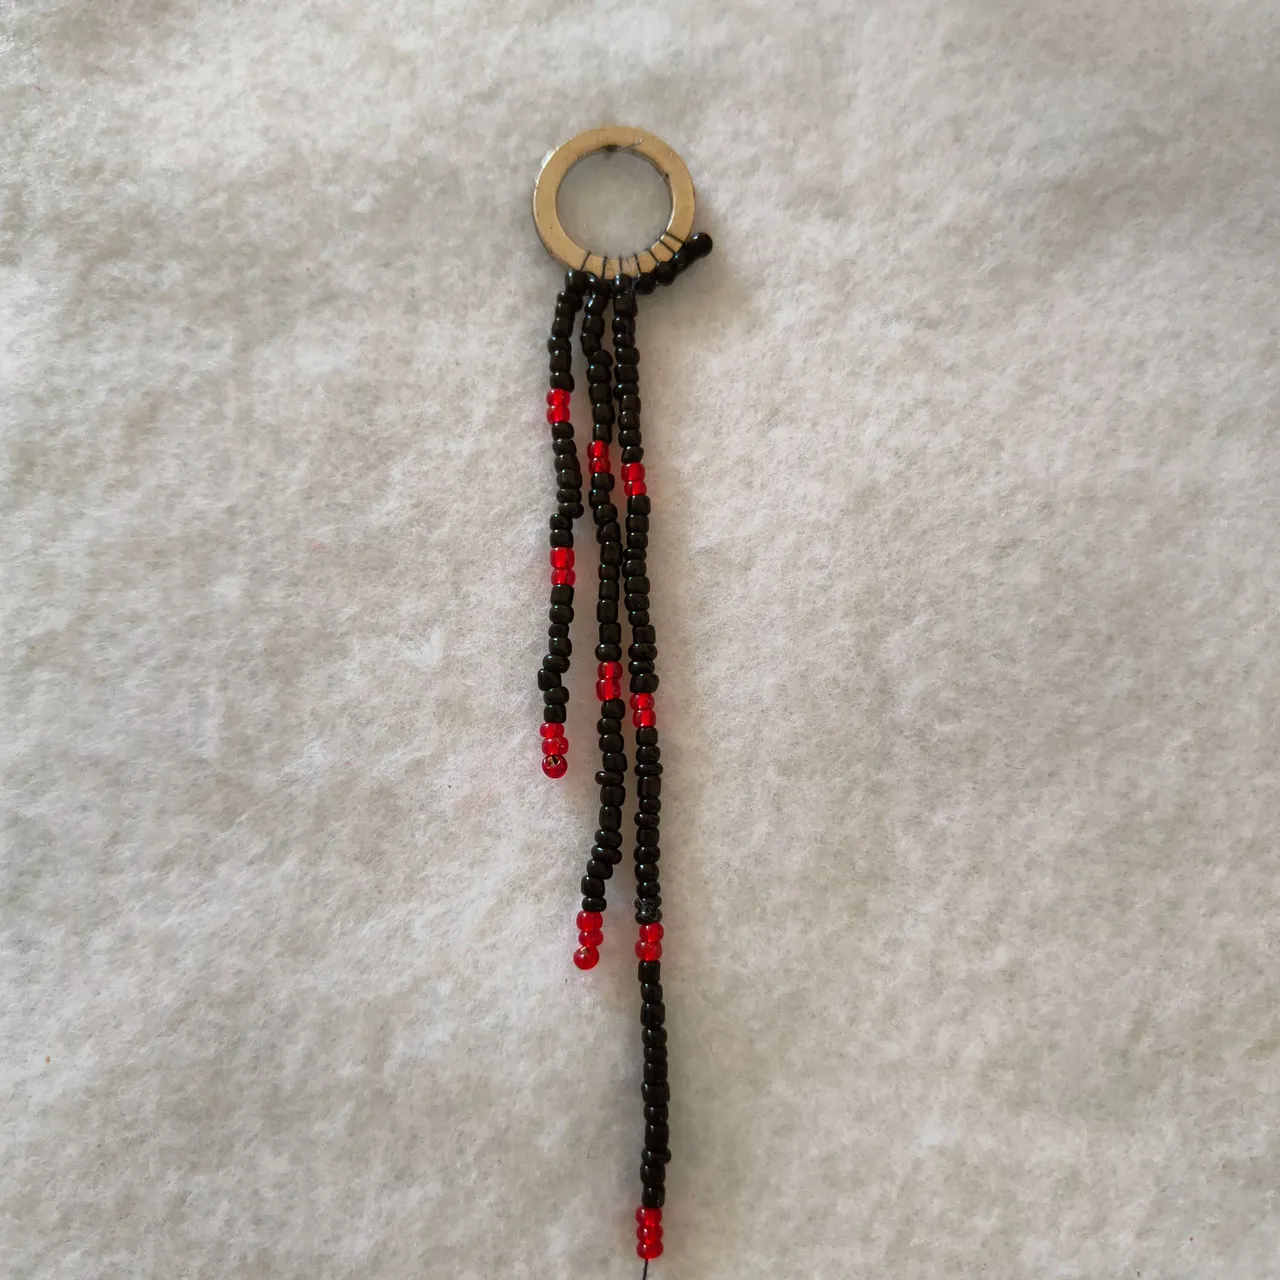
✨ Paso 6.| Volvemos a repetir el paso anterior para crear la siguiente hilera, pero esta vez vamos agregar 2 mostacillas negras en cada tramo de este color.
✨ Step 6.| We repeat the previous step again to create the next row, but this time we are going to add 2 black beads in each section of this color.
✨ Paso 7.| Ahora para la tercera hilera vamos agregar 2 Mostacillas negras en cada tramo y adicionalmente crearemos un cuarto tramo en negro para que sea más larga está hilera.
✨ Step 7.| Now for the third row we will add 2 black beads in each row and additionally we will create a fourth black row to make this row longer.
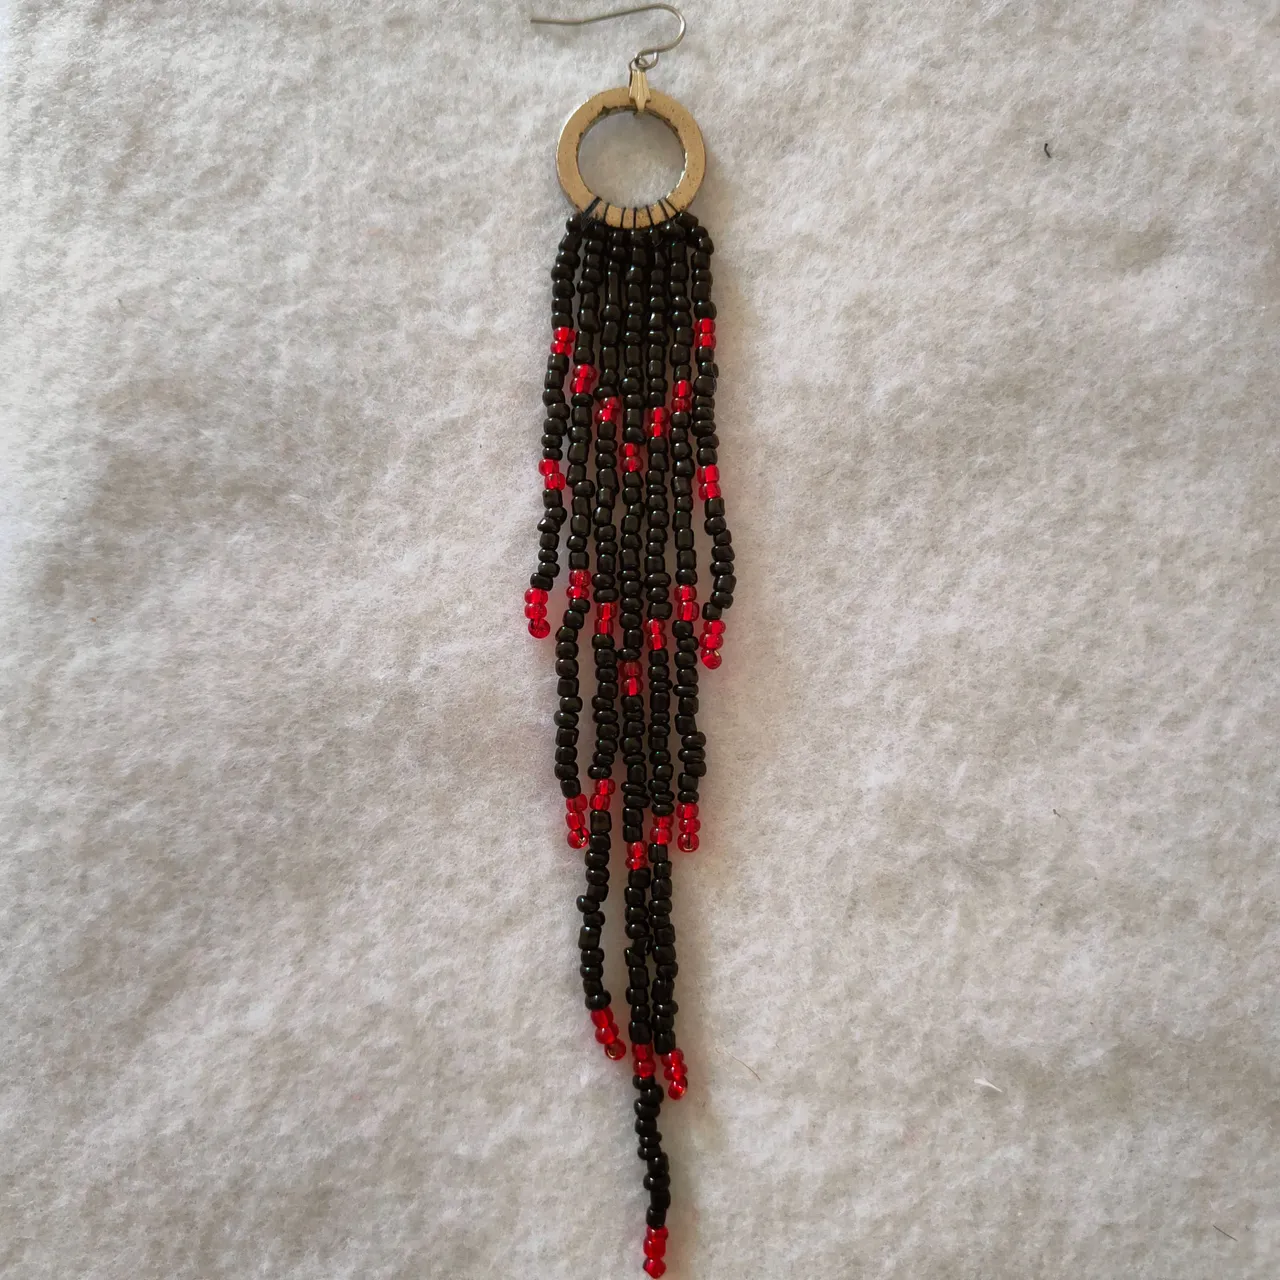
✨ Paso 8.| Agregamos 2 mostacillas negras en cada tramo negro y agregamos un quinto tramo negro, agregar las 2 mostacillas y tramos a medida que avanzamos en la elaboración del zarcillo es lo que va crear el degradado visual y su forma alargada peculiar.
✨ Step 8.| We add 2 black beads in each black section and add a fifth black section, adding the 2 beads and sections as we advance in the elaboration of the tendril is what will create the visual gradient and its peculiar elongated shape.
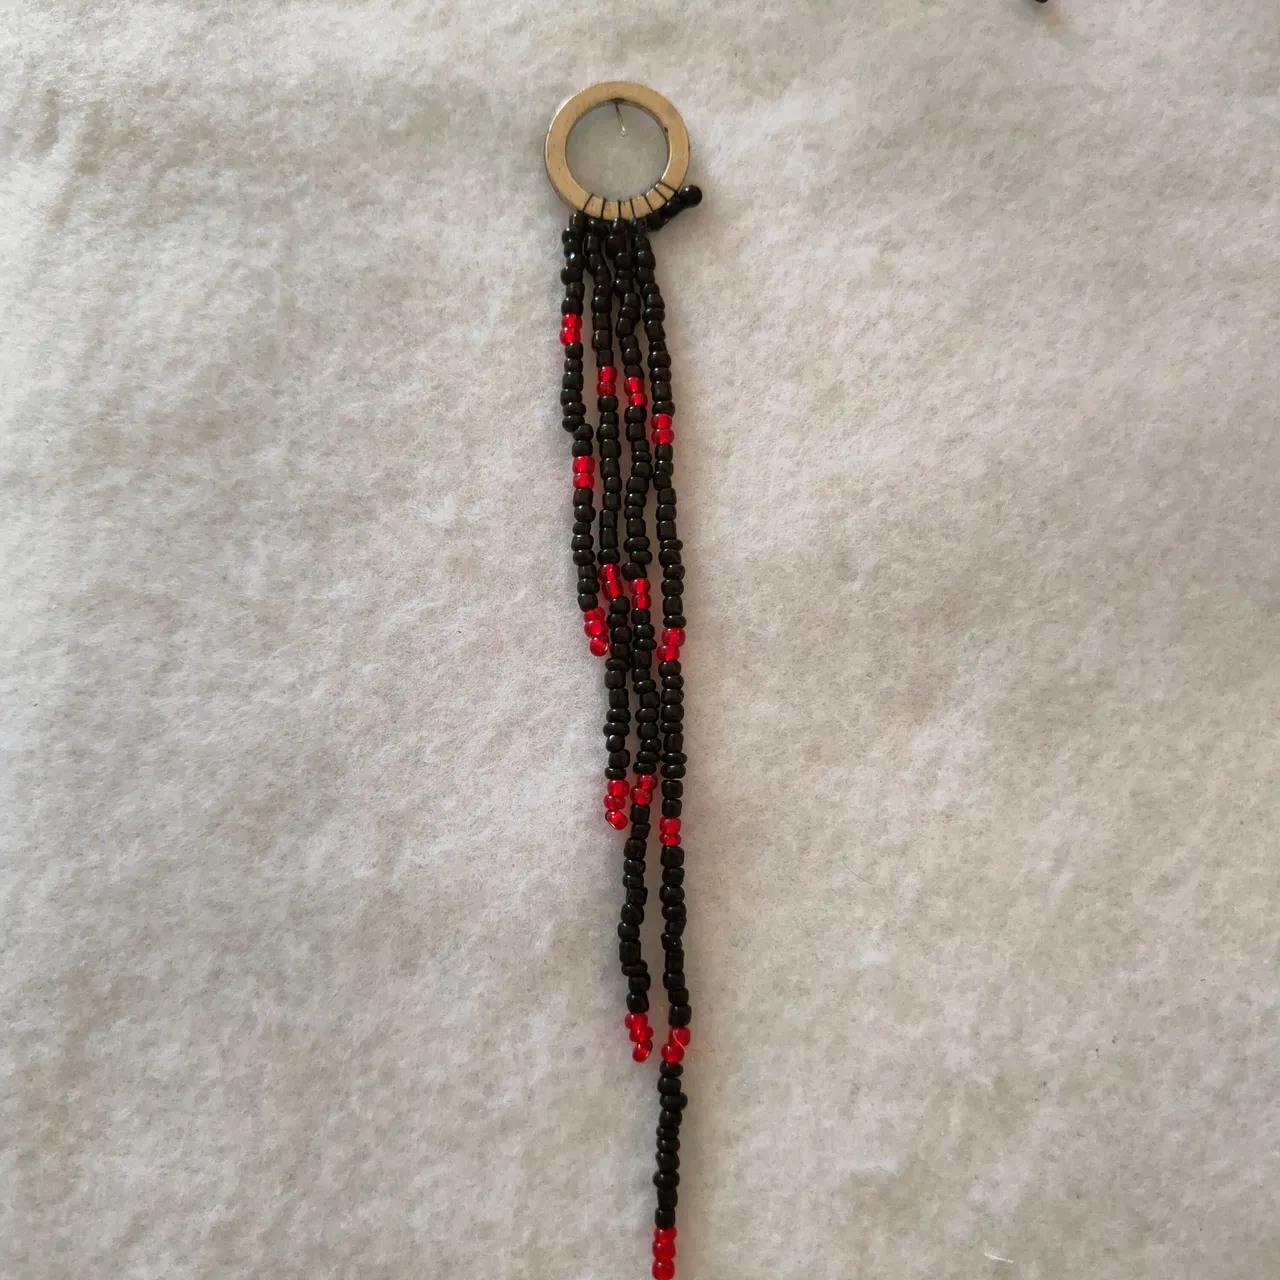
✨ Paso 9.| En este punto habremos ocupado 4 Mostacillas de las 7 que posicionamos en un inicio en el aro, ahora en las siguientes hileras vamos usar como referencia las anteriores ir poco a poco haciendo hileras más cortas y similares a las anteriores al realizar la última hilera y tener nuestro hilo en la parte superior al igual que el otro extremos vamos a realizar un nudo para culminar y cortar.
✨ Step 9.| At this point we will have occupied 4 beads of the 7 that we positioned at the beginning in the ring, now in the following rows we will use as a reference the previous ones, gradually making shorter rows and similar to the previous ones when we make the last row and have our thread at the top as well as the other ends we will tie a knot to finish and cut.
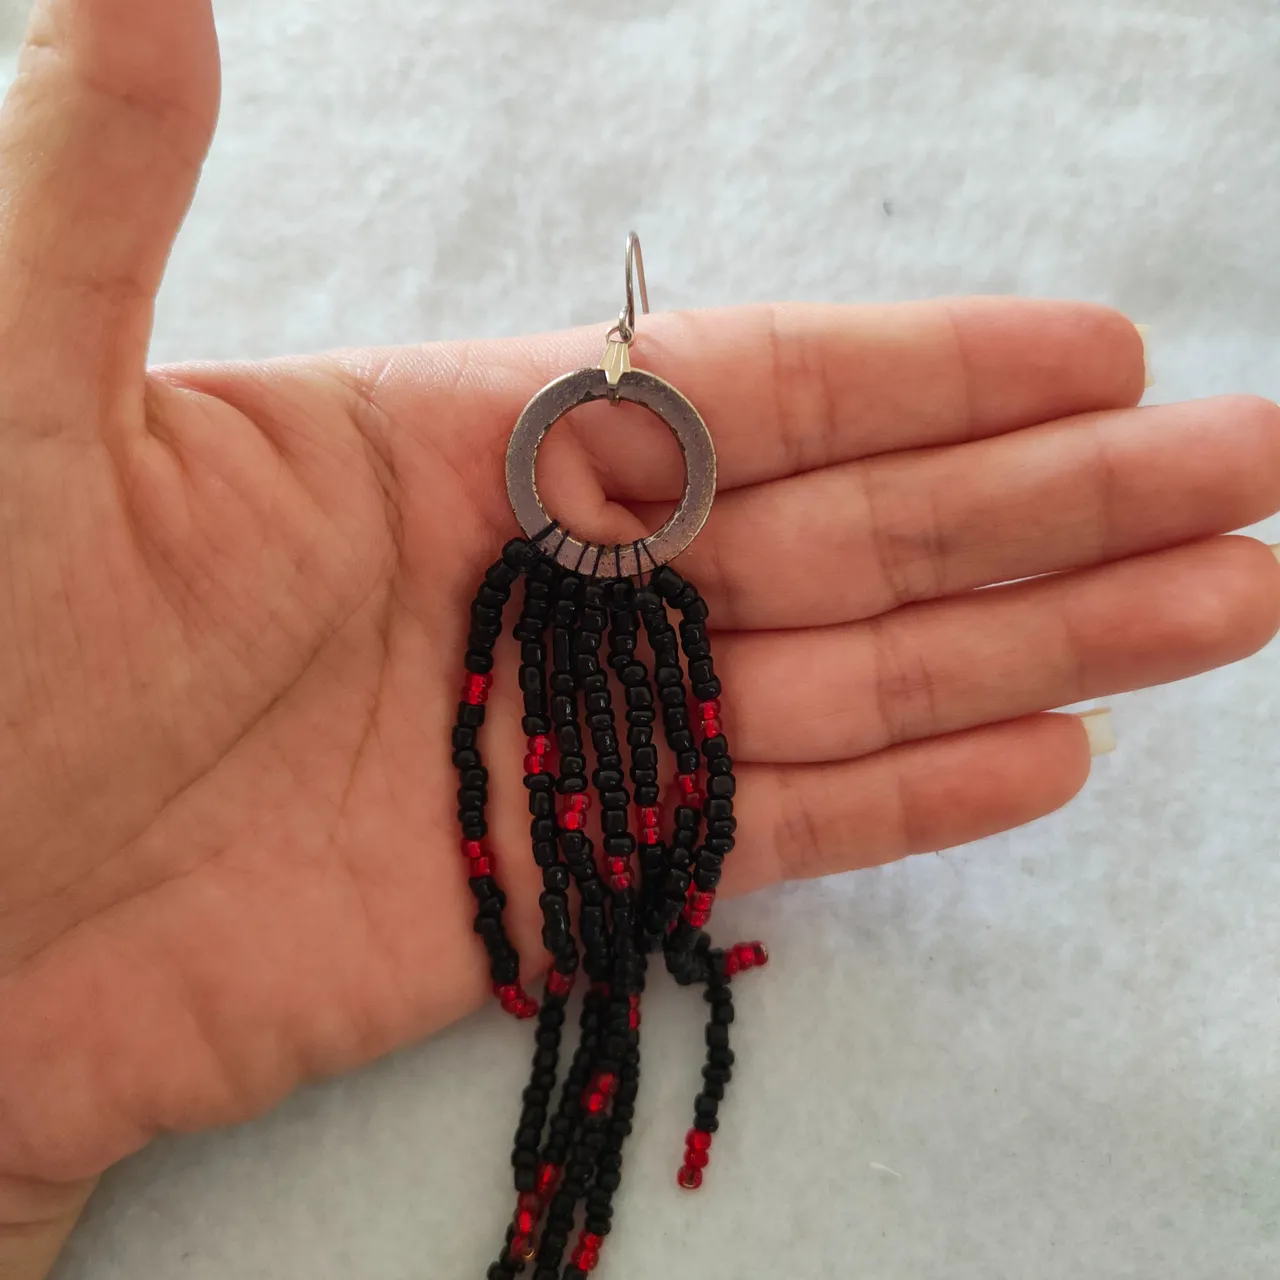
✨ Paso 10.| tomamos el anzuelo le agreguemos el aro de bisutería o como mi caso utilice esta pieza que se suele usar para dijes en las cadenas y fijamos estás al aro del zarcillo.
✨ Step 10.| we take the hook and add the costume jewelry ring or, as in my case, use this piece that is usually used for charms on chains and attach it to the ring of the tendril.
✨ Paso 11.| Repetimos todos los pasos anteriores para obtener nuestro segundo zarcillo y así poder culminar el par.
✨ Step 11.| We repeat all the previous steps to obtain our second tendril to complete the pair.
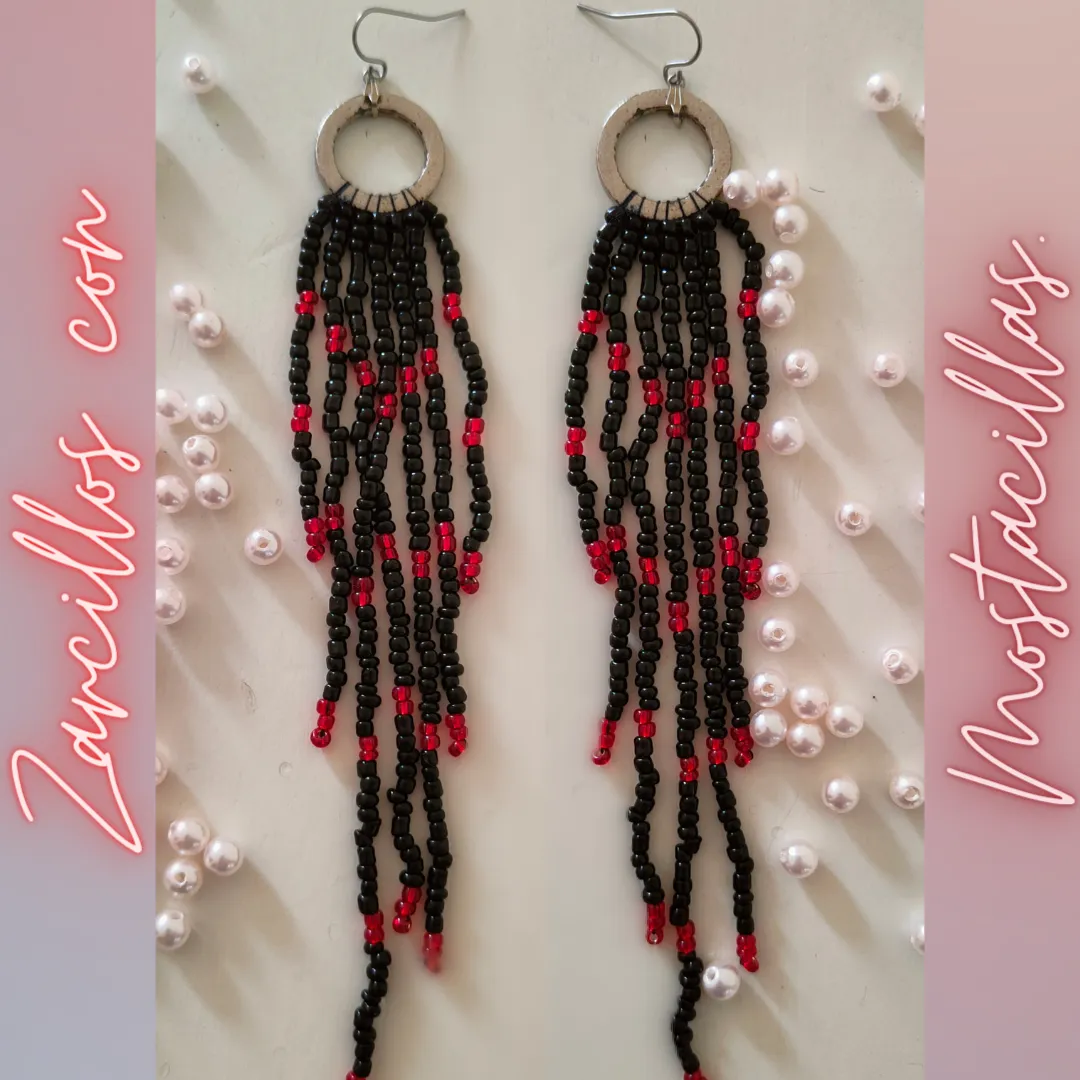
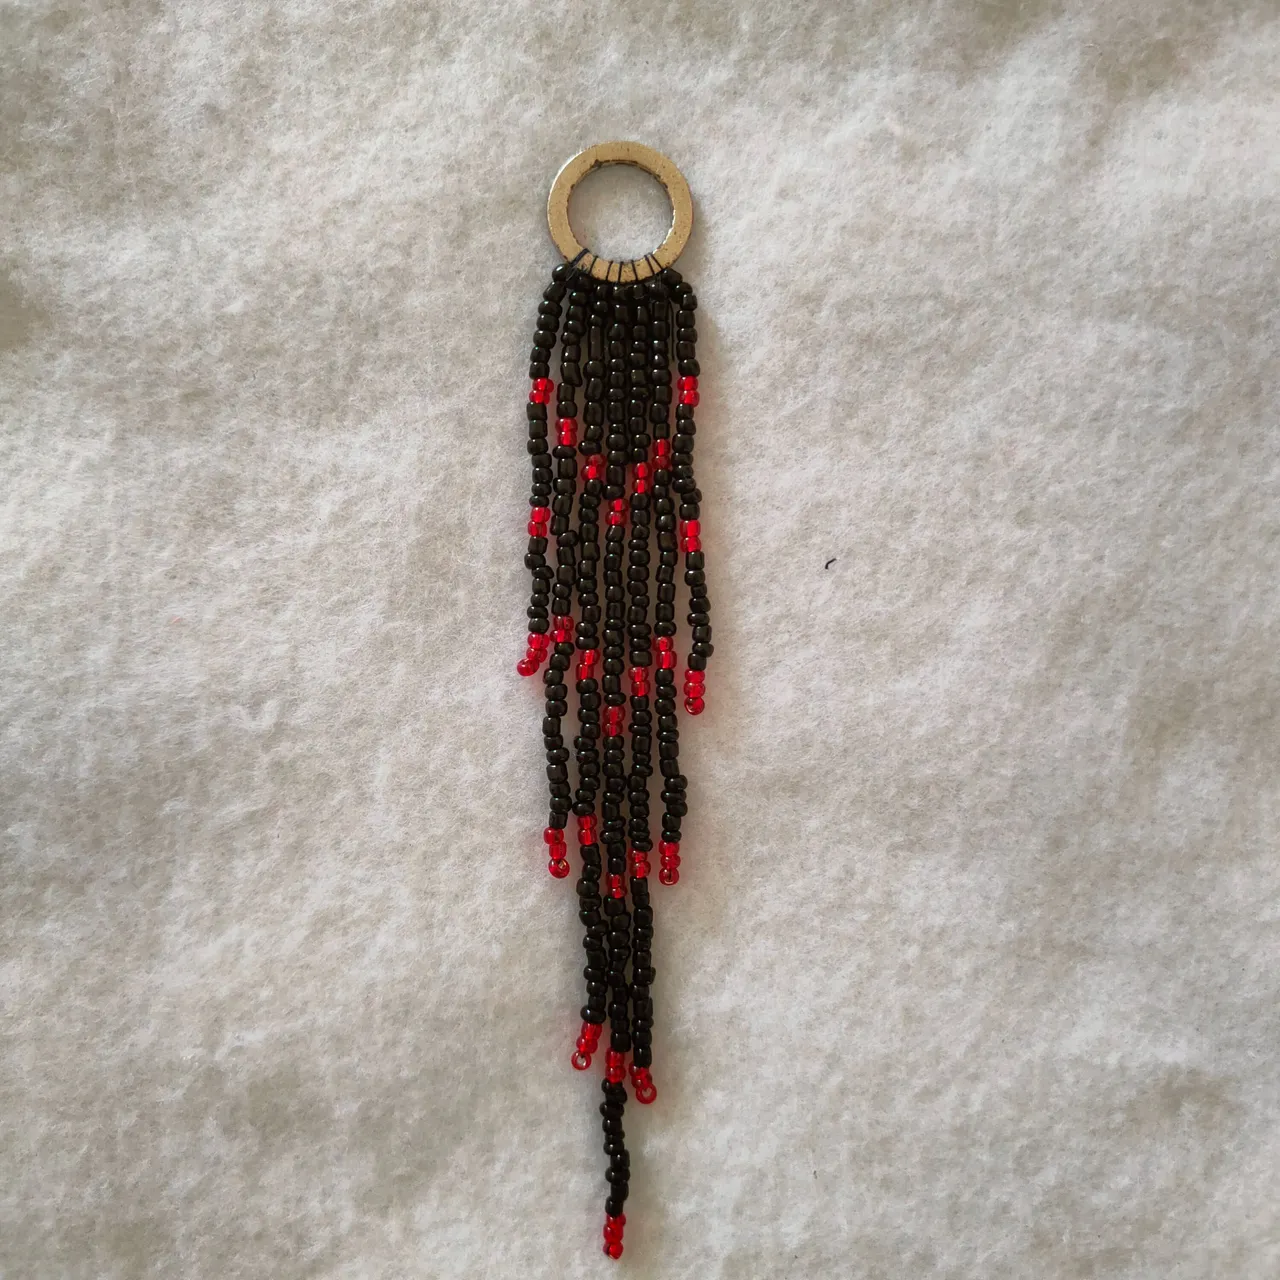
Resultado || Result
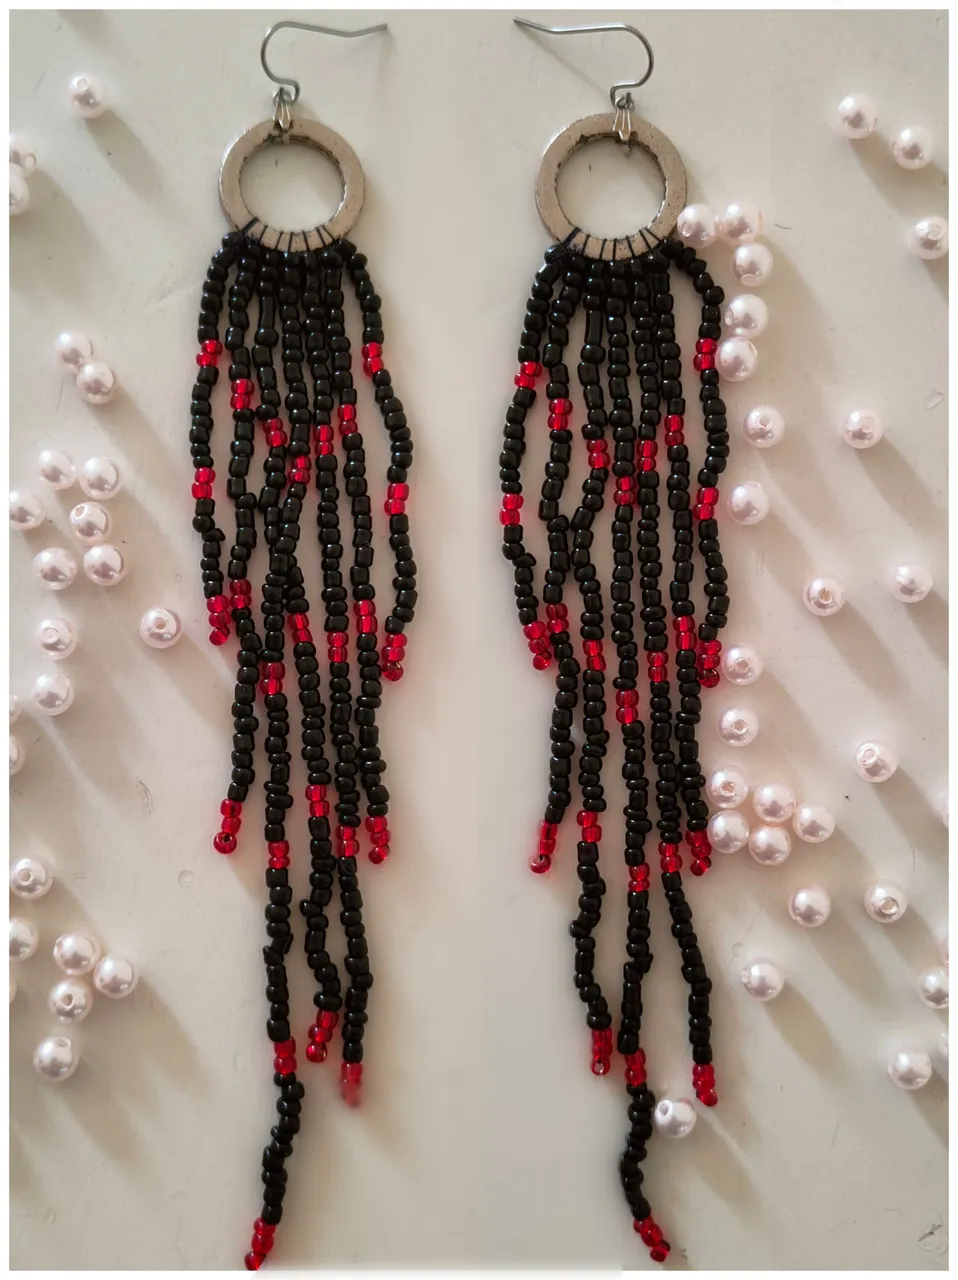
Cuando vi el diseño, pensé que no sería tan complejo pero una cosa es la teoría y otra la práctica, lo que más me costo realizar en este trabajo fue fijar las 7 mostacillas al aro, ya que el largo del hilo hacia complicado este proceso ya que se podía enredar con facilidad, imagino que con nailon podría ser este paso más sencillo, espero dentro de poco salir y adquirir nailon para ver la diferencia, espero que el resultado de está ocasión sea de su agrado estimados amigos, lectores y artesanos, será hasta una próxima entrega un fuerte abrazo.
When I saw the design, I thought it would not be so complex but one thing is the theory and another the practice, what cost me most to do in this work was to fix the 7 beads to the ring, as the length of the thread made this process complicated because it could be easily entangled, I imagine that with nylon could be this step easier, I hope soon to go out and acquire nylon to see the difference, I hope the result of this occasion is to your liking dear friends, readers and artisans, will be until a next installment a big hug.

🎥Imágenes y vídeo creados con: |Images and video created with: Youcut video| Giphy | Canva |
🇪🇸 Traducido con DeepL