

Bienvenidos || Welcome
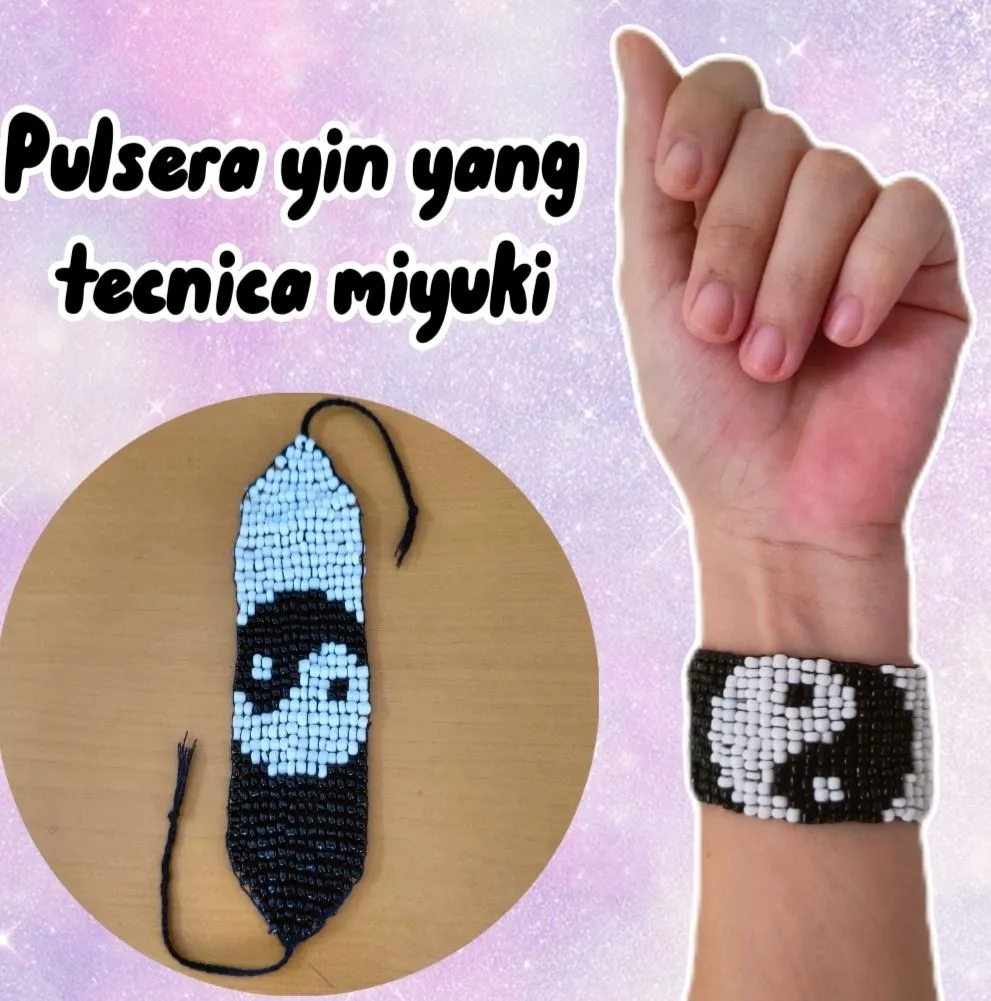
Feliz dia querida familia de Hive y Jewelry como siempre es un placer compartir con todos ustedes un vez más, un proyecto más 🥰 en esta oportunidad estar enseñando como realizar una pulsera con temática de yin yang ☯️ con mostacillas y técnica miyuki, lo más recomendable es tener un telar, pero si en tu caso no lo tienes... No te preocupes porque yo tampoco 😅😂 sin embargo hay una alternativa para trabajar esta técnica sin telar, lo que vas a necesitar es un bol de preferencia rectangular y grande para que puedas trabajar de forma cómoda, para realizar esta pulsera vamos estar usando los siguientes materiales:
Happy day dear Hive and Jewelry family as always it's a pleasure to share with you all once again, one more project 🥰 in this opportunity to be teaching how to make a yin yang themed bracelet ☯️ with beads and miyuki technique, the most recommended is to have a loom, but if in your case you don't have one..... Don't worry because I don't either 😅😂 however there is an alternative to work this technique without loom, what you will need is a bowl preferably rectangular and large so you can work comfortably, to make this bracelet we will be using the following materials:
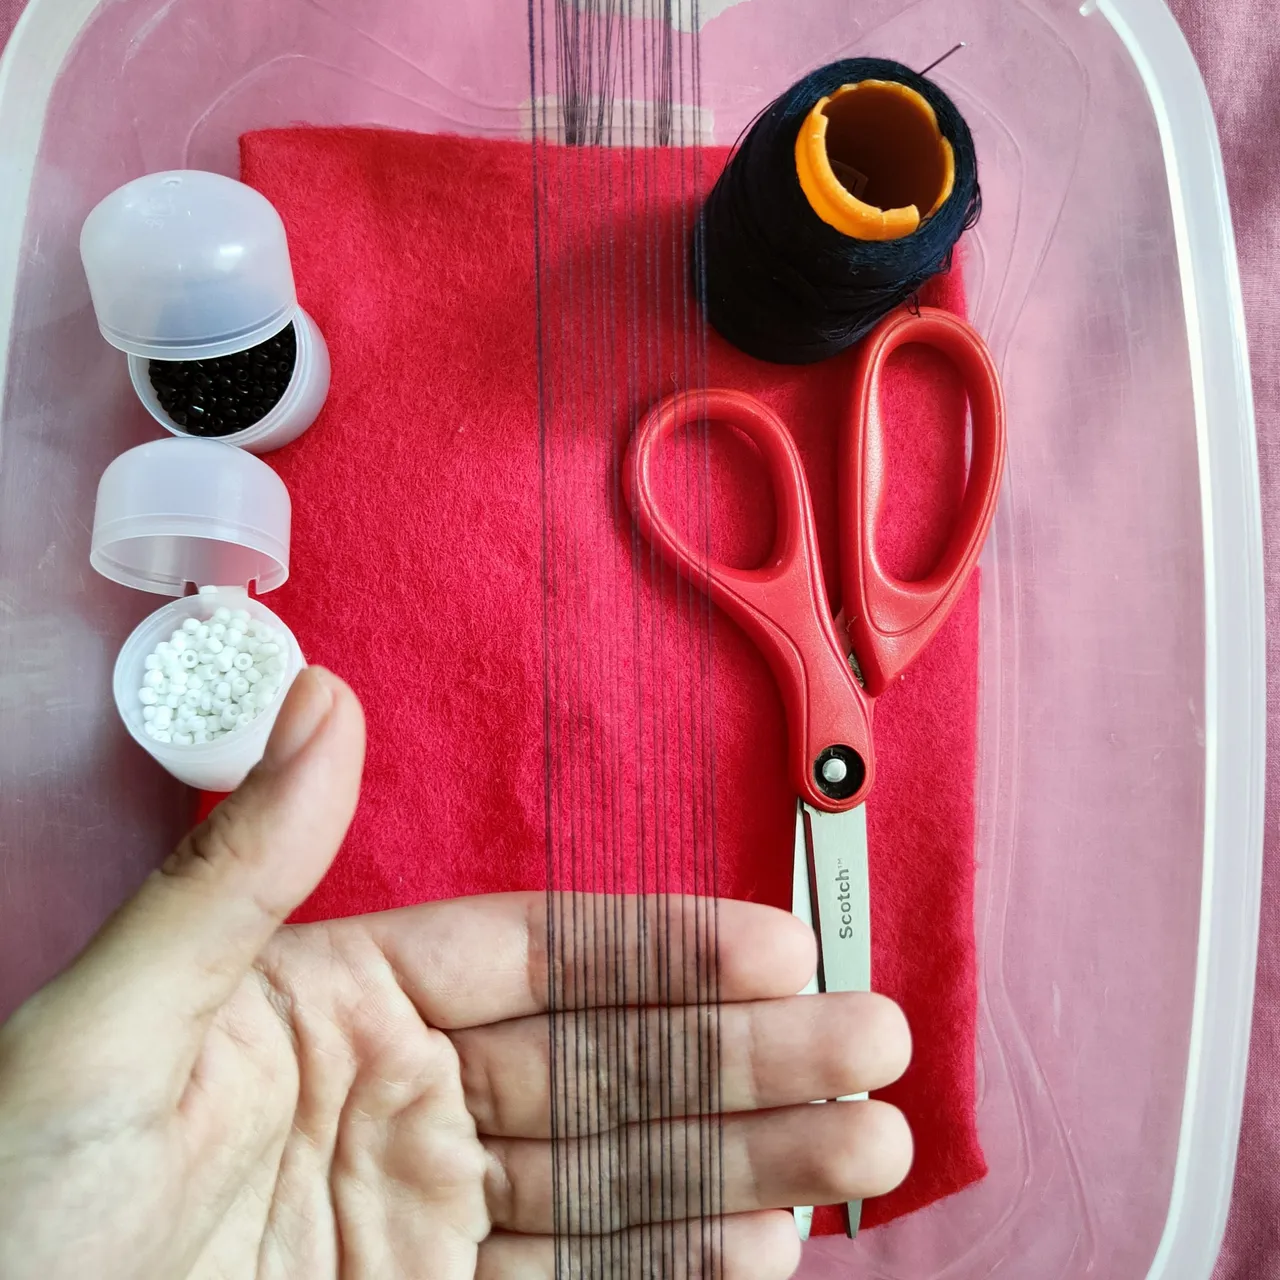
Materiales || Materials
☯️ Mostacillas negras y blancas.
☯️ Hilo nailon.
☯️ Aguja.
☯️Tijera.
☯️ Bol (opcional si no tienes telar)
☯️ Cinta adhesiva.
☯️ Black and white beads.
☯️ Nylon thread.
☯️ Needle.
☯️Tijera.
☯️ Bowl (optional if you don't have a loom).
☯️ Adhesive tape.
Pasos ||Steps
☯️ Paso 1.| lo primero que vamos hacer es preparar nuestro telar provisional, que será con un bol de preferencia rectangular y de un tamaño grande para poder trabajar cómodamente, tomaremos el hilo y comenzaremos a enrollar a lo largo del bol, como nuestra pulsera es gruesa haremos un total de 15 vueltas, es importante recordar que los hilos de ambos extremos deben ser doble por lo que serán 17 hilos alrededor del bol, para fijar los hilos y evitar que se muevan vamos a utilizar cinta adhesiva, en mi caso fijé está en los costados del bol.
☯️ Step 1.| the first thing we will do is prepare our provisional loom, which will be with a bowl preferably rectangular and of a large size to work comfortably, we will take the thread and begin to wind along the bowl, as our bracelet is thick we will make a total of 15 turns, it is important to remember that the threads at both ends must be double so there will be 17 threads around the bowl, to fix the threads and prevent them from moving we will use tape, in my case I fixed it is on the sides of the bowl.
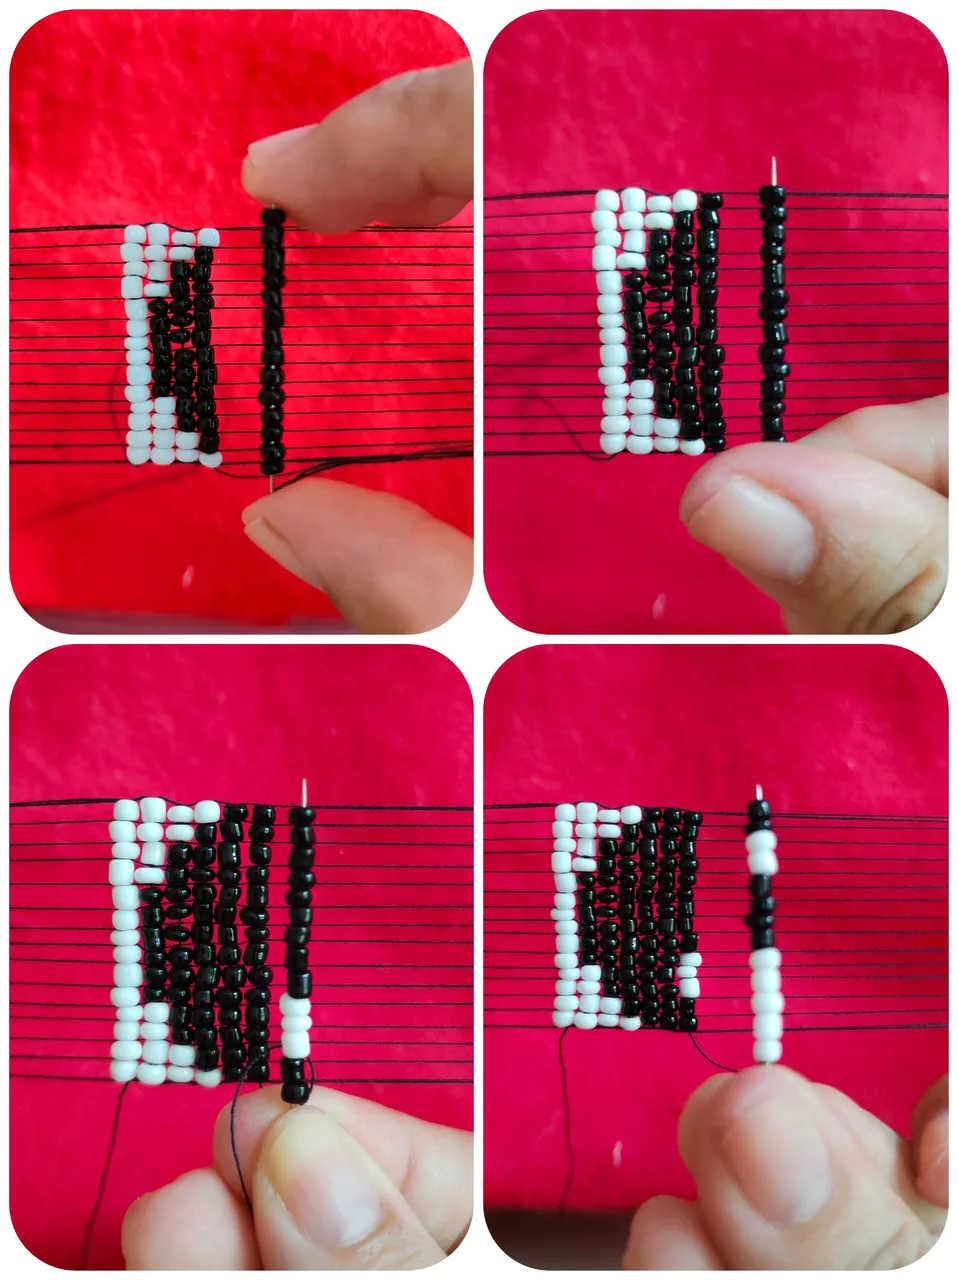
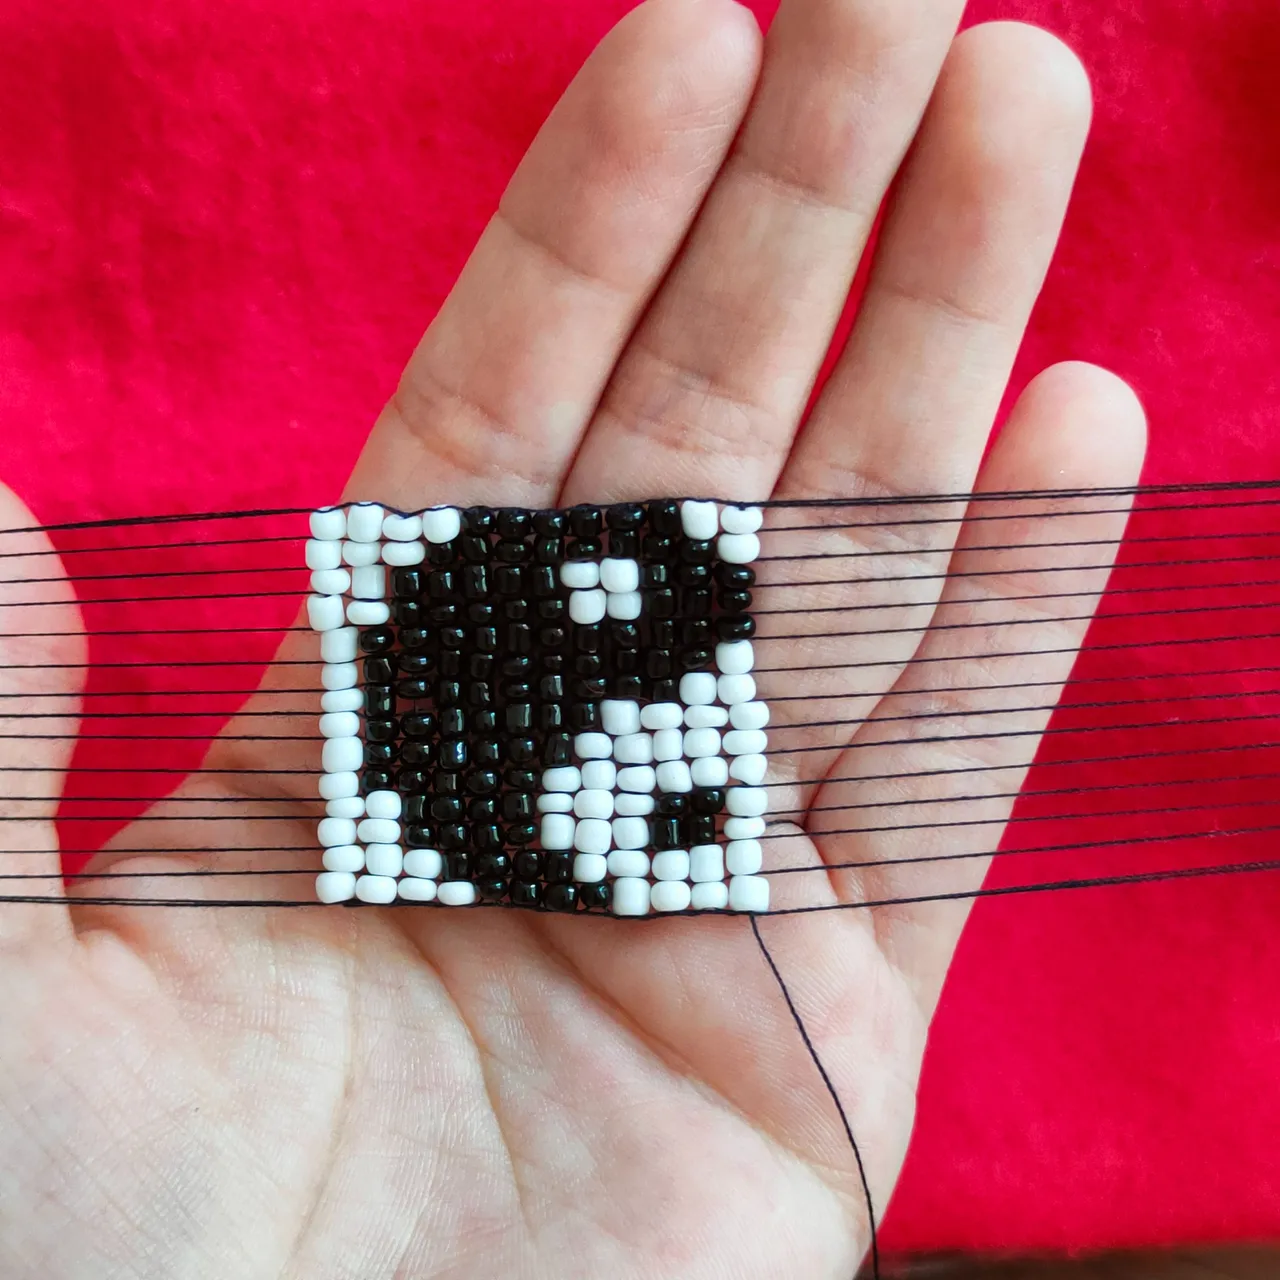
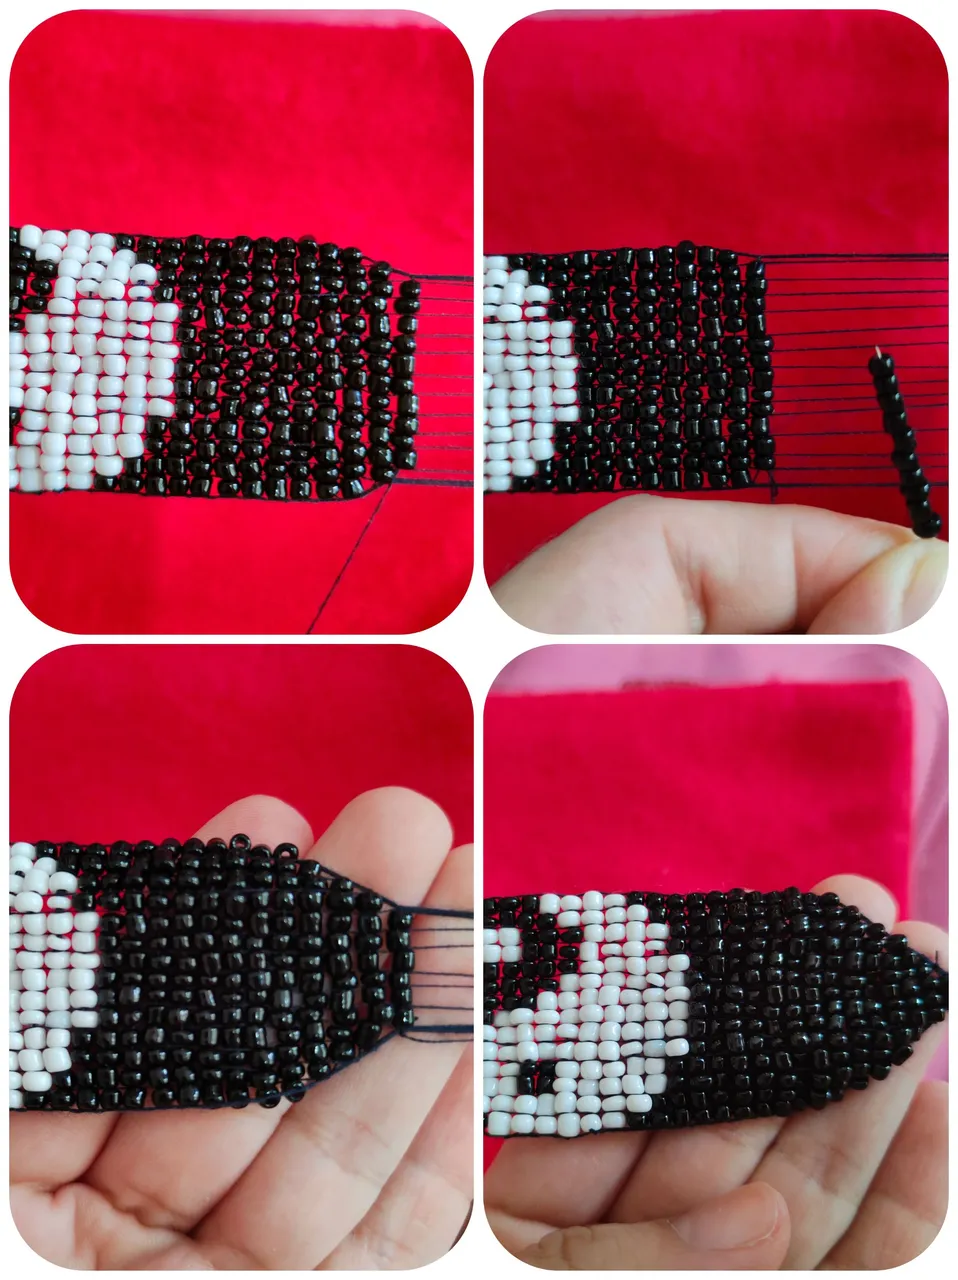
☯️ Paso 2.| Lo siguiente es ensartar nuestra aguja con un 1 metro de nailon, que comience la magia! Vamos a comenzar a trabajar en todo el centro del telar, comenzaremos tomando: 14 mostacillas blanca, acomodamos en el telar pasamos la aguja hasta atravesar todas mostacillas y retornamos con aguja a través de las mostacillas asegurándonos que la aguja pase sobre cada uno de los hilos del telar, esto lo vamos hacer siempre con cada hilera de mostacillas que vamos a ir agregando, para la siente hilera será 4 mostacillas blancas, 6 negras y 4 blancas, para la siguiente hilera 2 mostacillas blancas, 10 negras y 2 blancas más, para la siguiente hilera 1 mostacilla blanca, 12 negras y 1 blanca más, es importante mencionar que siempre serán 14 mostacillas por hilera lo que vamos a ir alternando son los colores de las mostacillas para crear el yin yang, de igual forma iré subiendo la foto de cada hilera para mayor referencia.
☯️ Step 2.| Next is to thread our needle with 1 meter of nylon, let the magic begin! We are going to start working on the whole center of the loom, we will start by taking 14 white beads, we place them on the loom and pass the needle through all of them: 14 white beads, we place them on the loom, we pass the needle through all the beads and return with the needle through the beads making sure that the needle passes over each of the threads of the loom, this we will always do with each row of beads that we will be adding, for the first row will be 4 white beads, 6 black and 4 white, for the next row 2 white beads, 10 black and 2 more white, for the next row 1 white bead, 12 black and 1 more white, it is important to mention that there will always be 14 beads per row what we will be alternating are the colors of the beads to create the yin yang, in the same way I will upload the photo of each row for further reference.

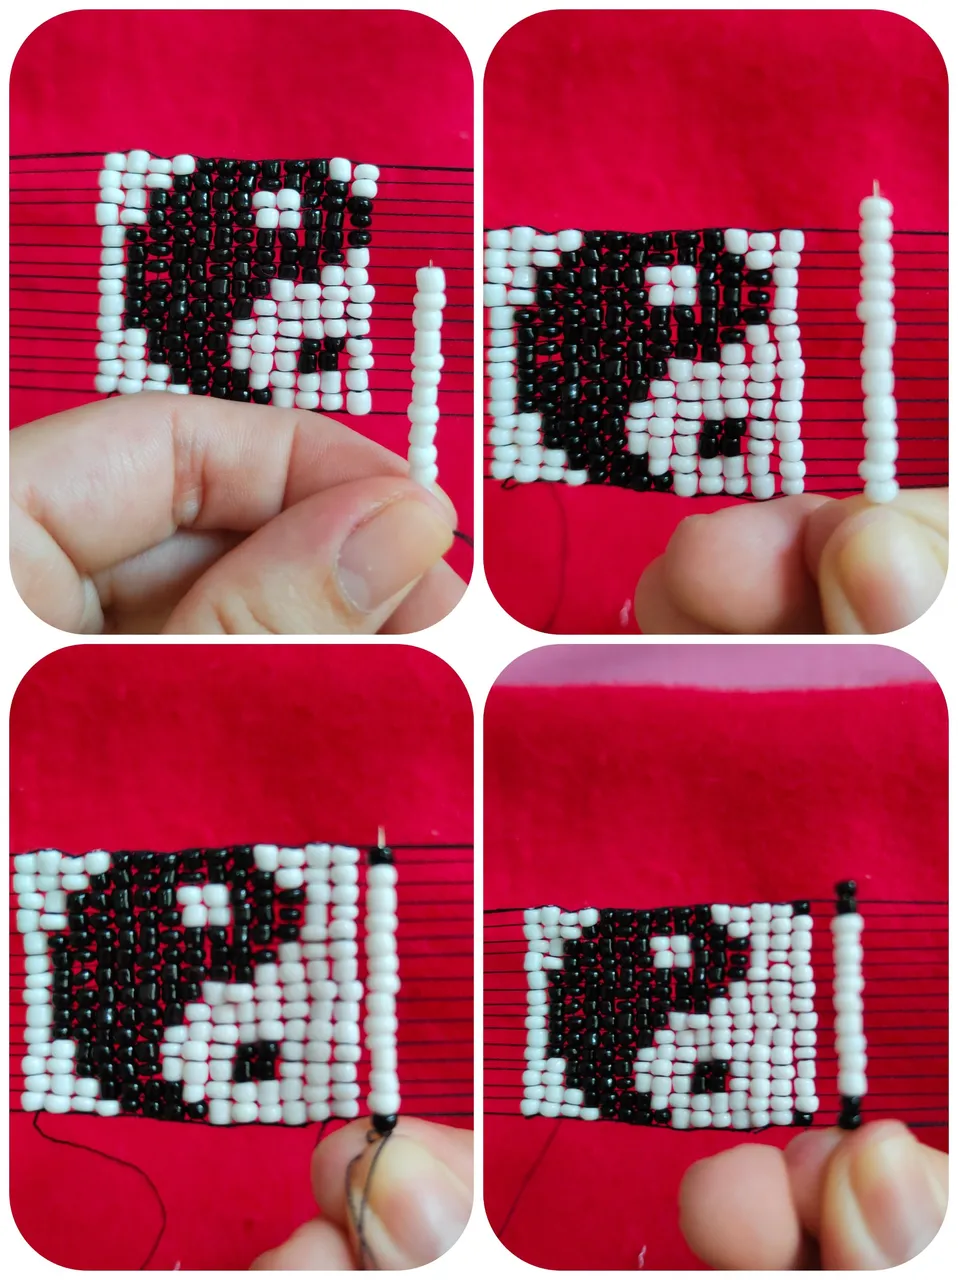
☯️ Paso 3.| Para este segundo grupo realizaremos 2 hileras de 14 mostacillas negras, la siguiente hilera será de 2 mostacillas negras, 3 blancas y 9 negras, y la última hilera 1 mostacillas negra 5 blancas, 4 negras, 2 blancas y 2 negras.
☯️ Step 3.| For this second group we will make 2 rows of 14 black beads, the next row will be 2 black, 3 white and 9 black beads, and the last row will be 1 black bead, 5 white, 4 black, 2 white and 2 black beads.
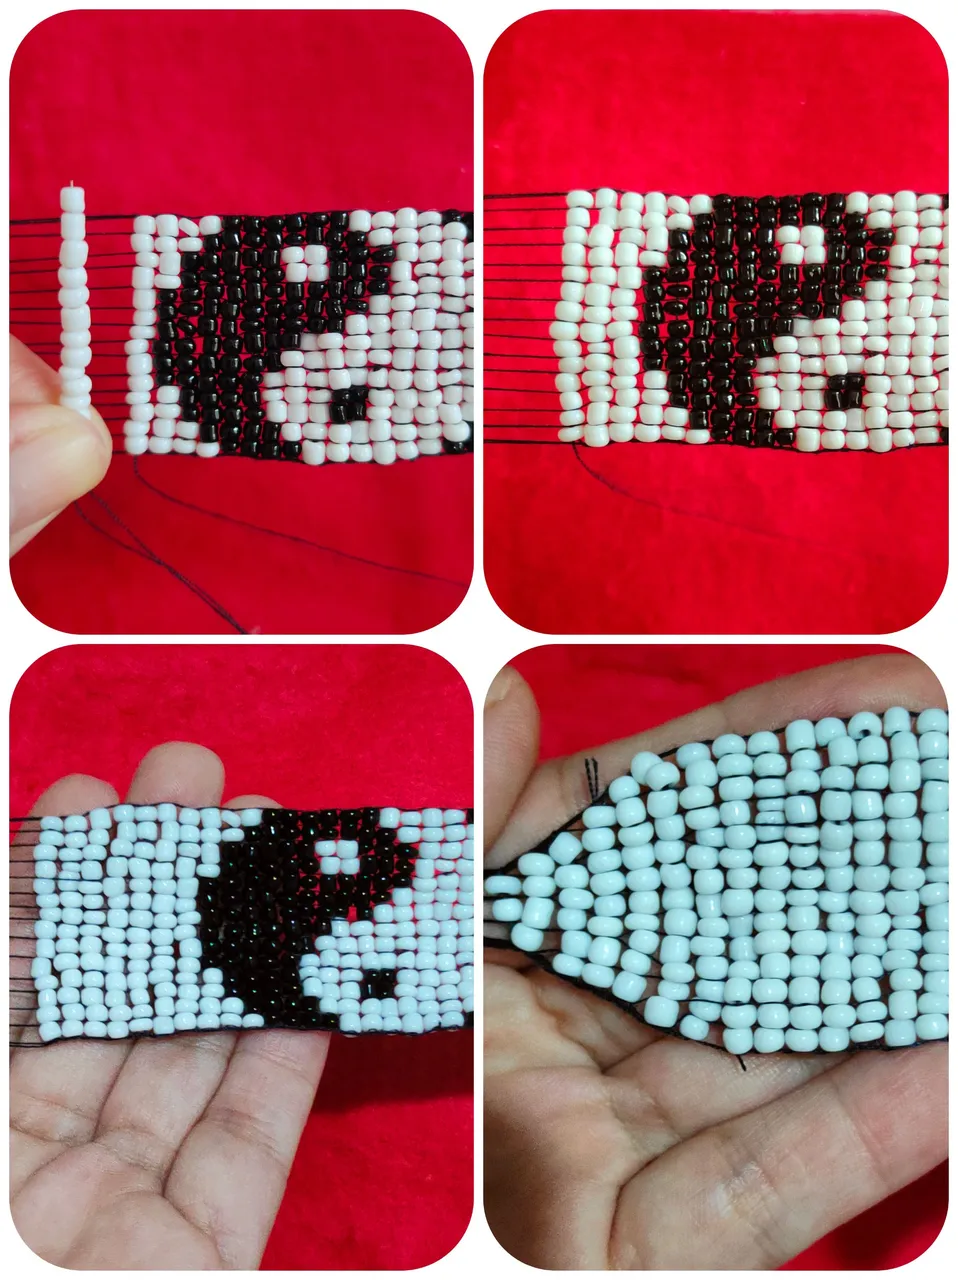
☯️ Paso 4.| para este grupo iniciaremos la primera hilera con 7 mostacillas blancas, 3 negras, 2 blancas y 2 negras, la siguiente hilera serán 2 mostacillas blancas, 2 negras, 3 blancas y 7 negras, la siguiente hilera 2 mostacillas blancas, 2 negras, 4 blancas, 5 negras y 1 blanca y la última hilera del grupo 9 mostacillas blancas, 3 negras y 2 blancas.
☯️ Step 4.| for this group we will start the first row with 7 white, 3 black, 2 white and 2 black beads, the next row will be 2 white, 2 black, 3 white and 7 black beads, the next row will be 2 white, 2 black, 4 white, 5 black and 1 white bead and the last row of the group will be 9 white, 3 black and 2 white beads.
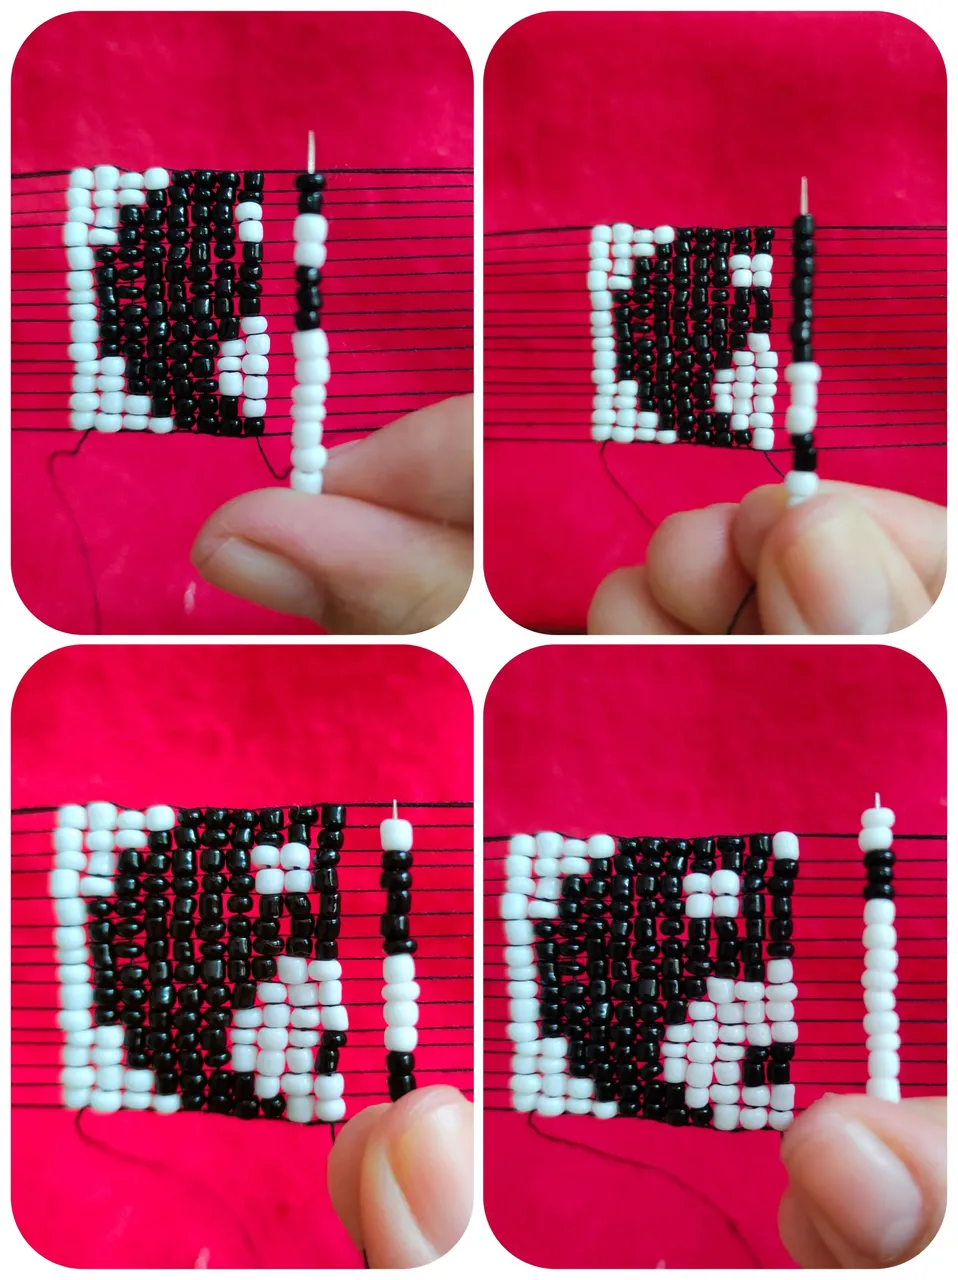
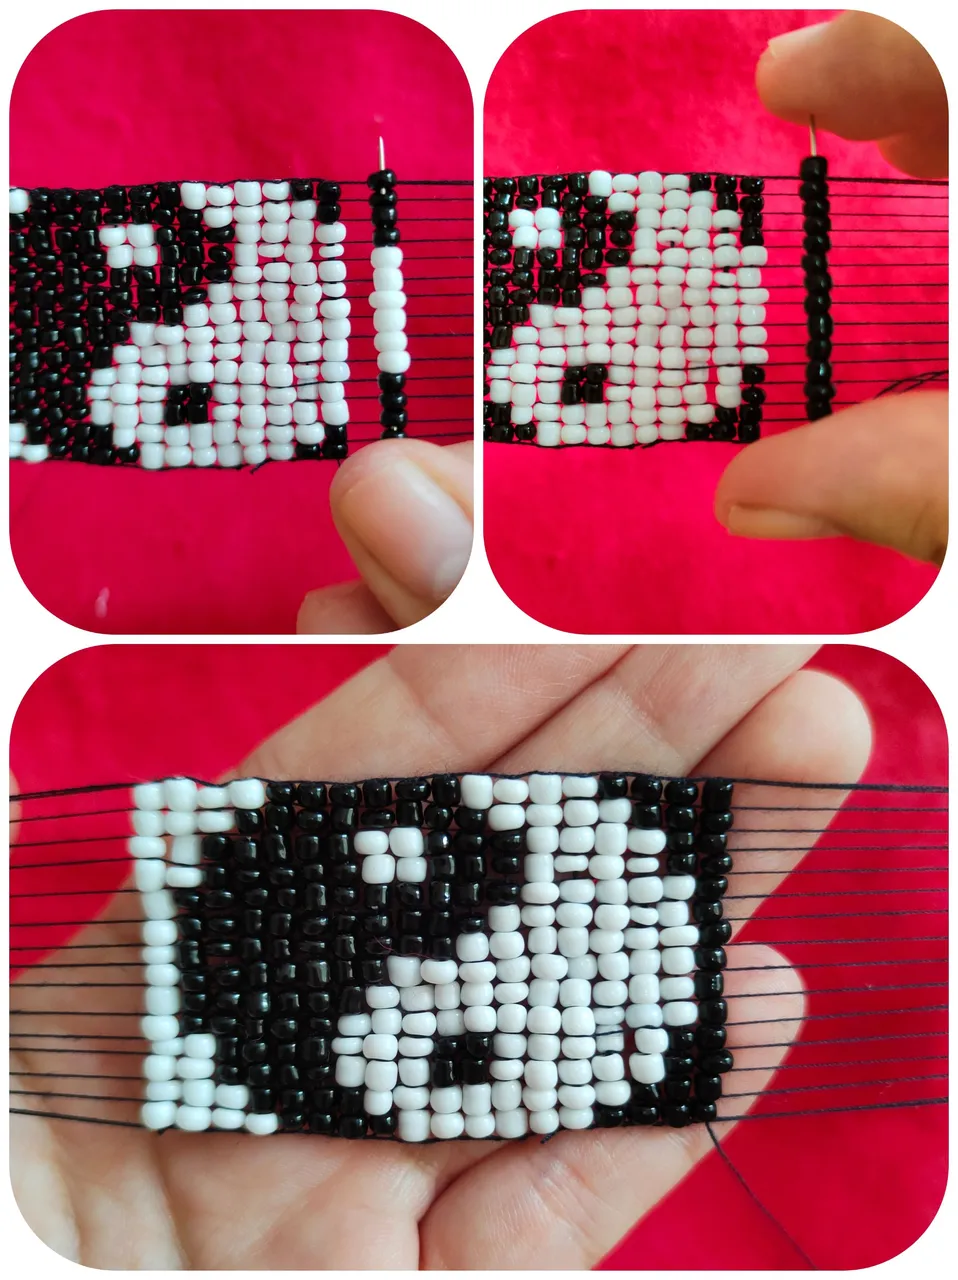
Vamos observando cómo va tomando forma nuestro trabajo. 🥰✨ Este es un trabajo que requiere paciencia pero el resultado es muy bonito.
☯️ Paso 5.| en este grupo iniciaremos con 2 hileras de 14 mostacillas, la siguiente hilera será 1 mostacilla negra, 12 blancas y una negra, y su última hilera, serán 2 mostacillas negras, 10 blancas y 2 negras.
☯️ Step 5.| in this group we will start with 2 rows of 14 beads, the next row will be 1 black, 12 white and 1 black bead, and the last row will be 2 black, 10 white and 2 black beads.
☯️ Paso 6.| en este grupo vamos iniciar su primera hilera con 4 mostacillas negras, 6 blancas y 4 negras y su última hilera serán 14 mostacillas negra de esta manera culminaremos el centro de nuestra pulsera que es el símbolo de Yin Yang.
☯️ Step 6.| in this group we will start its first row with 4 black, 6 white and 4 black beads and its last row will be 14 black beads in this way we will complete the center of our bracelet which is the symbol of Yin Yang.
☯️ Paso 7.| En este paso vamos a realizar 8 hileras completamente de color negro.
☯️ Step 7.| In this step we are going to make 8 rows completely in black.
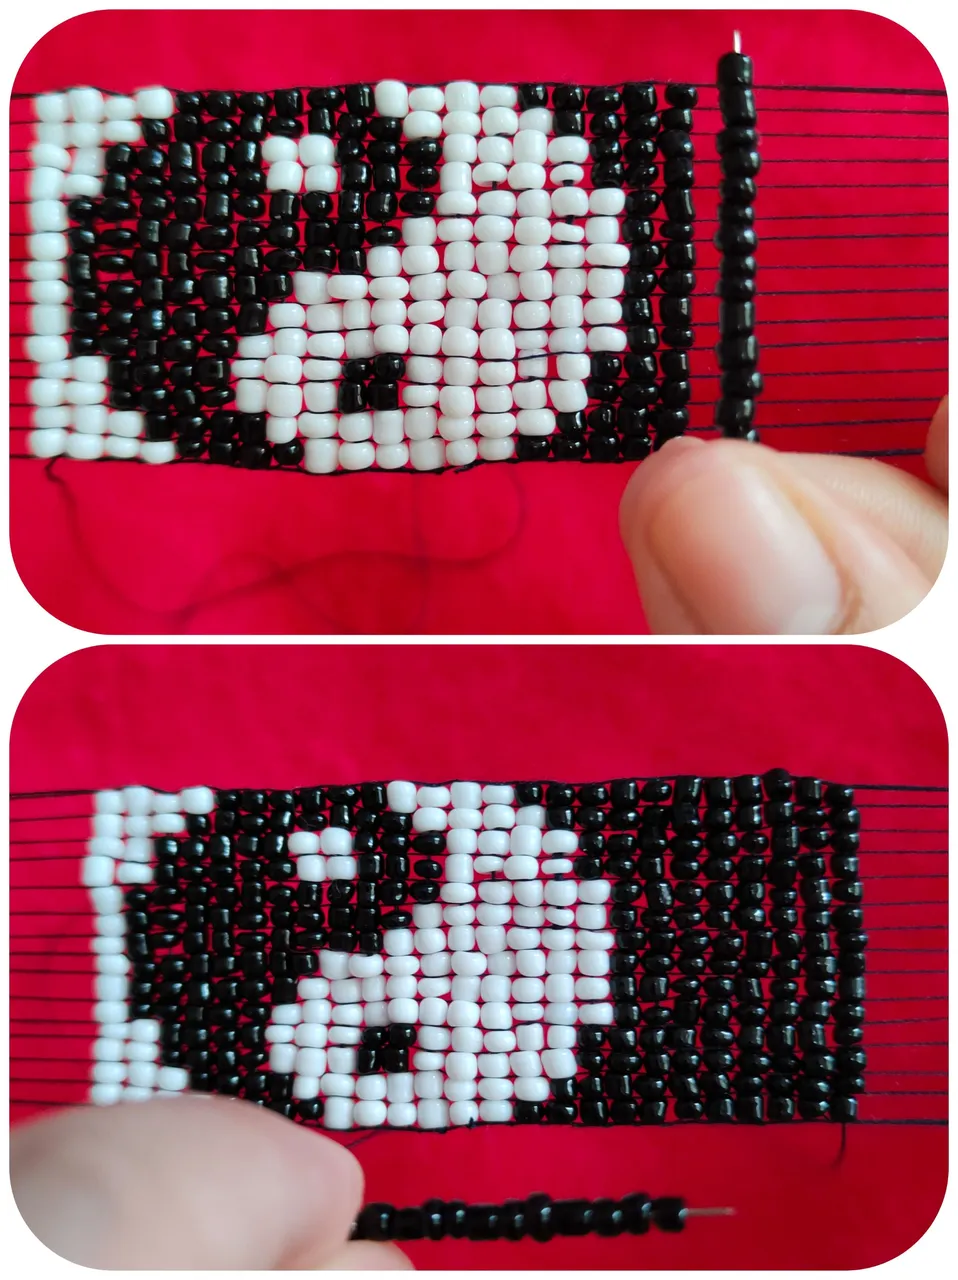
☯️ Paso 8.| Seguidamente haremos 6 hileras mas pero con la diferencia que en cada una vamos a reducir 2 mostacillas es decir la primera hilera tendrá 12 mostacillas, las siguiente 10, luego 8, 6, 4 y finalmente 2, esto para ir realizando un cierre piramidal en la pulsera.
☯️ Step 8.| Next we will make 6 more rows but with the difference that in each one we will reduce 2 beads, that is to say the first row will have 12 beads, the following 10, then 8, 6, 4 and finally 2, this to make a pyramidal clasp on the bracelet.
☯️ Paso 9.| Vamos a repetir el paso 6 y 7 exactamente del otro lado de la pulsera pero con mostacillas blancas.
☯️ Step 9.| We are going to repeat step 6 and 7 exactly on the other side of the bracelet but with white beads.
☯️ Paso 10.| Por último vamos a cortar nuestros hilos dejando una cantidad considerable para podré realizar una trenza en cada extremos de la pulsera.
☯️ Step 10.| Finally we are going to cut our threads leaving a considerable amount to be able to make a braid at each end of the bracelet.
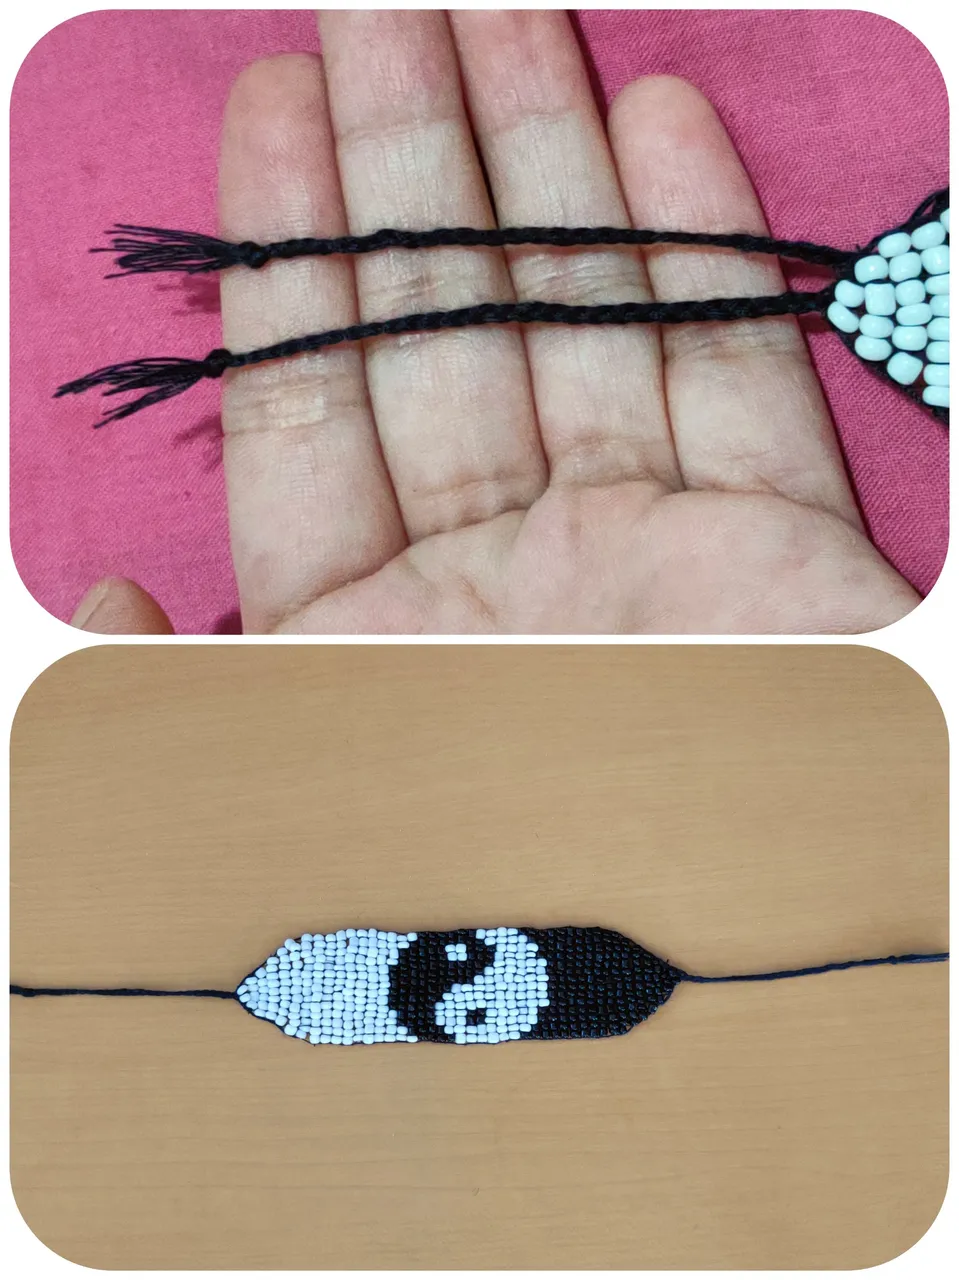
Resultado || Result
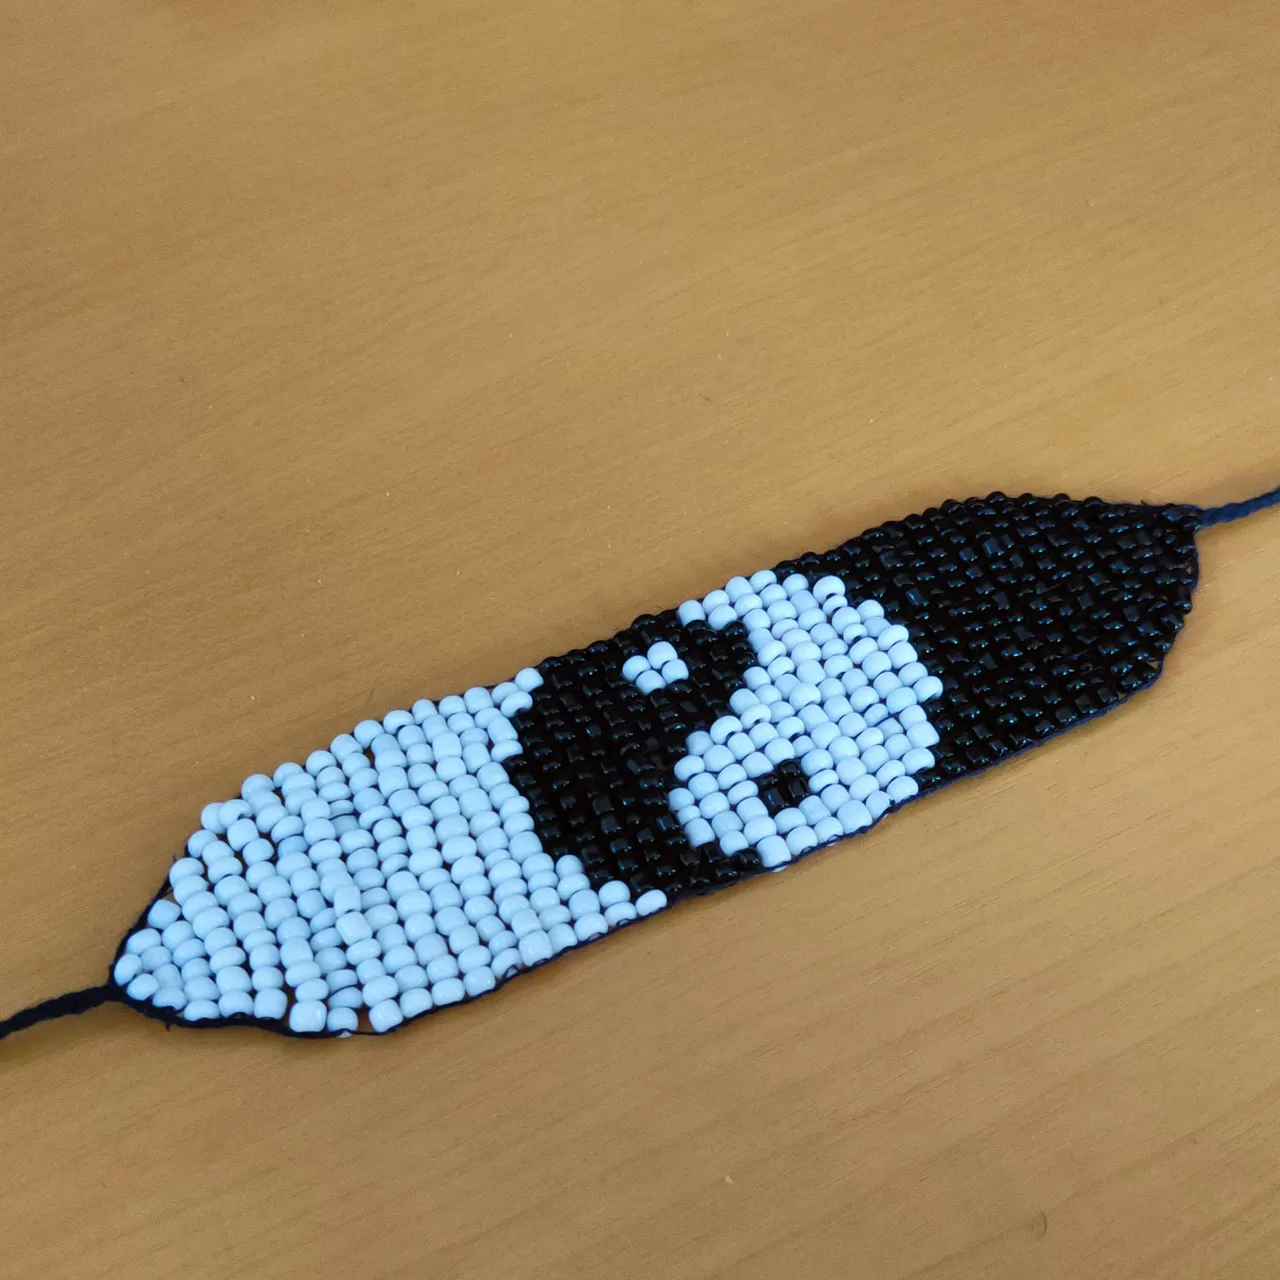
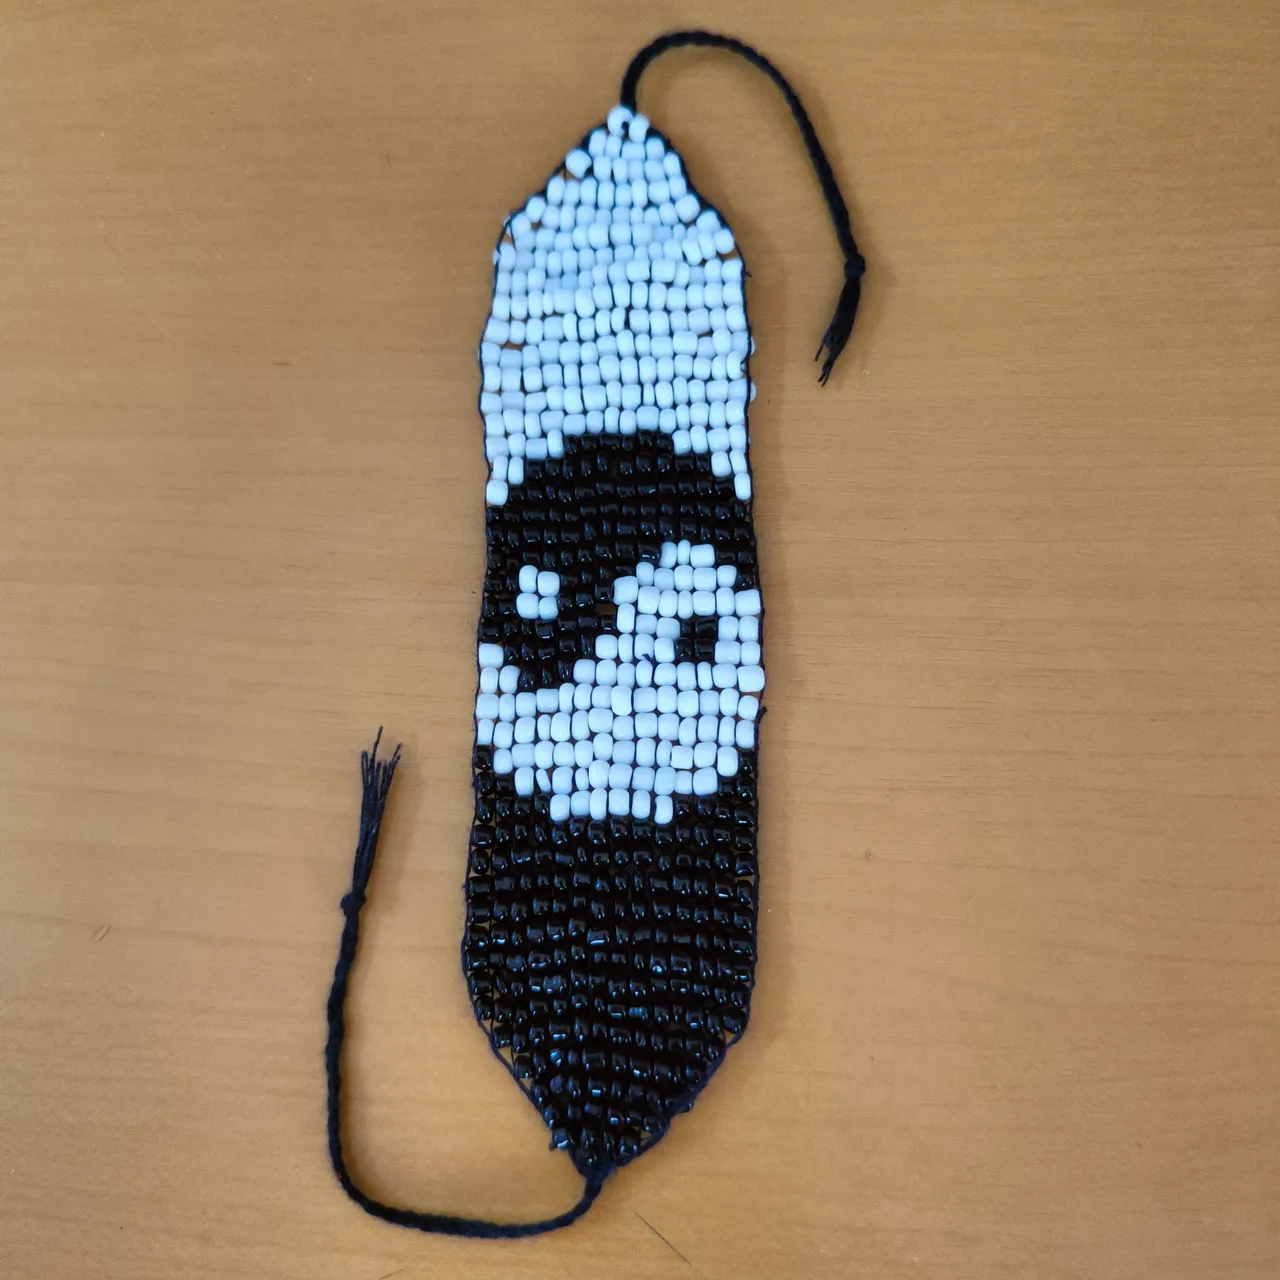
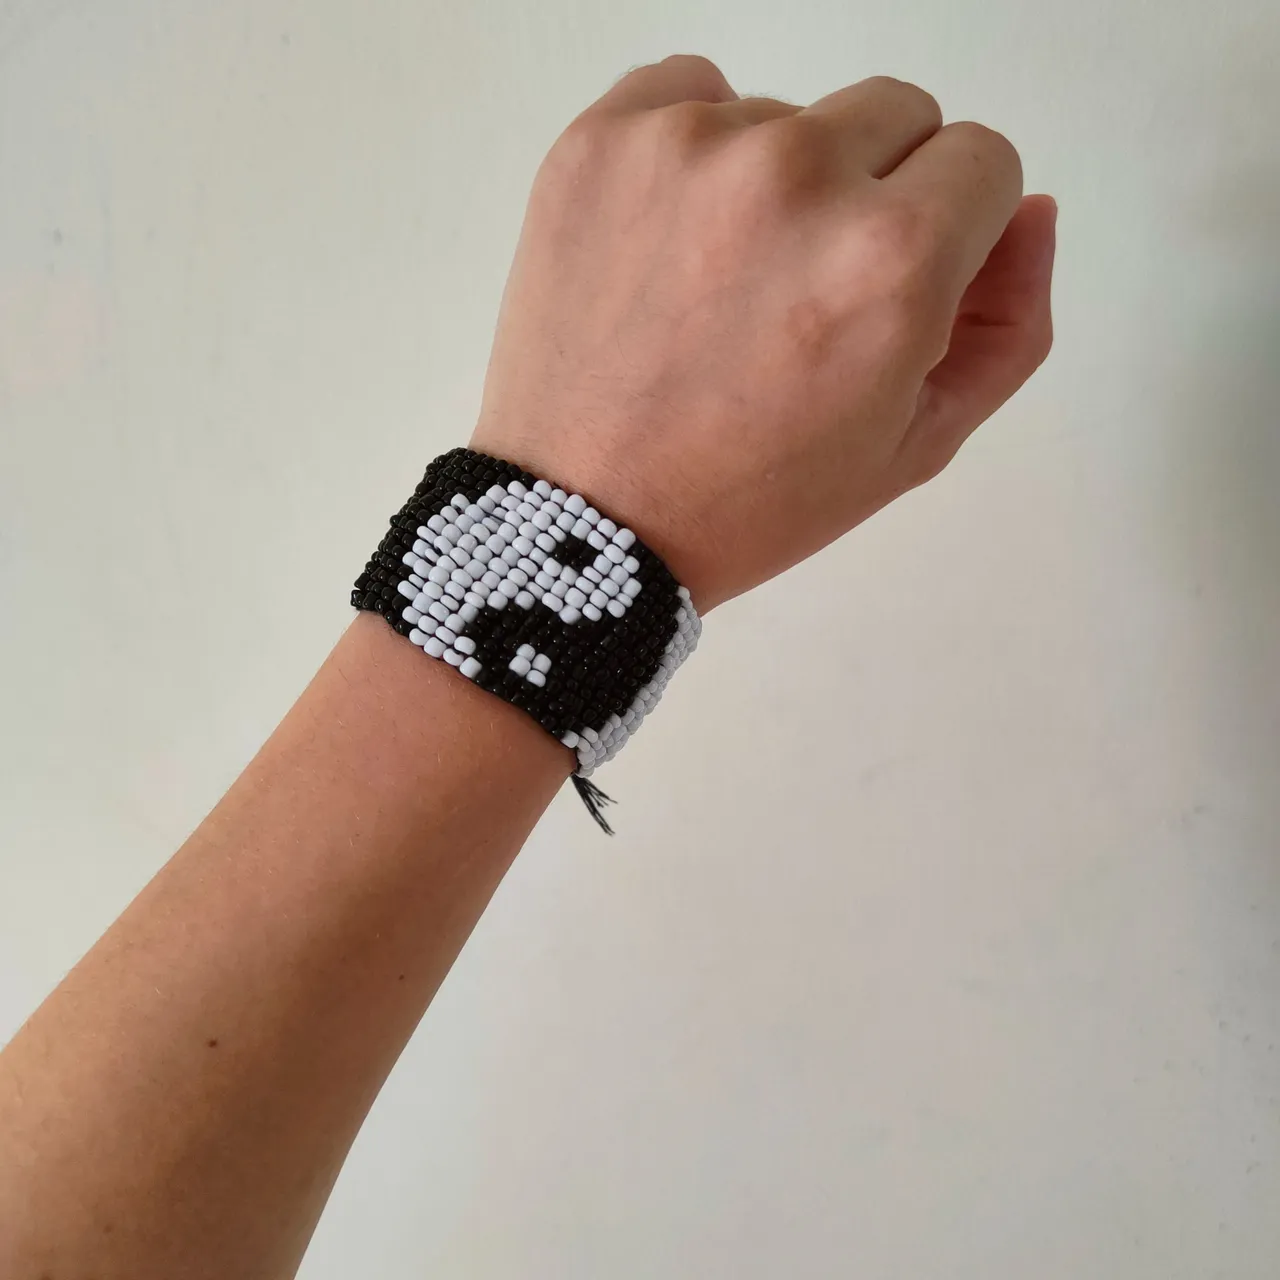
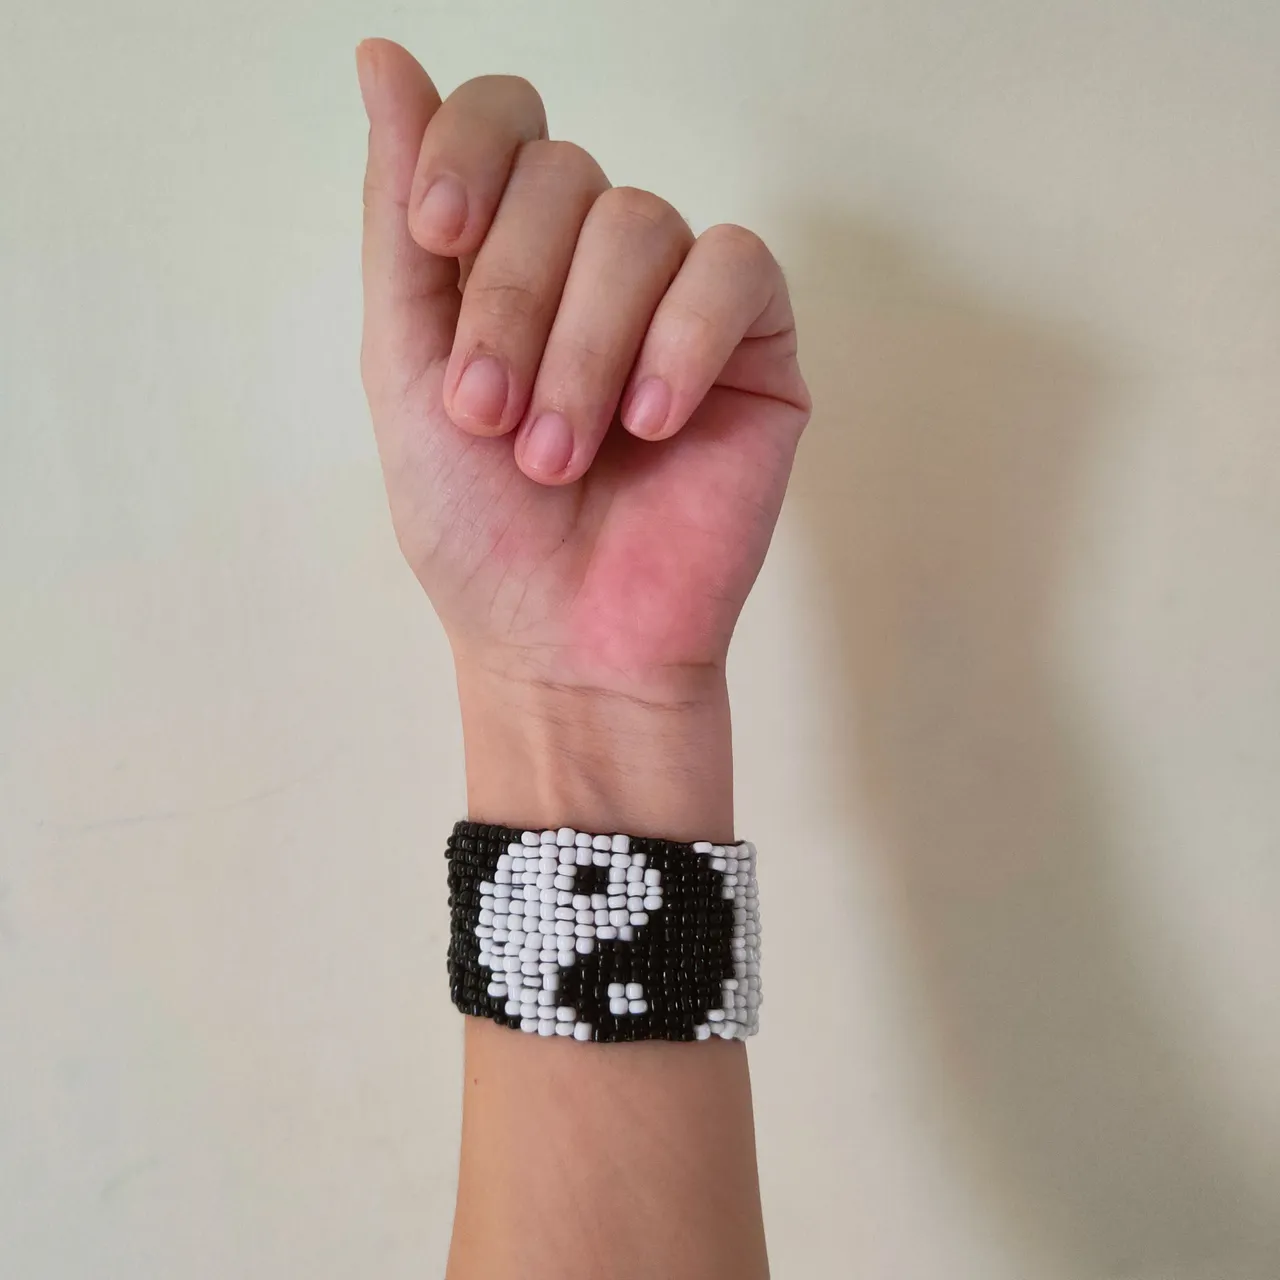
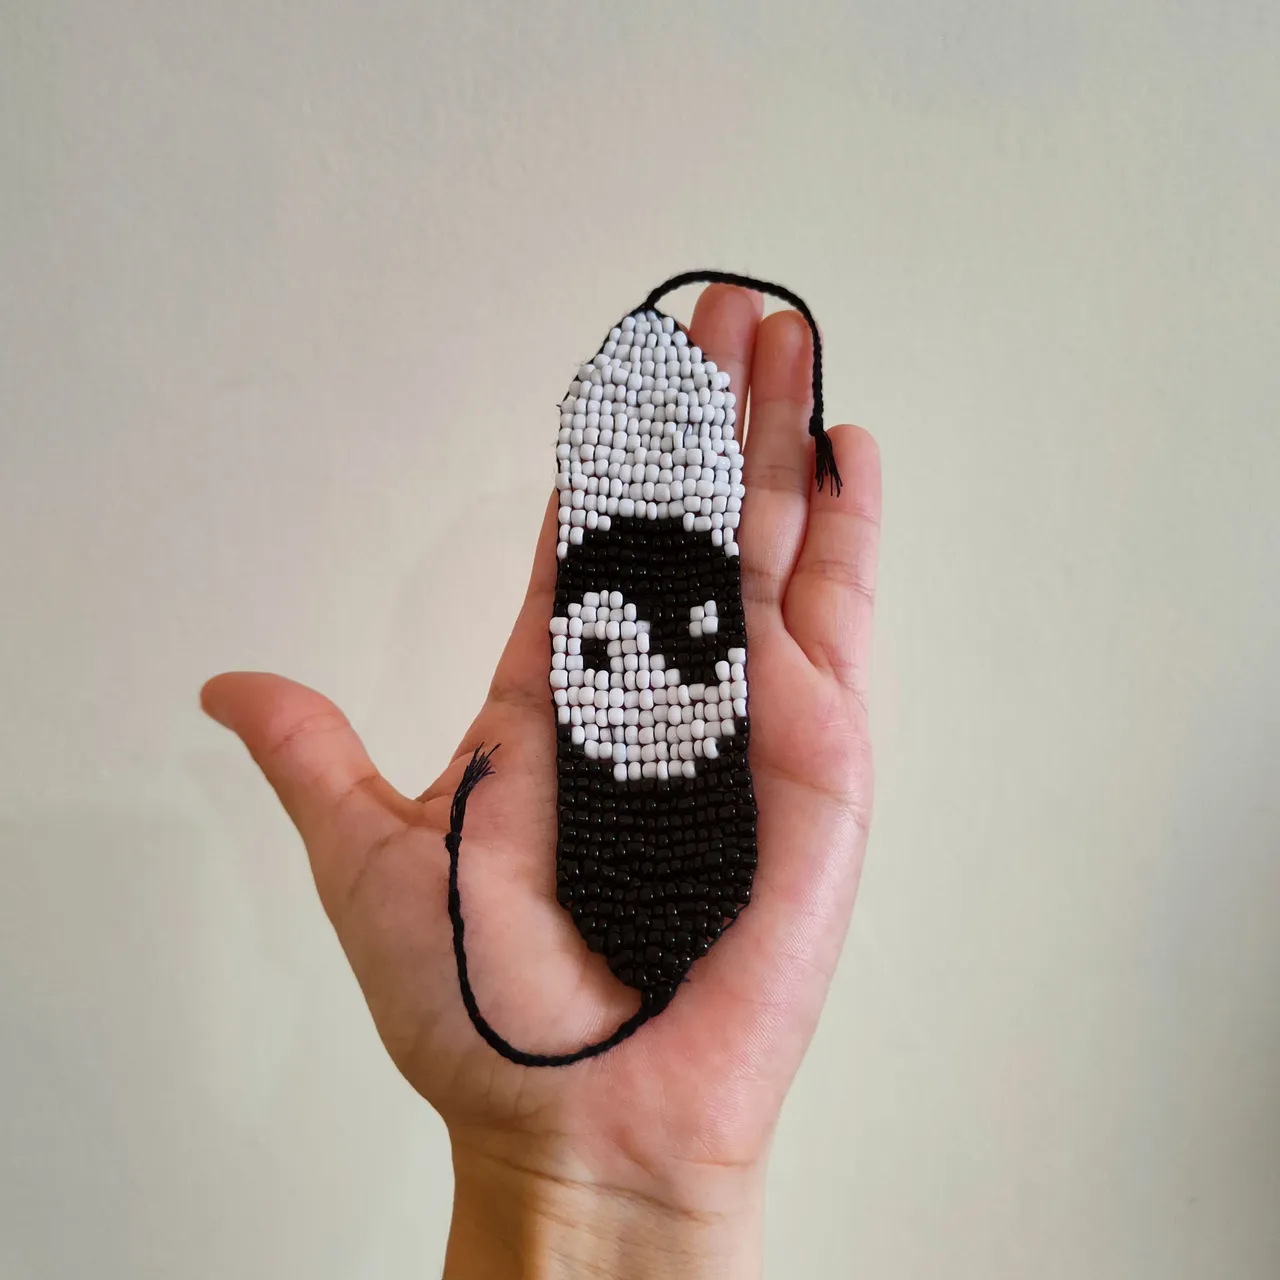
Espero el resultado fuese del su agrado, como siempre agradecida por su tiempo, atención, apoyo y comentarios, será hasta un próximo post queridos amigos.
I hope the result was to your liking, as always grateful for your time, attention, support and comments, will be until a next post dear friends.

🎥Imágenes y vídeo creados con: |Images and video created with: Youcut video| Giphy | Canva |
🇪🇸 Traducido con DeepL