

Bienvenidos || Welcome
Feliz noche a todos queridos amigos, no saben cómo extrañaba estar aquí, en este maravilloso espacio y compartir con cada unos de ustedes mis queridos y estimados artesanos, tenía tiempo trabajando con mostacillas y aún falta tanto por aprender, sin embargo el día de hoy compartiré con ustedes como realizar un lindo collar con trapillo, este proyecto parte por el hecho que literalmente se dañó una de mis camisa y cuando esto sucedió decidí guardarla para realizar con ella algún accesorio o manualidad ya que su tela al cortarla toma la forma característica del trapillo que se suele comprar para elaborar esta clase de prendas y como buena artesana no dude en darle un segunda oportunidad a la tela de esa camisa para elaborar este collar vamos a necesitar los siguientes materiales:
Happy night to all my dear friends, you don't know how I missed being here, in this wonderful space and sharing with each of you my dear and esteemed artisans, I had some time working with beads and there is still so much to learn, however today I will share with you how to make a nice necklace with rag, this project starts with the fact that literally one of my shirts was damaged and when this happened I decided to save it to make with it some accessory or craft since its fabric when cut takes the characteristic shape of the rag that is usually bought to make this kind of garments and as a good craftswoman I did not hesitate to give a second chance to the fabric of that shirt to make this necklace we will need the following materials:
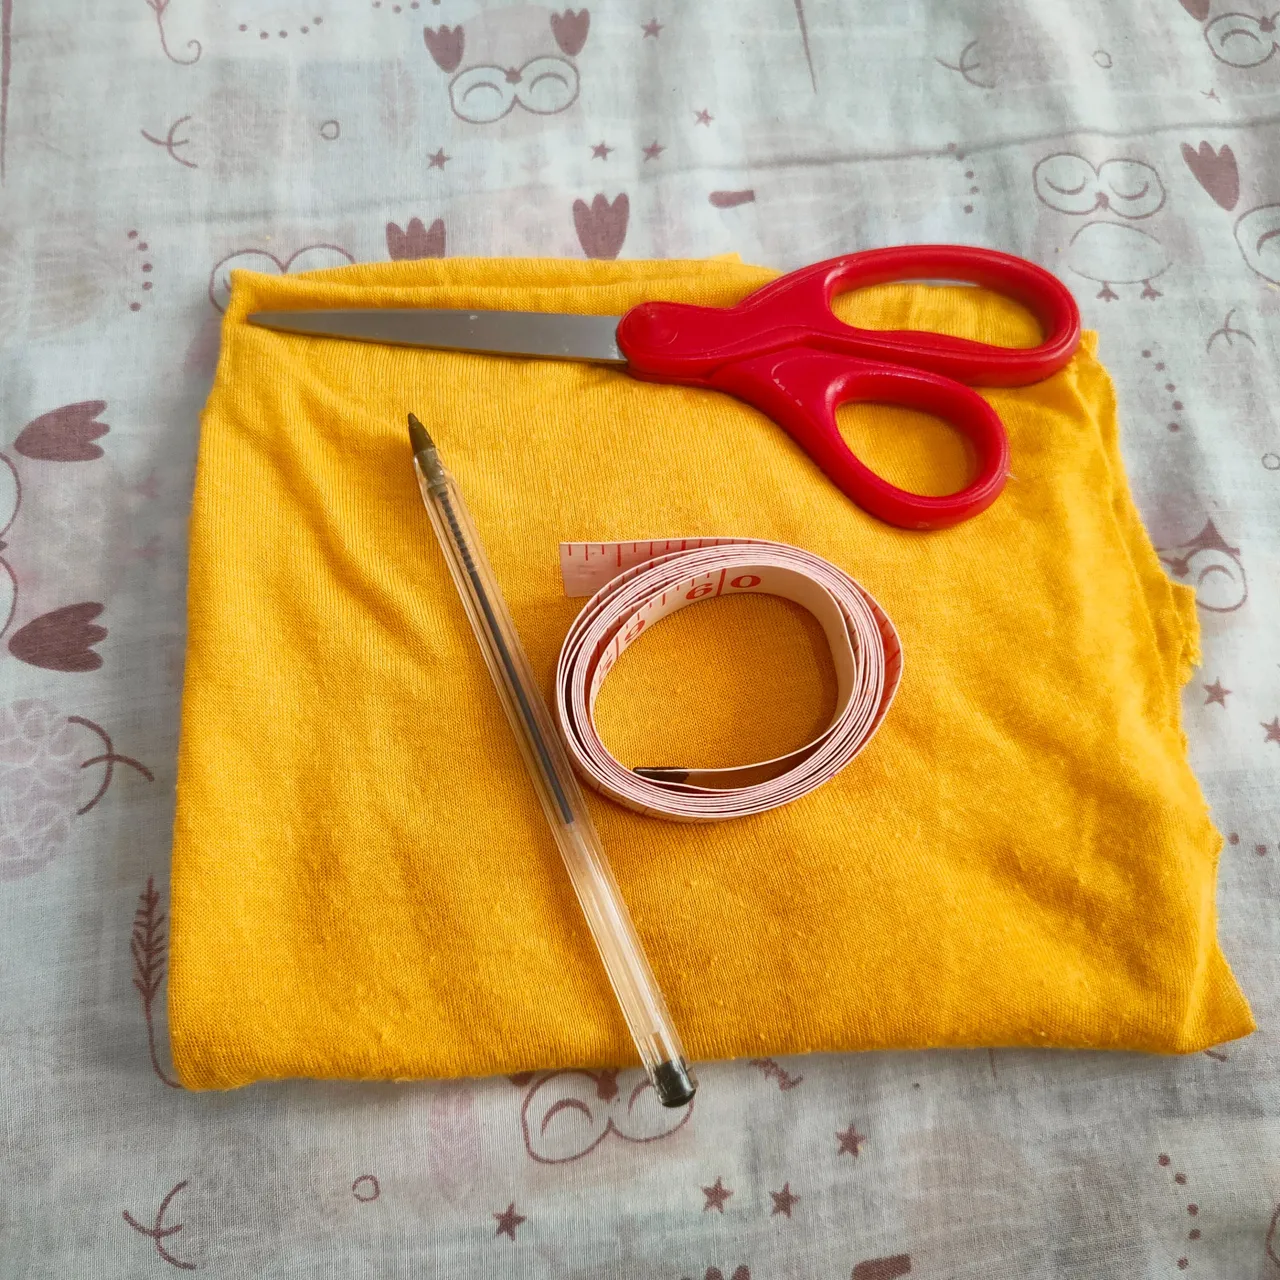
Materiales || Materials
✅ Trapillo.
✅ Cinta métrica.
✅ Tijera.
✅ Silicon en barra.
✅ Collar.
✅ Perlas.
✅ Rag.
✅ Tape measure.
✅ Scissors.
✅ Silicon stick.
✅ Collar.
✅ Beads.
Pasos ||Steps
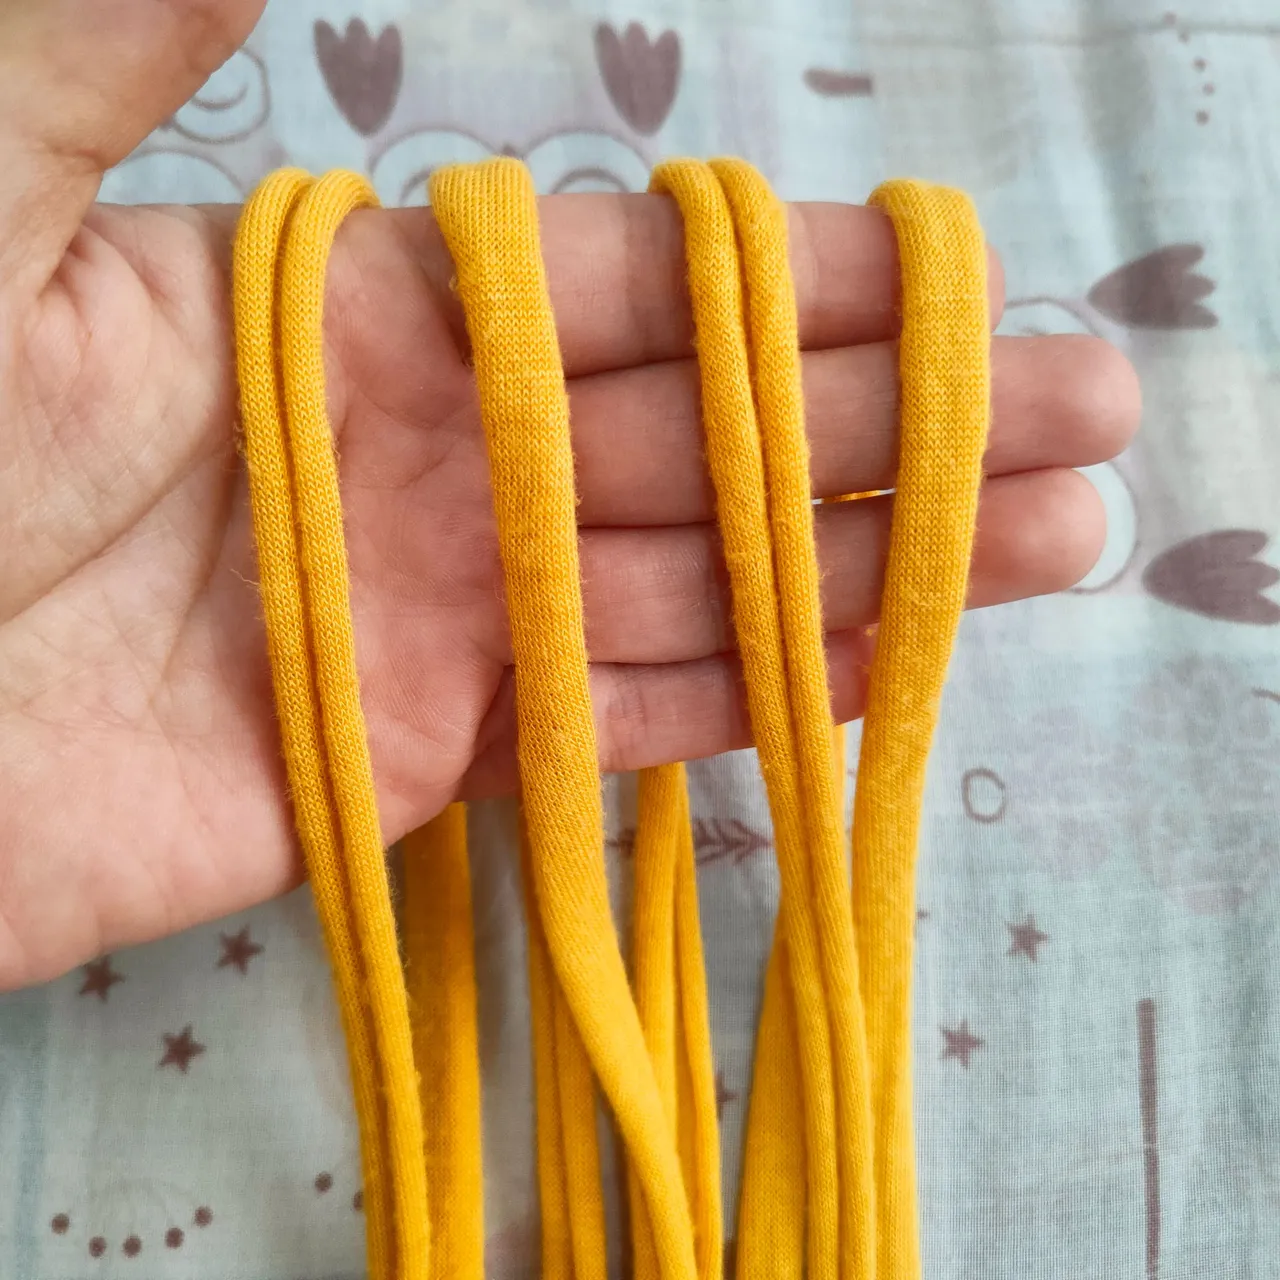
✨ Paso 1.| En mi caso que el trapillo salió de la tela de una camisa, lo primero que hice fue medir cuánto era 3 centímetros de ancho para así tener una idea y comenzar cortar todos los trapillos de este ancho con un largo de 120 centímetros.
✨ Step 1.| In my case, the first thing I did was to measure how much was 3 centimeters wide to have an idea and start cutting all the fabrics of this width with a length of 120 centimeters.

✨ Paso 2.| una vez que corte 4 tiras las tomé de ambos extremos y procedí a estirarla para que así tomarán la característica propia del trapillo.
✨ Step 2.| Once I cut 4 strips, I took them from both ends and proceeded to stretch them so that they would take on the characteristic of the rag.
✨ Paso 3.| Seguidamente Aline las 4 tiras de trapillo.
✨ Step 3.| Next, line up the 4 strips of ragweed.

✨ Paso 4.| Para así proceder a tomar el extremo de unas de las tiras de trapillo con el fin de hacer con este una agarradera.
✨ Step 4.| In order to proceed, take the end of one of the strips of rag in order to make a handle out of it.
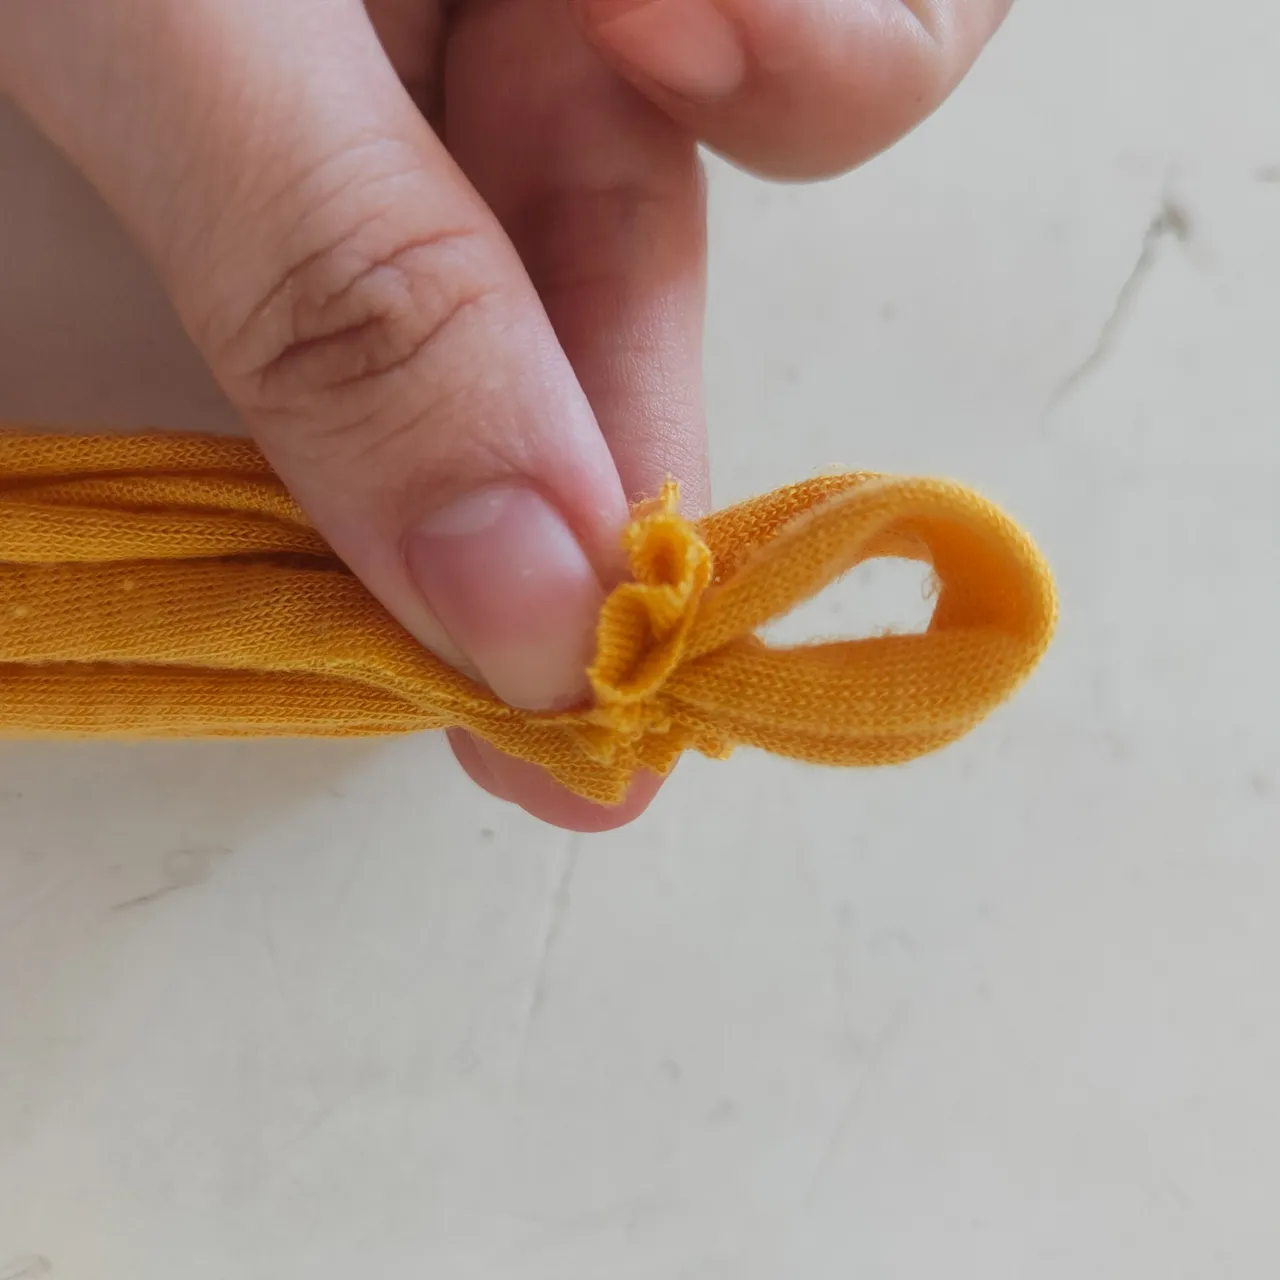
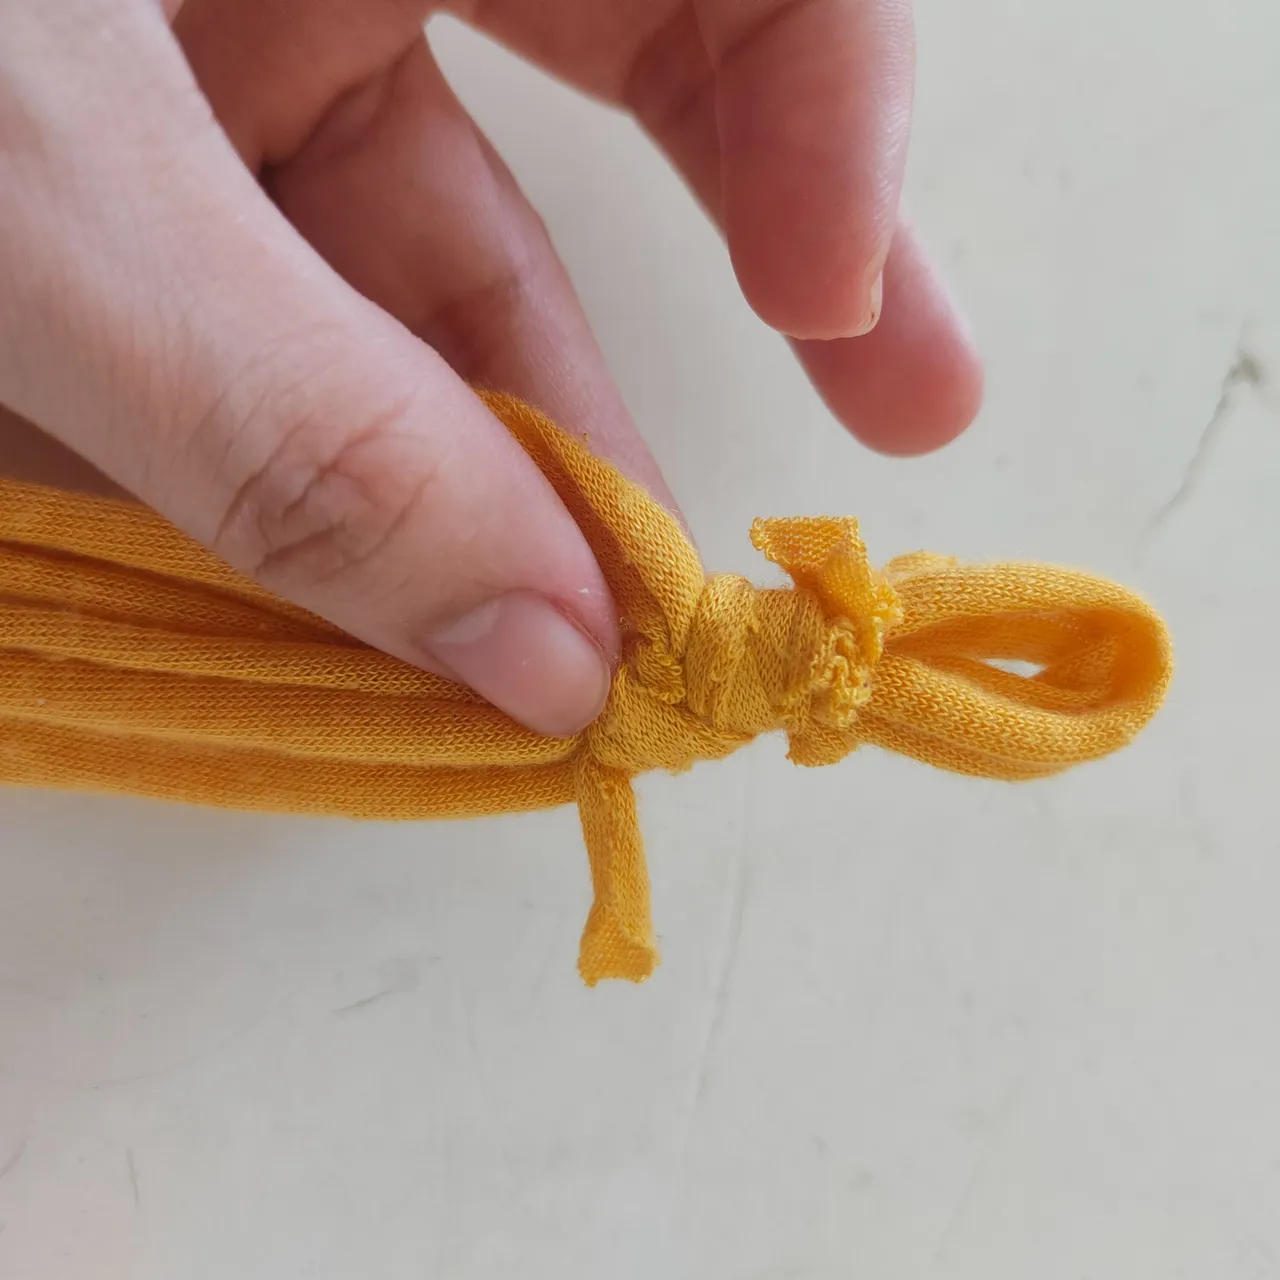
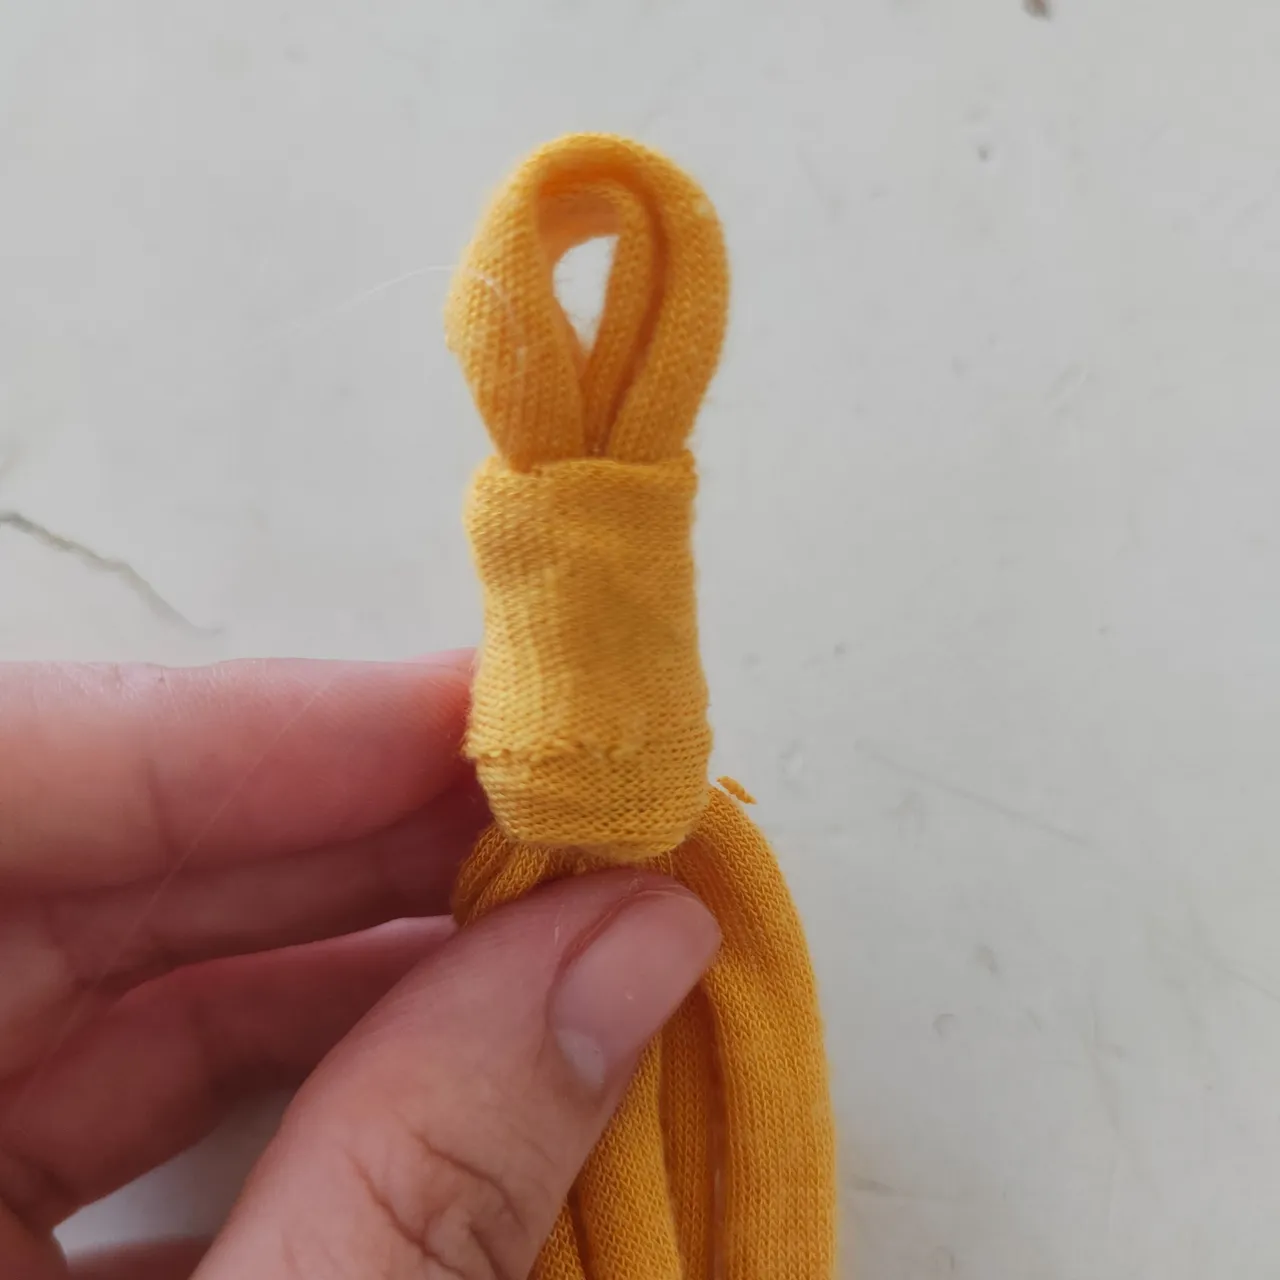
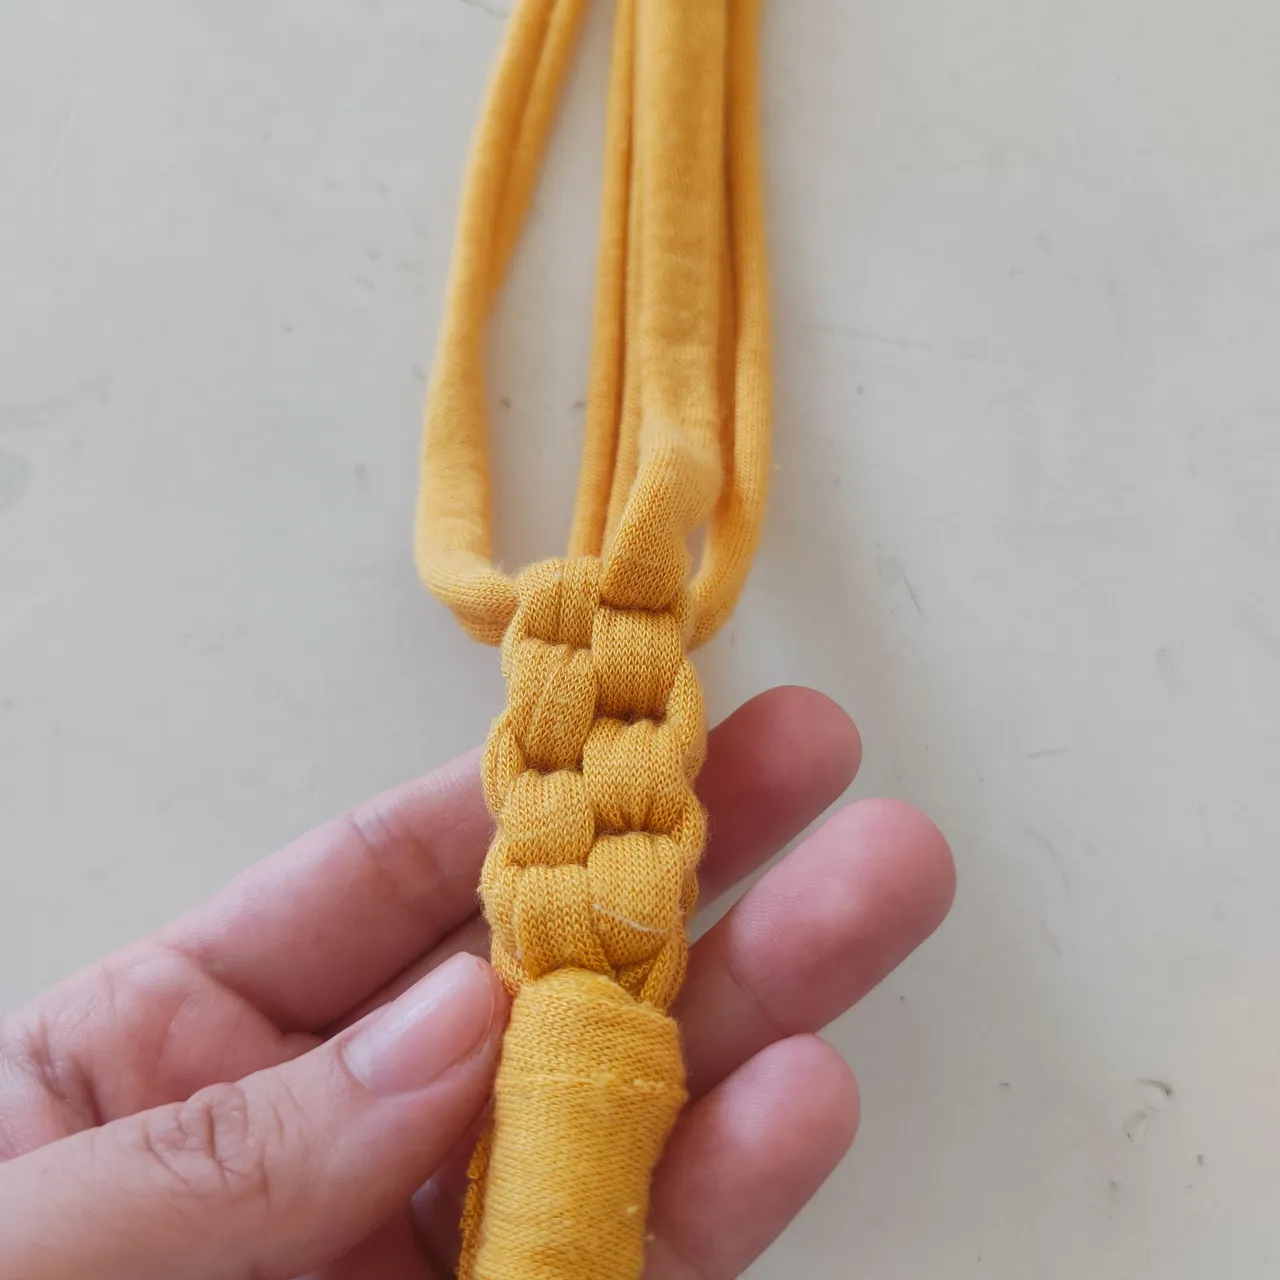
✨ Paso 5.| con otra tira amarramos las 4 tiras principales y para que luzca estético vamos a tomar un trozo de trapillo y vamos envolver la zona donde realizamos en nudo y fijaremos está con la ayuda del Silicon en barra.
✨ Step 5.| with another strip we tie the 4 main strips and to make it look aesthetic we will take a piece of rag and we will wrap the area where we tie the knot and we will fix it with the help of the Silicon bar.
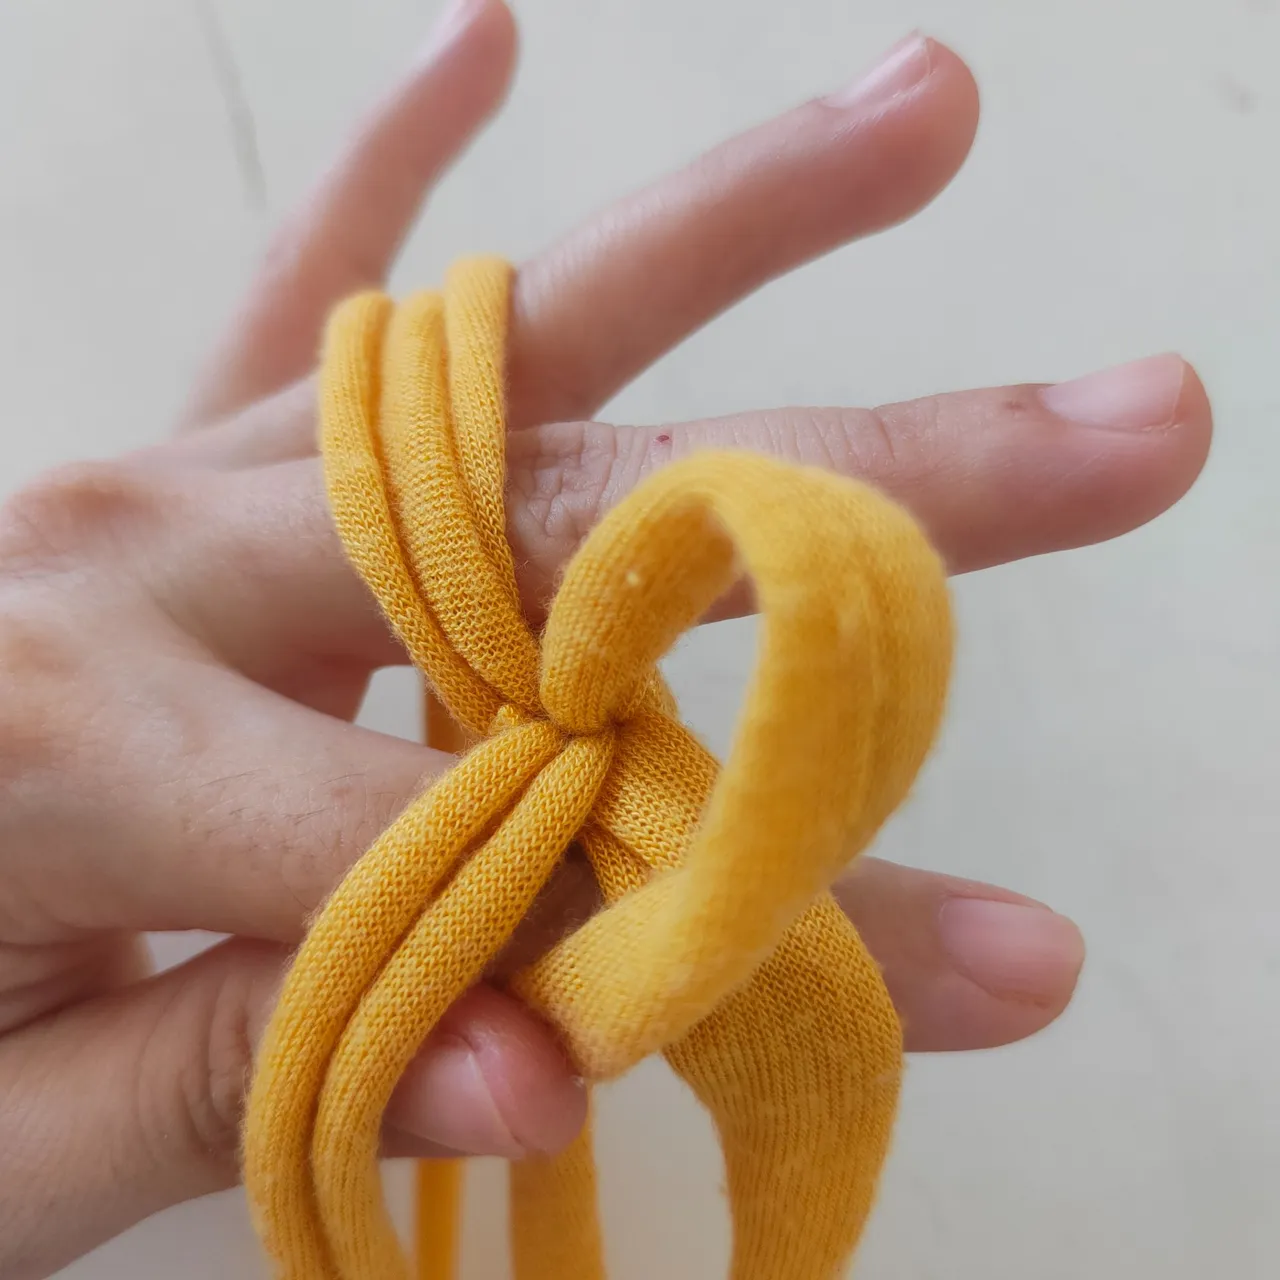
✨ Paso 6.| Ahora viene lo bueno y es comenzar a entrelazar nuestros trapillos para así darle la forma característica de este collar, debo admitir que siempre tuve curiosidad como se realizaba y hasta llegue a pensar que era super complejo pero la cierto es que es sencillo de realizar, lo primero que vamos hacer es poner los cuatros trapillos en direcciones distintas simulando una flor.
✨ Step 6.| Now comes the good part and is to begin to intertwine our rags to give the characteristic shape of this necklace, I must admit that I was always curious how it was done and even came to think it was super complex but the truth is that it is simple to perform, the first thing to do is to put the four rags in different directions simulating a flower.
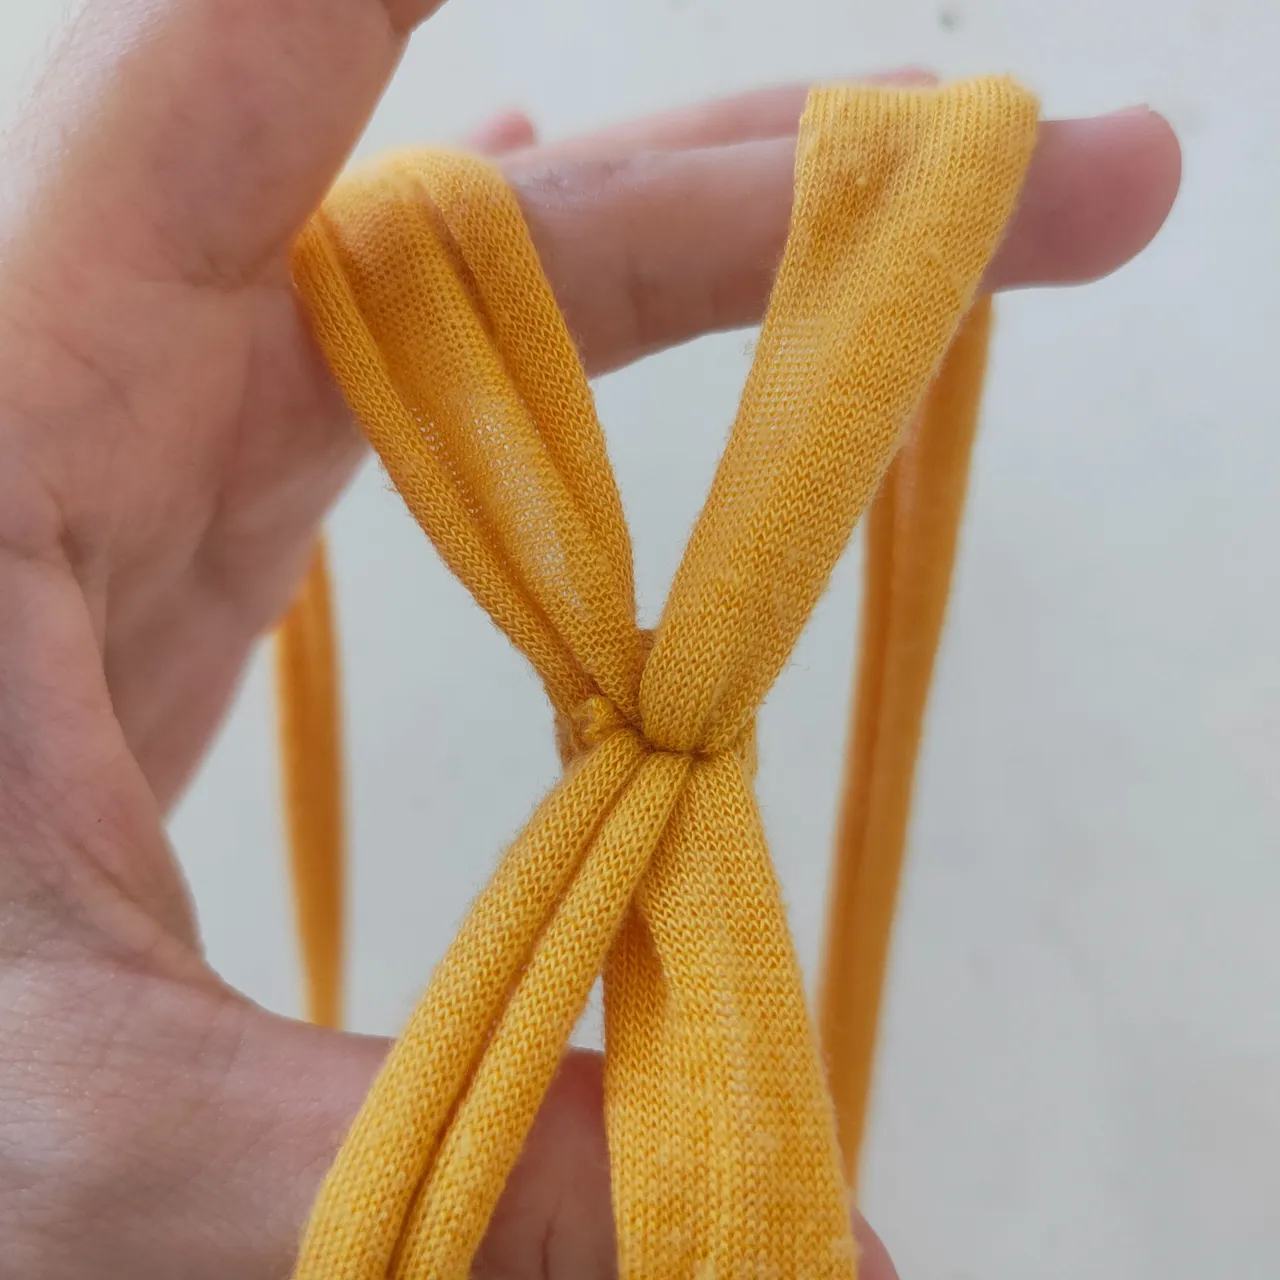
✨ Paso 7.| Ahora vamos a tomar unos delos trapillos que están en la parte de arriba y lo vamos a traer hacia nosotras formando una especie de semicírculo y así mismo vamos a tomar otro trapillo que está en la parte de abajo a la izquierda y lo vamos llevar hacia el otro extremos formando así un segundo semicírculo.
✨ Step 7.| Now we are going to take some of the rags that are at the top and we are going to bring it towards us forming a kind of semicircle and likewise we are going to take another rag that is at the bottom on the left and we are going to bring it towards the other end forming a second semicircle.
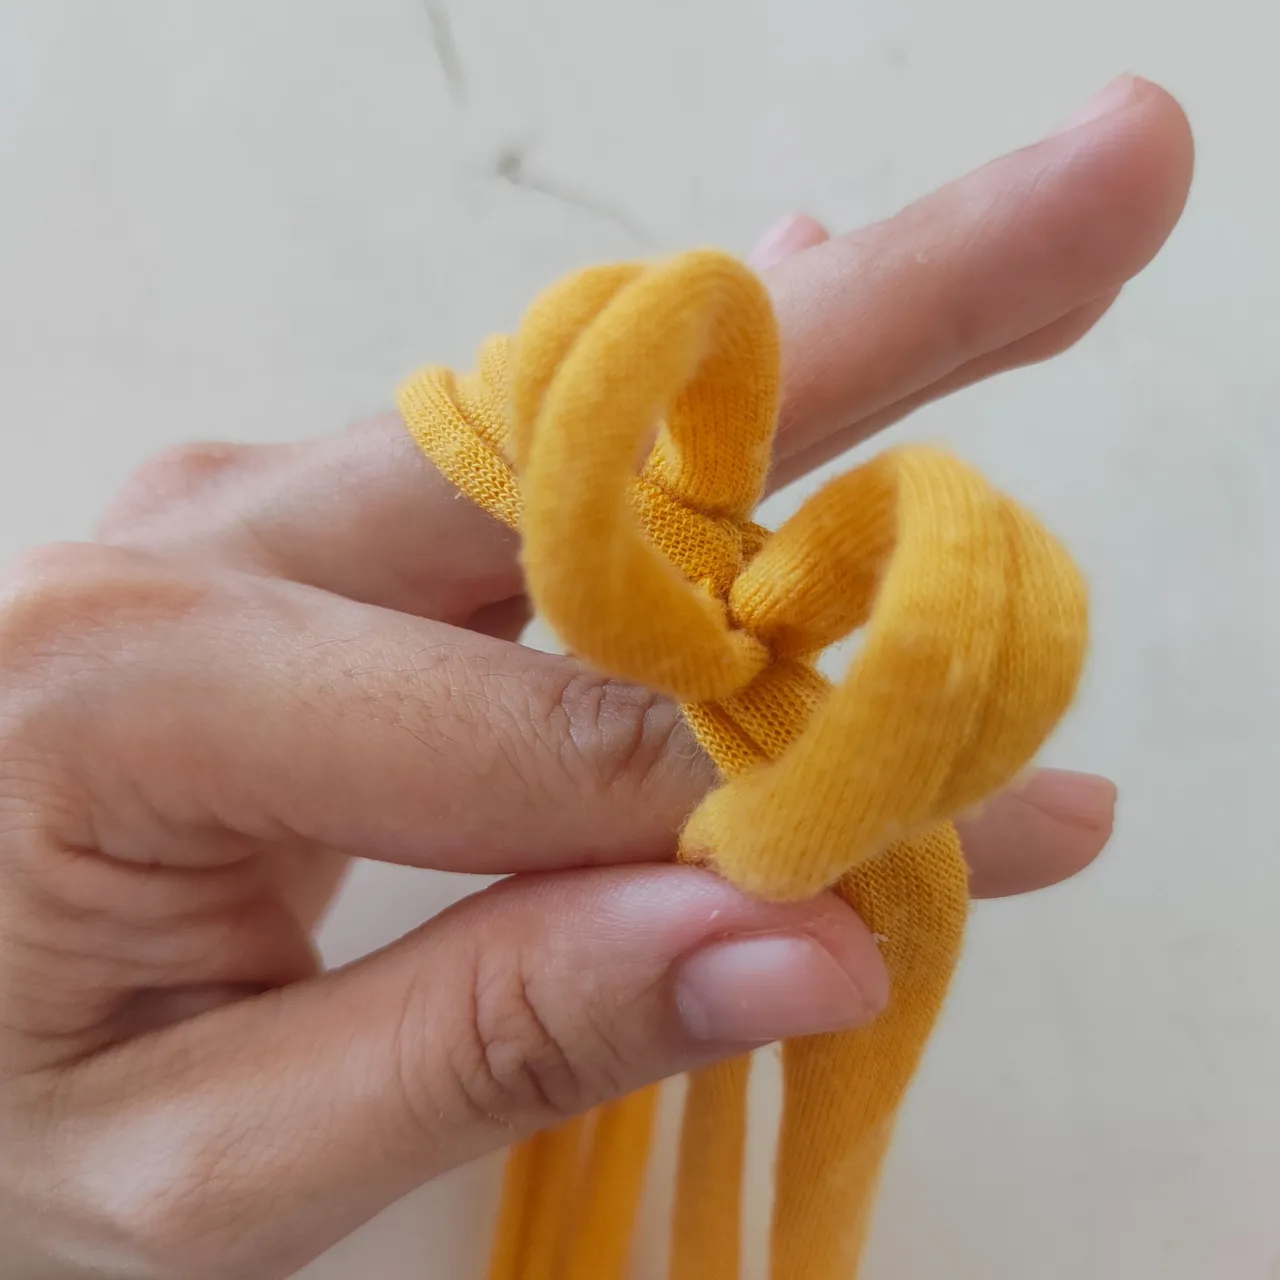
✨ Paso 8.| Ahora el trapillo que está a la derecha lo pasamos por el centro del semicírculo que está en la izquierda, y el trapillo que está en la izquierda lo pasamos por el centro de semicírculo de la derecha, formando así un cuadrado.
✨ Step 8.| Now we pass the right-hand cloth through the center of the semicircle on the left, and the left-hand cloth through the center of the semicircle on the right, thus forming a square.
✨ Paso 9.| El cual vamos a ir ajustando, jalando los extremos de l cada trapillo hasta que sea un cuadrado pequeño.
✨ Step 9.| which we will be adjusting, pulling the ends of each rag until it is a small square.
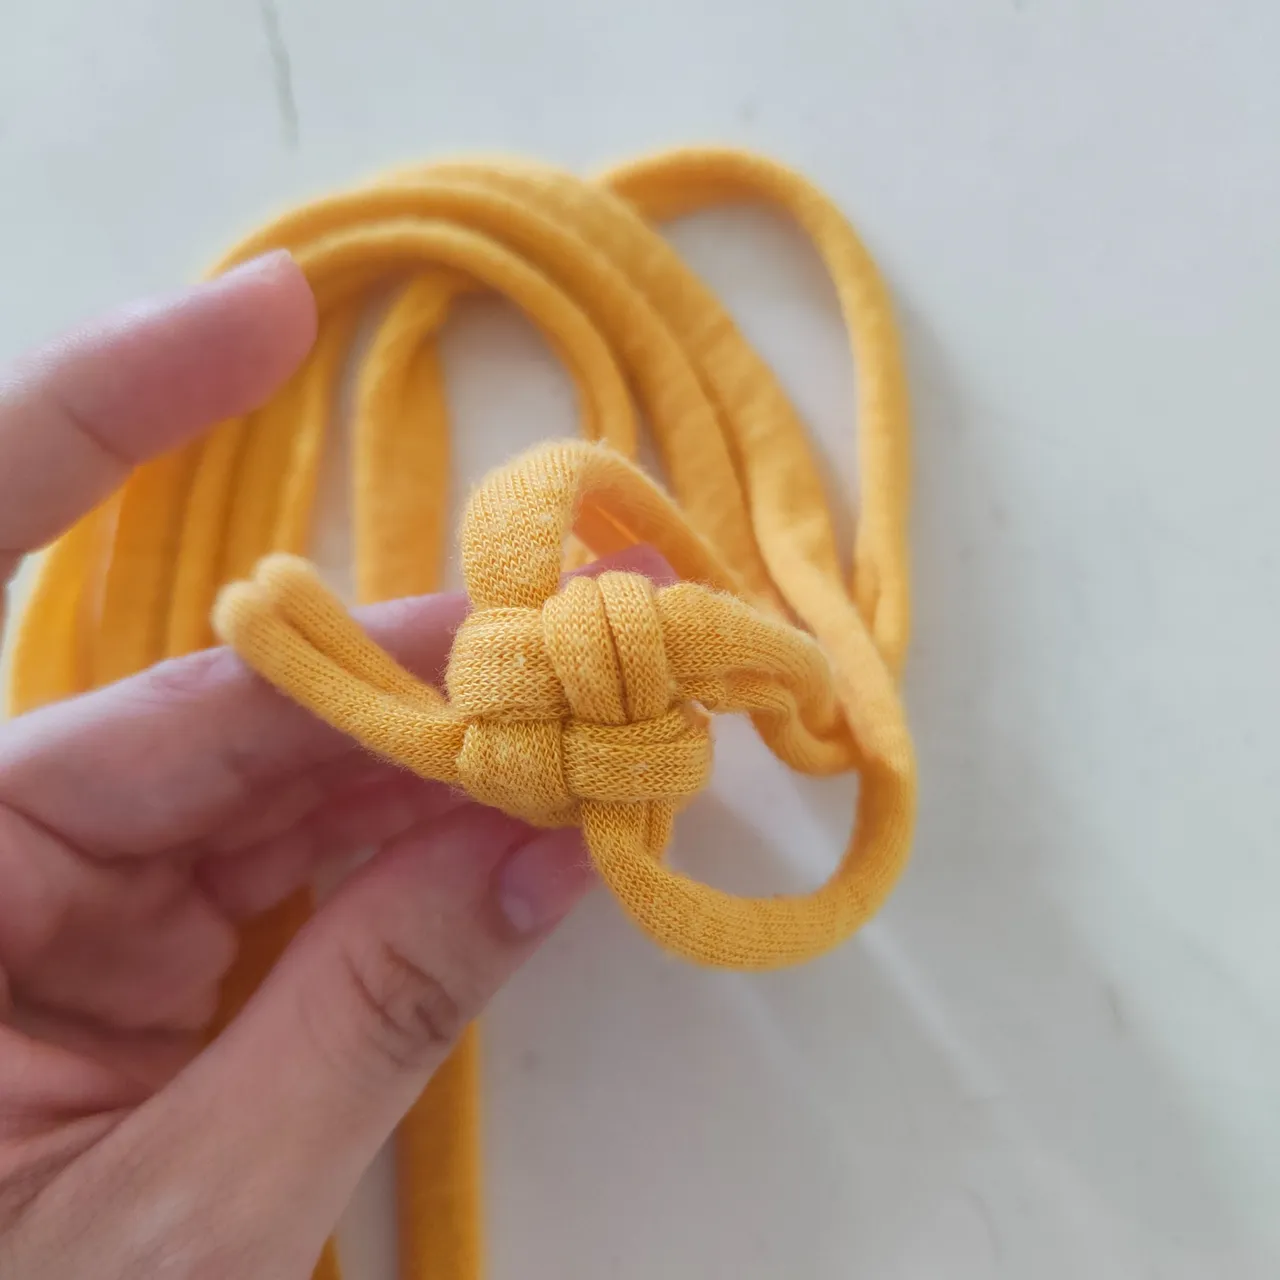
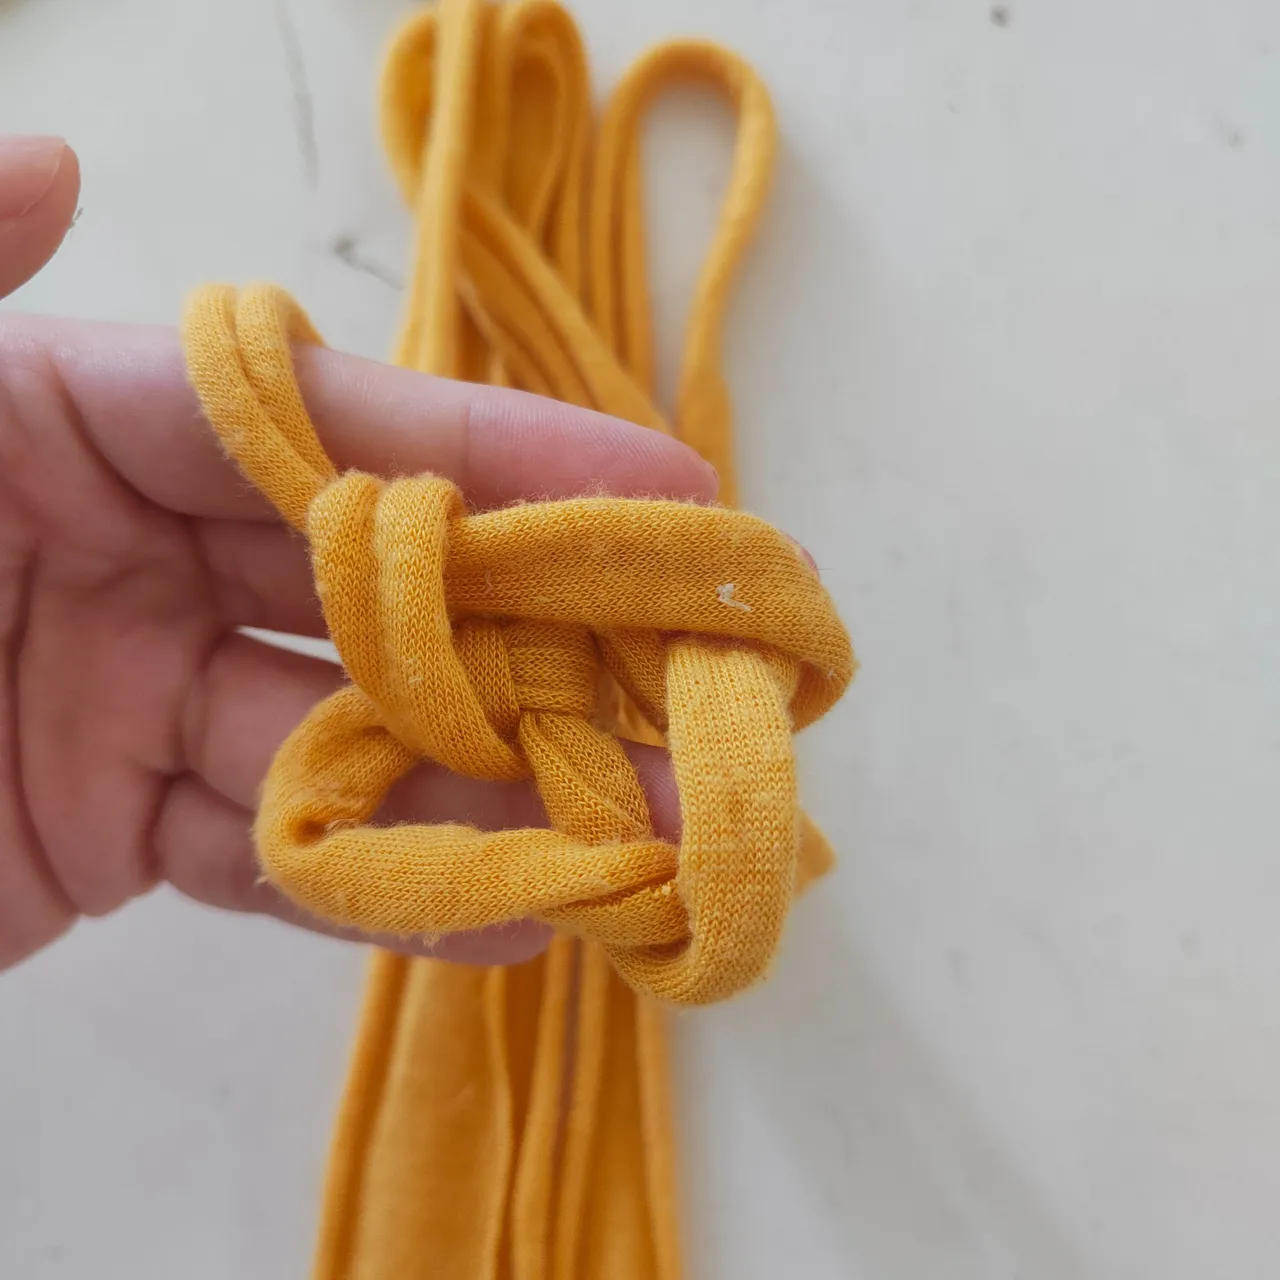
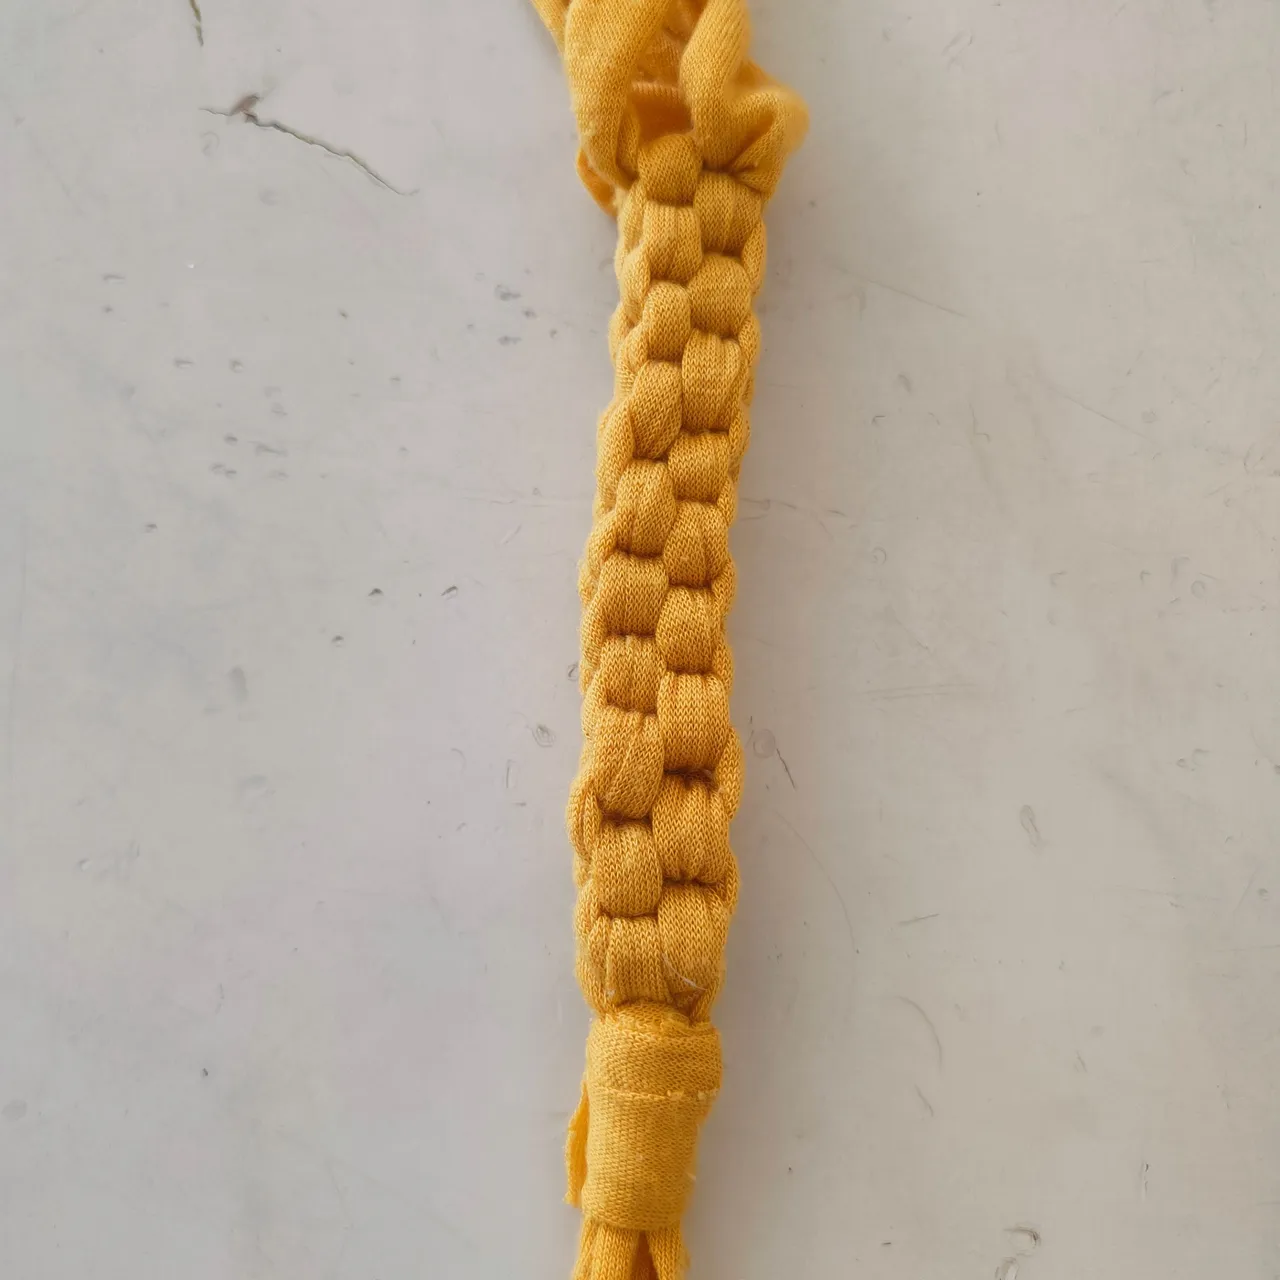
✨ Paso 10.| Así de simple es nuestro nudo pero con un resultado espectacular, de aquí en adelante vamos a repetir este nudo hasta tener el largo deseado para nuestro collar.
✨ Step 10.| This is how simple our knot is but with a spectacular result, from here on we will repeat this knot until we have the desired length for our necklace.

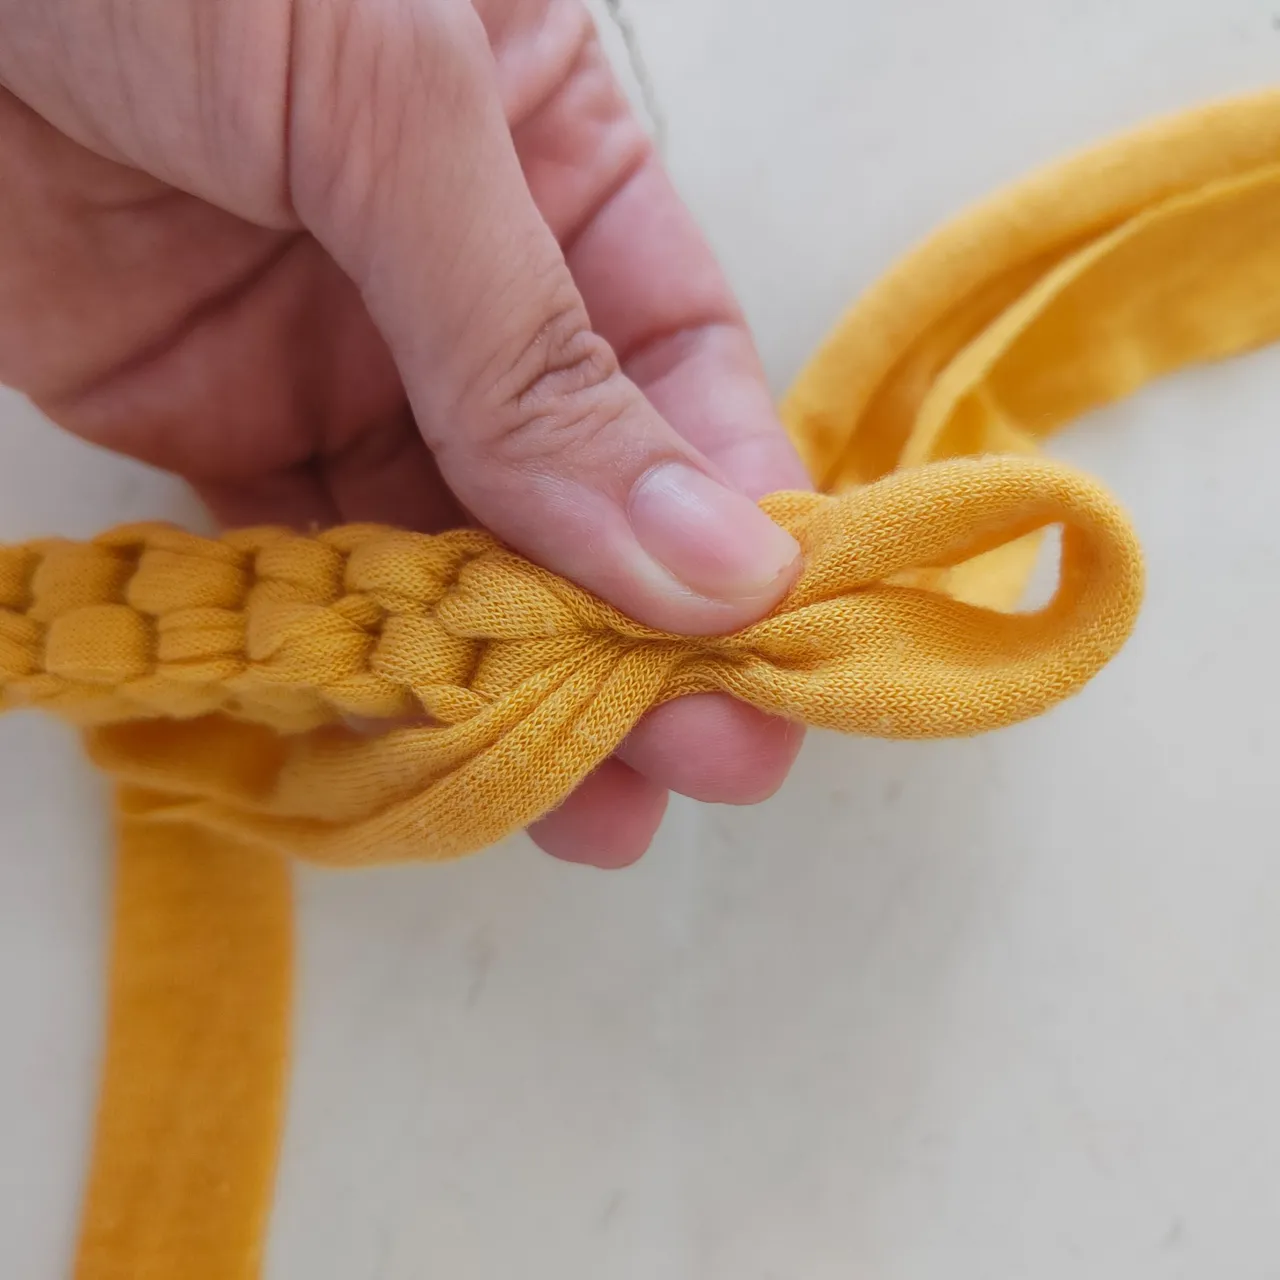
✨ Paso 11.| Cuanto tengamos el largo deseado de nuestro collar vamos a repetir en este extremo los mismo pasos del inicio de manera que ambos sea similar.
✨ Step 11.| Once we have the desired length of our necklace, we will repeat the same steps from the beginning on this end so that both are similar.
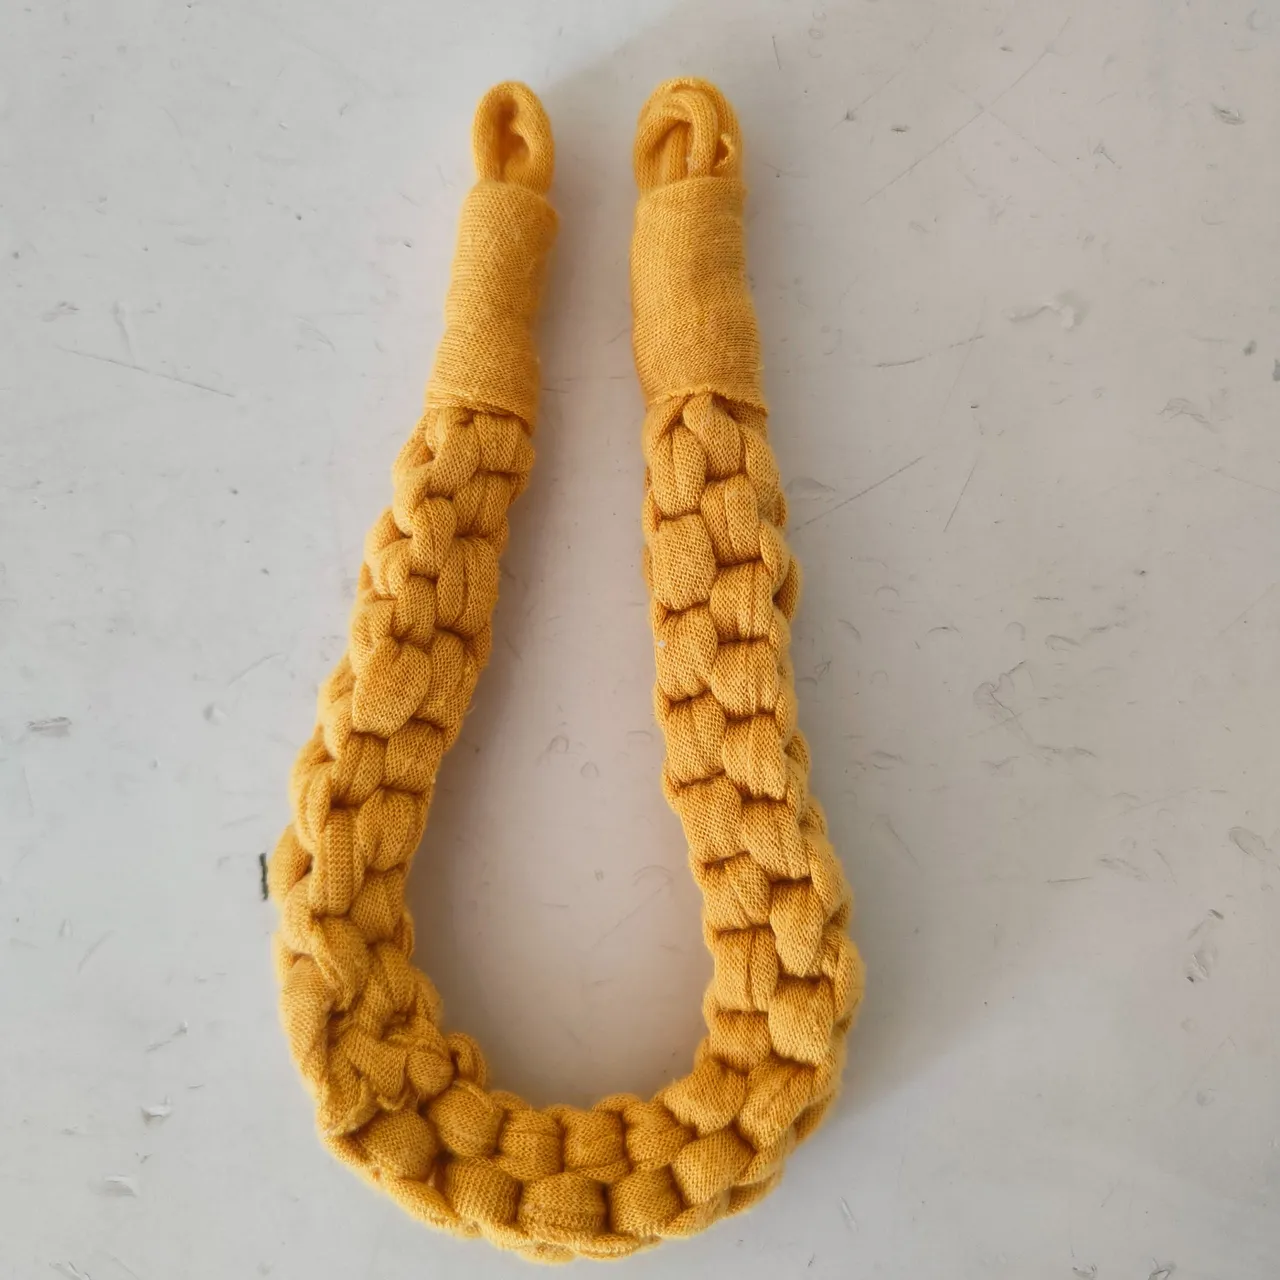
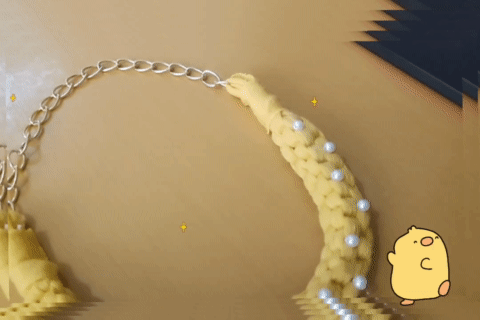
✨ Paso 12.| Procedemos a colocar nuestra cadena de bisutería en cada extremo de nuestro collar de trapillo.
✨ Step 12.| We proceed to attach our costume jewelry chain to each end of our rag necklace.
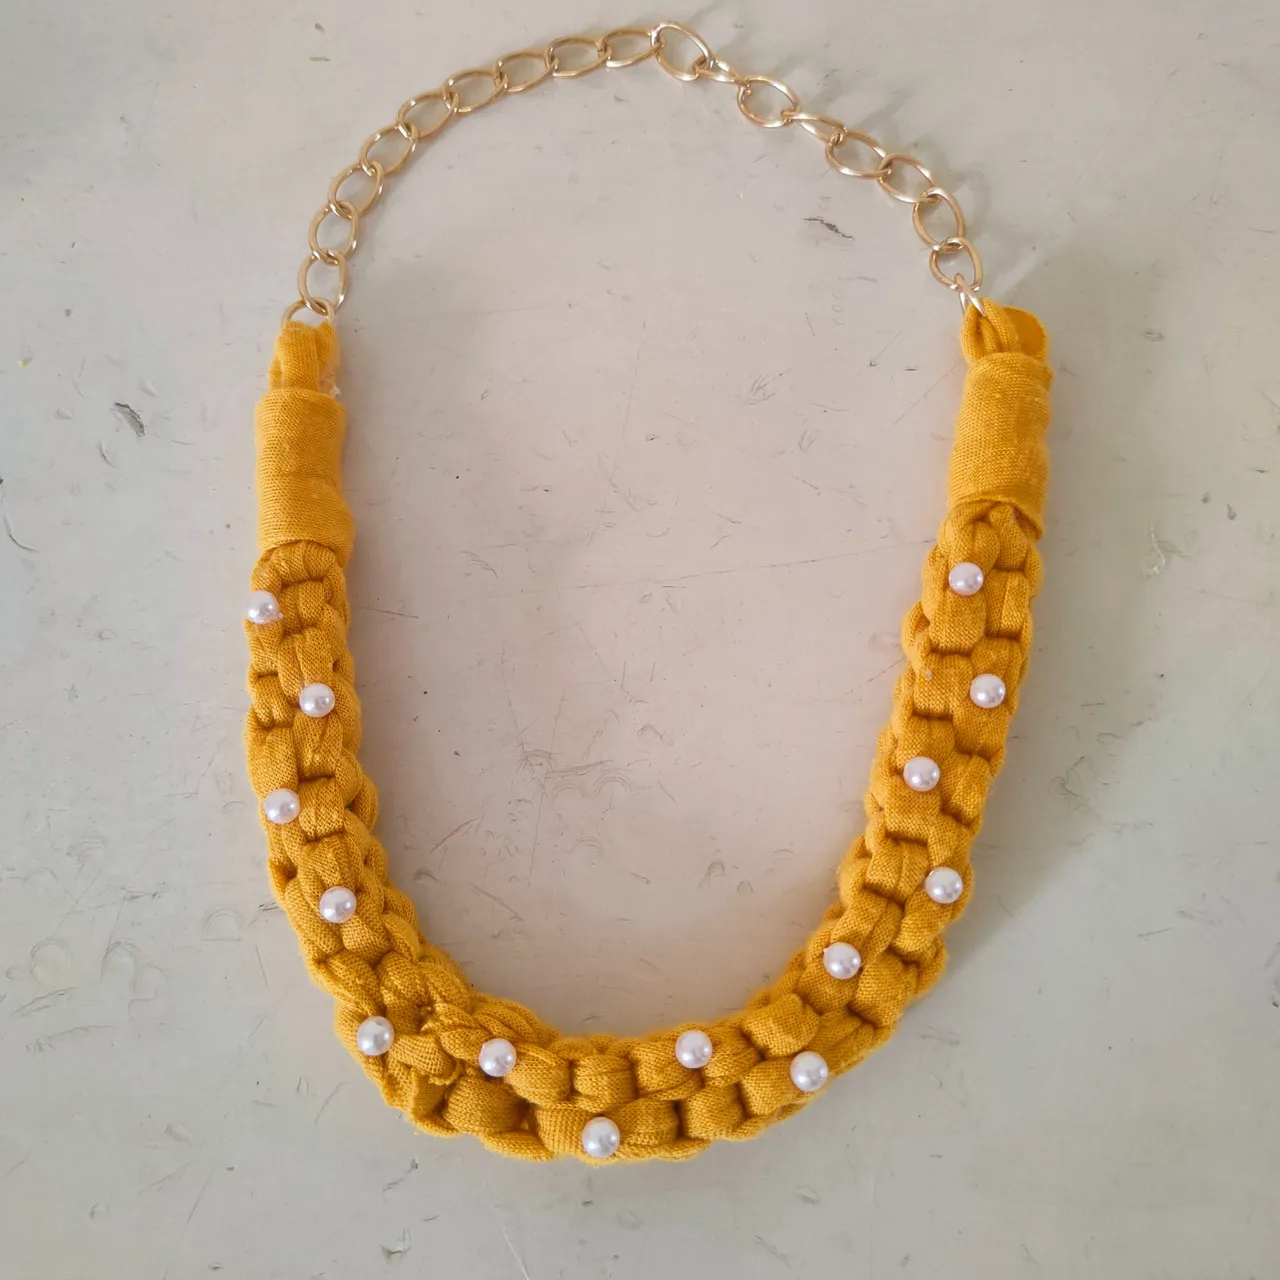
✨ Paso 13.| Por último vamos a fijar en el collar nuestras perlas con la ayuda del Silicon en barra.
✨ Step 13.| Finally, we will fix our pearls on the necklace with the help of the silicon stick.
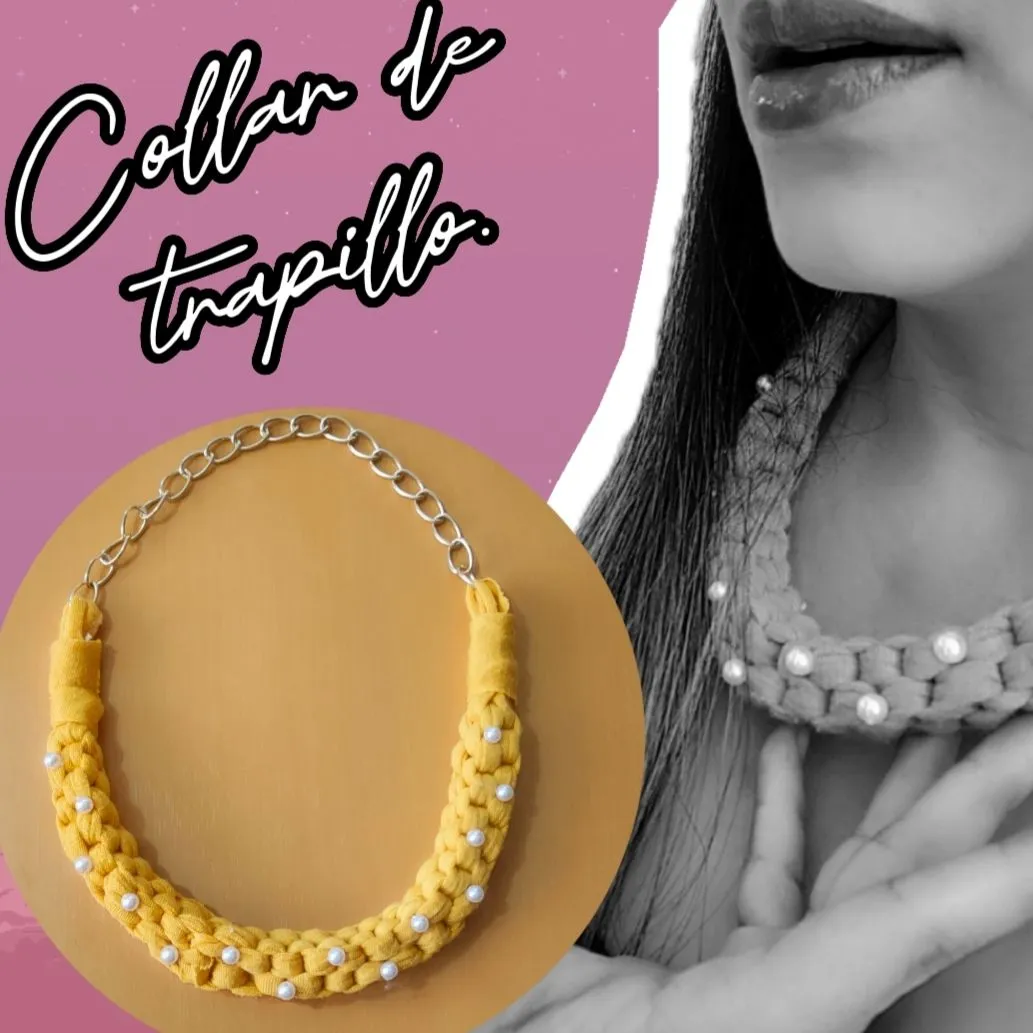
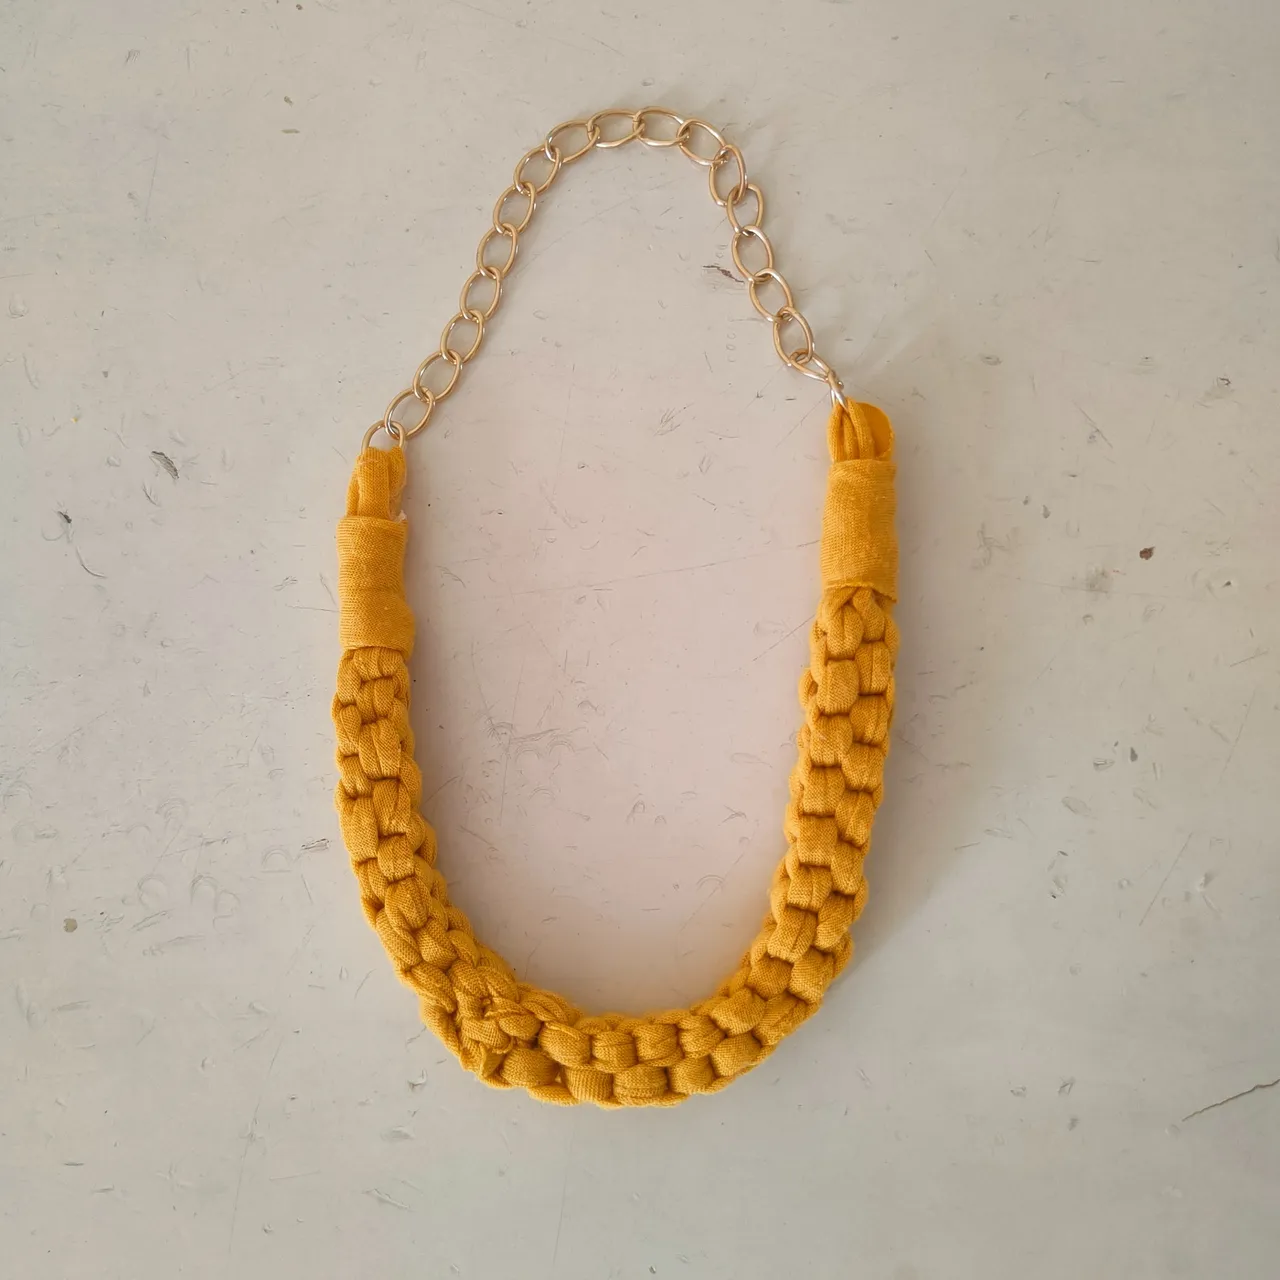
De esta manera habremos culminado nuestro hermoso collar realizado con trapillo.
In this way we will have finished our beautiful necklace made with ragweed.
Resultado || Result
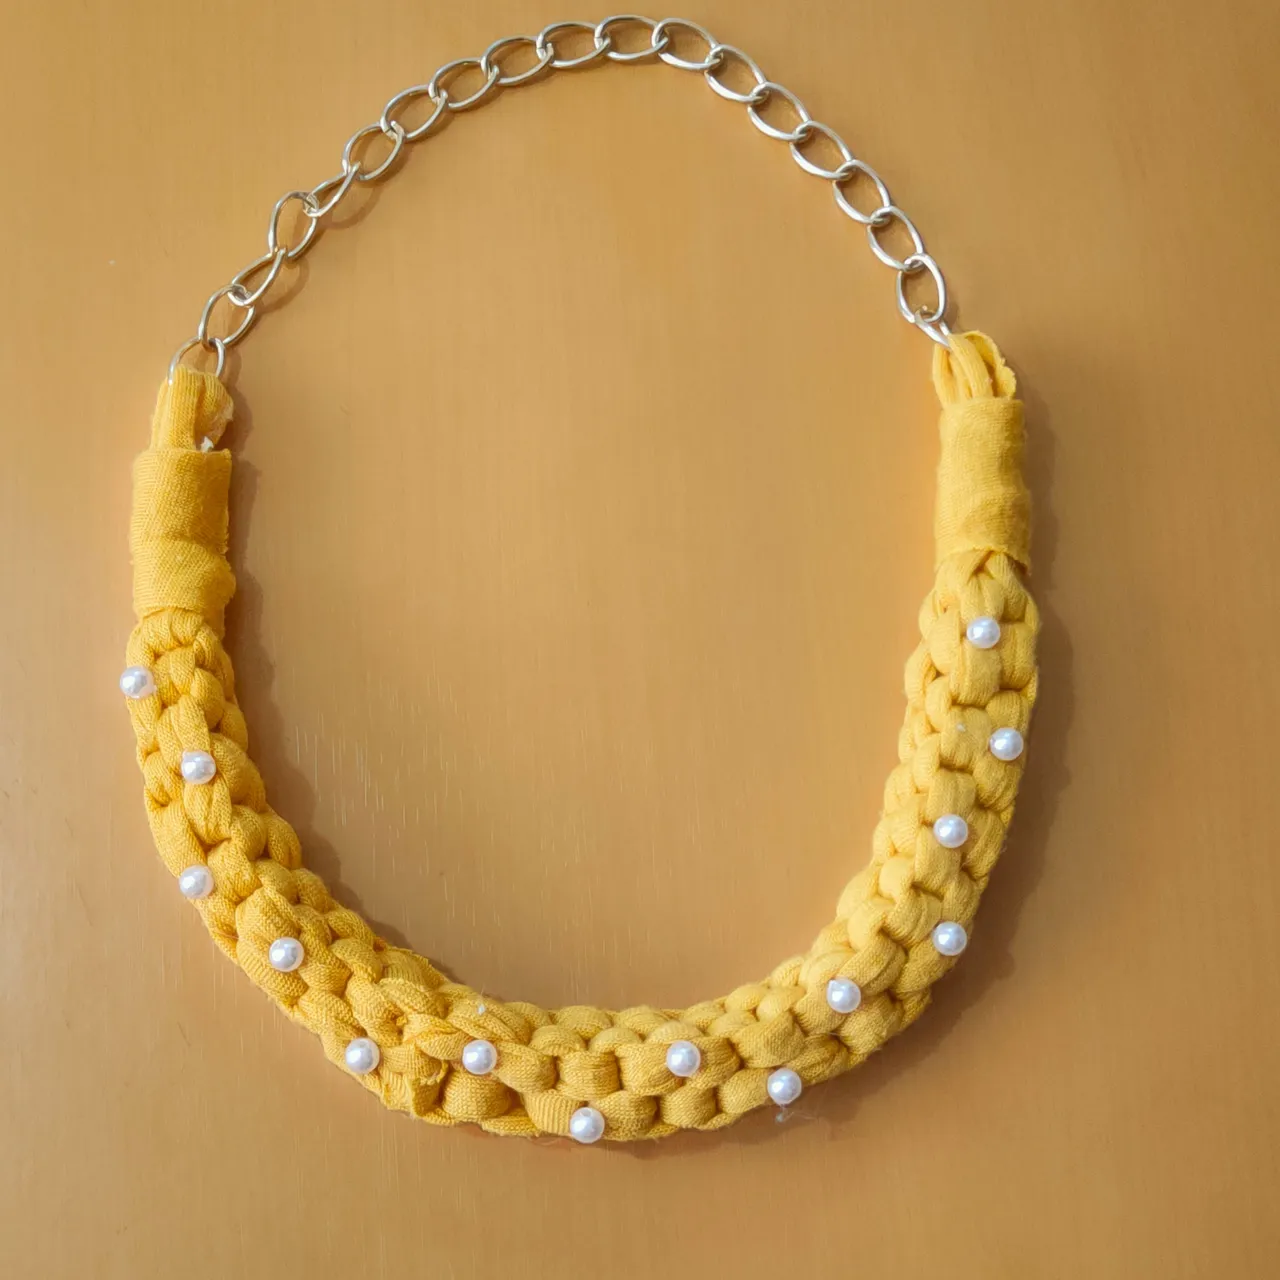
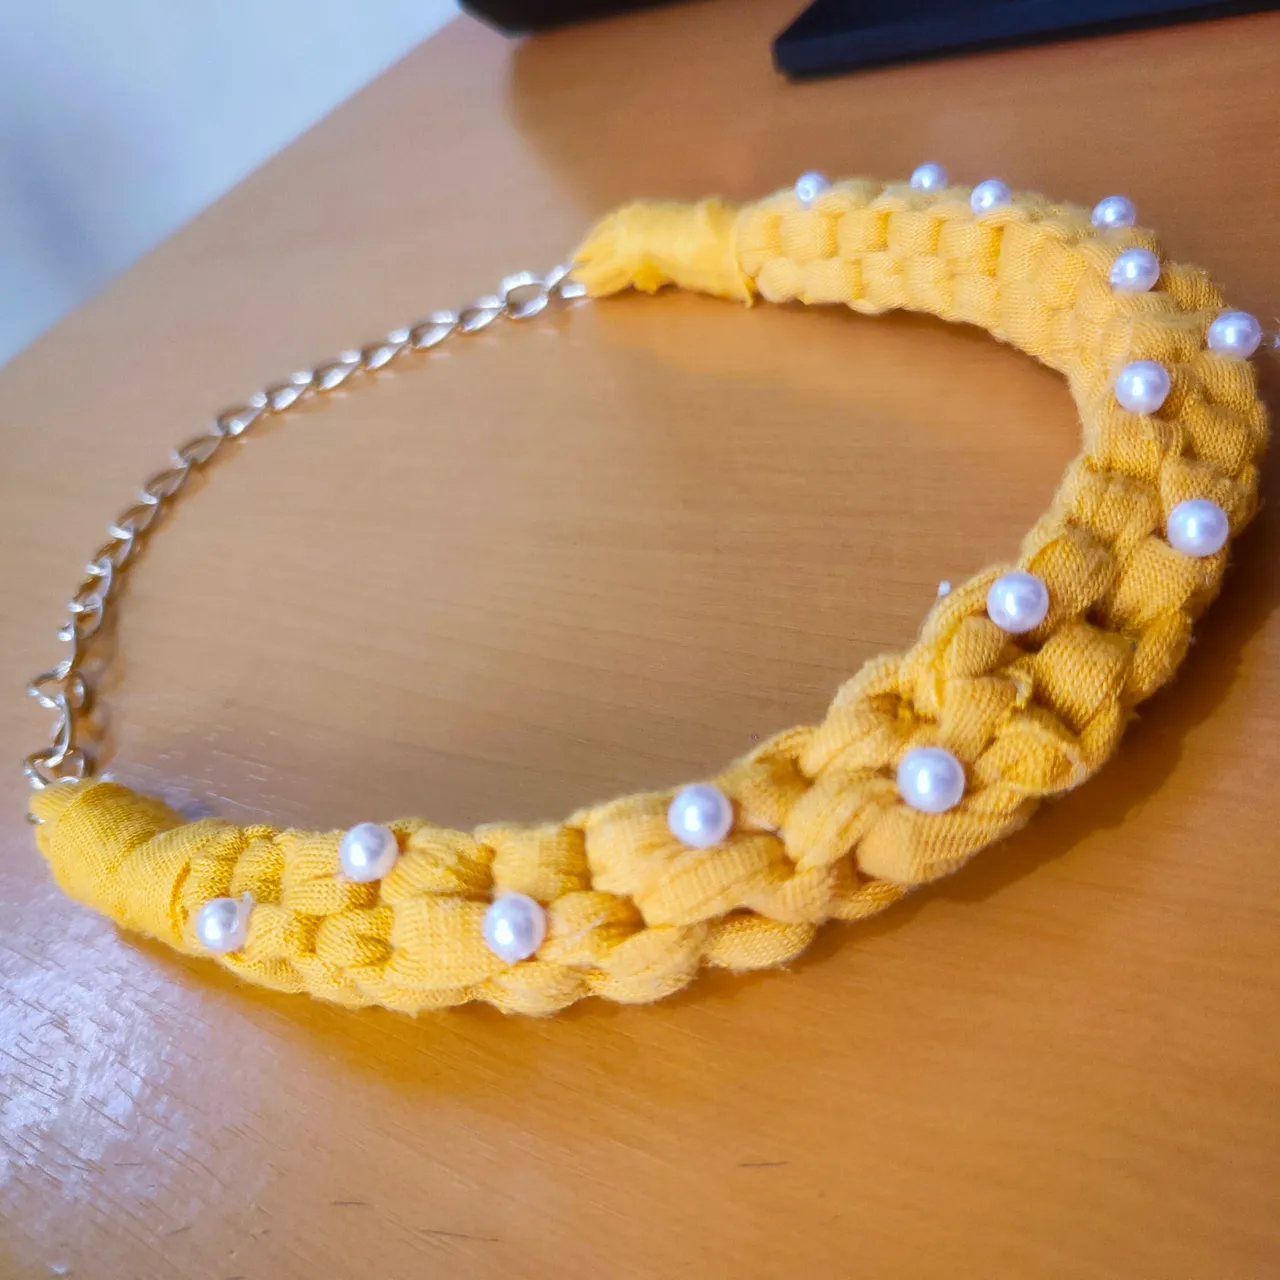
¿Que le ha parecido el resultado? Espero el mismo fueses de su agrado y hasta se animen a recrearlo, es un accesorio fácil de realizar con pocos materiales y que luce bastante bonito, como en cada entrega agradezco a cada uno por su tiempo, atención y apoyo será hasta un próximo post.
What did you think of the result? I hope you like it and you even dare to recreate it, it is an easy accessory to make with few materials and looks quite nice, as in each delivery I thank everyone for their time, attention and support will be until a next post.
La creatividad no tiene límite. || There is no limit to creativity. ✨💎🎉🌷

🎥Imágenes y vídeo creados con: |Images and video created with: Youcut video| Giphy | Canva |
🇪🇸 Traducido con DeepL