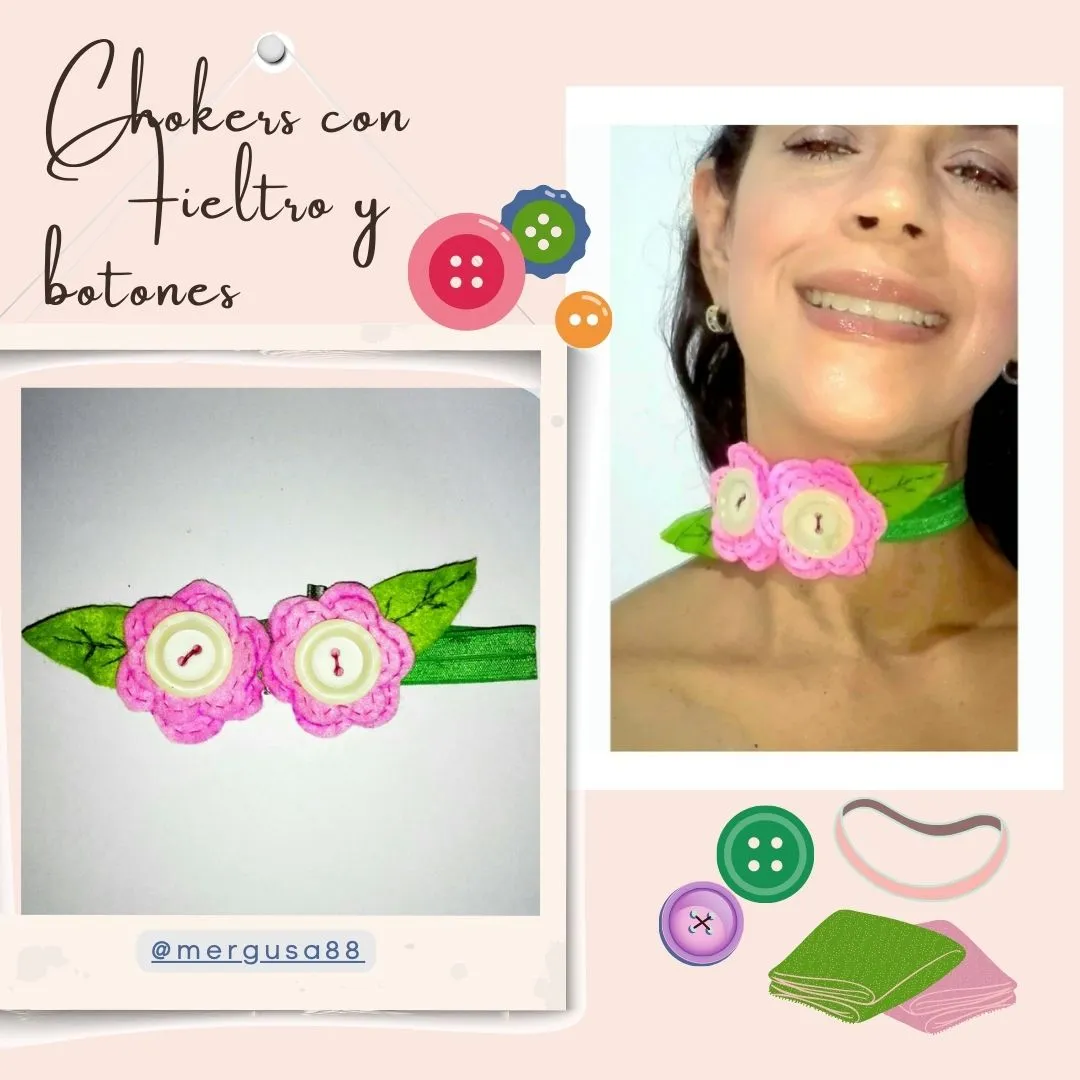

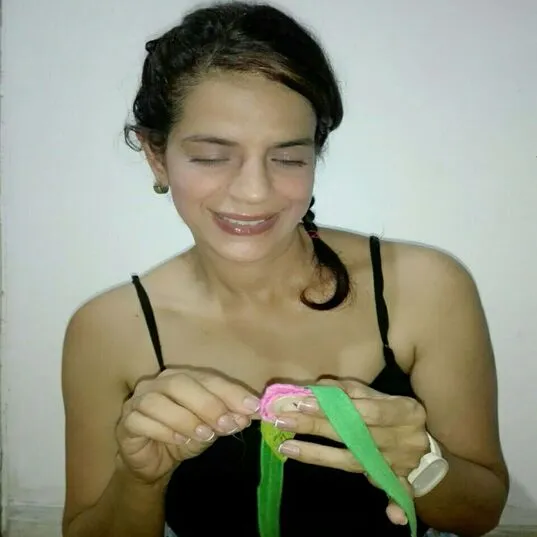
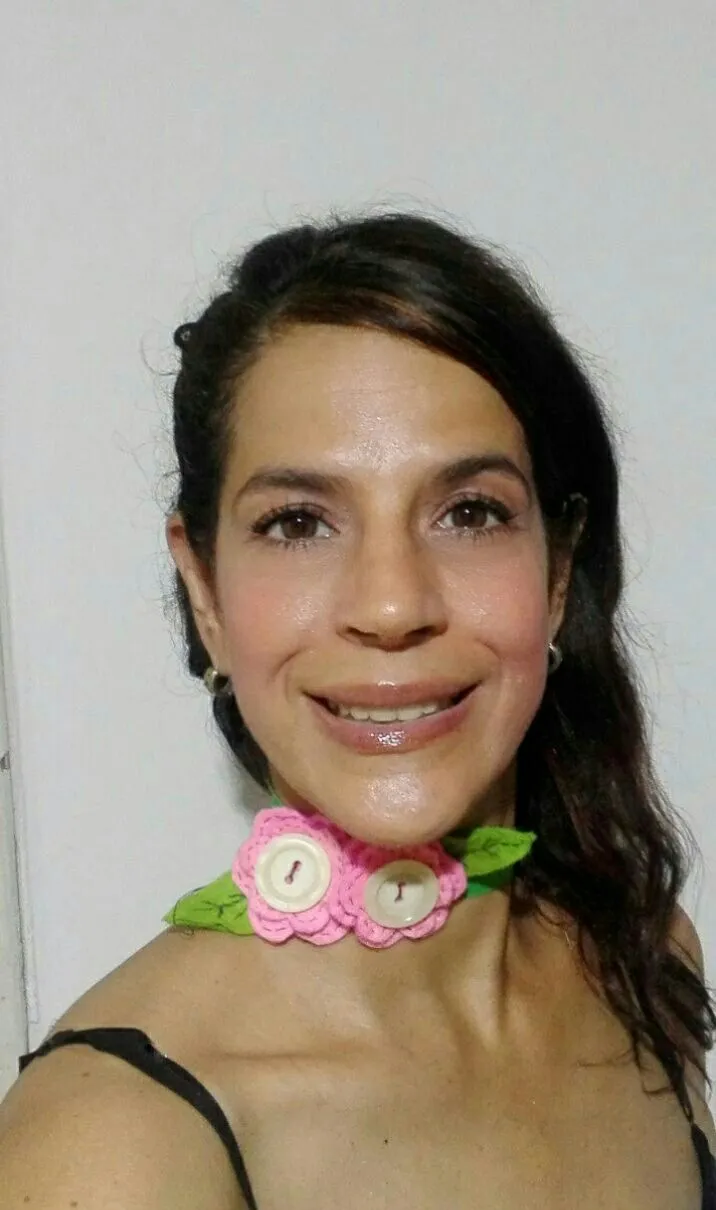
Es un placer estar aquí de nuevo. Empiezo por decir que esta publicación la tenía pendiente de subir, quería participar en la iniciativa de elaboración de un accesorio con botones que hubo hace unos días, tristemente tuve que guardar reposo por dolor en la columna por varias semanas, pero ni modo, son esos momentos que la vida nos obliga a hacer un alto y cuidar nuestra salud. Gracias a Dios ya estoy mejor y estoy aquí para mostrarles este Chokers con fieltro y botones que hice para esos días 😇
It's a pleasure to be here again. I start by saying that I had this publication pending to upload, I wanted to participate in the initiative of making an accessory with buttons, sadly I had to rest because of pain in the spine for several weeks, so no way, are those moments that life forces us to take a break and take care of our health. Thank God I'm better now and I'm here to show you these Chokers with felt and buttons that I made for those days. 😇
Para este Chokers inspirado en flores, utilicé dos botones que tenía guardados y eran de una chaqueta. También usé cinta elástica que es ideal para hacer este tipo de accesorio ya que por ser elástica queda pegadita al cuello, he visto pulseras hechas con esta cintas y quedan hermosas. Para las flores usé un retazo de fieltro de cada color que compré en una mercería; hice solo 2 flores porque quería que se viera la cinta elástica, pero se puede hacer tantas flores como quieran, de varios tamaños y colores y usarlos como cintillos.
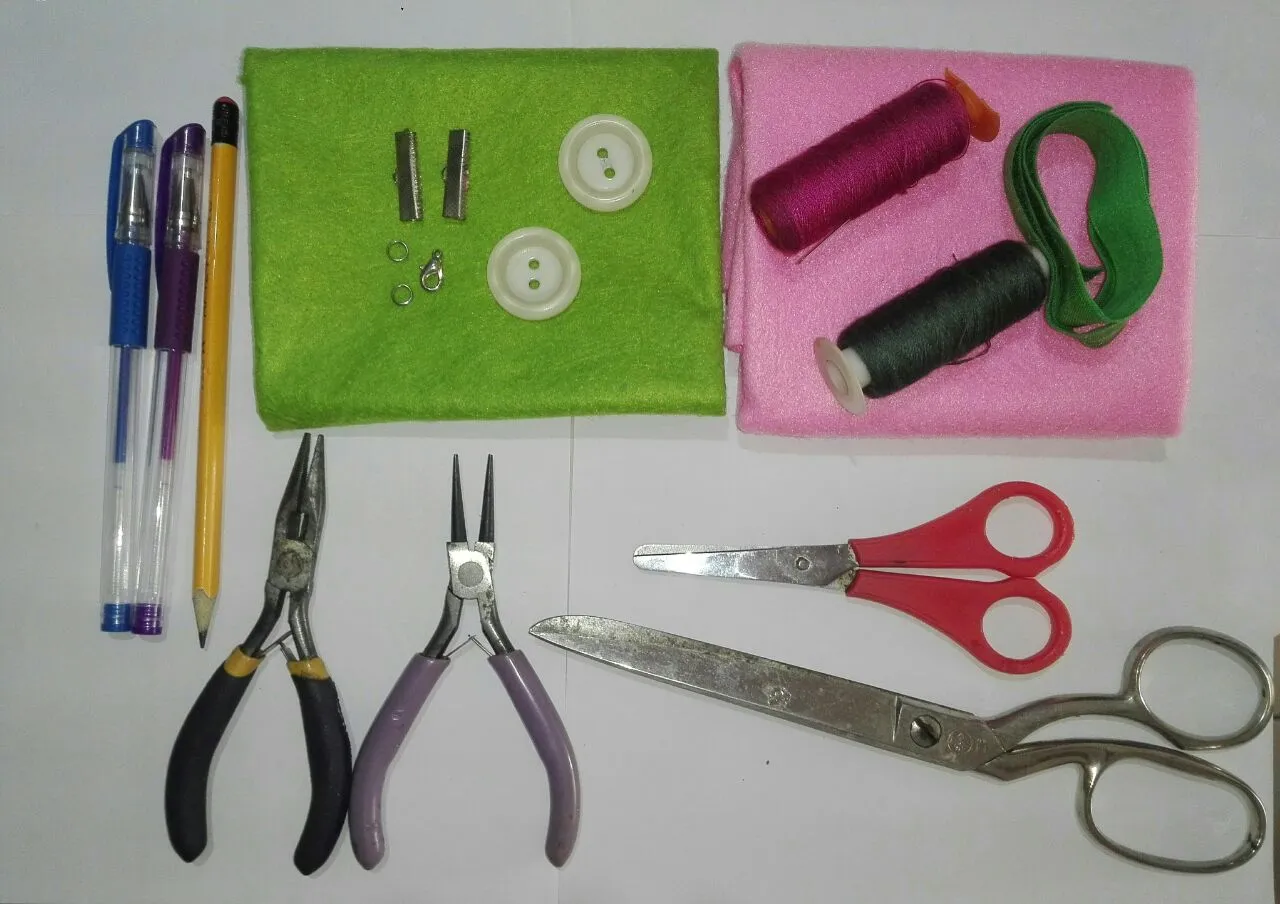
A continuación paso a detallar la lista completa de materiales y elaboración:
The following is the complete list of materials and elaboration:
- Fieltro de colores rosa y verde
- 1/2 metro de cinta elástica color verde
- 2 Botones grandes
- Hilos y agujas
- 2 argollas para collar
- 1 broche pico de loro
- 2 maletas de bisutería
- Pinzas para bisutería
- Tijeras
- Lápiz y marcadores
- Hoja para sacar los moldes
- Pink and green felt
- 1/2 meter of green elastic ribbon
- 2 large buttons
- Thread and needles
- 2 rings for necklace
- 1 parrot beak brooch
- 2 suitcases for costume jewelry
- Tweezers for costume jewelry
- Scissors
- Pencil and markers
- Sheets to make the molds
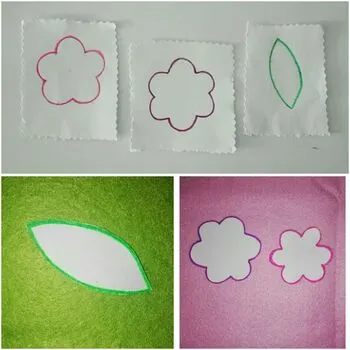
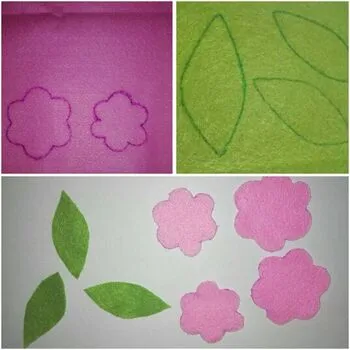
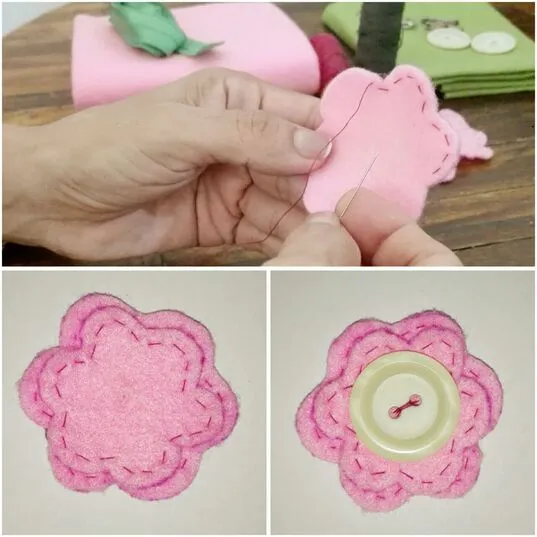
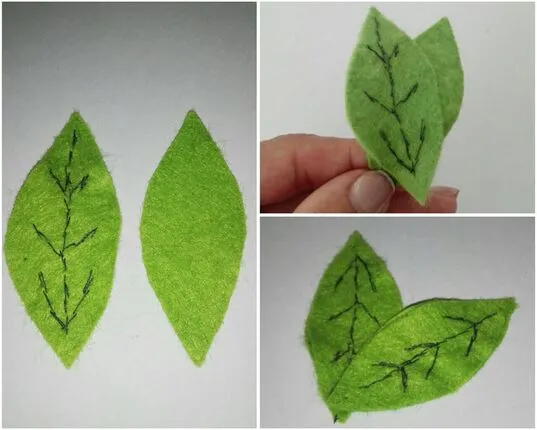
PASO 1 : Lo primero será sacar los patrones en papel, utilicé internet para encontrar la figura de una flor, para este diseño hice un molde de flor más grande y otro más pequeño. También busqué un molde de hoja, por cada hoja corté dos veces el patrón ,al final una hoja irá encima de la otra.
STEP 1 : The first thing is to get the patterns on paper, I used the internet to find the figure of a flower, for this design I made a mould of a larger flower and a smaller one. I also looked for a leaf mould, for each leaf I cut the pattern twice, at the end one leaf will go on top of the other.
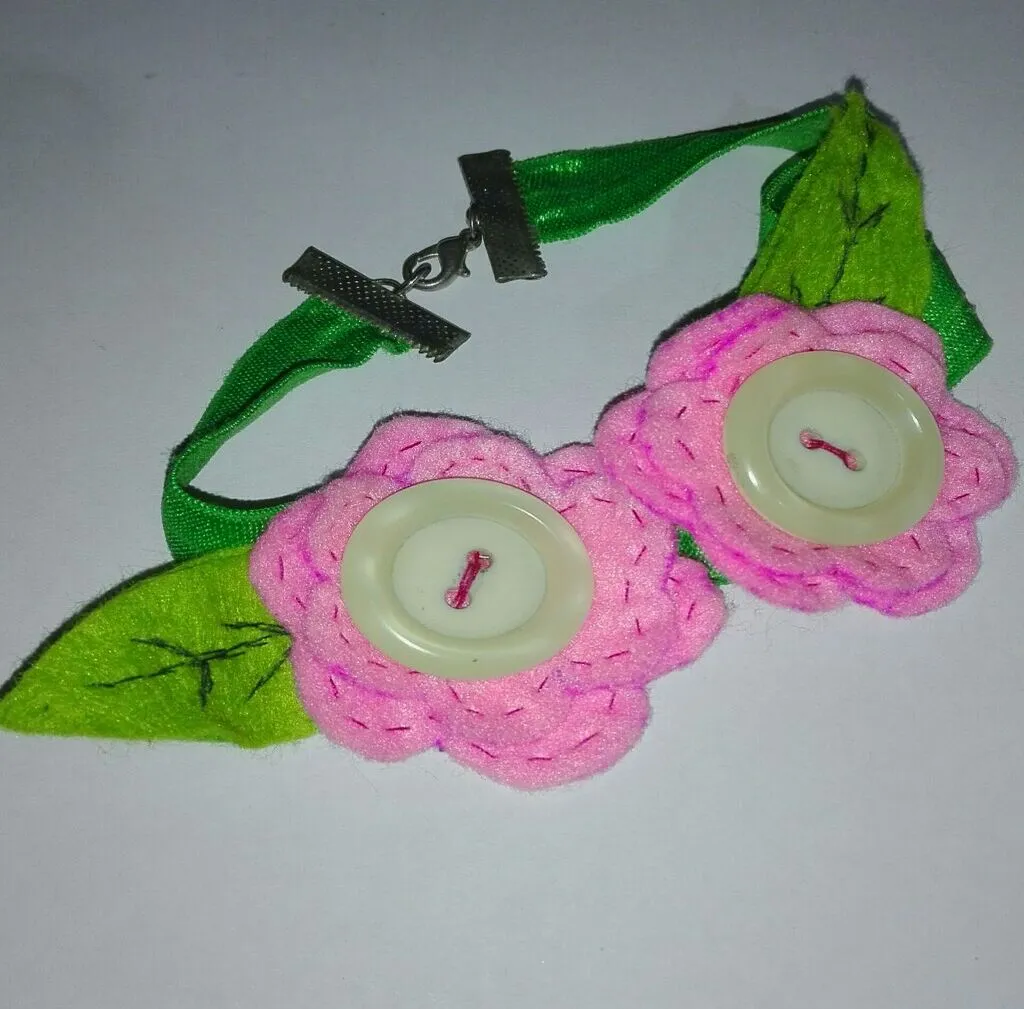
PASO 2: Cosí alrededor de cada forma de flor, utilizando un color fucsia para contrastar con el rosa del fieltro, luego coloqué la flor pequeña encima de la grande y cosí unas puntadas para unirlas. Después cosí el botón encima.
STEP 2: I sewed around each flower shape, using a fuchsia colour to contrast with the pink of the felt, then placed the small flower on top of the large one and sewed a few stitches to join them together. I then sewed the button on top.
PASO 3: Es el turno de las hojas, así que agarré el hilo verde y empecé a dar puntadas para crear como un efecto bordado. Sólo lo hice en una sola hoja, luego tomé la otra hoja y los uní con unas puntadas. Esto es para que por detrás no se vean las puntadas del bordado.
STEP 3: It's the turn of the leaves, so I grabbed the green thread and started stitching to create like an embroidery effect. I only did it on one leaf, then I took the other leaf and joined them with a few stitches. This is so that the embroidery stitches don't show on the back.
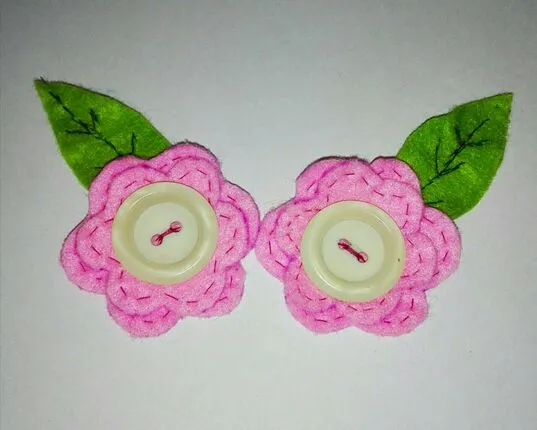
PASO 4: Cuando ya tenía listas las flores y las hojas, tomé hilo y aguja y uní las piezas.
STEP 4: When I had the flowers and leaves ready, I took thread and needle and joined the pieces together.
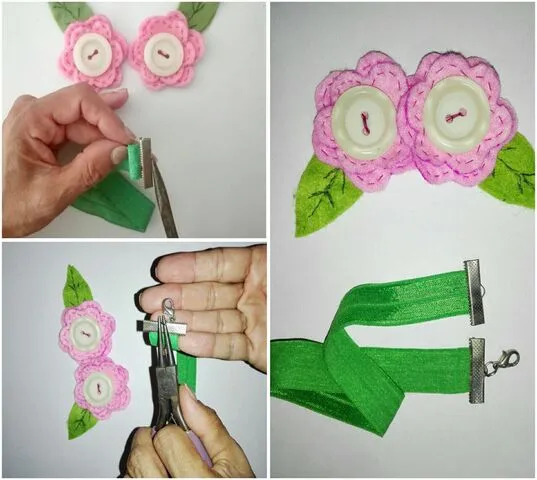
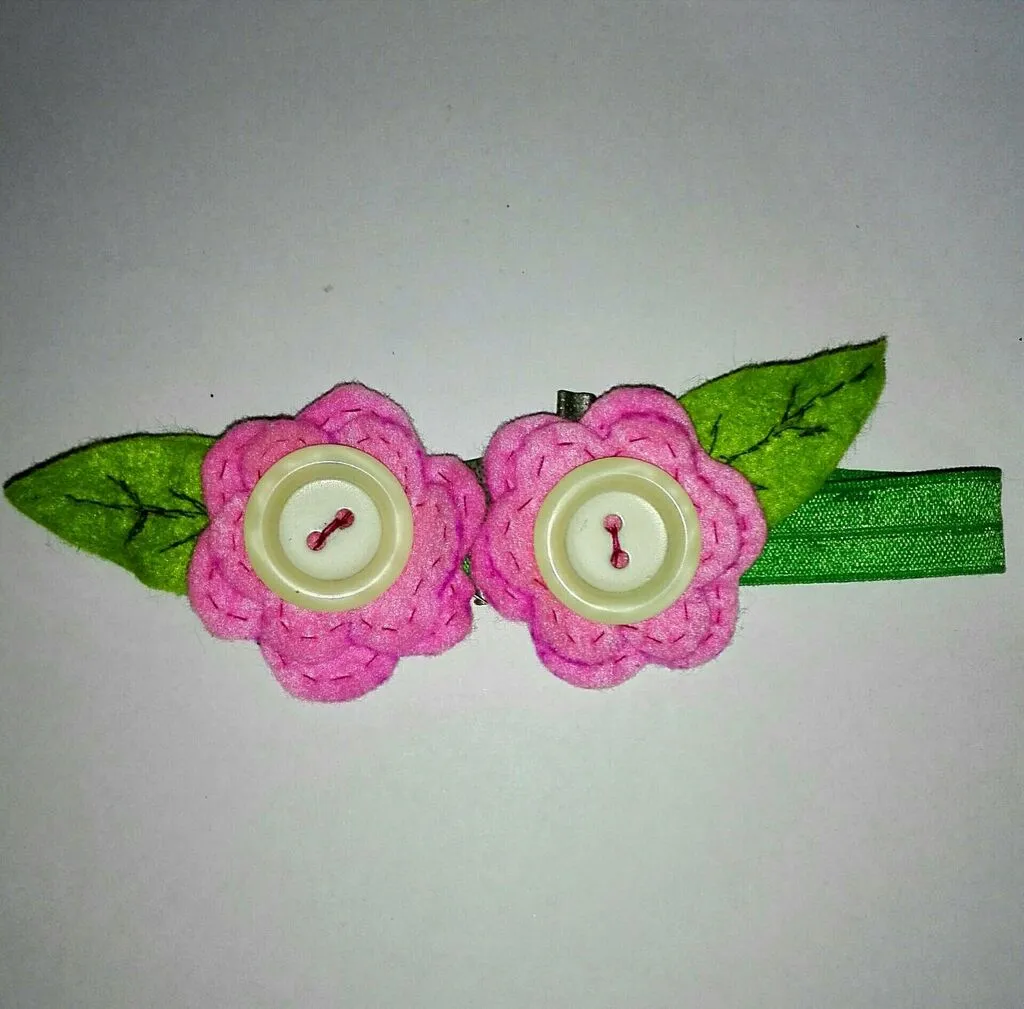
PASO 5: Es el momento de saber dónde cortar la cinta elástica, así que medí el cuello y corté con tijera. Con ayuda de las pinzas, coloqué las maletas y las anillas en ambos extremos y por último el broche en la argolla que quedaría en el lado derecho.
STEP 5: It's time to know where to cut the elastic band, so I measured the neck and cut with scissors. With the help of the pliers, I placed the suitcases and the rings on both ends and finally the brooch on the ring that would be on the right side.
PASO 6: Volví a medir la cinta elástica en el cuello y marqué dónde quería que estuvieran las flores para luego coserlas en la cinta.
STEP 6: I remeasured the elastic ribbon at the neck and marked where I wanted the flowers to be and then sewed them onto the ribbon.
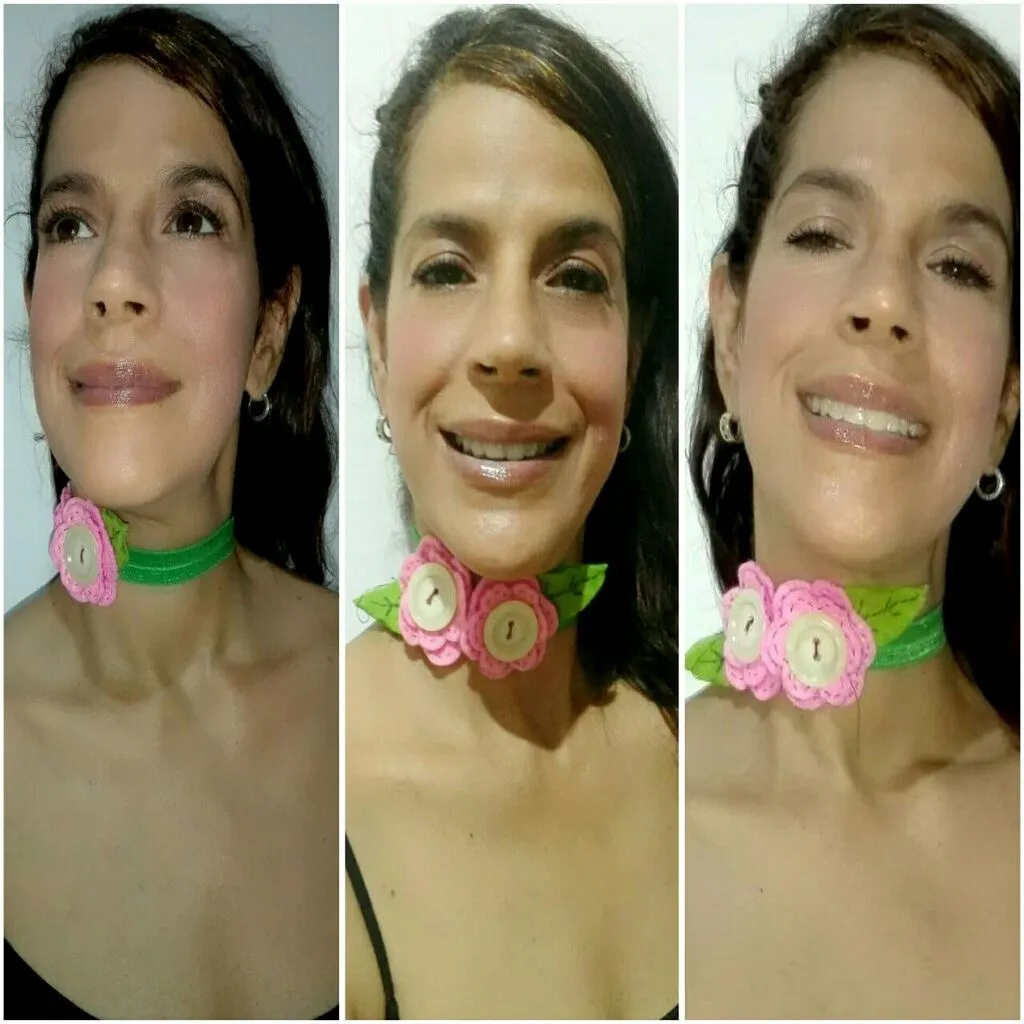
Y así es como quedó este accesorio. Me encantó y lo mejor es que es muy sencillo y se hace con muy pocos materiales. La verdad es que siente genial llevar algo hecho por ti misma.
And this is how this accessory turned out. I loved it and the best part is that it is very simple and it is made with very few materials. The truth is that it feels great to wear something made by yourself.
Espero esta publicación sea de tu agrado. Tus sugerencias y comentarios siempre son bienvenidos.
Con cariño...
Mercedes 💜
I hope this publication is to your liking. Your suggestions and comments are always welcome.
With love...
Mercedes 💜
Todas las fotografías fueron tomadas con mi telefóno móvil // All photos were taken with my mobile phone.
Fotografías editadas en App GridArt y Portada editada en Canva // Photos edited in App GridArt and Cover edited in Canva
Separadores realizados en Canva // Dividers made in Canva
Traducción realizada con www.deepl.com // Translation made with www.deepl.com
