
Felíz miércoles comunidad Jewelry, saludos y bendiciones para todos espero se encuentren bien en sus hogares resguardados debido a la situación tan tensa que estamos viviendo, realmente me he sentido muy ansiosa, por lo que realizar algún accesorio puede ayudar a controlar esto, es difícil pero aquí seguimos compartiendo lindos accesorios.
Happy Wednesday Jewelry community, greetings and blessings to all, I hope you are well in your sheltered homes due to the tense situation we are experiencing, I have really felt very anxious, so making an accessory can help control this, it is difficult but Here we continue sharing cute accessories.
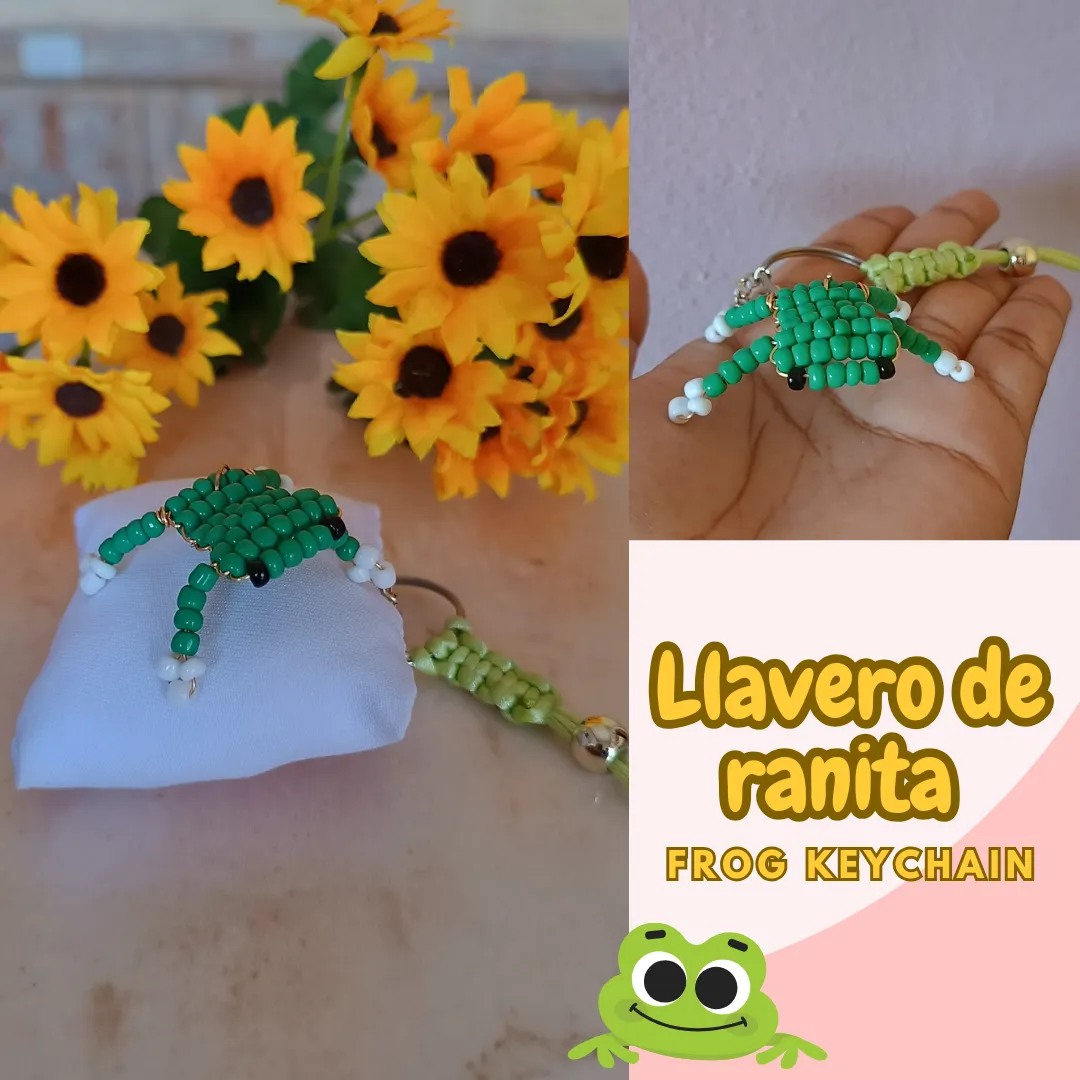
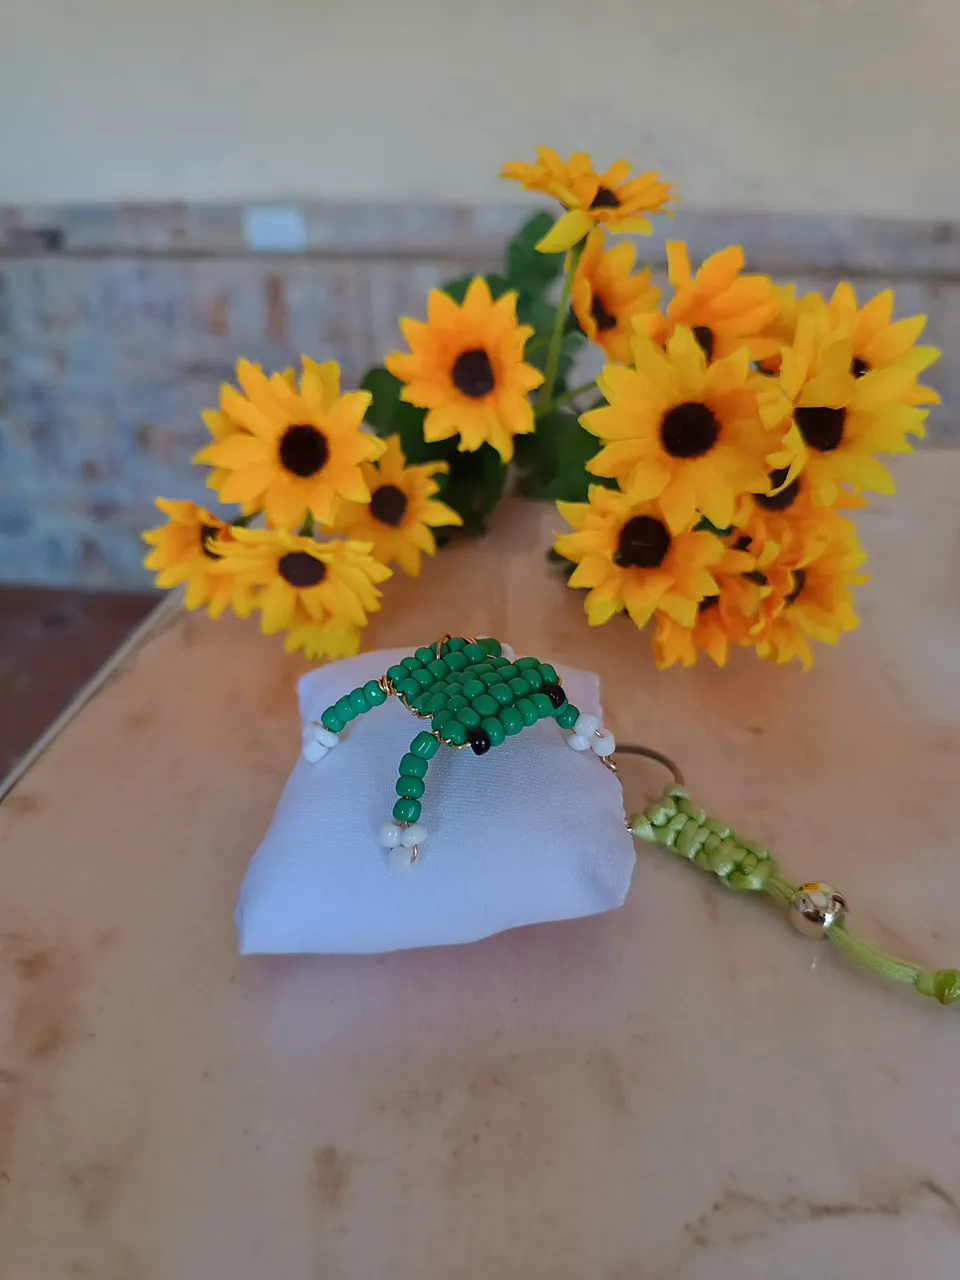
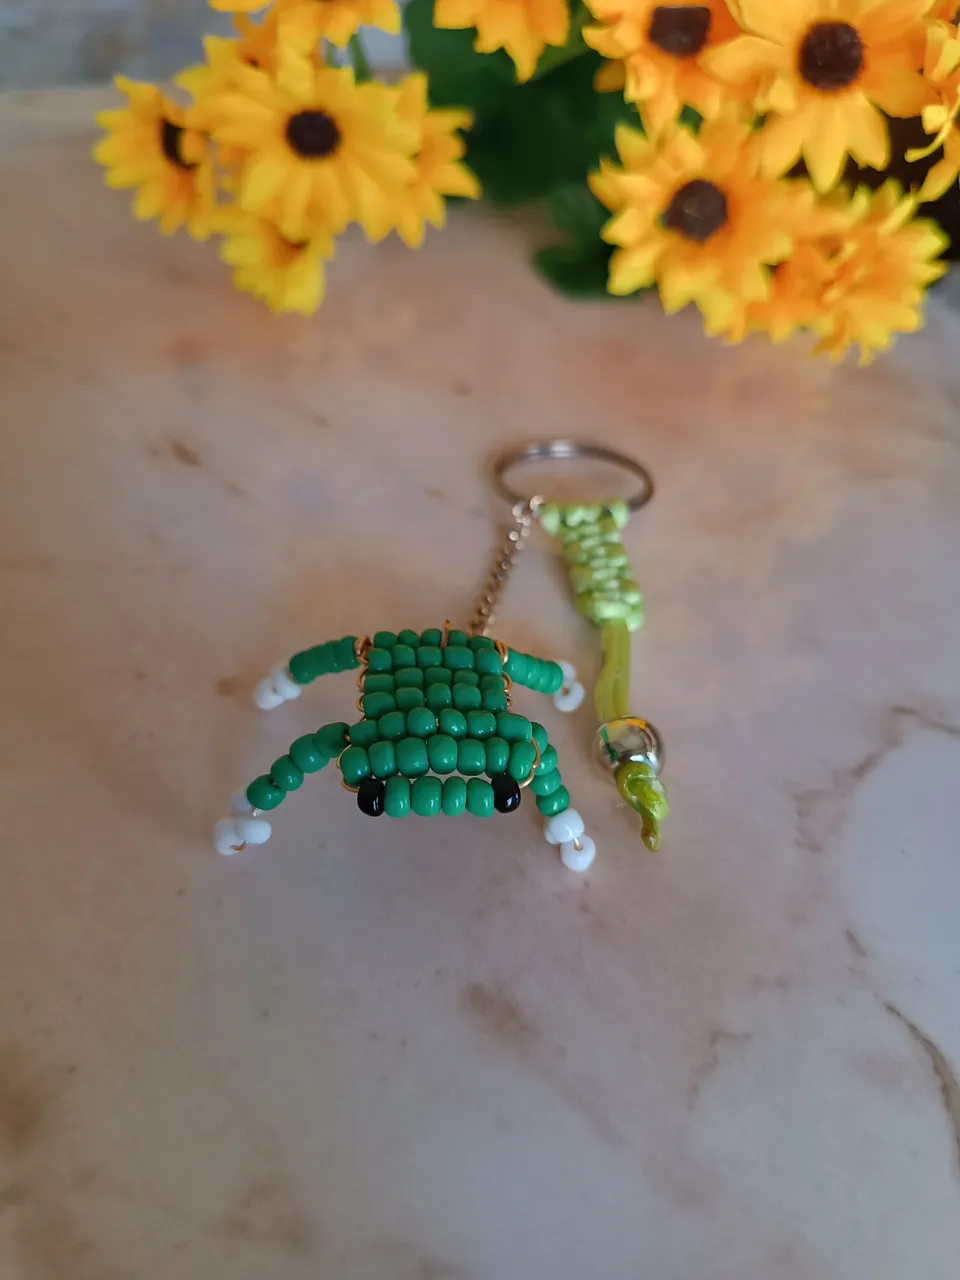
En ésta ocasión les comparto un llavero de ranita en mostacillas, este llavero es muy tierno, utilicé alambre dorado para dar una mejor forma, me sentí contenta con el resultado y hasta mi madre quería que se lo regalara, es un llavero divertido y facil de realizar, puedes realizarlo para obsequiar, o para emprender, a continuación les muestro los materiales y el paso a paso.
On this occasion I share with you a frog keychain made of beads, this keychain is very cute, I used gold wire to give it a better shape, I was happy with the result and even my mother wanted me to give it to her, it is a fun and easy keychain to make, you can make it as a gift, or to undertake, below I show you the materials and the step by step.
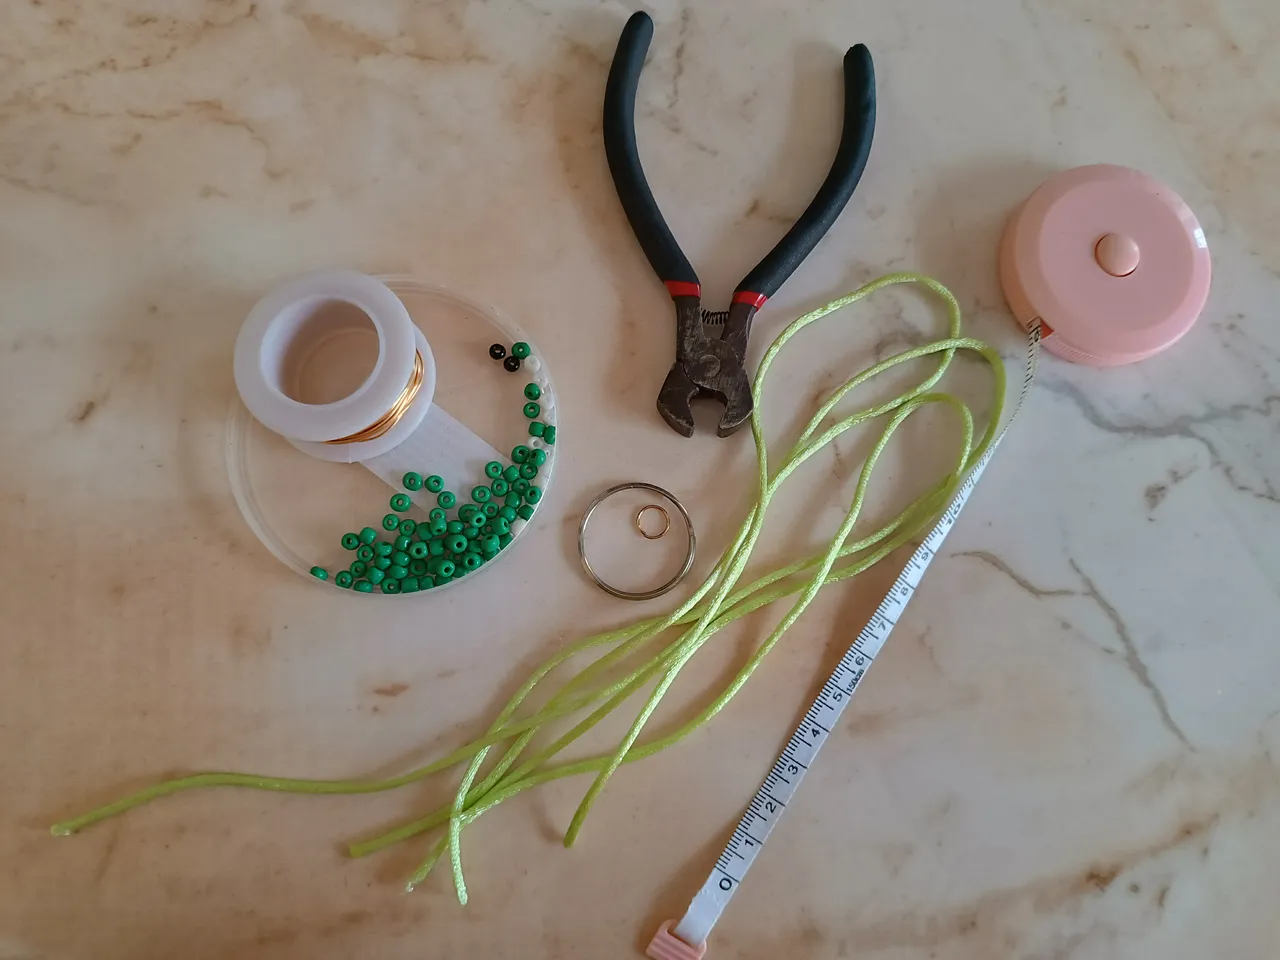
Materiales:
💚50 cm de alambre dorado #22.
💚53 Mostacillas color verde.
💚12 mostacillas color blanco.
💚2 mostacillas color negro.
💚Retazo de cadena.
💚1 argolla.
💚Cola de ratón color verde.
💚1 cuenta dorada grande.
💚Pinza de corte.
Materials:
50 cm of #22 gold wire.
53 Green beads.
12 white beads.
2 black beads.
Chain scrap.
1 ring.
Green mouse tail.
1 large golden bead.
Cutting clamp.
Paso a paso / Step by Step
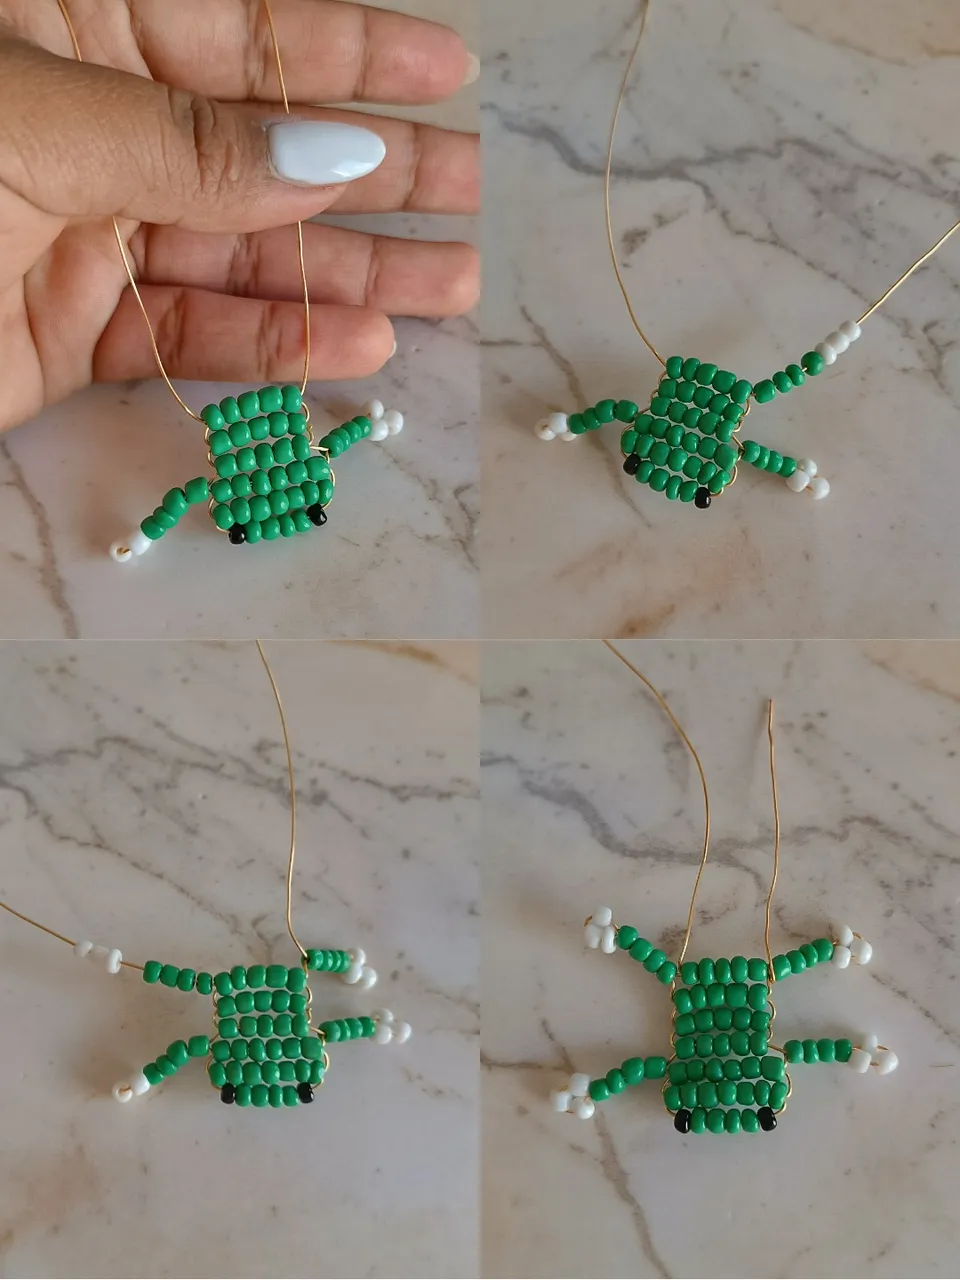
El primer paso es cortar 50 cm de alambre dorado, voy a introducir un mostacilla negra, luego cuatro mostacillas color verde y una mostacilla negra nuevamente, luego voy a introducir siete mostacillas color verde, y voy a pasar la otra punta del alambre a través de las siete mostacillas.
The first step is to cut 50 cm of gold wire, I am going to insert one black bead, then four green beads and one black bead again, then I am going to insert seven green beads, and I am going to pass the other end of the wire through the seven little beads.
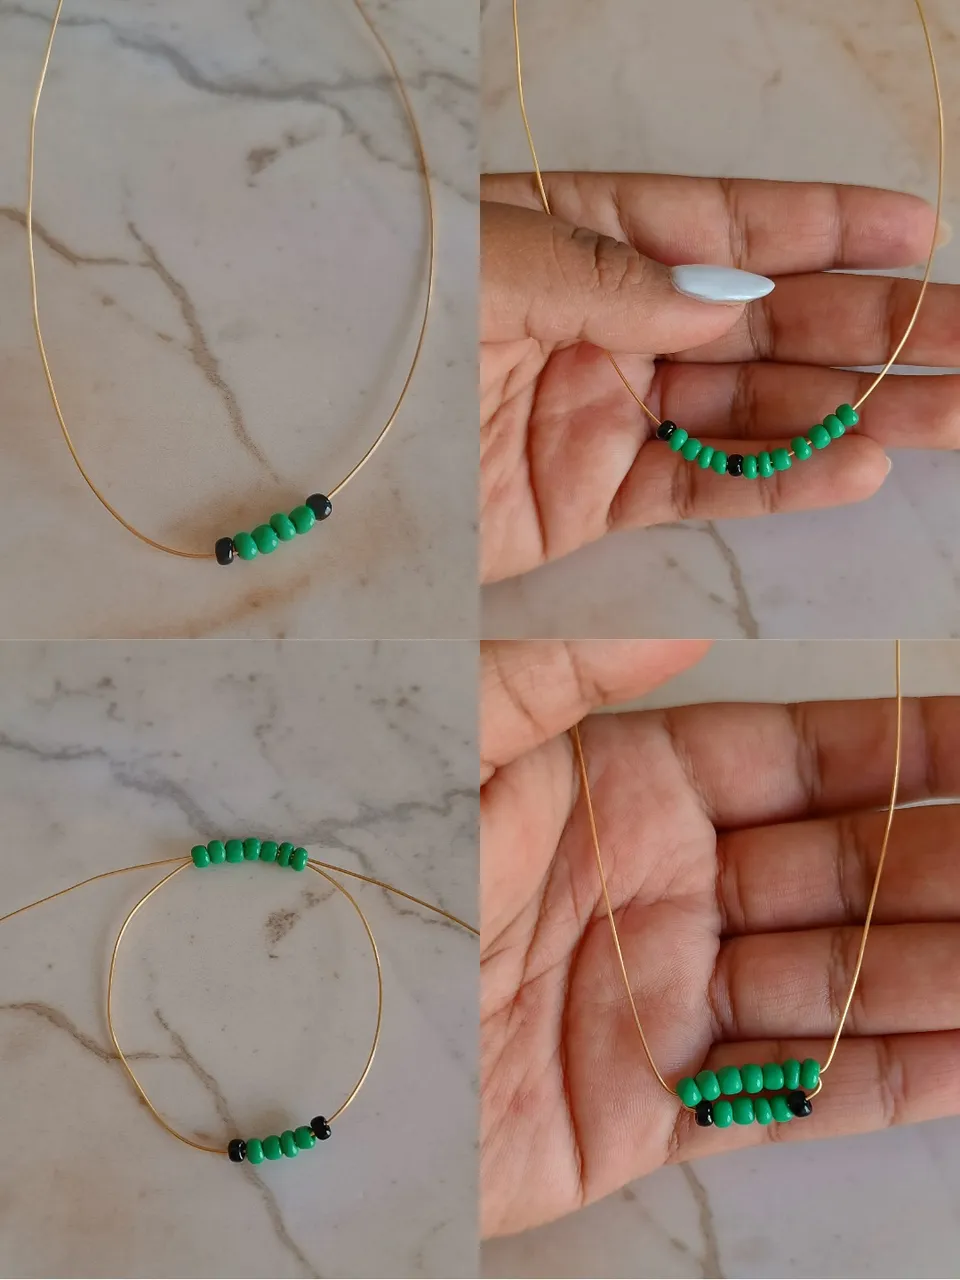
Nos aseguramos que las mostacillas queden alineadas y ajustadas, luego voy a introducir seis mostacillas verdes y pasamos el alambre a través de ellas, luego en una de las puntas del alambre coloqué cuatro mostacillas color verde seguido de tres mostacillas color blanco, con cuidado voy a pasar el mismo alambre en sentido contrario a través de las mostacillas verdes, de esta forma hemos realizado una de las patitas, realizamos el mismo procedimiento del otro lado.
We make sure that the beads are aligned and adjusted, then I am going to introduce six green beads and pass the wire through them, then on one of the ends of the wire I placed four green beads followed by three white beads, carefully I will pass the same wire in the opposite direction through the green beads, in this way we have made one of the legs, we carry out the same procedure on the other side.
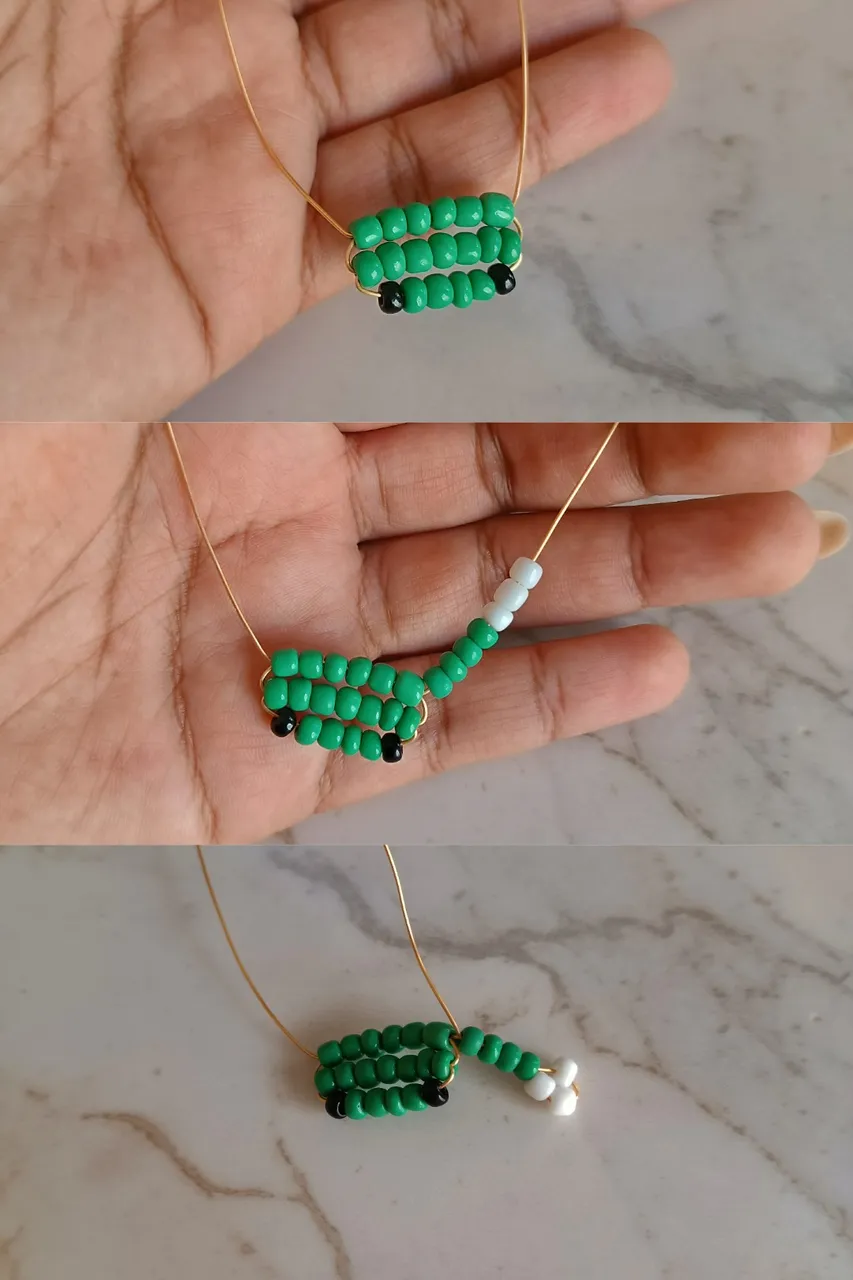
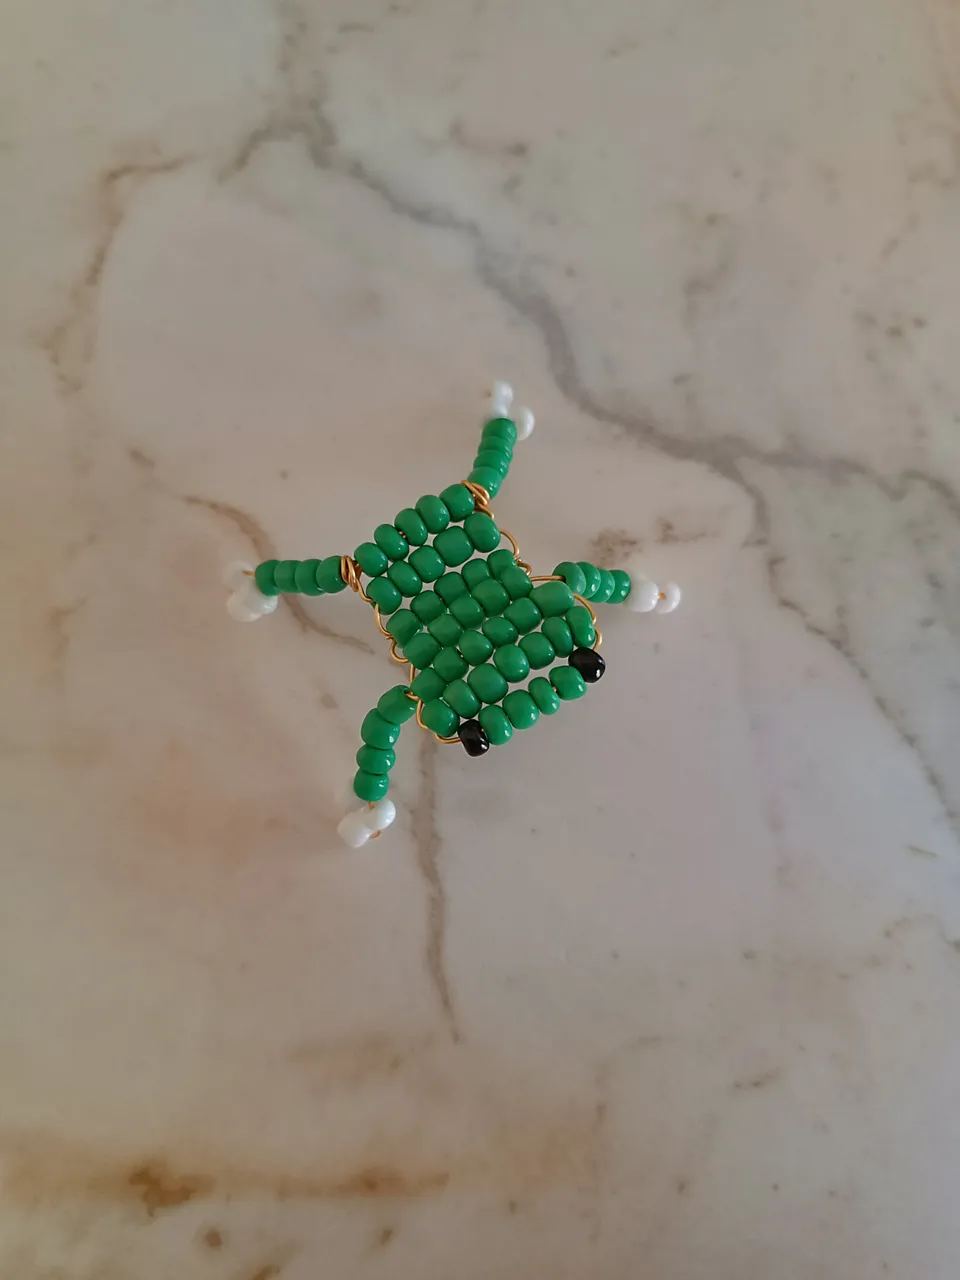
Voy a agregar tres filas de cinco mostacillas color verde, luego voy a realizar las patitas traseras de la misma forma que ya les expliqué, al terminar cerramos con una fila más de cinco mostacillas, de cada lado voy a dar tres vueltas al alambre en las esquinas y cortamos con una pinza.
I am going to add three rows of five green beads, then I am going to make the rear legs in the same way that I already explained to you, when we finish we close with one more row of five beads, on each side I am going to make three turns of the wire in the corners and cut with tweezers.
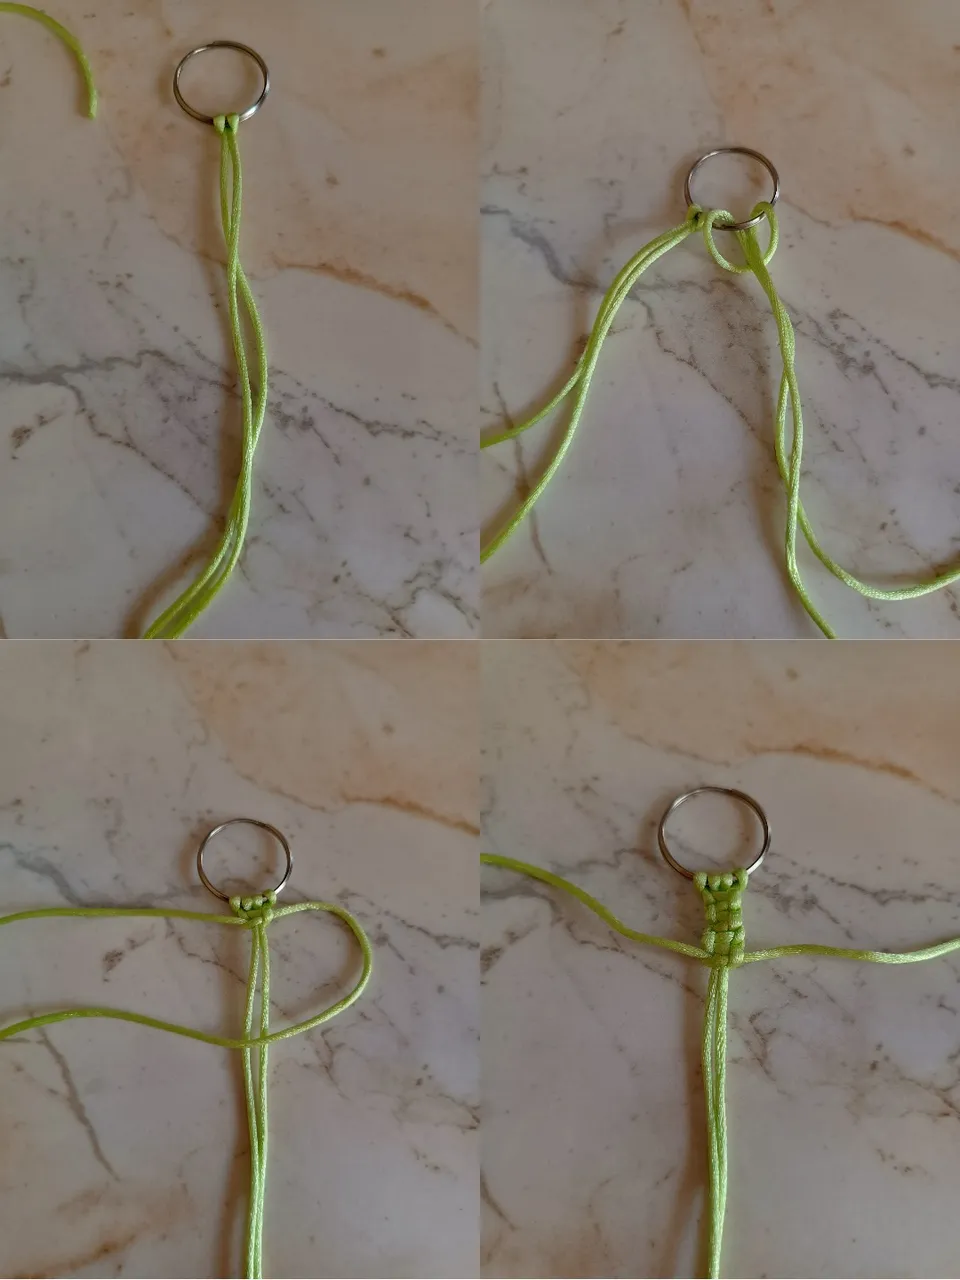
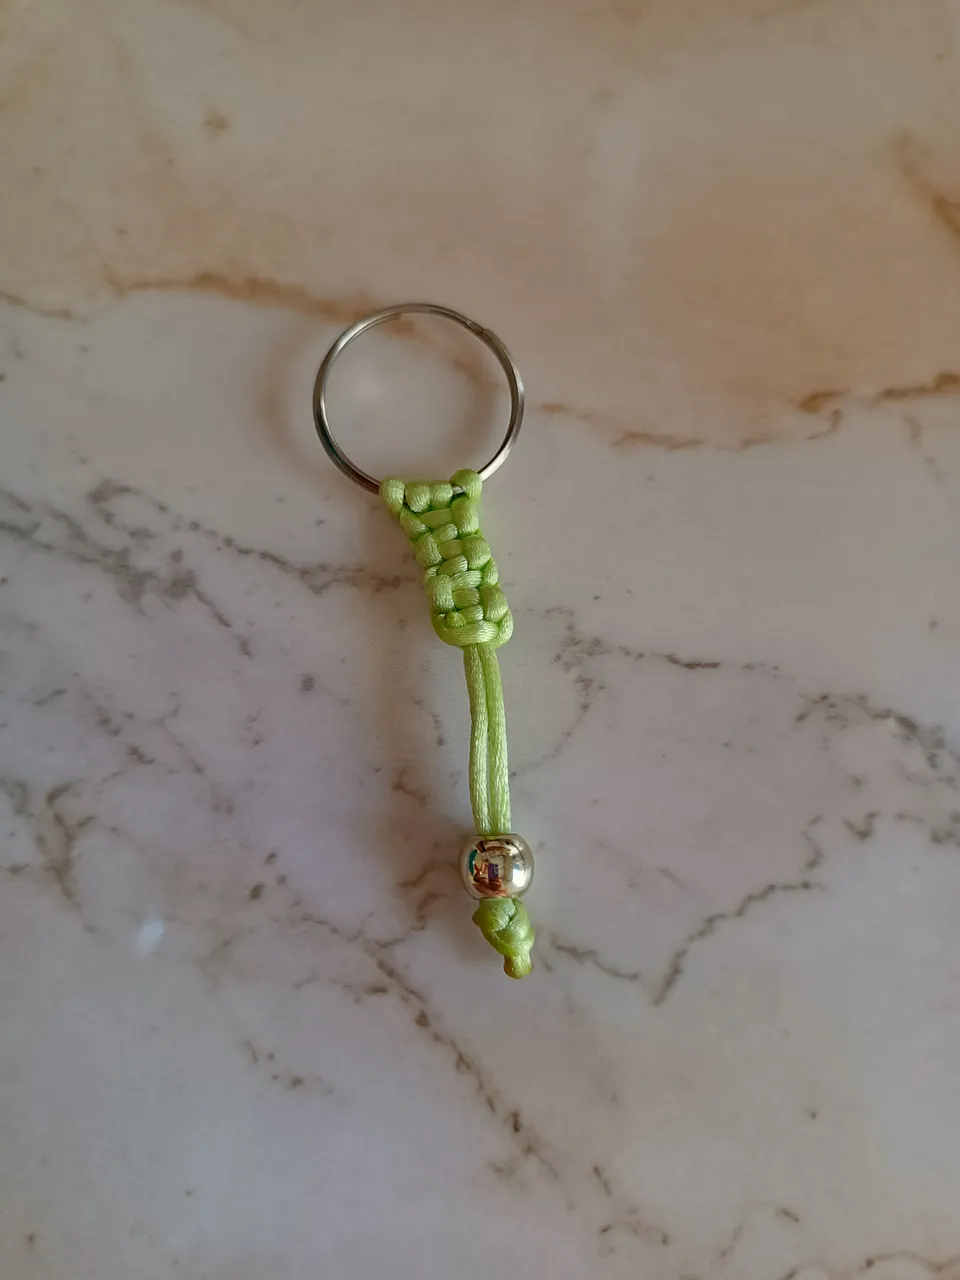
Ya tenemos lista a la ranita, ahora voy a tomar un retazo de 48 cm de cola de ratón verde, lo voy a colocar en el aro del llavero y voy a realizar un corto tejido con nudo plano, al final coloqué una cuenta dorada grande y sellé la punta con un encendedor. Luego voy a unir una argolla a la ranita y luego al retazo de cadena, lo colocamos en el aro y listo, ya tenemos un bello llavero hecho en casa con mostacillas y reutilizando la cola de ratón.
We already have the frog ready, now I am going to take a 48 cm piece of green mouse tail, I am going to place it on the ring of the keychain and I am going to make a short weave with a flat knot, at the end I placed a large golden bead and I sealed the tip with a lighter. Then I am going to attach a ring to the little frog and then to the piece of chain, we place it in the ring and that's it, we now have a beautiful keychain made at home with beads and reusing the mouse tail.
Muchas gracias por el apoyo, espero les haya gustado, nos vemos en una próxima oportunidad con más ideas creativas.
Thank you very much for your support, I hope you liked it, see you next time with more creative ideas.

Contenido original. - original content.
Los separadores y banner fueron realizados en Canva. - The dividers and banner were made in Canva.
Las fotografias son tomadas con mi teléfono Redmi Note 11s y editadas en PicsArt - The photographs are taken with my Redmi Note 11s phone and edited in PicsArt.
Traducción de: Google traductor - Translation of: Google translator.
