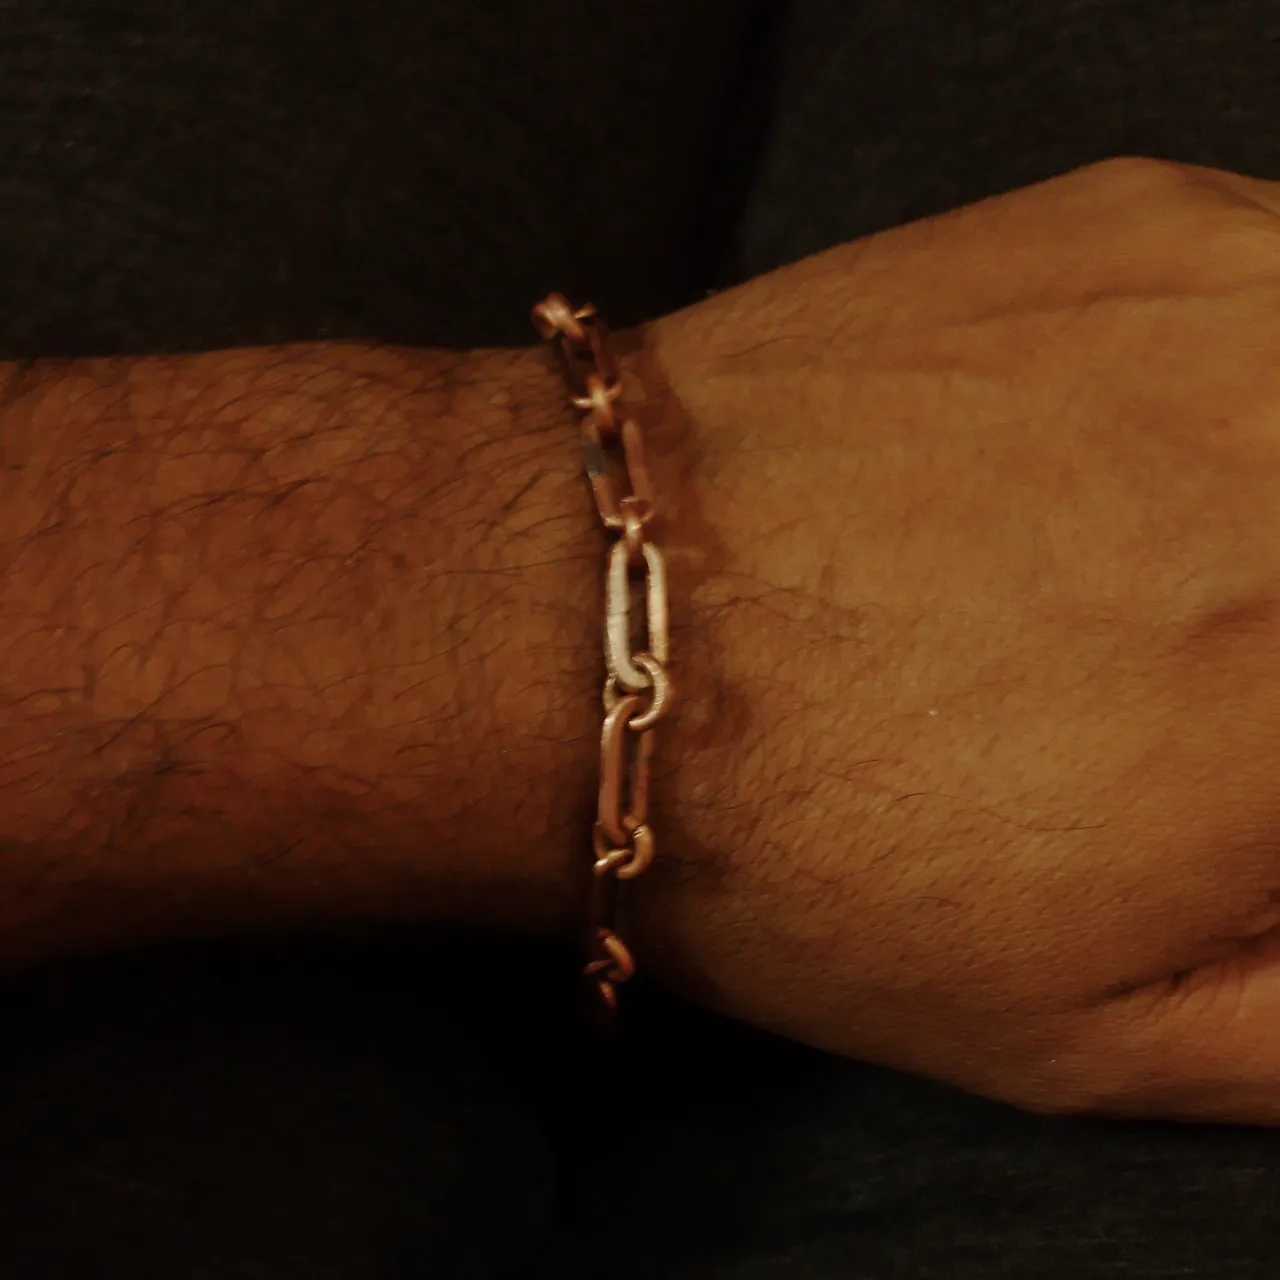
Hola amigos míos, hoy les vengó a mostrar un proyecto que me da orgullo y es esta esclava poderosa y varonil que mandaron a hacer a principios de año, que encaja perfecto en la iniciativa, volviendo, La mujer que me contacto me dijo que quería regalar junto a su hija una pulsera para caballero, dentro de la conversación que me encanto, ella me dijo que el hombre es un buen padre y que merecía algo significativo para u cumpleaños, algo único, que quería que la ayudara a lograrlo y si podía hacerlo, porque parecía complicado.
Así continuamos hablando para poder ir guiándola en el proceso, lo primero es que quería que la pulsera fuera lo suficientemente robusta y que tuviera las iniciales de su esposo, entonces le recomendé revisar Pinterest, cosa que hicimos juntos, a lo que más o menos determinamos el estilo de la cadena y las iniciales; posteriormente al llegar a casa busque algunas tipografías en internet y le mostré varias opciones a la señora, decidiéndose por una.
Ahora un resumen de los materiales y herramientas usados para este proyecto:
- Lámina de cobre de 1 mm, alambre de cobre 1.2 mm
- Arco de Segueta y sierras 2/0
- Soladura Harris 5% plata, Borax
- Martillo y base de acero
- pinzas de joyería
- Soplete
- Dremel
- Fresa de 0.75 mm par abrir los huecos , fresas diamantadas.
+Motor de banco, disco de tela y cera de pulir.
Proceso

Corte pedazos de alambre de cobre de 1.2 mm con motivo de empezar a hacer la cadena de la pulsera, los pedazos deben medir más o menos 2.5 cm y fueron cortados con una piqueta.
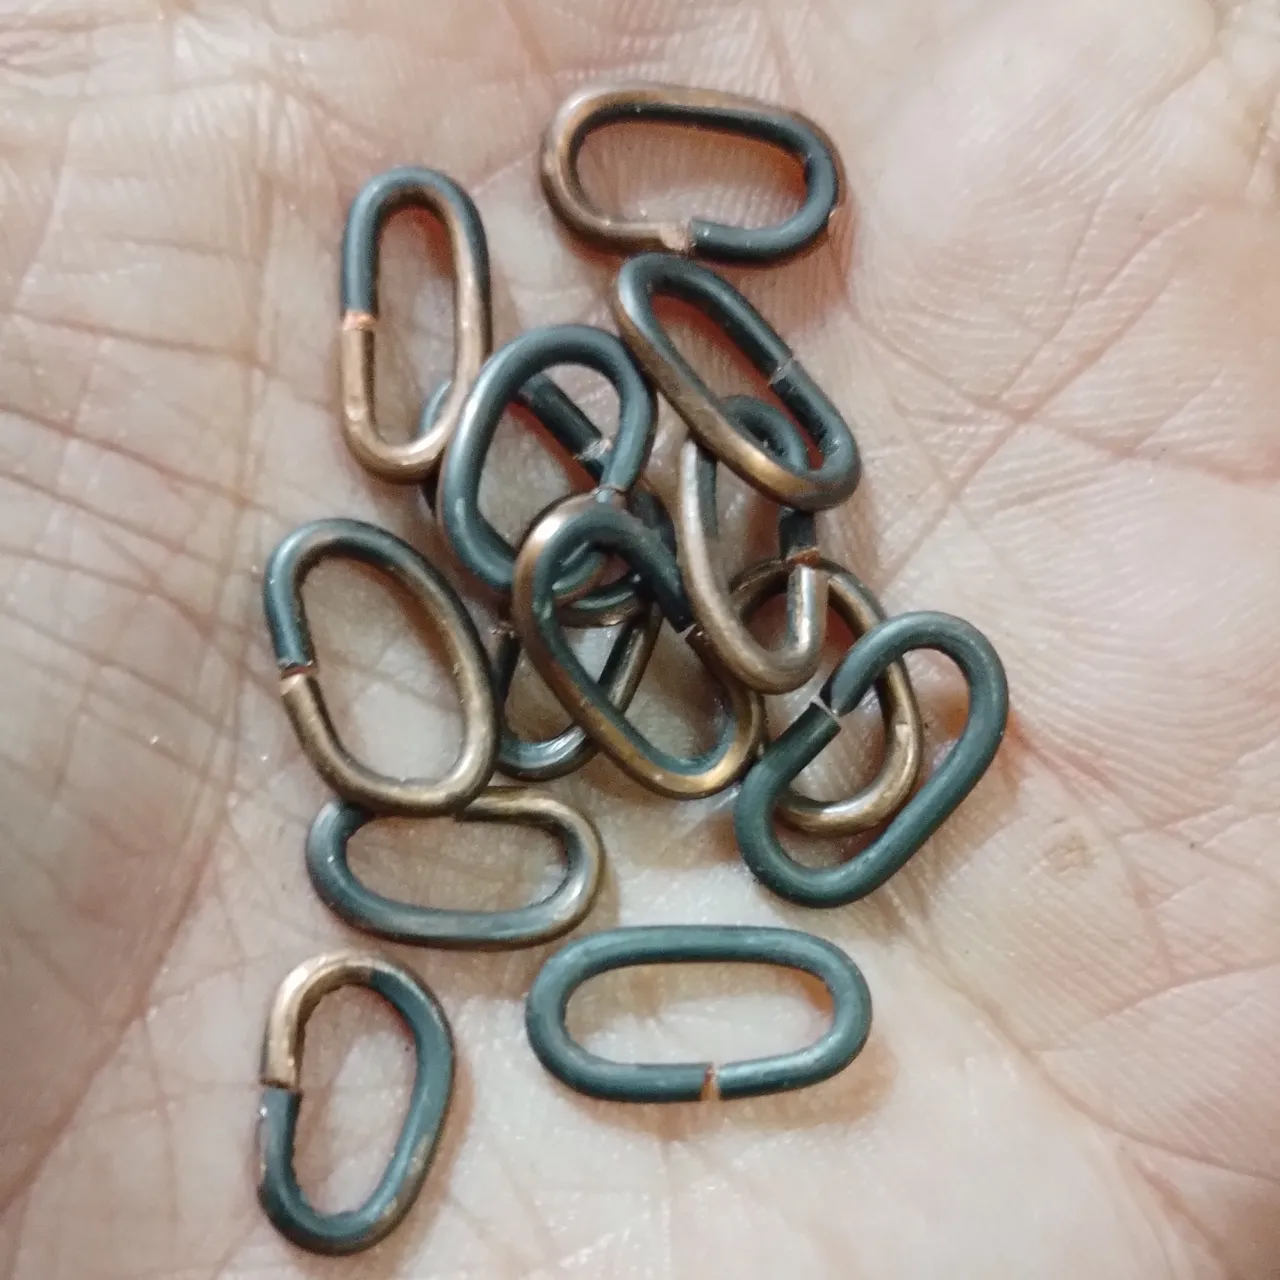
Lime las puntas y las junte para crear los eslabones.
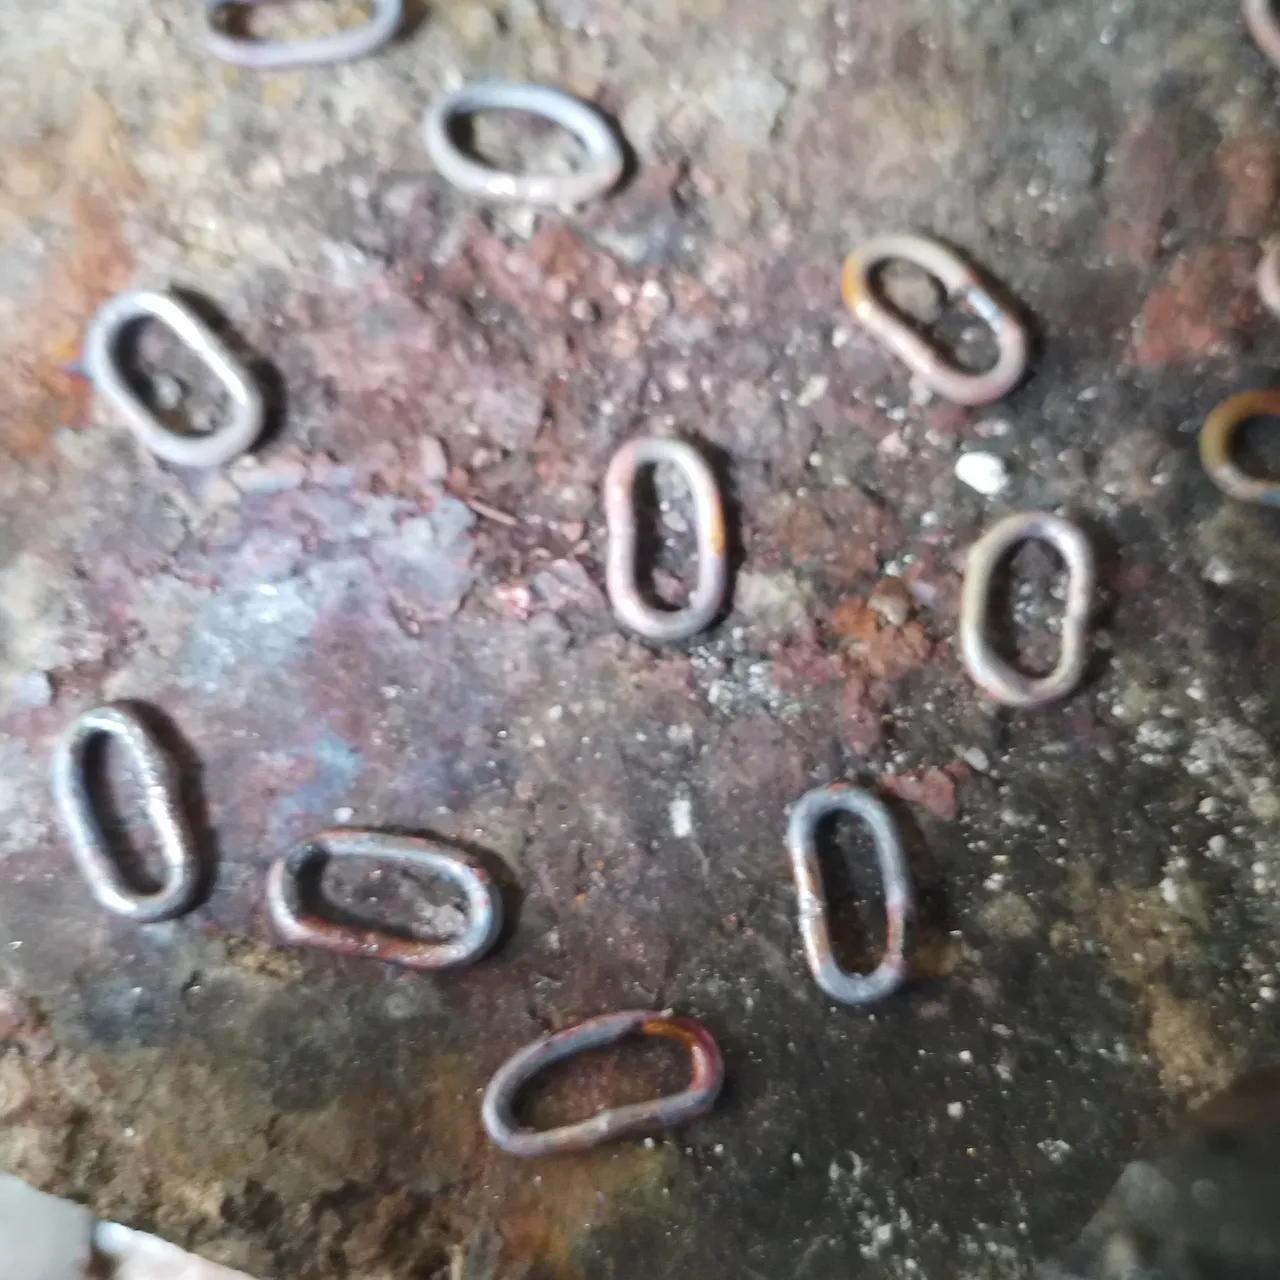
Luego me fui a la piedra refractaria y soldé los eslabones con la soldadura y el soplete.
Una vez soldados, con la pinza redonda los estiré, con esta cantidad estamos bien para la construcción de la cadena.
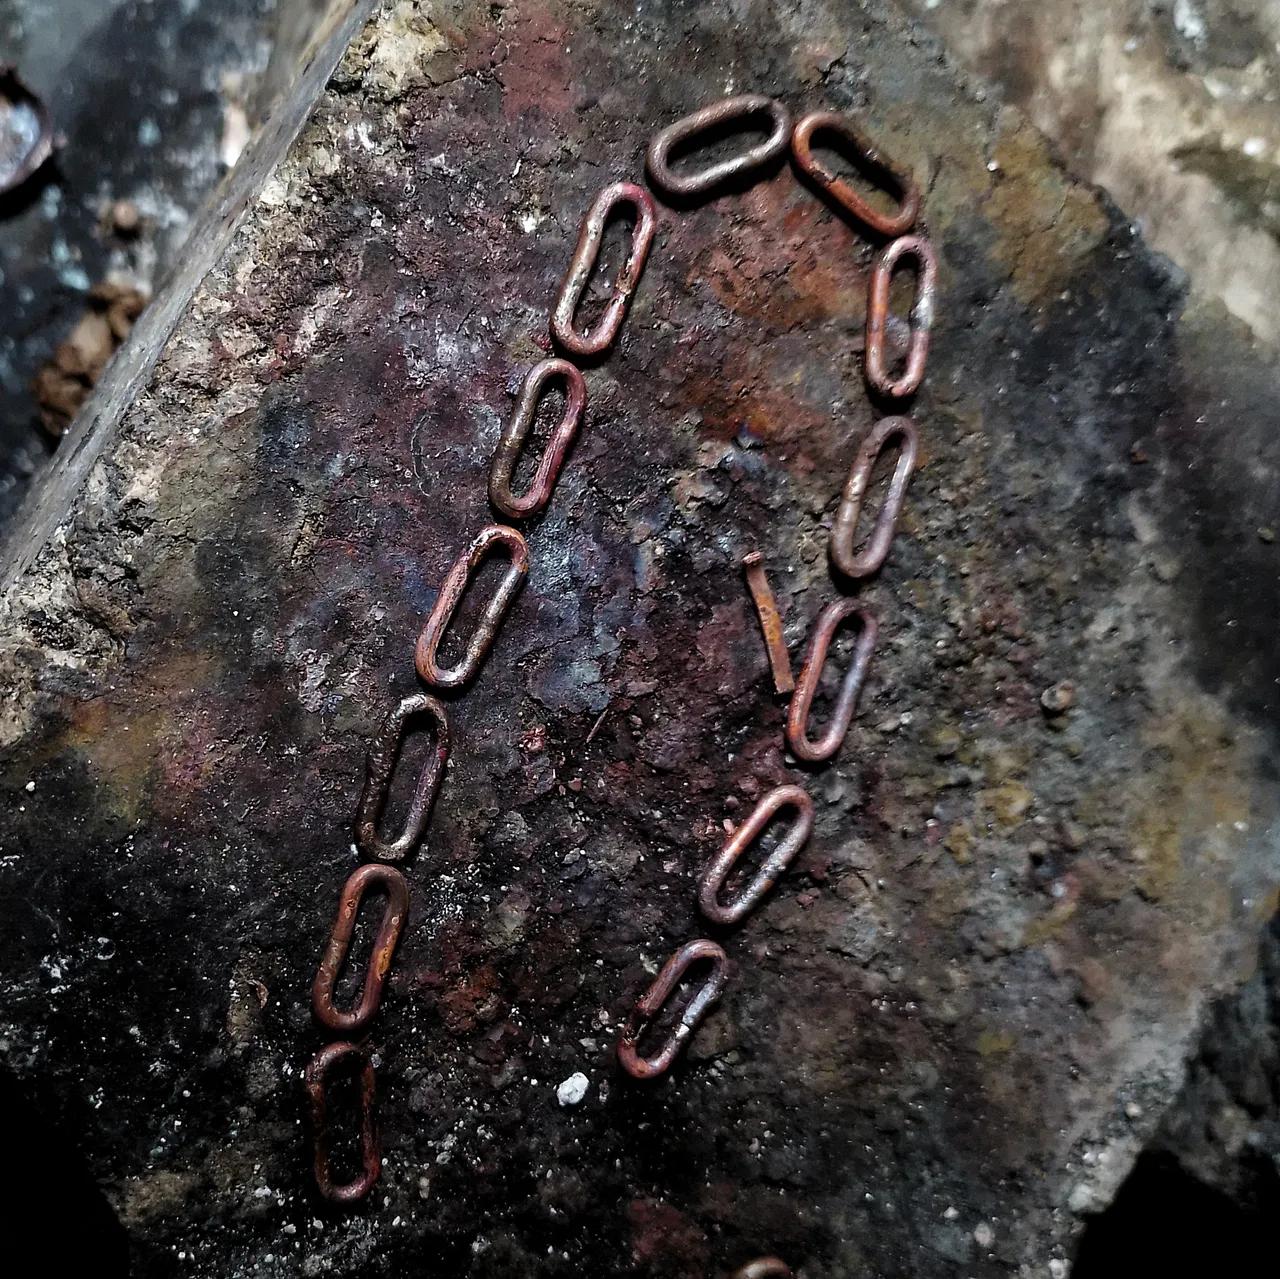
Aplane cada eslabón con la ayuda de un martillo y una superficie de acero que tengo, después corte argollas del mismo cobre de 1.2 mm, e hice la cadena con ayuda de 2 pinzas planas.
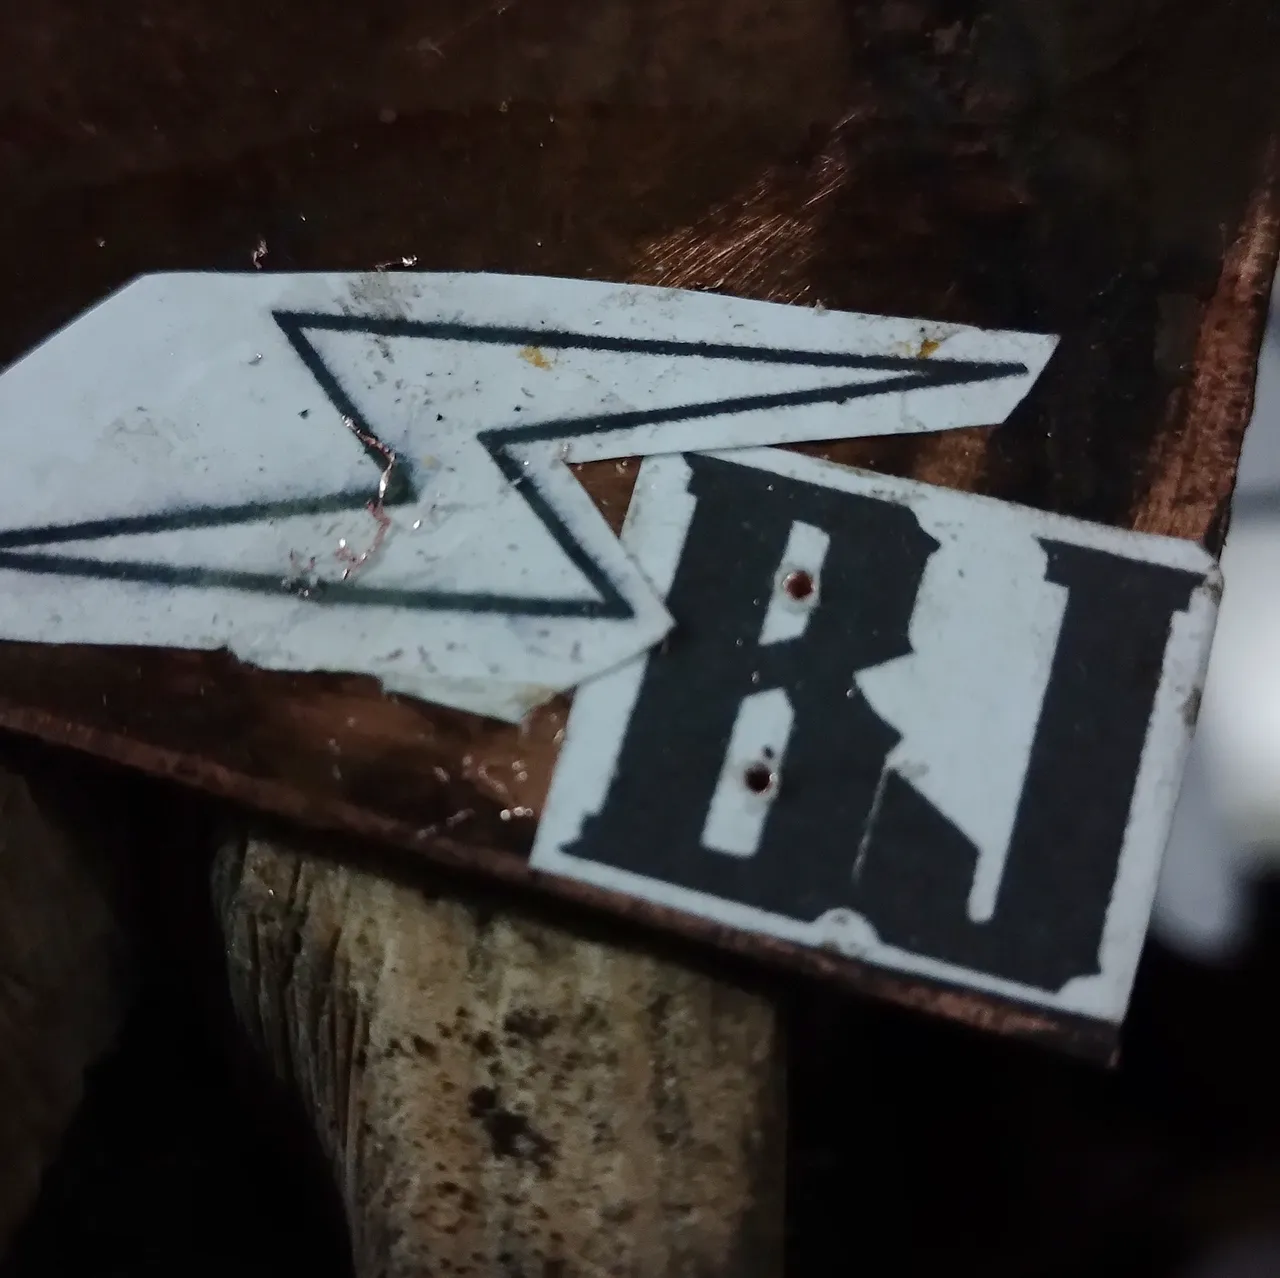
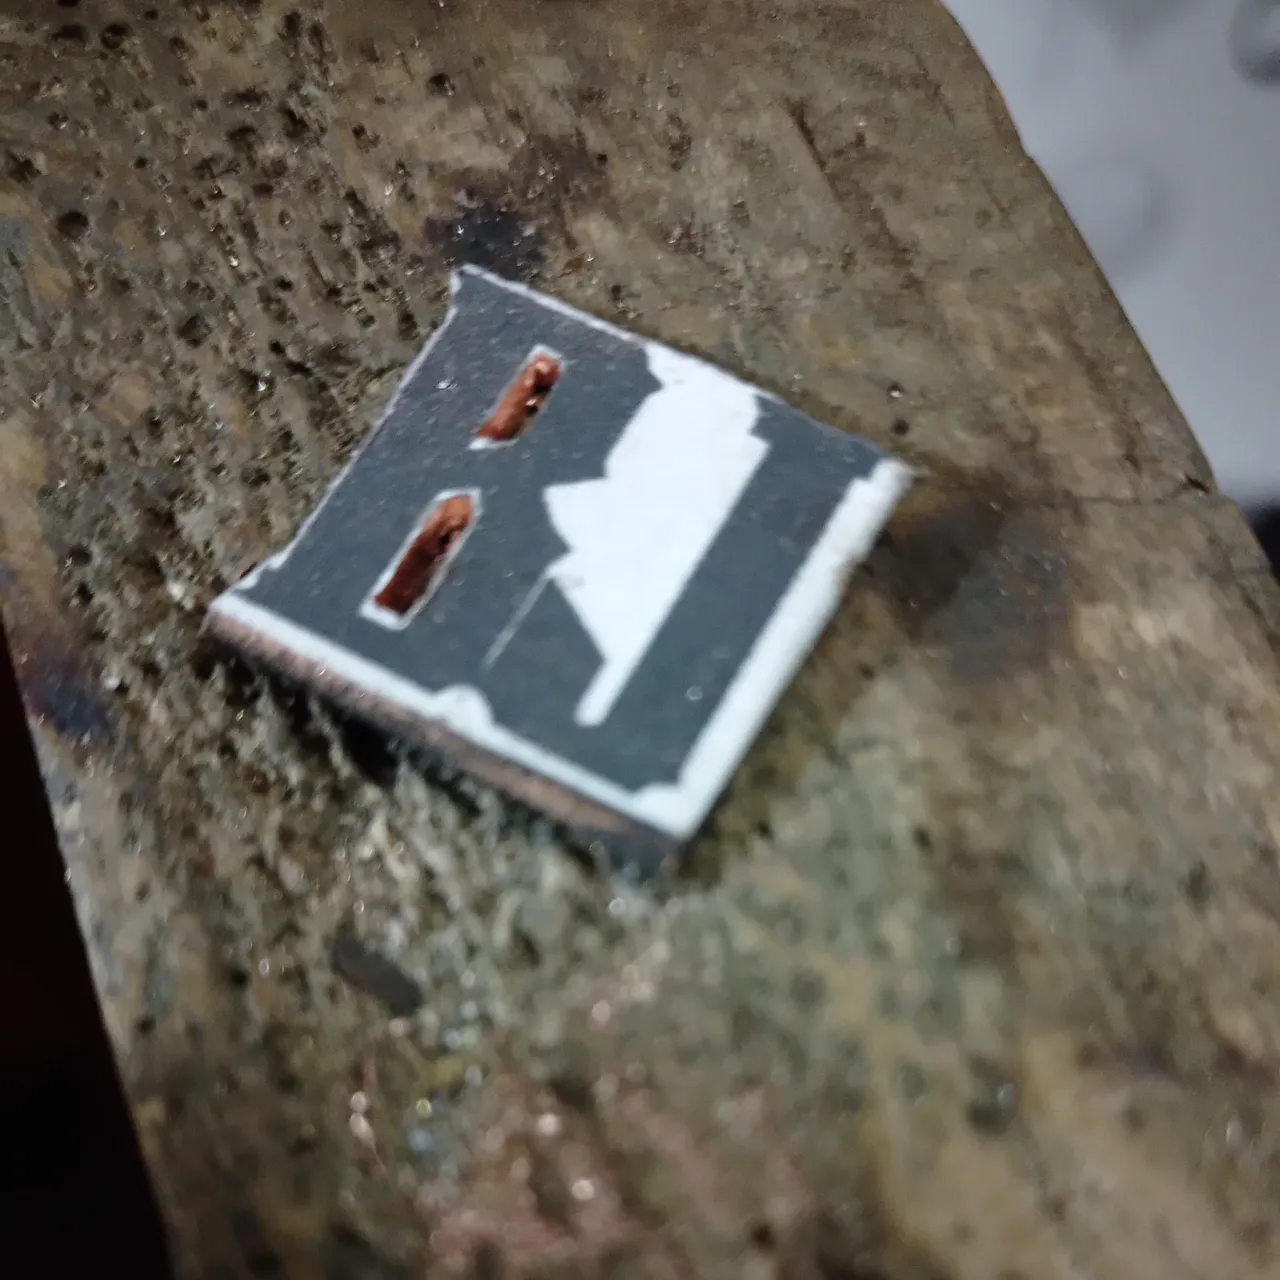
Ahora vamos con las iniciales, en este caso seleccione una lámina de cobre de aproximadamente 1 mm de espesor y pegue las iniciales, y abril los huecos para hacer el corte interno con la ayuda del Dremel.
Con el arco de Segueta realicé los cortes internos empleando la sierra 2/0.

Con la misma segueta realicé el corte externo.
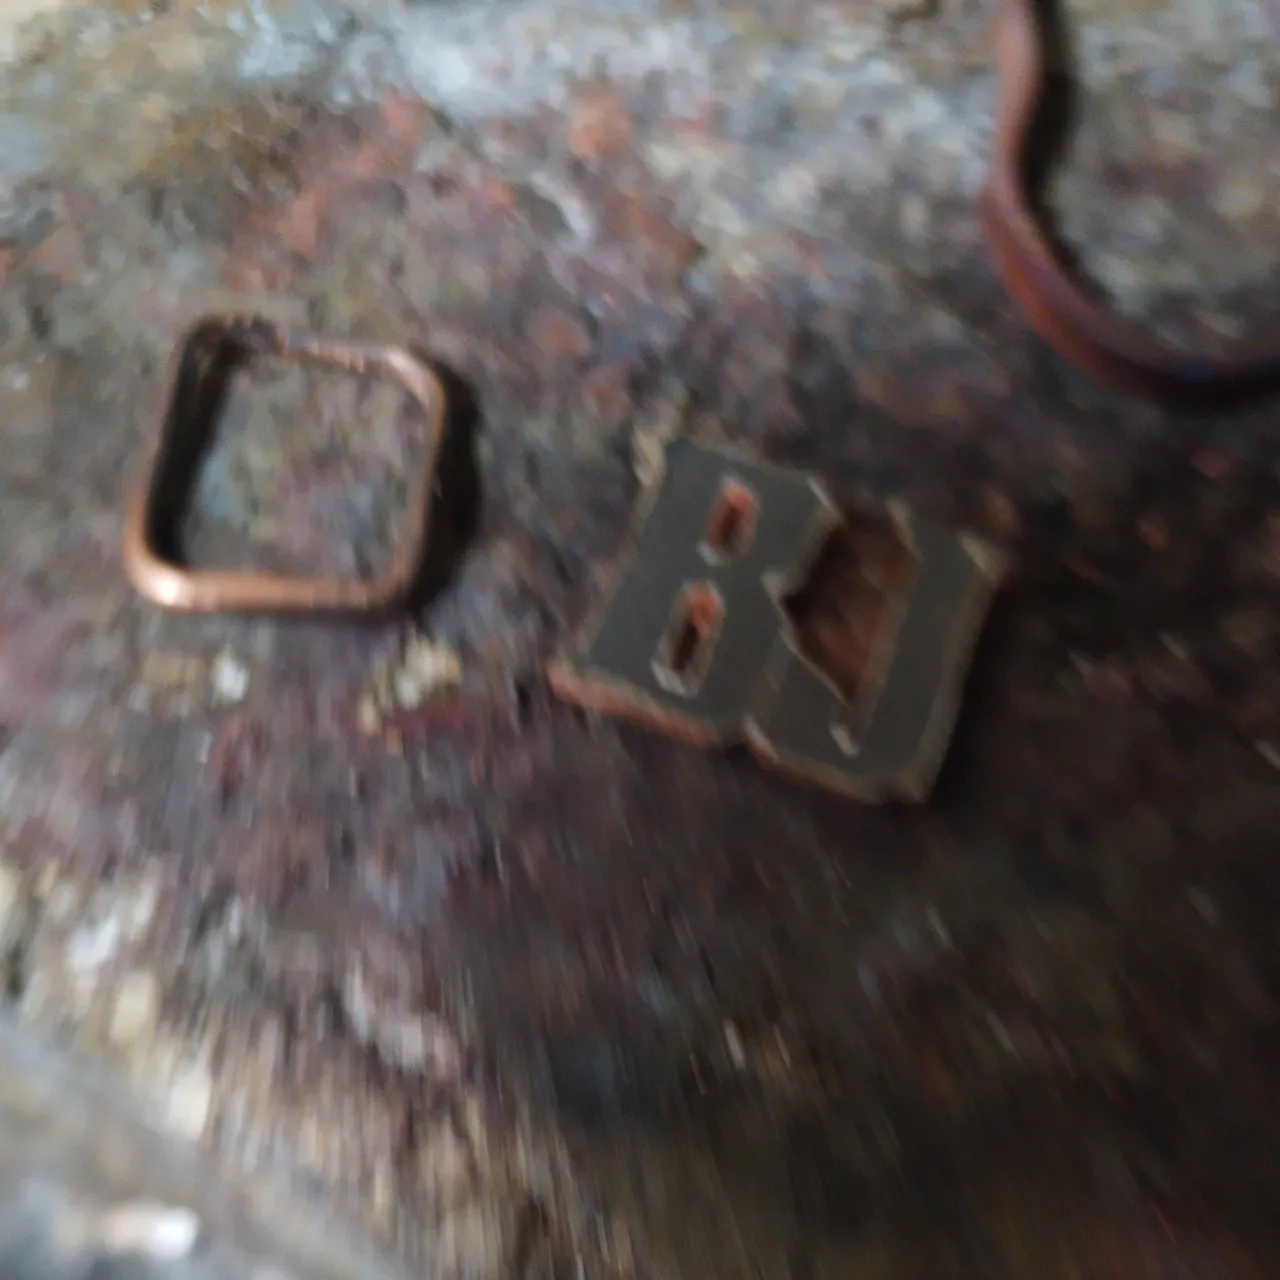
Con un alambre de cobre y las pinzas modelo la base sobre la que se soldaran las iniciales.
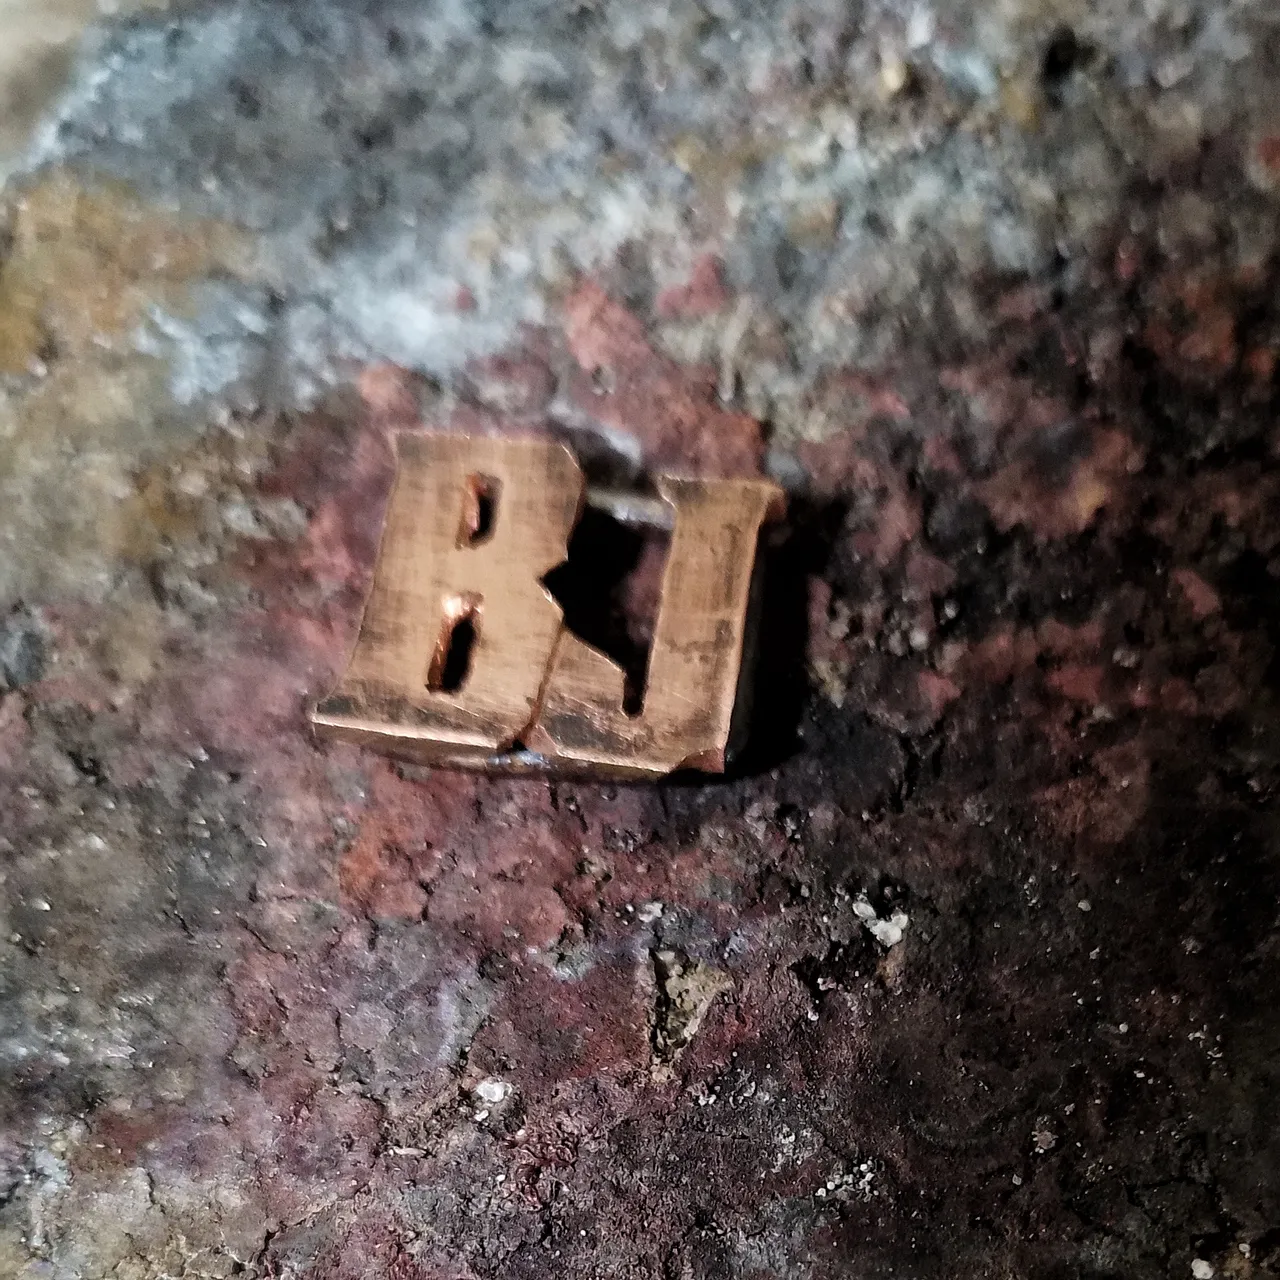
Aquí se aprecia las iniciales ya soldadas sobre la base, pero antes soldé la base, la termine mejor con ayuda de las pinzas y la aplane con el martillo.

Esta especie de “c” se colocarán soldadas en la base de las letras para ser el agarradero de las iniciales.
Aquí la vemos casi acabada, Honestamente me emocioné terminando esta pulsera y se me paso seguir la secuencia de las fotos del proceso, pero le resumo que sobre todo en la parte de las iniciales debí aplicar lima y el uso del Dremel con fresas para devastar y limar que son unas diamantadas que tengo, para poder quitar los residuos o excedentes de soldadura, lije luego la pieza con lijas numero 260, 360 y 400, para finalmente pulir en el motor de banco con el disco de tela y cera de pulir para darle ese acabado brillante. El caimán o agarradero de la pulsera si lo tuve que comprar.
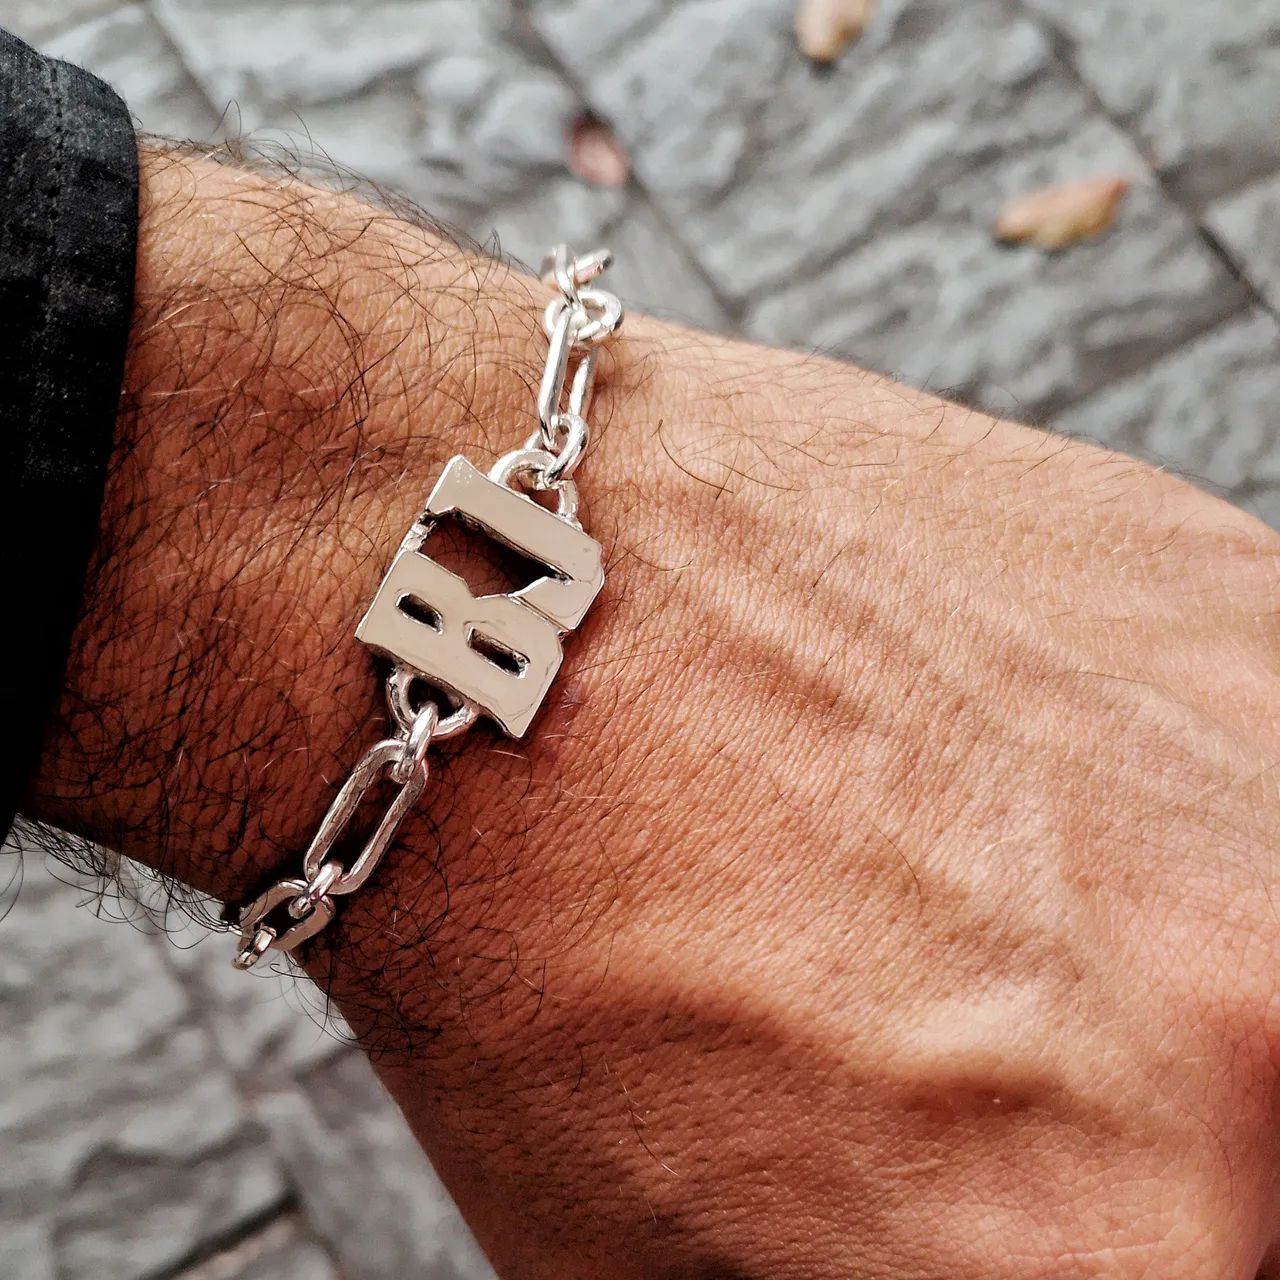
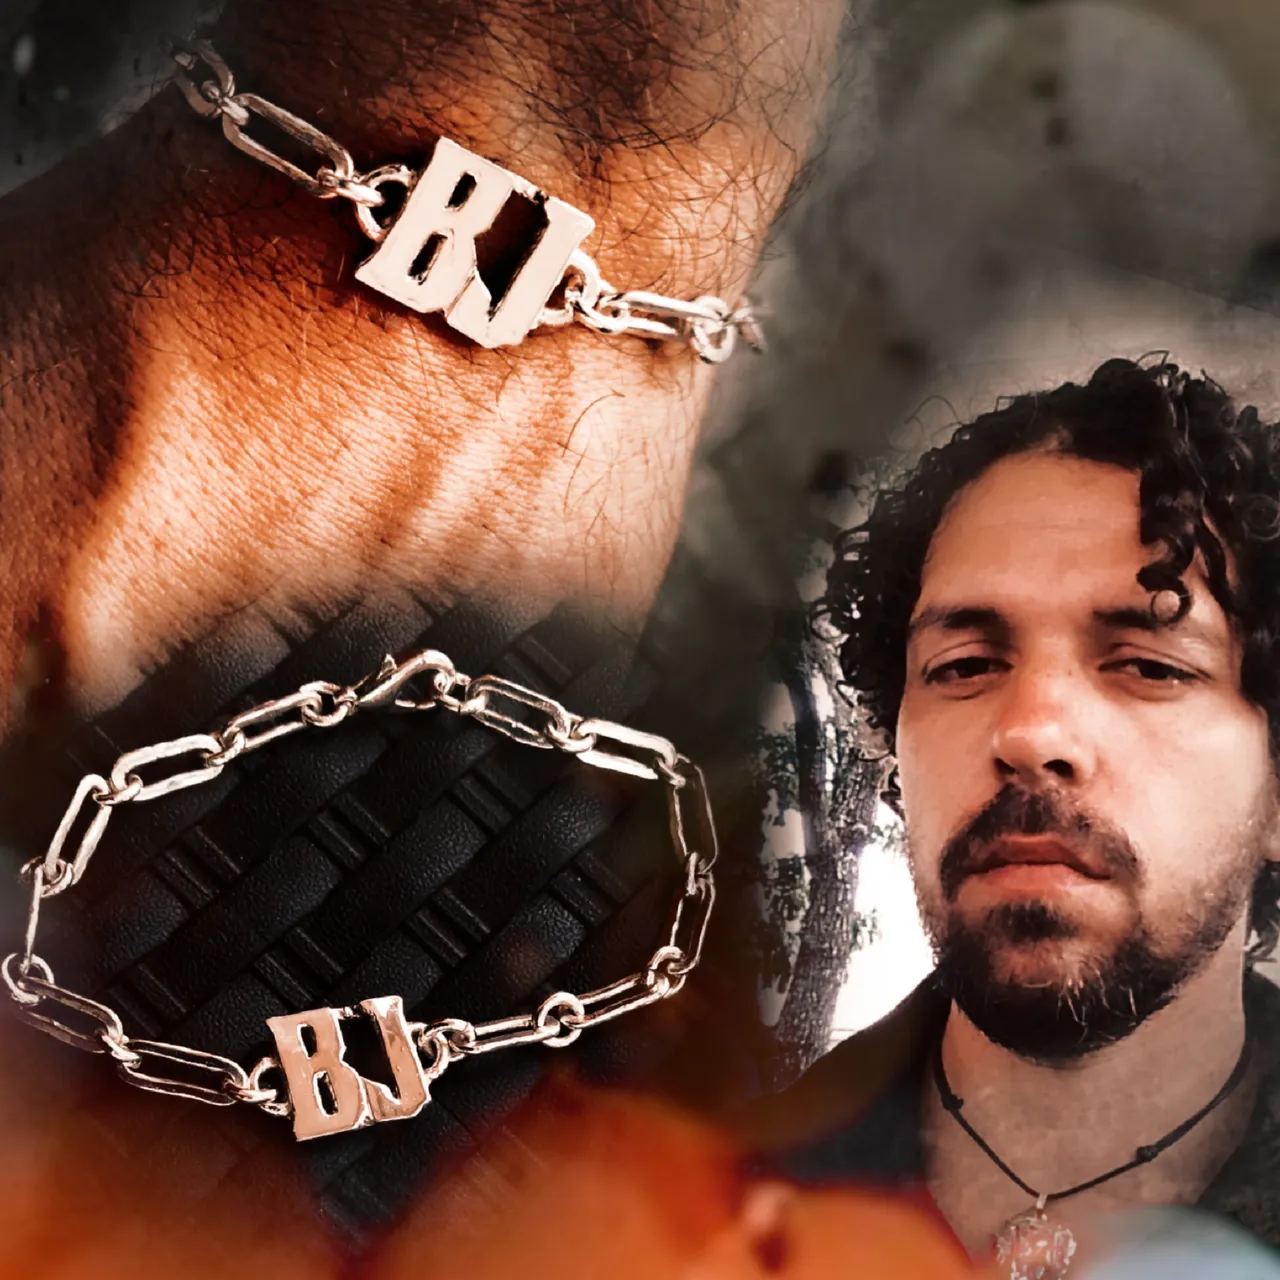
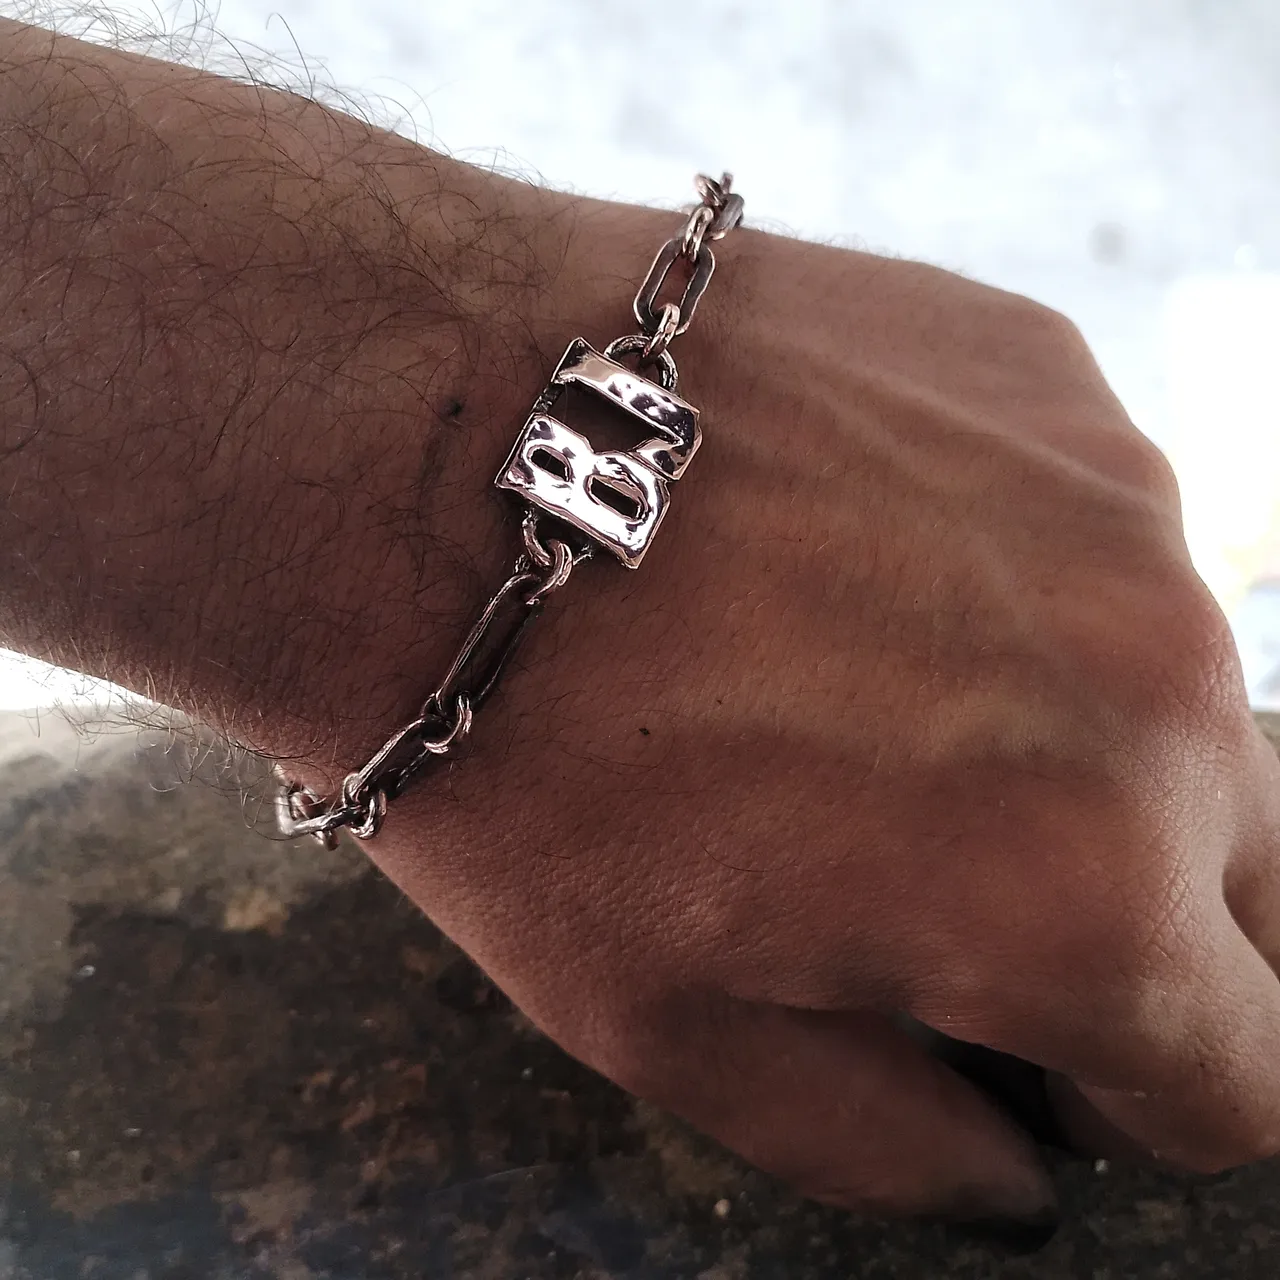
Este es el resultado final luego de mandar a bañar en plata.
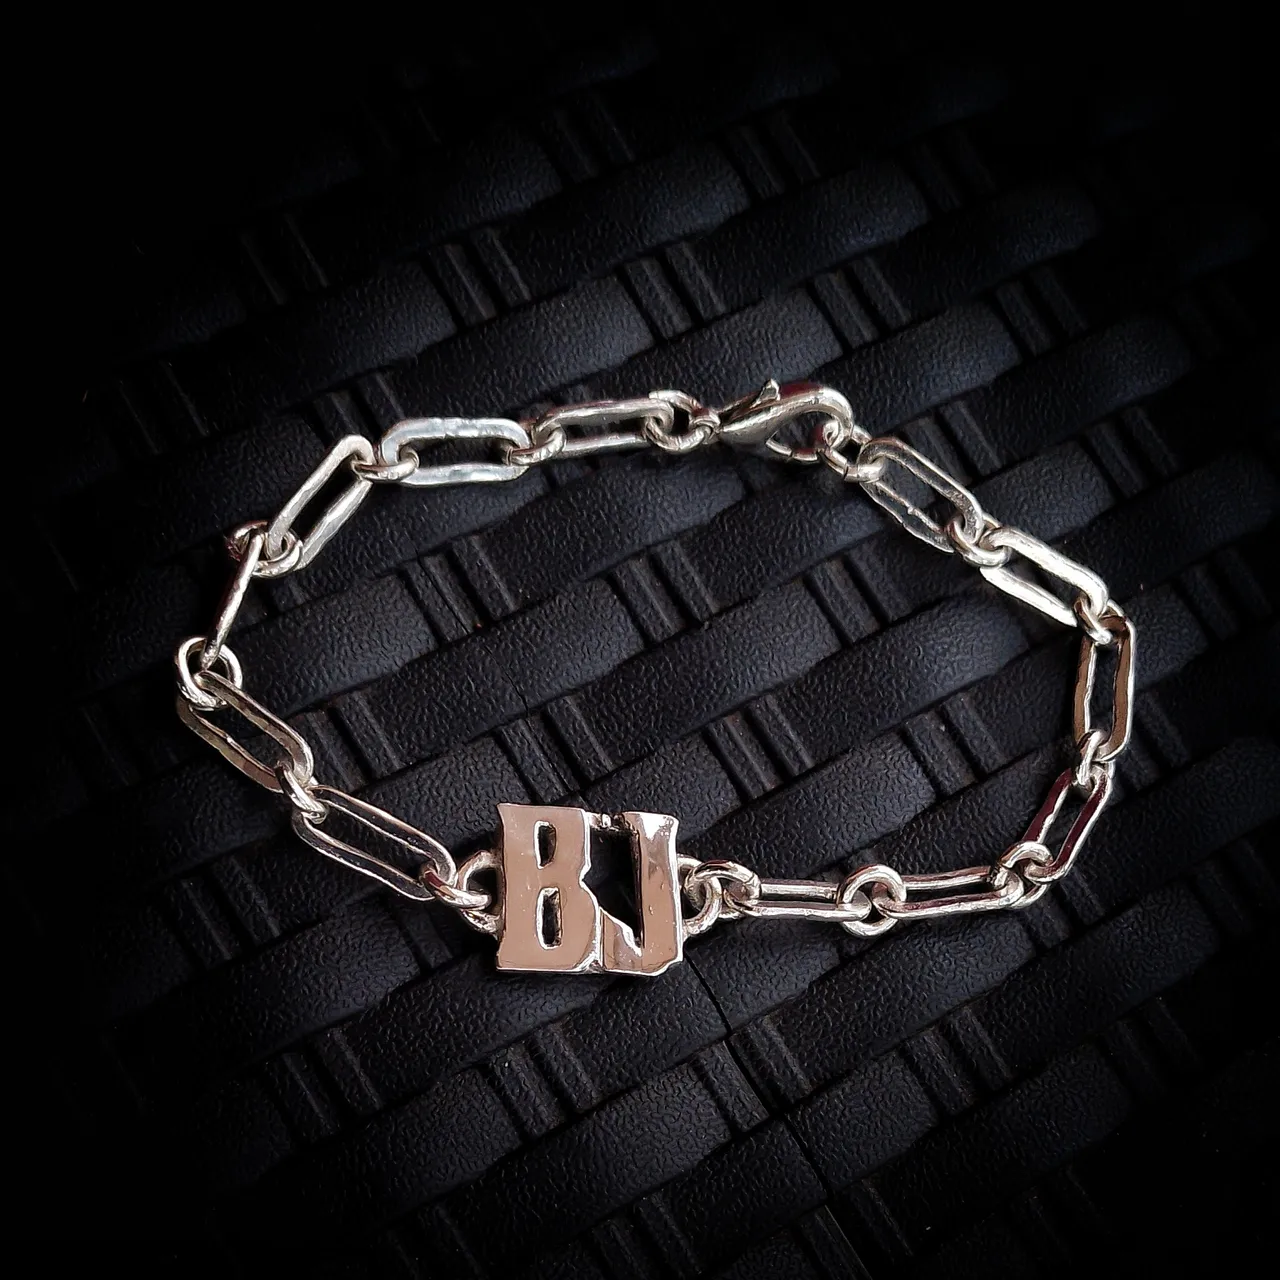
Otra vista de la pulsera.
Para finalizar quede con la Señora y su hija para hacerle la entrega, quedaron encantadas con el trabajo, yo también porque hacer joyería para hombres no es tan común y este accesorio, además de bastante varonil, elegante, era una pieza personalizada.
Digan Ustedes que les pareció.
Si deseas participar en esta iniciativa ve los detalles en el siguiente enlace:
@hive-189504/a-gift-for-dad-oror-initiative
De mi parte invito a participar a las siguientes personas: @comandoyeya , @rlathulerie y a @torre-alba y a unirse a la comunidad de jewelry.
Nota la edición de la imagen principal la elabore en Picsart, el resto se recortó con Snapseed.
ENGLISH WITH GOOGLE TRANSLATOR
Hello my friends, today I came to show you a project that makes me proud and it is this powerful and manly slave that they had made at the beginning of the year, which fits perfectly into the initiative, coming back, The woman who contacted me told me that she wanted to give away With her daughter a men's bracelet, in the conversation that I loved, she told me that the man is a good father and that he deserved something meaningful for her birthday, something unique, that she wanted me to help her achieve it and if I could do it , because it seemed complicated.
So we continued talking to be able to guide her through the process, the first thing was that she wanted the bracelet to be robust enough and to have her husband's initials, so I recommended that she check Pinterest, which we did together, which we more or less determined. the style of the chain and initials; Later, when I got home, I looked for some fonts on the internet and showed several options to the lady, deciding on one.
Now a summary of the materials and tools used for this project:
- 1mm copper foil, 1.2mm copper wire
- Segueta bow and saws 2/0
- Harris solder 5% silver, Borax
- Hammer and steel base
- jewelry tweezers
- Blowtorch
- Dremel
- 0.75 mm drill bit to open the gaps, diamond drill bits.
+Bench motor, cloth disc and polishing wax.
Process
Cut pieces of 1.2 mm copper wire to start making the bracelet chain, the pieces should measure approximately 2.5 cm and were cut with a pickaxe.
File the ends and join them together to create the links.
Then I went to the refractory stone and soldered the links with the solder and the blowtorch.
Once welded, with the round clamp I stretched them, with this amount we are good for the construction of the chain.
I flattened each link with the help of a hammer and a steel surface that I have, then cut rings from the same 1.2 mm copper, and made the chain with the help of 2 flat pliers.
Now let's go with the initials, in this case select a copper sheet approximately 1 mm thick and glue the initials, and open the gaps to make the internal cut with the help of the Dremel.
With the Segueta bow I made the internal cuts using the 2/0 saw.
With the same saw I made the external cut.
With a copper wire and tweezers, model the base on which the initials will be soldered.
Here you can see the initials already soldered on the base, but first I soldered the base, finished it better with the help of tweezers and flattened it with the hammer.
This type of “c” will be placed welded at the base of the letters to be the handle for the initials.
Here we see it almost finished, Honestly I was excited finishing this bracelet and I forgot to follow the sequence of the photos of the process, but I will summarize that especially in the part of the initials I had to apply file and use the Dremel with burs to devastate and file, which are some diamond blades that I have, to be able to remove the residue or excess welding, then sand the piece with sandpaper number 260, 360 and 400, to finally polish on the bench motor with the cloth disc and polishing wax to give it that shiny finish. I did have to buy the alligator or bracelet handle.
This is the final result after having it silver-plated.
Another view of the bracelet.
Finally, I met with the Lady and her daughter to deliver it. They were delighted with the work, and so was I because making jewelry for men is not so common and this accessory, in addition to being quite manly, elegant, was a personalized piece.
Say what you think.
If you want to participate in this initiative, see the details in the following link:
@hive-189504/a-gift-for-dad-oror-initiative
For my part, I invite the following people to participate: @comandoyeya, @rlathulerie and @torre-alba and to join the jewelry community.
Note that the main image was edited in Picsart, the rest was cropped with Snapseed.