*** BIENVENIDOS A MI BLOG***
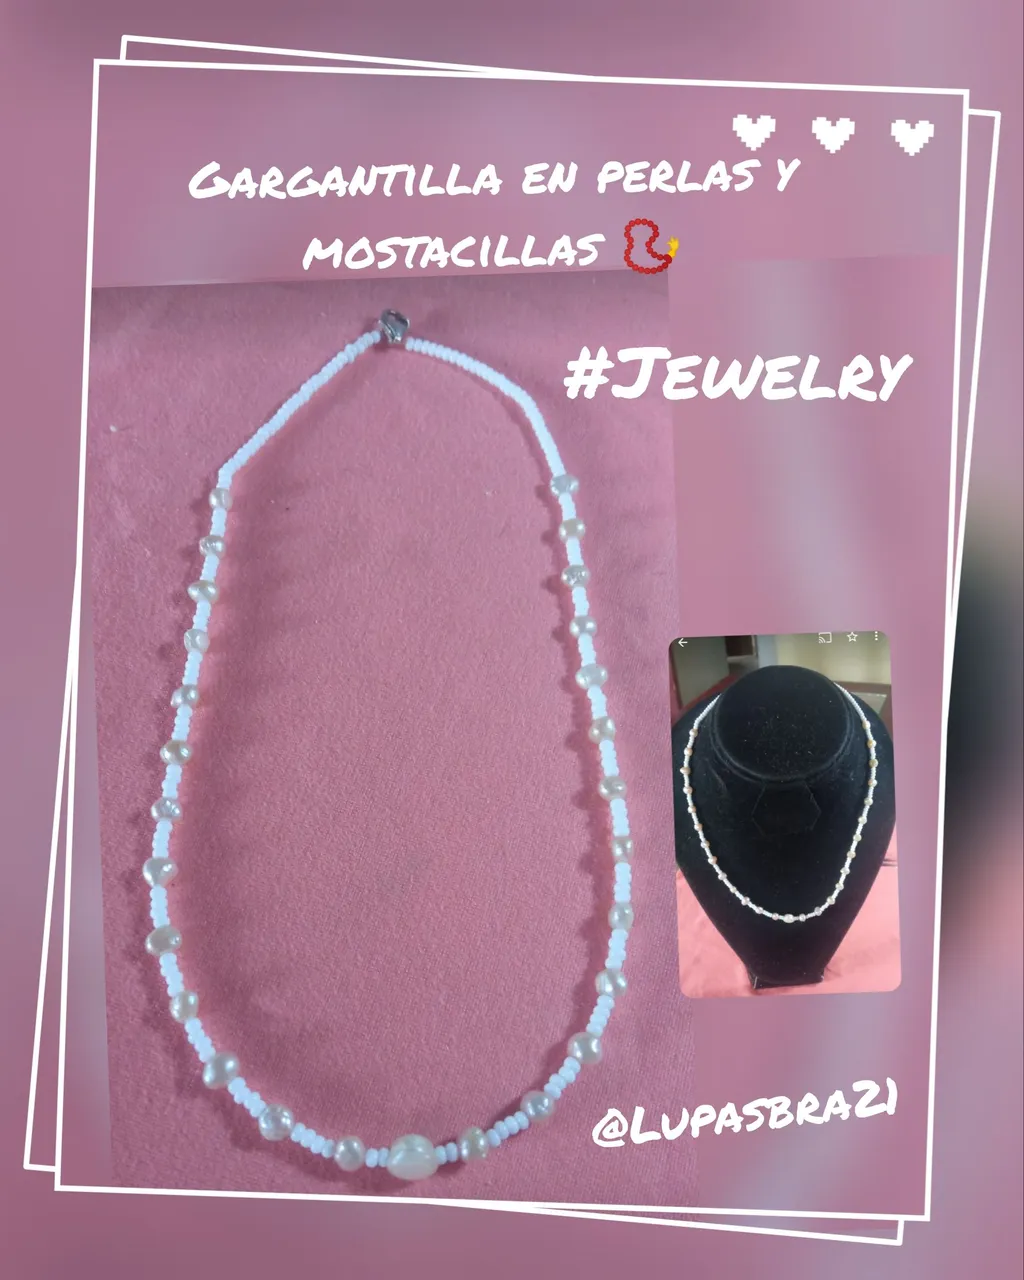
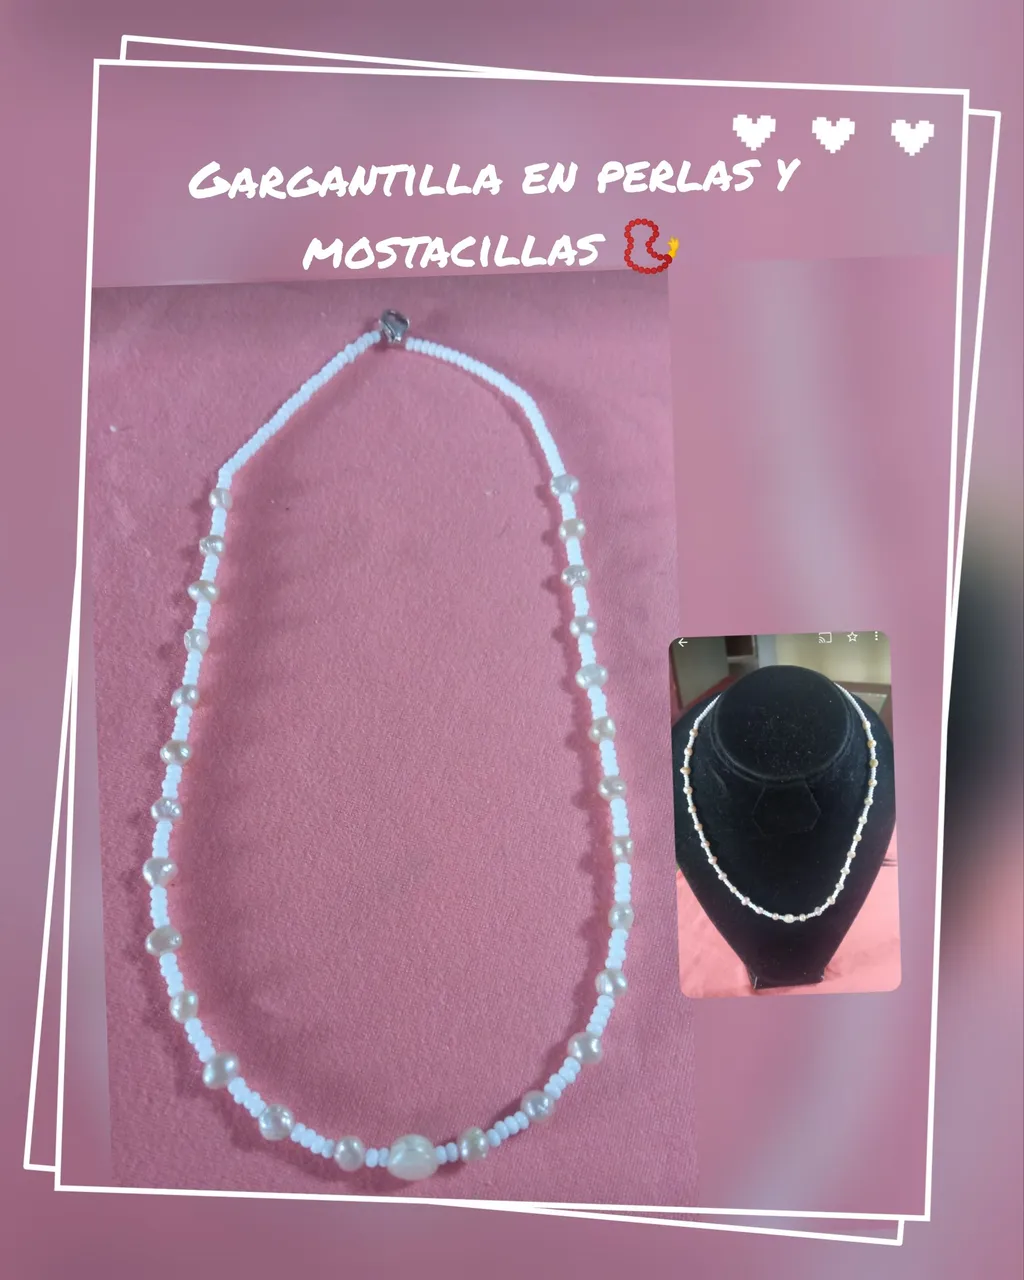
Hola, hola hermosa comunidad de #hive y de esta bella comunidad de #Jewelry deseo se encuentren todos bien, por acá todavía viendo y viviendo los acontecimientos en nuestro país Venezuela 🇻🇪, igual seguimos adelante y confiando en Dios que todo va estar bien. En la bisutería no solo elaboramos accesorios, también en muchas oportunidades me ha tocado recuperar o restaurar collares, gargantillas y pulseras de clientas que quieren seguir usando esas piezas y yo la verdad se las restauro con mucho gusto y en muchas ocasiones les realizo piezas diferentes,es por ello que en esta oportunidad les comparto el paso a paso o tutorial de como reutilizar unas bellas perlas cultivadas en un hermosa gargantilla, como siempre he dicho los accesorios con perlas siempre serán los más buscados ya que son accesorios que quedan tan delicados , elegantes y cuando se elaboran con perlas cultivadas son duraderos, una clienta me trajo unas perlas de un collar que ella tenía y me dijo que le hiciera uno que ella pudiera usar a diario, así que le elaboré una linda gargantilla la cual puede usar a diario , lo hice tipo shoker (corto) de manera que pueda utilizar otra gargantilla o cadena más larga , la verdad el proyecto es muy fácil de realizar, espero les guste el resultado final, así que los invito que lean hasta el final y gracias por visitar mi blog.
*** WELCOME TO MY BLOG***
Hello, hello beautiful community of #hive and this beautiful community of #Jewelry I wish you all well, here still watching and living the events in our country Venezuela 🇻🇪, but we move forward and trusting in God that everything will be fine. In costume jewelry we not only make accessories, also in many opportunities I have had to recover or restore necklaces, chokers and bracelets of clients who want to continue using those pieces and I really restore them with pleasure and in many occasions I make them different pieces, that is why this time I share with you the step by step or tutorial on how to reuse some beautiful cultured pearls in a beautiful choker, as I have always said the accessories with pearls will always be the most sought after because they are accessories that are so delicate and elegant, elegant and when they are made with cultured pearls are durable, a client brought me some pearls from a necklace she had and told me to make one that she could use daily, so I made her a nice choker which she can use daily, I made it shoker type (short) so you can use another choker or longer chain, the truth is the project is very easy to do, I hope you like the end result, so I invite you to read to the end and thank you for visiting my blog.
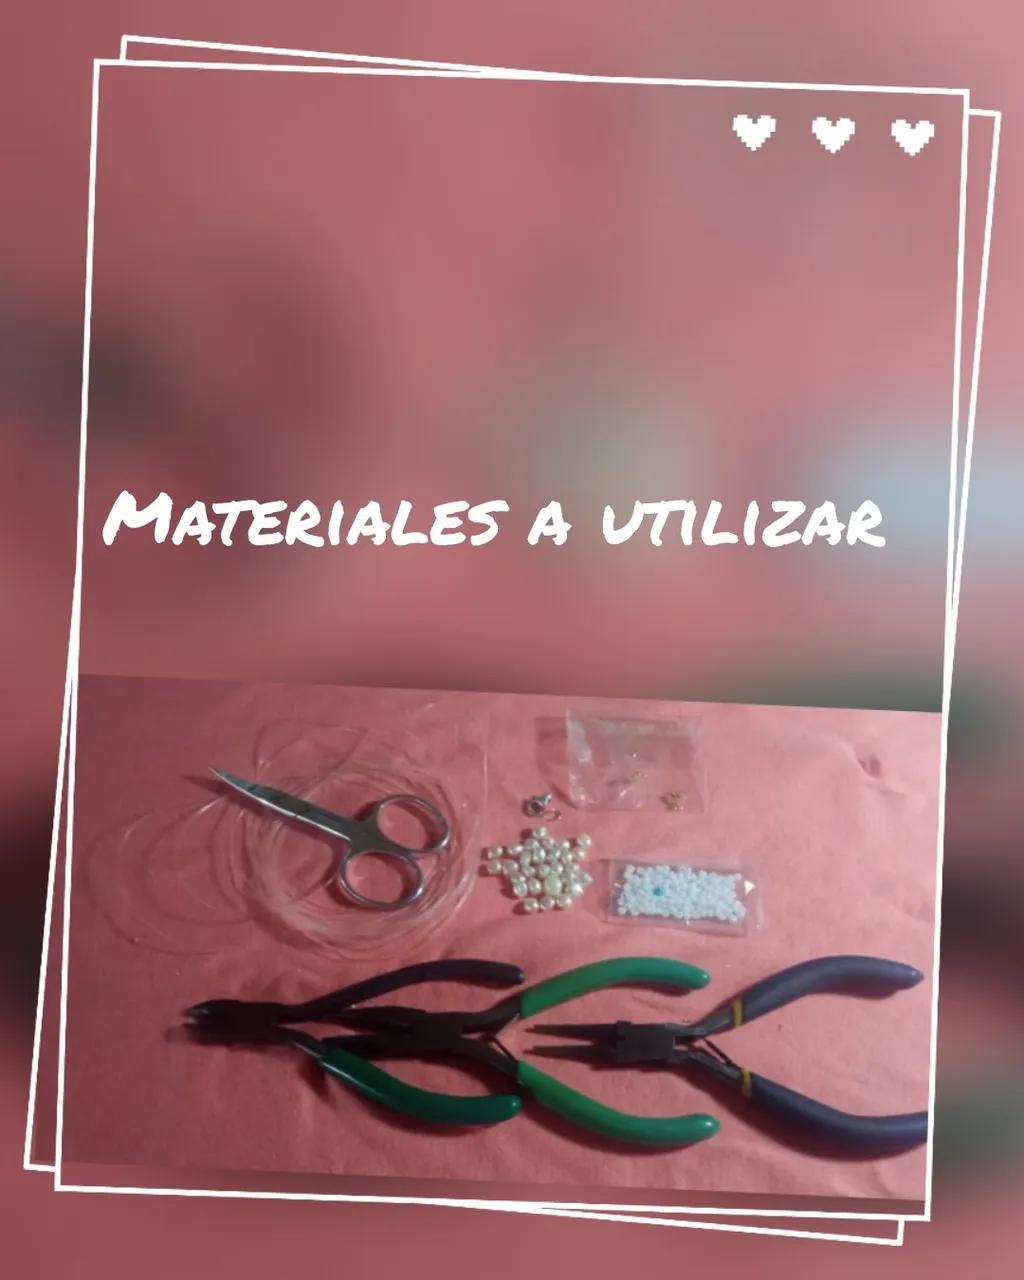
materiales a utilizar
☑️ Hilo nylon de 0.30 mm.
☑️ 26 Perlas cultivadas No 4 .
☑️ 1 perla No 6.
☑️ 2 argollas .
☑️ 1 trancadero pico de loro.
☑️ Mostacillas calibradas blancas.
☑️ Tijeras.
☑️ Pinza plana.
☑️ 2 grapas o escarlachin.
☑️ Pinza punta redonda, punta plana.
☑️ Pinza piqueta.
materials to be used
☑️ 0.30 mm nylon thread.
☑️ 26 No 4 cultured pearls.
☑️ 1 No 6 pearl.
☑️ 2 rings .
☑️ 1 parrot beak locking ring.
☑️ White calibrated beads.
☑️ Scissors.
☑️ Flat tweezers.
☑️ 2 staples or scarlachin.
☑️ Tweezers round tip, flat tip.
☑️ Pickaxe clamp
Tutorial o paso a paso
Comienzo introduciendo una grapa o escarlachin sin cortar el nylon y seguidamente introduzco 33 mostacillas blancas ,luego una perla cultivada seguida de 4 mostacillas y repito ese mismo procedimiento hasta completar 13 perlas cultivadas , luego introduzco 2 mostacillas y en el centro coloco la perla No 6 y repito la misma secuencia hasta completar el largo deseado e introduzco otra grapa o escarlachin ( 1 al 6).
Tutorial or step by step
I start introducing a staple or scarlachin without cutting the nylon and then I introduce 33 white beads, then a cultured pearl followed by 4 beads and repeat the same procedure to complete 13 cultured pearls, then I introduce 2 beads and in the center I place the bead No 6 and repeat the same sequence to complete the desired length and introduce another staple or scarlachin (1 to 6).
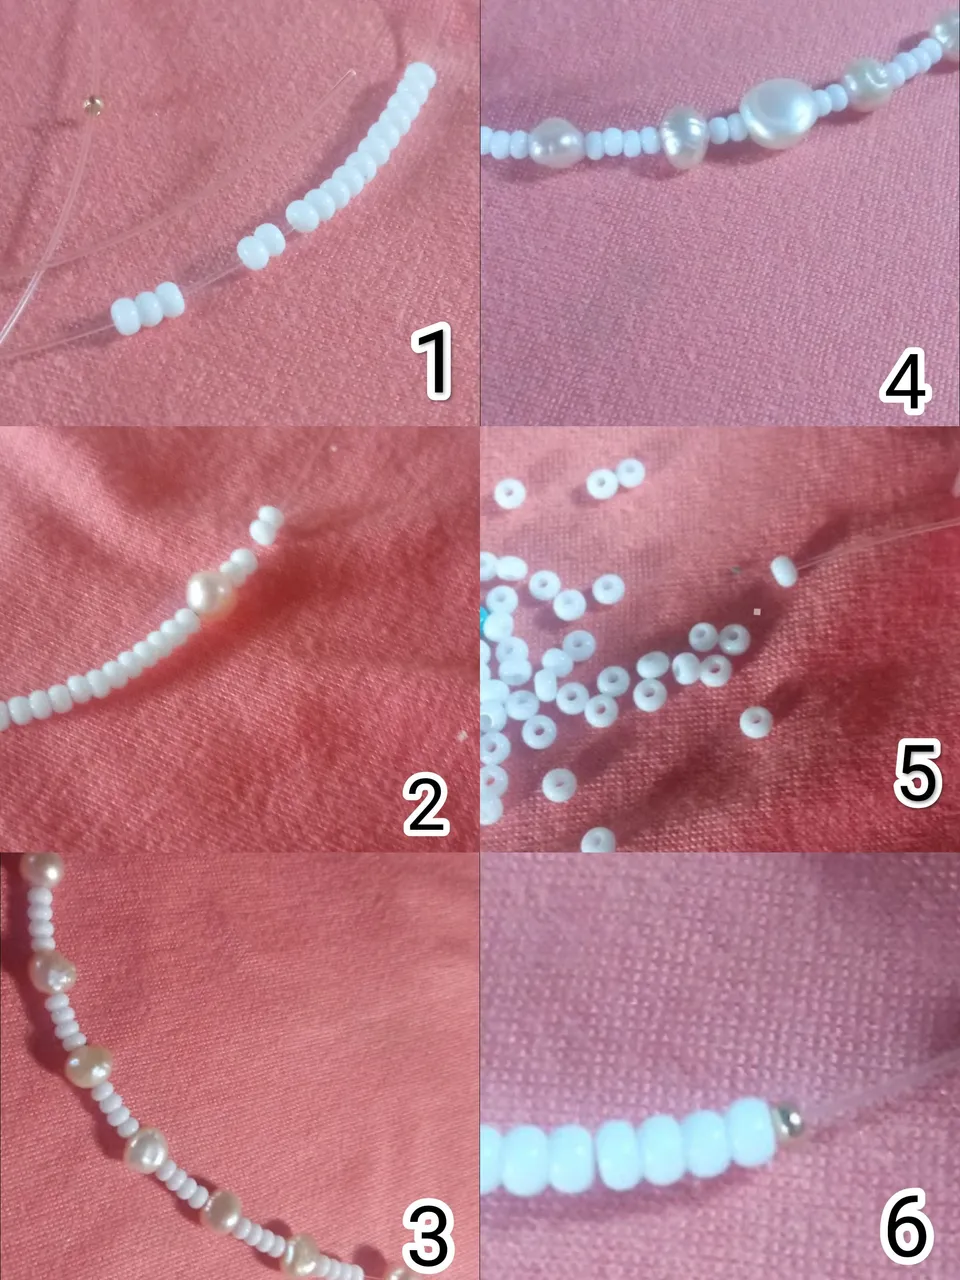
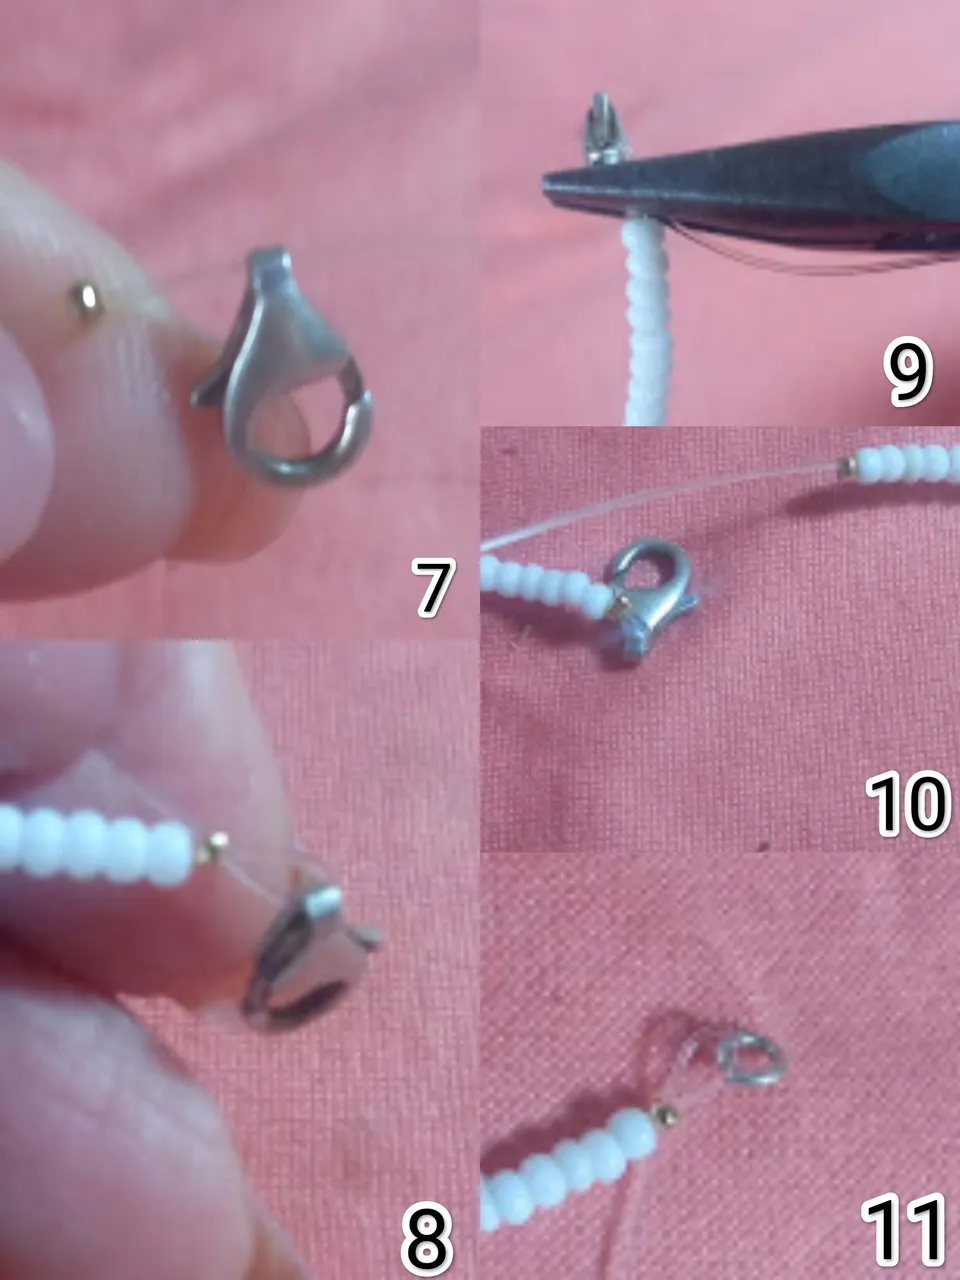
Antes de cerrar la grapa o escarlachin introduzco el trancadero pico de loro, luego introduzco el hilo nylon por la grapa lo halo hasta que quede una pequeña argolla y aprieto muy bien con la pinza punta plana, corto el nylon sobrante muy al raz del escarlachin para evitar que moleste al moleste al momento de ser usado, luego en el otro extremo corto el hilo nylon, introduzco una argolla previamente bien cerrada , aprieto el escarlachin o grapa corto el hilo nylon , reviso que este todo bien y doy por terminado el proyecto ( 8 al 11).
Before closing the staple or scarlachin I introduce the parrot beak locking ring, then I introduce the nylon thread through the staple, I pull it until a small ring is left and I tighten it very well with the flat tip pliers, I cut the excess nylon very close to the scarlachin to avoid that it bothers the scarlachin at the moment of being used, then in the other end I cut the nylon thread, I introduce a previously well closed ring, I tighten the scarlachin or clamp, I cut the nylon thread, I check that everything is well and I finish the project (8 to 11).
Espero sea de su agrado el trabajo realizado y será hasta una próxima oportunidad que les comparta con mucho gusto mis trabajos, todas las fotos son de mi autoría @lupasbra21 , fueron tomadas con mi teléfono inteligente Redmi, utilicé la aplicación polish para la edición de fotos y usé el traductor Deepl translate.
I hope you like the work done and will be until a next opportunity to share with pleasure my work, all photos are of my authorship @lupasbra21, were taken with my Redmi smartphone, I used the polish application for photo editing and used the translator Deepl translate.