Holaa hermosa comunidad, de artesanos, espero se encuentren muy muy bien.. este arte es muy versátil y se pueden hacer accesorios de casi cualquier elemento, el límite es nuestra mente, por eso cuando ví esta hermosa iniciativa no dude en participar aunque ya está a punto de terminar nunca es tarde..
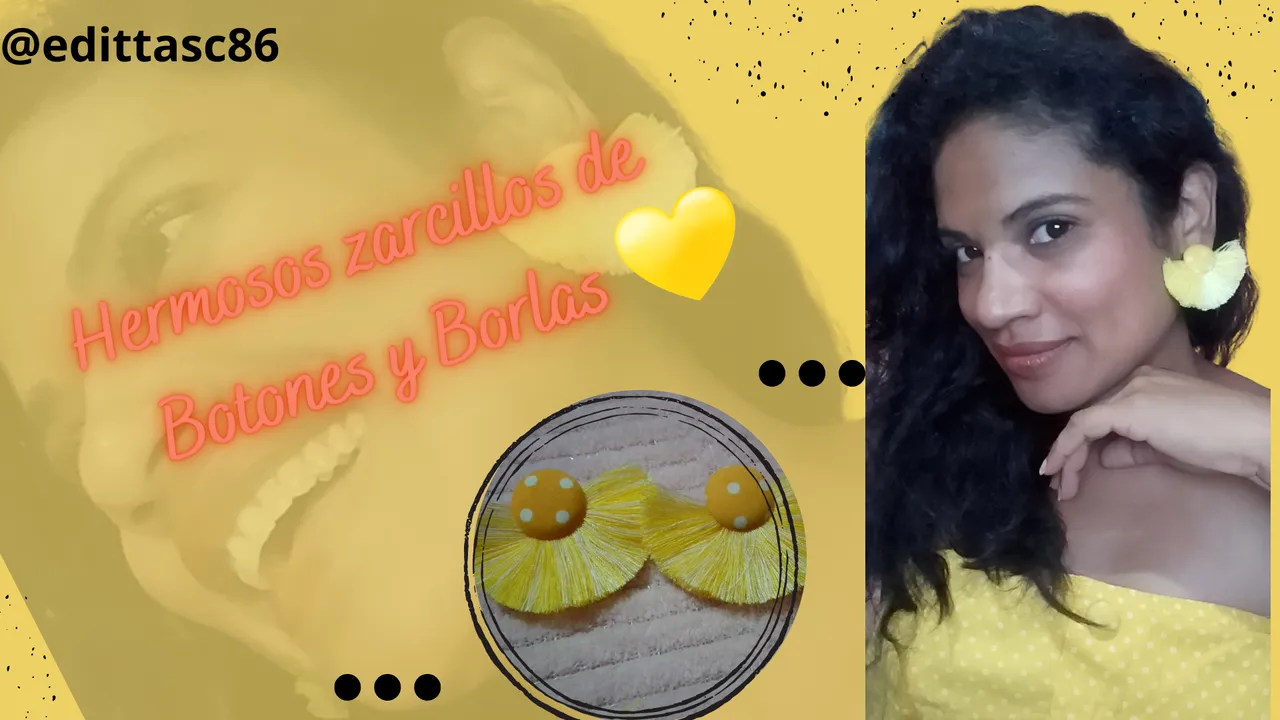
Mi accesorio de botones..
Revise mis tesoros en busca de botones increíbles 😅 y hasta mi mamá se puso en esa labor y encontré unos que vinieron de repuesto de un lindo vestido amarillo y me dije: "mi misma estos son 🤭" de este vestido 💛 que me puse el 24 de diciembre del 2022. (un poco arrugado pero vamos a hacer que no se nota)

Luego de ubicar los botones perfectos, ahora venía otra parte importante ¿qué voy hacer, zarcillos, pulsera o collar? cuando me dije zarcillos pensé ahora el cómo? 😅 bordados, con alambres, otras piedras y de repente? 💛¡EUREKA!💛 me vino la idea a la cabeza y hasta le explique a mi mamá..
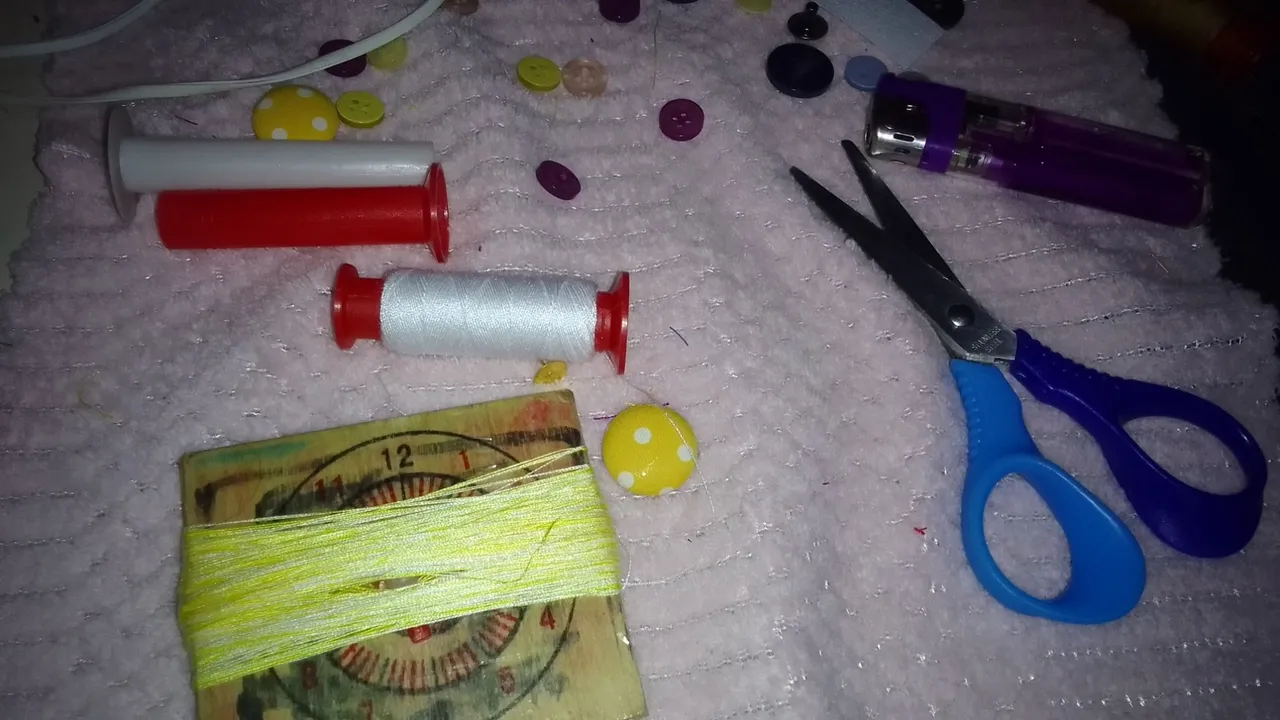
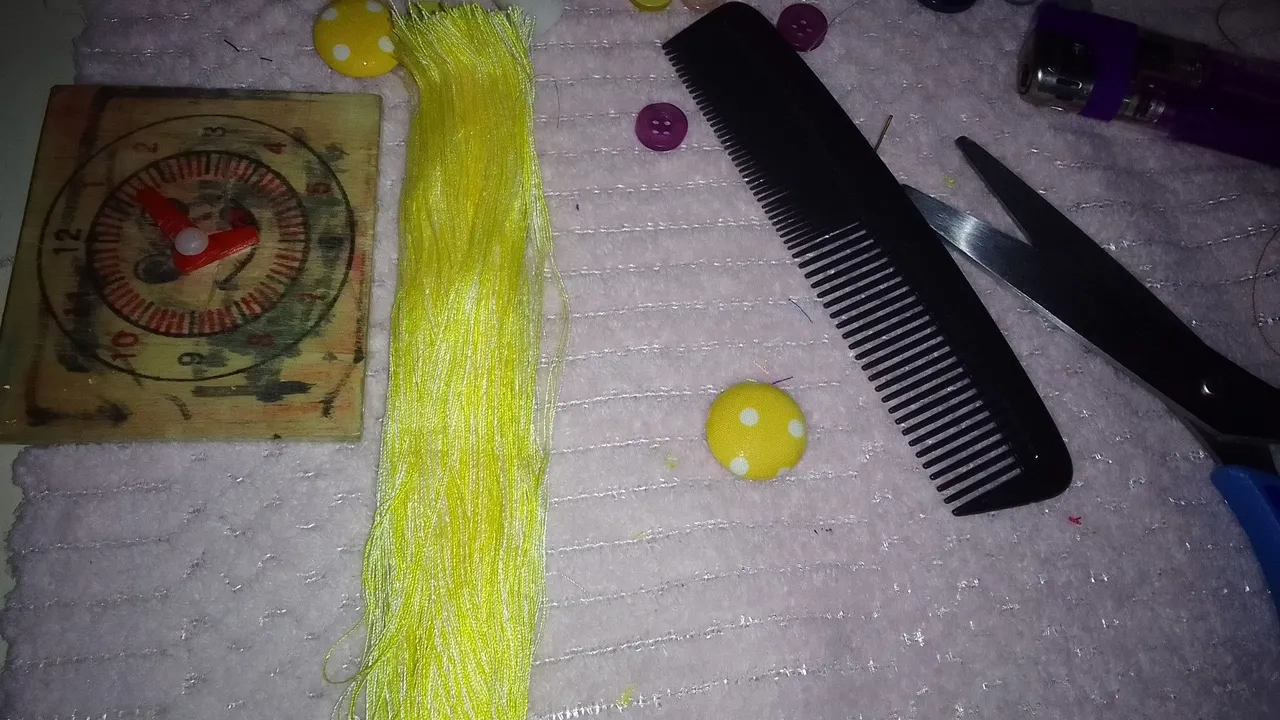
Para realizar estos hermosos zarcillos utilice los siguientes materiales:
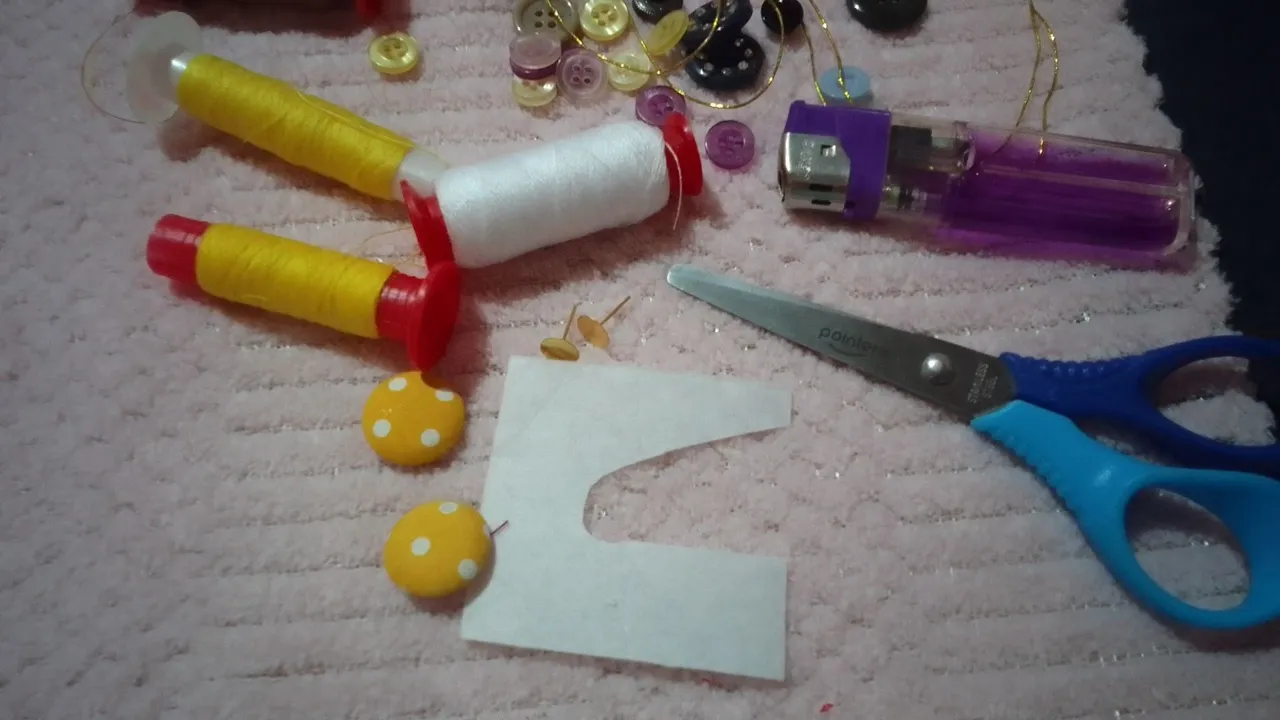
💛 Botones forrados
💛 Hilo de costura (amarillo y blanco)
💛 Tijera
💛 Entre tela o pelón
💛 Silicona líquida
💛 Cuadrito de madera
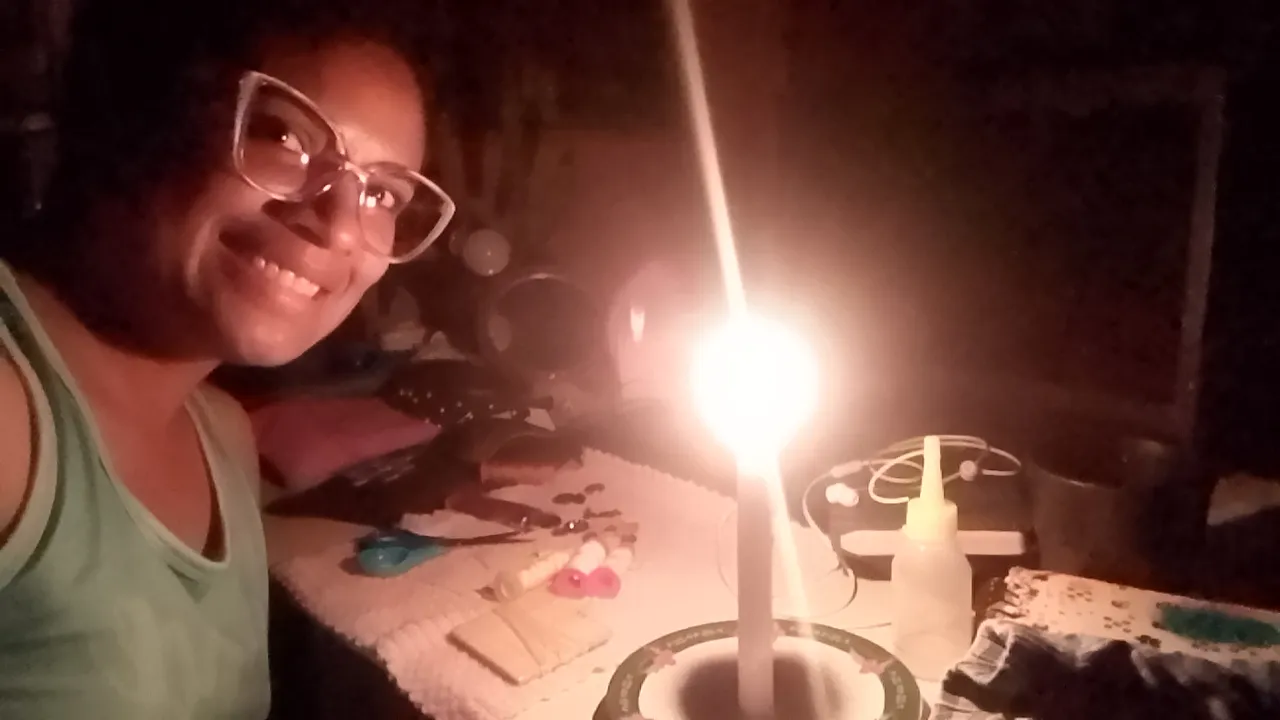
Pues luego de esta foto y cuando comencé a enrollar el hilo en el cuadrito para hacer borlas se fue la electricidad 😪, pero lejos de lamentarse aunque el emoji diga lo contrario, me acorde que habia comprado unas velas, así que sin miedo al éxito 😂 continúe
 |  |
|---|
Bueno, con la compañía de esa tenue luz y los zancudos e insectos 🤭 seguí dando vueltas al cuadrito hasta que los colores amarillos se agotaron
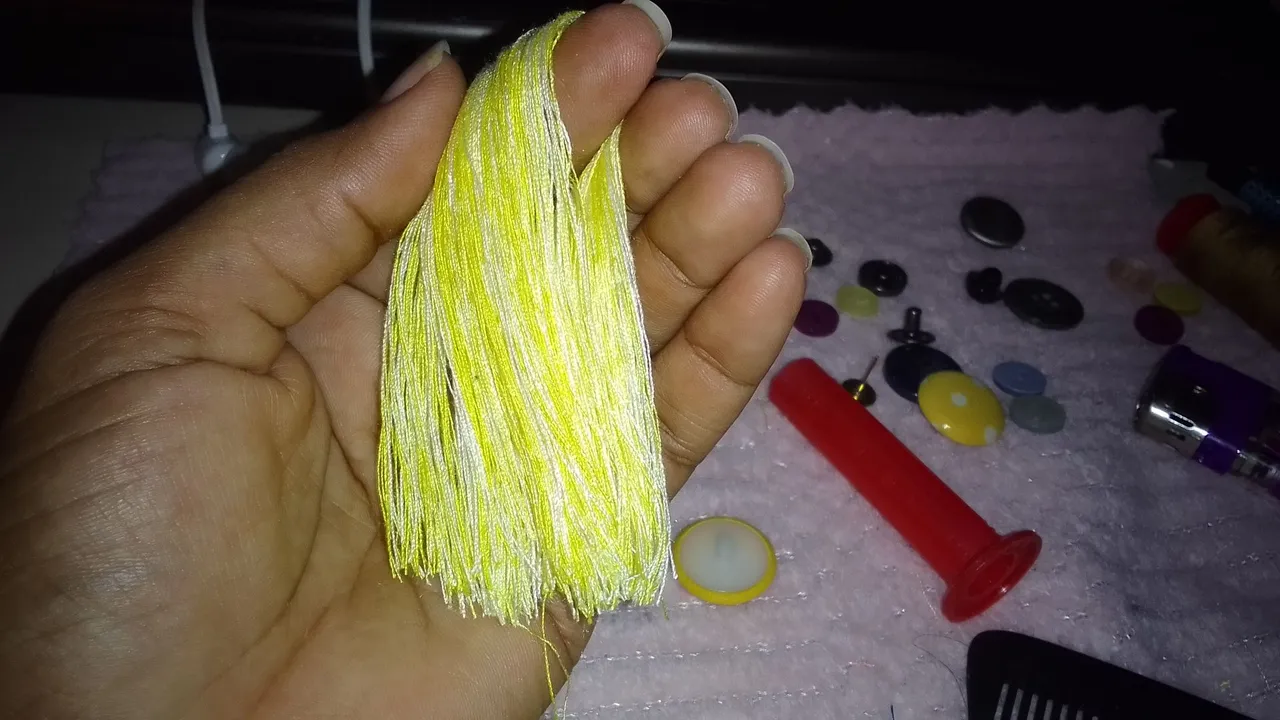
Luego con la tijera corte uno de los extremos para sacar el hilo y con un peine que tengo especialmente para hacer borlas las peine y desenrede a veces sucede que los hilos se enredan
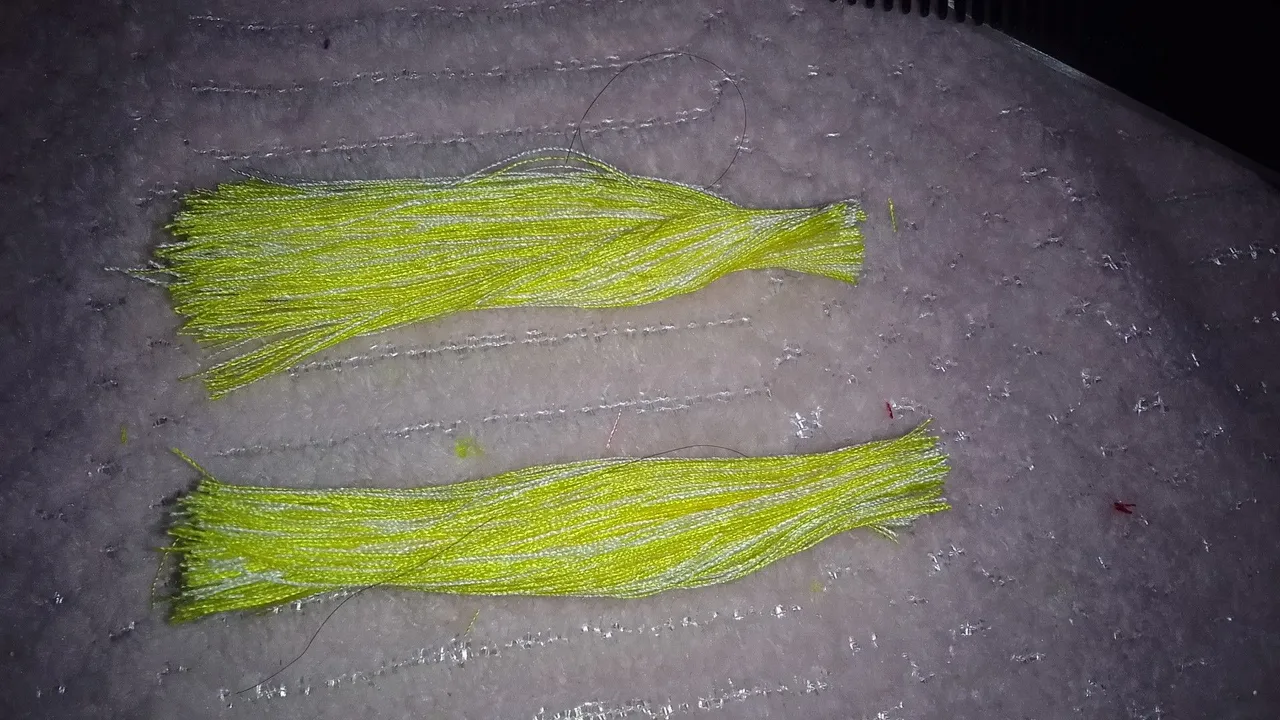
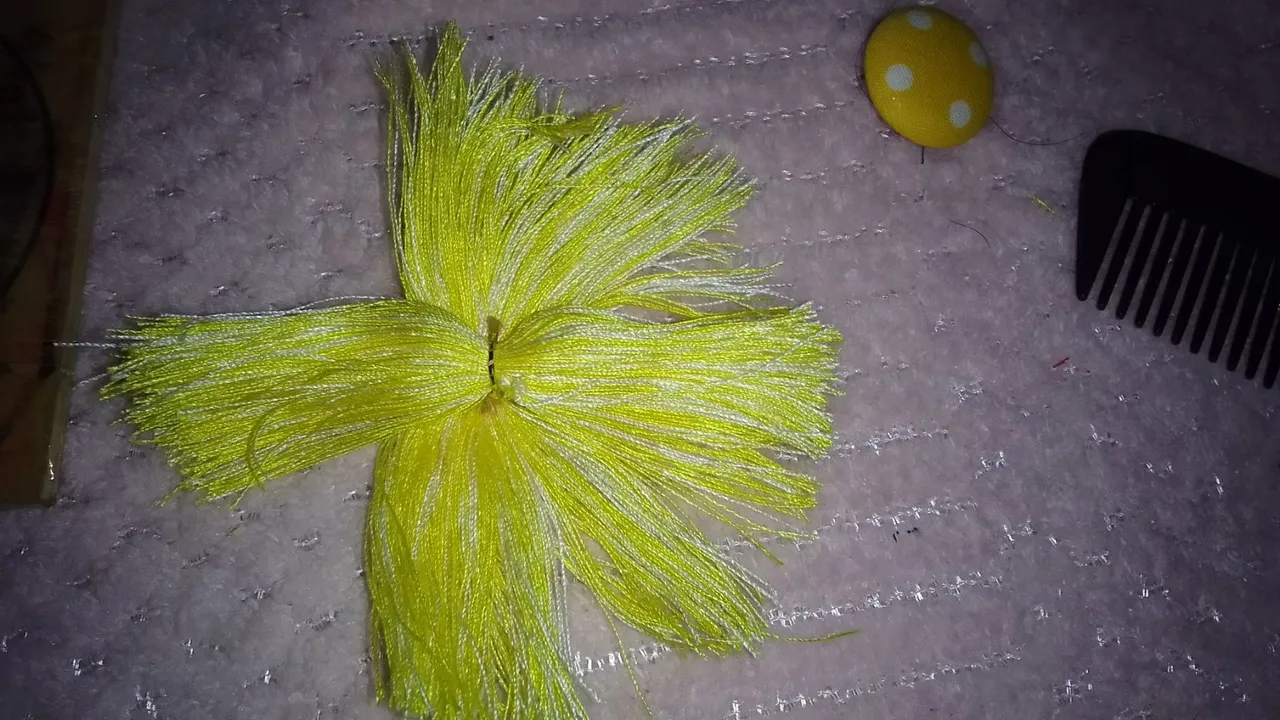
Separe en dos partes para cada zarcillos. Con mis dedos doble en dos para tratar de tener dos partes iguales y picar a la mitad
 |  |
|---|
Pasos para Realizar la borla 💛
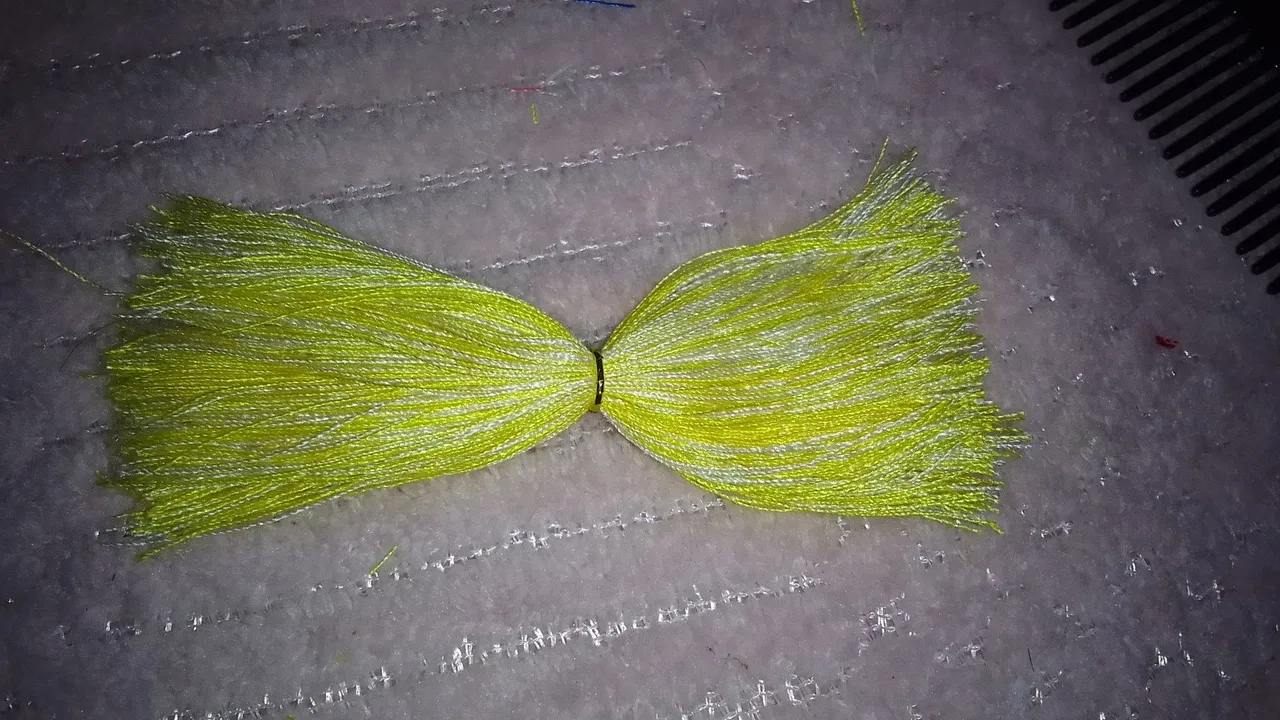
1- Tome las partes que se cortó anteriormente y le ató un nudo a la mitad, luego de eso las coloco una encima de la otra como se ve en la foto:
 |  |
|---|
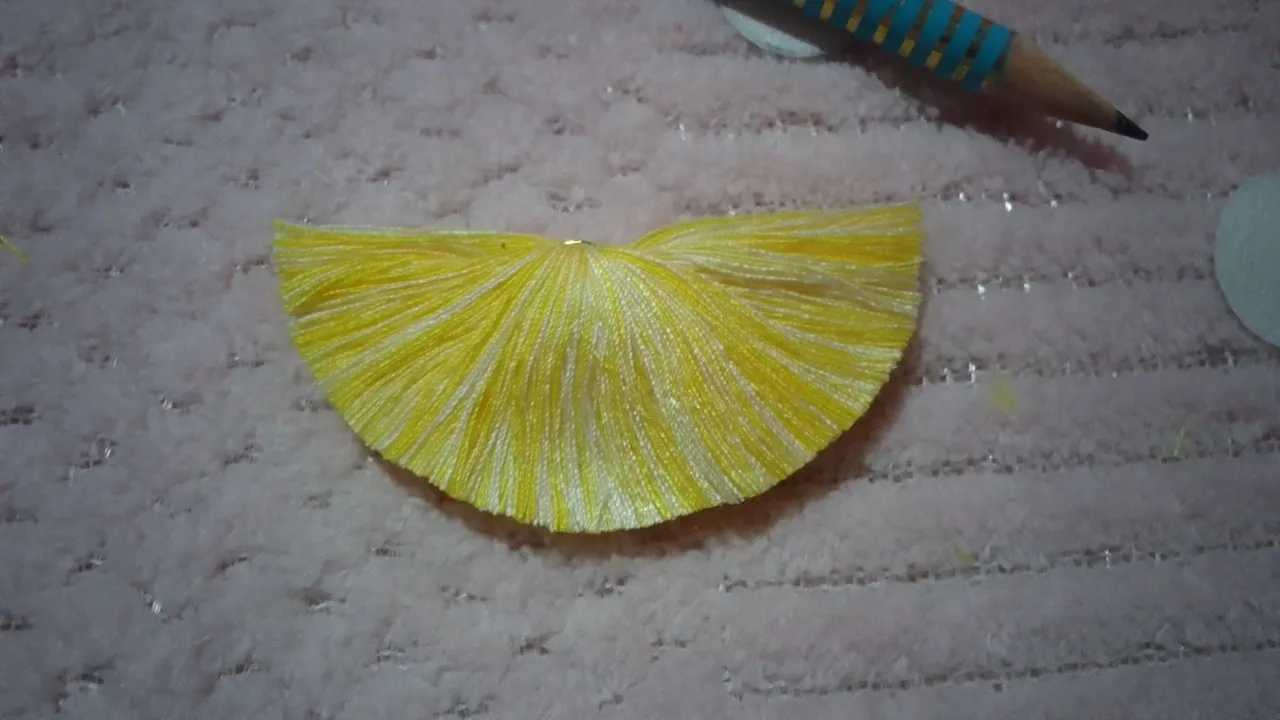
2- Le aplique silicona líquida y los peque y doble para crear la borla, repetí el procedimiento para realizar el otro zarcillo:
 |  |
|---|
Ya para ese momento de la foto, la electricidad hizo acto de presencia Gracias a Dios..
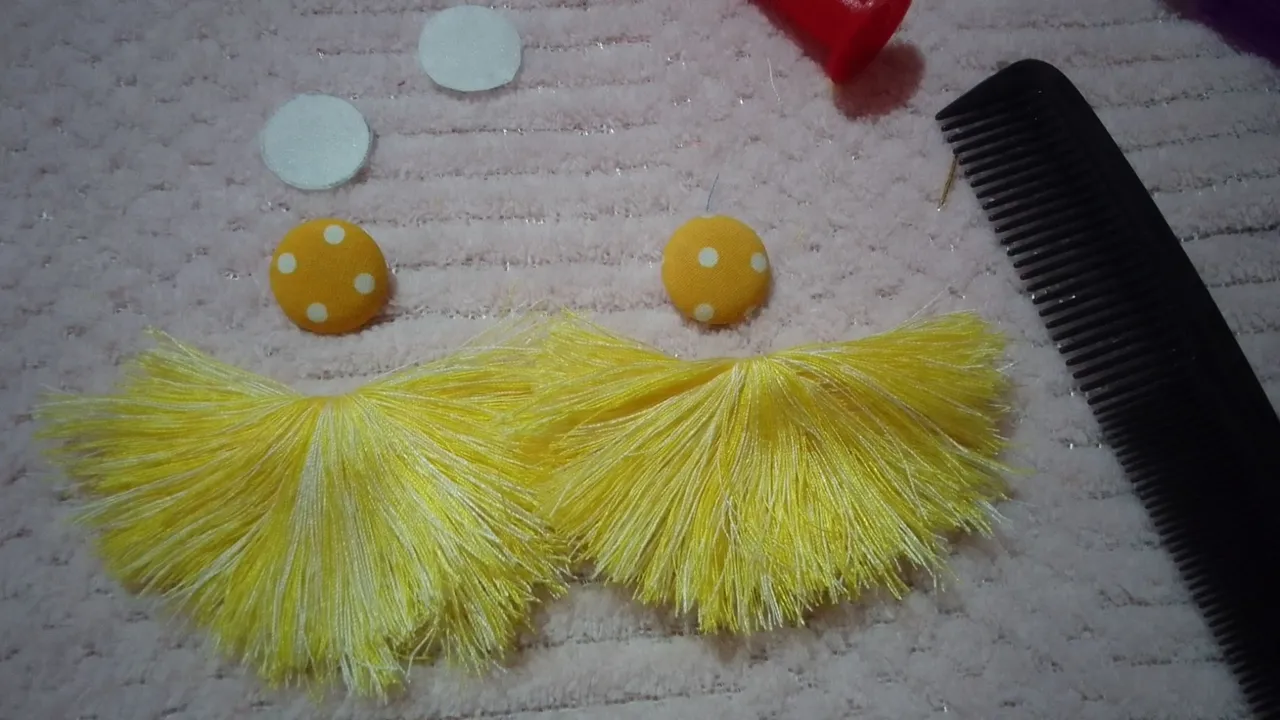
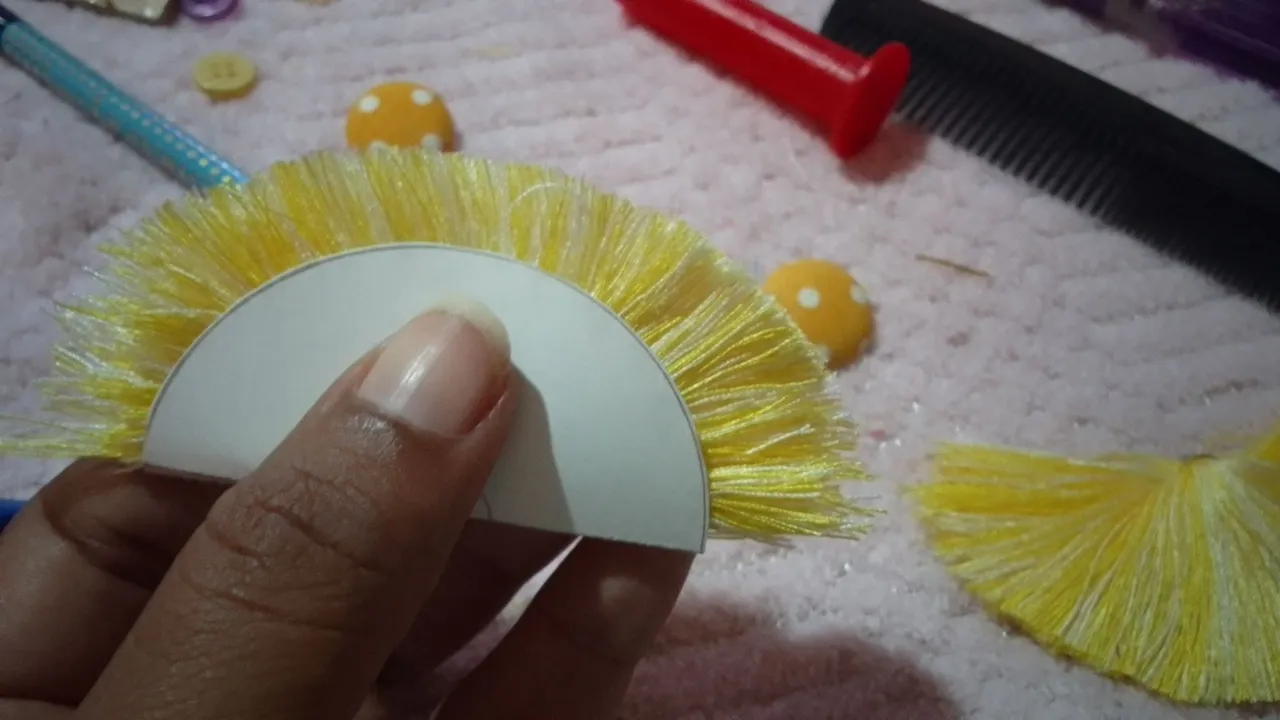
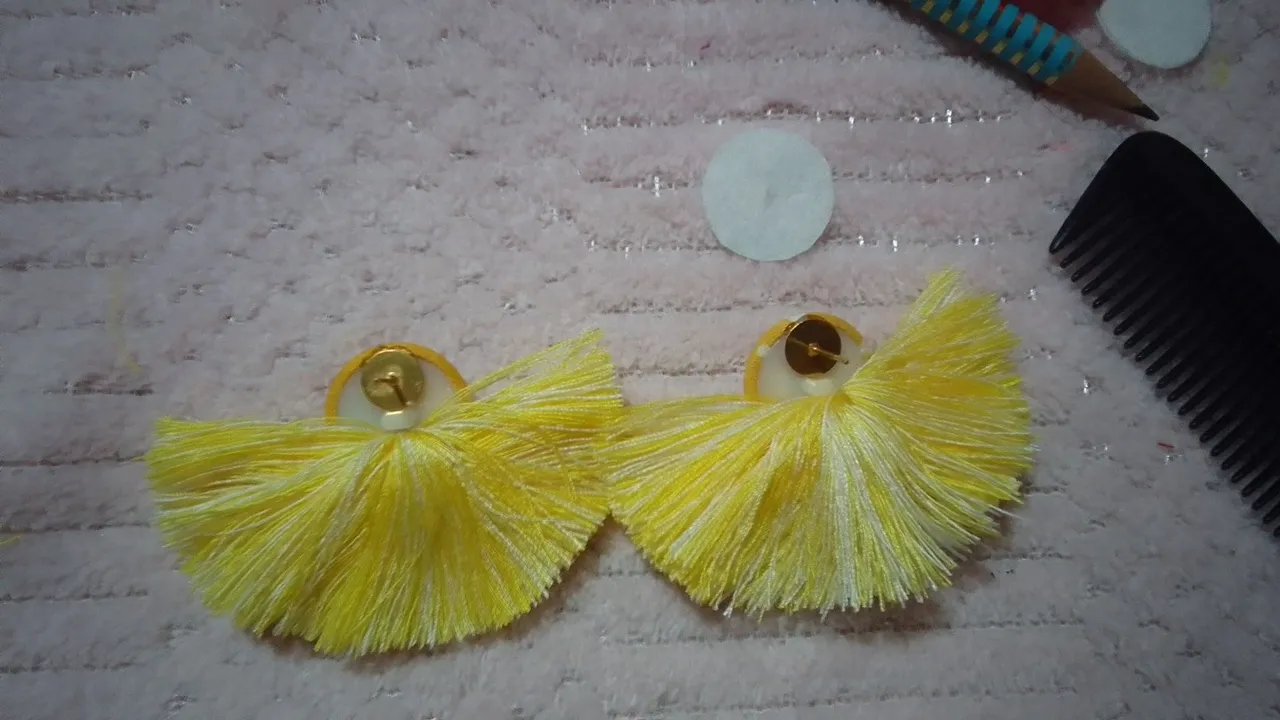
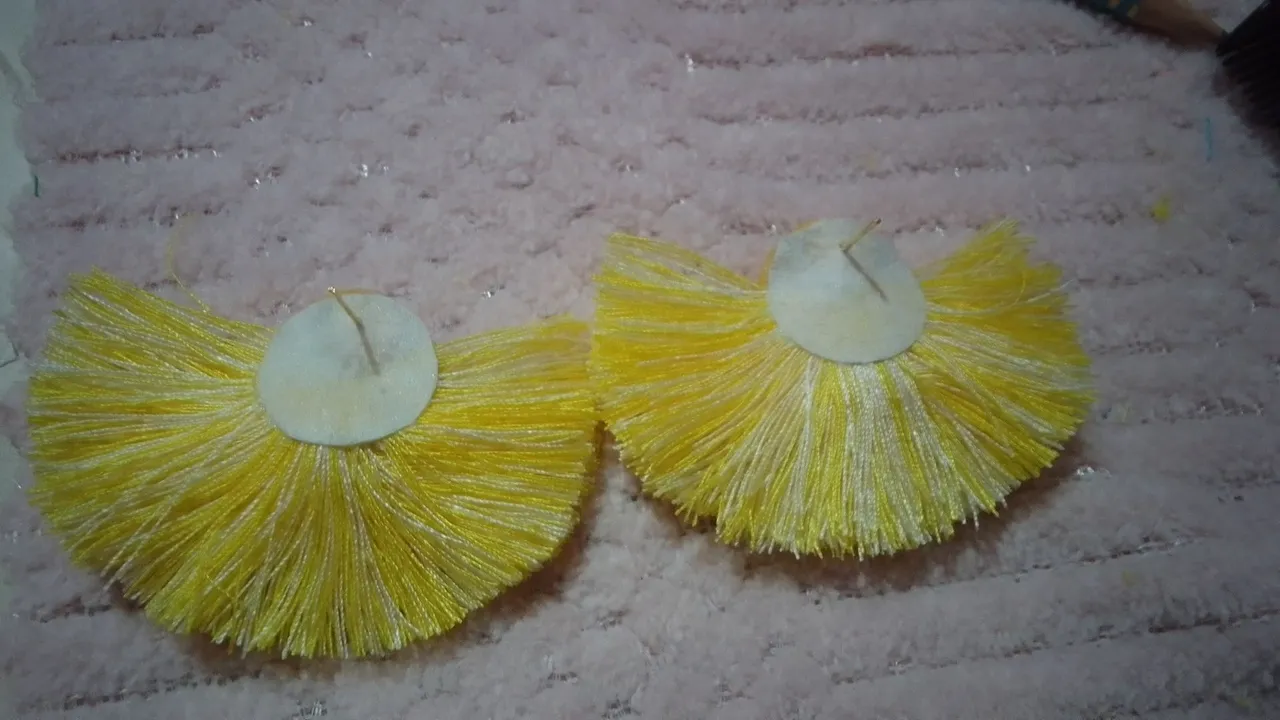
3- Realice cositas adicionales como unos círculos pequeños con la entre tela o pelón, para la parte de atrás del zarcillo, así como una basesita de cartón para eliminar el exceso de hilo, una vez lista quite con la tijera esa parte que sobra:
 | 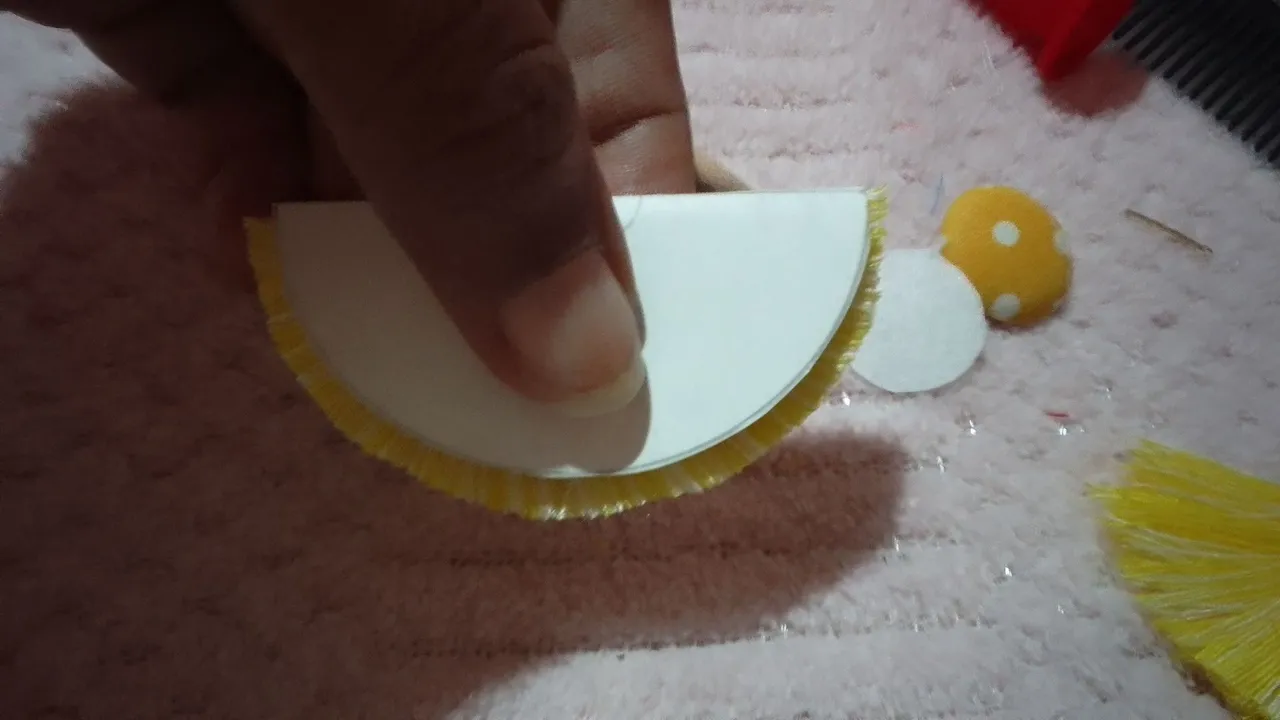 |
|---|---|
 |  |
Realice el mismo procedimiento para el otro zarcillo.
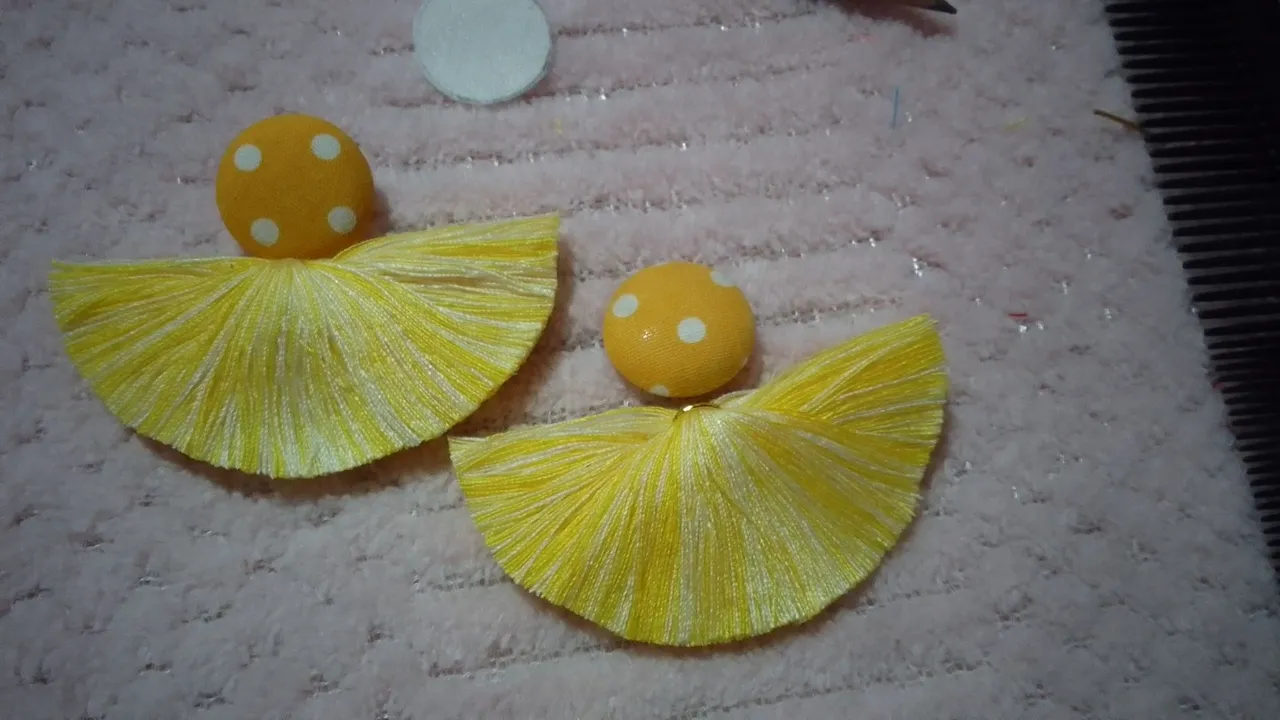
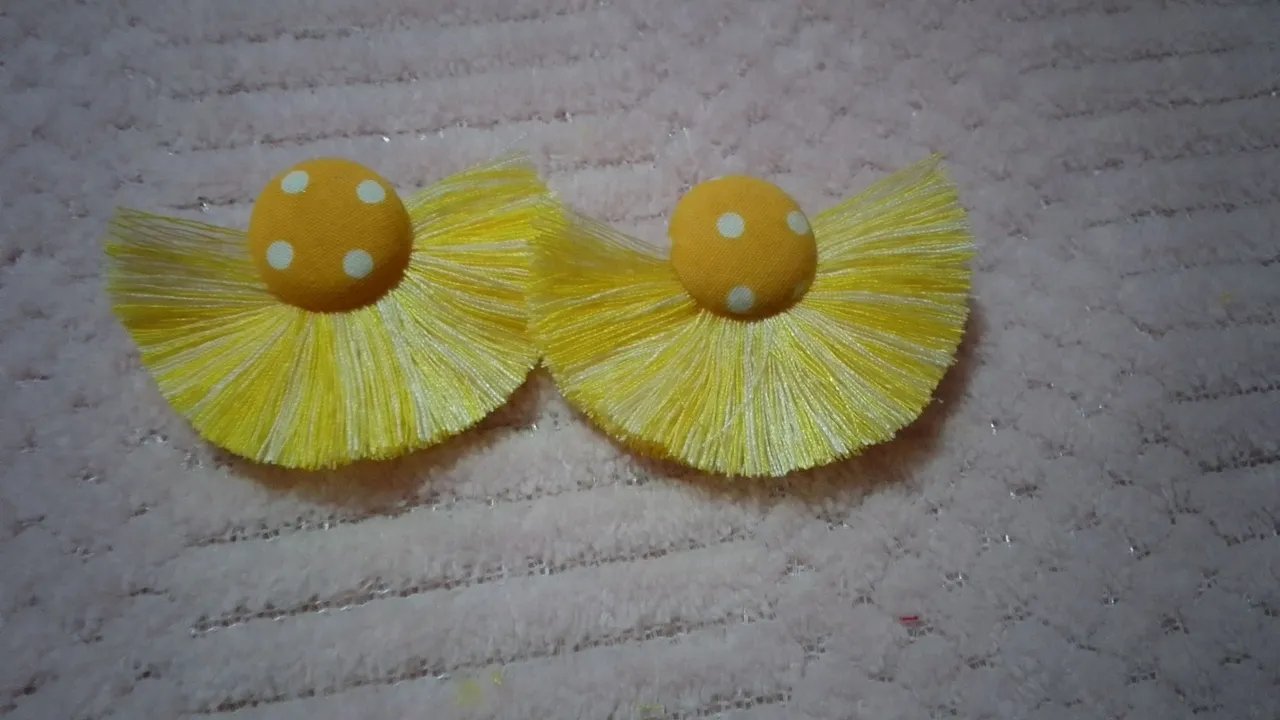
4- Lo siguiente el ensamblaje de las piezas, para ello, con la silicona pegue una parte del botón al hilo, espere unos minutos a que secara, y continúe con el pin del zarcillo, luego coloque el círculo de pelón en la parte de atrás de los zarcillos:
 |  |  |
|---|
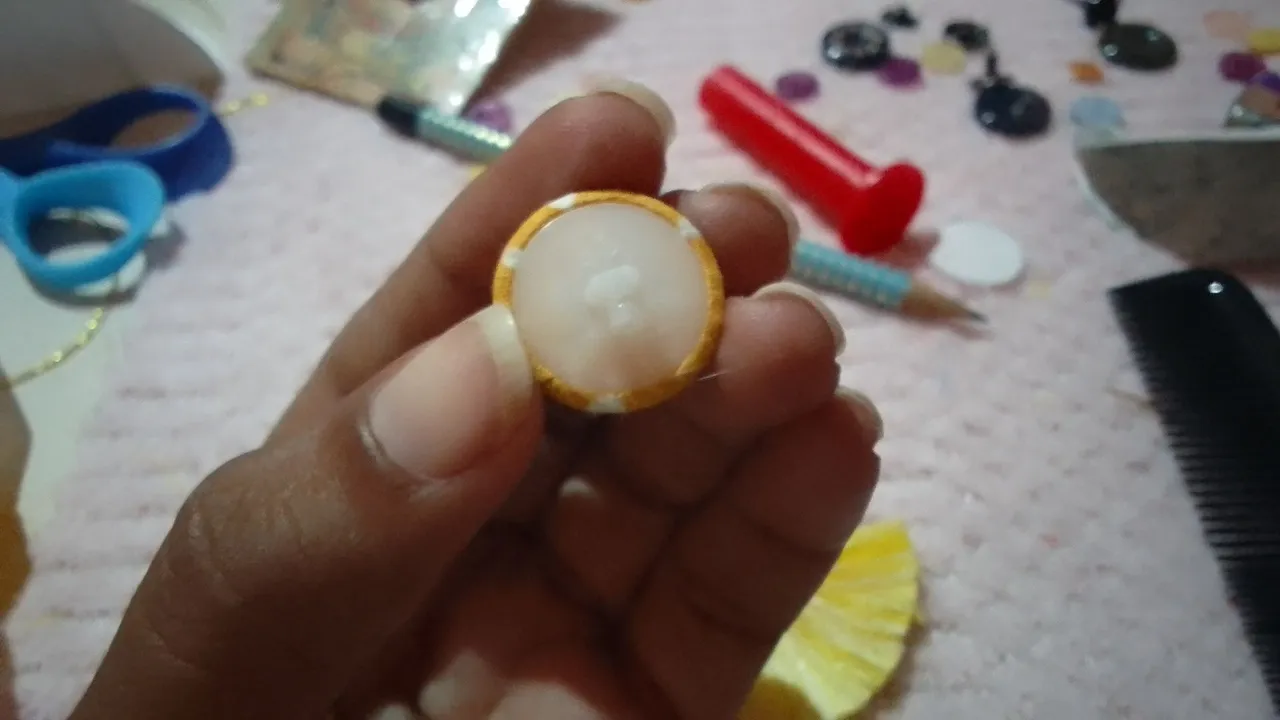
Así quedaron estas bellezas:
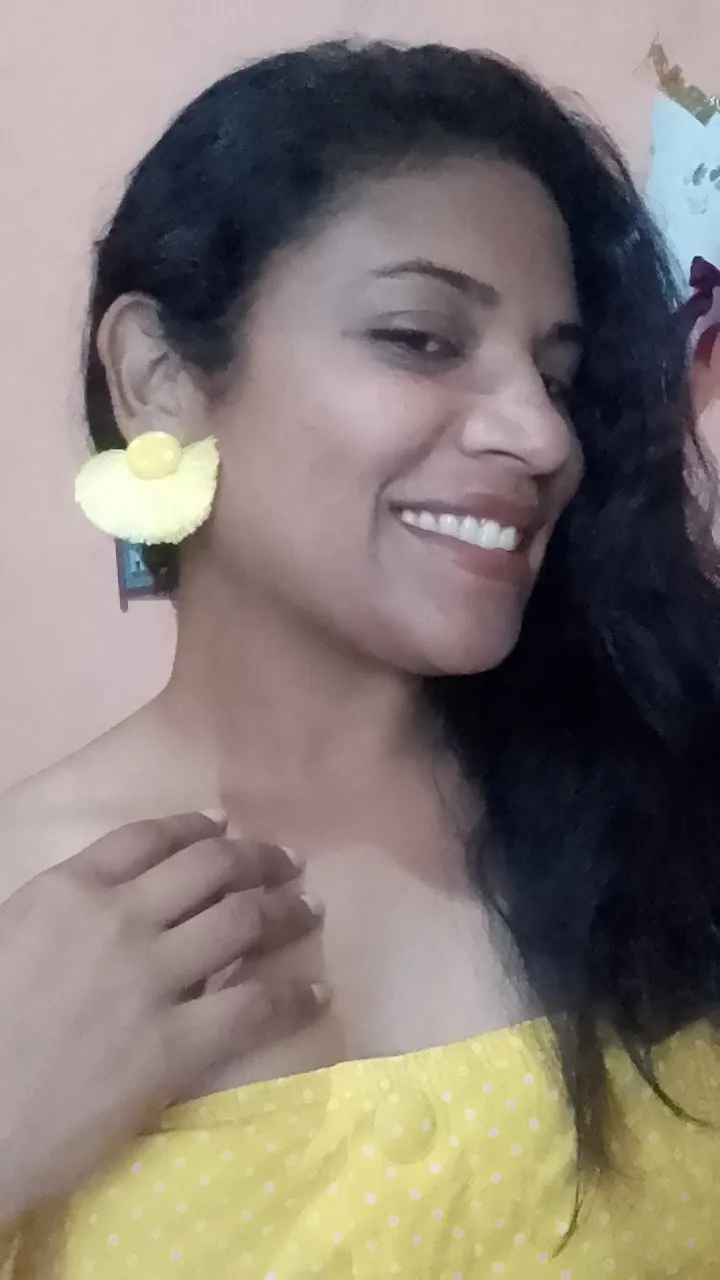
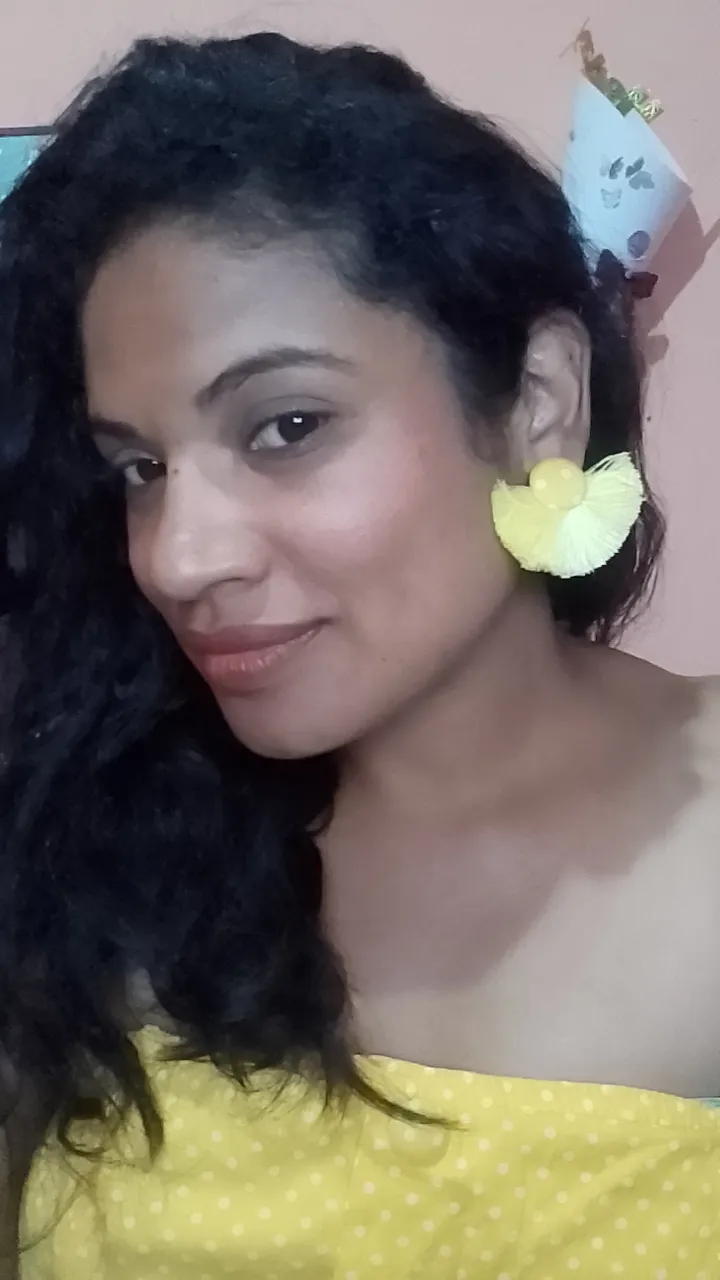
Y así lucen, demasiado hermosas y para combinar me coloque el vestido:
 |  |
|---|
Espero les haya gustado tanto como a mi.. me encanto esta INICIATIVA , e invito a @ikigaidesign, @bayondalways1 y a @yanetzi1 💛 a participar aun hay tiempo 🙏
Gracias por leer y llegar hasta aquí.. Bendiciones 💛
ENGLISH 💛
Hello beautiful community of artisans, I hope you are very very well ... this art is very versatile and you can make accessories of almost any element, the limit is our mind, so when I saw this beautiful initiative did not hesitate to participate although it is about to end is never too late ...
My button accessories...
I went through my treasures in search of amazing buttons 😅 and even my mom got into that work and I found some that came spare from a cute yellow dress and I said to myself: "my myself these are 🤭" from this dress 💛 that I wore on December 24, 2022. (a little wrinkled but let's make it not noticeable).
After locating the perfect buttons, now came another important part what am I going to do, tendrils, bracelet or necklace? when I said tendrils I thought now how? 😅 embroidered, with wires, other stones and all of a sudden? 💛 EUREKA!💛 the idea came to my head and I even explained to my mom....
To make these beautiful tendrils use the following materials:
💛 Lined buttons
💛 Sewing thread (yellow and white)
💛 Scissors
💛 In between fabric or fur
💛 Liquid silicone
💛 Wooden square
Well after this photo and when I started to wind the thread on the square to make tassels the electricity went out 😪, but far from regretting even if the emoji says otherwise, I remembered that I had bought some candles, so without fear of success 😂 continue.
| |
|---|
Well, with the company of that dim light and the waders and insects 🤭 I kept going around the square until the yellow colors were exhausted.
Then with the scissors I cut one of the ends to remove the thread and with a comb that I have especially for making tassels I combed and unraveled them sometimes it happens that the threads get tangled.
Separate in two parts for each tendrils. With my fingers fold in two to try to have two equal parts and chop in half.
| |
|---|
Steps to make the tassel 💛
1- Take the parts that were cut earlier and tie a knot in half, after that I place them on top of each other as seen in the picture:
| |
|---|
2- Apply liquid silicone and the small ones and fold to create the tassel, repeat the procedure to make the other tendril:
| |
|---|
By the time the photo was taken, the electricity was on, thank God!
3- I made some additional little things like small circles with the fabric for the back of the tendril, as well as a cardboard base to remove the excess thread, once ready, remove with the scissors that part that is left over:
| |
|---|---|
| |
Do the same procedure for the other tendril.
4- Next is the assembly of the pieces, for this, with the silicone glue a part of the button to the thread, wait a few minutes for it to dry, and continue with the pin of the tendril, then place the circle of hair on the back of the tendrils:
| | |
|---|
This is how these beauties turned out:
And this is how they look, too beautiful and to match I put on the dress:
| |
|---|
I hope you liked it as much as I did... I loved this INITIATIVE , and I invite @ikigaidesign, @bayondalways1 and @yanetzi1 💛 to participate there is still time 🙏.
Thanks for reading and making it this far.. Blessings 💛
Cover and banner made in Canva
Separator made in Powerpoint
Photographs of my authorship