Hello my dear friends of Hive. I hope you are doing well in this new beginning of the week, that the universe manages to move in our favor and that we can achieve our goals for the remainder of this year.

I recently started to work with cold flexible dough, it is a dough that allows us to perform various types of cold work, including the benefit of this dough allows us to perform jewelry work. I am very happy to be able to present you my first work of jewelry with this type of material, I hope you like it and I hope to see your comments and suggestions of this work.
Materials
- Cold Flexible Dough
- Oil paint
- Brush
- Stakes
- Ring
- Chain
- Instant glue
Step by Step
1
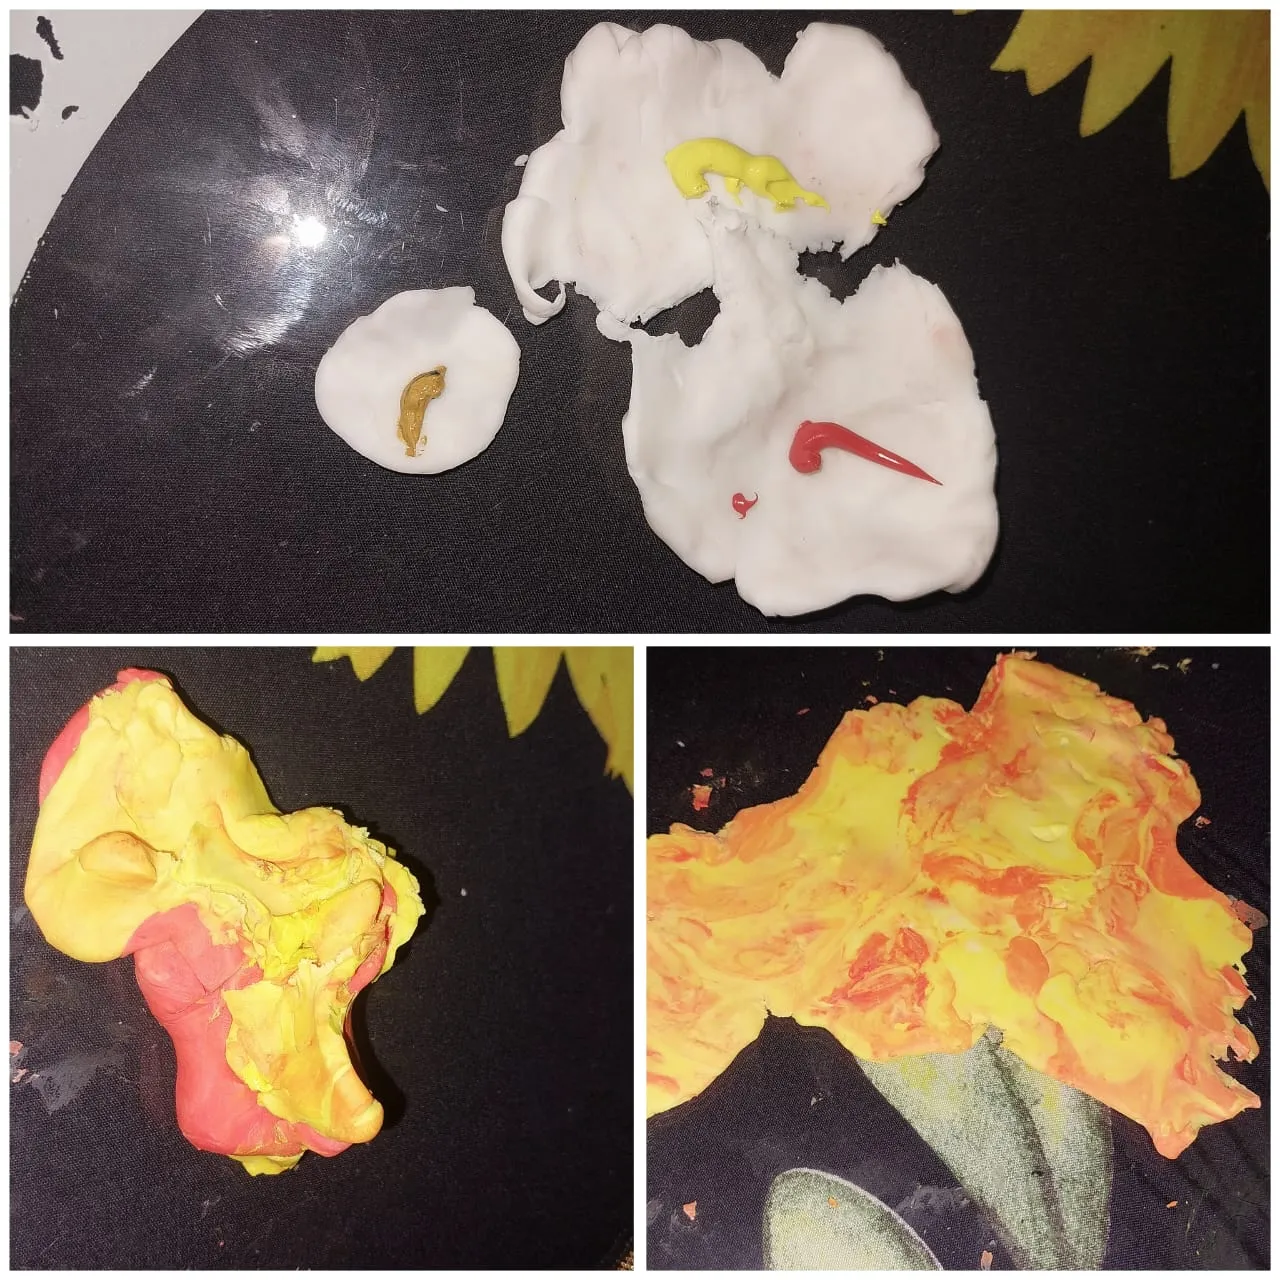
We take just a little bit of flexible dough as a small ball just to make the petals and the pistil of the sunflower. To make the petals I have separated two halves, one to apply yellow paint and the other to add orange paint, then we mix both masses to give a nuanced touch to the petals between intervals of yellow and orange.
2
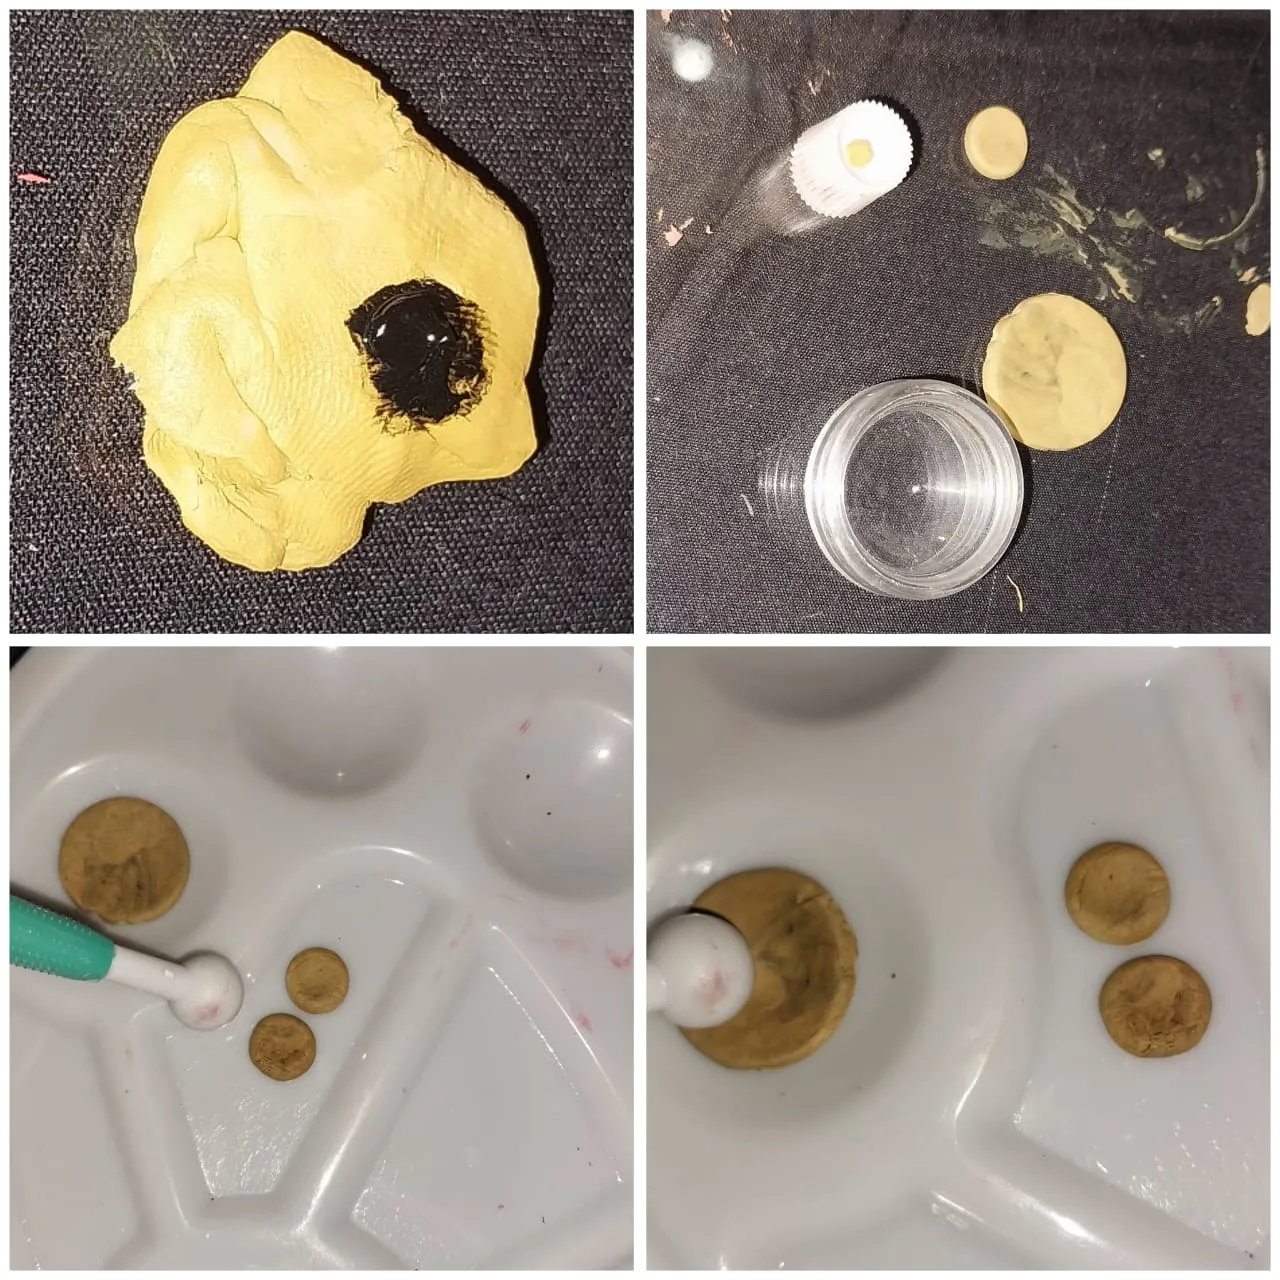
Then to make the pistils of the dough we must use a shade of brown and then apply a little bit of black paint and then mix. Then we must use a circular frame to obtain the pistils. In this case I have used two lids to obtain a circular mold, one for the big flower of the necklace and other two for the earrings.
3
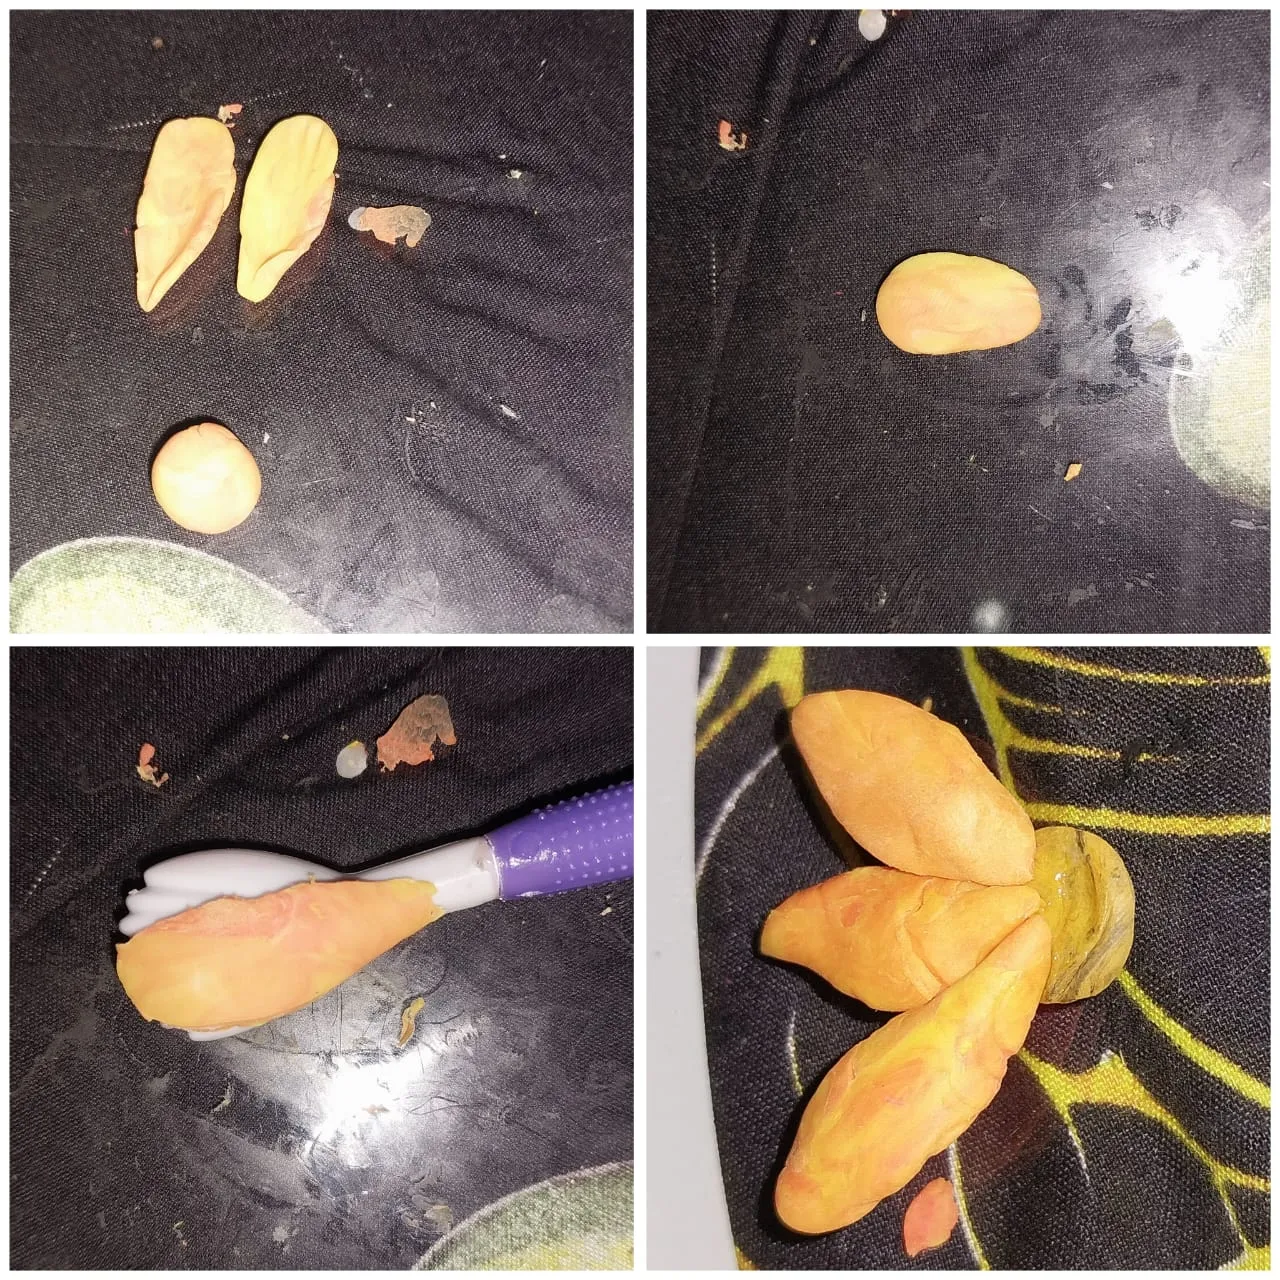
Then we used the orange and yellow dough to make the flower petals, and molded the petals with the stake. Then we used the instant glue to glue petal by petal to the back of the circular brown pistil we created earlier.
4
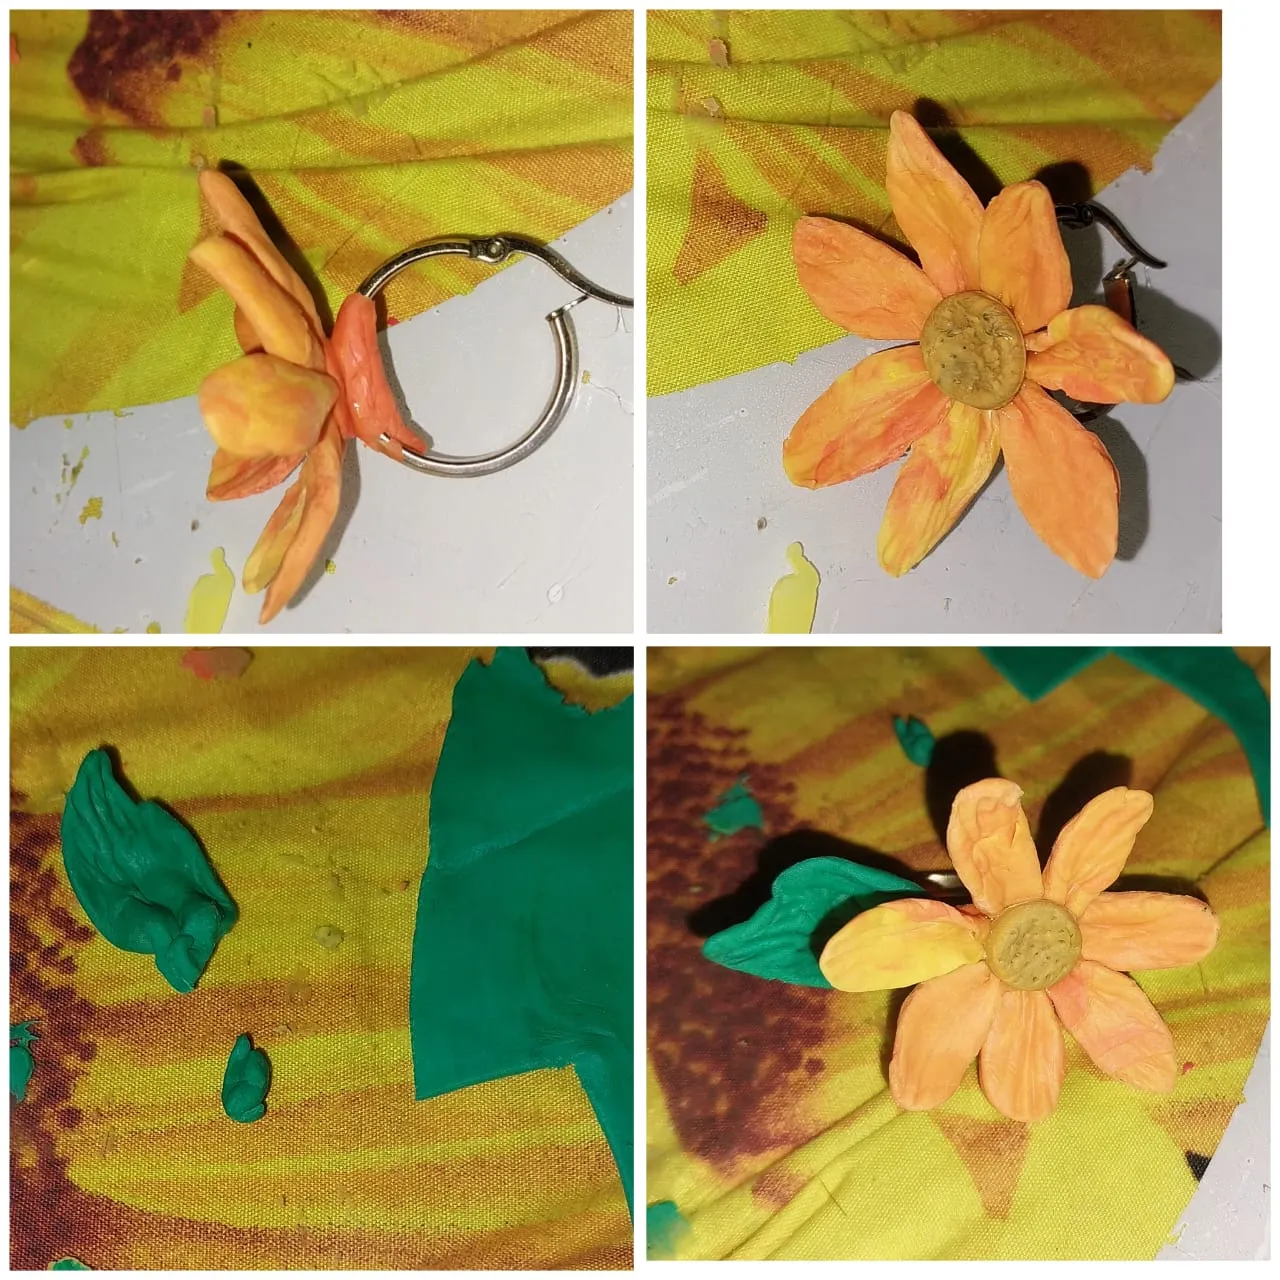
Then we must glue the flower on the part of the ring structure, we use some flexible dough to glue the flower to the ring material. To make the leaves we must apply a little green color in the dough and then flatten the dough with a rolling pin to form the leaves taking a triangle or giving it the shape that resembles a leaf.
Then with one of the stakes or a toothpick and give relief to the dough by marking lines on the leaf, and then glue it on the back.
5
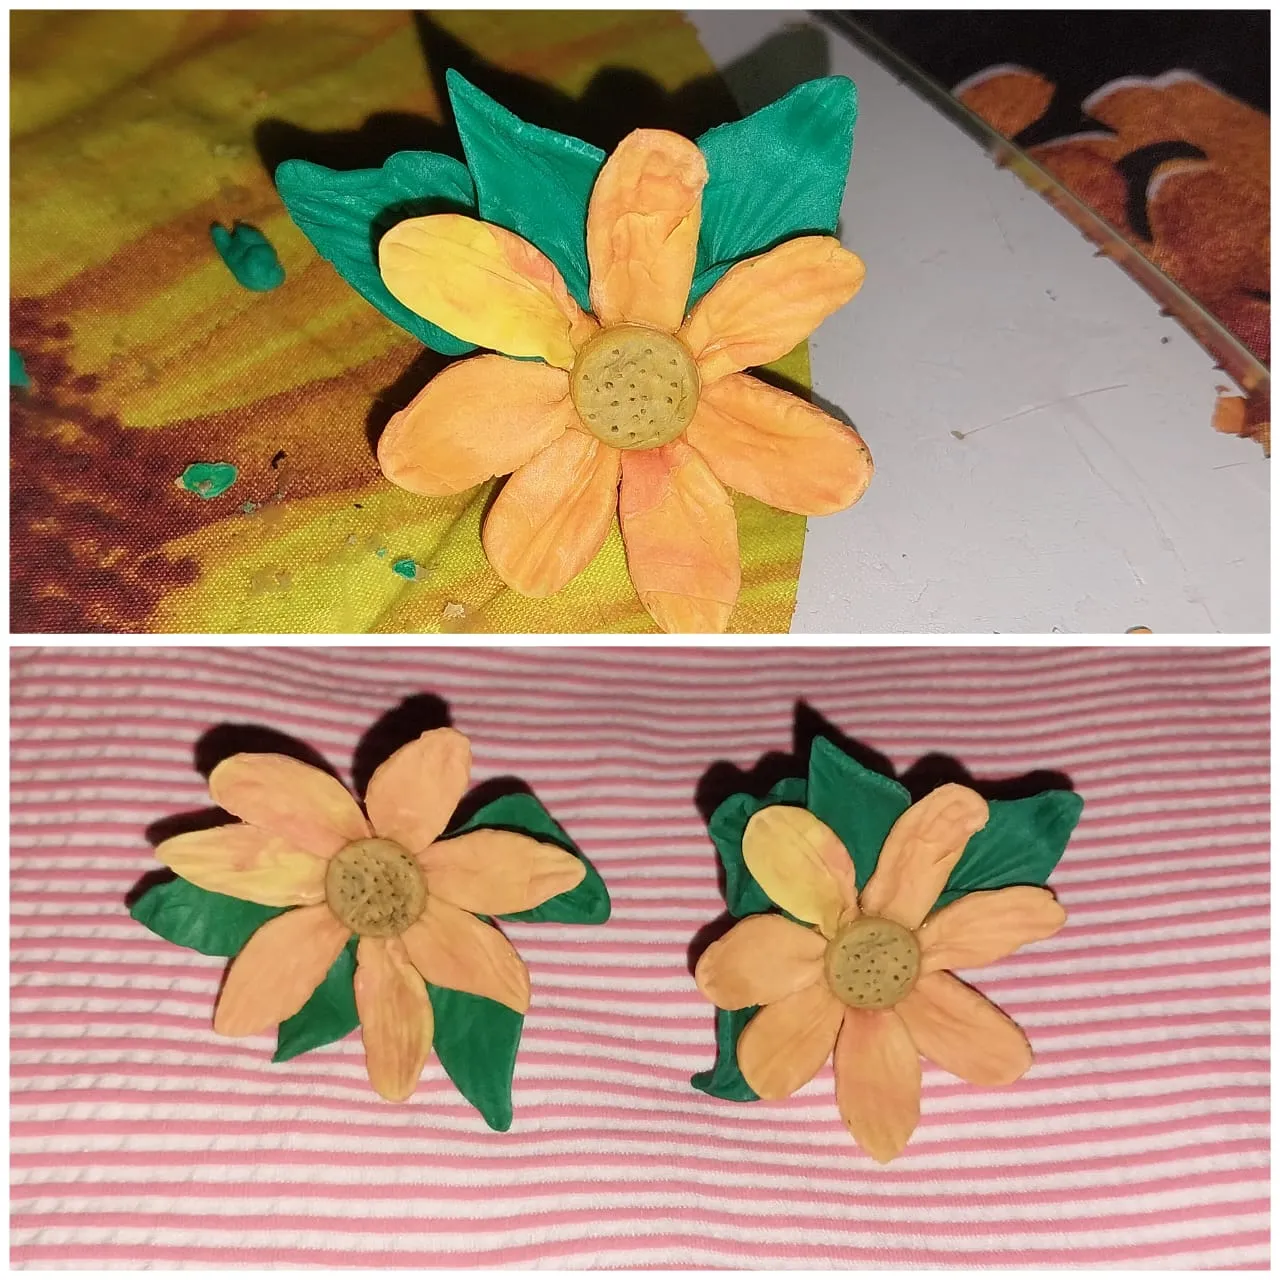
In this way in the central part of the pistil I marked several points with a needle. I added three more leaves to each earring and glued them with the instant glue.
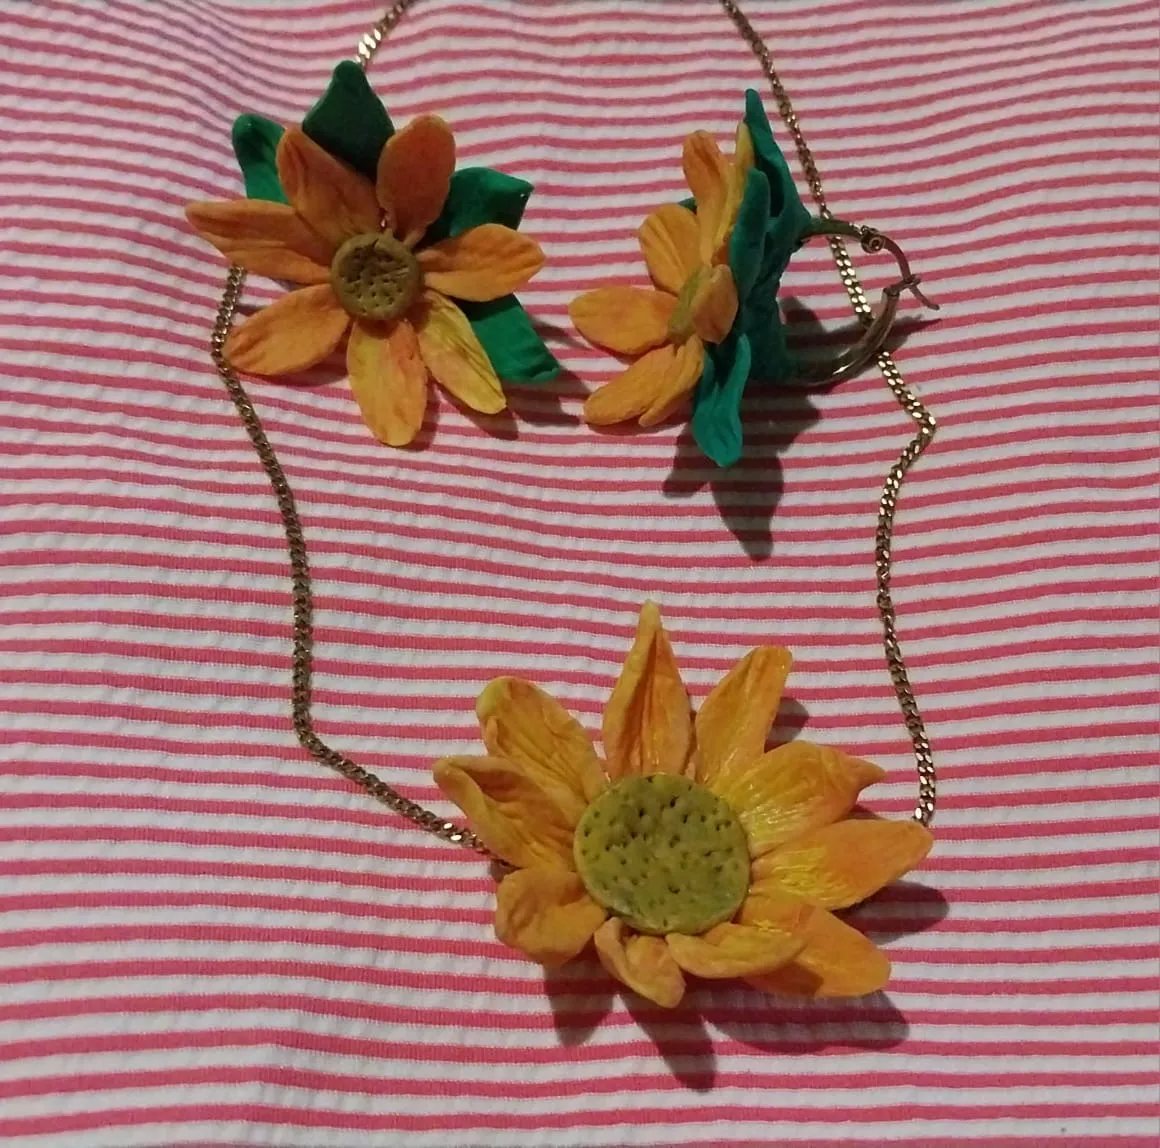
Then following the same steps above we made the center flower only for this flower we used the larger pistil that was created at the beginning.
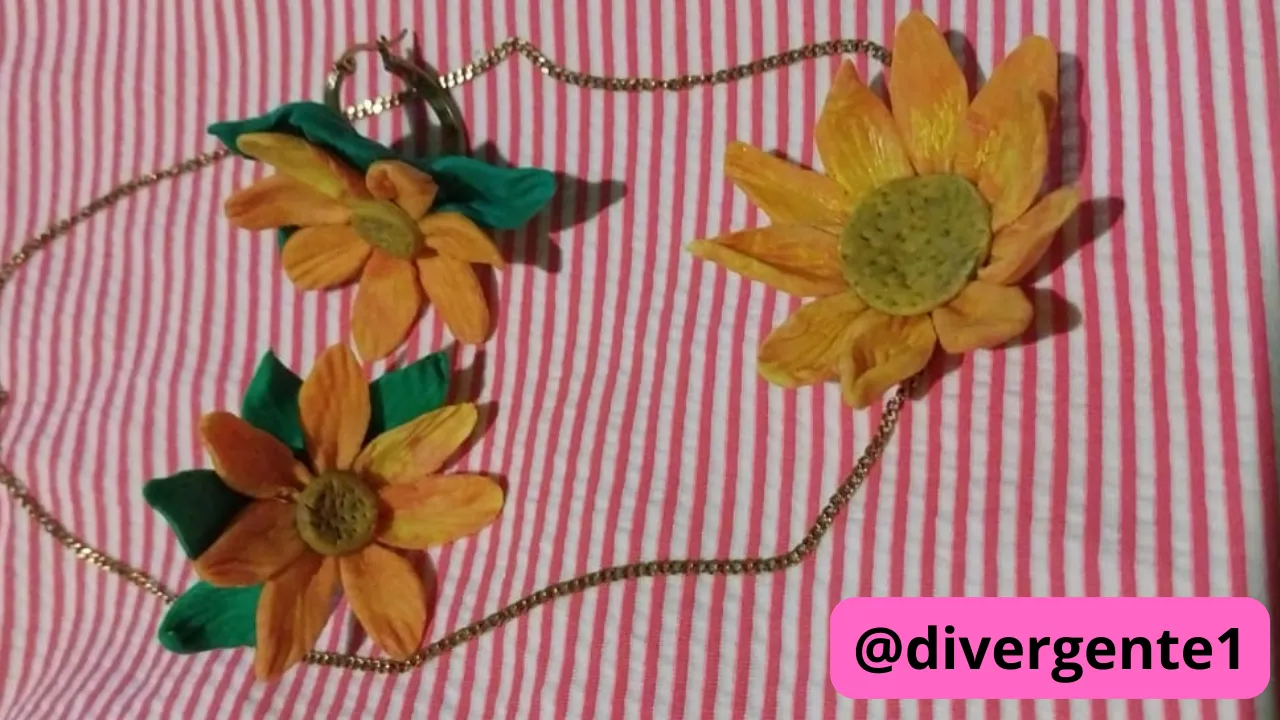
This is the final result, I hope you like these pieces, with much affection and with much desire to continue learning and creating new pieces, I promise that later I will show you a little more of the creations with this type of material.
Thank you very much for reading my dear friends! Greetings
- Images belong to me
- Translator: Deepl Traslator
- Editing: Canva
Hola mis queridos amigos de Hive. Espero que se encuentren muy bien en este nuevo inicio de semana, que el universo se logré mover a nuestro favor y que podamos alcanzar nuestro objetivos por lo que queda de este año.
Hace poco inicié a trabajar con la masa flexible fría, es una masa que nos permite realizar diversos tipos de trabajo en frio, entre ellos el beneficio de esta masa nos permite realizar trabajos de joyería. Estoy muy feliz de poder presentarles mi primer trabajo de joyería con este tipo de material, espero que les guste y que además espero poder mirar sus comentarios y sugerencias de este trabajo.
Materiales
- Masa Flexible fría
- Pintura de oleo
- Pincel
- Estacas
- Argolla
- Cadena
- Pegamento instantáneo
Paso a Paso
1
Tomamos solo un poco de masa flexible como una pequeña bolita solo para hacer los pétalos y el pistilo del girasol. Para hacer los pétalos he separado dos mitades, una para aplicar pintura amarilla y el otro para agregar pintura naranja, luego mezclamos ambas masas para dar un toque matizado a los pétalos entre intervalos de color amarillo y naranja.
2
Luego para hacer los pistilos de la masa debemos utilizar un tono de color marrón y luego aplicar un poquito de pintura negra y luego mezclamos. Luego debemos utilizar un marco circular para poder obtener los pistilos, En este caso he utilizado dos tapas para obtener un molde circular, uno para la flor grande del collar y otras dos para los aretes.
3
Luego usamos la masa anaranjada y amarilla para hacer los pétalos de la flor, y moldeamos los pétalos con la estaca. Luego utilizamos el pegamento instantáneo para ir pegando pétalo a pétalo en la parte trasera del pistilo Marrón circular que creamos anteriormente.
4
Luego debemos pegar la flor sobre la parte de la estructura de la argolla, utilizamos un poco de masa flexible para pegar la flor al material de la argolla. Para hacer las hojas debemos aplicar un poco de color verde en la masa y luego aplastar la masa con un rodillo para luego formar las hojas tomando un triangulo o dándole la forma que se asemeje a una hoja.
Luego con una de las estacas o un palillo y damos relieve a la masa marcando líneas sobre la hoja, y luego lo pegamos en la parte trasera
5
De esta manera en la parte central del pistilo he marcado varios puntos con una aguja. Añadí tres hojas mas en cada arete y los pegué con el pegamento instantáneo.
Luego siguiendo los mismos pasos anteriores se ha realizado la flor del centro solo que para esta flor utilizamos el pistilo mas grande que se creó al principio.
Este es el resultado final, espero que les guste estas piezas, Con mucho cariño y con muchas ganas de seguir aprendiendo y creando nuevas piezas, les prometo que luego les muestro un poco más de las creaciones con este tipo de material.
Muchas gracias por leer mis queridos amigos! Saludos
- Las imágenes me pertenecen
- Traductor: Deelp traslator
- Edicion: Canva