Hello everyone... ✨
Hello to my dear Hivers and the dear community of artists #Jewelry, as always very pleased and excited to be here again, showing you my work made with love and especially for you.
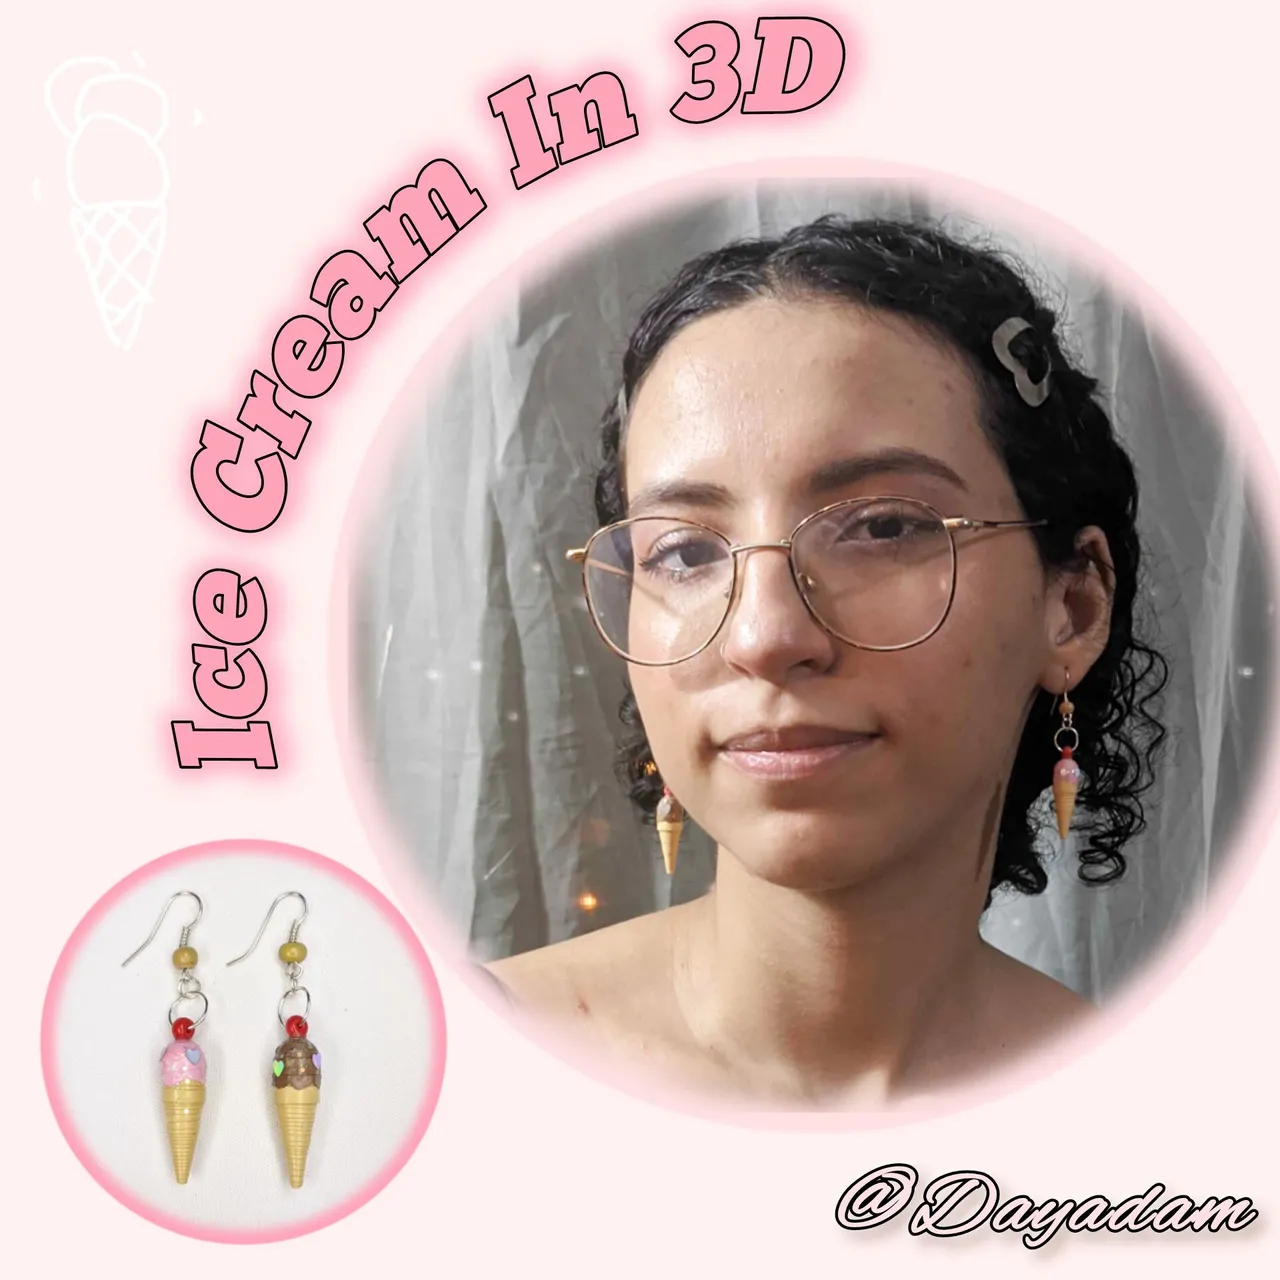
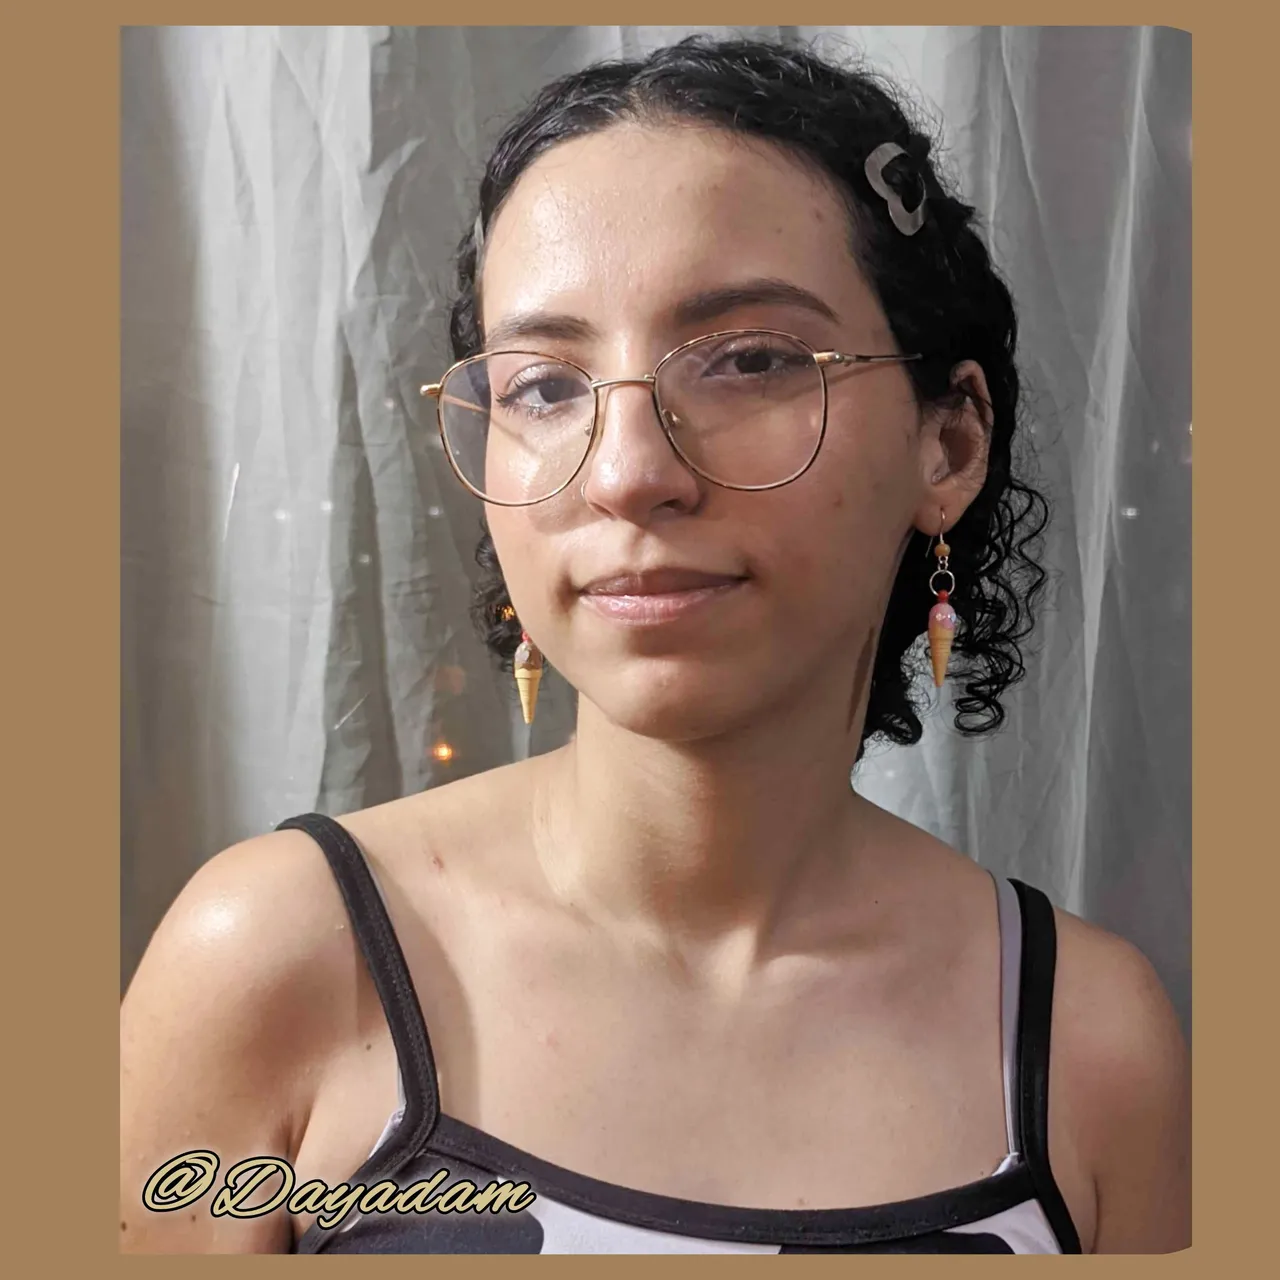
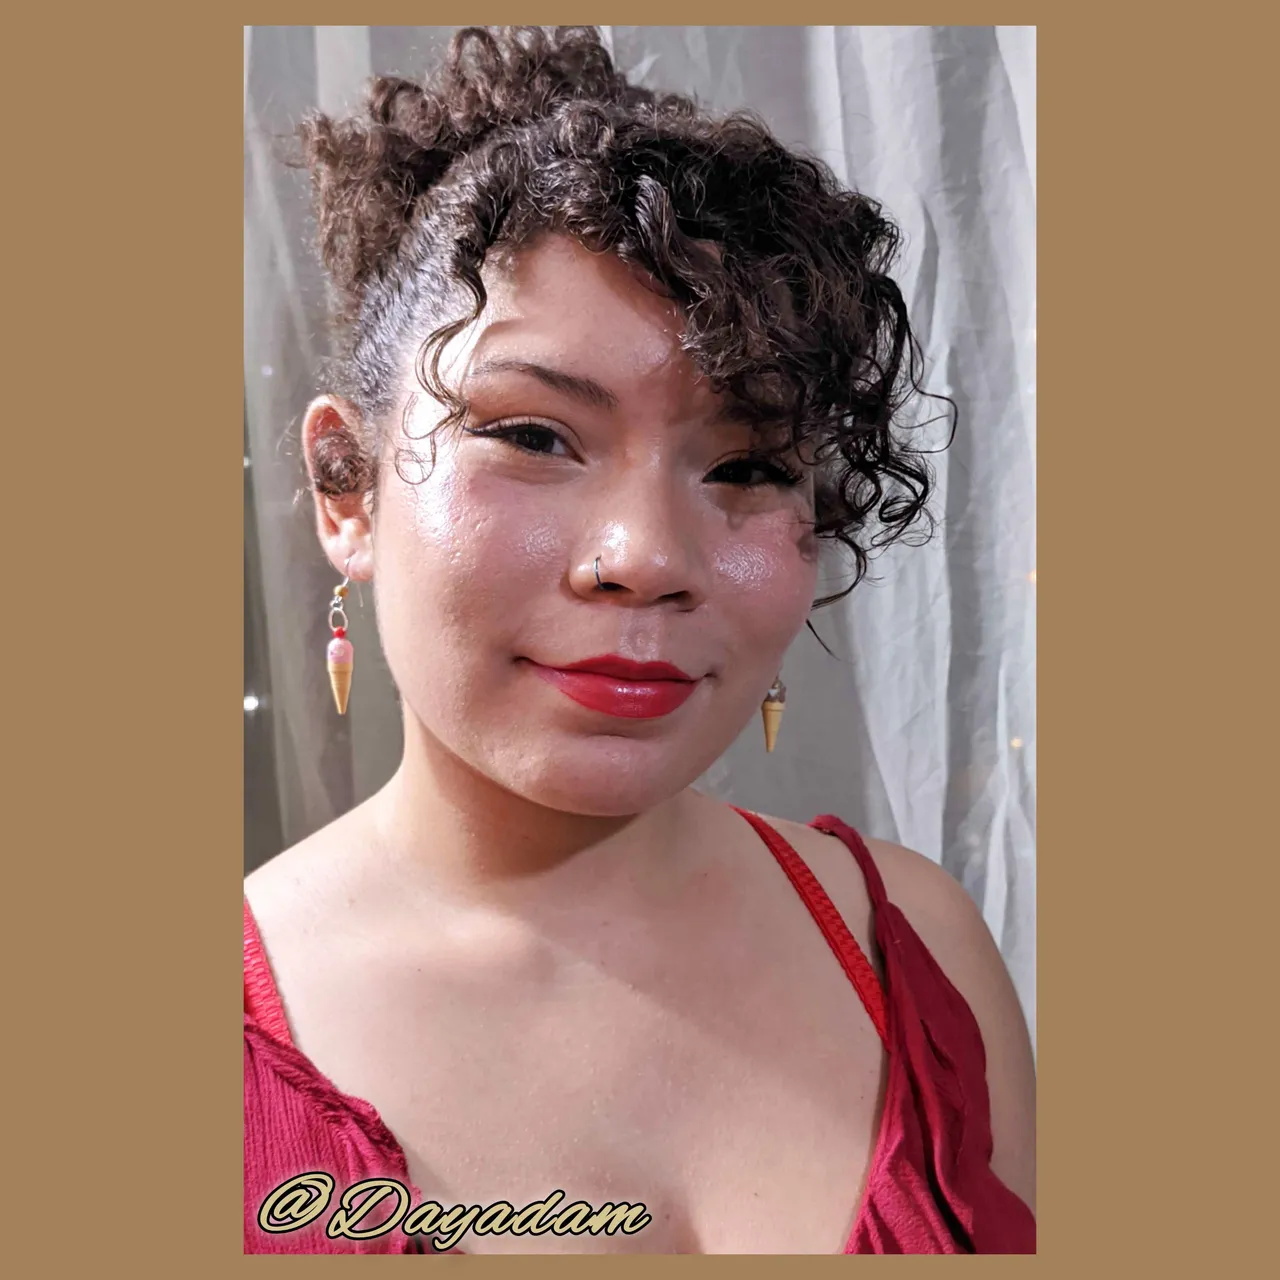
For today I bring you a pretty simple work, I decided to make a small hanging tendrils in the form of mini 3D nacelles in the technique of quilling, I made them in 2 different colors for my taste as I am passionate about everything related to chocolate, and for my daughter @shinfxx which was one of my models in the post along with @alixmitchels, which loves strawberry ice cream.
I hope you like the work, join me in this creative process.
Let's get started:😃

Hola a Todos... ✨
Hola a mis queridos Hivers y a la querida comunidad de artistas #Jewelry, como siempre muy complacida y emocionada de encontrarme por acá nuevamente, mostrándole mi trabajo hecho con mucho amor y especialmente para ustedes.
Para hoy les traigo un trabajo bastante sencillo, decidí realizar unos pequeños zarcillos colgantes en forma de mini barquillas en 3D en la tecnica de quilling, los realice de 2 colores diferentes por gusto de mi persona ya que me apasiona todo lo que tenga relación con el chocolate, y por mi hija @shinfxx la cual fue una de mis modelos en el post junto a @alixmitchels , a la cual le encanta el helado de fresa.
Espero sea de su agrado el trabajo, acompáñenme en este proceso creativo.
Comencemos:😃

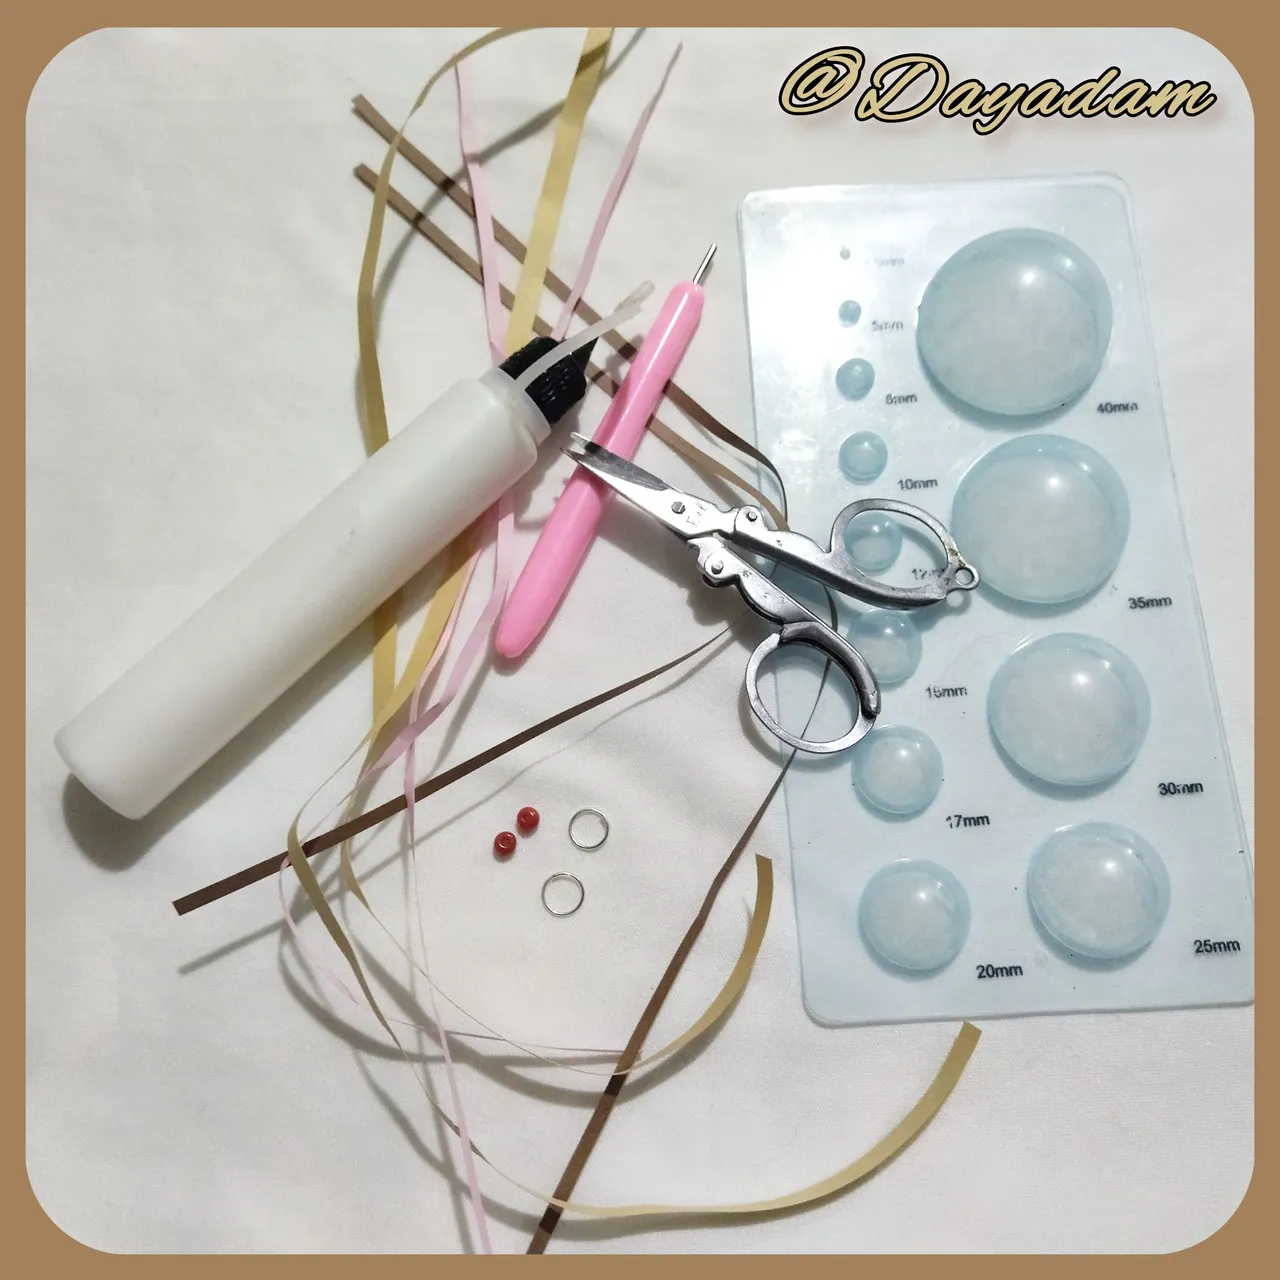
• Cintas de quilling.
• Aguja para quilling.
• Molde para círculos.
• Pega blanca extra fuerte (de carpintería).
• Argolla de bisutería mediana.
• Base colgante para zarcillos (anzuelos).
• Perlas de madera medianas.
• Escarcha y brillos en forma de corazón
• Alfiler.
• Repujador.
• Tijera.
• Pincel.
• Pinza punta fina.
• Alicate punta fina.
- Quilling ribbons.
- Quilling needle.
- Mold for circles.
- Extra strong white glue (carpentry glue).
- Medium size jewelry ring.
- Hanging base for tendrils (hooks).
- Medium wooden beads.
- Frost and glitter in the shape of a heart.
- Pin.
- Pusher.
- Scissors.
- Paintbrush.
- Fine tip tweezers.
- Fine-nosed pliers.

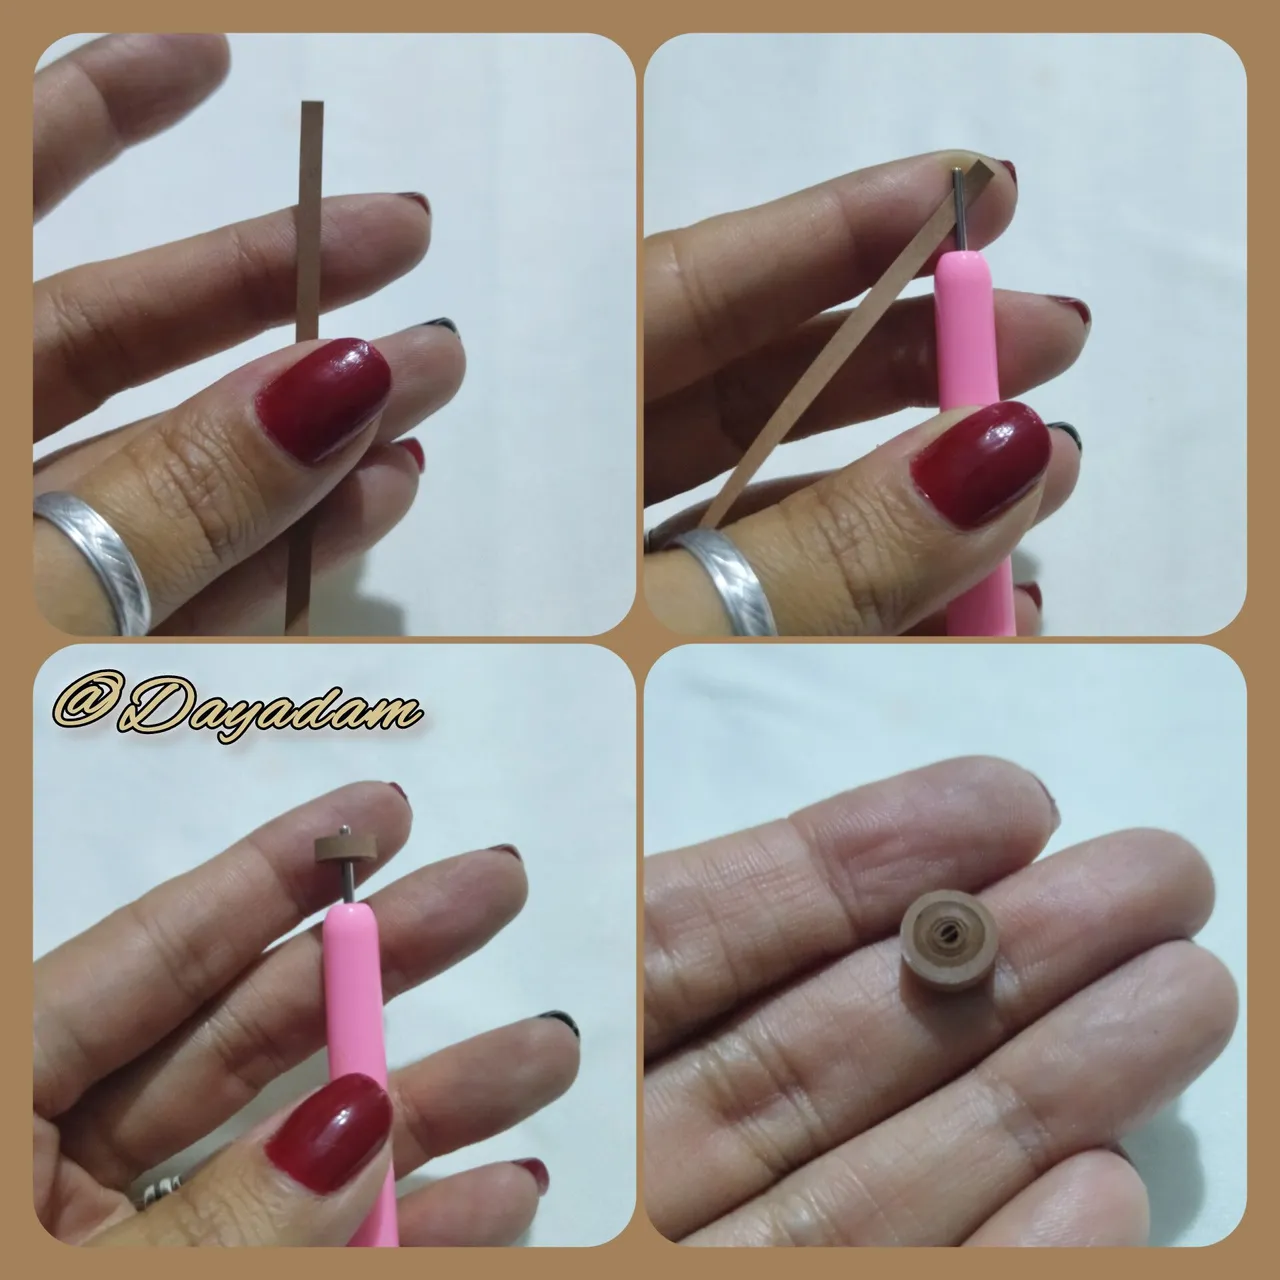
To make the ice cream cone:
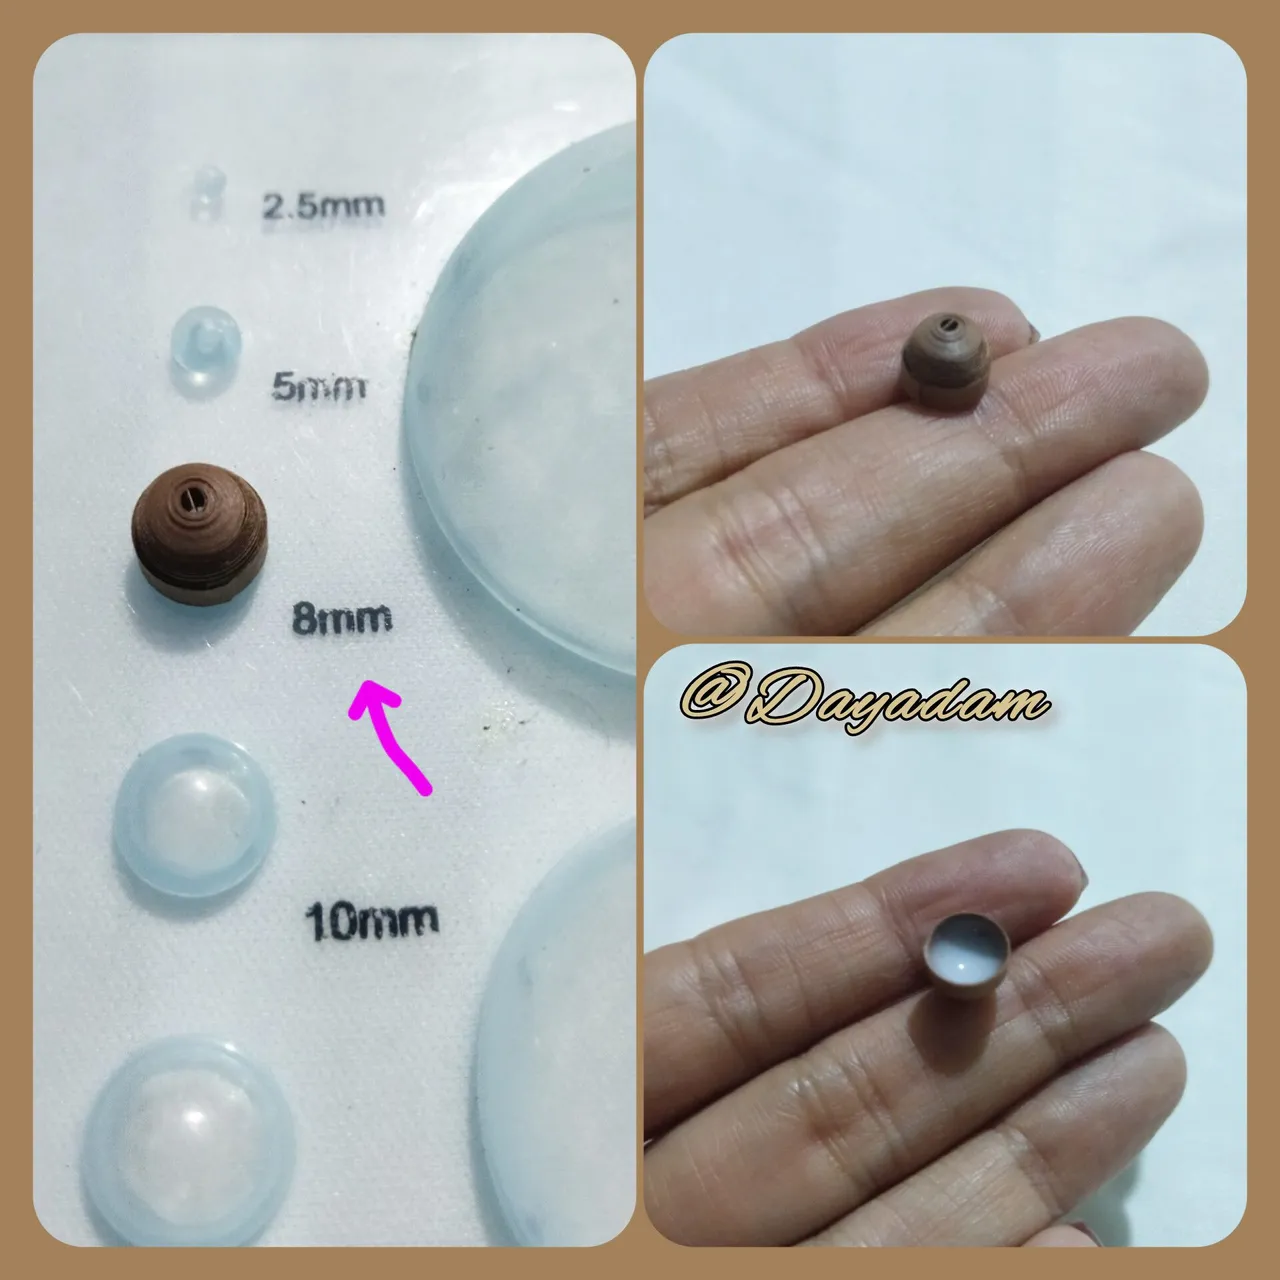
- We start by taking brown quilling tape 3mm wide, with the quilling needle we roll until we reach the end of the tape, we remove from the needle, we seal with glue, to obtain a closed circle. we can use the color of our preference, for the pair of earrings we will need 2 equal pieces.
- Once the circle is ready, we will mold it in the template for circles in the measure number 8mm, we take it out and apply extra strong glue on the inside to prevent it from deforming.
To make the basket:
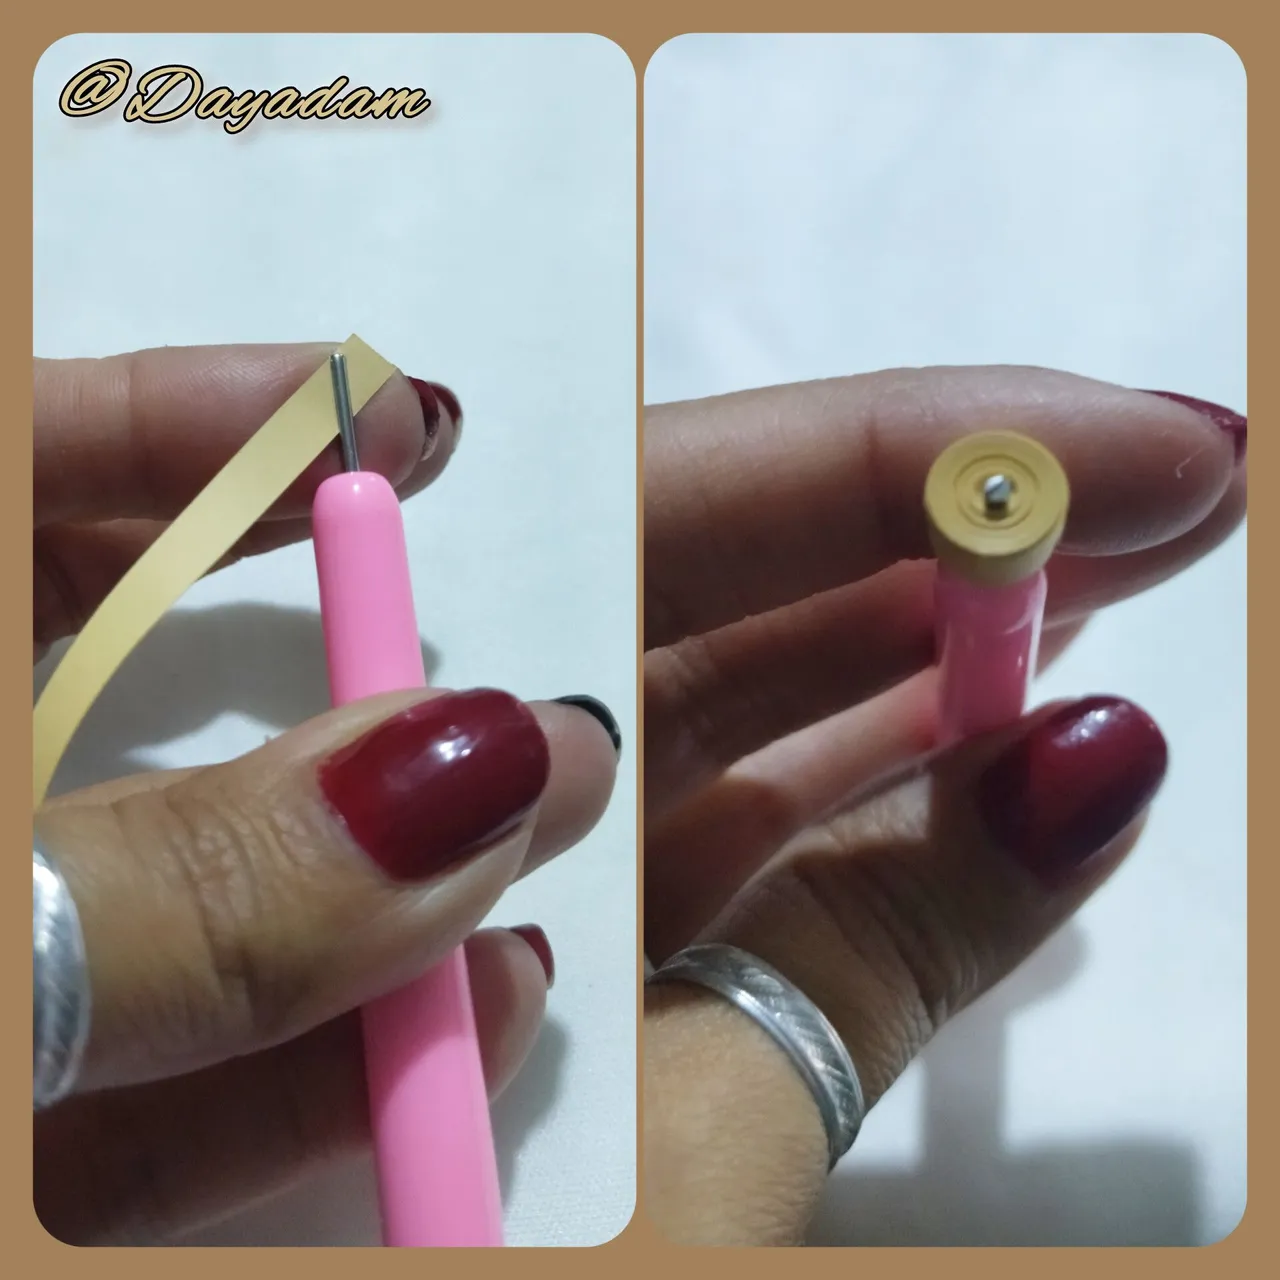
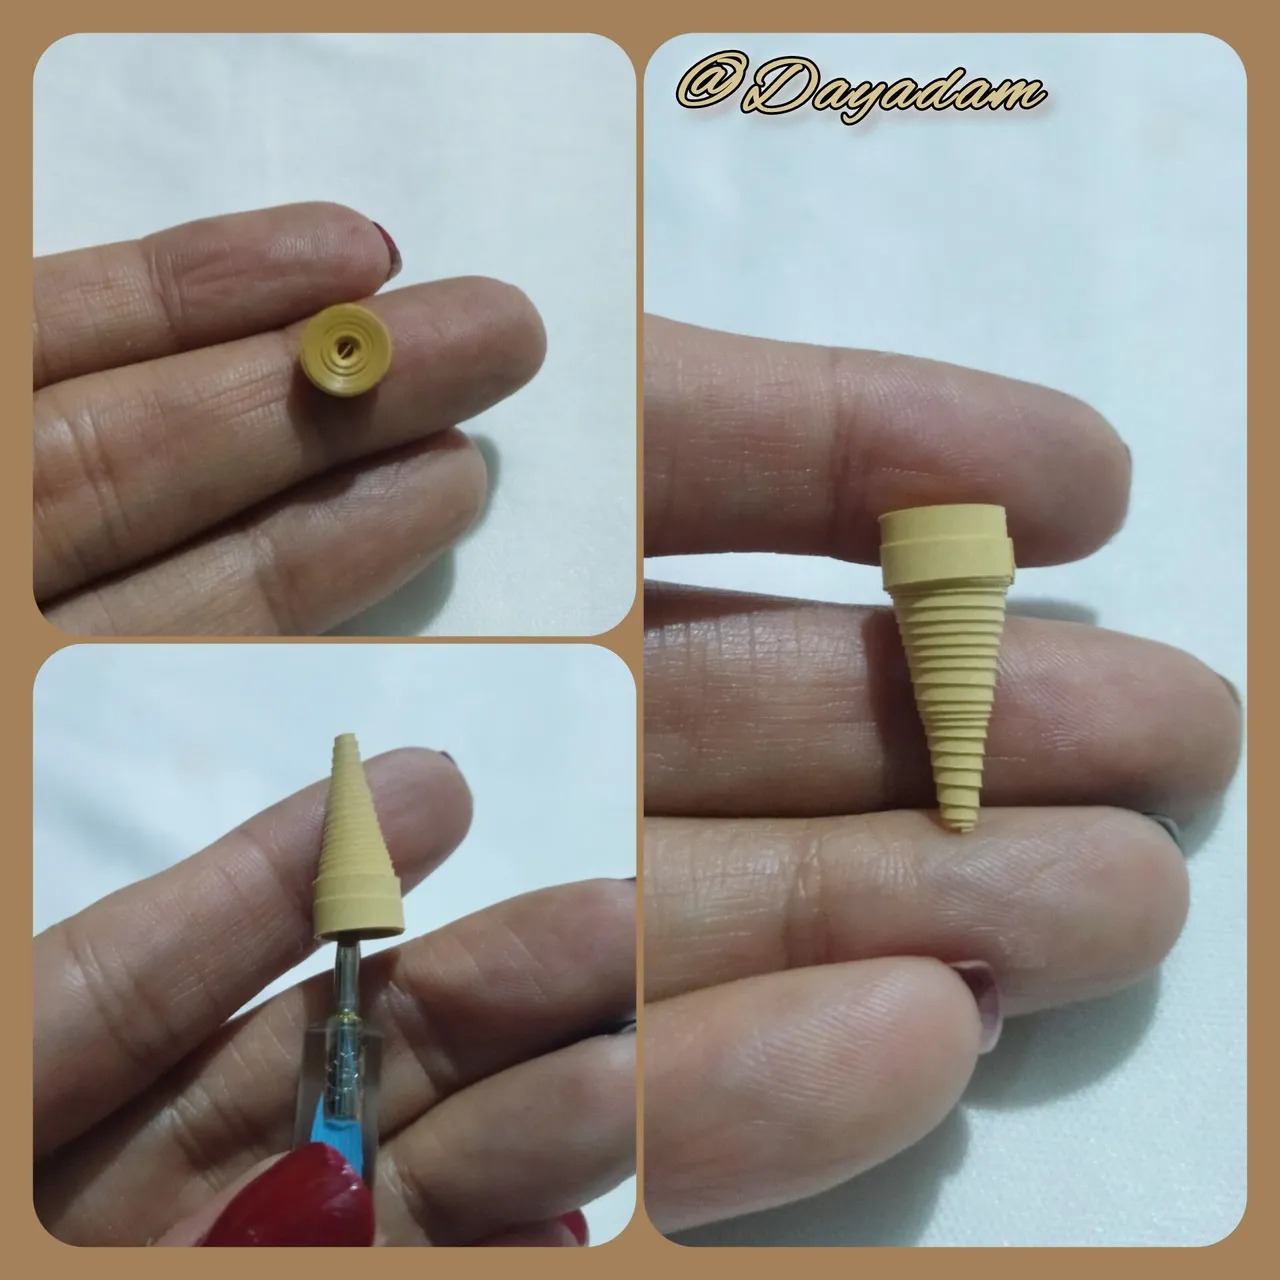
- We take a 3mm wide yellow quilling tape, under the same parameters as above, we will make a closed circle of the same size as the ones we made for the cone.
- We will mold taking an embosser and pushing the circle outwards to form the nacelle, we apply glue on the inside.

Para realizar el cono del helado:
• Comenzamos tomando cinta para quilling de color marrón de 3mm de ancho, con la aguja para quilling enrollamos hasta llegar al final de la cinta, sacamos de la aguja, sellamos con pega, para obtener un circulo cerrado. podemos utilizar el color de nuestra preferencia, para el par de aretes necesitaremos 2 piezas iguales.
• Una vez listo el circulo, lo moldearemos en la plantilla para círculos en la medida numero 8mm, sacamos de la misma y aplicaremos pega extra fuerte por la parte interna para evitar que el mismo se deforme.
Para realizar la barquilla:
• Tomamos cinta para quilling de color amarillo tostado de 3mm de ancho, bajo los mismos parámetros anteriores realizaremos un circulo cerrado del mismo tamaño que los que hicimos para el cono.
• Moldearemos tomando un repujador y empujando el circulo hacia afuera para formar la barquilla, aplicamos pega por la parte interna.
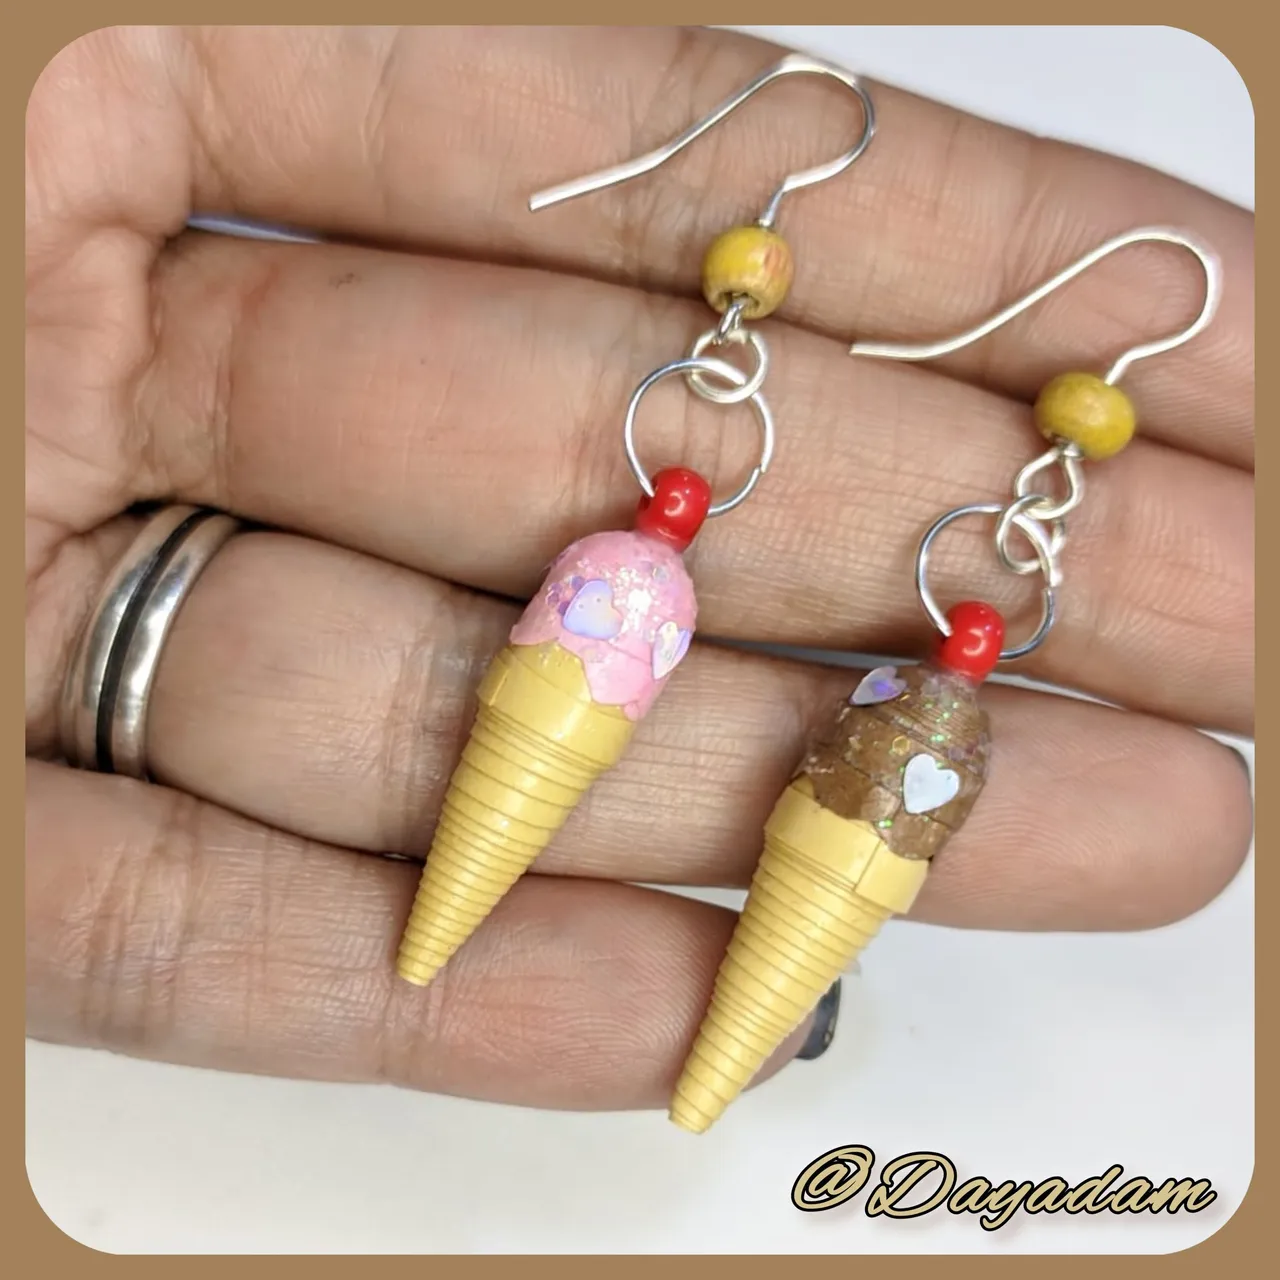
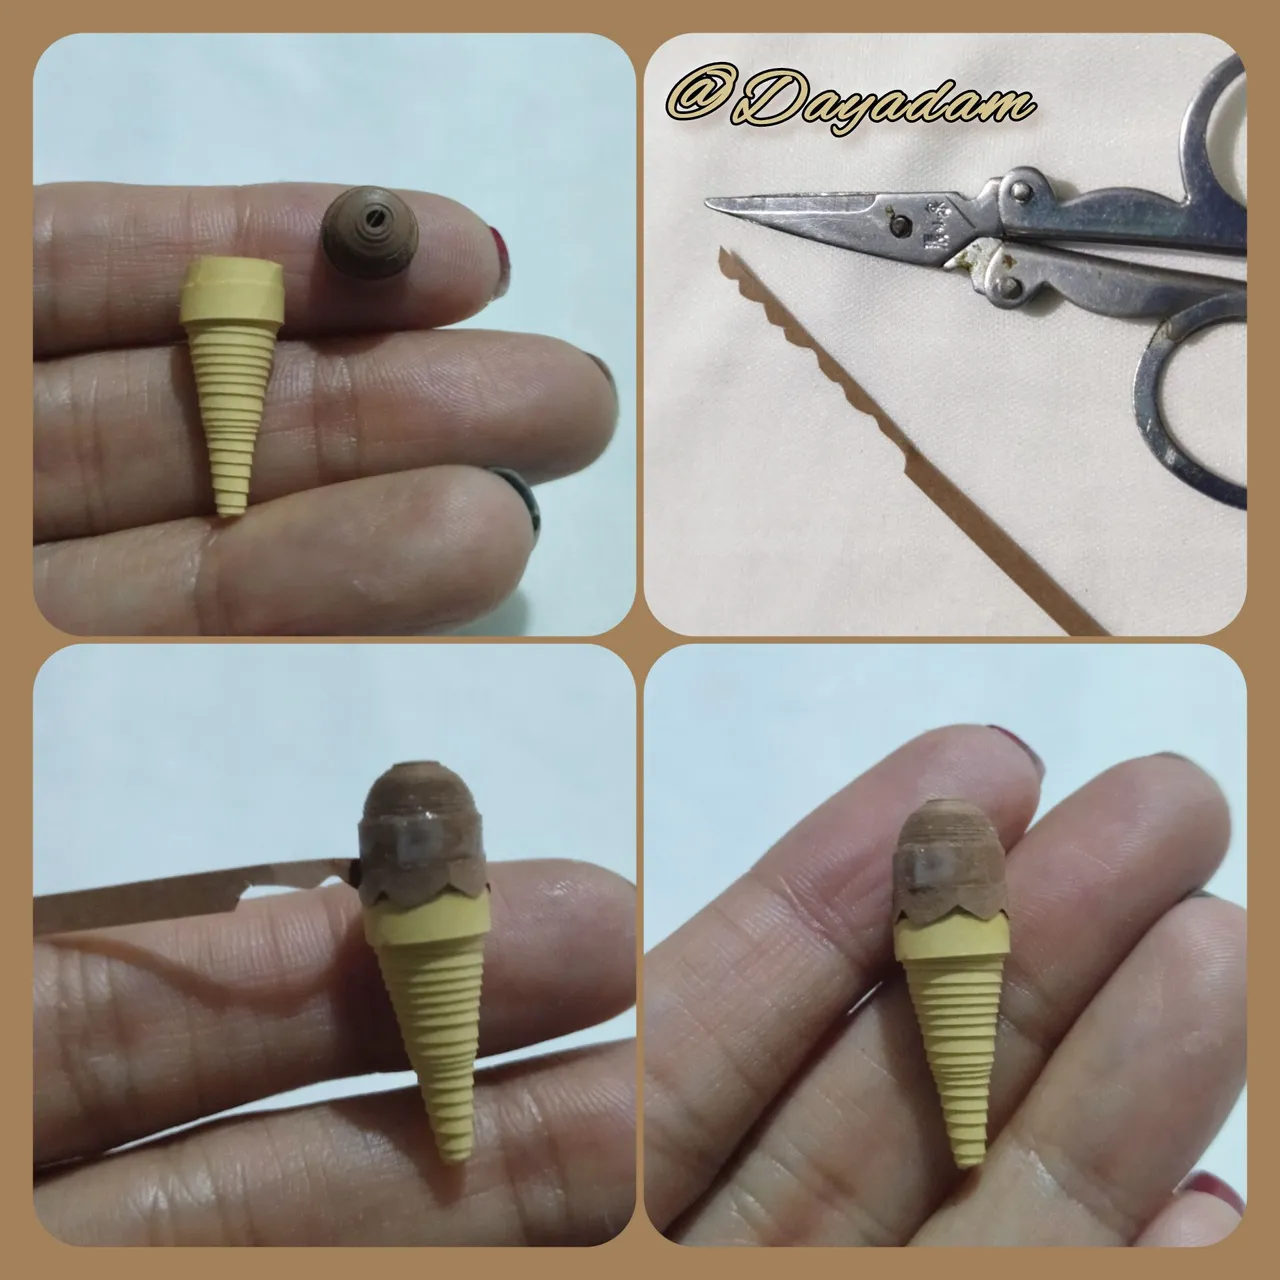
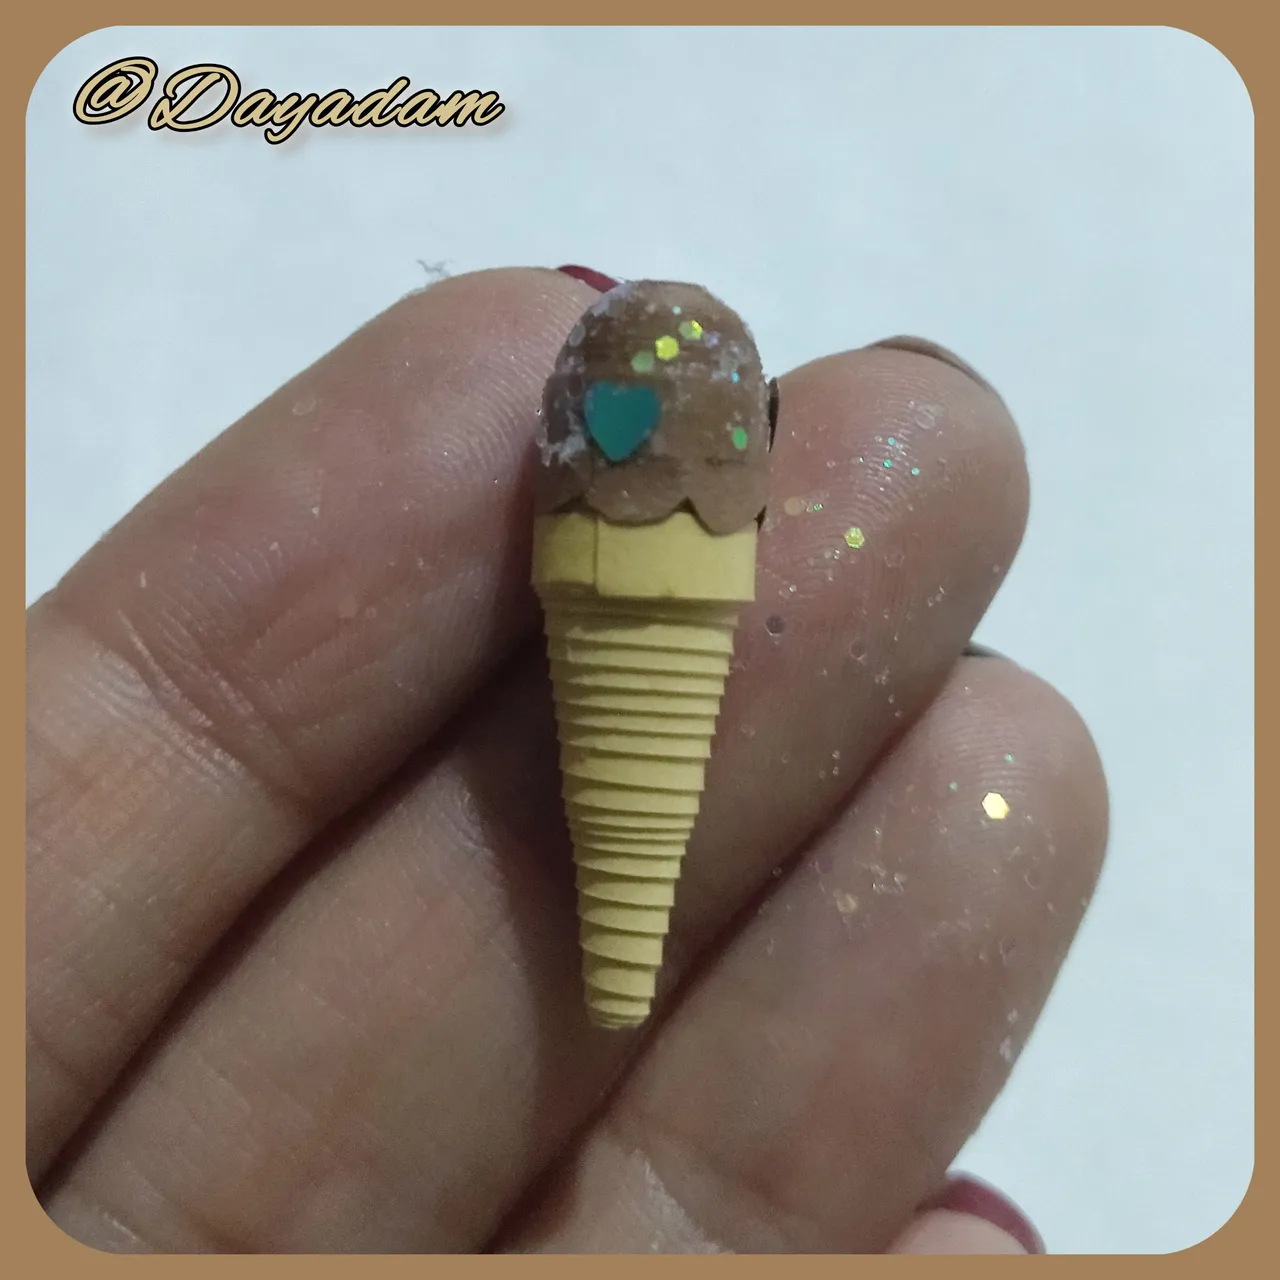
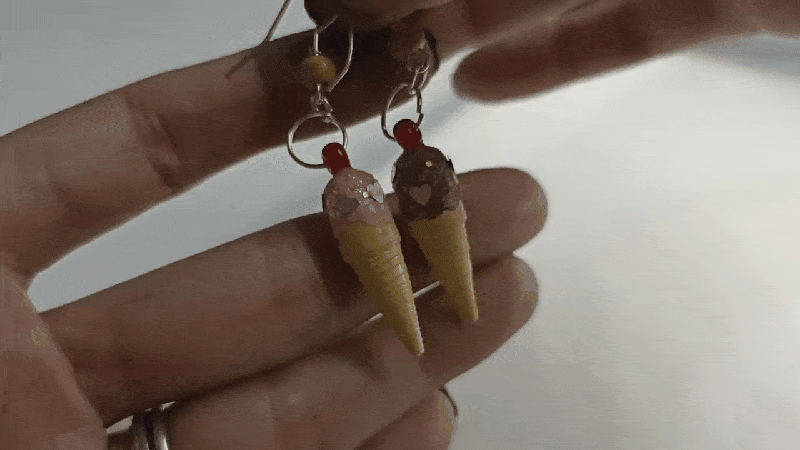
- To join the pieces and form the ice cream, we will take a piece of 3mm wide quilling tape and cut it in the shape of slingshots, we will glue it around both with extra strong white glue.
- To decorate the top, apply some glue, sprinkle some frosting and place some glitter in the shape of a heart.
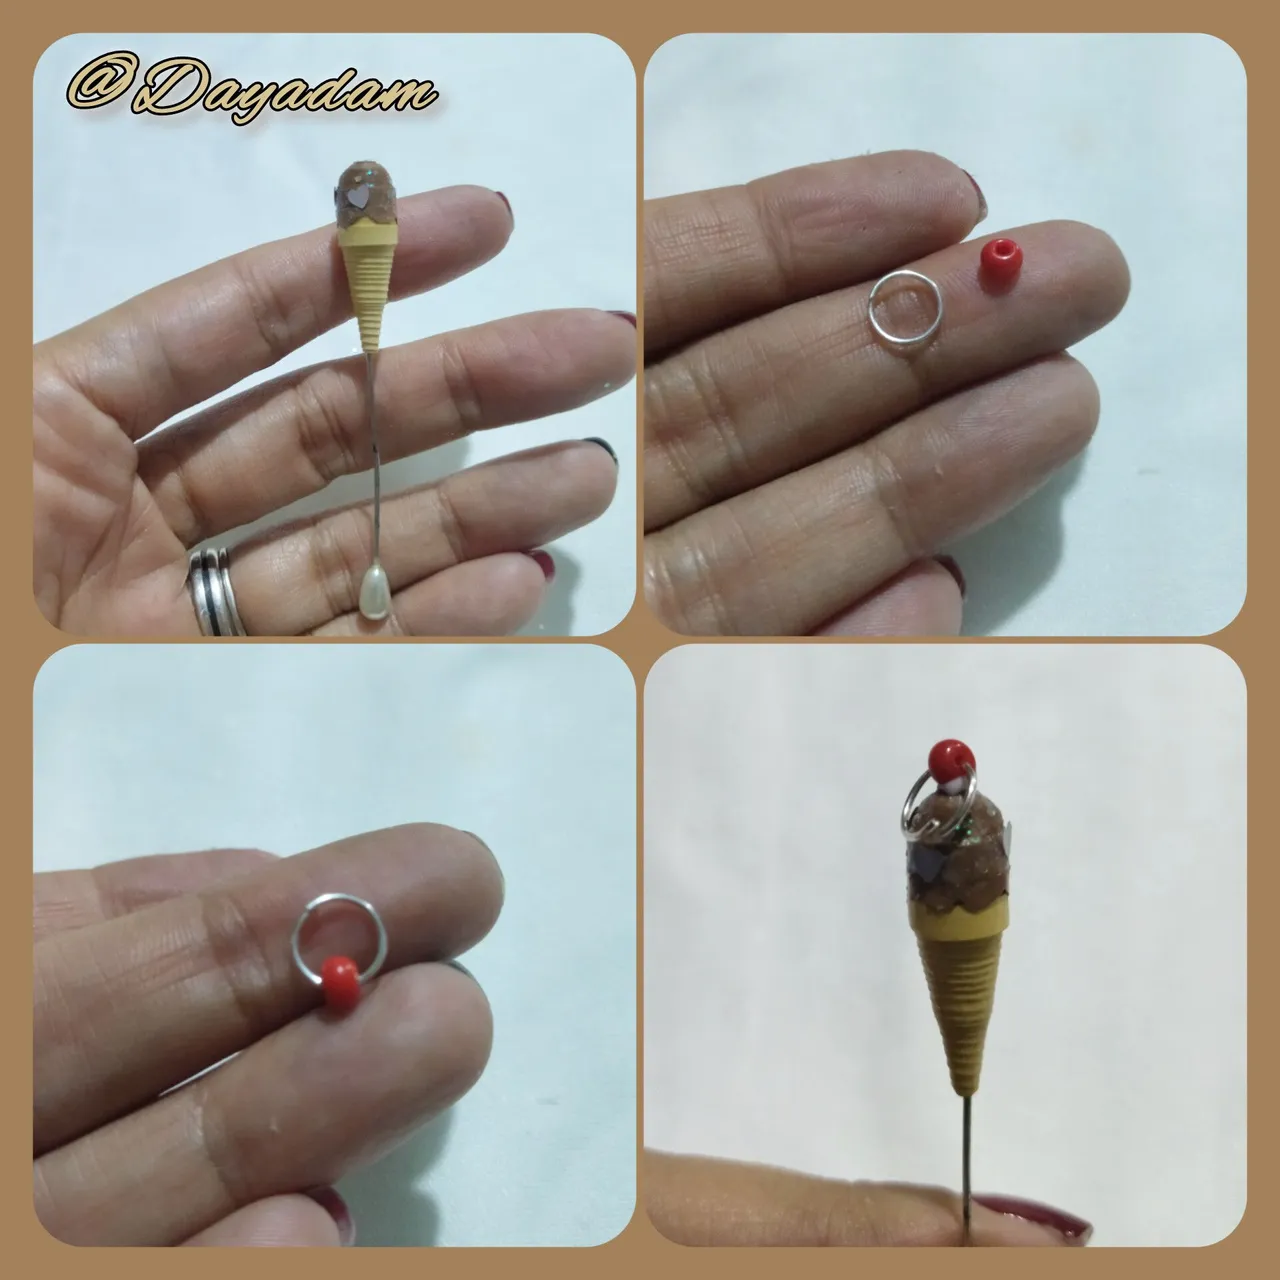
- Take a pin on which to place the mini ice cream, on the top of the piece apply extra strong white glue, a red pearl to which I placed a medium-sized costume jewelry ring, this to resemble a decorative cherry.
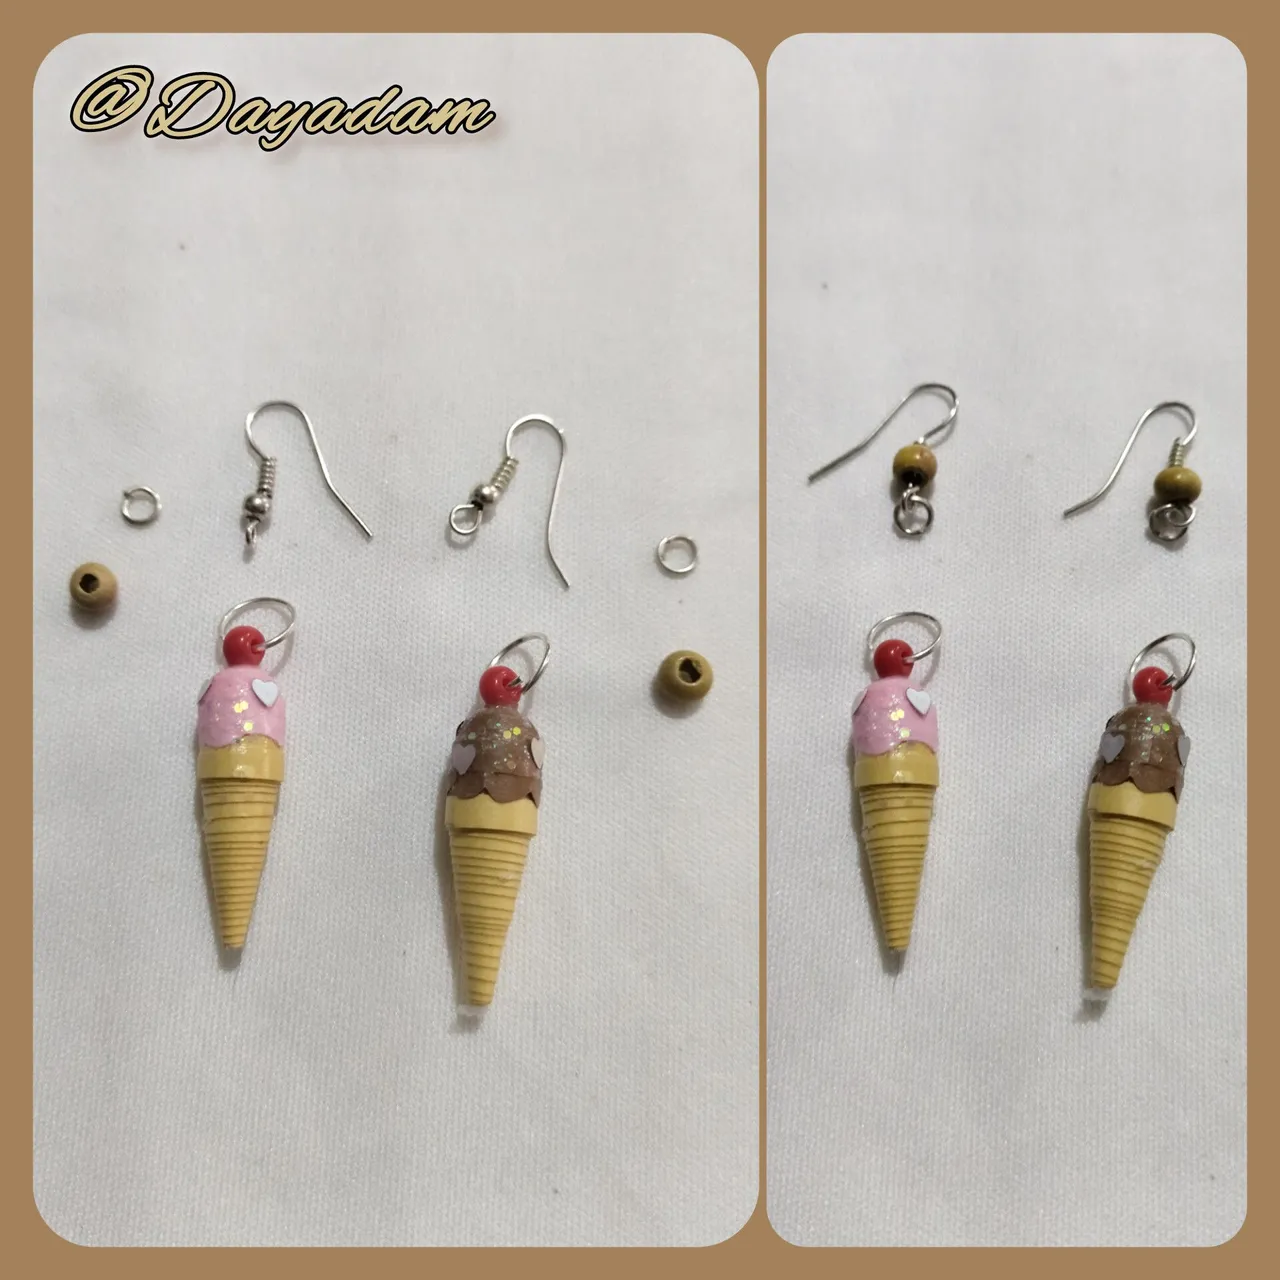
- To give protection, plasticize and give shine to the earring I applied several layers of extra strong white glue, letting it dry between one layer and another.
- To finish I put the hanging base for earrings (hooks), to which I put a yellow wooden pearl, to give it more showiness and a small costume jewelry ring.
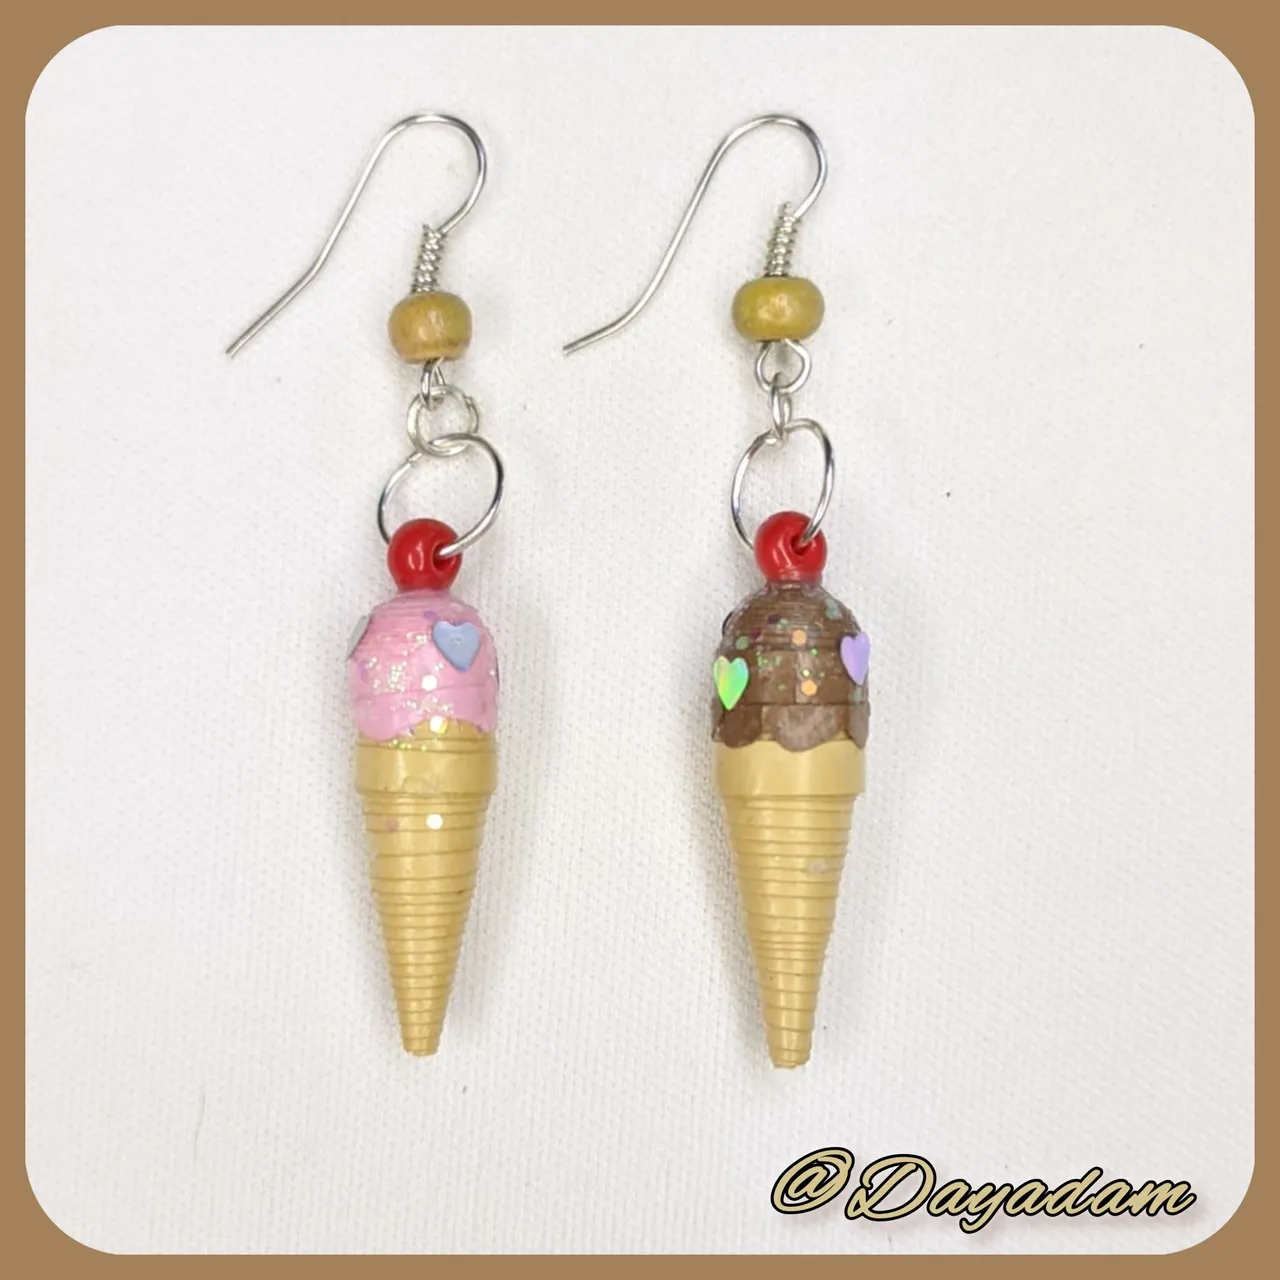
So we have this pair of dangling earrings strawberry and chocolate flavor with cherry in 3D, which I made in the technique of quilling.
• Para unir las piezas y formar el helado, tomaremos un trozo de cinta para quilling de 3mm de ancho y cortaremos en forma de hondas, esta la pegaremos alrededor de ambas con pega blanca extra fuerte.
• Para decorar la parte de arriba le aplique un poco de pega, rocie escarcha y coloque algunos brillos en forma de corazón.
• Tome un alfiler en el cual coloque el mini helado,en la parte de arriba de la pieza coloque aplicando pega blanca extra fuerte, una perla de color rojo a la cual coloque una argolla mediana de bisutería, esto para asemejar una cereza decorativa.
• Para darle protección, plastificar y darle brillo al arete aplicaremos varias capas de pega blanca extra fuerte, dejando secar entre una capa y otra.
• Para finalizar puse la base colgante para zarcillos (anzuelos), a la que le coloque una perla de madera color amarillo, para darle mayor vistosidad y una argolla pequeña de bisutería.
De esta manera tenemos este par de aretes colgantes sabor a fresa y chocolate con cereza en 3D, que realice en la tecnica de quilling.

What did you think, did you like it?
I hope you did, I hope you liked my explanation, procedure and photos, I made them with love for you.
"Let out that muse that inspires you, and let your imagination fly".
Thank you all, see you next time...
¿Que les pareció, les gustó?
Espero que sí, que les haya gustado mi explicación, procedimiento y fotos, los hice con mucho cariño por y para ustedes.
"Deja salir esa musa que te inspira, y deja volar tu imaginación".
Gracias a todos, nos vemos en la próxima.
Todas las fotos usadas en este post son de mi autoría y han sido sacadas en mi celular personal un Redmi 9T y editadas en Canva y en Inshot Banner y separador hecho por mí en Canva Traducido con la ayuda de DeepL
