Es un placer compartir mi nueva creación con la comunidad, en esta ocasión he mantenido la temática de animales realizados con mostacilla. Anteriormente, les mostré como hacer una araña usando materiales reciclados, pero en esta ocasión tenía la dudas, ya que quería hacer un animal acuático (pulpo, pez) o una animal volador, pero al final hice una libélula.
It is a pleasure to share my new creation with the community, this time I have kept the theme of animals made with clay. Previously, I showed you how to make a spider using recycled materials, but this time I had doubts, since I wanted to make an aquatic animal (octopus, fish) or a flying animal, but in the end I made a dragonfly.
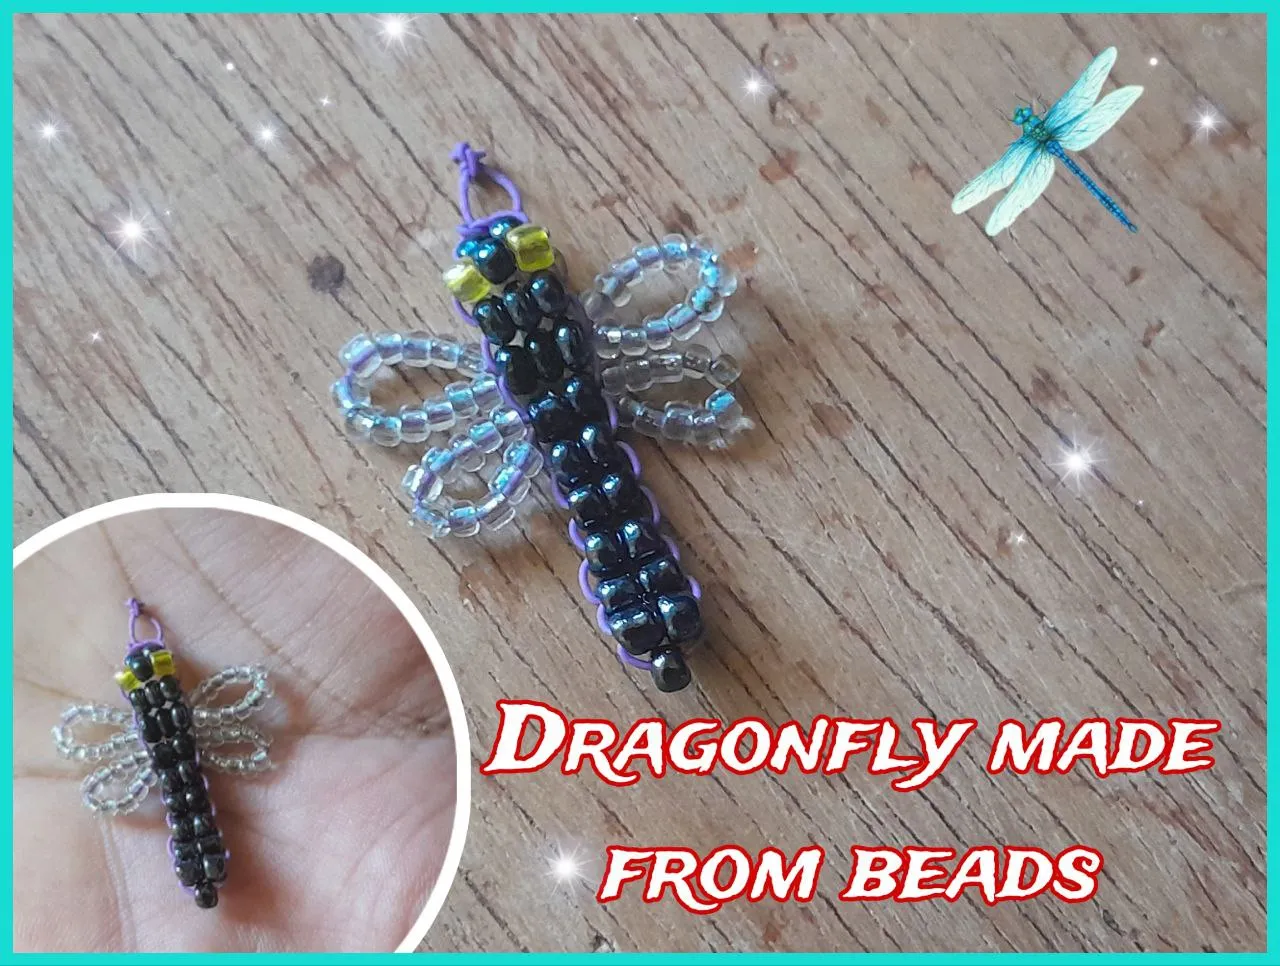
Image edited in PicsArt.
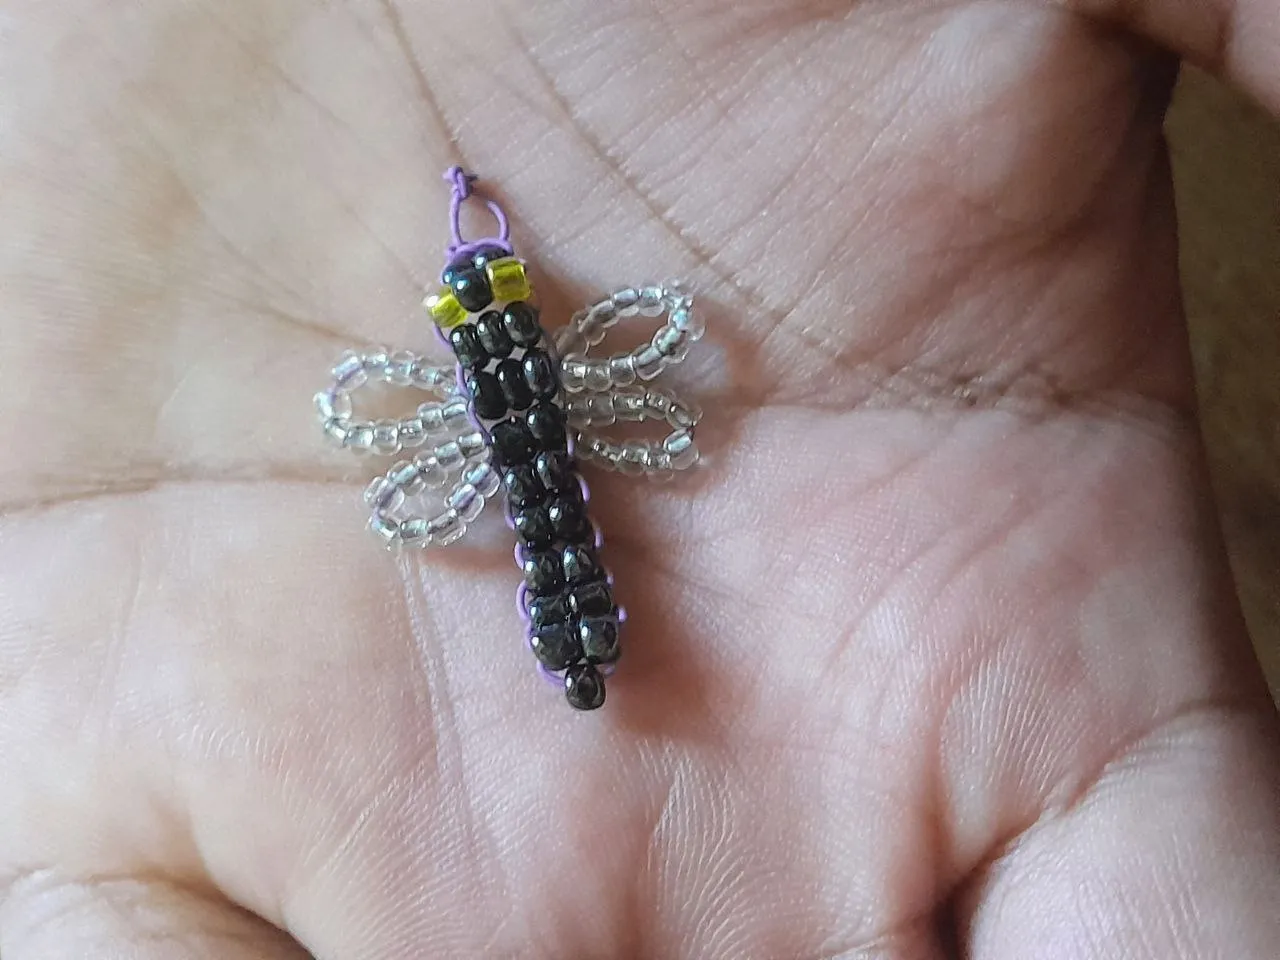
Las libélulas de forma coloquial podemos llamarlas de diferentes maneras, pero lo mejor de ellas es su hermosa forma de volar, por el hecho de que se ven muy llamativas al estar en el aire, sin duda es una de las maravillosas creaciones de la naturaleza. Mi objetivo, antes de realizar mi creación, era que fuese un adorno simbólico, pero preferí hacer un dije, que pudiese ser usado en una pulsera, collar o en alguna otra prenda.
The dragonflies in a colloquial way we can call them in different ways, but the best thing about them is their beautiful way of flying, by the fact that they look very striking when they are in the air, no doubt it is one of the wonderful creations of nature. My goal, before making my creation, was to make a symbolic ornament, but I preferred to make a pendant, which could be used in a bracelet, necklace or any other garment.
Materiales. / Materials.
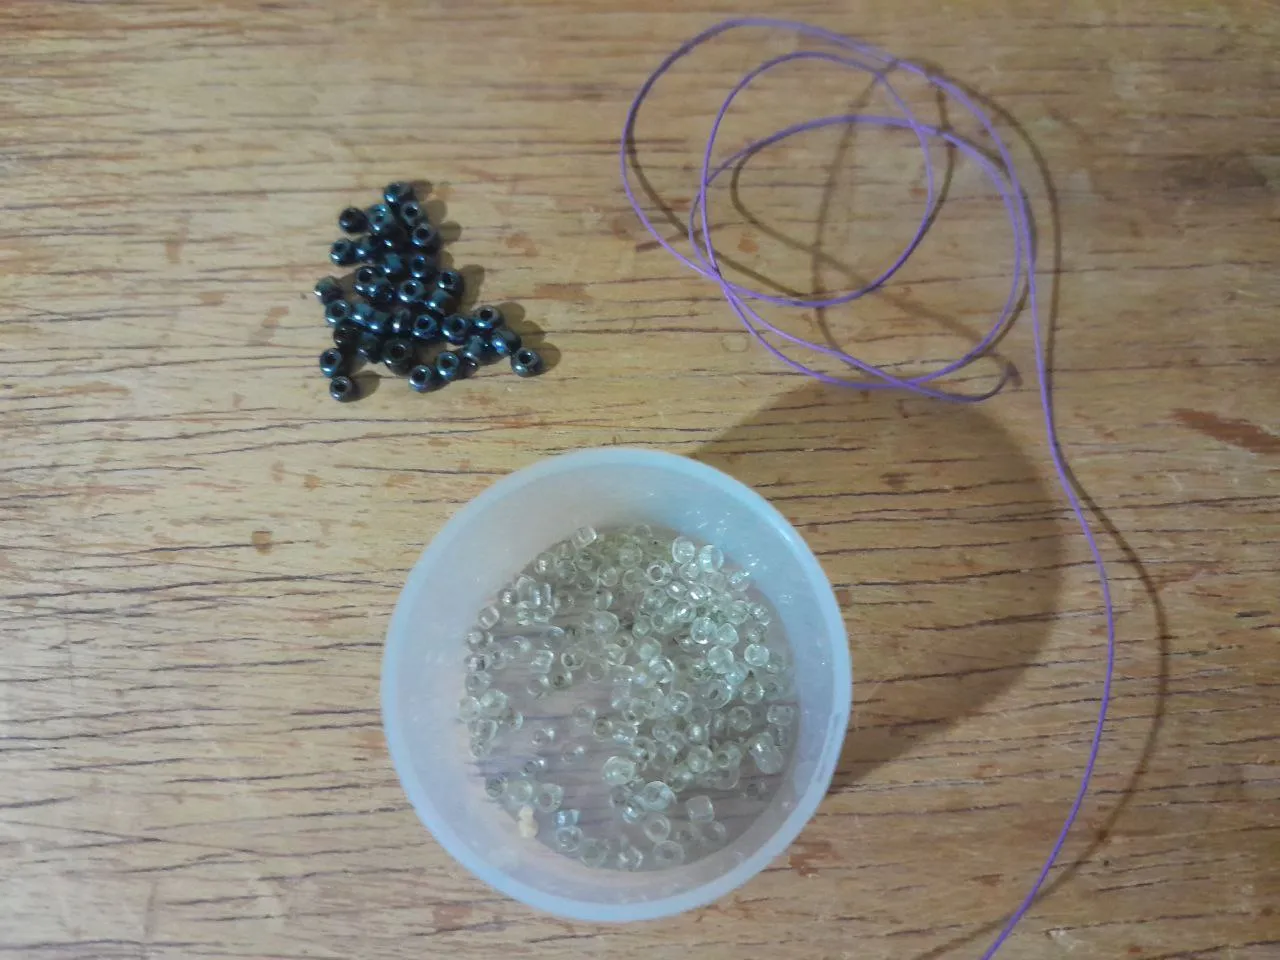
Para realizar esta creación usé los siguientes materiales:
To make this creation, I used the following materials:
- Mostacillas transparentes.
- Chaquiras negras.
- Hilo morado.
- Transparent beads.
- Black beads.
- Purple thread.
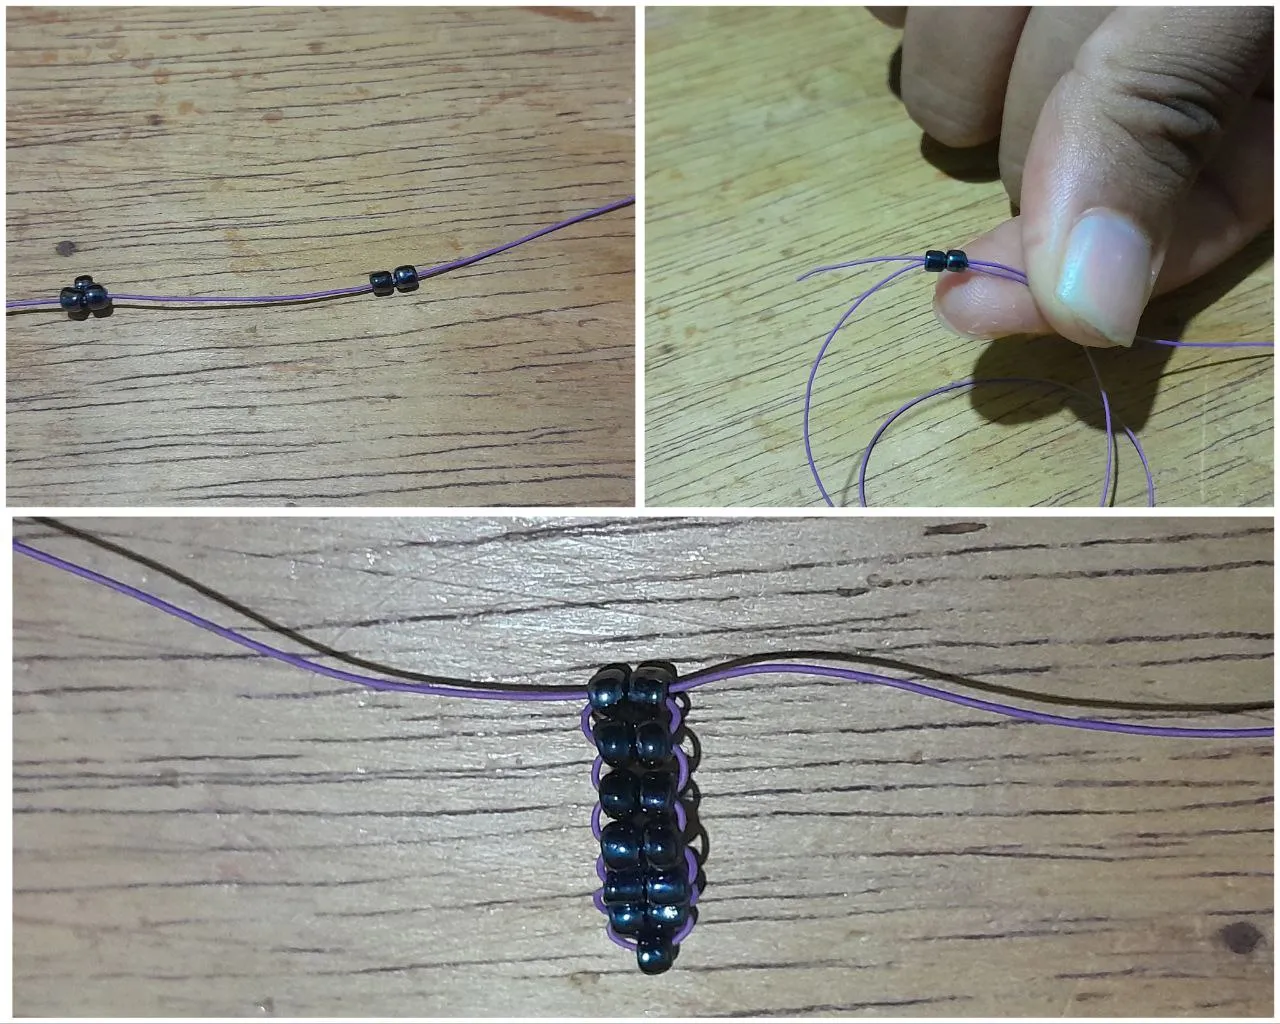
Proceso de creación. / Creation process.
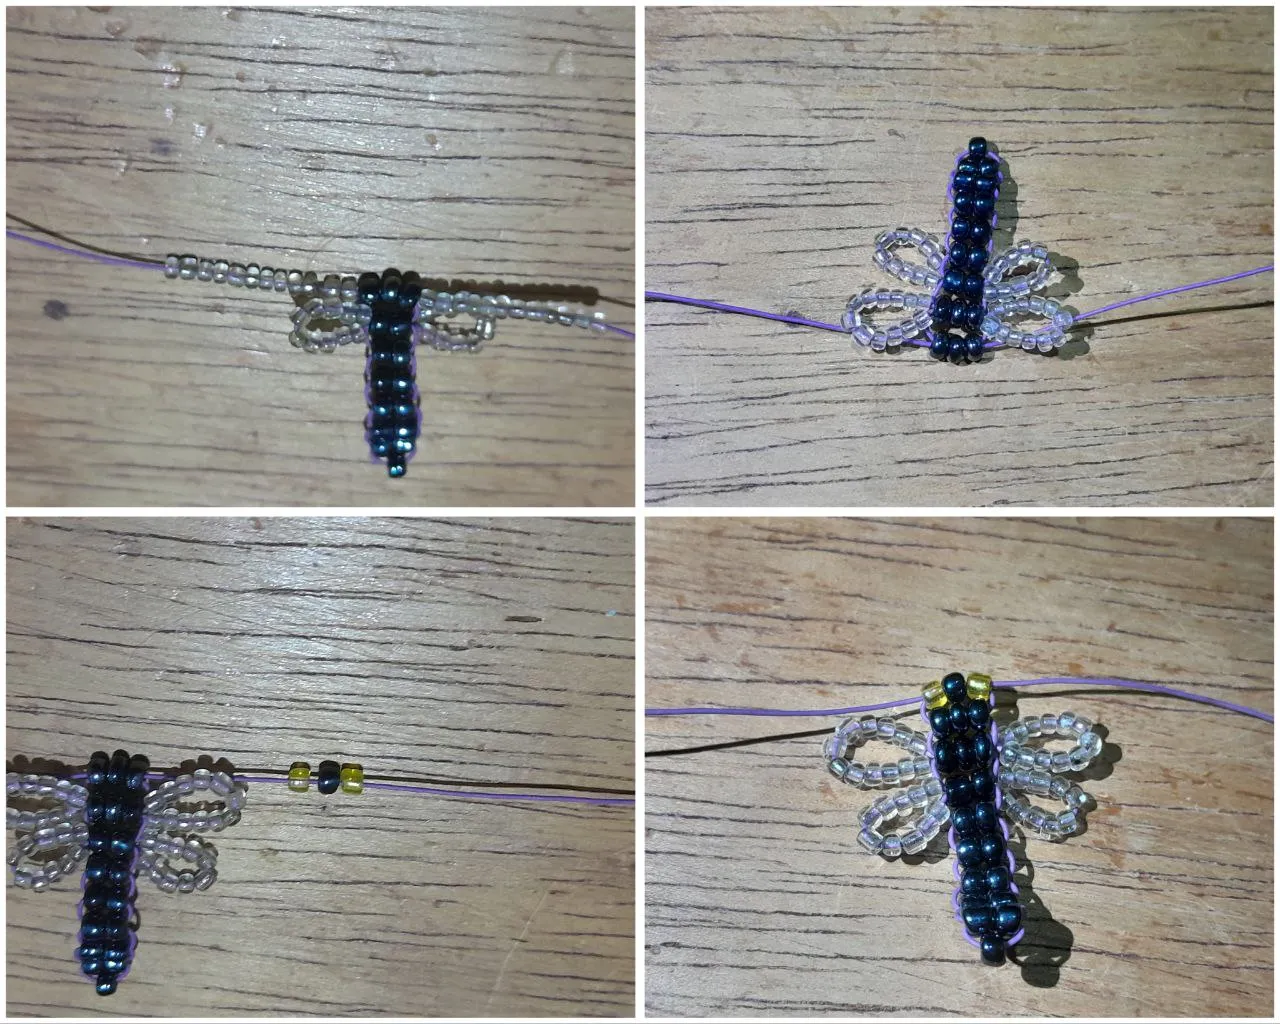
El primer paso es colocar una Chaquira en la parte central del hilo, posteriormente colocamos dos chaquiras, pero los dos hilos deben atravesar ambos extremos, es decir, uno entrará por el lado izquierdo y el otro por el derecho, en pocas palabras se cruzan y nuevamente tendremos dos hilos saliendo de cada chaquira.
The first step is to place a Chaquira in the central part of the thread, then we place two beads, but the two threads must cross both ends, that is to say, one will enter on the left side and the other on the right, in short, they cross, and again we will have two threads coming out of each chaquira.
Posteriormente, colocamos una secuencia de 6 pares de mostacillas, tal como lo indica el procedimiento que explique previamente. Al llegar a ese punto, hay que adicionar las alas, en este caso el hilo formará un semi arco e introducimos 10 mostacillas transparentes de cada lado del hilo.
Next, we place a sequence of 6 pairs of beads, as indicated in the procedure I explained previously. When we reach this point, we must add the wings, in this case the thread will form a half bow, and we introduce 10 transparent beads on each side of the thread.
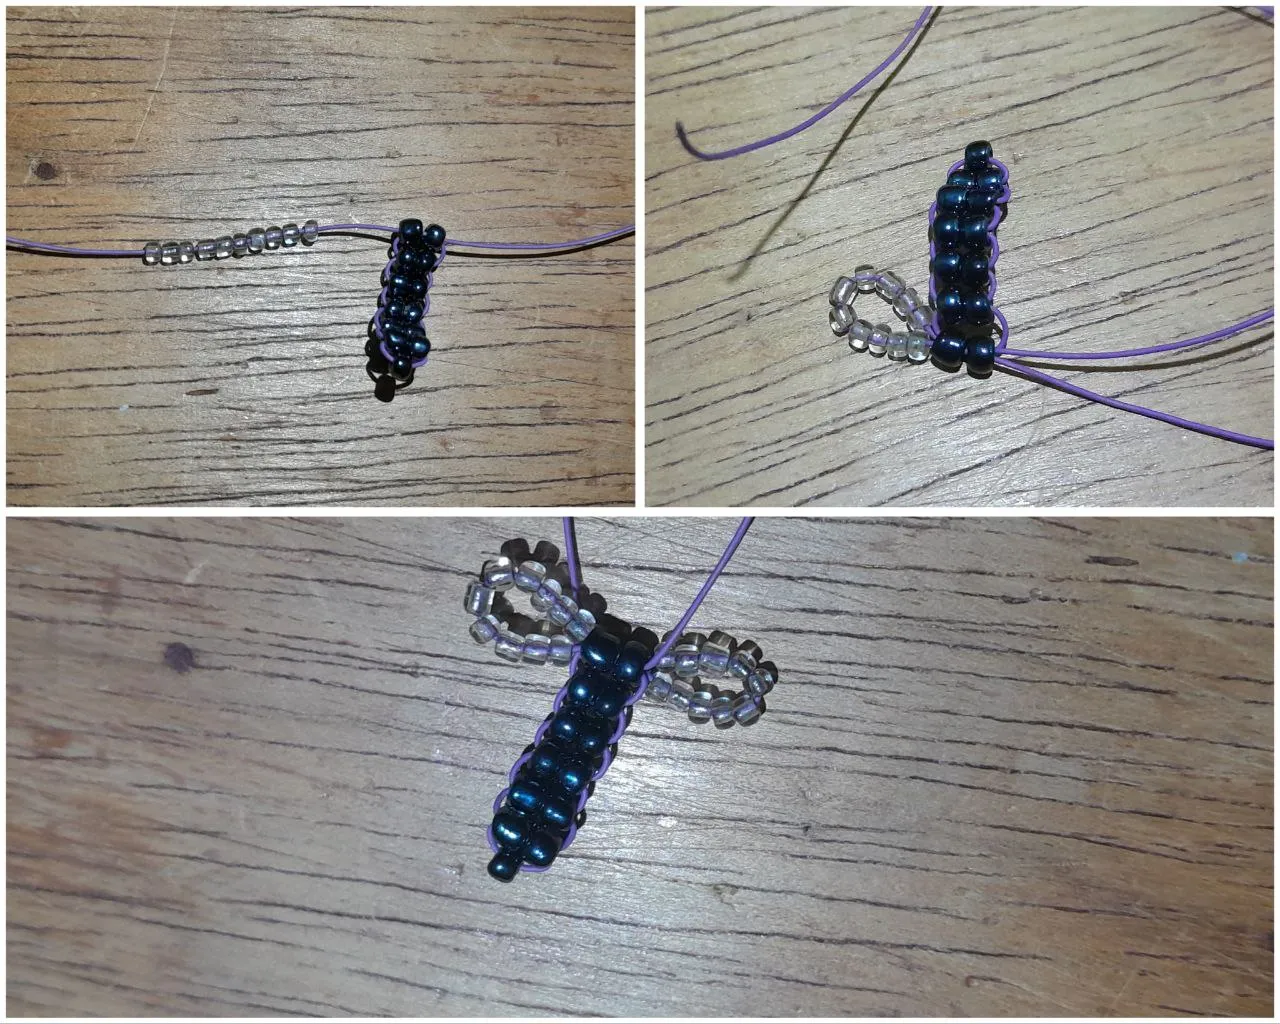
Ahora volvemos a introducir el hilo en las chaquiras, este paso puede ser difícil, ya que el espacio se reduce mucho, así que usar un alfiler o aguja puede ayudar a que los hilos atraviesen cada una de las chaquiras. Cabe recordar que siempre se deben cruzar los hilos, para tener un extremo de cada lado.
Now we return to introduce the thread in the beads, this step can be difficult, since the space is reduced a lot, so using a pin or needle can help the threads to cross each of the beads. It is important to remember that the threads must always be crossed, to have one end on each side.
En este paso, vamos a cambiar el número de Chaquiras a colocar, ya que usaremos 3, en ese caso serán dos secuencias de 3 chaquiras, pero al colocar las primeras, debemos realizar el segundo par de alas, pero en este caso usaremos 12 mostacillas transparentes. El procedimiento es el mismo, se deben cruzar los hilos y hacerlo con mucha paciencia, puesto que es complicado atravesar las chaquiras por el espacio reducido y aún más porque son tres.
In this step, we are going to change the number of beads to be placed, since we will use 3, in this case we will use two sequences of 3 beads, but when we place the first ones, we must make the second pair of wings, but in this case we will use 12 transparent beads. The procedure is the same, you must cross the threads and do it with a lot of patience, since it is complicated to cross the beads because of the reduced space and even more because there are three of them.
Específicamente tarde 10 minutos, tratando de que los hilos entrarán, así que debí empujar con mucha fuerza el hilo, pero al mismo tiempo con delicadeza para evitar dañarlo o romperlo.
Specifically, it took me 10 minutes, trying to get the threads to enter, so I had to push the thread with a lot of force, but at the same time with delicacy to avoid damaging or breaking it.
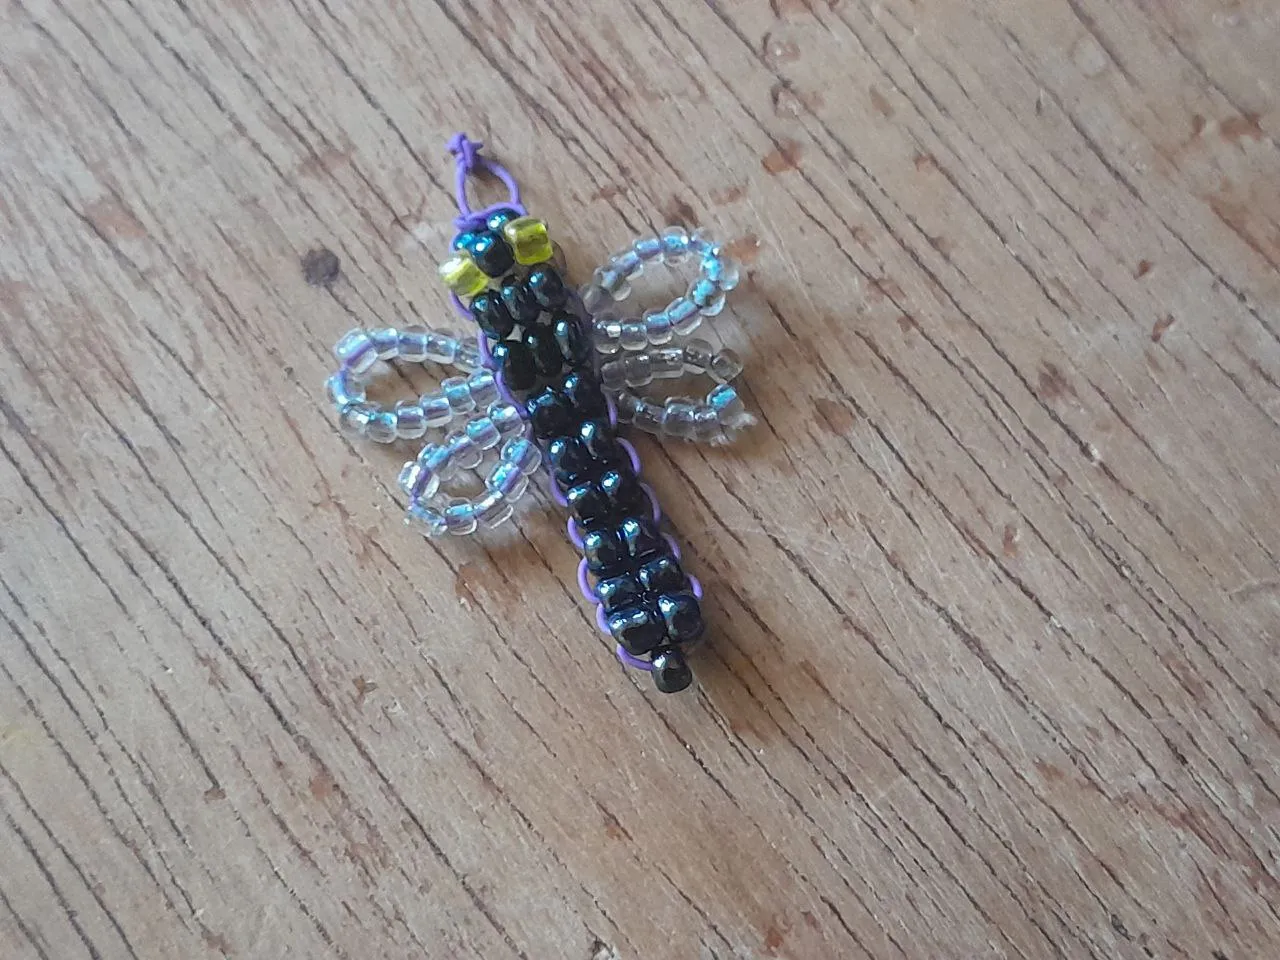
En el último paso, debemos colocar una tercera secuencia de 3 chaquiras, pero en este caso, la del medio será del mismo color que las anteriores, y las de los extremos deben ser de un color diferente, como pueden observar, yo use dos mostacillas de color amarillo, estás simularían ser los ojos.
In the last step, we must place a third sequence of 3 beads, but in this case, the middle one will be of the same color as the previous ones, and the ones at the ends must be of a different color, as you can see, I used two yellow beads, these would simulate the eyes.
Además de eso finalicé colocando dos chaquiras, estas serían parte de la cabeza de la libélula, antes de finalizar, hay que realizar un pequeño aro, este servirá para que podamos enganchar el dije, preferiblemente hay que usar un aro o gancho, pero como el hilo que use es duro y moldeable, lo deje de esta forma.
In addition to that I finished placing two beads, these would be part of the head of the dragonfly, before finishing, you have to make a small ring, this will serve so that we can hook the pendant, preferably you have to use a ring or hook, but as the thread I used is hard and moldable, I left it this way.
Sin duda fue un placer, compartir mi creación en la comunidad; disfrute mucho el proceso de elaboración y sé que esta tendrá mucha utilidad, ya que es un accesorio o dije muy atractivo.
Without a doubt, it was a pleasure to share my creation with the community; I really enjoyed the process of making it and I know that it will be very useful, since it is a very attractive accessory or pendant.

Espero haber cumplido sus expectativas y que hayan disfrutado observando mi publicación.
I hope I have fulfilled your expectations and that you have enjoyed watching my publication.
Written in Spanish and translated with www.DeepL.com/Translator (free version)