🍃💕✨💥💓🍃💕✨💥💓
 🍃💕✨💥💓🍃💕✨💥💓
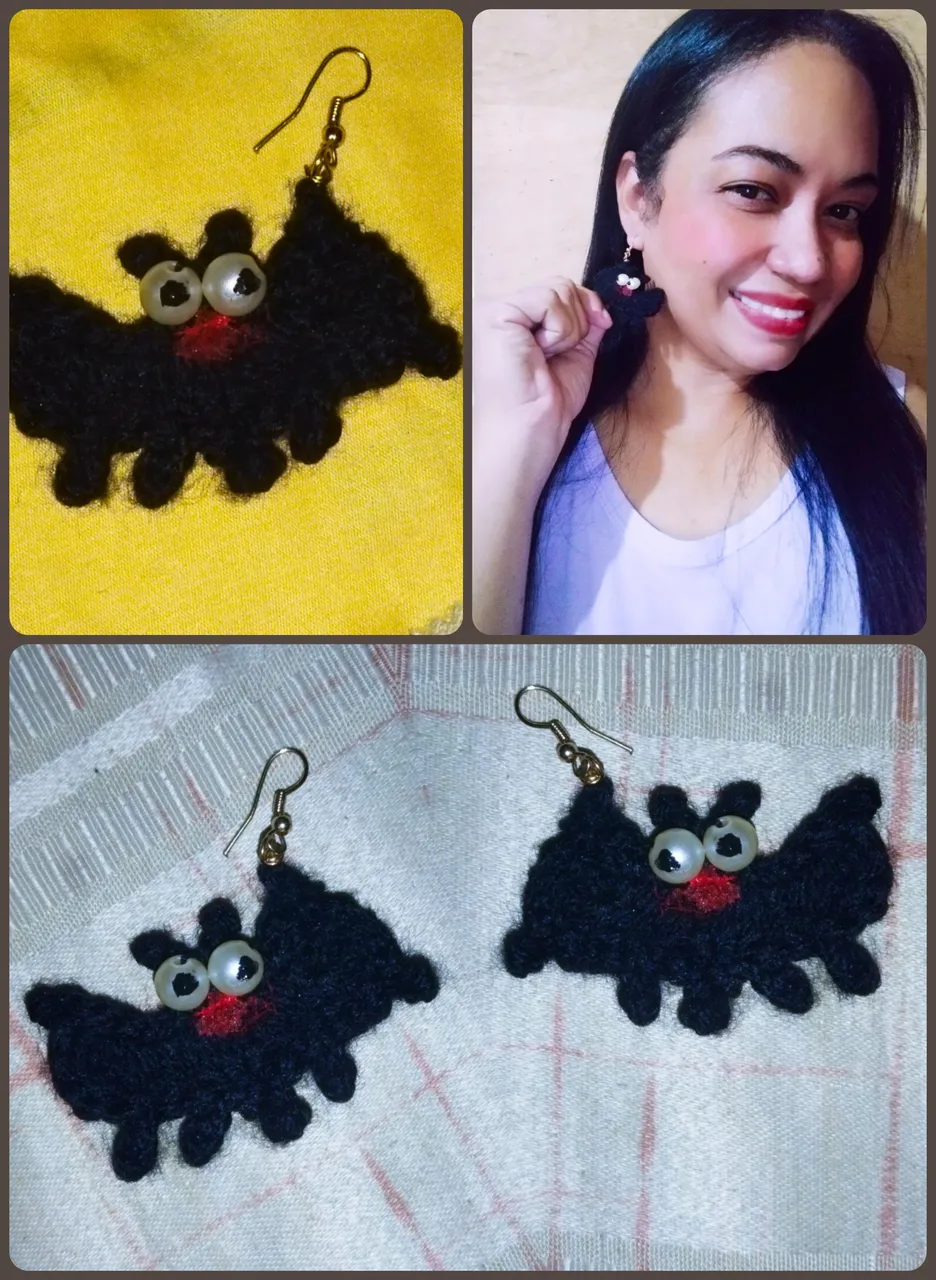
Hello everyone! welcome one more day to a creative and original post, today we are going to knit some beautiful tendrils in the shape of bats, very fun, easy to knit and take very little material. With this pattern is perfect to get ready for Halloween, they are made in acrylic cotton material, we can also use a cotton or a wool and a 3 mm hook, the hook is according to the type of material we are using, we will also use two white basins that will serve as the eyes very funny and a little instant glue to glue them, if you do not have glue you can put a drop of hot silicone or simply sew them.
Hola a todos!! bienvenidos un día más a un post creativo y original ,hoy vamos a tejer unos hermosos zarcillos en formar de murciélagos, muy divertidos,fáciles de tejer y llevan muy poco material. Con este patrón viene perfecta para ir preparandose para Halloween, están hechos en material algodón acrílico, también podemos utilizar un algodón o una lanita y un gancho de 3 mm, el gancho es acorde al tipo de material que estemos utilizando, también vamos a utilizar dos cuencas blancas que nos van a servir como los ojos muy divertidos y un poco de pegamento instantáneo para pegarlos, si no tienes pegamento puedes ponerle una gotita de silicona caliente o sencillamente coserlos.
🍃💕✨💥💓🍃💕✨💥💓
 🍃💕✨💥💓🍃💕✨💥💓
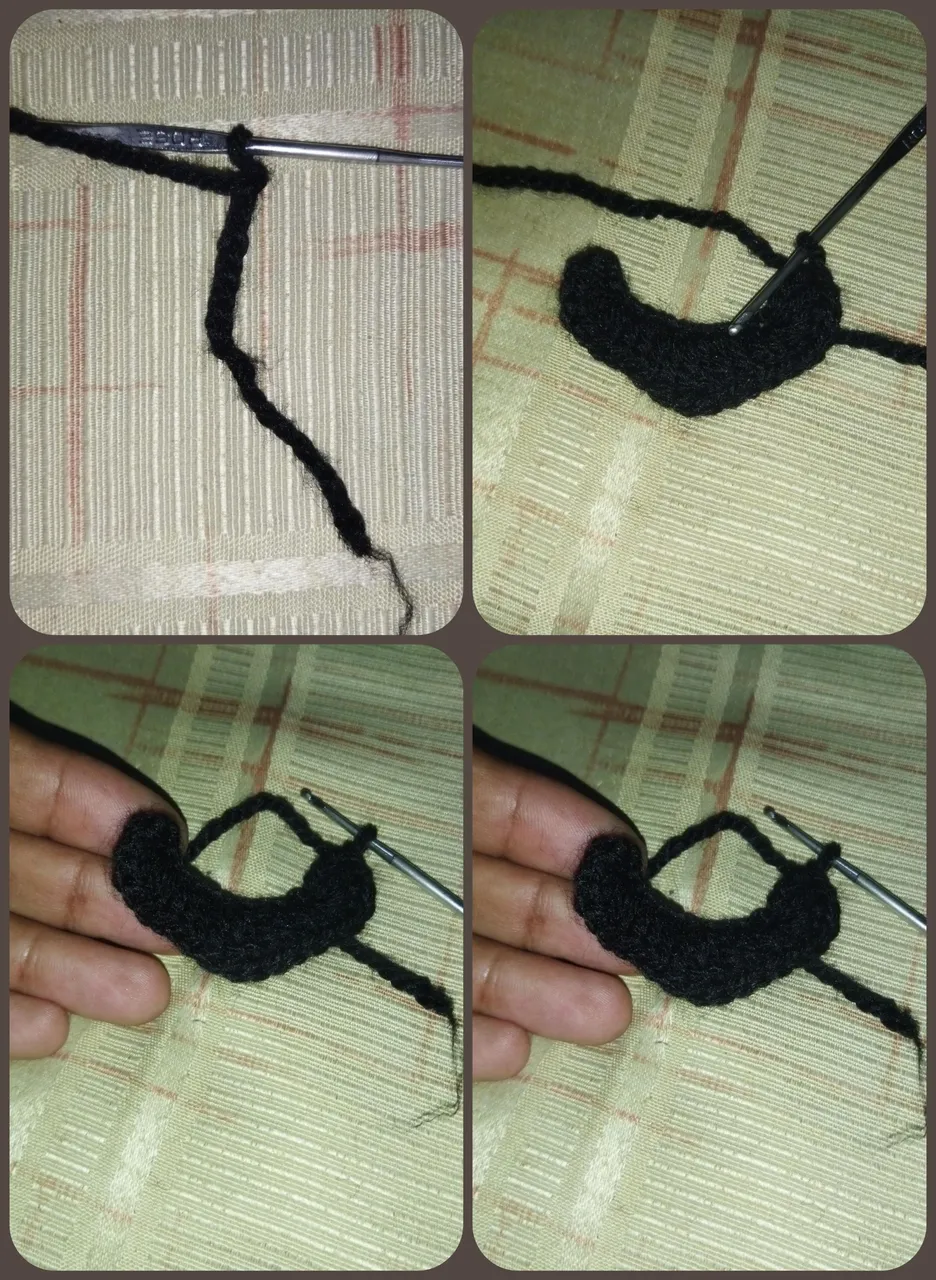
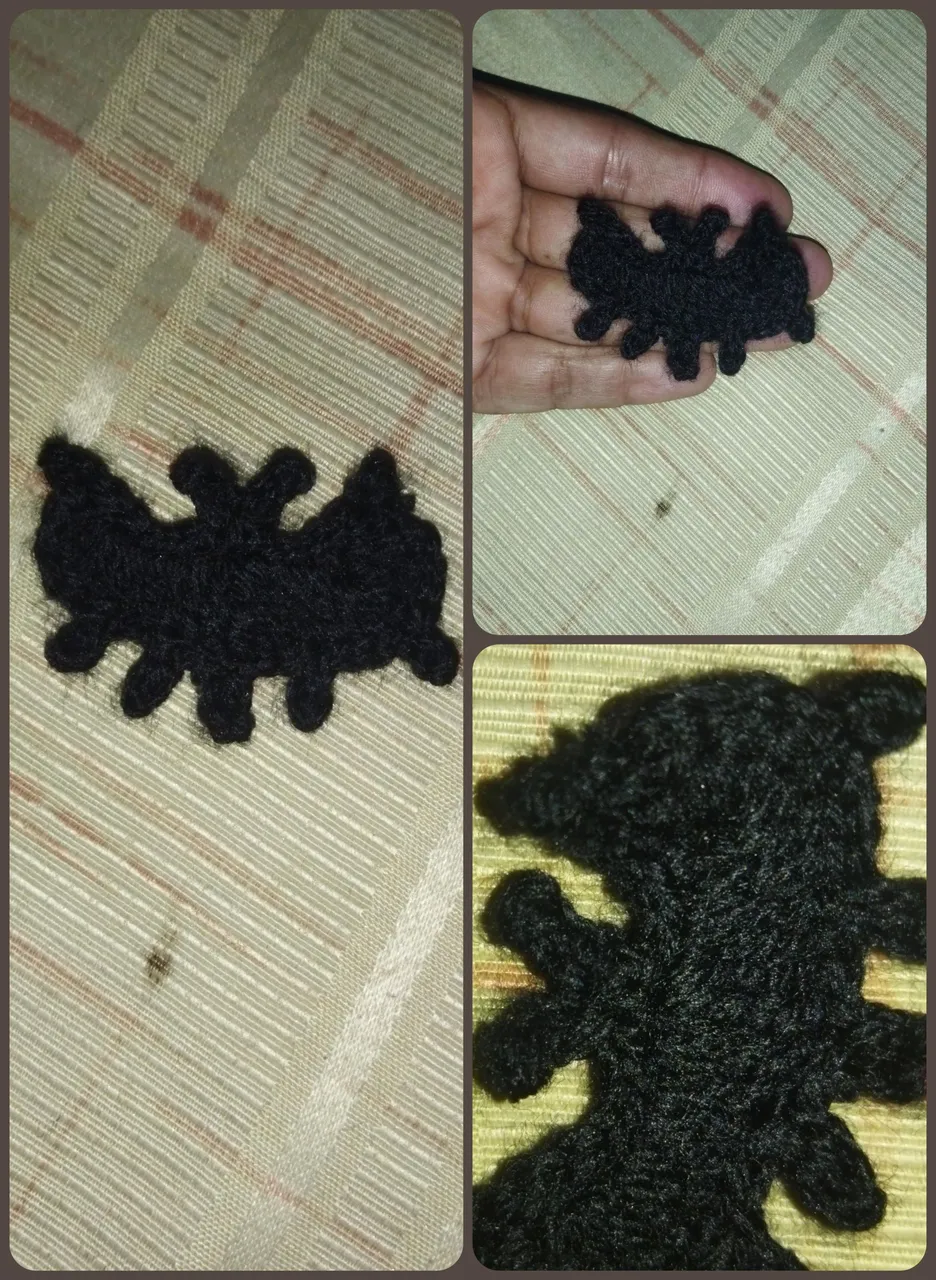
We are going to start by making a slip knot, we go up with 16 chains, a double crochet in each chain, we have to have a total of 16 double crochets and we go up now four chains, we make a slip stitch in the first chain that we have made of these four, we pull the fabric, we pick up yarn and in the first stitch we knit a slip stitch in the next stitch, we pick up the next stitch, and we knit a single crochet, three chains and slip stitch in that first chain we have made, from the three we pick up yarn we go to the next stitch and we knit a single crochet, in the next stitch, we pick up yarn and in the next stitch, high stitch, we go up three chains and slipped stitch in that first chain we have made, we pick up yarn and in the next stitch, high stitch, slipped stitch and in the next stitch, high stitch, forming all these small stitches and we repeat, we go up three chains, a slip stitch in the first chain, next stitch, double crochet, next stitch, slip stitch, we go up three chains and slip stitch in the first chain, next stitch, double crochet, slip stitch and next stitch which will be the last stitch. We knit three chains and slip stitch in that first chain to form the piquito, we go up two chains and we are going to slip stitch where the curve is formed.
We are going to make a slip stitch before the first stitch of the side and we will make in these stitches, slip stitches, go up with a chain and now we are going to work all around the edge.
Vamos a iniciar haciendo un nudo corredizo, subimos con 16 cadenas, un punto alto en cada cadena, tenemos que tener un total de 16 puntos altos y subimos ahora cuatro cadenas, hacemos punto deslizado en la primera cadenita que hemos hecho de estas cuatro, tiramos del tejido,cogemos hebra y en el primer punto hacemos punto alto en el siguiente punto, un punto deslizado, cogemos el siguiente punto, y hacemos un punto alto, tres cadenas y punto deslizado en esa primera cadenita que hemos hecho,de las tres cogemos hebra vamos al siguiente punto y hacemos punto alto, en el siguiente punto, punto deslizado, cogemos hebra y en el siguiente punto, punto alto, subimos tres cadenas y punto deslizado en esa primera cadenita que hemos hecho de las tres cogemos hebra y en el siguiente punto, punto alto,punto deslizado y en el siguiente punto, punto alto, formando todos estos piquitos y repetimos, subimos tres cadenas, un punto deslizado en la primera cadenita,siguiente punto, punto alto, siguiente punto, punto deslizado, subimos tres cadenas y punto deslizado en la primera cadenita siguiente punto, punto alto, punto deslizado y siguiente punto que será el último. Tejemos tres cadenas y hacemos punto deslizado en esa primera cadenita para formar El piquito, subimos dos cadenas y vamos a hacer punto deslizado en donde se forma la curva.
Vamos a hacer punto deslizado antes del primer punto de el lado y haremos en estos puntos, puntos deslizados , subimos con una cadena y ahora vamos a trabajar por todo el borde.
🍃💕✨💥💓🍃💕✨💥💓
 🍃💕✨💥💓🍃💕✨💥💓
🍃💕✨💥💓🍃💕✨💥💓
🍃💕✨💥💓🍃💕✨💥💓
 🍃💕✨💥💓🍃💕✨💥💓
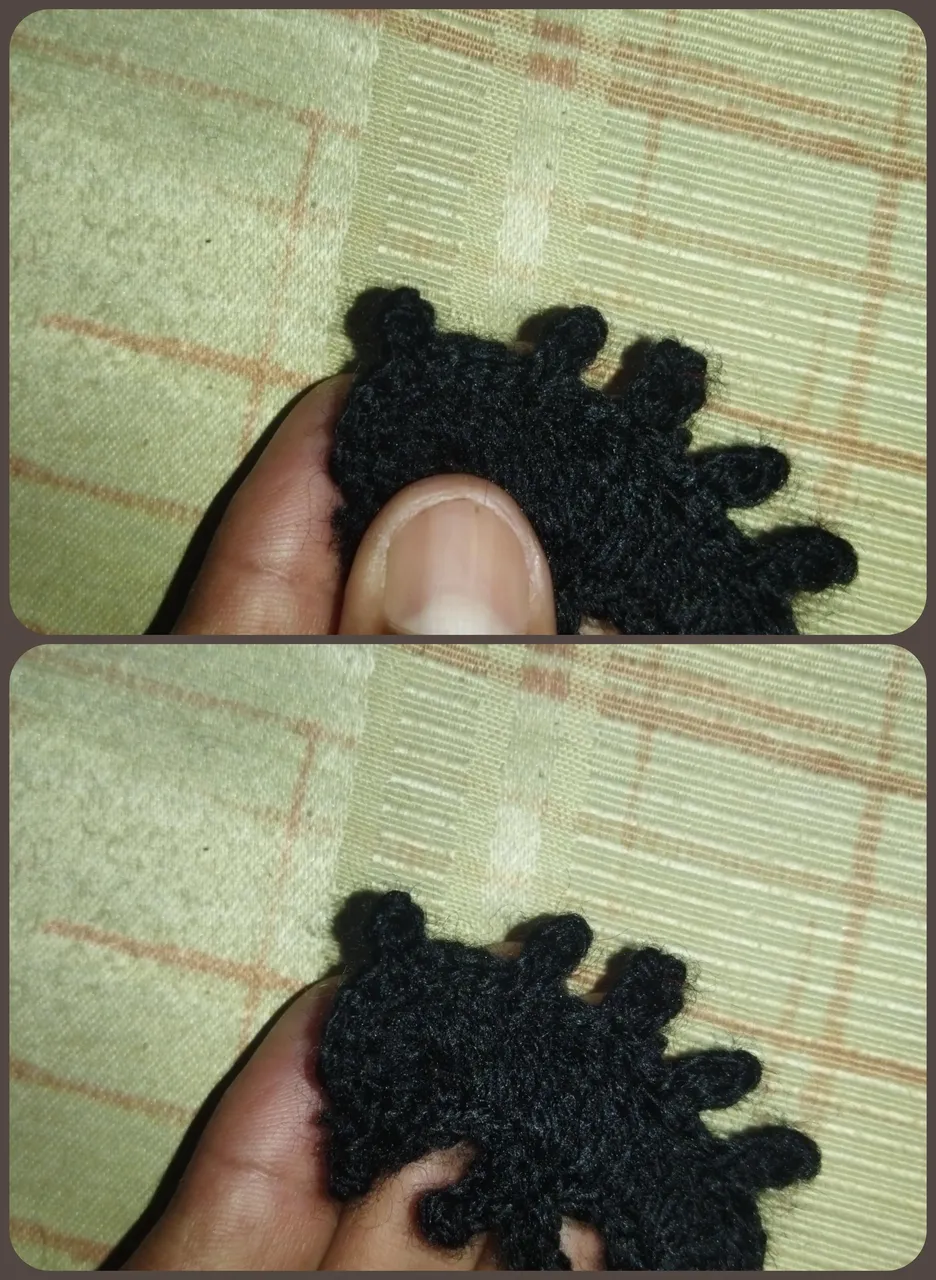
We go up five chains and at the base of where the chains come out we make a slip stitch, we make two slip stitches in a row, one in each stitch, and another slip stitch we go up five chains at the base of where the chains come out and now we make 7 slip stitches, we make a safety chain and cut this strand, we accommodate well all the piquitos because these chains tend to rotate, we are putting well and lose the strand, with our needle from behind And now we have completed this nice bat, we make another piece exactly the same, to complete the pair.
Subimos cinco cadenas y en la base de dónde salen las cadenitas hacemos punto deslizado, hacemos dos puntos deslizados seguidos uno en cada punto, Y otro punto deslizado subimos cinco cadenas en la base de donde salen esas cadenitas y ahora hacemos 7 puntos deslizados, hacemos una cadenita de seguridad y cortamos esta hebra, acomodamos bien todos los piquitos porque estas cadenitas se suelen girar,vamos poniendo bien y perdemos la hebra, con nuestra aguja por detrás Y ahora sí hemos culminado este simpático murciélago, hacemos otra pieza exactamente igual, para completar el par.
🍃💕✨💥💓🍃💕✨💥💓
 🍃💕✨💥💓🍃💕✨💥💓
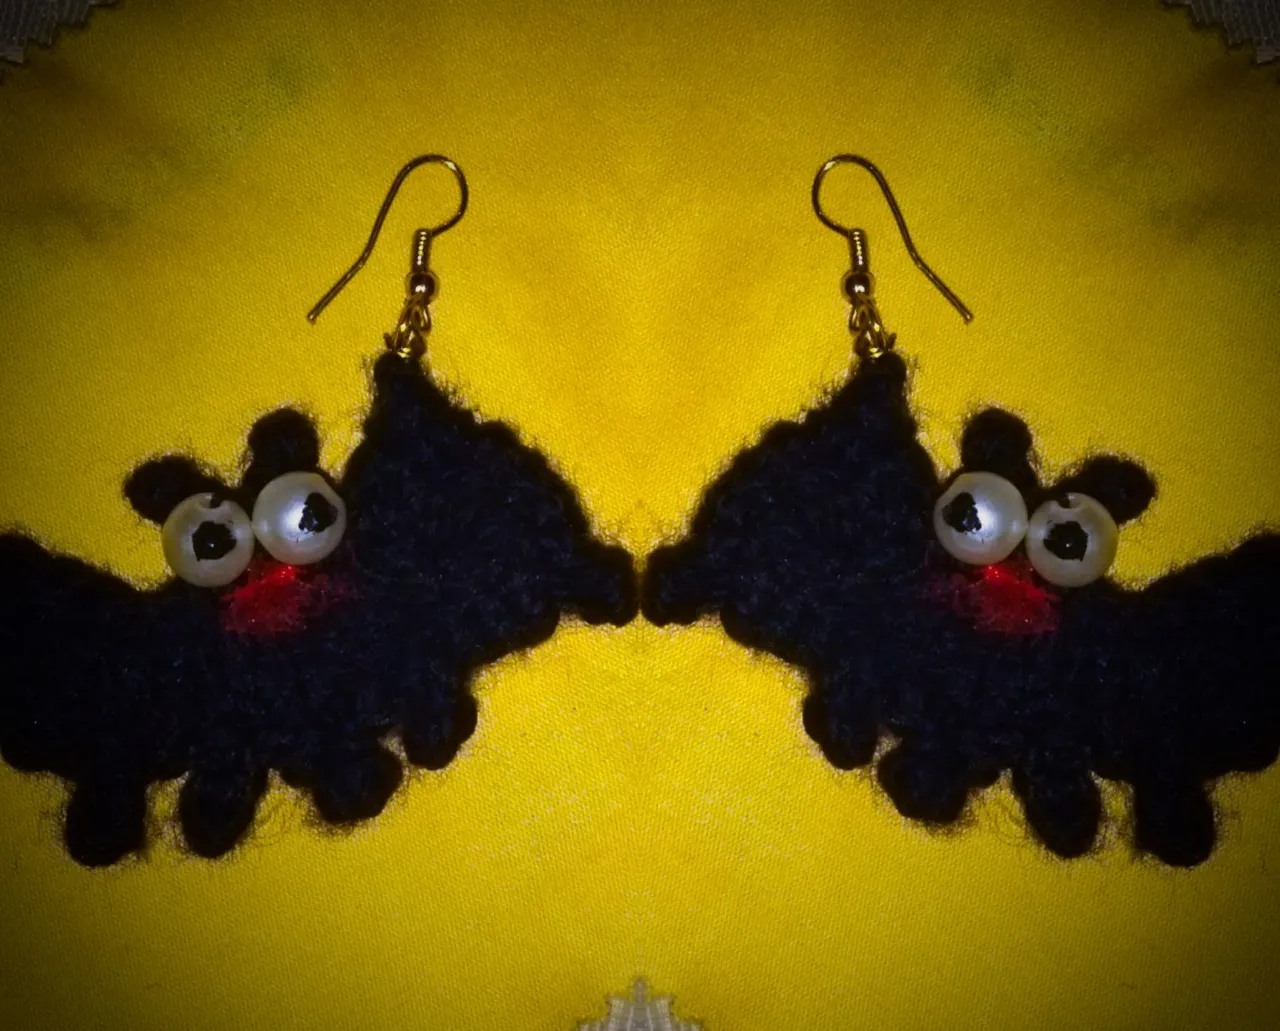
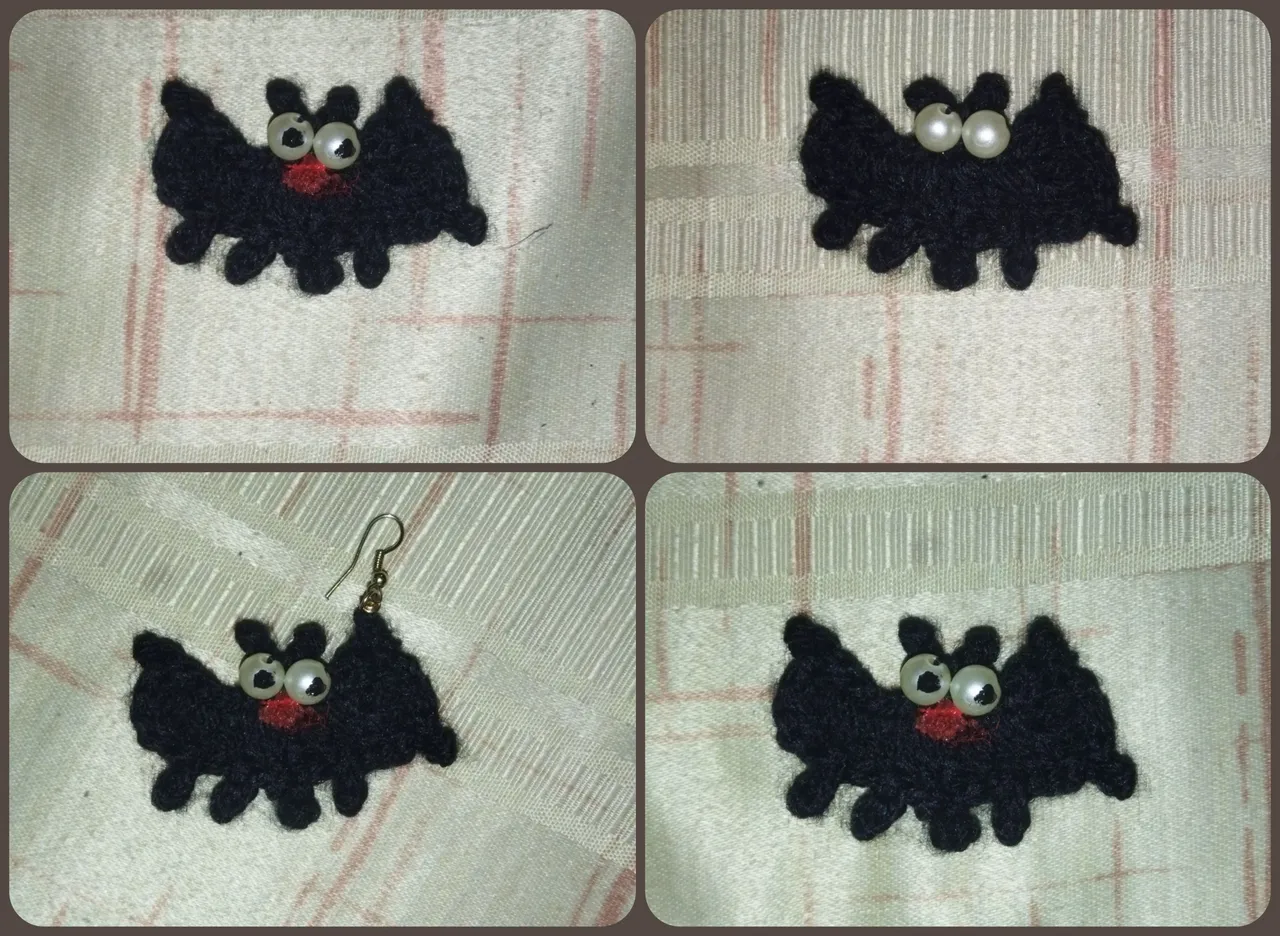
In front of the ears without going up much we will sign the white sockets as the eyes, I used a medium size to give more grace to the image of the character, and the details of the iris and mouth painted them with cold paint, and we place the base of some tendrils and that's it, we would have our bat finished and have been well cool, beautiful and fun.
Delante de las orejitas sin subir mucho vamos a firmar las cuencas blancas como los ojos, yo utilicé un tamaño mediano para darle más gracia a la imagen de del personaje, y los detalles del iris y la boca los pinte con pintura al frío, y le colocamos la base de unos zarcillos y ya está, ya tendríamos nuestro murciélago terminado y han quedado bien chulos,bonitos y divertidos.
🍃💕✨💥💓🍃💕✨💥💓
 🍃💕✨💥💓🍃💕✨💥💓
I really appreciate your attention if you got to this point, for my part I say goodbye until a new opportunity greetings!!!!
Agradezco mucho tu atención si llegaste hasta este punto, por mi parte me despido hasta una nueva oportunidad saludos!!
🍃💕✨💥💓🍃💕✨💥💓
 🍃💕✨💥💓🍃💕✨💥💓
All images are my own taken with redmi 9t and edited with Photoshop Express app for Android.
Todas las imágenes son de mi propiedad tomadas con redmi 9t y editadas con la aplicación Photoshop Express para Android.
🍃💕✨💥💓🍃💕✨💥💓
 🍃💕✨💥💓🍃💕✨💥💓