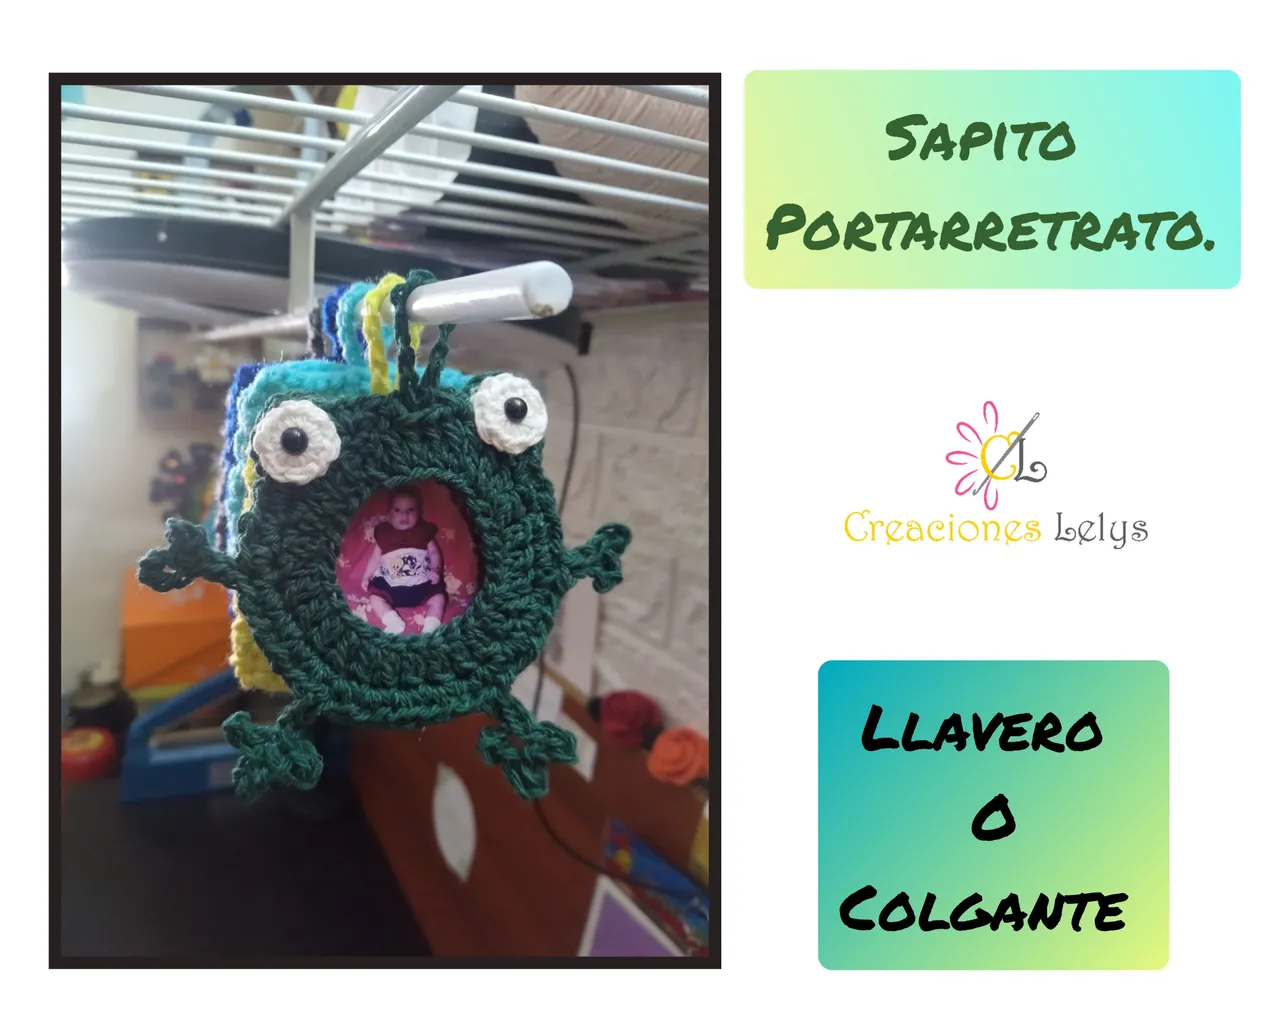
SAPITO PORTARRETRATO 🐸 PARA LLAVERO O COLGANTE.
TOAD PORTRAIT HOLDER 🐸 FOR KEYCHAIN OR PENDANT.
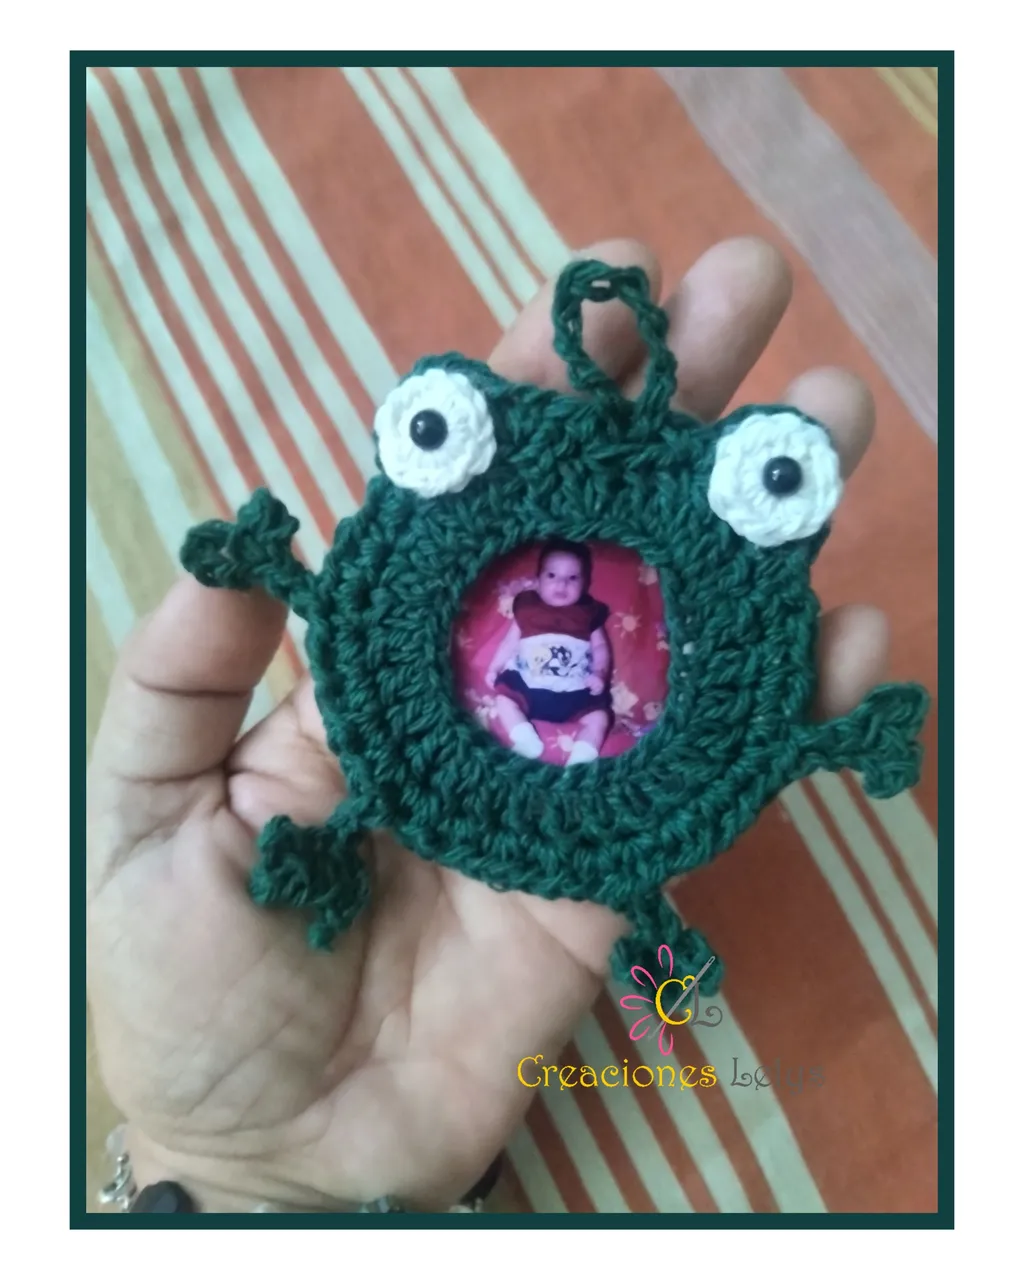
Hola queridos amigos 👋🏽 yo soy Lelys. El día de hoy quiero mostrarles el resultado final de un proyecto que surgió de momento. Solo pensé en hacer algo diferente para sorprender a los padres. Ustedes saben que cuando un niño nace siempre le queremos tomar las fotos para luego tener en nuestras carteras, monederos, portarretratos y demás soportes en los que podamos verlo en todo momento. Las fotografías de los niños al nacer son y serán siempre un tesoro para los padres. ¿Si o no? Motivado a ello quise tejer otro modelo de portarretrato, pero esta vez que fuera más divertido y llamativo.
Hello dear friends 👋🏽 I am Lelys. Today I want to show you the final result of a project that came up at the moment. I just thought of doing something different to surprise the parents. You know that when a child is born we always want to take pictures to have in our wallets, purses, picture frames and other supports in which we can see it at all times. Photographs of children at birth are and will always be a treasure for parents, yes or no? Motivated by this, I wanted to weave another model of picture frame, but this time more fun and eye-catching.
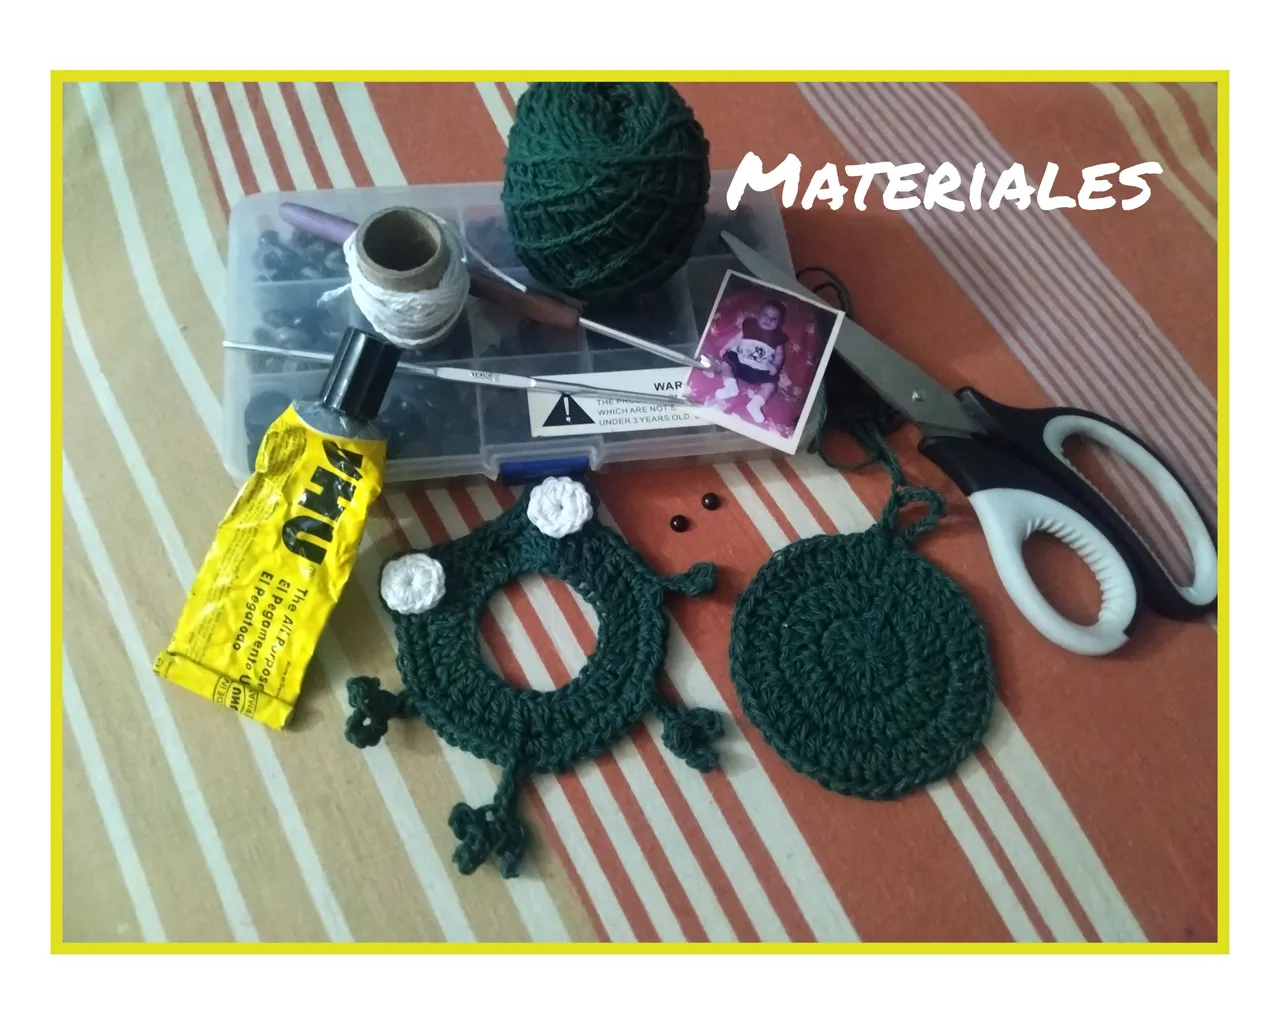
Para realizar estos portarretratos estoy usando una foto pequeña tipo carnet que tengo de uno de mis sobrinos. David ya es un hombre de 20 años de edad y su oficio y pasión es ser bombero. Actualmente se desempeña como funcionario de defensa civil en Monagas, Municipio Cedeño. Hay fotos tipo carnet de tamaños más grandes, por eso yo recomiendo tener a mano las medidas o la foto para que estos llaveros o colgantes queden a la medida.
MATERIALES. / MATERIALS.
Los materiales que usé para hacer el sapito son:
🐸 Hilo pabilo colores blanco y verde.
🐸 Agujas de crochet de 3,25mm y 2,50mm.
🐸 Aguja lanera.
🐸 Pegamento.
🐸 Ojitos plásticos.
🐸 Tijeras.
To make these portraits I am using a small passport photo I have of one of my nephews. David is already 20 years old and his profession and passion is to be a fireman. He is currently working as a civil defense officer in Monagas, Municipio Cedeño. There are passport photos of larger sizes, so I recommend having the measurements or the photo at hand so that these keychains or pendants are tailored to fit.
The materials I used to make the sapito are:
🐸 Pabilo thread white and green colors.
🐸 Crochet needles of 3,25mm and 2,50mm.
🐸 Wool needle.
🐸 Glue.
🐸 Plastic eyes.
🐸 Scissors.
PROCEDIMIENTO. / PROCEDURE.
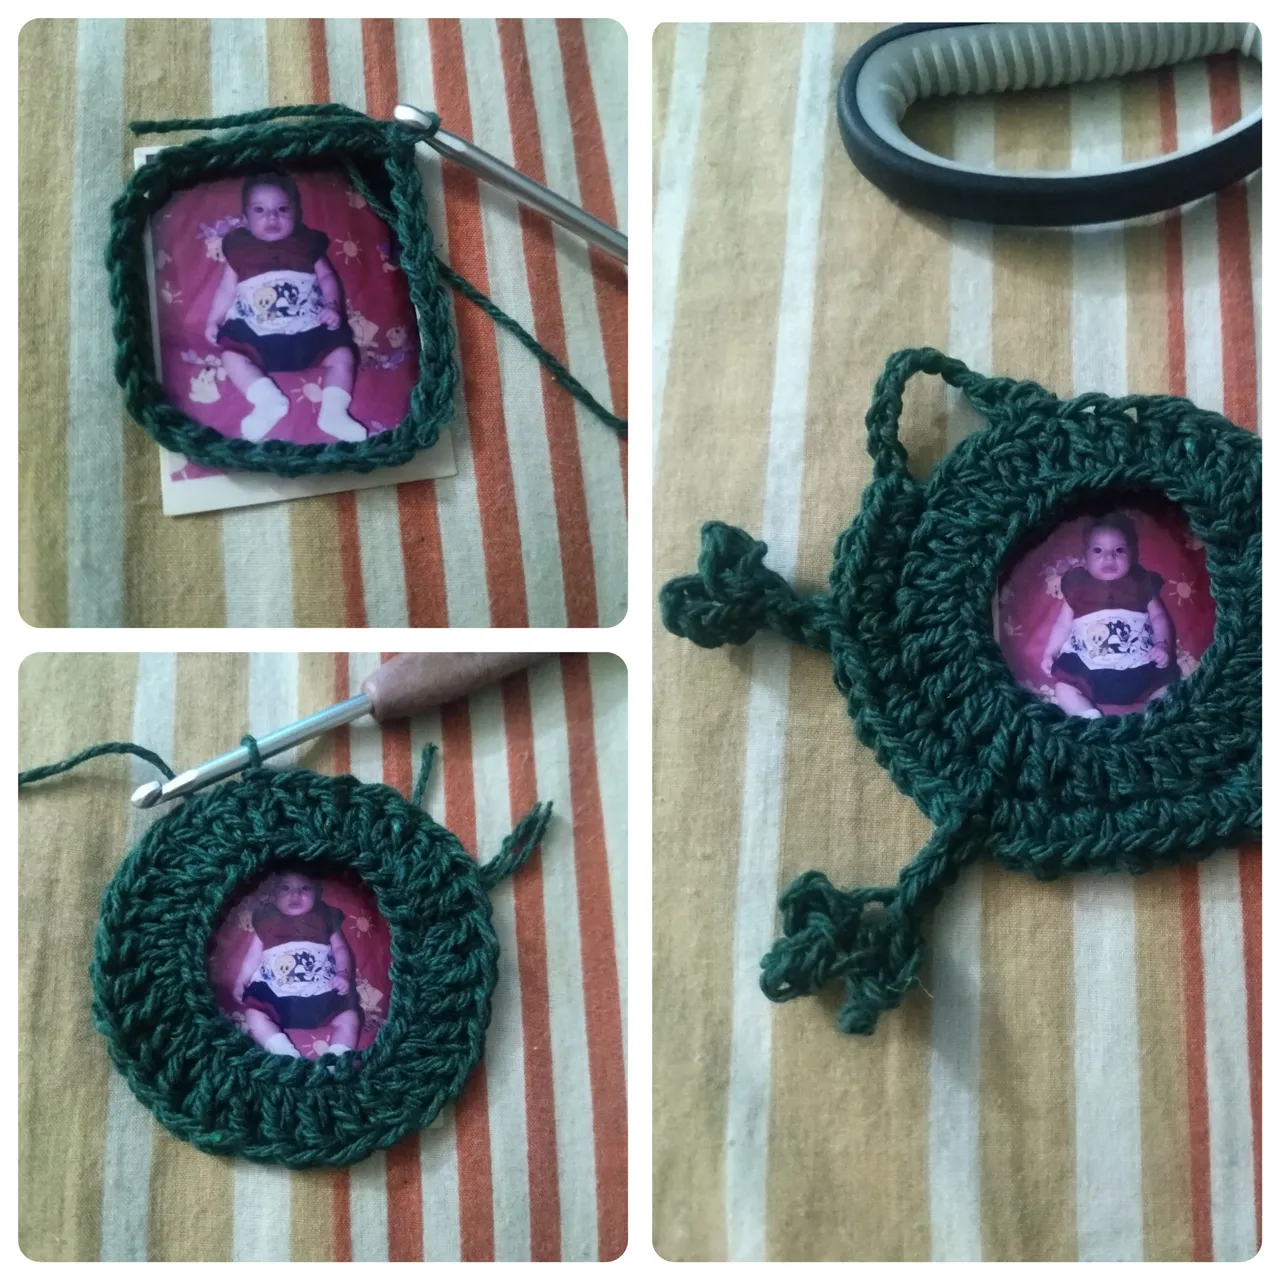
🐸 Inicié el proyecto tejiendo 30 cadenas, por supuesto que fue la medida necesaria para cubrir la parte importante de la foto. Cerré con punto deslizado en la primera cadena para formar un círculo.
🐸 En la segunda vuelta tejí 30 puntos altos tomando solo una hebra de la cadena.
🐸 En la tercera vuelta tejí solo con puntos bajos. Inicié tejiendo aumentos (2) luego tejí ocho cadenas al aire dejando libres dos puntos de la vuelta anterior e hice aumentos de puntos bajos. Luego tejí la primera pata del sapito: subí con tres siete cadenas, me devolví a la tercera y tejí un punto deslizado. Luego tejí nuevamente cuatro cadenas y volví a tejer un pd en donde nace la cadena. Seguidamente tejí un aumento de punto bajo en el punto siguiente. Seguí tejiendo aumentos de punto bajo hasta ubicarme en posición para tejer la segunda pata. Subí con siete cadenas, me devolví a la cadena tres y tejí un punto deslizado, tejí de nuevo cuatro cadenas y me devolví de nuevo al mismo punto. Repetí una vez más. Luego tejí aumentos de puntos bajos hasta llegar al otro lado del sapito para tejer ahora de manera inversa; primero la pata larga de tres y luego la de dos y kas cadenas al aire. Al finalizar tejí una cadena y dejé un punto libre de la base, ubicando en el medio entre los dos arcos de cadenas. Cerré con pd. Escondí la hebra. Ver imagen.
🐸 I started the project by knitting 30 chains, of course that was the size needed to cover the important part of the photo. I closed with slipped stitch in the first chain to form a circle.
🐸 In the second round I knit 30 high stitches taking only one strand of the chain.
🐸 In the third round I knitted only with single crochet. I started by knitting increases (2) then I knit eight chains in the air leaving two stitches free from the previous round and made low stitch increases. Then I knitted the first leg of the frog: I went up with three seven chains, went back to the third chain and knit a slip stitch. Then I knitted four chains again and knitted a stitch back to where the chain starts. I then knit a single crochet increase in the next stitch. I continued knitting single crochet increases until I was in position to knit the second leg. I went up with seven chains, returned to chain three and knit a slip stitch, knit four chains again and returned to the same stitch. I repeated once more. Then I knitted low stitch increases until I reached the other side of the toad to knit now in reverse; first the long leg of three and then the long leg of two and kas chains in the air. At the end I knit a chain and left a stitch free from the base, placing it in the middle between the two arches of chains. I closed with pd. I hid the strand. See image.
🐸 Para la tapa o parte de atrás del sapito empecé tejiendo 15 puntos altos dentro de un anillo mágico. Enseguida tejí la segunda vuelta de 15 aumentos de puntos altos. La tercera vuelta fue de 1pa-1aum. Cerré con punto deslizado, dejé la hebra larga antes de cortar.
🐸 For the top or back of the frog I started by knitting 15 double crochet stitches inside a magic ring. I then knit the second round of 15 increases of double crochet. The third round was 1pa-1aum. I closed with a slip stitch, leaving the yarn long before cutting.
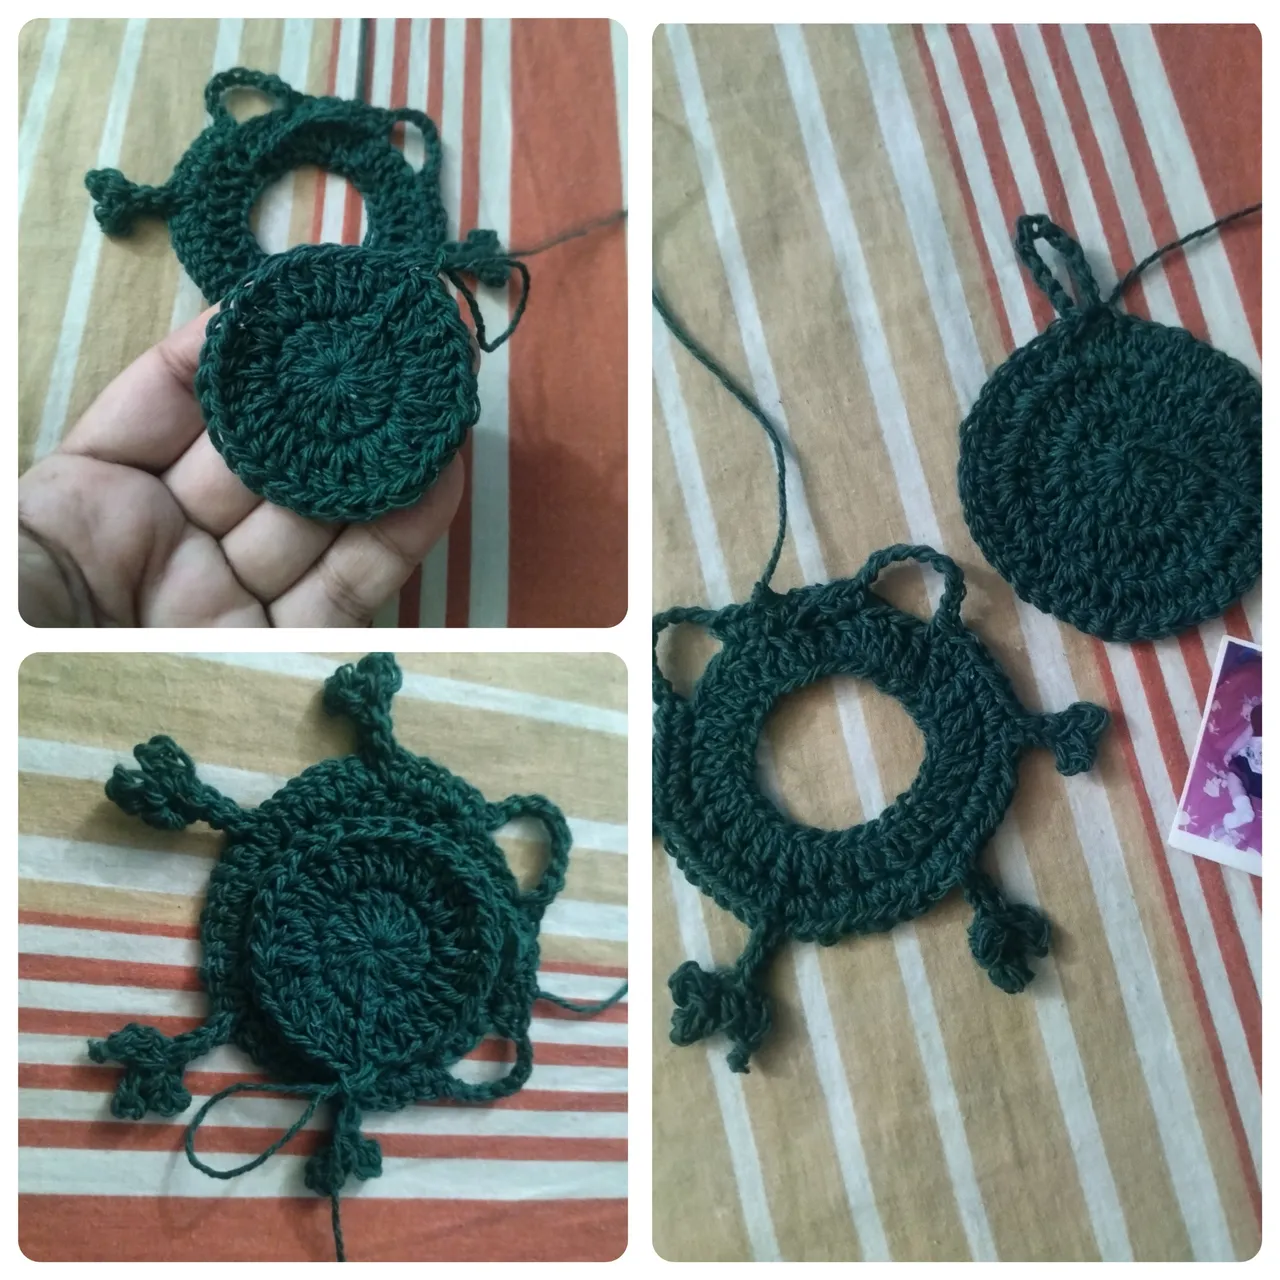
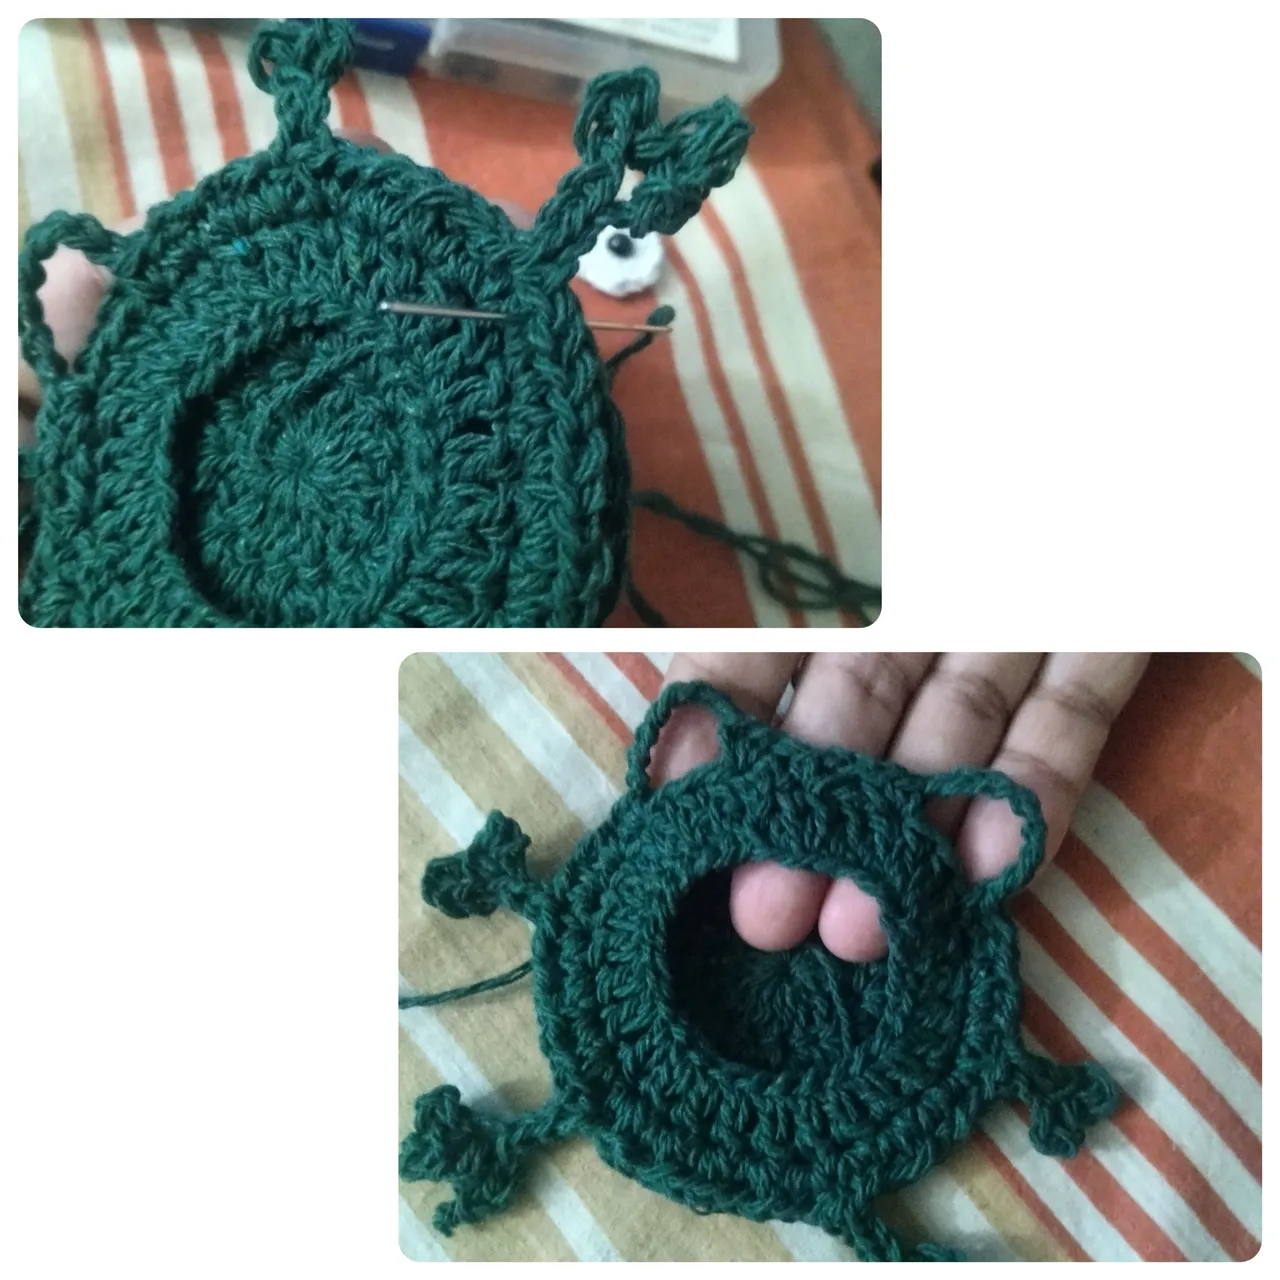
🐸 El siguiente paso fue unir ambas piezas; usando la aguja lanera y el hilo verde uní con costura desde uno de los costados del arco de cadenas hasta antes de llegar al otro. Cerré con un nudo y corté el hilo.
🐸 The next step was to join both pieces together; using the wool needle and green thread I stitched together from one side of the chain bow to before I reached the other. I closed with a knot and cut the yarn.
🐸 Con el hilo blanco y el gancho de 2,50mm tejí un anillo mágico con 12 puntos bajos. Cerré y escondí la hebra. Sobre este anillo pegué un ojo plástico color negro en el centro. De estos hice dos.
🐸 Coloqué pegamento en el arco o cadenas libres y sobre ellas pegué los ojos blancos. Esperé que secara muy bien.
🐸 With the white yarn and the 2,50mm hook I knitted a magic ring with 12 low stitches. I closed and hid the yarn. On this ring I glued a black plastic eye in the center. From these I made two.
🐸 I put glue on the bow or free strings and on them I glued the white eyes. I waited for it to dry very well.
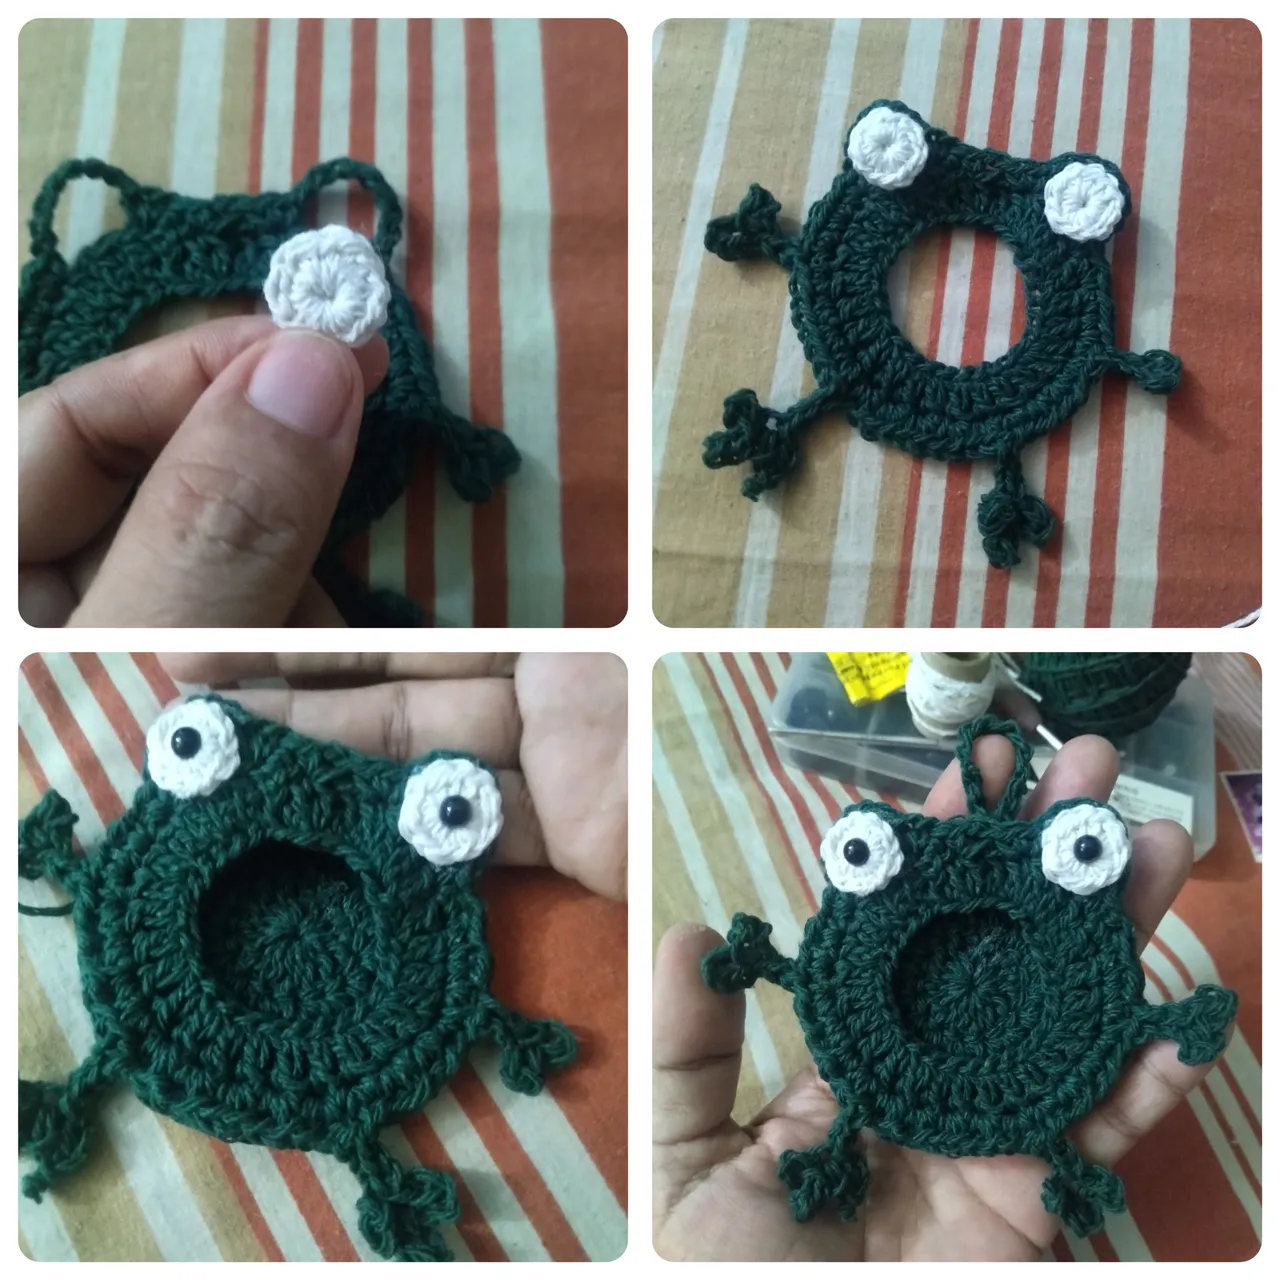
🐸 Una vez seco el pegamento procedí a meter la foto. Como pueden ver cabe perfectamente. Este modelo me encantó. Espero que se animen e inspiren a realizar portarretratos divertidos. Y que nunca les falten fotos de sus niños donde quieran que estén.
Todas las fotos son de mi propiedad. Edité con Polish. Usé el traductor de Deelp. Hasta pronto.
🐸 Once the glue was dry I proceeded to put the photo in. As you can see it fits perfectly. I loved this model. I hope you are encouraged and inspired to make fun picture frames. And I hope you never lack photos of your children wherever you want them to be.
All photos are my property. I edited with Polish. I used Deelp translator. See you soon.