Hola queridos amigos de Hive y de esta hermosa comunidad de Jewelry, en esta hermosa tarde les quiero compartir como he hecho está bella y sencilla pulsera de perlas en dos tonos de rosado, un rosado claro y un rosado muy intenso, quién es el que hace que sea una pulsera que no pase desapercibida. Está pulsera es muy sencilla de hacer, son muy pocos pasos, los cuales son muy repetitivos., también necesita pocos materiales y poco tiempo para hacerla, yo me tardé aproximadamente 10 minutos en terminarla, aún así es una pulsera muy hermosa para salir de forma casual a cualquier lugar que deseemos.
Materiales:
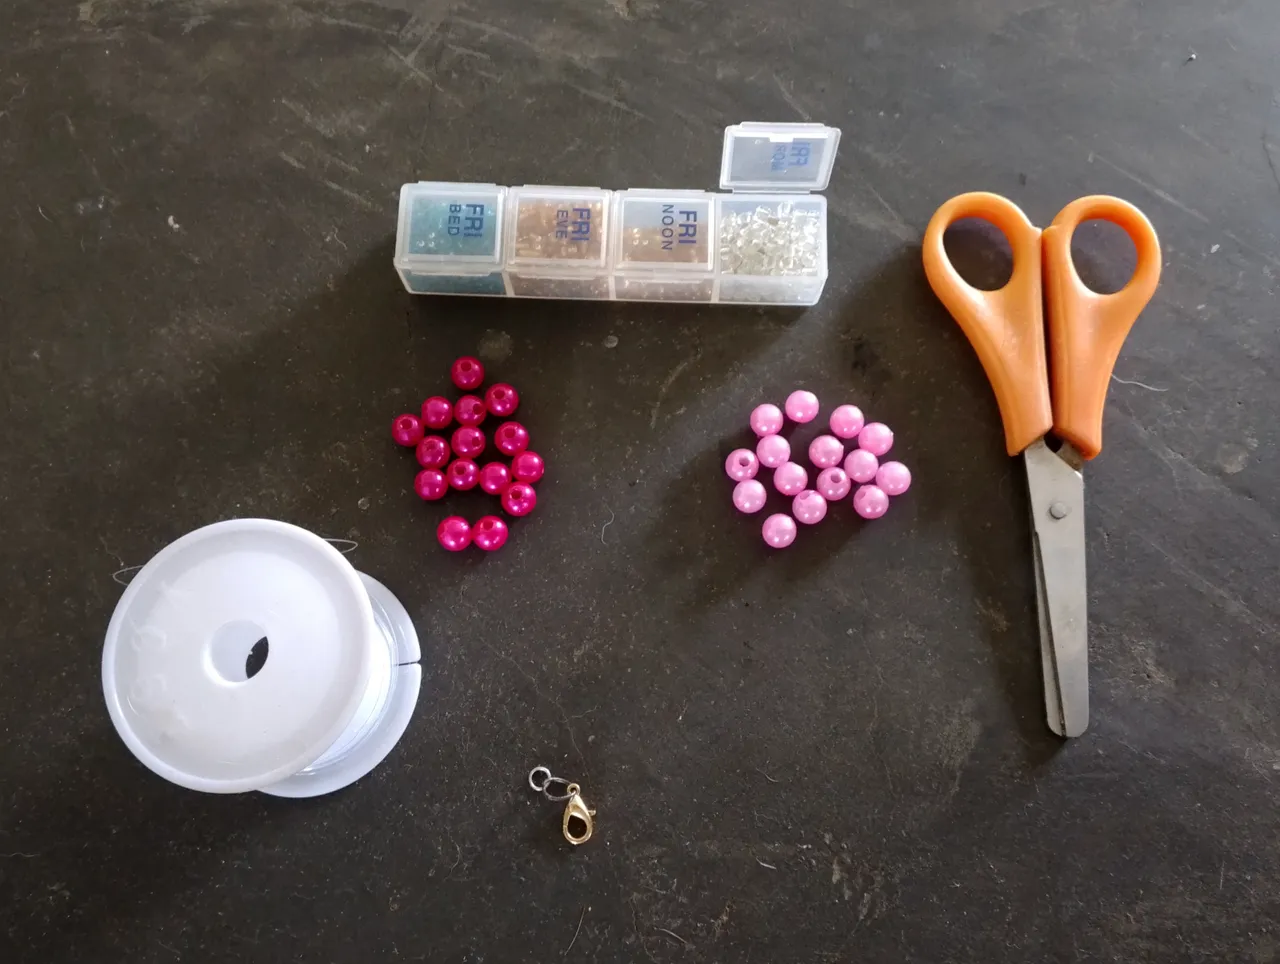
💖8 Perlas de color rosado claro y tamaño mediano
💖8 Perlas de color fucsia y tamaño mediano
💖 Mostacillones transparentes
💖 Mostacillas transparentes
💖1mt de nylon 0,3
Procedimiento
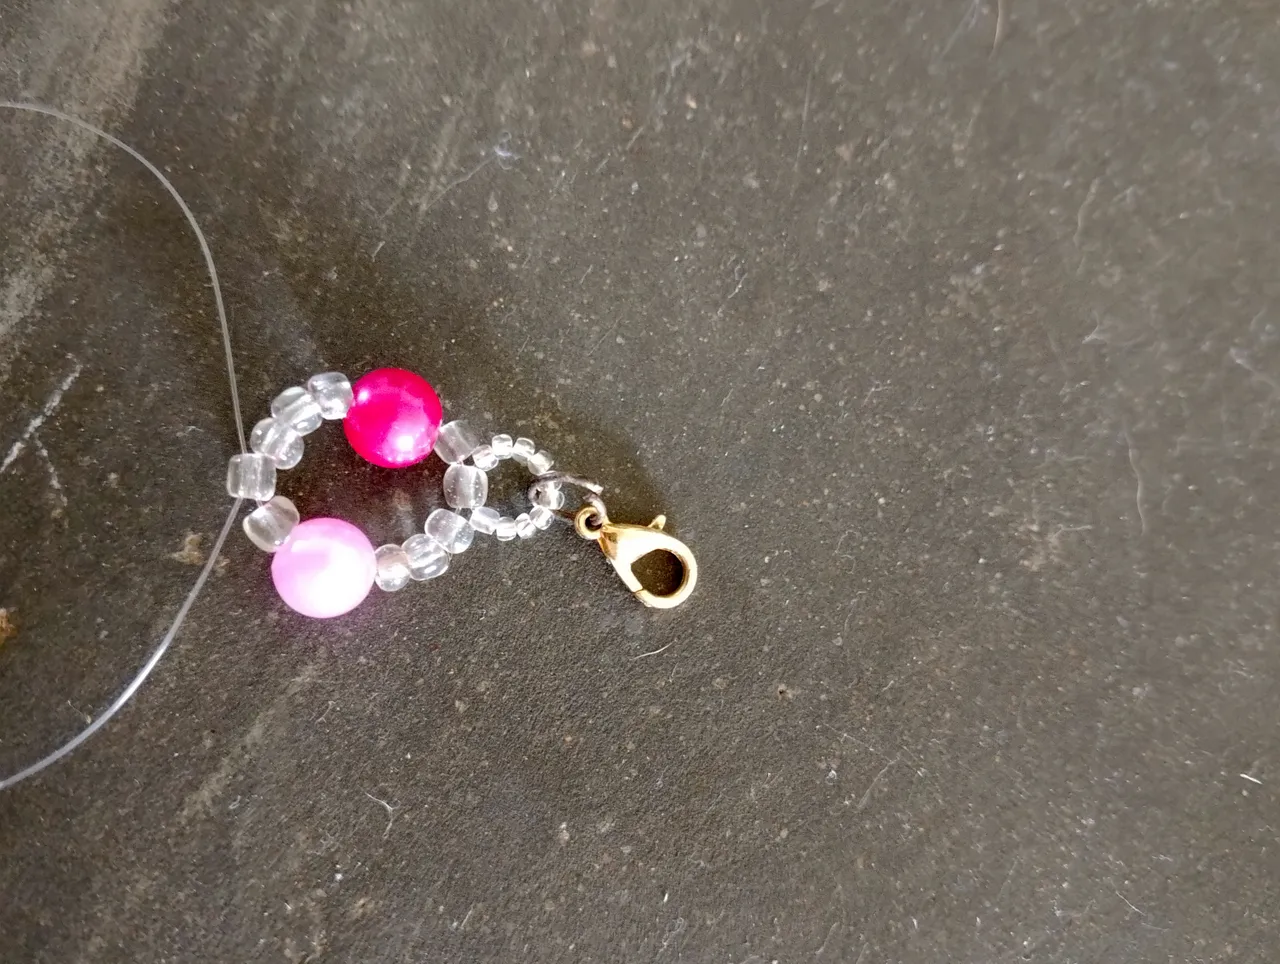
Empezamos insertando en el nylon 5 mostacillas transparentes, el broche, 5 mostacillas trasparentes más y cruzamos por un mostacillón transparente. Luego en uno de los nylon vamos a insertar un mostacillón transparente, una perla de color fucsia y tres nuevos mostacillones transparentes, en el otro nylon vamos a agregar tres mostacillones transparentes, una perla de color rosado claro, un mostacillón transparente más y cruzamos por un nuevo mostacillón transparente.
Ahora en el nylon que se encuentra en el lado de la perla de color fucsia vamos a insertar un mostacillón transparente, una perla de color fucsia y tres nuevos mostacillones transparentes, en el otro nylon, el nylon del lado de la perla rosada, vamos a agregar tres mostacillones transparentes, una perla de color rosado claro, un mostacillón transparente más y cruzamos por un nuevo mostacillón transparente. Una vez más, en el nylon que se encuentra en el lado de la perla de color fucsia vamos a insertar un mostacillón transparente, una perla de color fucsia y tres nuevos mostacillones transparentes, en el otro nylon, el nylon del lado de la perla rosada, vamos a agregar tres mostacillones transparentes, una perla de color rosado claro, un mostacillón transparente más y cruzamos por un nuevo mostacillón transparente. Seguimos así hasta acabar las perlas, es decir, hacemos este procedimiento 4 veces más para completar el largo.

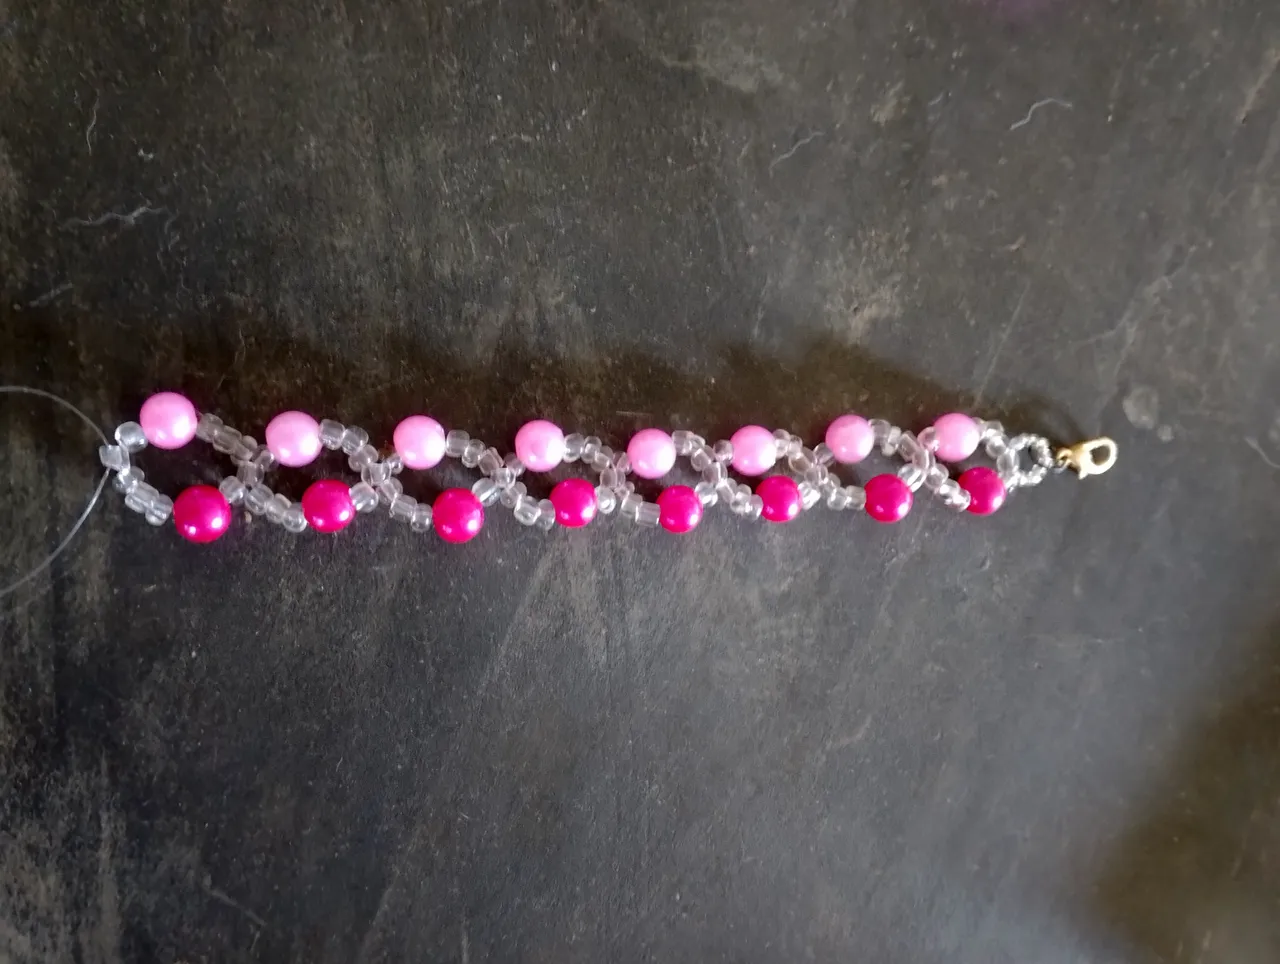
Por último vamos a insertar nuevamente en el nylon que se encuentra en el lado de la perla de color fucsia vamos a insertar un mostacillón transparente, una perla de color fucsia y tres nuevos mostacillones transparentes, en el otro nylon, el nylon del lado de la perla rosada, vamos a agregar tres mostacillones transparentes, una perla de color rosado claro, un mostacillón transparente más y cruzamos por un nuevo mostacillón transparente, luego en cada nylon insertamos 5 nuevas mostacillas transparentes y en uno de estos nylon agregamos la argolla, luego anudamos muy bien y cortamos el nylon sobrante. Y listo, tenemos una nueva perla para estrenar cuando queramos y disfrutarla cada vez que deseemos.

Que Dios los Bendiga a todos 🙏
Feliz noche
- Fotos de mi autoría y fueron tomadas con un celular Infinix Hot 40i
- Traductor usado: DeepL
- Edición de fotos y separadores hechos con la app Editor de fotos Canva.

Hello dear friends of Hive and this beautiful Jewelry community, in this beautiful afternoon I want to share with you how I have made this beautiful and simple pearl bracelet in two shades of pink, a light pink and a very intense pink, which is what makes it a bracelet that does not go unnoticed. This bracelet is very simple to make, there are very few steps, which are very repetitive, it also needs few materials and little time to make it, I took me about 10 minutes to finish it, even so it is a very beautiful bracelet to go out casually anywhere we want.
Materials:
💖8 Medium-sized light pink pearls.
💖8 medium-sized fuchsia pearls
💖 Transparent beads
💖 Transparent beads
💖1mt of nylon 0,3
Procedure
We start by inserting in the nylon 5 transparent beads, the brooch, 5 more transparent beads and cross through a transparent bead. Then in one of the nylons we are going to insert a transparent bead, a fuchsia pearl and three new transparent beads, in the other nylon we are going to add three transparent beads, a light pink pearl, one more transparent bead and we cross through a new transparent bead.
Now in the nylon that is on the fuchsia colored pearl side we are going to insert one transparent mostacillone, one fuchsia colored pearl and three new transparent mostacillone, in the other nylon, the nylon on the pink pearl side, we are going to add three transparent mostacillone, one light pink colored pearl, one more transparent mostacillone and cross through one new transparent mostacillone. Once again, in the nylon that is on the side of the fuchsia pearl we will insert a transparent bead, a fuchsia pearl and three new transparent beads, in the other nylon, the nylon on the side of the pink pearl, we will add three transparent beads, a light pink pearl, one more transparent bead and we cross through a new transparent bead. We continue in this way until we finish the pearls, that is, we do this procedure 4 more times to complete the length.
Finally we are going to insert again in the nylon that is on the side of the fuchsia colored pearl we are going to insert a transparent bead, a fuchsia colored pearl and three new transparent beads, in the other nylon, the nylon on the side of the pink pearl, we are going to add three transparent beads, then in each nylon we insert 5 new transparent beads and in one of these nylons we add the ring, then we knot very well and cut the remaining nylon. And ready, we have a new pearl to use whenever we want and enjoy it whenever we want.
God Bless You All 🙏
Happy evening
- Photos of my authorship and were taken with an Infinix Hot 40i cell phone.
- Translator used: DeepL
- Photo editing and separators made with Canva Photo Editor app.