
Welcome to my Blog 💚
Hello dear #hive community, today is Monday start of the week, starting it with lots of energy and enthusiasm, I'm here to infect you with that energy and make it a beautiful week for everyone.
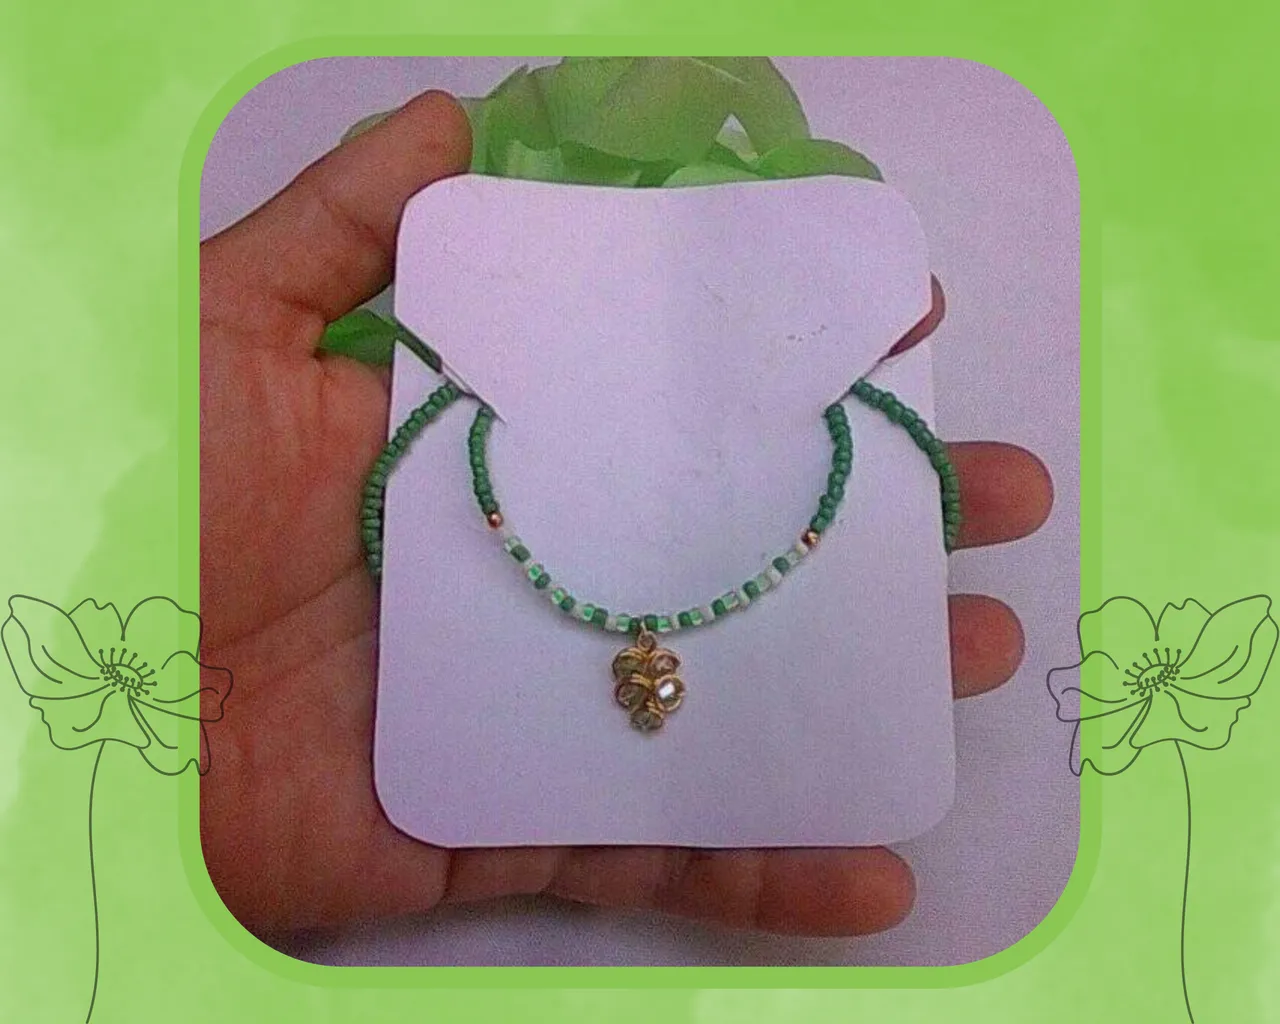
Happy afternoon friends and artisans of #jewelry, I am with you again, my work today is a very green necklace that I made this weekend, which serves to wear it on a sunny afternoon, it is a very striking and attractive color to the eye. I made it with beads of two shades of green and giving it a touch of white that makes it stand out a lot.
It is a very easy necklace to make and today I want to share it with you to see if you dare to make it. Let's start...
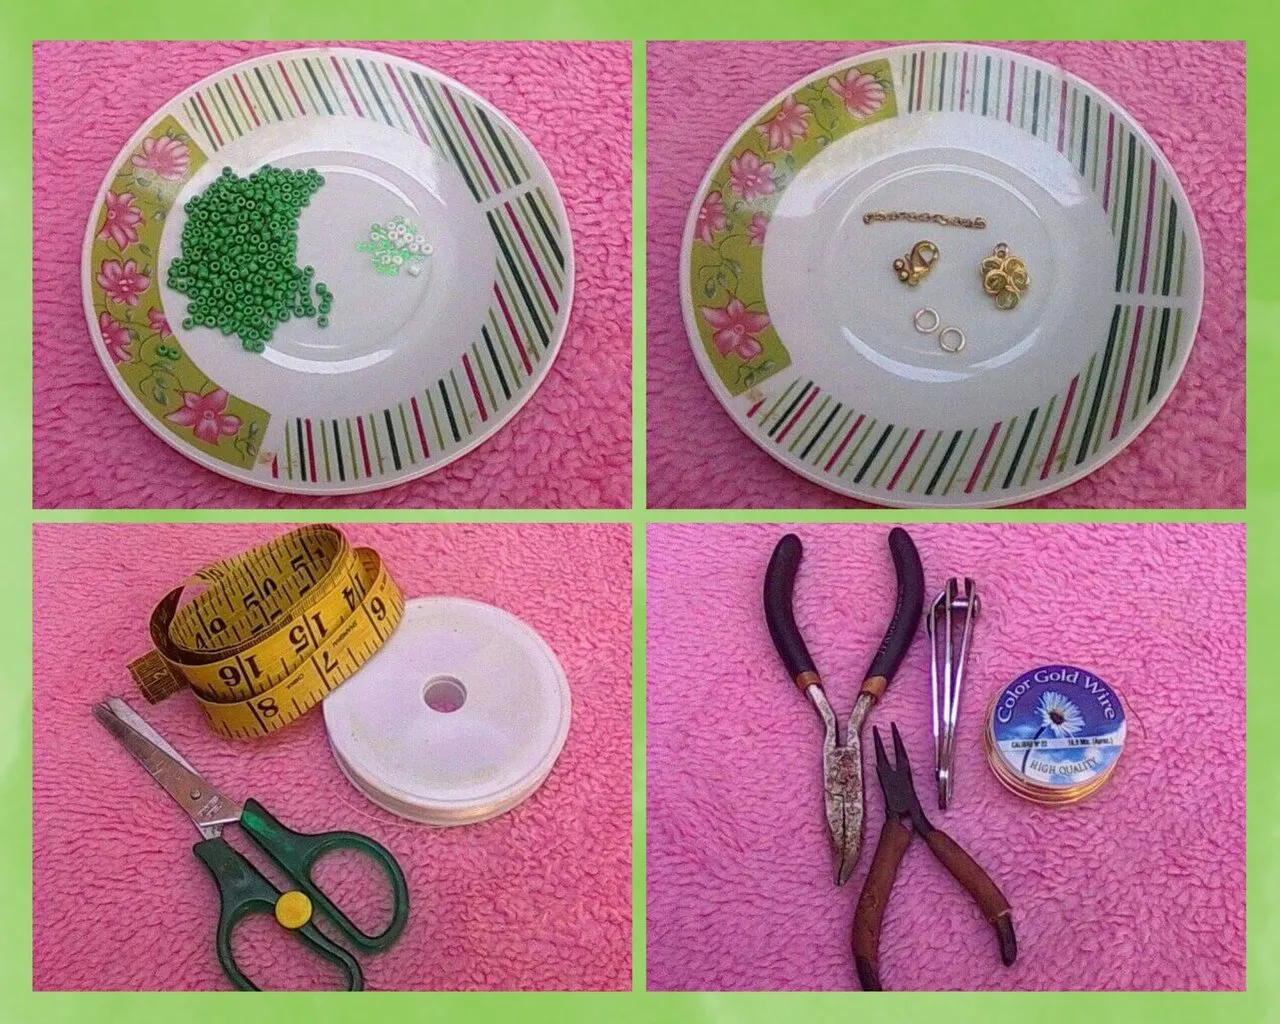
Materials
◽Beads
◽2 rings
◽1 charm
◽5 cm of chain
◽2 golden balls
◽Measuring tape
◽Nylon
◽Scissors
◽N# 22 wire
◽Cutter
◽Round and flat nose pliers
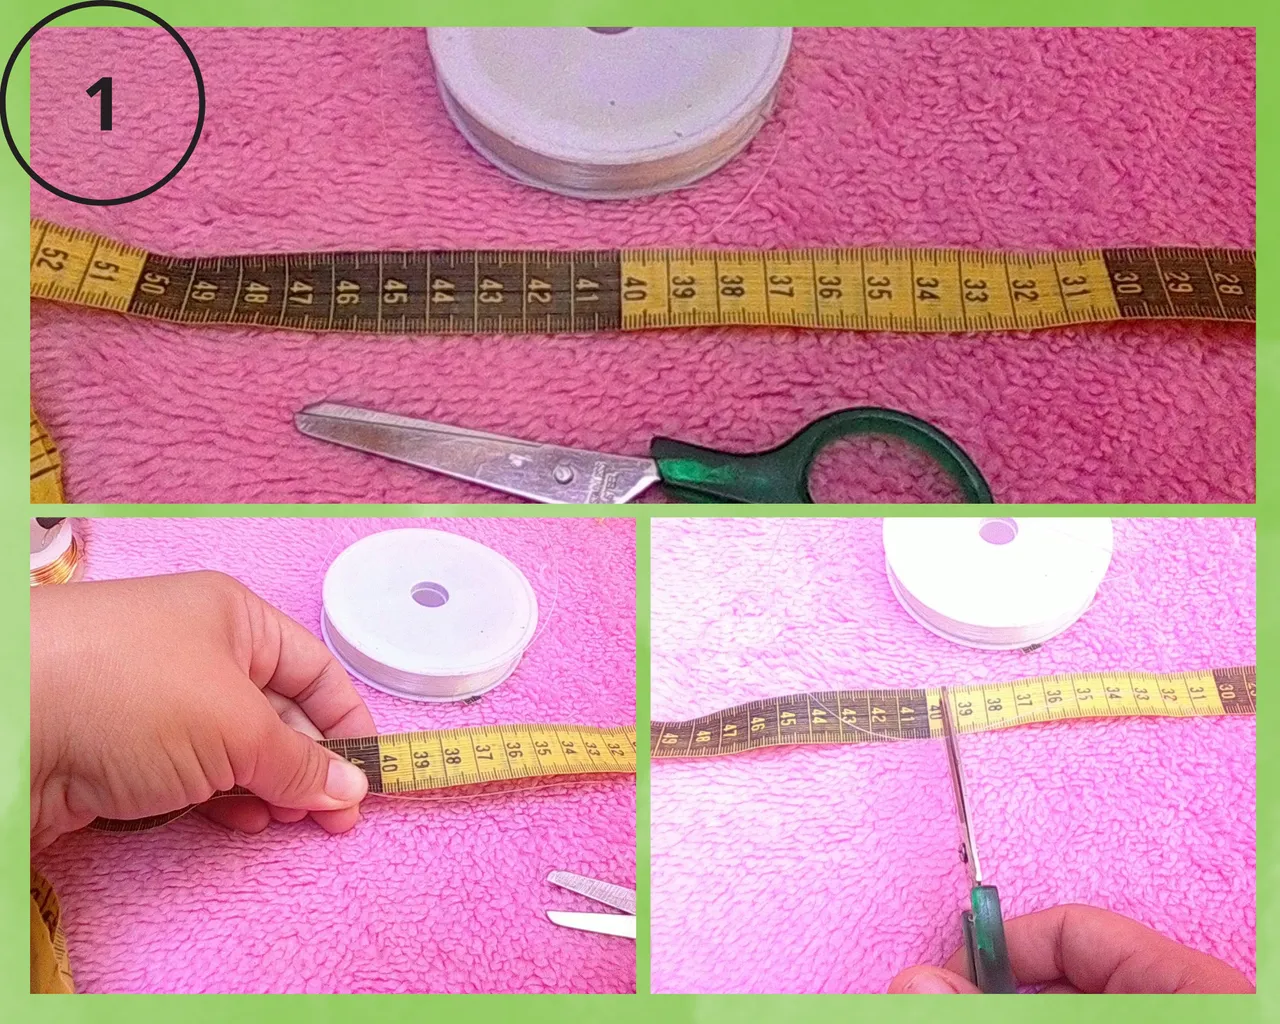
Steps
1️⃣ We take the scissors, tape measure and nylon, with the tape we measure 40 cm of nylon and cut.
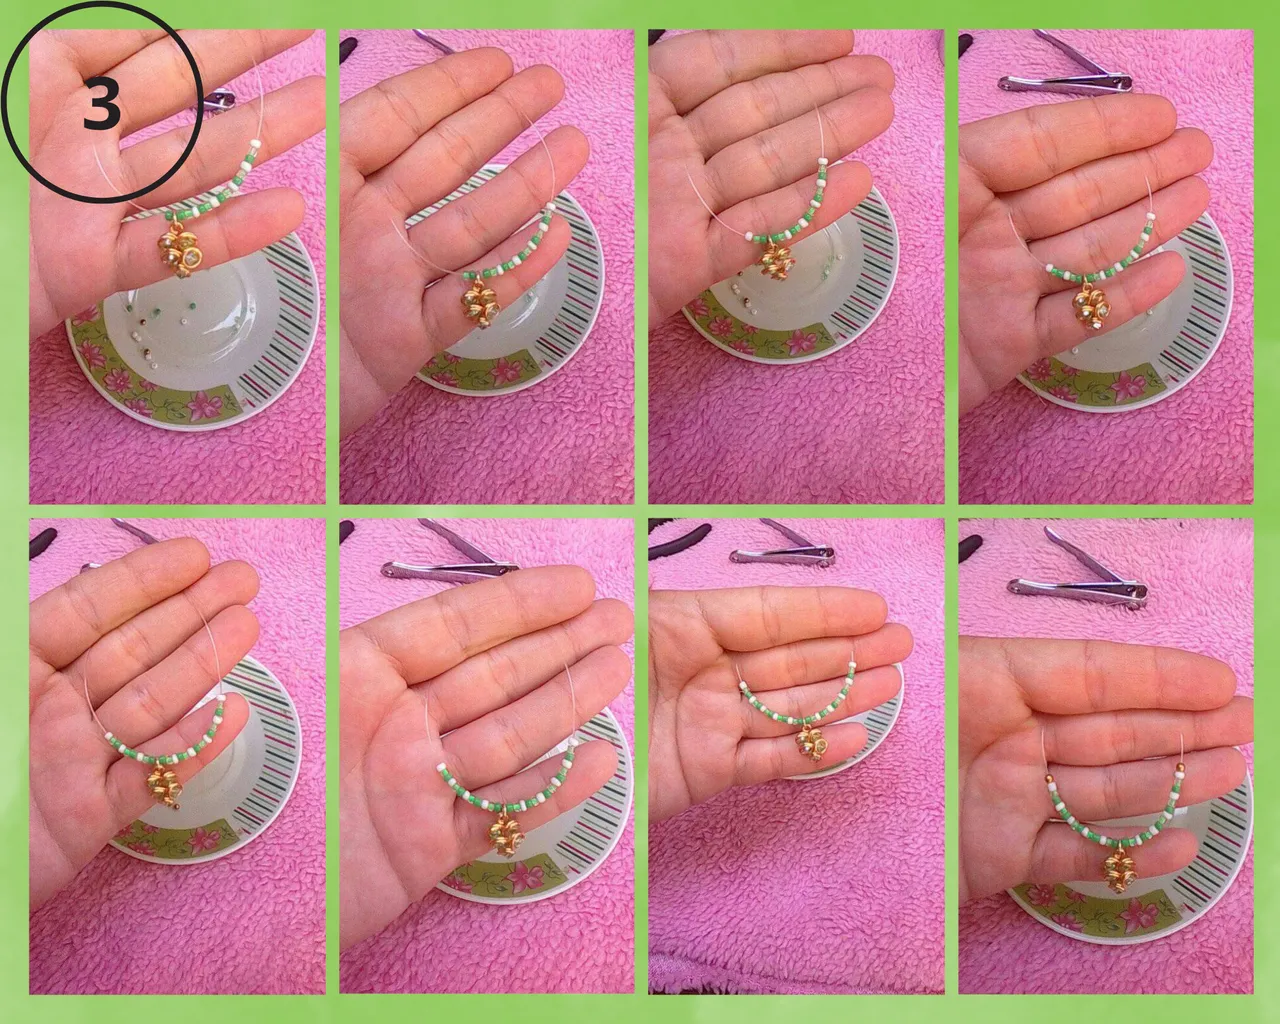
2️⃣ We take some dark green, light green and white beads, the charm, the 40 cm of nylon. We place the pendant on the nylon, on the right side we are going to insert a dark green, light green and a white bead, and repeat this step four more times, as shown in the picture.

3️⃣ Now on the left side we introduce a dark green, light green and white beads and repeat this step four more times. Now that the central ornament of the necklace is ready, we introduce the two golden beads, one on the right side and the other on the left side, as shown in the picture.
4️⃣ We take dark green beads and start inserting them on the right side of our nylon, about 90 approximately.
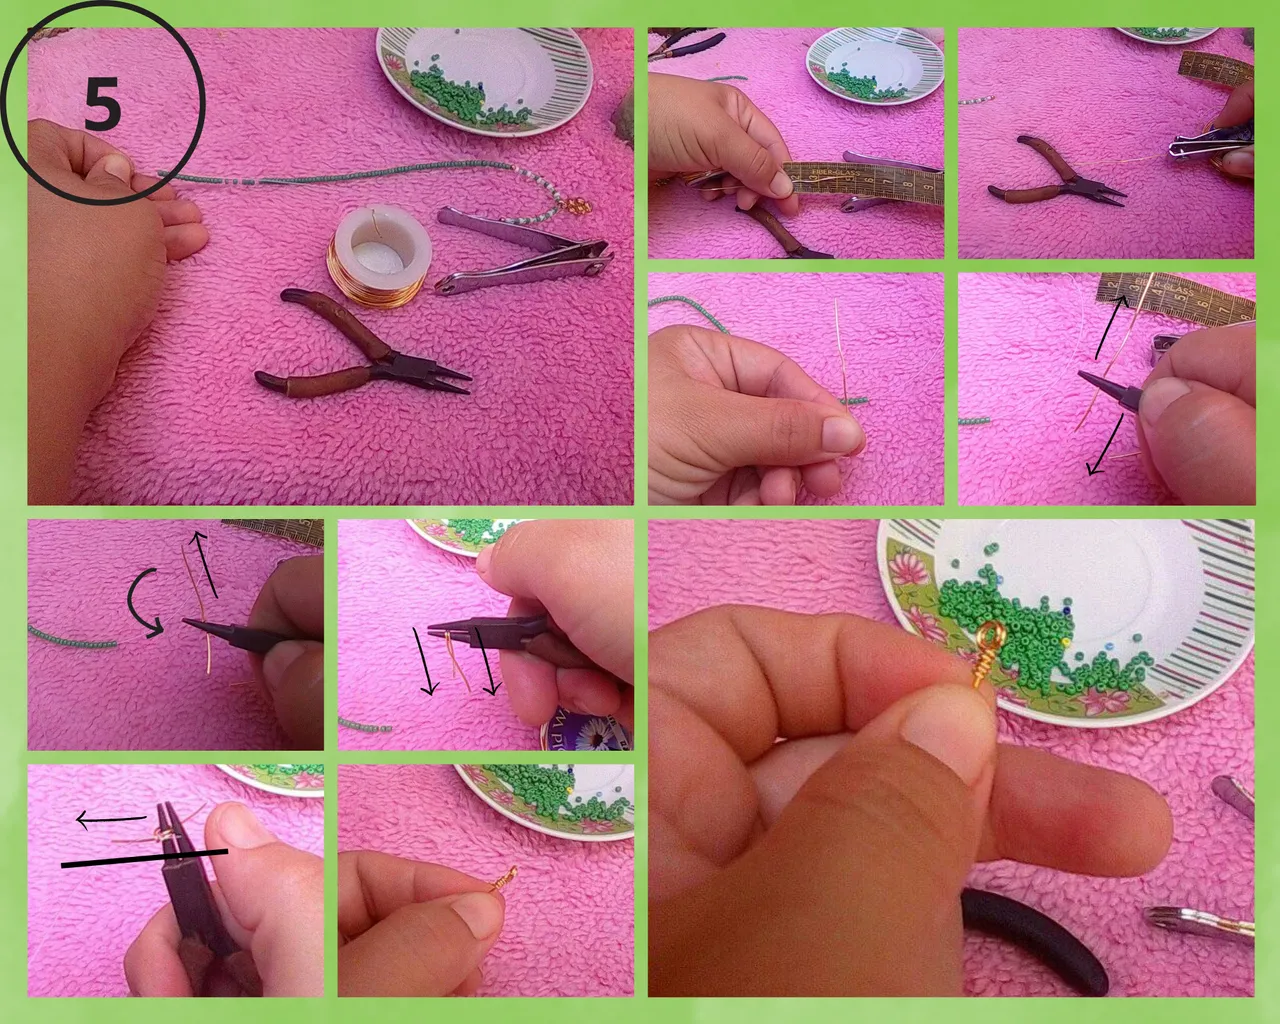
5️⃣ In this step we will make the clasp of the necklace (the lock so that the beads do not come out), we take the round tip pliers, the cutter and the wire N# 22. We measure 5 cm of wire, cut, take the piece of wire with the pliers leaving 2 cm approximately at the bottom and make a ring with the top wire. We place the nylon on one of the two pieces of wire, and with the other piece we wrap it firmly holding the nylon, as shown in the image.
6️⃣ In this step we will repeat step 4 and 5 on the left side of the necklace, we will introduce the green beads, 90 approximately and we will go measuring with the right side so that they are of the same length, since they are irregular beads and the size varies. We make the clasp of the necklace, leaving a perfect finish on both sides.

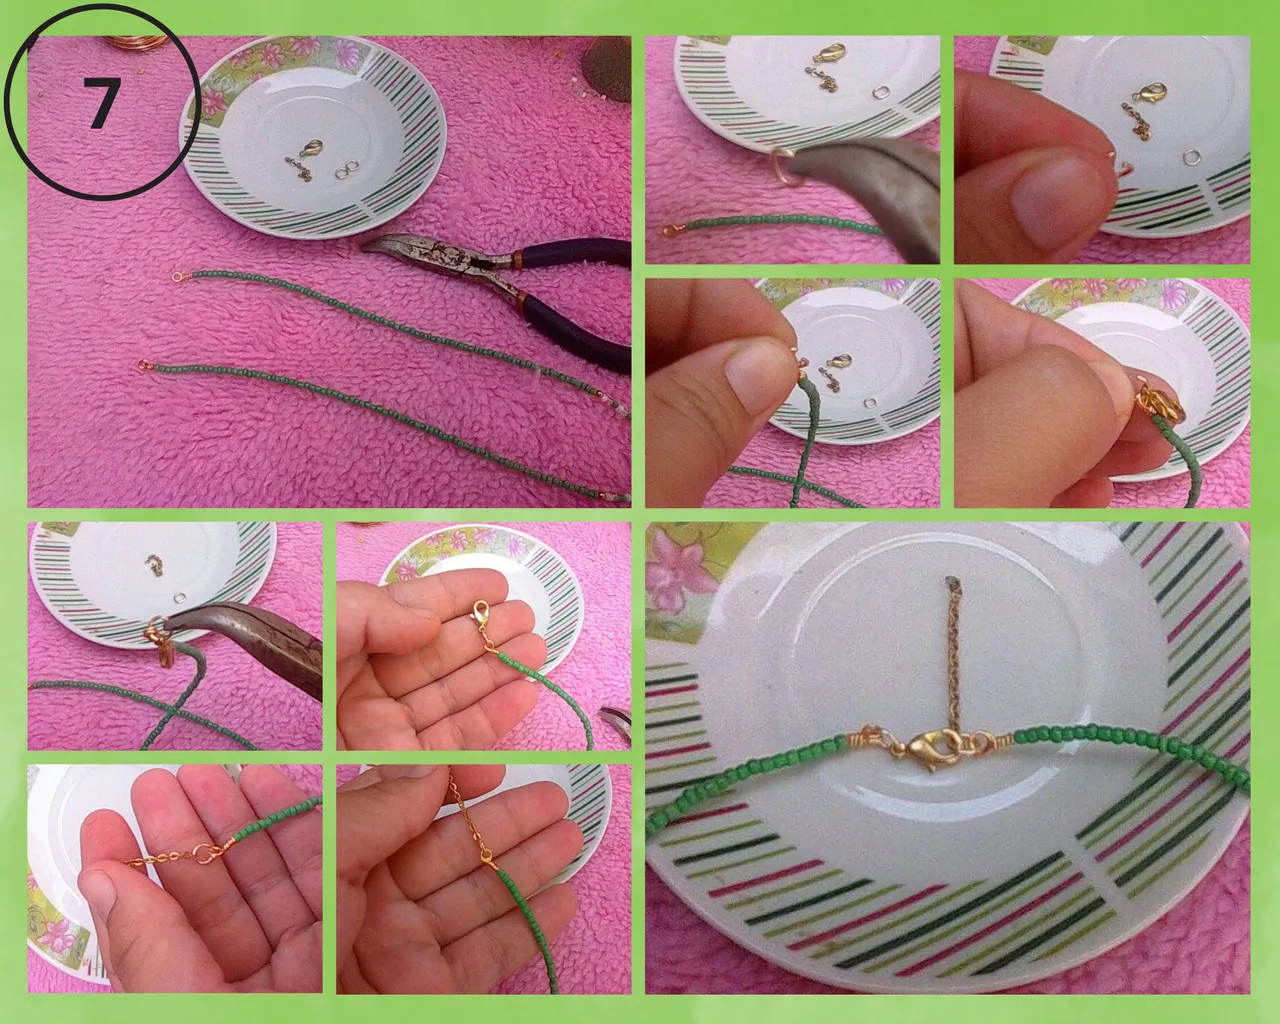
7️⃣ In this last step we take the parrot beak, the two rings, the 5cm of chain and the flat clip. We take one ring and open it with the flat clamp, in that ring we introduce the left side of the necklace, plus the parrot beak, we close very well with the flat clamp, on the right side we place the other ring and the 5cm of chain. As shown in the pictures.
With this last step, I finish with the creation of this beautiful work, a very green necklace, very simple and elegant at the same time. Well dear artisans, thank you for reading to the end, I hope you liked it as much as I did, a hug, see you next time.
Thanks for reading my Blog 💚
Translated from https://www.deepl.com/es/translator
Photographs of my authorship and edited in https://www.canva.com

Bienvenidos a mi Blog 💚
Hola apreciada comunidad de #hive, hoy es lunes inicio de semana, iniciándola con muchas energía y entusiasmo, estoy por aquí para contagiarlos con esa energía y que sea una semana bonita para todos.
Feliz tarde amigas y artesanas de #jewelry, me encuentro de nuevo con ustedes, mi trabajo de hoy es un collar muy verde que realice este fin de semana, que sirve para lucirlo en una tarde muy soleada, es un color muy llamativo y atractivo para la vista. Lo realice de mostacillas de dos tonalidades de verde y dándole un toque de blanco que lo hace resaltar bastante.
Es un collar muy fácil de hacer y hoy quiero compartirlo con ustedes a ver si se animan a realizarlo. Comencemos...
Materiales
◽Mostacillas
◽1 Pico de loro
◽2 argollas
◽1 dije
◽5 cm de cadena
◽2 balines dorados
◽Cinta métrica
◽Nilón
◽Tijera
◽Alambre del N# 22
◽Cortador
◽Pinza punta redonda y plana
Pasos
1️⃣ Tomamos las tijeras, cinta métrica y nilón, con la cinta medimos 40 cm de nilón y cortamos.
2️⃣ Tomamos unas mostacillas de color verde oscuro, verde claro y blanco, el dije, los 40 cm de nilón. Colocamos el dije en el nilón, del lado derecho vamos a introducir una mostacilla verde oscura, verde claro y una blanca, y repetimos este paso cuatro veces mas, como se ve en la imagen.
3️⃣ Ahora del lado izquierdo introducimos una mostacilla verde oscura, verde claro y una blanca, repetimos el paso cuatro veces mas. Ya listo el adorno central del collar, introducimos los dos balines dorados una del lado derecho y el otro del lado izquierdo, como se ve en la imagen.
4️⃣ Tomamos mostacillas verde oscuras y la empezamos a introducir por el lado derecho de nuestro nilón, unas 90 aproximadamente.
5️⃣ En este paso haremos el cierre del collar (el seguro para que no se salgan las mostacillas), tomamos la pinza punta redonda, el cortador y el alambre N# 22. Medimos 5 cm de alambre, cortamos, tomamos el pedazo de alambre con la pinza dejando 2 cm aproximadamente en la parte de abajo y hacemos una argolla con el alambre de arriba. Colocamos el nilón sobre uno de los dos pedazo de alambre, y con el otro pedazo se envuelve sujetando firmemente el nilón, como se muestra en la imagen.
6️⃣ En este paso repetiremos el paso 4 y 5 del lado izquierdo del collar, introduciremos las mostacillas verdes, 90 aproximadamente e iremos midiendo con el lado derecho para que queden del mismo largo, ya que son mostacillas irregulares y el tamaño varían. Hacemos el cierre del collar, quedando un acabado perfecto de ambos lados.
7️⃣ En este ultimo paso tomamos, el pico de loro, las dos argollas, los 5cm de cadena y la pinza plana. Agarramos una argolla y la abrimos con la pinza plana, en esa argolla introducimos el lado izquierdo del collar, mas el pico de loro, cerramos muy bien con la pinza plana, del lado derecho colocamos la otra argolla y los 5cm de cadena. Como se aprecia en las imágenes.
Con este ultimo paso, termino con la creación de este hermoso trabajo, un collar muy verde, muy sencillo y elegante a la vez. Bueno queridas artesanas gracias por haber leído hasta el final, espero le haya gustado tanto como a mi, un abrazo, nos vemos en la próxima.
Gracias por leer mi Blog 💚
Traducido en https://www.deepl.com/es/translator
Fotografías de mi autoría y editadas en https://www.canva.com
