
Greetings architecture+furniture design, I am @deltasteem and after a few days before I finished the double-door furniture project for the construction of houses which are orders belonging to local public and yesterday I just got one of the single projects which is 1 units of window house and I have to finish that window project that very day.
And in today's modern era, for building construction window designs in general, I often offer and prioritize rectangular window designs beacuse besides they look more beautiful in the process is easier.
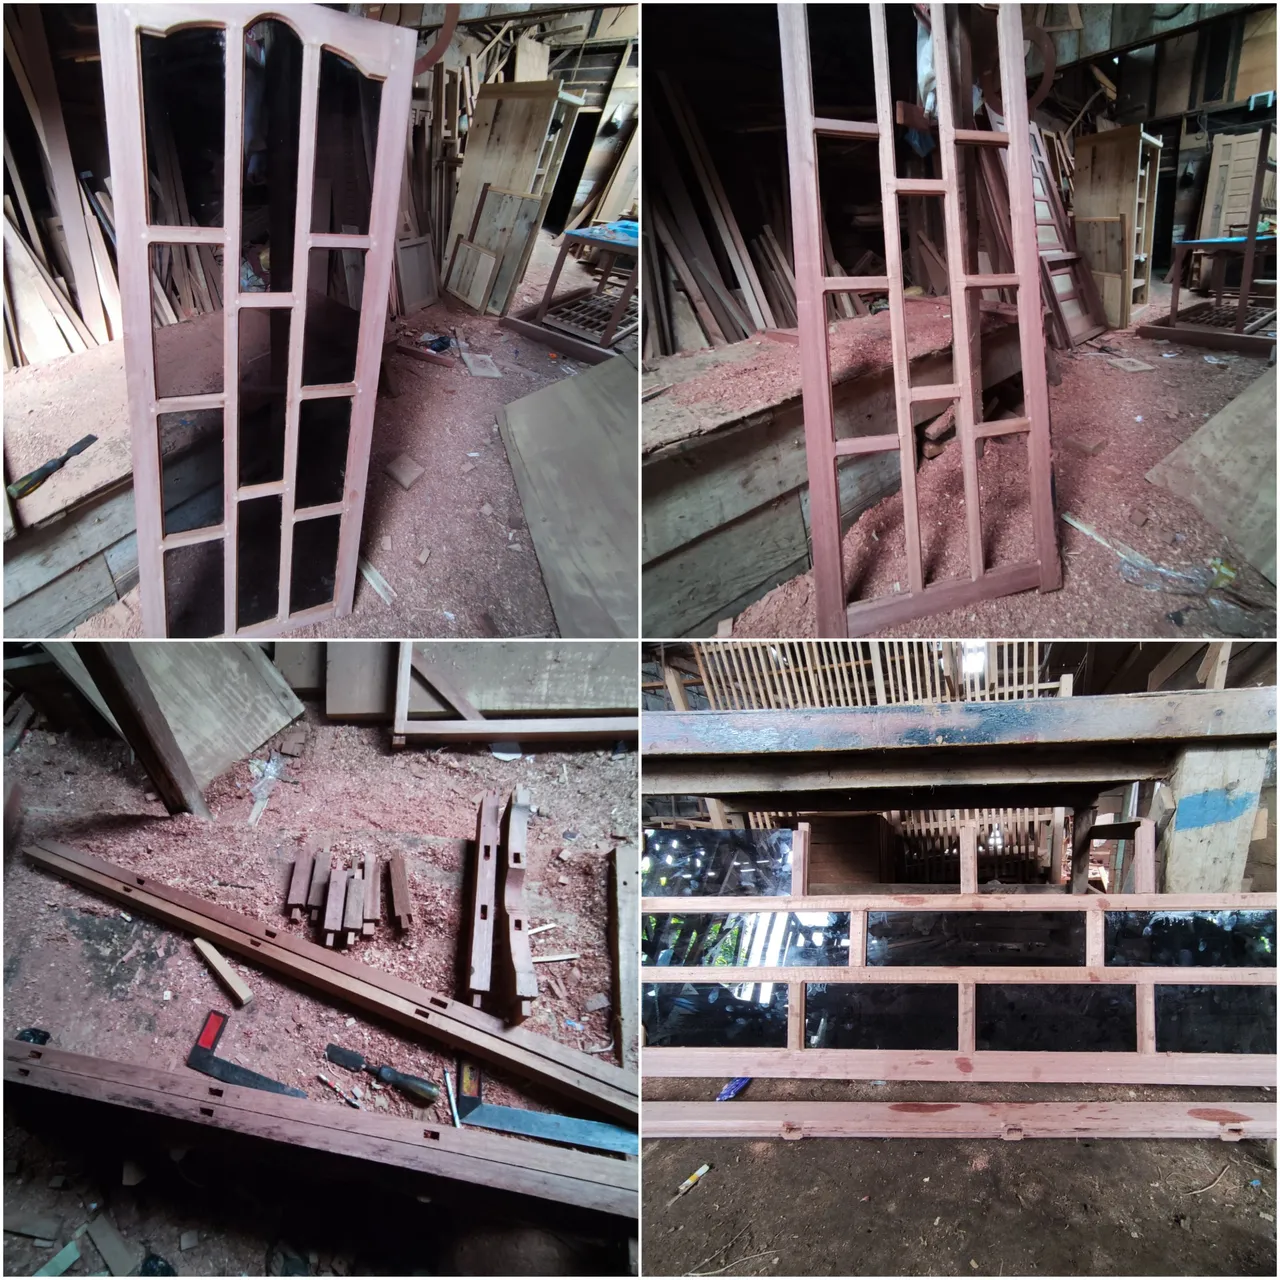
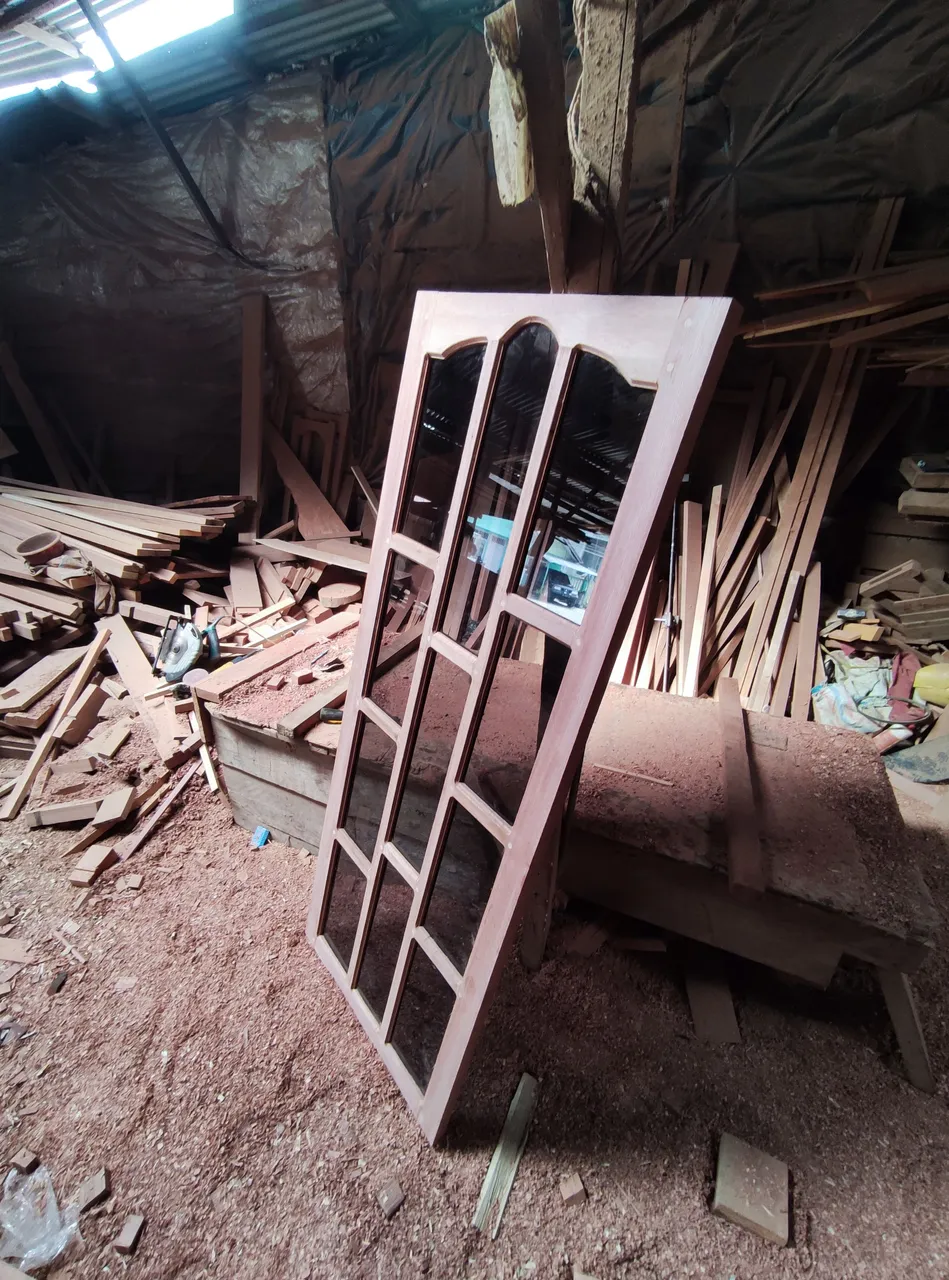
And for one window order unit design that I got today, it is quite complicated in the process and this is one of the most popular house window designs around the 2000s among the people.
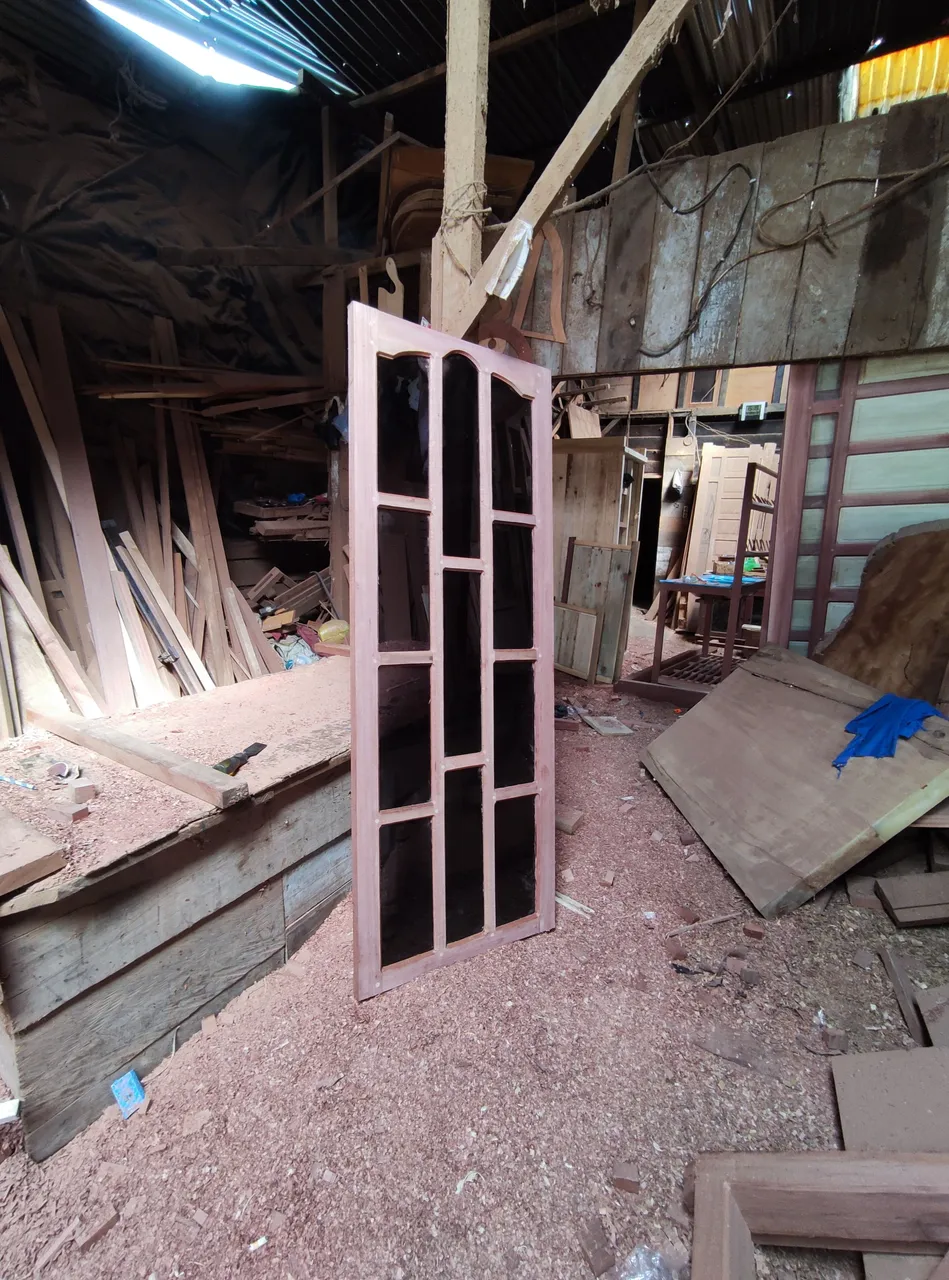
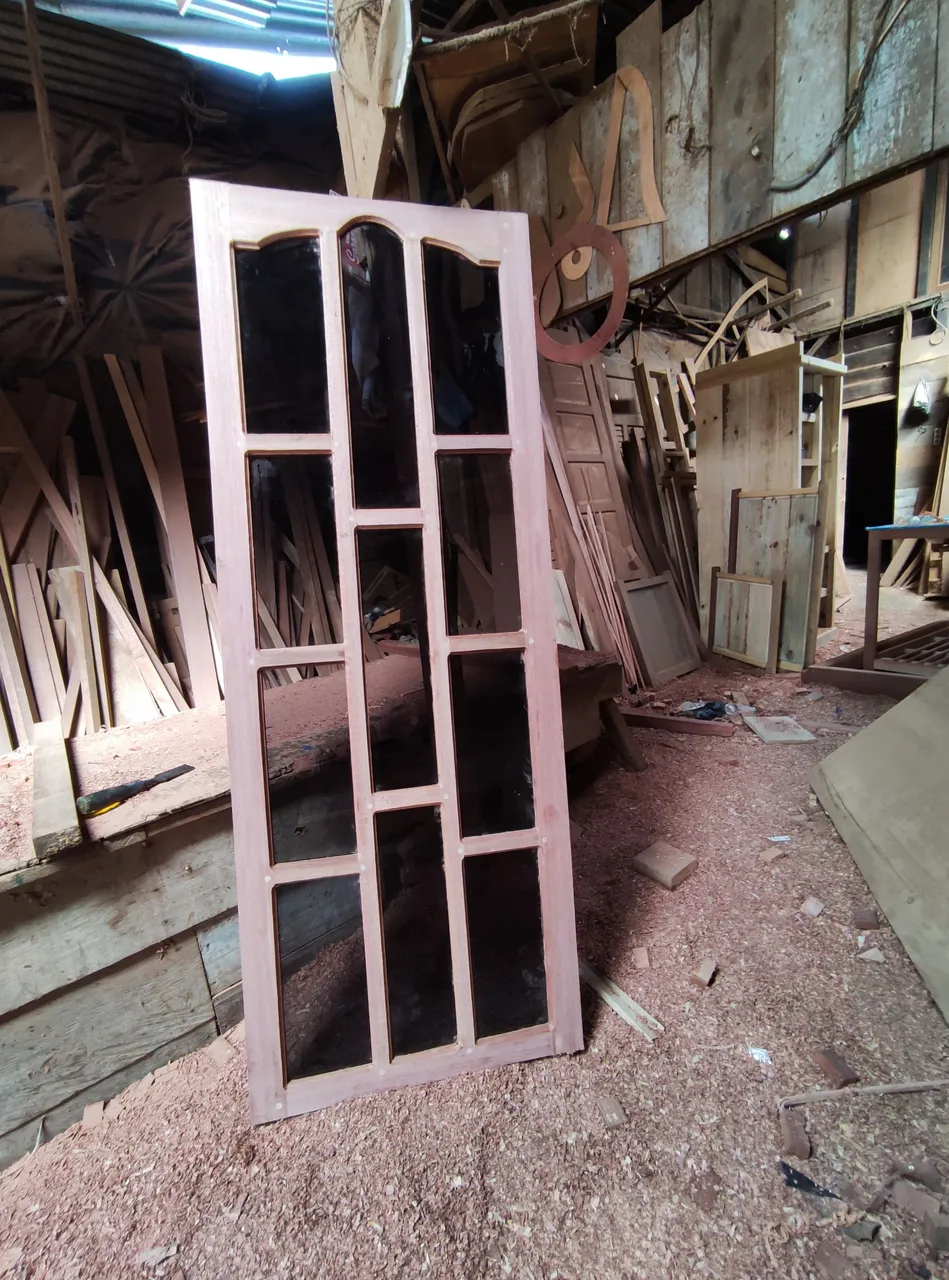
The window has a width of 60 cm x a height of 160 cm with 5mm transparent black glass and that window is a renovation window of a house building with image design.
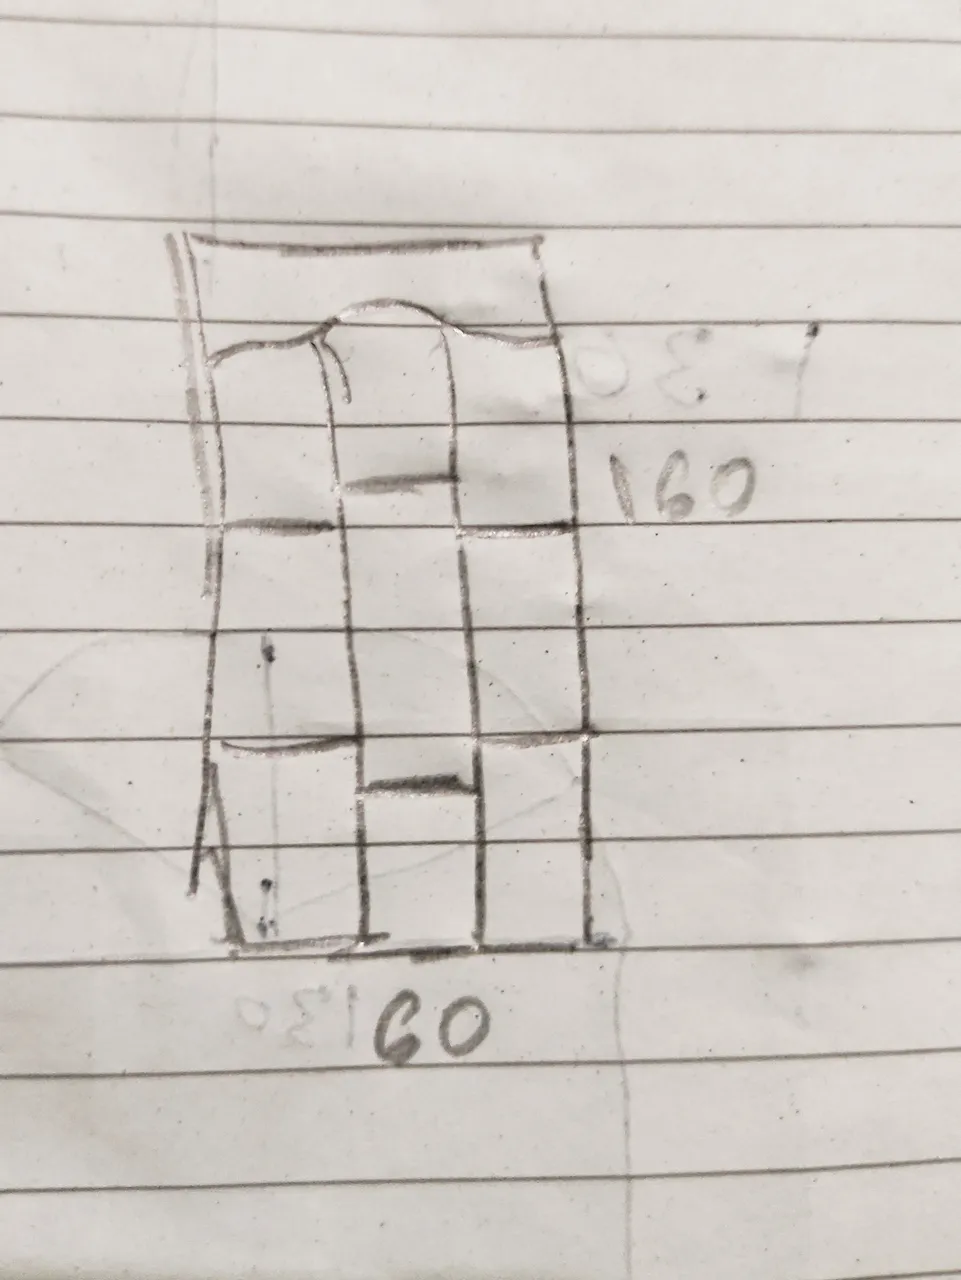
And the window is one of the broken windows of 14 other window units installed in his house building and the owner of the order only brought me a sheet of paper with an image design without the size of the spacing of the glass arrangement patterns and the curved design of the surface bulkhead of the pair of windows.
And what is certain is that the results of my design and the arrangement of the bulkhead pattern on the series of windows owned by the owner of the previous order will definitely be a little different due to the design of the written image without the complete size.
To complete 1 unit of the window project with a size of 60cm x 160 cm with transparent black glass,the materials I need are as follows.,,
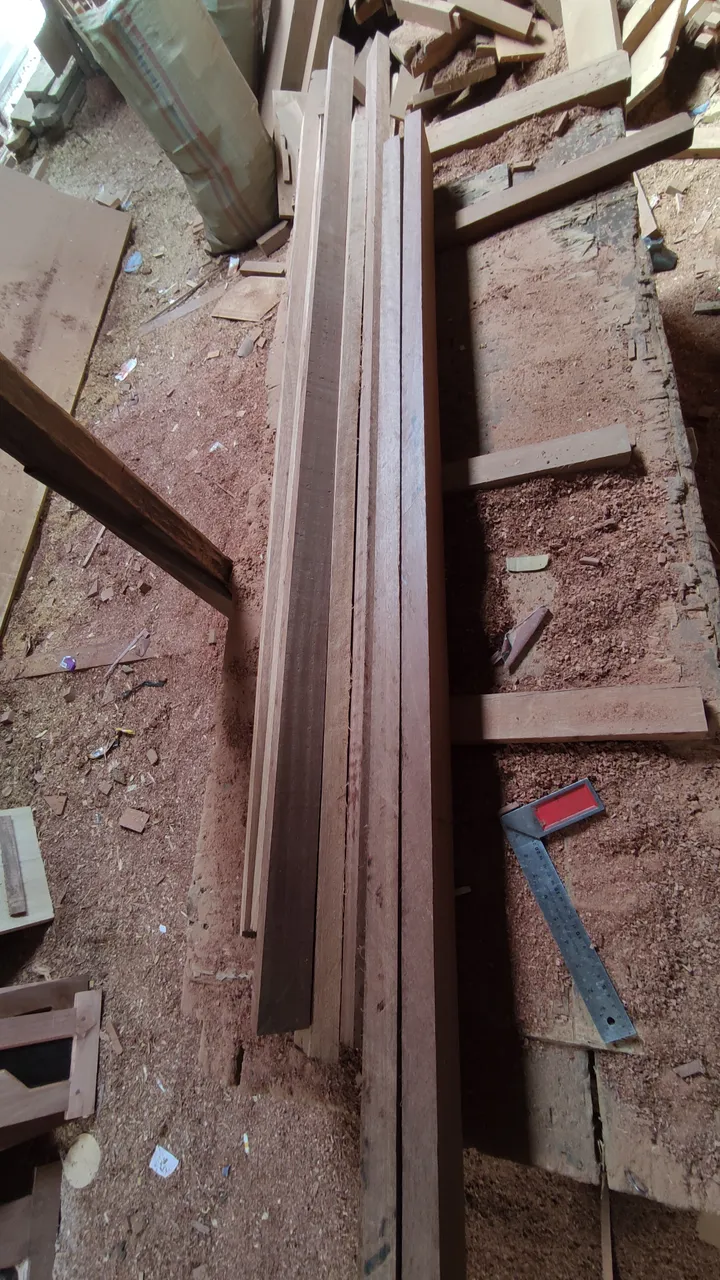
•Meranti wood measures 6cm wide x 3.5cm thick (the size of the window material we often use).
•Meranti wood measuring 10.5 cm wide x 3.5 m thick as a concave frame material for the design of the upper surface of the window (material for a series of doors that we often use)
•Meranti wood measuring 3.5 cm to form four squares (as material for a series of pattern partitions in the window) and
•5mm transparent black glass.
The machines that I need to complete the project are also the same as the machines that I use in my other architectural furniture projects, among others.

• Electric wood cutting machine.
• Shaving machine.
• Wood drilling machine.
• Sanding machine.
• Router machine.
• Panel machine / for making nipple pegs.
• Elbow.
• Jigsaw machine.
• Meter.
• Chisel.
• Hammer and
• Press.
The window design that I am working on this time that is as I said above, which is one of the window designs that is a little complicated in the process and in one unit of this window for now the price is $ 20.
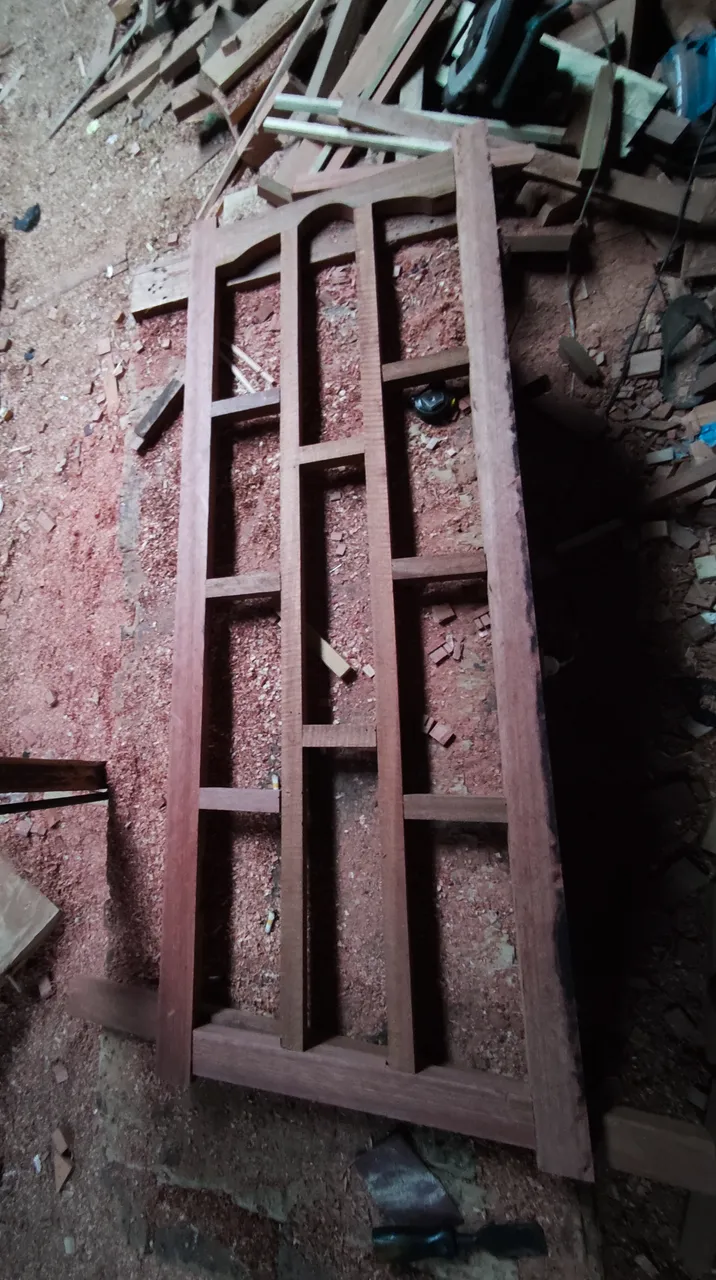
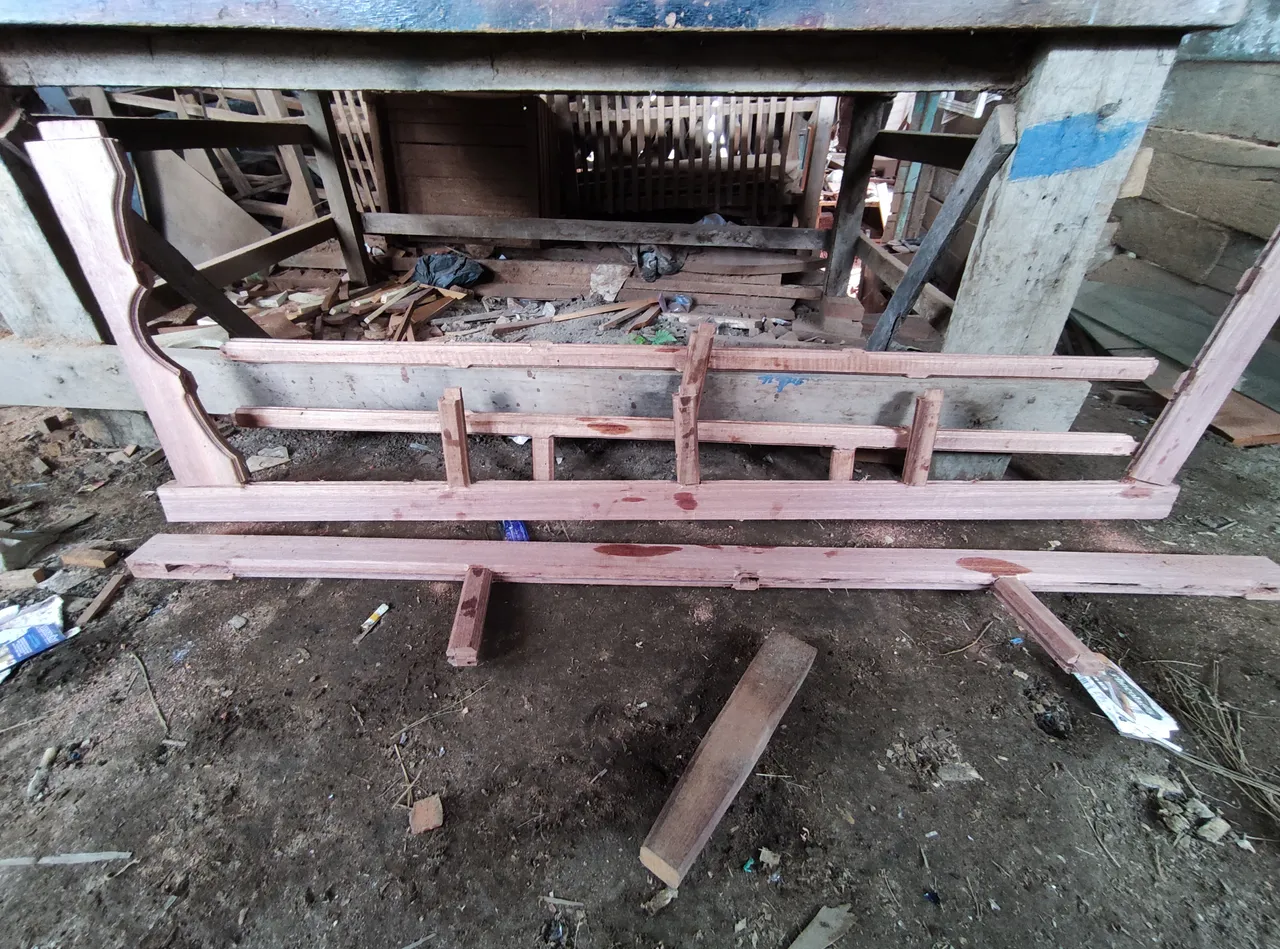
To complete the project, I first prepared the left and right truss for the window with the main frame wood measuring 6cm wide and 3.5cm thick and I continue to divide the distance of the series of bulkhead patterns in the window followed by outline the point of the drilling area for the wide bulkhead holder and the window design pattern partition.
Then after that I continued to prepare the wood for the window width divider and the window pattern insulation consisting of.
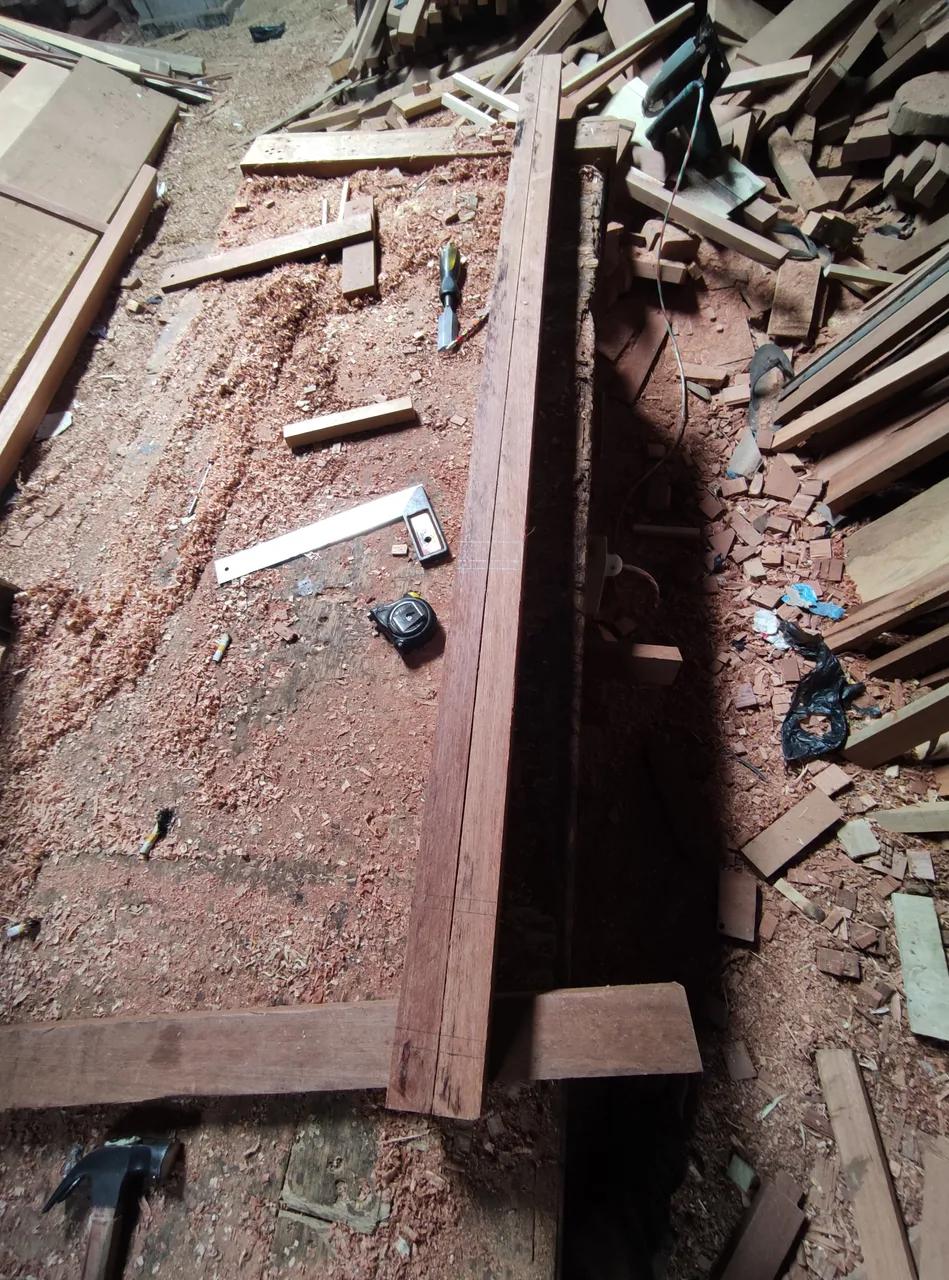
• 1 unit of top window bulkhead to make a hollow design with a wood size of 10.5cm wide x 3.5cm thick consisting of 3 cm left and right nipples.
• 1 unit of window screen under the window with a wooden size of 6 cm wide x 3.5 cm thick and 54 cm long consisting of 3 cm left and right nipples.
• 2 bulkheads for the middle of the window with a wooden size of 3.5cm x3.5cm and a length of 144cm consisting of top and bottom 3cm dowels and
• 8 wooden partitions measuring 3.5 cm x 3.5 cm with a length of 19.5 cm consisting of 3 cm nipples, left and right pegs.
After that, after I had prepared all the materials for the circuit, for the top of the window with a size of 10.5cm x 3.5cm and a length of 54cm, I drew a hollow shape pattern and continued the pattern cutting process. using a jitaw machine.
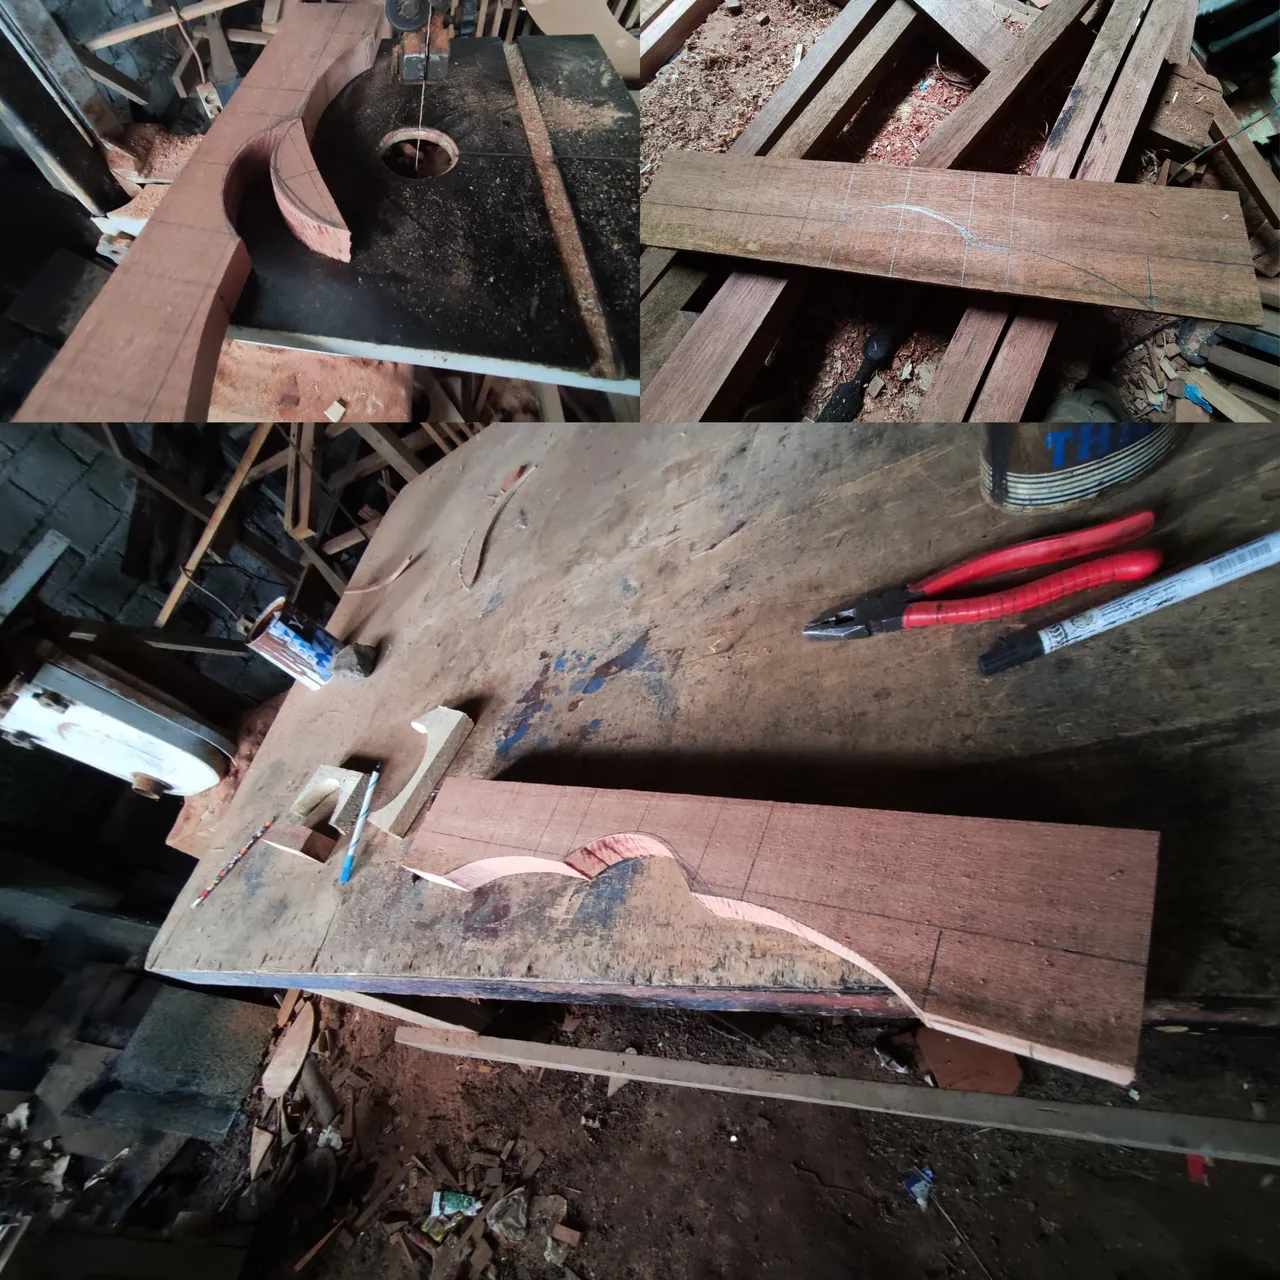
And after the process of cutting the design hollow on the surface of the upper bulkhead of the window was completed, I continued the process of making the nipple pegs on all the window bulkheads using a panel machine.
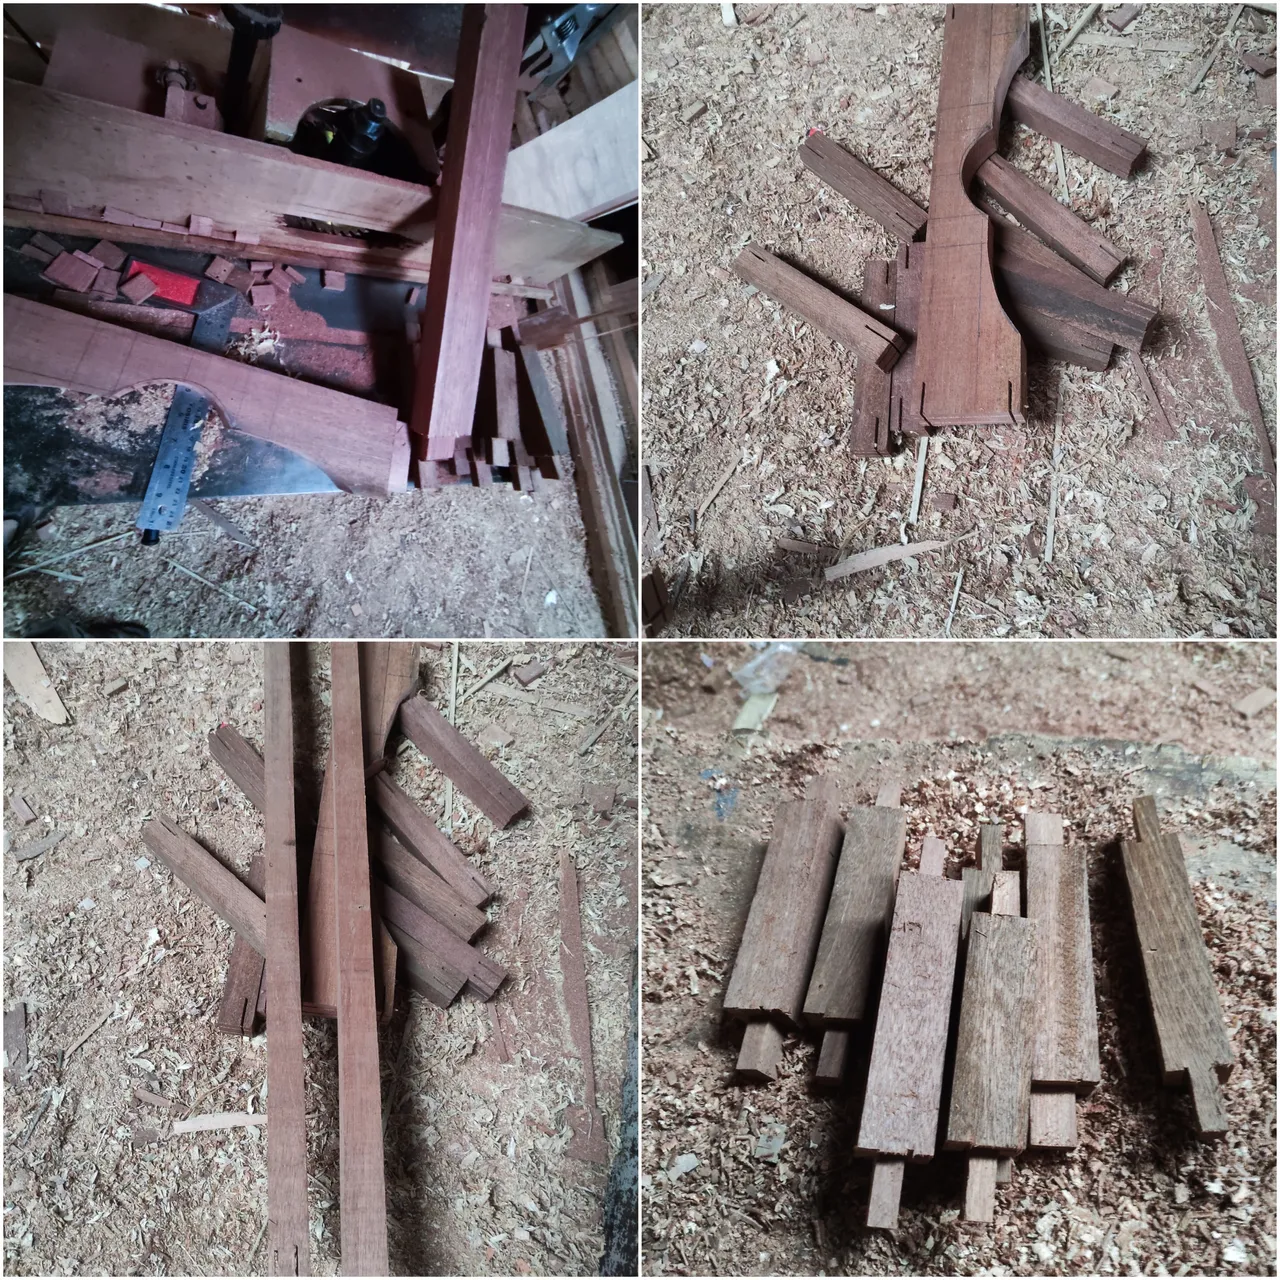
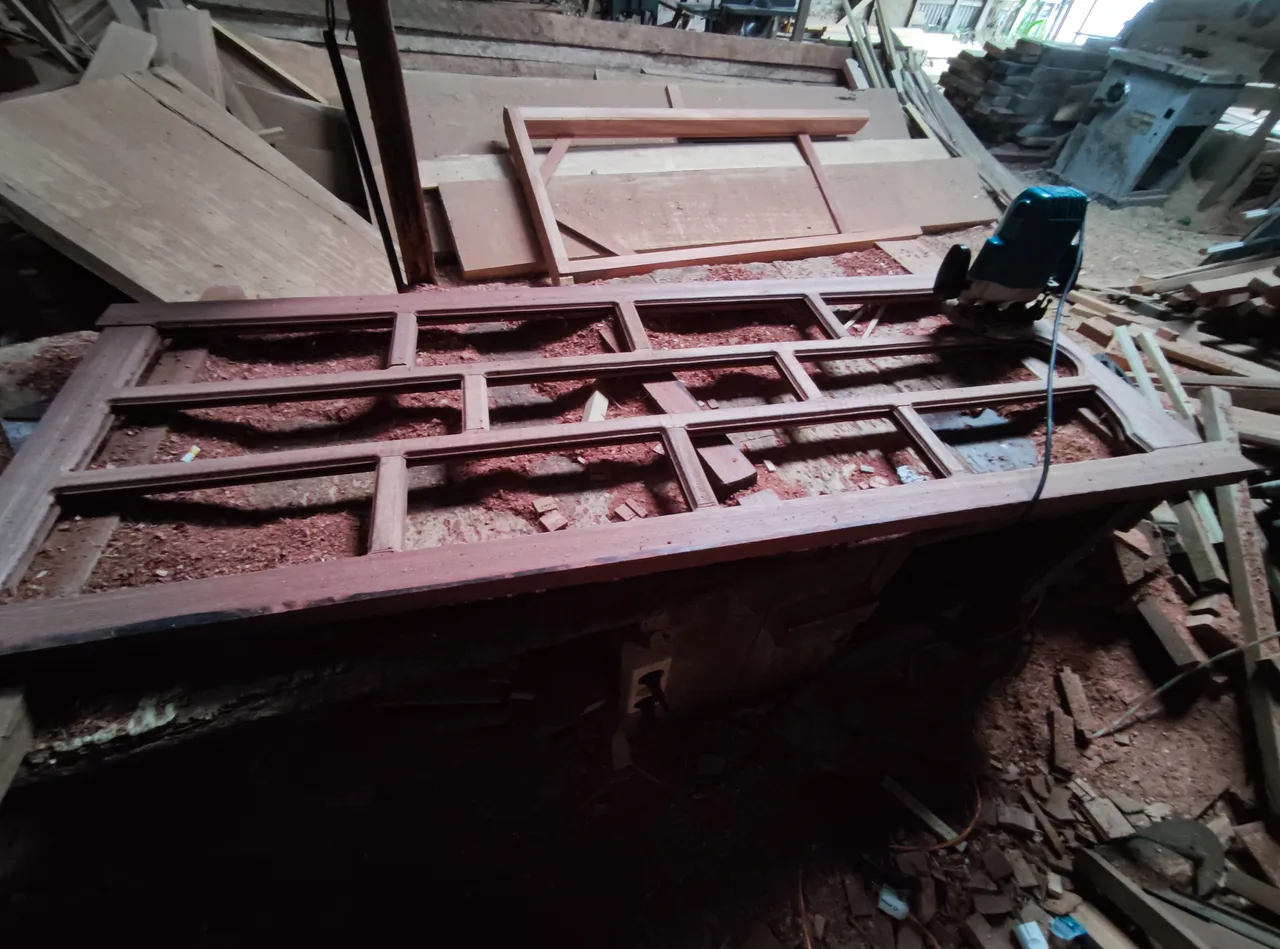
And after the process of making the nipples is complete, then I continue the process of drilling on the 2 main poles of the main circuit and in the middle of the window assembly material.
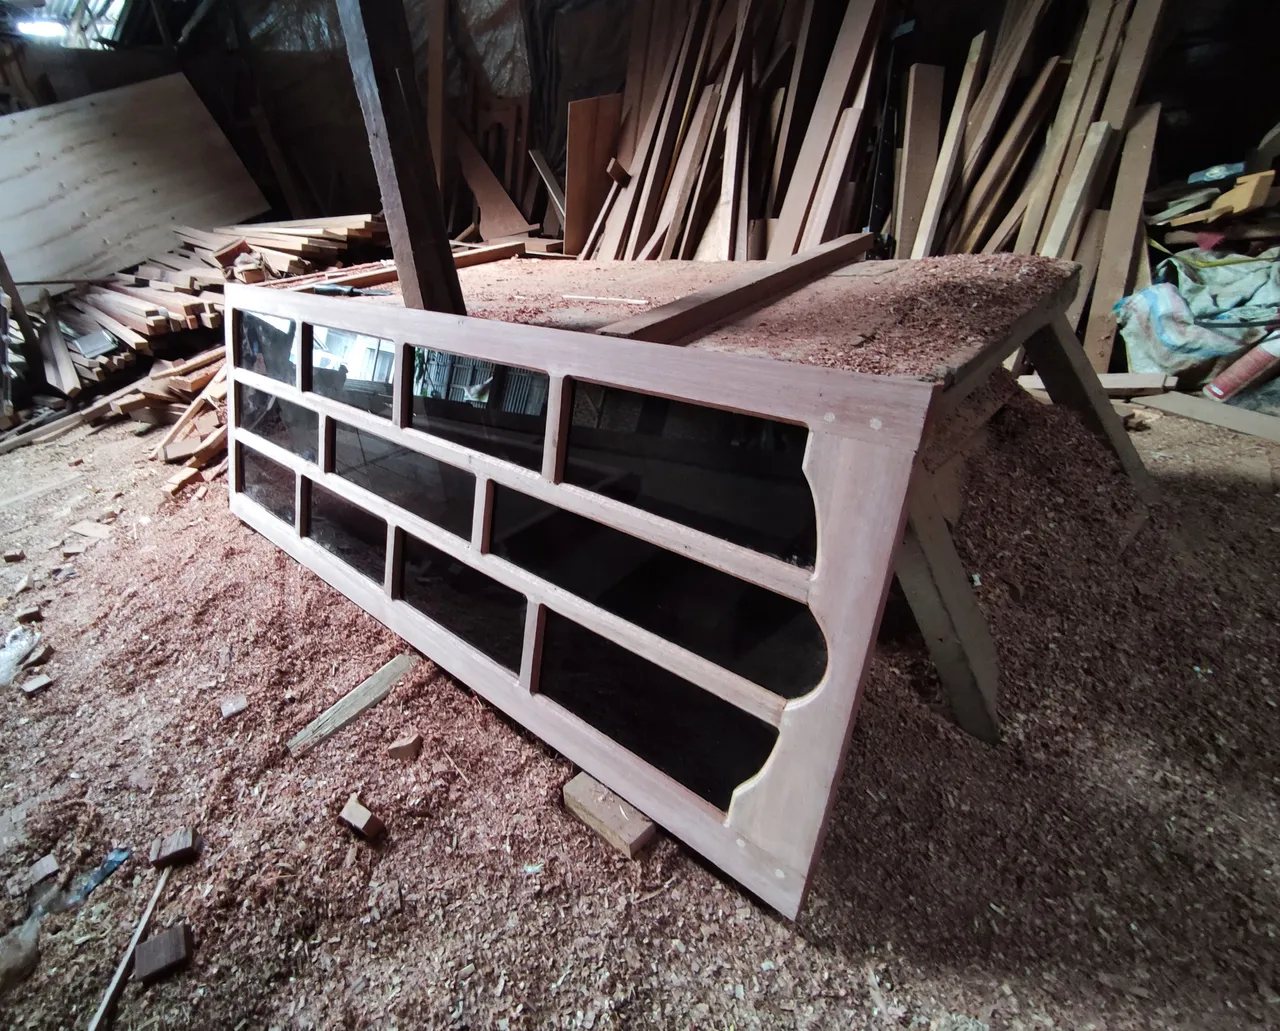
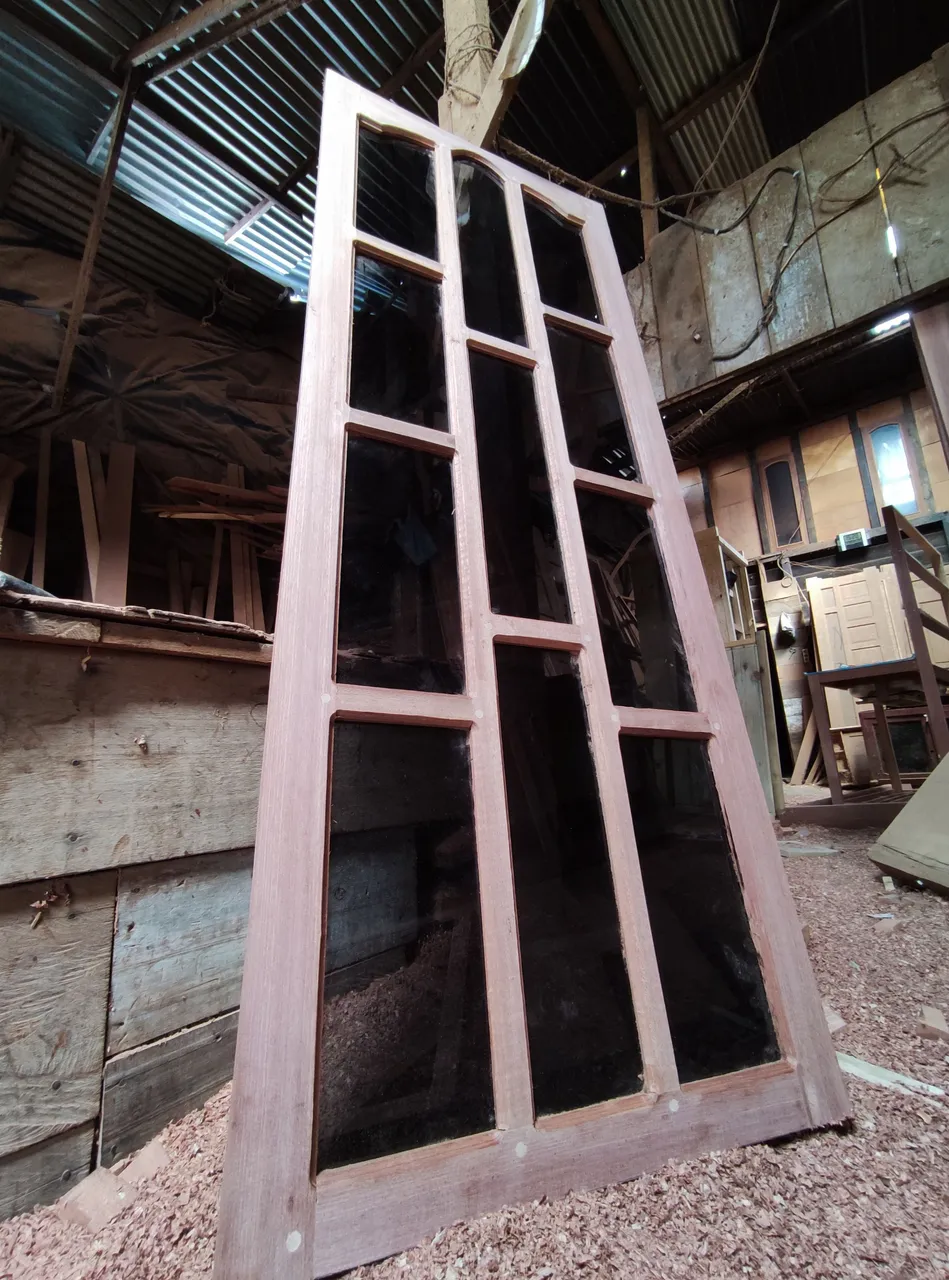
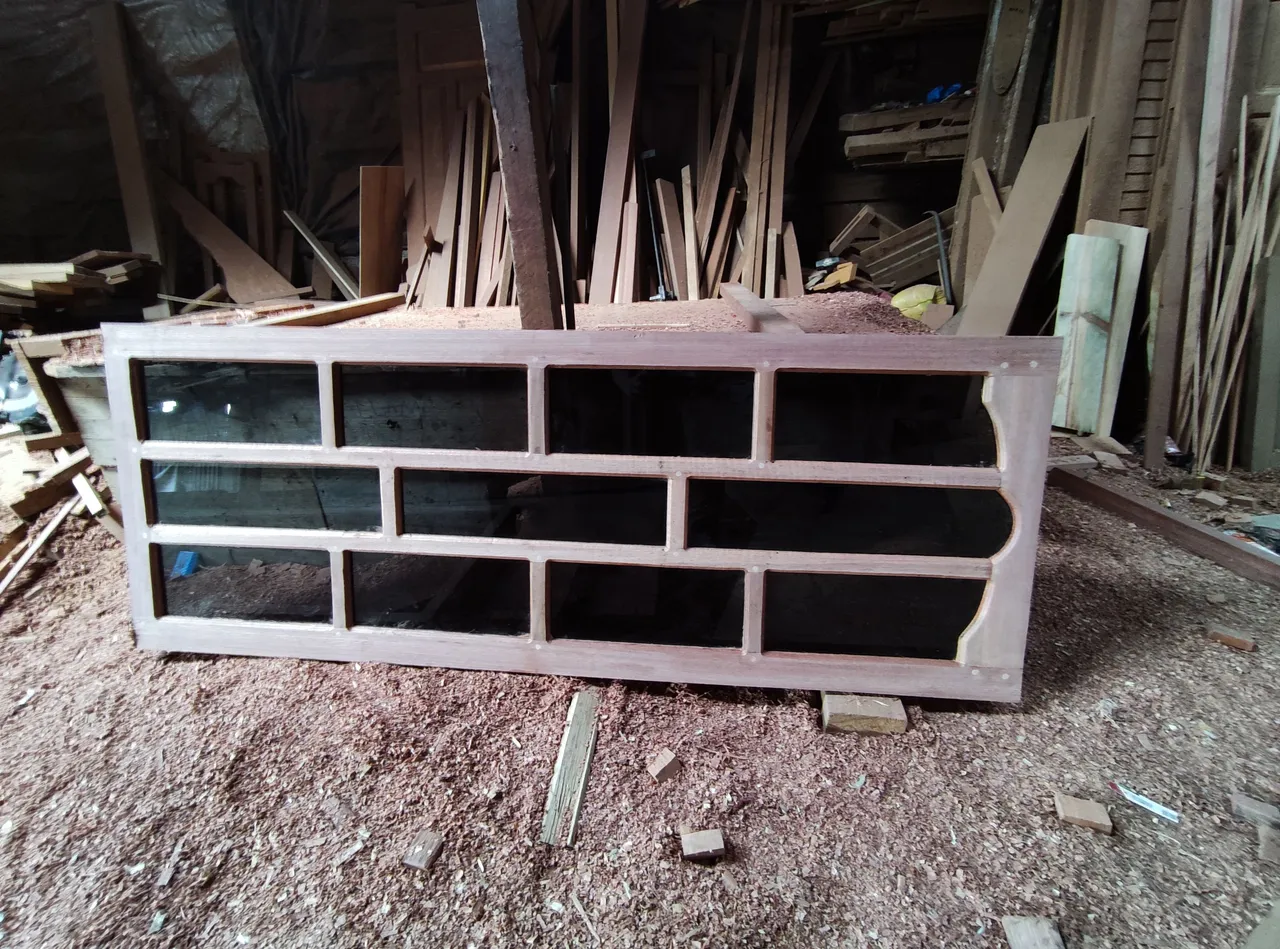
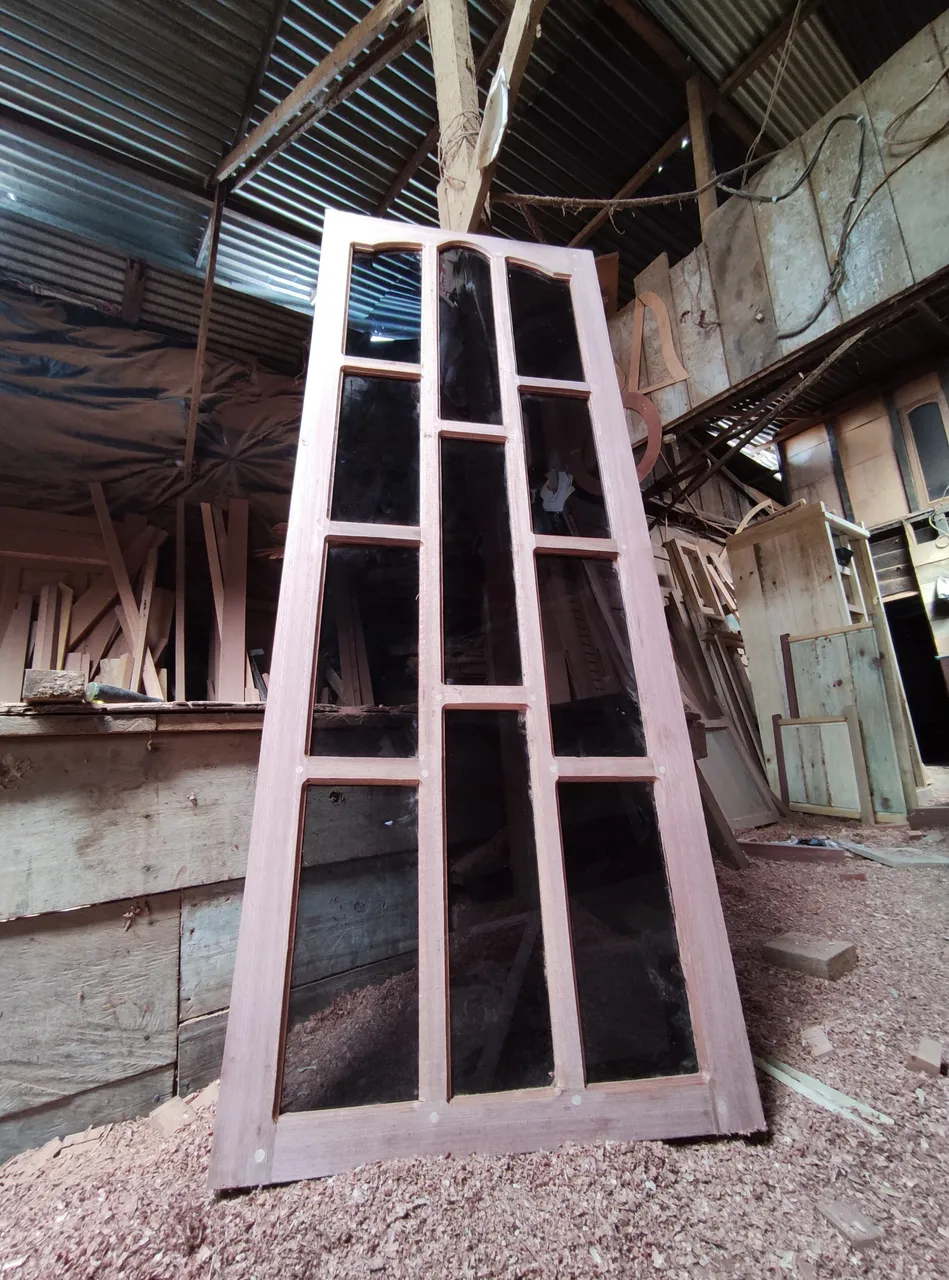
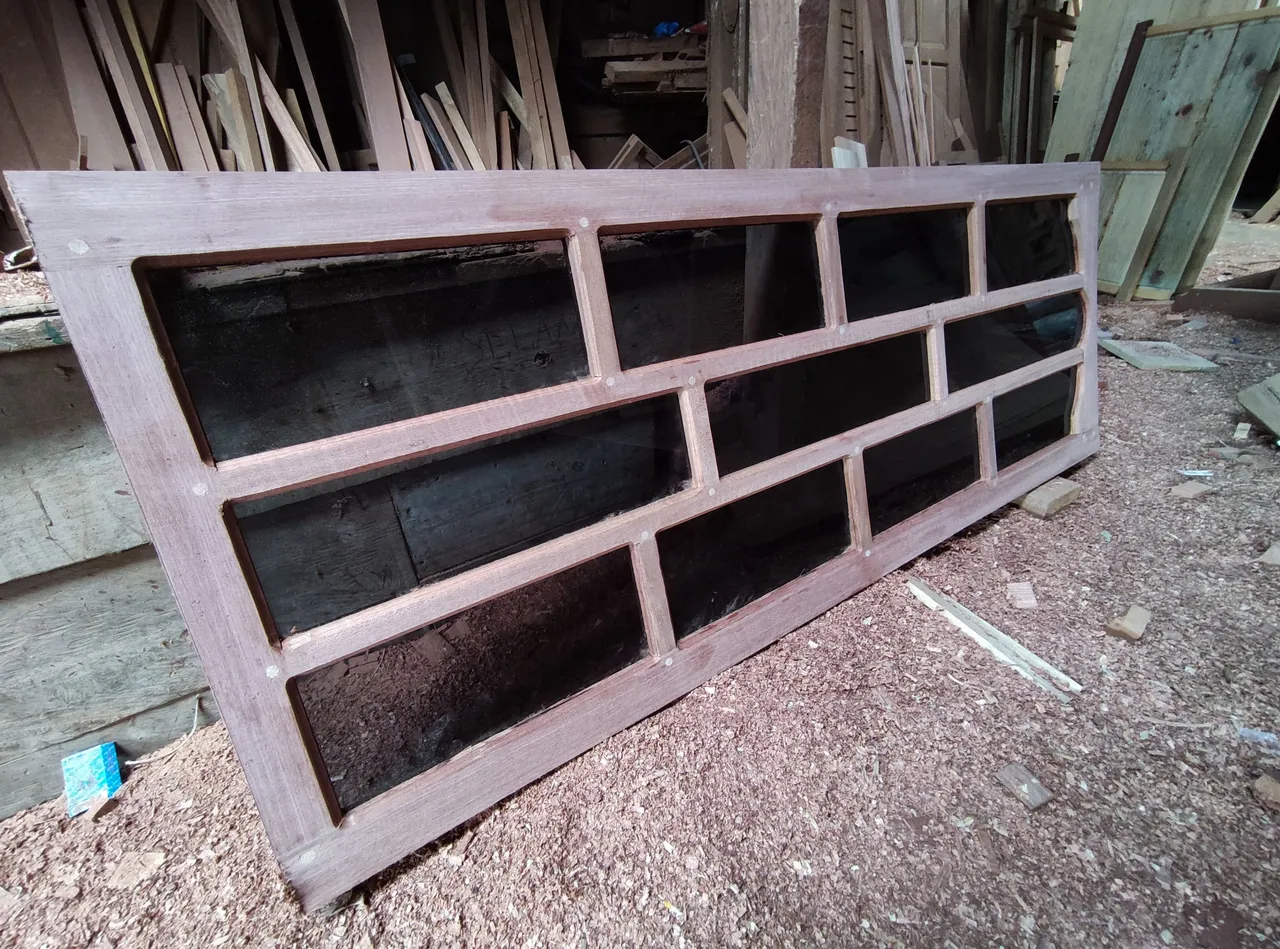
And after all the drilling is complete, this is what all that circuit materials look like.
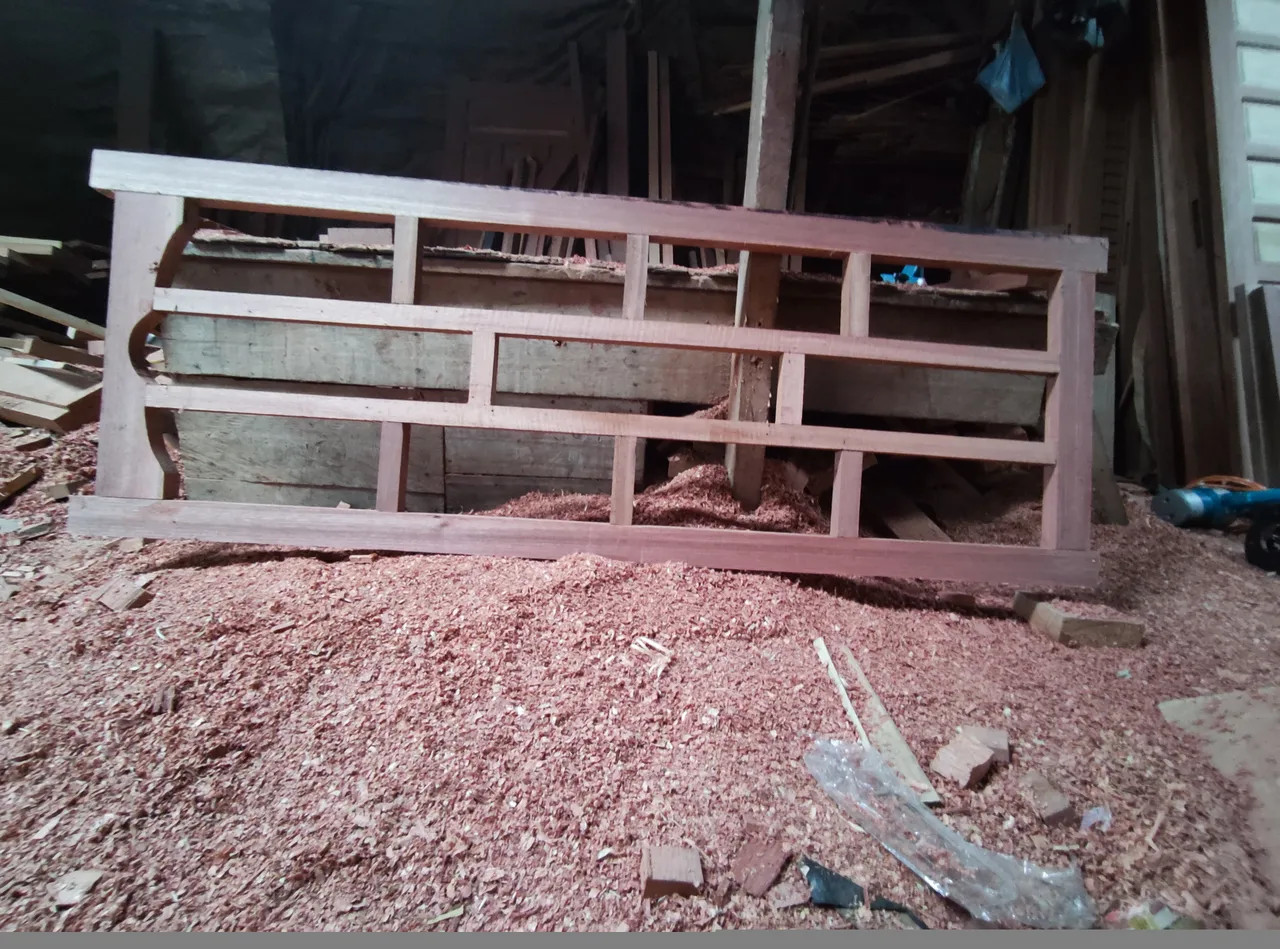
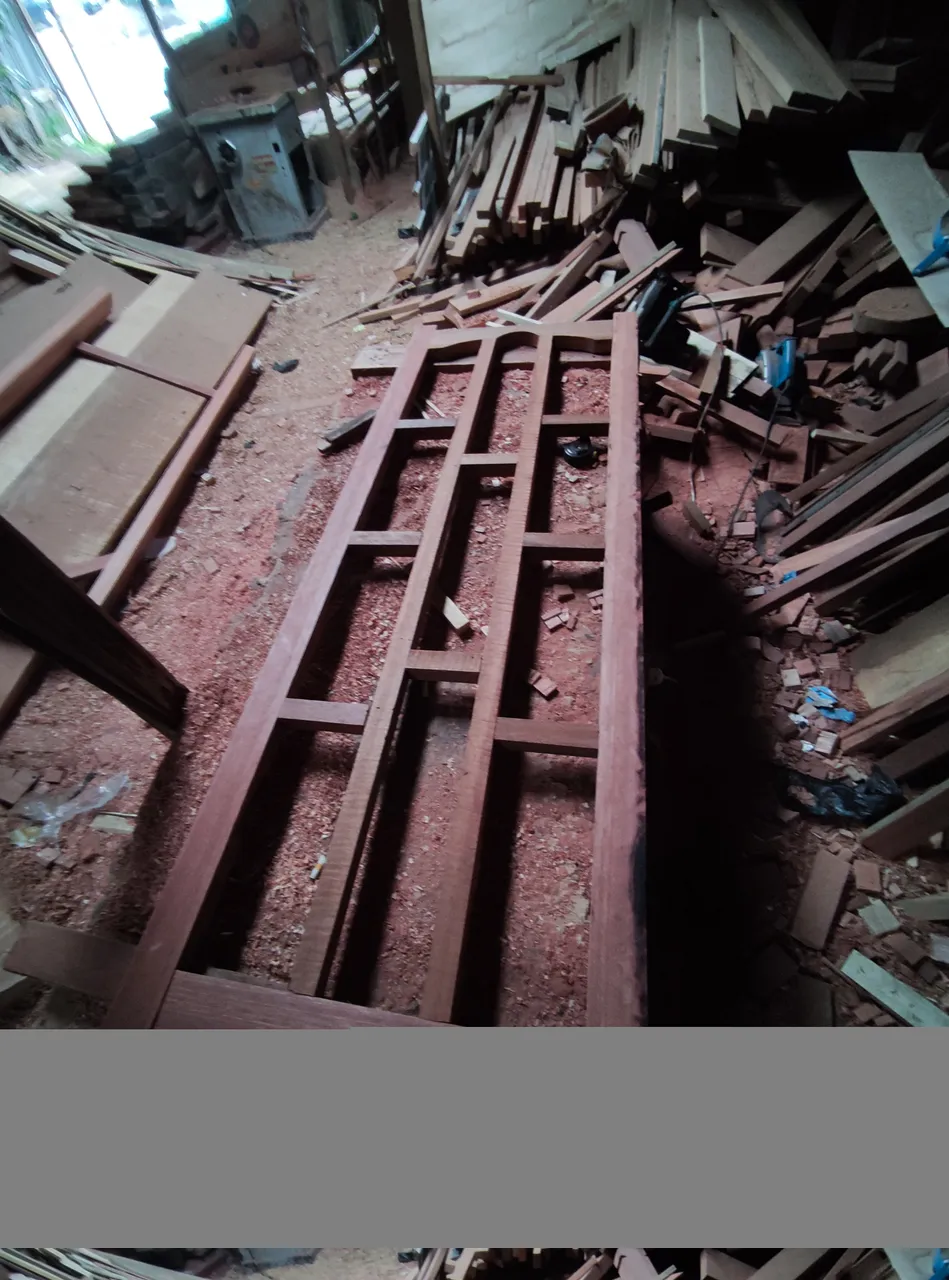
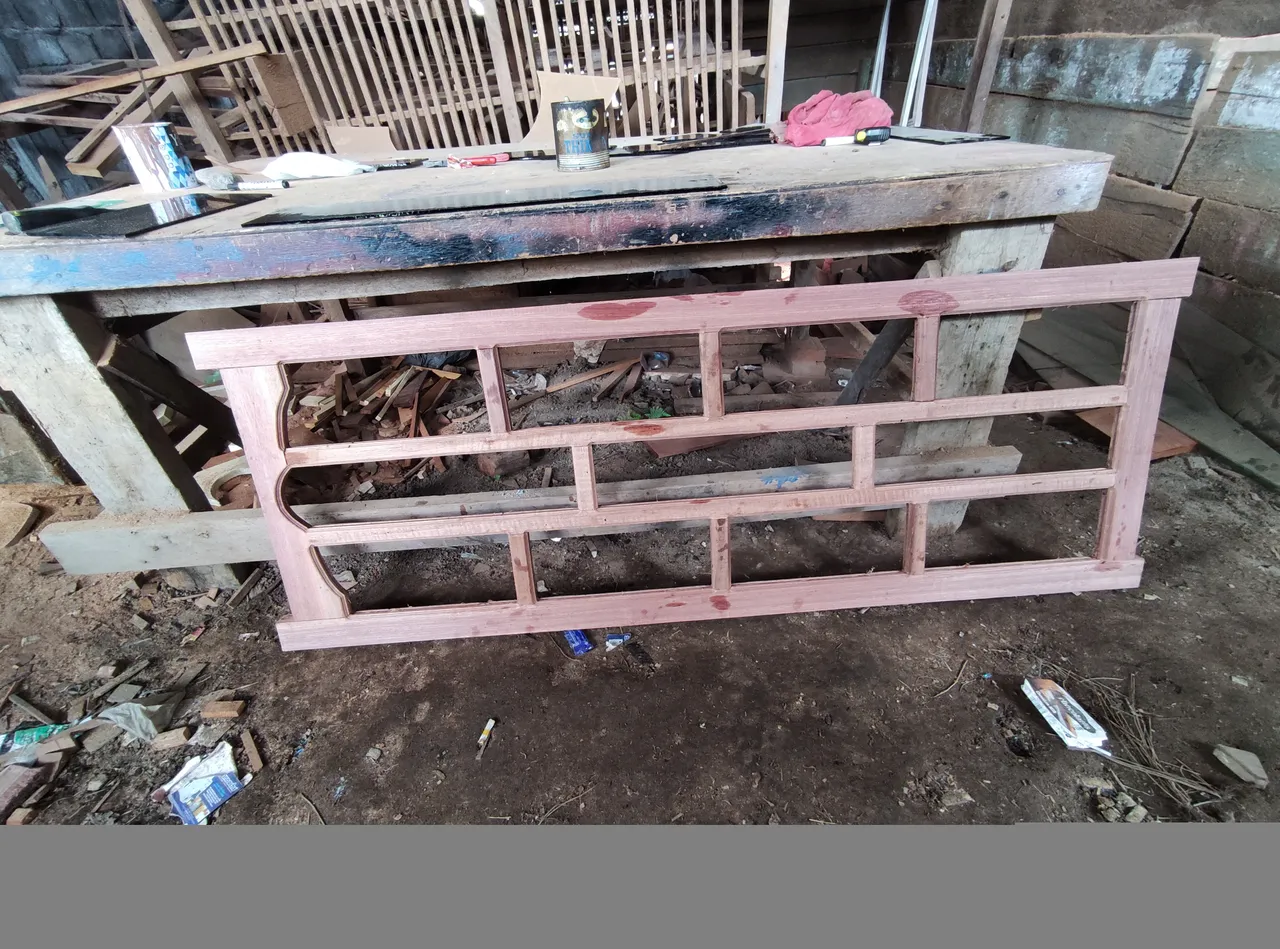
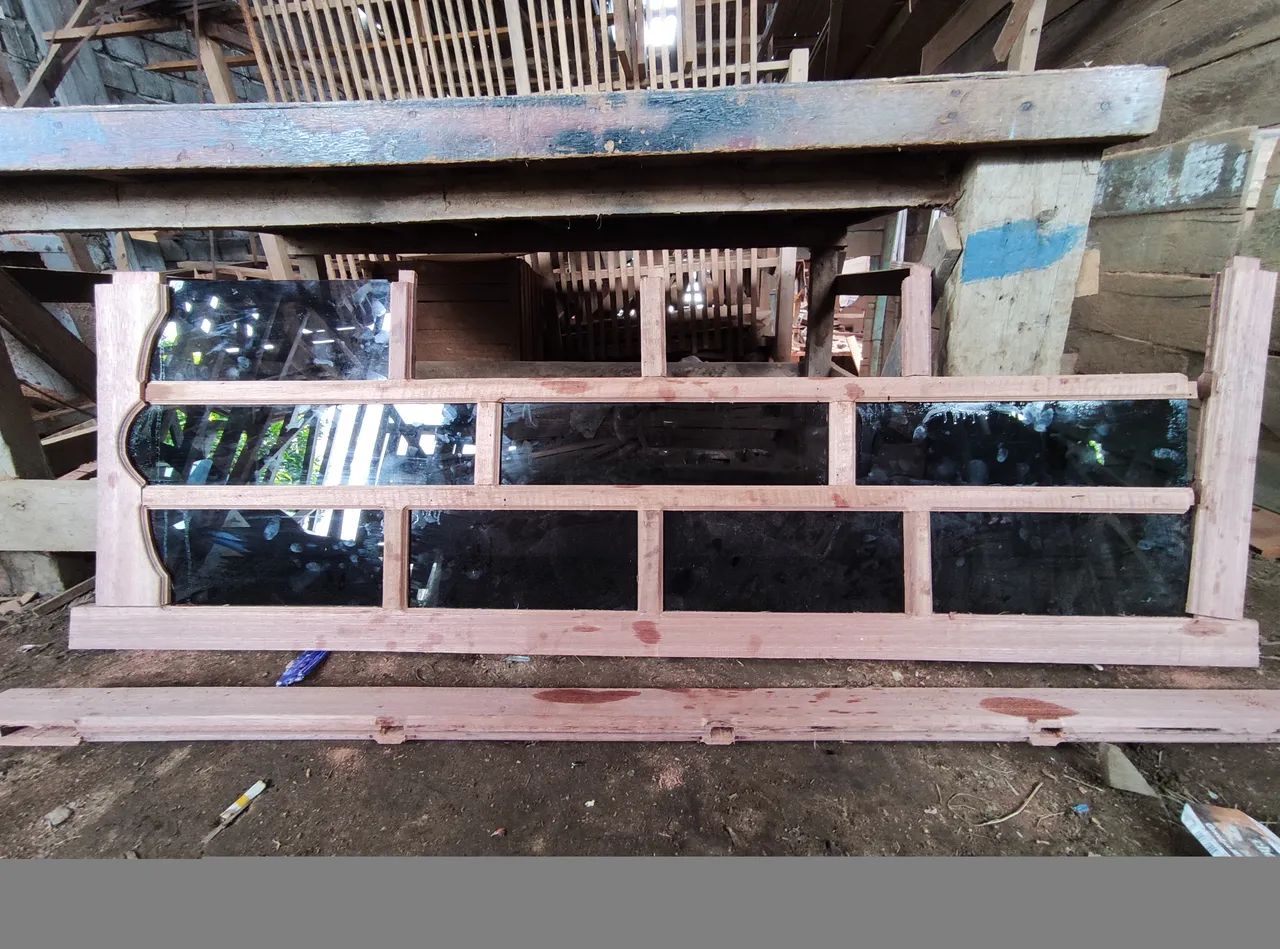
Next, I continued the process of assembling the entire series of window materials and after the process was complete, this is the result of that window assembly.
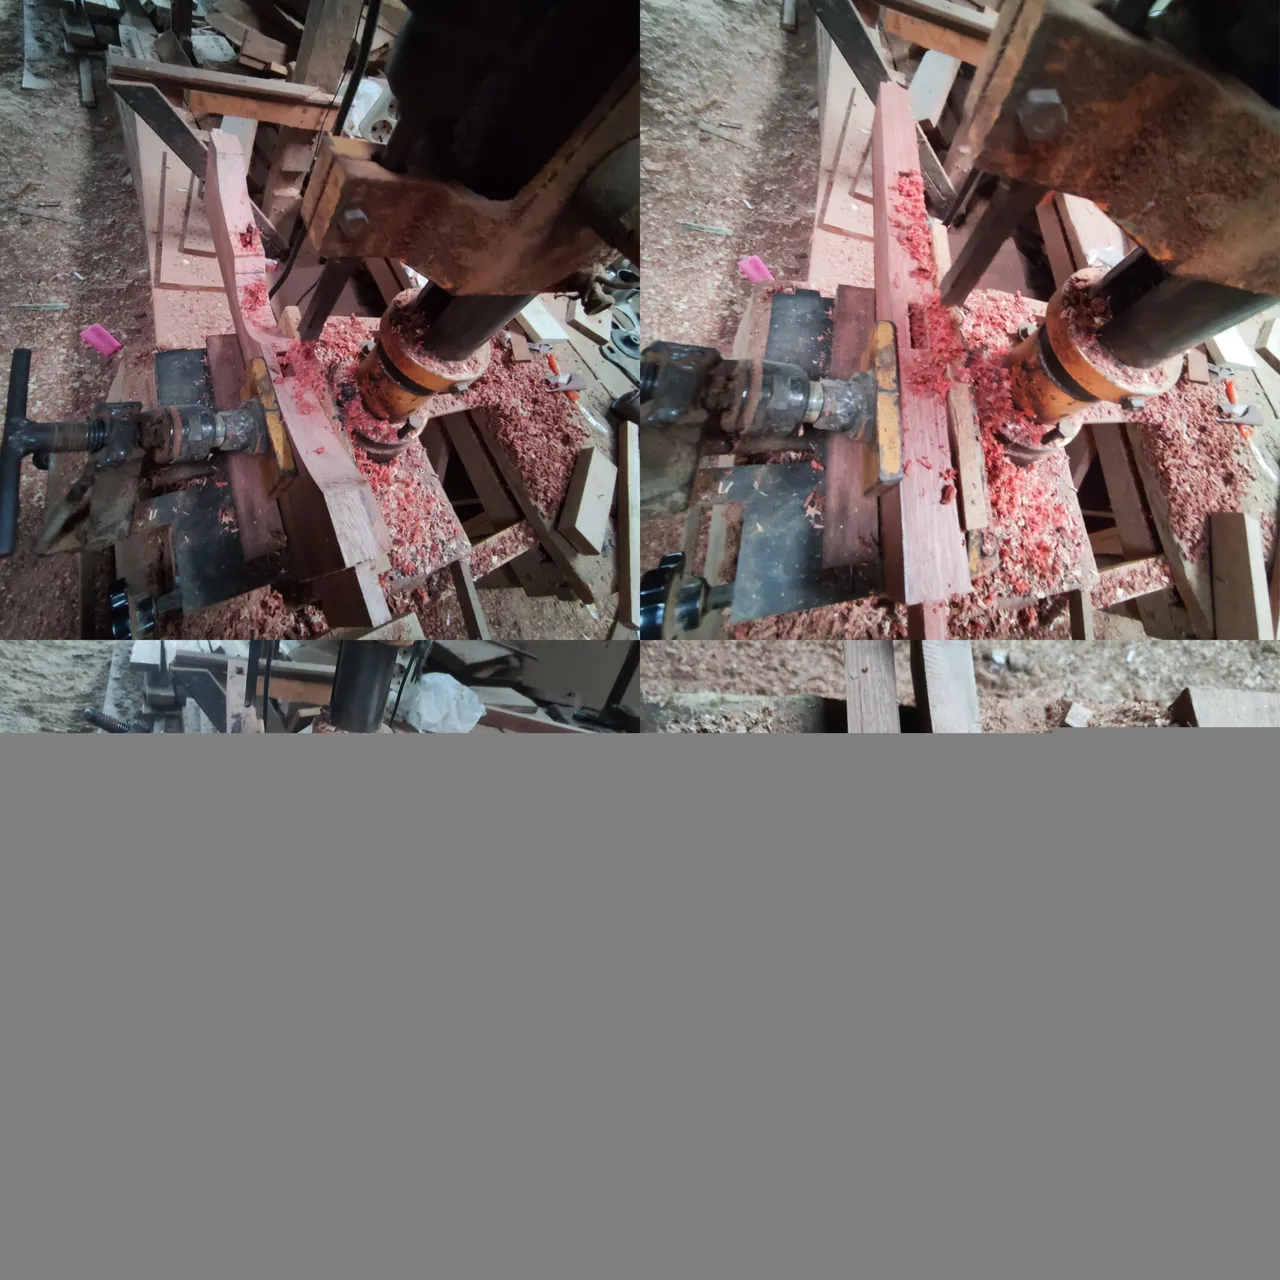
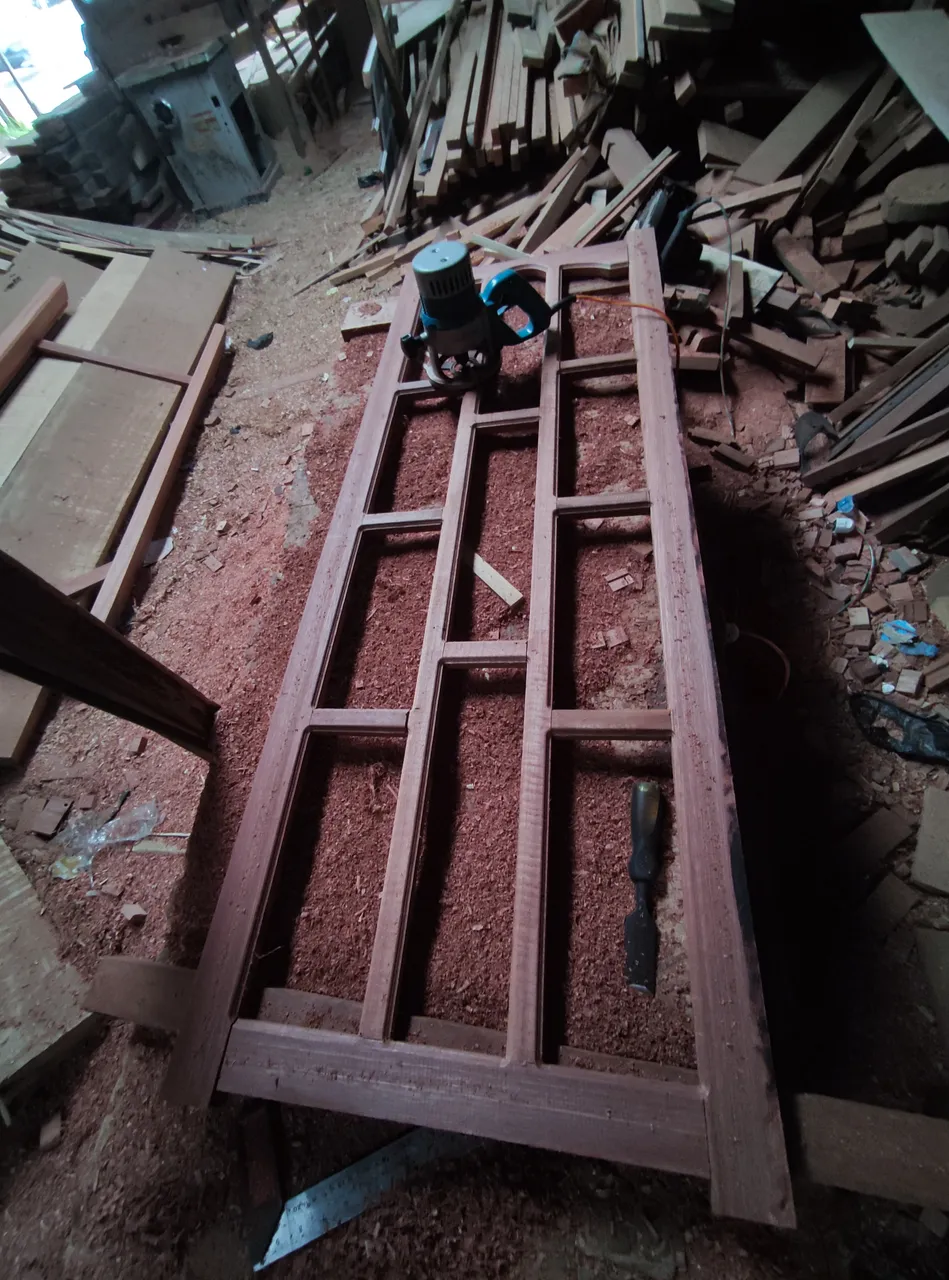
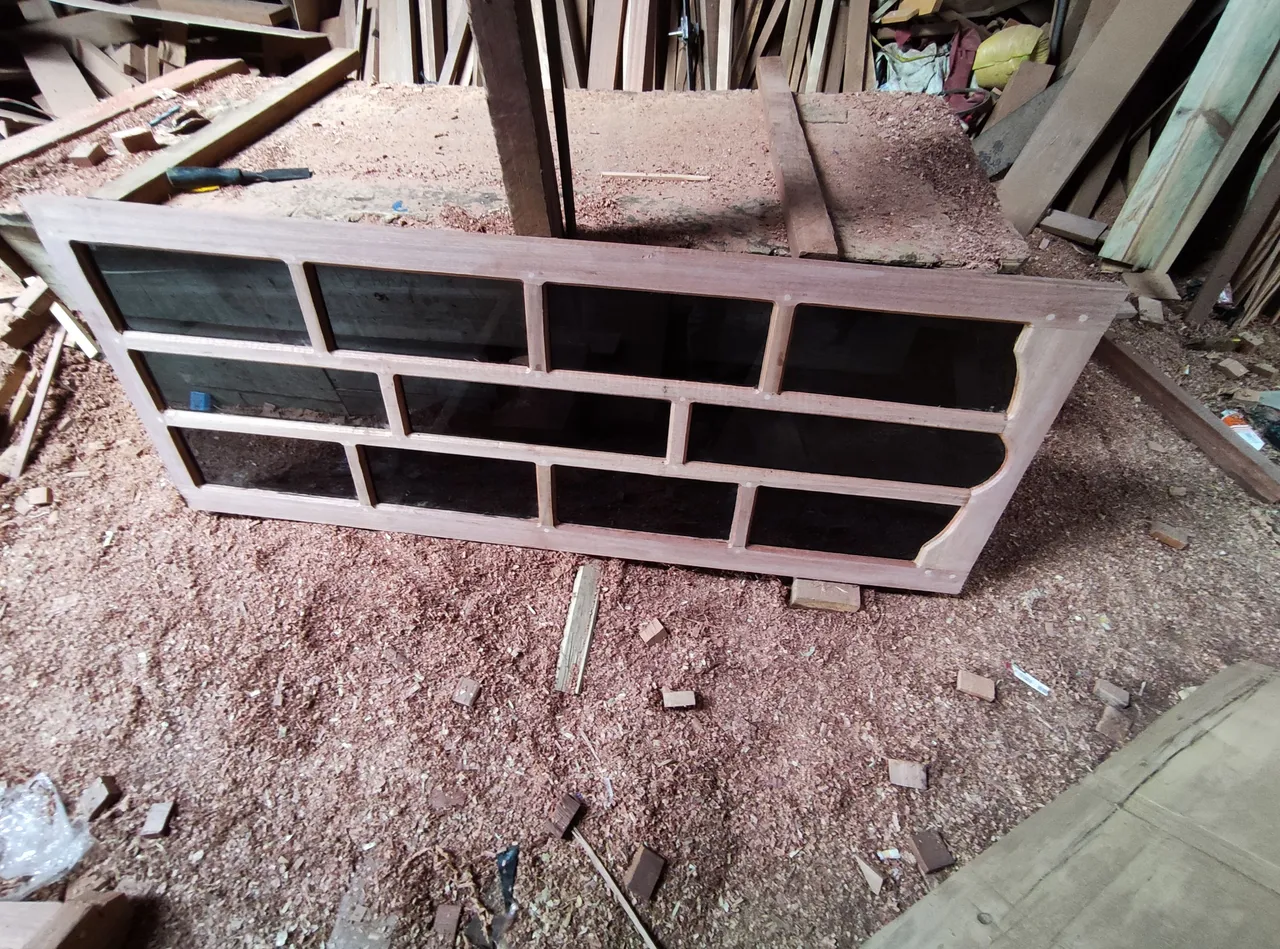
And now, after the unification process is complete, I now continue the process of smoothing the entire surface of the window series joints using a shaving machine.
Then after the shaving process was complete, I continued the process of giving flowers to the wooden surface insulation and also continued the process of engraving the glass holder using a router machine.
Next we enter the stage of installing the glass on that window series.
in the glass cutting stage, I have to be quite careful cut the width and length according to the circuit holder so that the glass does not break when pressing the circuit key and the installation of glass for that window design is quite complicated and takes a long time to set up the seat of each layout.
And for the glass recess at the top of the window, the cutting system follows the concavity of the series by shifting 1 cm around the outer size of the glass as a glass retaining peg and after the cutting was done, I had to disassemble the whole set of windows and reassemble them together with the glass.
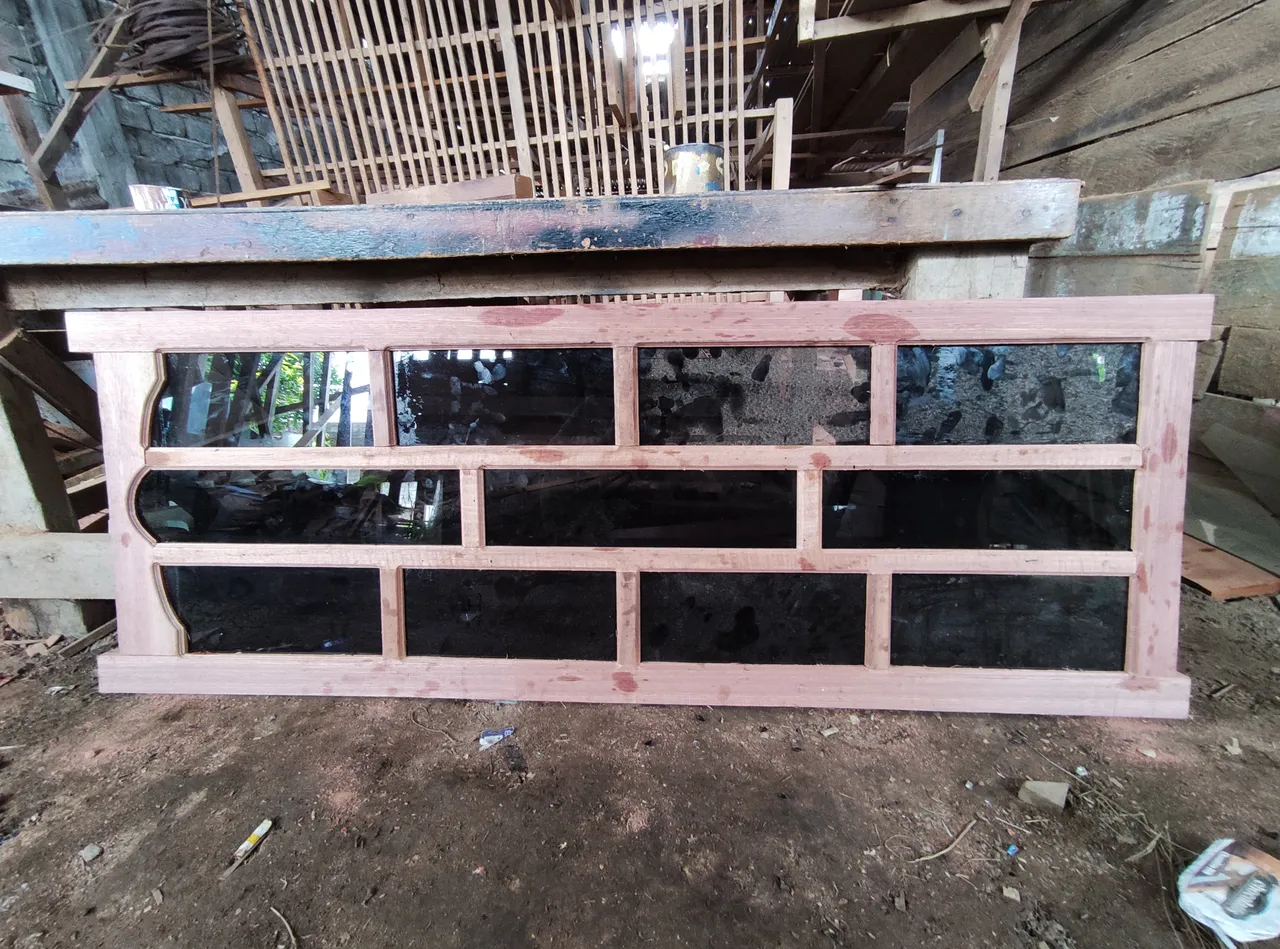
And after the installation of the glass is complete, then the process of locking the window series pegs bulkhead is next.
The process of locking the nipple series series of window pegs is also the same as the process I did on the door making project,namely by pressing and drilling processes as well as providing frame key pegs using wood.

When pressing windows with a pattern arrangement design like this, I have to be really careful in pressing and checking the series of each pattern arrangement so that the glass does not break easily upon soft impact and also to maintain the level of product quality.
After pressing is complete, I continue to apply glue to the gaps in connection circuit so that the window has strong durability and makes it look neater and after that I waited about an hour for the glue to dry completely, after the glue is dry.
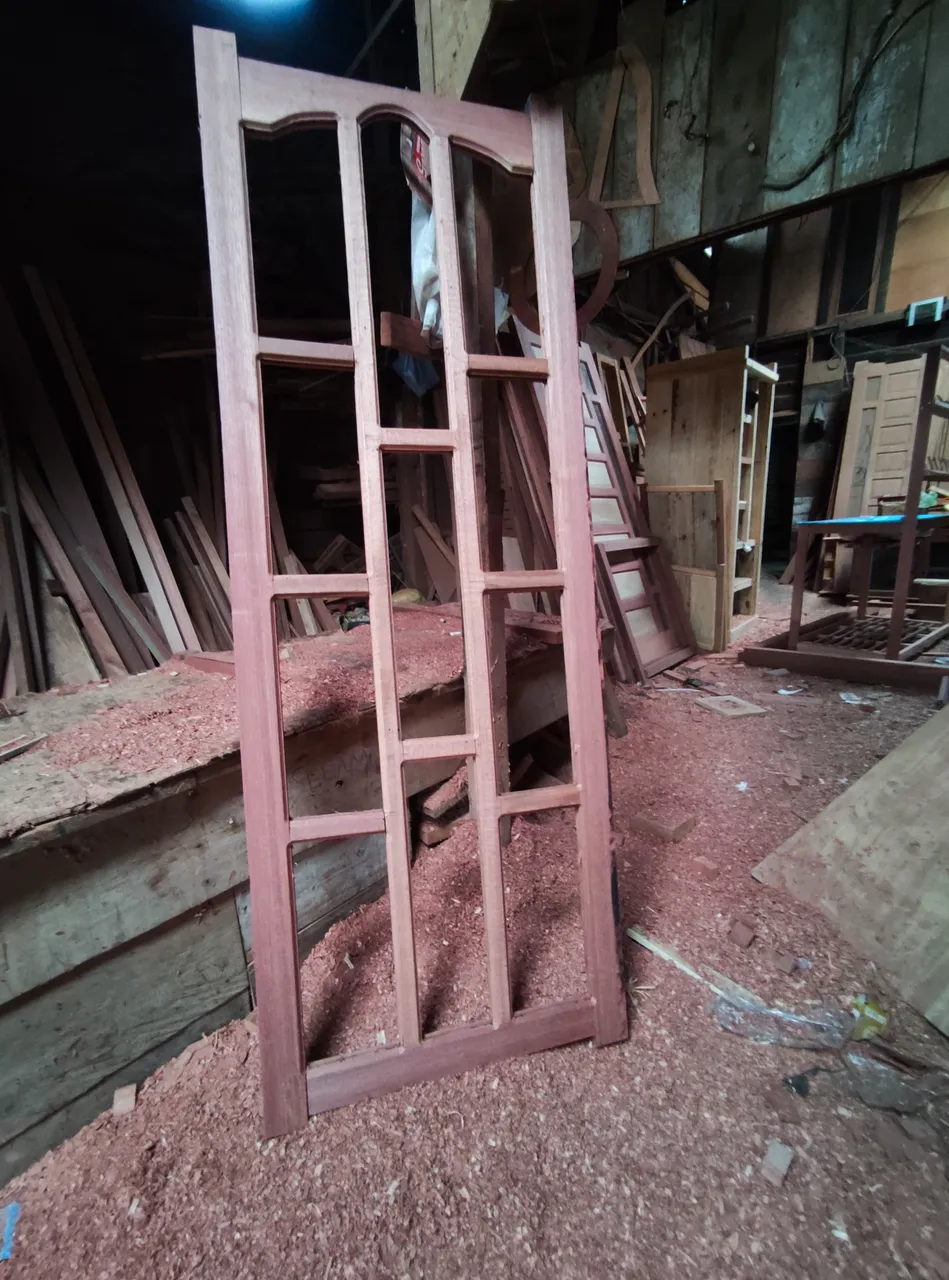
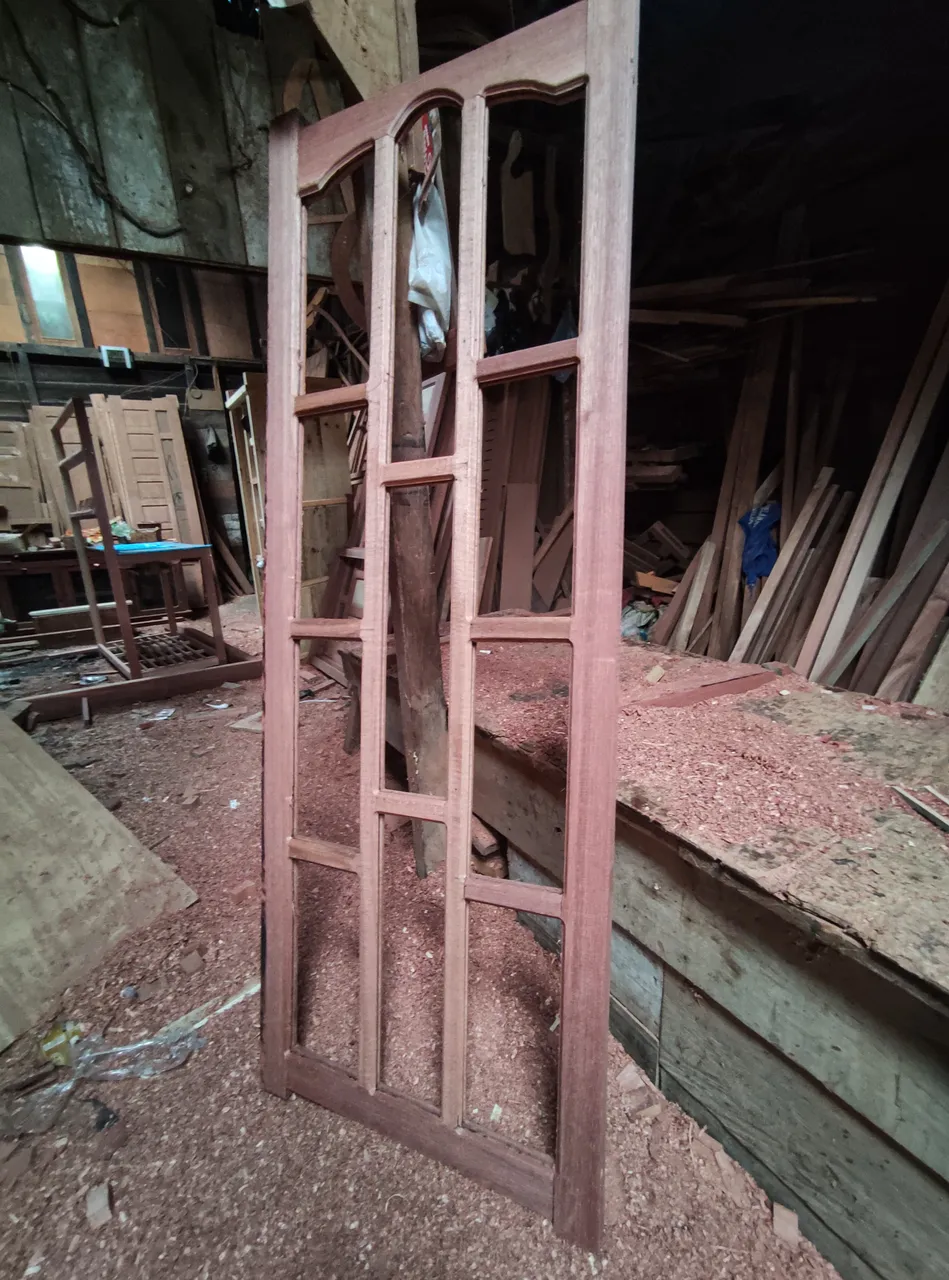
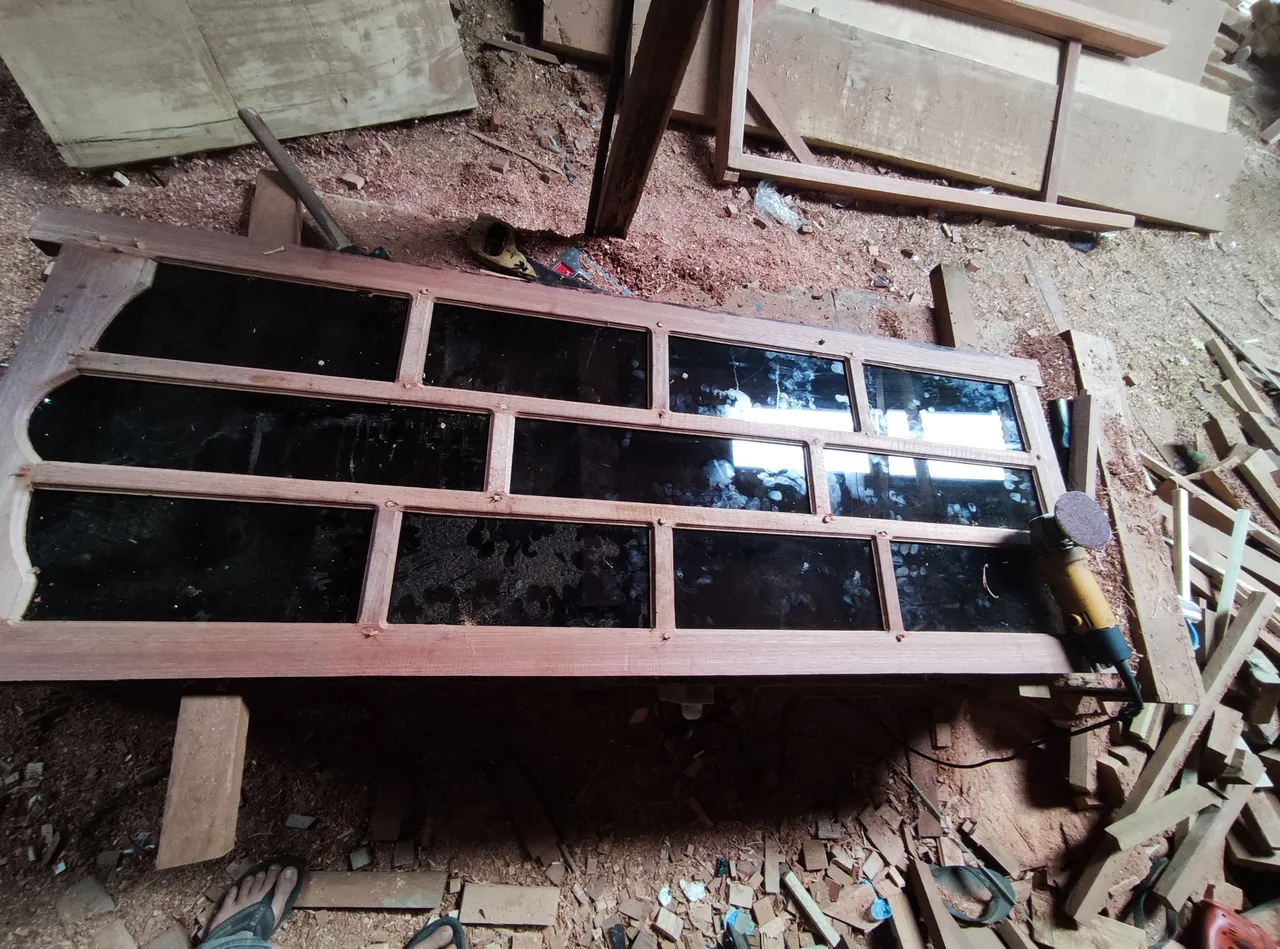
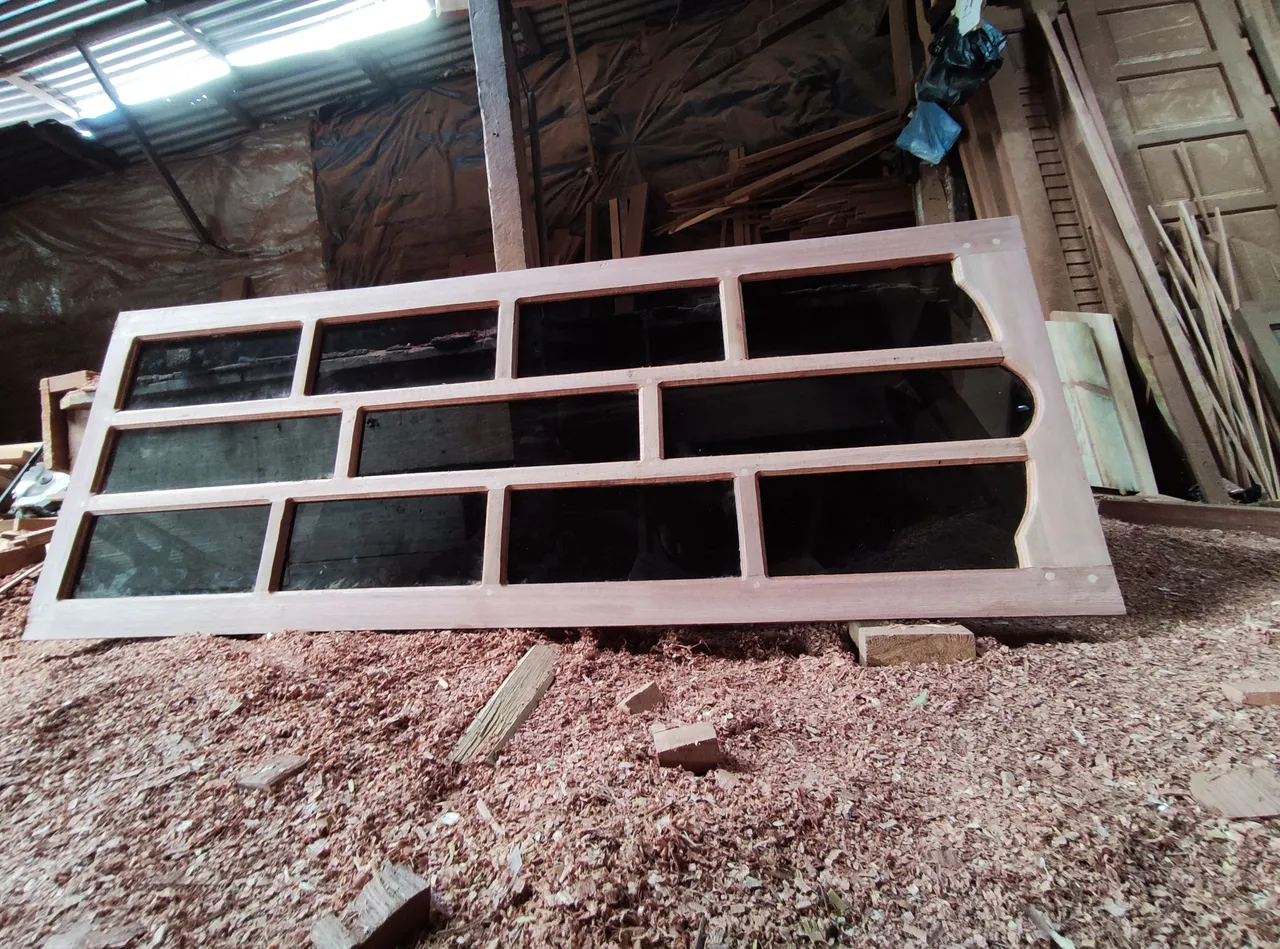
Now we enter the finishing stage, which is sanding the entire front and back surface of the window.
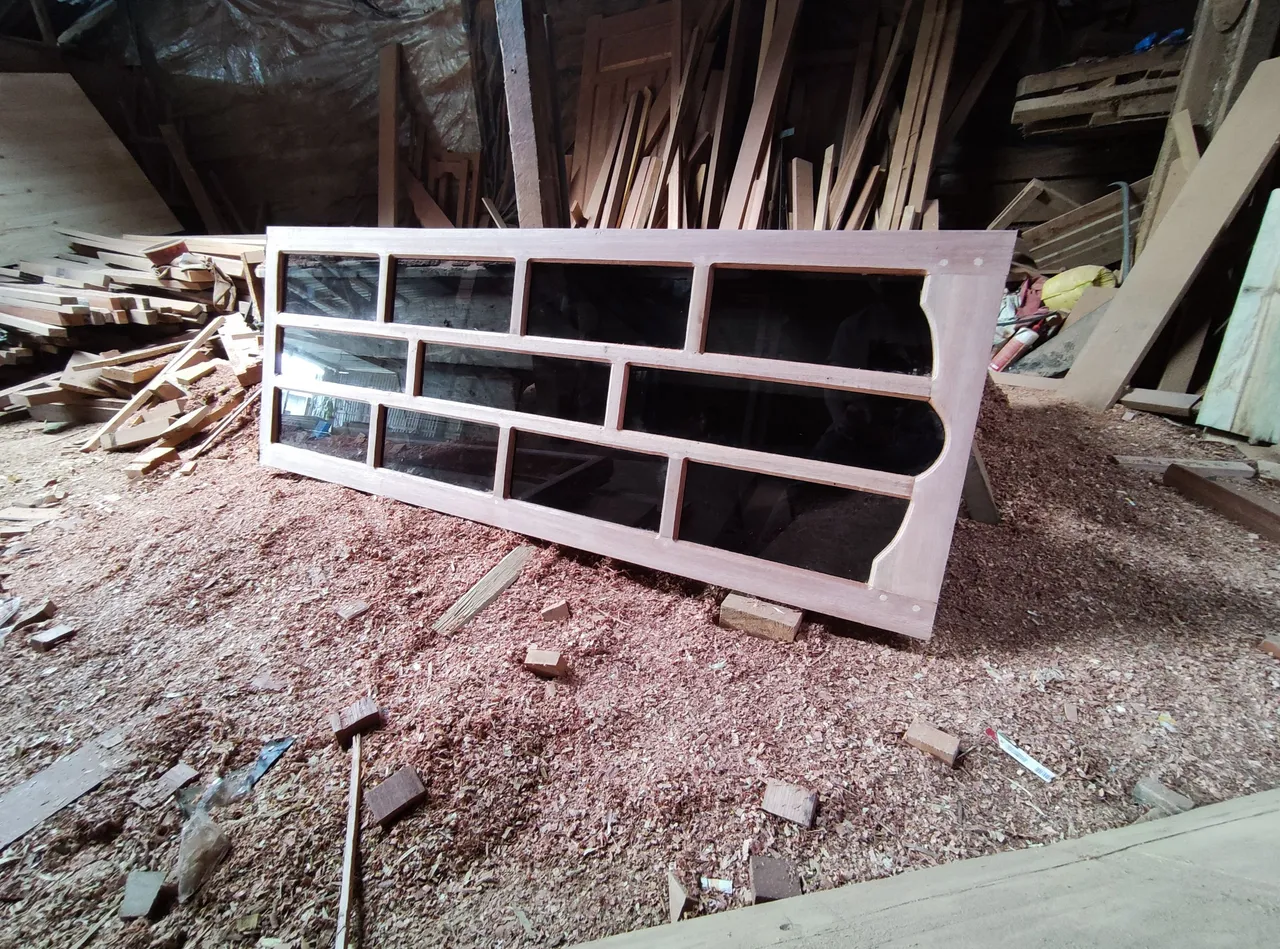
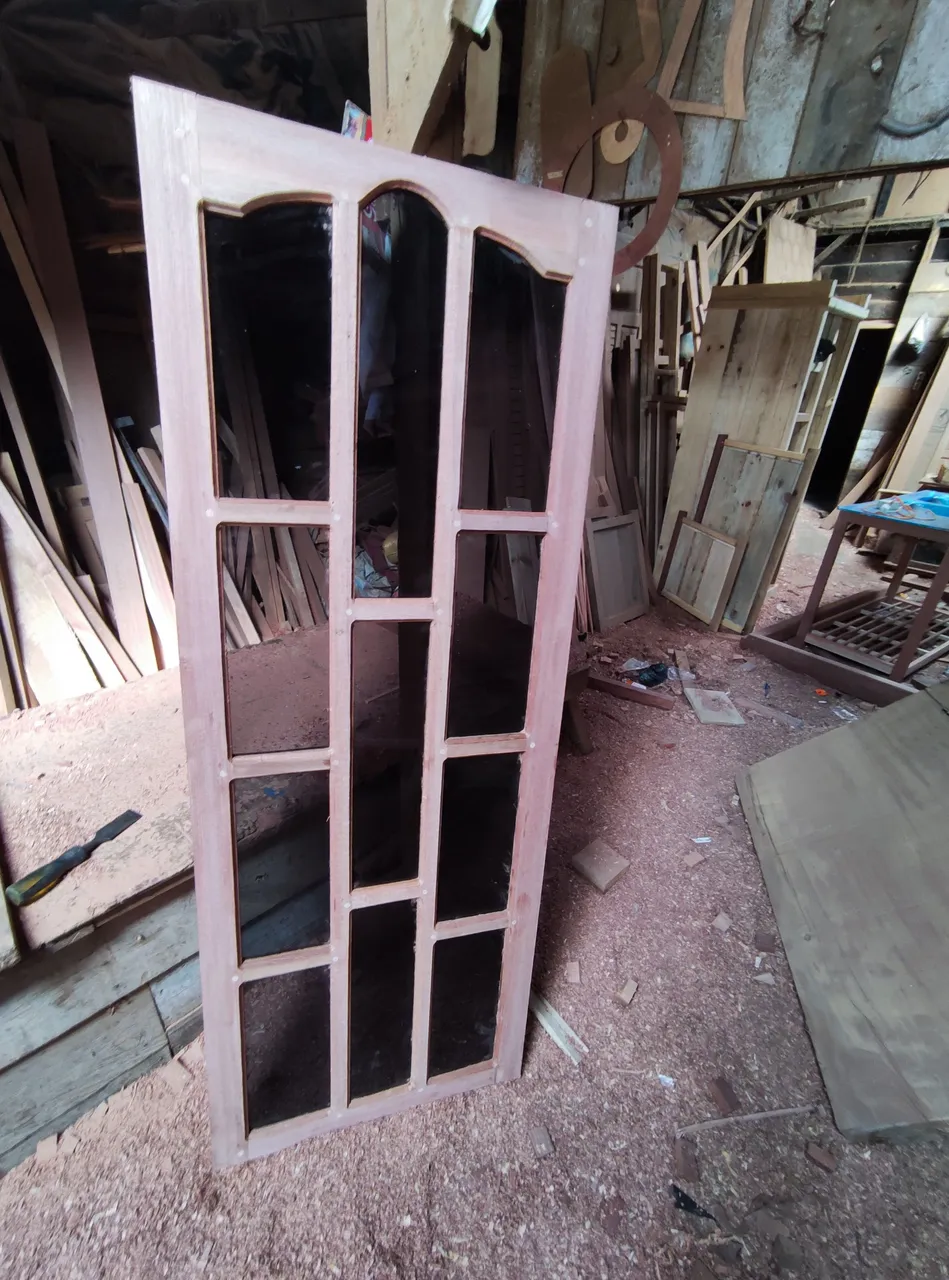
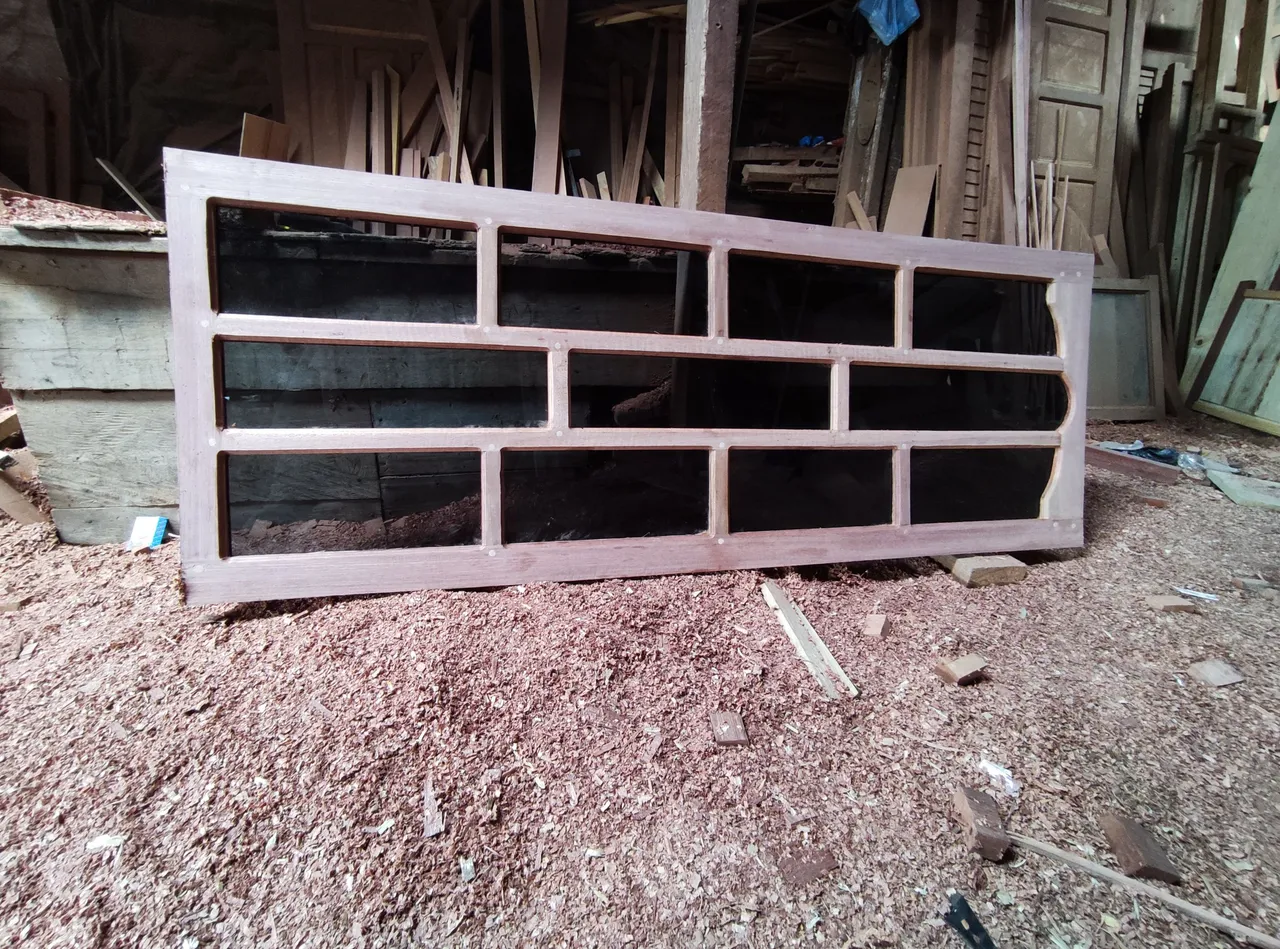
For the window sanding stage I did it in stages using a grinding machine until the surface of the wood is completely smooth and after the process is complete this is a picture display of 1 meranti window unit with a width of 60cm x height 160cm with transparent black glass.

All of these pictures when i was working on that window and jalousie project ,all images were taken using a smartphone camera, if you want to enjoy my previous architectural design works, please visit the post link below.
1.Architectural design- simple cafe bar table
2.Architectural design - Wooden tray with natural wood color combination/utilization of wood waste
3.Architectural design - Flower vases / utilization of wood waste.
4.Architectural design-Simple architectural design of my baby crib basket.
5.Architectural design-Table simple the combination of natural wood colors and classic table tops
6.Architectural design- Shophouse frame jalousie
7.simple-minimalist-mini-wall-shelf-architectural-design-to-decorate-your-home-room
8.architectural-design-of-the-ventilation-jalousie - part 1
9.architectural-design-of-windows-house -part 1
10.interior-design-architecture-simple-makeup-mirror-frame.
11.architectural-design-simple-minimalist-wooden-window -part 2
12.architectural-design-window-designs-that-are-in-great-demand-by-local-residents
13.architectural-design-of-a-mini-table-and-a-simple-photo-frame
14.architecturaldesign-of-glass-windows-and-jalousies - house
15.Architecture + door design of local people's houses.
16.Furniture design architecture || Making multiplex doors for motorcycle workshops.
17.Architecture+furniture design || Simple comb design house door.
18.Architecture + furniture design || A pair of doors home belonging to local residents.
20.Architecture + Design || Double-faced house door part ll.