In the past week and this one, my teacher explained the color theory to me and I had to admit that I had a lot of fun!
Theory Phase
The teacher explained the primary colors, how to mix them correctly, and a few tricks. Also, the most surprising thing to me was that the black and white colors were for creating new colors.
Also, I would like to point out that I started the drawing classes alone but now two new classmates joined. I’m happy to have people to identify with and share common interests. I hope to create a good friendship with them in this long way.
Not much to say about the colors but it seems we are gonna paint using watercolors in the near future to practice the color theory. These days, I have been watching a lot of videos about watercolors and I must say that now I’m very hooked on them. I’d like to recommend the James Gurney YouTube channel.
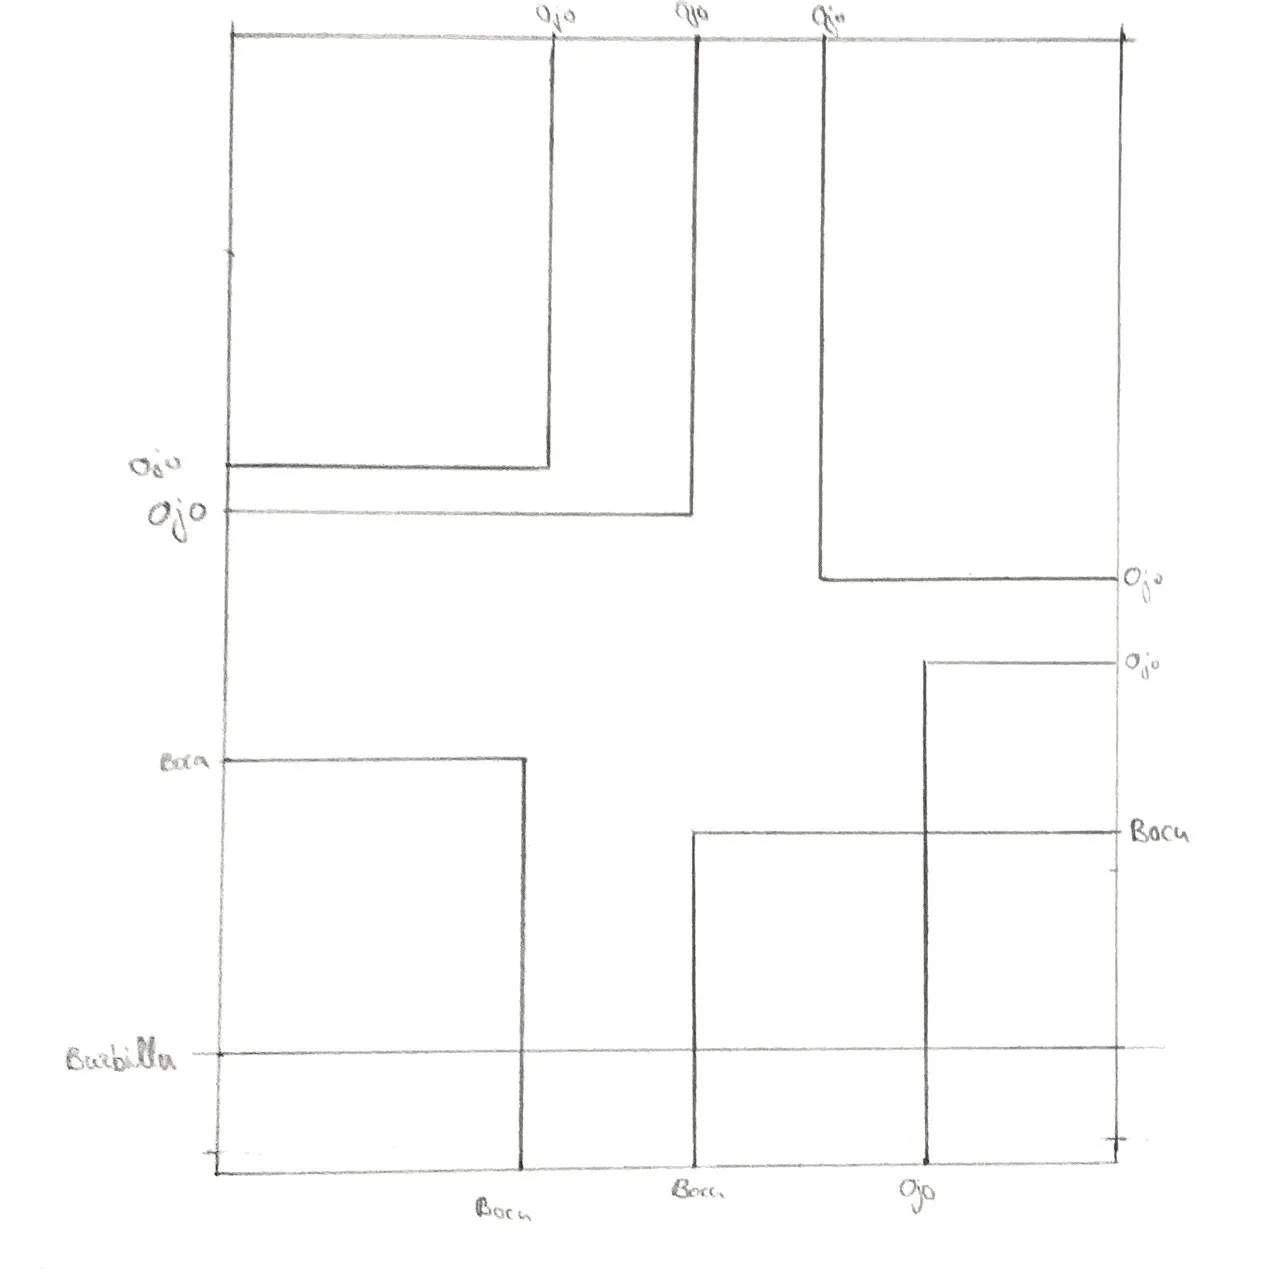
Drawing The Grid
Now, time to do the weekly exercise! This week I have to draw another head from a figure. This one seems more complicated than the previous one because now we have rounded shapes, so the ruler won’t help me that much.
I started drawing the grid which will help me later to localize where are the eyes, the mouth, and so on. Here is where the rule helped me the most.
Drawing the Shape of the Head
Once the grid was done, I started to draw the form or shape of the head from the neck and follow the grid. A big struggle for me was to make lines almost perfect, so I erased lines a lot of times and drew them again.
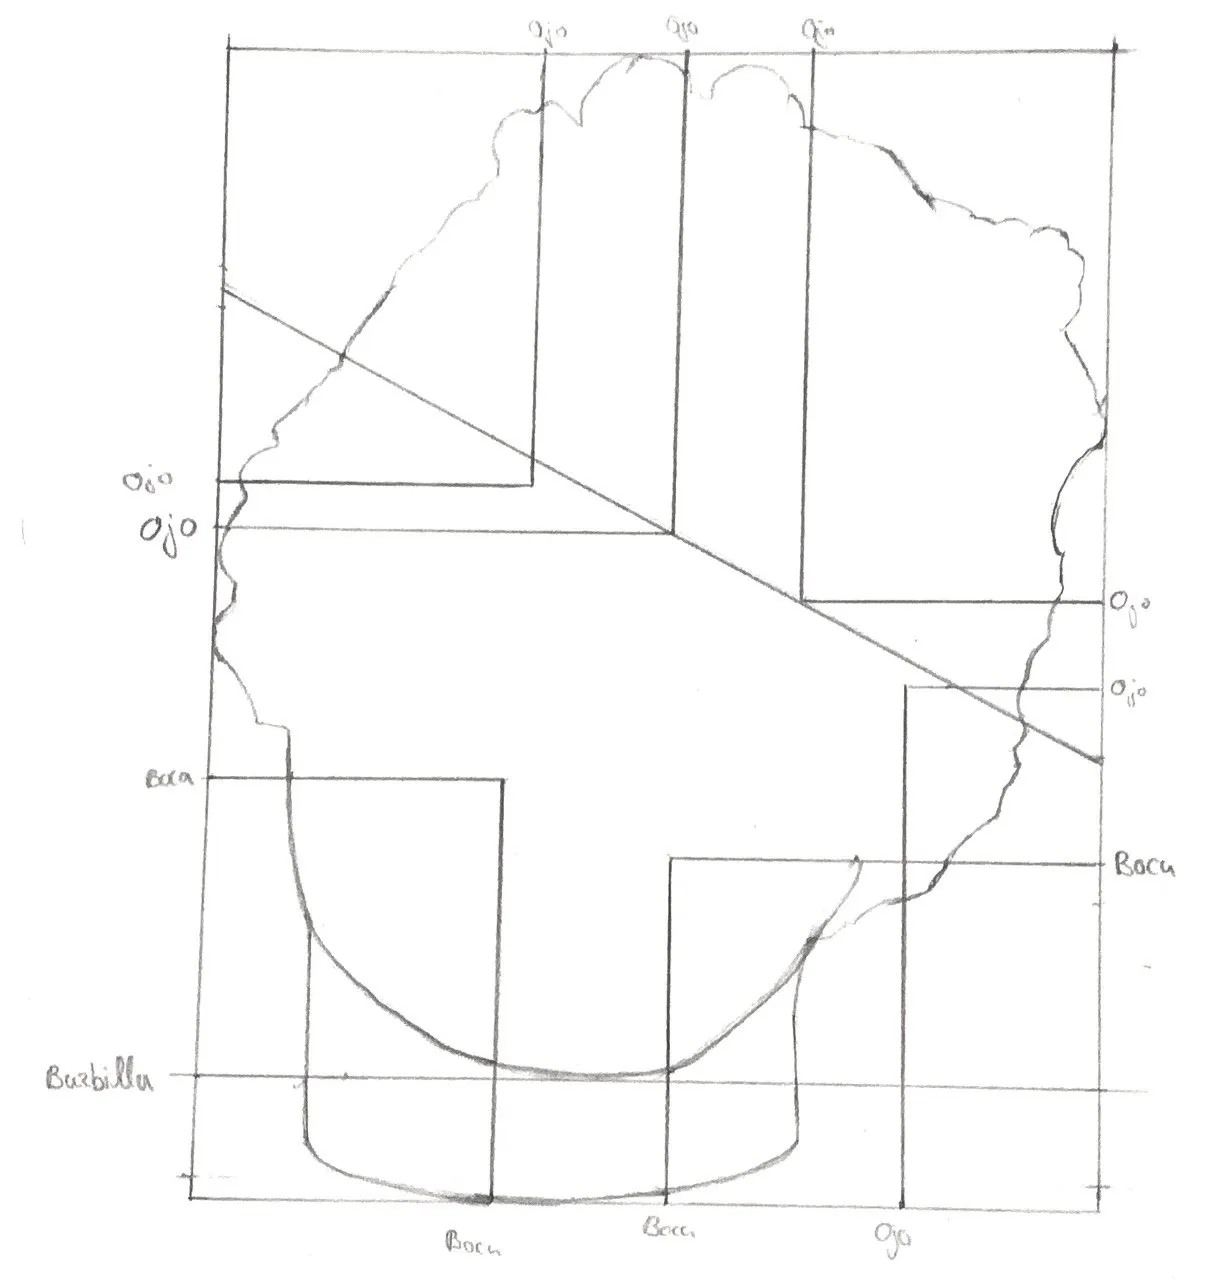
You can start seeing the face right? It isn’t that bad, I really like the final work on this section. Now, for the next one, I will define the interior of the face like the eyes, mouth, and nose.
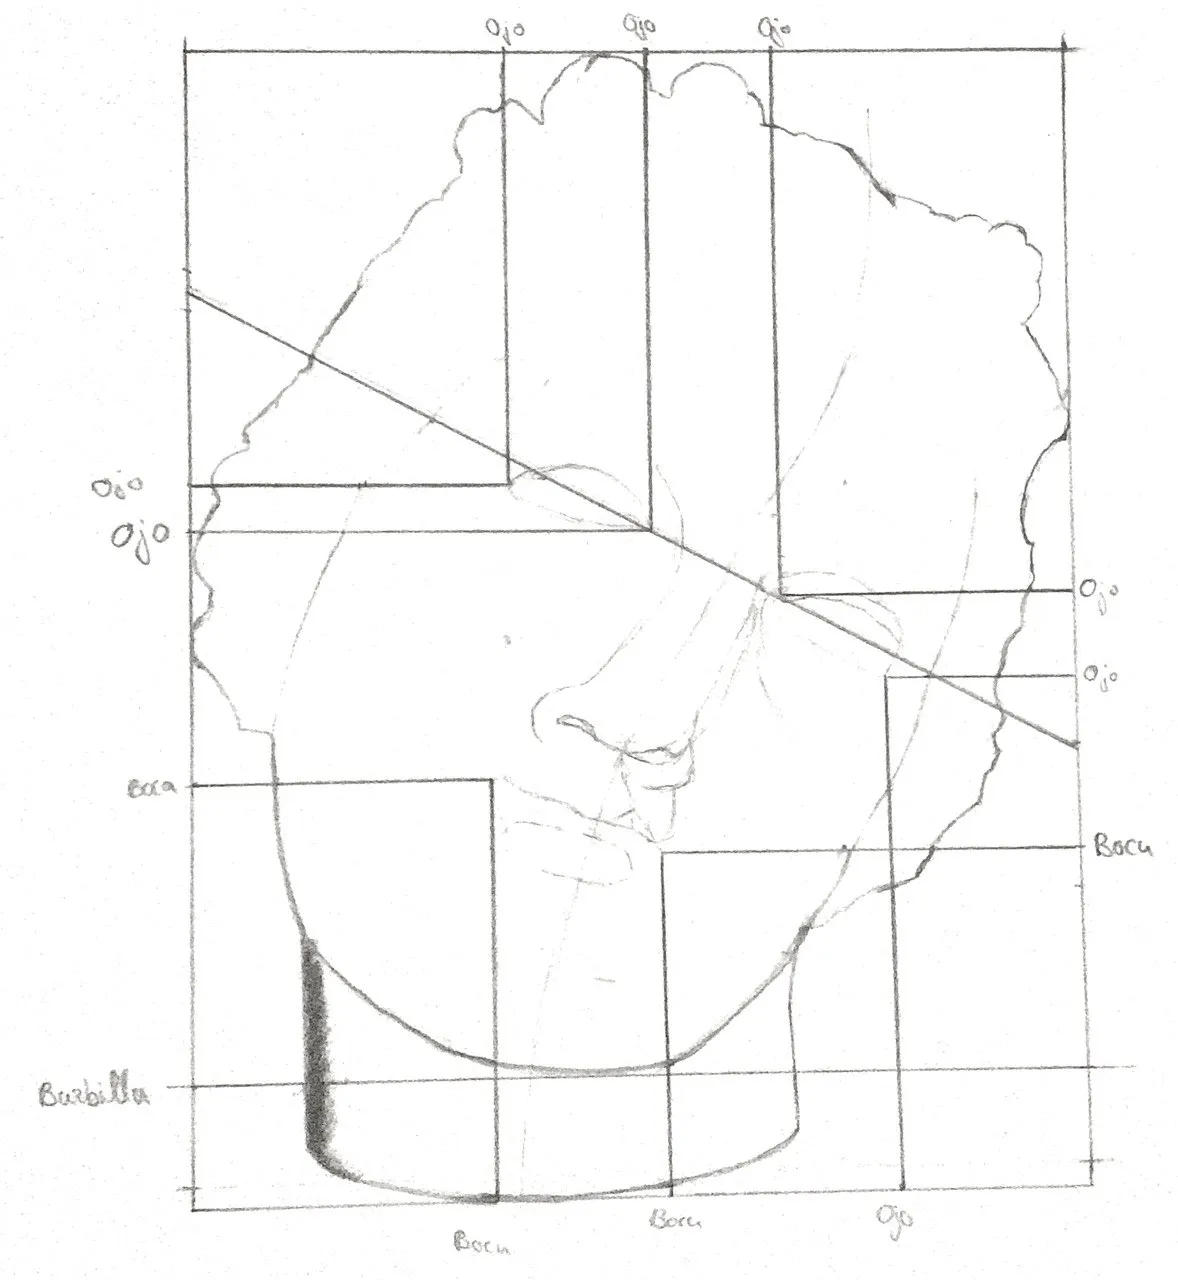
For every line or curve I drew, I tried to measure it with the ruler and use the grid lines as a guide to proportions and sizes. Again, I’m quite happy with the final result, maybe is not perfect but good enough. I think it took me a couple of days to get to this point because trying to make things the best possible takes its time.
Adding Shadows
Now that the head is in a good form the next and final step is to add shadows. For me, it was the first time applying this technique and the result wasn’t quite good.
I went from section to section of the grid adding shadows and focusing on small areas, then adding the different grayscales and turning them into forms. Also, with the help of the eraser, I added some light.
Where I struggled the most was with the hair. There were a lot of small details and forms and it was very hard to layer the different grey levels. So, I focus on big areas and long lines. This is the final result:
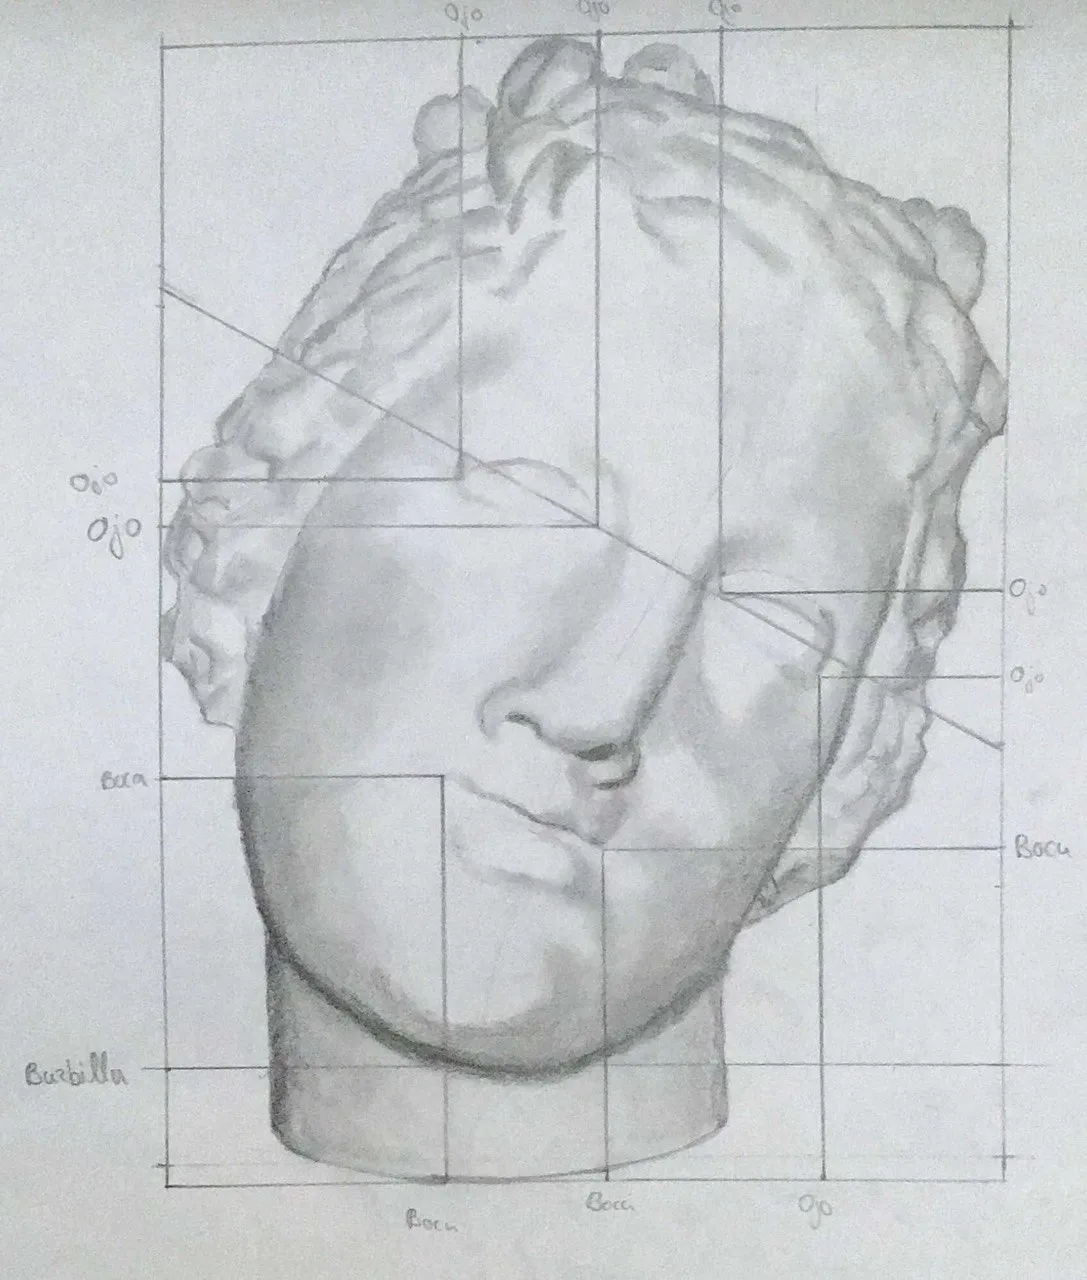
I’m quite happy with the final result because I thought it would be much worse. There are a lot of things to improve but after 5 days of work I will leave it here, also I don’t want to retouch the drawing risking making it worse.
Remember to upvote if you like this post and subscribe to follow my progress. Leave a comment if you have any feedback or liked it :)
See you next week!