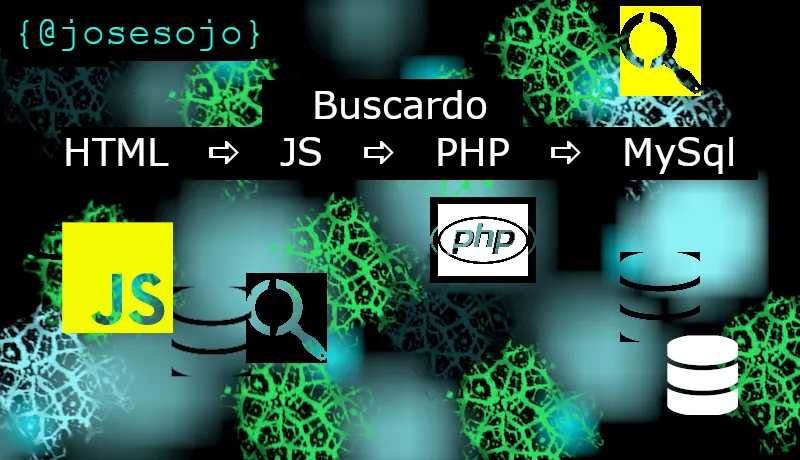
Hello hive friends, my name is José Sojo I am passionate about technology and I always like to be doing something new ... what we are going to do in this tutorial is to do a search engine
Hola hive amigos, mi nombre es José Sojo estoy apasionado por la tecnología y me gusta siempre estar haciendo algo nuevo... lo que vamos a hacer en este tutorial será hacer un buscarcdor
What do we need?:
- A local server to work with php and mysql, for practice I will use Xampp
- A text editor, which is where we are going to write all our code, I use Sublime text 3
- A web browser, which is where we will see the changes made
¿Que necesitamos?:
- Un servidor local para trabajar con php y mysql, para la practica utilizaré Xampp
- Un editor de texto, que es donde vamos a escribir todo nuestro codigo, yo uso Sublime text 3
- Un navegador web, que es donde vamos ver los cambios realizados
What are we going to use ?:
- Php / html - to make the form
- Boostrap - for the form styles
- jQeury / js - for our search engine logic
- Php - to do the search
- Php - myslqi for database queries
- phpmyadmin - To see the changes in the database
¿Que vamos a utilizar?:
- Php / html - para hacer el formulario
- Boostrap - para los estilos del formulario
- jQeury / js - para la lógica de nuestro buscador
- Php - para hacer la busqueda
- Php - myslqi para las consultas en la base de datos
- phpmyadmin - Para ver los cambios en la base de datos
- Create a form to add data
- Create a form to search for data
- Send it to the database
- Show received data
¿Que vamos a hacer?:
- Crear un formulario para agragar datos
- Crear un formulario para buscar datos
- Enviarlo a la base de datos
- Mostrar los datos recibidos
We are going to create the following files:
- databse.sql - Containing the database structure
- db.php - For connection with MySql
- Index.php - For the form view
- app.js - For Javascript logic
- save.php - To save the data
- search.php - To do the searches
Vamos a crear los siguentes archivos:
- databse.sql - Que continentrá estructura de la base de Datos
- db.php - Para la conección con MySql
- Index.php - Para la vista del formulario
- app.js - Para la lógica Javascript
- save.php - Para guardar los datos
- search.php - Para hacer las busquedas
We start with the database.php file
Comenzamos con el archivo database.php
    CREATE TABLE `example`.`data` (
        `id` INT NULL AUTO_INCREMENT ,
        `name` VARCHAR(100) NOT NULL ,
        PRIMARY KEY (`id`)
    ) ENGINE = InnoDB;
Inside the database.php file we will have the structure of the MySql data class, now in the php my admin we create the database called 'send_data', to that database we import the database.sql file and thus we will have the structure of the database finished
Dentro del archivo database.php tendremos la estructura de la dase de datos MySql, ahora en el php my admin creamos la base de datos llamada 'send_data', a esa base de datos importamos el archivo database.sql y así tendremos la estructura de la base de datos finalizada
Now we go with the file 'db.php'
Ahora vamos con el archivo 'db.php'
    $connection = mysqli_connect(
        '127.0.0.1',
        'root',
        '',
        example
    );
This file contains the connection to MySql: and is stored in the variable '$ connection' it is a connection by the method 'mysqli' that receives 4 parameters the first is the server in this case it is '127.0.0.1' which is the server of xampp then it is a user that by default is root , the password in this case is empty, and the name of the database in this case is example
Este archivo contine la conección a MySql: y se almacena en la variable '$connection' es una conección por el metodo 'mysqli' que recive 4 parametros el primero es el servidor es este caso es '127.0.0.1' que es el servidor de xampp luego es usuario que por defecto es root sigue la contraseña en este caso está vacia, y el nombre de la base de datos en este caso es example
Let's go with the Index.view.php: it's basically html tags for form
Vamos con el Index.php: es básicamente etiquetas html para los formularios
The head should look like this, it contains the UTF-8 encoding, a meta tag that provides us with boostrap, the link tag that links the boostrap styles in my case I have it locally, and the title tag that will be the title that goes in the browser tab
El head debe quedar así, contiene la codificacion UTF-8, una etiqueta meta que nos proporcina boostrap, la etiqueta link que enlaza los estilos de boostrap en mi caso lo tengo de forma local, y la etiqueta title que será el titulo que va en la pestaña del navegador
    <head>
        <meta charset="UTF-8">
        <meta name="viewport" content="width=device-width, initial-scale=1, shrink-to-fit=no">
        <link rel="stylesheet" href="css/bootstrap.min.css">
        <title>Search to jQuery</title>
    </head>
The body would look like this, it will be two card one to add data with an input with its boostrap classes their id to work with javascript, in the card-footer it will show a message when the name is added, and the second card with an input of type text to do the searches, and in the card-footer it will show the results ... and at the end of everything will be the scripts that link a jQuery and the app.js file
El body se vería así, será dos card uno para agregadar datos con un input con sus clases de boostrap sus id para trabajarlos con javascript, en el card-footer mostrará un mensaje cuando se agregue el nombre, y la segunda card con un input de tipo text para hacer las busquedas, y en el card-footer mostrará los resultados... y al final de todo estará los script que enlazan a jQuery y el archivo app.js
<div class="container">
<div class="row">
<div class="card mt-5 col-12 col-md-5 m-auto p-0">
<div class="card-body">
<form class="d-flex" id="form-save" autocomplete="off">
<input type="text" class="form-control rounded-0 border-success" id="input-save" placeholder="Add to name">
<input type="submit" id="btn-save" value="Save Name" class="btn btn-success rounded-0">
</form>
</div>
<div class="card-footer" id="msj-add-name"> </div>
</div>
<div class="card mt-5 col-12 col-md-5 m-auto p-0">
<div class="card-body">
<form>
<input type="text" class="form-control rounded-0 border-success" id="input-search" placeholder="Search to name">
</form>
</div>
<div class="card-footer" id="result"> </div>
</div>
</div>
</div>
<script src="js/jquery-3.6.0.min.js"></script>
<script src="js/app.js"></script>
Now we will start with our app.js , let's start with the card to save the name
Ahora comenzaremos con nuestro app.js, comencemos con la card de guardar el nombre
// Ocultamos el div para mostrar los mensaje
$('#msj-add-name').hide()
$('#form-save').submit(function(event) {
event.preventDefault();
let name = $('#input-save').val();
$.post('php/save.php', { name }, function(response) {
$('#msj-add-name').text(response)
$('#msj-add-name').show(1500)
$('#msj-add-name').hide(600)
});
});
First we select the save form is the one with the id # form-save we capture its submit event, then we save the value of the input in the name variable, following the codes provided by jQuery we make a request of type POST that receives certain parameters, the first is the url where we are going to send the data, the second is the data that we are going to send and the third is a function that it will be executed if it receives the correct parameter ... What will it do? first add the response data in the add it where we are going to show the message using the .text () method and using the .show () method we show the message, then we hide it using the .hide () method
Primero seleccionamos el formulario de guardar es el que tienen el id #form-save capturamos su evento submit, luego cuardamos el valor del input el la variable name, siguendonos de los codigos que nos proporciona jQuery hacemos una peticion de tipo POST que recive ciertos parametros, el primero el la url a donde vamos a enviar los datos el segundo el el dato que vamos a enviar y el tercero es un function que se ejecutará si recive el parametro correcto... ¿Qué hará? primero agrega el dato de respuesta en el lo agrega donde vamos a mostrar el mensaje utilizando el metodo .text() y utilizando el metodo .show() mostramos el mesaje, luego lo ocultamos utlizando el metodo .hide()
Now we need to create the file save.php
Ahora nos hace falta crear el archivo save.php
include('db.php');
if (isset($_POST['name'])) {
$name = $_POST['name'];
$query = "INSERT INTO data VALUES(null, '$name')";
mysqli_query($connection, $query);
echo $name . ', add succesting';
}
First we include the connection to the database, then we validate that it receives aside by the POST method then we store the variable name the data received, now in the variable $ query goes the request that it will only include in the database, and to finish the cutamoe axis the mysqli_query () that receives two parameters the first is the connection that we receive from the file db.php and the request that we store in the variable $ query , and we end up showing a success message that we will show with the javascript code
Primero incluimos la conección a la base de datos, luego validamos que reciba de lado por el metodo POST luego almacenamos el la variable name el dato recibido, ahora en la variable $query va la peticion que solo incluirá en la base de datos, ya para ir finalizando eje cutamoe el mysqli_query() que recibe dos parametros el primero es la conección que recivimos desde el archivo db.php y la petición que almacenamos en la variable $query, y finalizamos mostrando un mensaje de exito que mostraremos con el codigo javascript
Now we go with the search engine, we will also do it in the app.js
Ahora vamos con el buscador, tambien lo haremos en el app.js
$('#input-search').keyup(function(event) {
let search = $('#input-search').val();
$.ajax({
url: 'php/search.php',
type: 'POST',
data: { search },
success: function(response){
let names = JSON.parse(response);
template = '';
names.forEach(name =>{
template += `<li>${name.id}.- ${name.name}</li>`
})
$('#msj-result').html(template)
$('#msj-result').show(800);
}
})
});
It is very simple, we select the input by its id, we capture its keyup event, we store the input value in a variable, and we execute the $ .ajax method that receives certain for meters the first is the url where we are going to make the request the type is the type of request that we are going to do in this case it is POST type and we end with the method success: which is a function that will be executed when it receives a successful response, what does this function do? stores the received data in the names variable and executes the parse method to convert the received data to an object, we create the template variable that will be empty and we apply the forEach method provided by jQuery with this method we go through the received data and store it in the template variable within the labels for a list, then using the .html () <method / b> we pass the template variable with the received data and show the selected element with the .show () method
Es muy sencillo seleccionamos el input por su id, capturamos su evento de keyup, almacenamos el una variable el valor del input, y ejecutamos el metodo $.ajax que recive ciertos para metros el primero es la url a donde vamos a hacer la petición el type es el tipo de petición que vamos a hacer en este caso es de tipo POST y finalizamos con el metodo success: que es una function que se ejecutará cuando reciva una respuesta exitosa, ¿Que hace esta function? almacena en la variable names el dato recibido y ejecuta el metodo parse para convertir a un objeto el dato recibido, creamos la variable template que estarpa vacía y aplicamos el metodo forEach que nos proporciona jQuery con este metodo recorremos el dato recibido y los almacenamos en la variable template dentro de las etiquetas para una lista, luego utilizando el metodo .html() le pasamos la variable template con los datos recibidos y mostramos el elemento seleccionado con el metodo .show()
Now we are going to create the file search.php to make the request to the database
Ahora vamos a crear el archivo search.php para hacer la petición a la base de datos
include('db.php');
$search = $_POST['search'];
if (!empty($search)) {
$query = "SELECT * FROM data WHERE name LIKE '$search%'";
$request = mysqli_query($connection, $query);
$json = array();
while ($row = mysqli_fetch_array($request)) {
$json[] = array(
'id' => $row['id'],
'name' => $row['name'],
);
}
$jsonstring = json_encode($json);
echo $jsonstring;
}
This file is very simple, first the database is included, then the received data is stored in the variable $ search and validates if it has a value, executes the request that only selects all the data in the table < b> data where the name matches whatever is in the variable '$ search%' the percent sign at the end is to search for all matches ... then the $ json variable is created, which is an array and the while loop is opened, which is going to be filled with the data received in the request, then creates the $ jsonstring variable that stores the json_encode result of the $ json variable and displays the $ jsonstring
este archivo es muy sencillo, primero se incluye la base de datos, luego se almacena el la variable $search el dato recivido y valida si tiene valor ejecuta la peticion que solo selecciona todos los datos de la tabla data donde el name conincidoa con lo que esté en la variable '$search%' el signo de porcentaje al final es para que busque todas las conincidencias... luego se crea la variable $json que es un array y se apertura el ciclo while que se va a rellenar con los datos que reciba en la peticion, luego se crea la variable $jsonstring que almacena el resultado de json_encode de la variable $json y muestra el $jsonstring
https://images.hive.blog/DQmWrmsrk7rqVXVSUzTSRNG4D8PBzNr92eLvyqYAuuW6nMr/save.png
https://images.hive.blog/DQmYHYZFxrep2vUVzhcNyH8hSwxL1epcur9YYgcG3zfj6y4/successting.png
https://images.hive.blog/DQmWARCQ2SJoLbvspre3RdbetkJYFv8Ph6VDnB2eNFU3Urk/search.png
https://images.hive.blog/DQmQxcBcGtvqSznZseQDSppGXqZuvM2a1fSuxJpe1NnUiaJ/see%20search.png

You can see the code on my Github:
Puedes ver el código en mi Github:
You can follow me on instagram:
Puedes seguirme en instagram:
code
Instagram
All the images were developed in the GIMP application in its Windows 7 distribution
Todas las imagenes fueron desarrolladas en la aplicación GIMP en su distribución de Windows 7
And well friends, I hope you have understood the tutorial, any questions do not hesitate to leave it in the comments ... I hope it has been to your liking, thank you for reading my content ... my name is José Sojo and we will read next time
Y bueno amigos espeto hayan entendido el tutorial, cualquier duda no dudes en dejarla en los comentarios... espero haya sido de su agrados gracias por leer mi contenido... mi nombre es José Sojo y nos leemos en la proxima