Cover Image: photo of my property: my Multi-monitors setup
 La versione in italiano è subito dopo la versione in inglese - The Italian version is immediately after the English version

My new multi-monitor setup and the usefulness of Fancy Zones

After more than 12 years of use, I decided to send my (dinosaur) Desktop Pc on vacation to build a new Pc much faster and also quieter.
My new Desktop Pc has this configuration:
CPU: Intel i5-14500
RAM: 32 GB DDR5 6000Mhz
VIDEO: NVIDIA GeForce RTX 4060 OC 8GB
HD: 2TB M.2 SSD 7000MB/s
PSU: Be Quiet! Pure Power 12 M 850W 80 Plus Gold
Case: Be Quiet! Pure Base 500 FX
I shared all the steps of building my new desktop pc on Hive starting from component selection to final assembly.
At the next links below you can read my four previous posts about the building of my new Desktop Pc.
 | c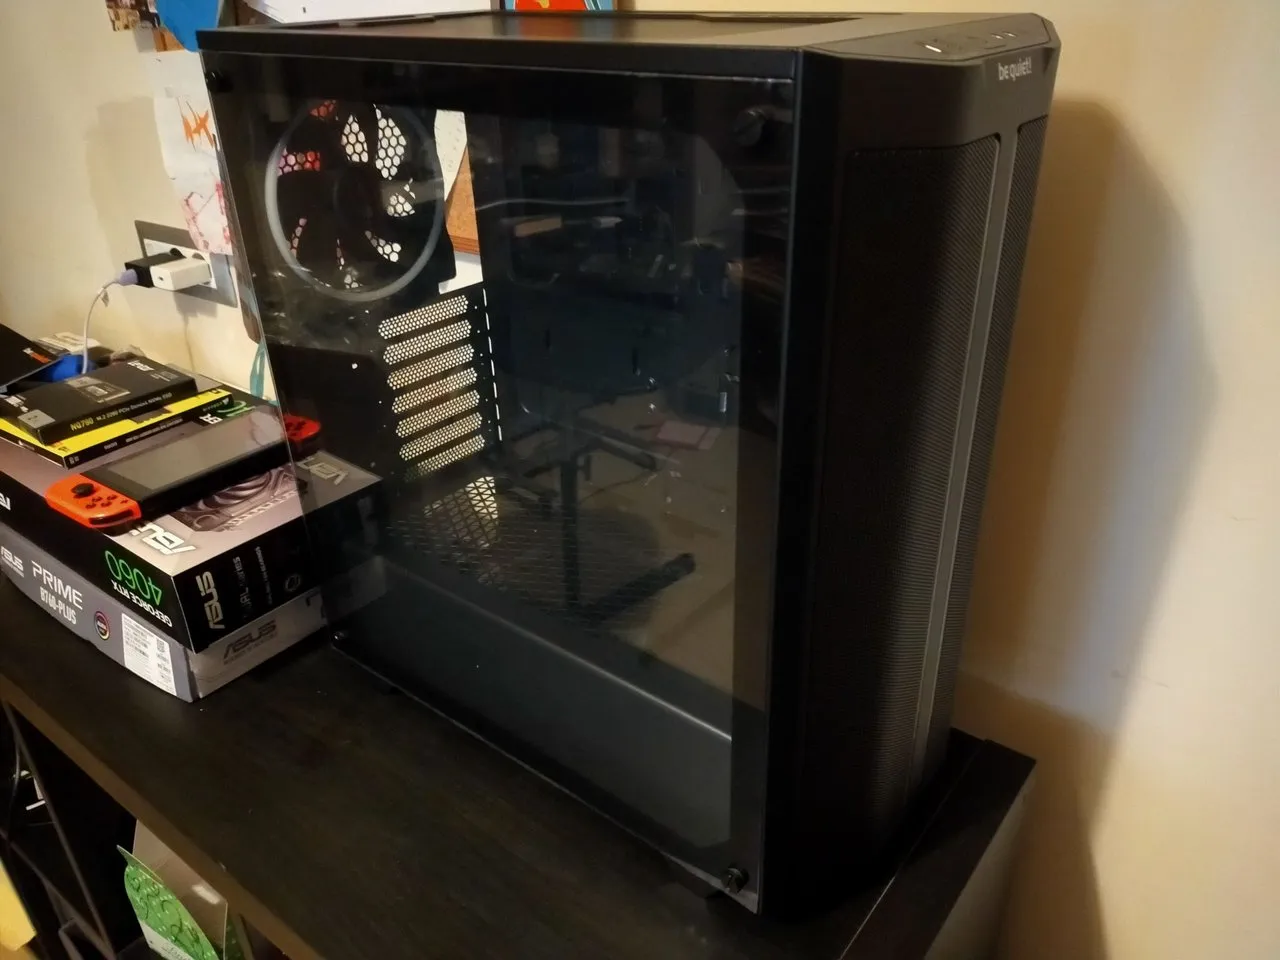 |  | 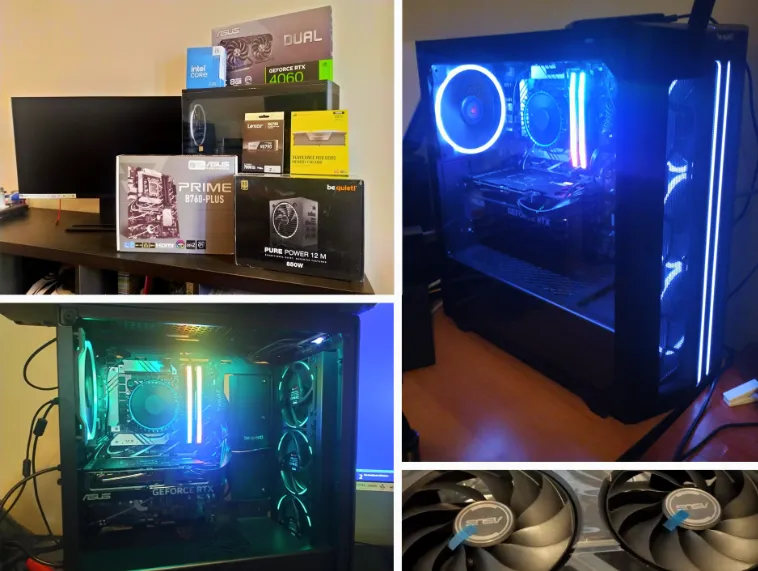 |
|---|---|---|---|
| STEP 1: Choosing components to purchase | STEP 2: Components Purchased! | STEP 3: CPU Installation on the Motherboard | STEP 4: Assembly Completed! |
After assembling my new Desktop Pc, I decided to change also my multi-monitor setup.
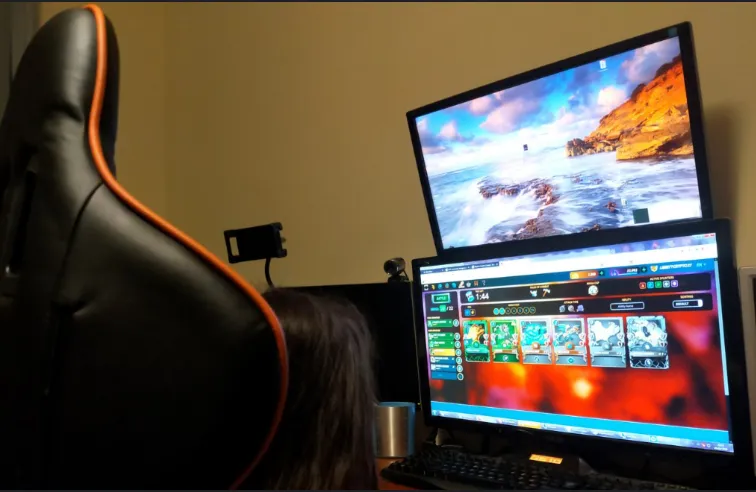
In fact, before I was using 2 monitors: 1 24-inch monitor and 1 27-inch monitor placed on top of each other.

The video card in my old desktop pc allowed me to use a maximum of two monitors.
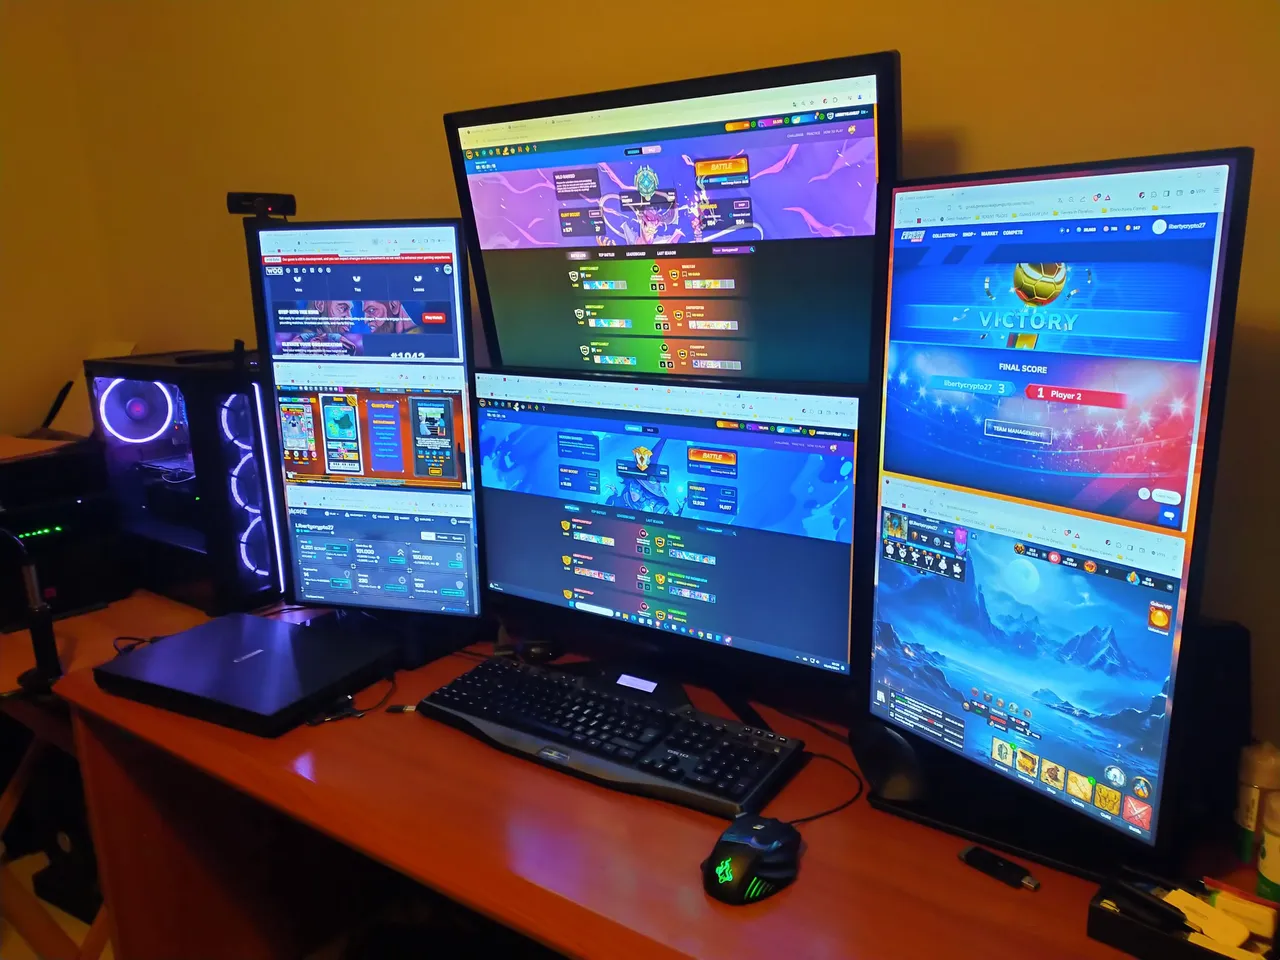
Now my new desktop pc has a video card that has 3 display port and 1 HDMI port and I decided to enhance multitasking from a visual point of view as well by limiting even more the time spent in switching from one window to another by adding two monitors to my previous dual monitors setup.
I moved my old 27-inch monitor up instead of the 24-inch monitor and attached it to a wall mount.
I purchased 3 more monitors.
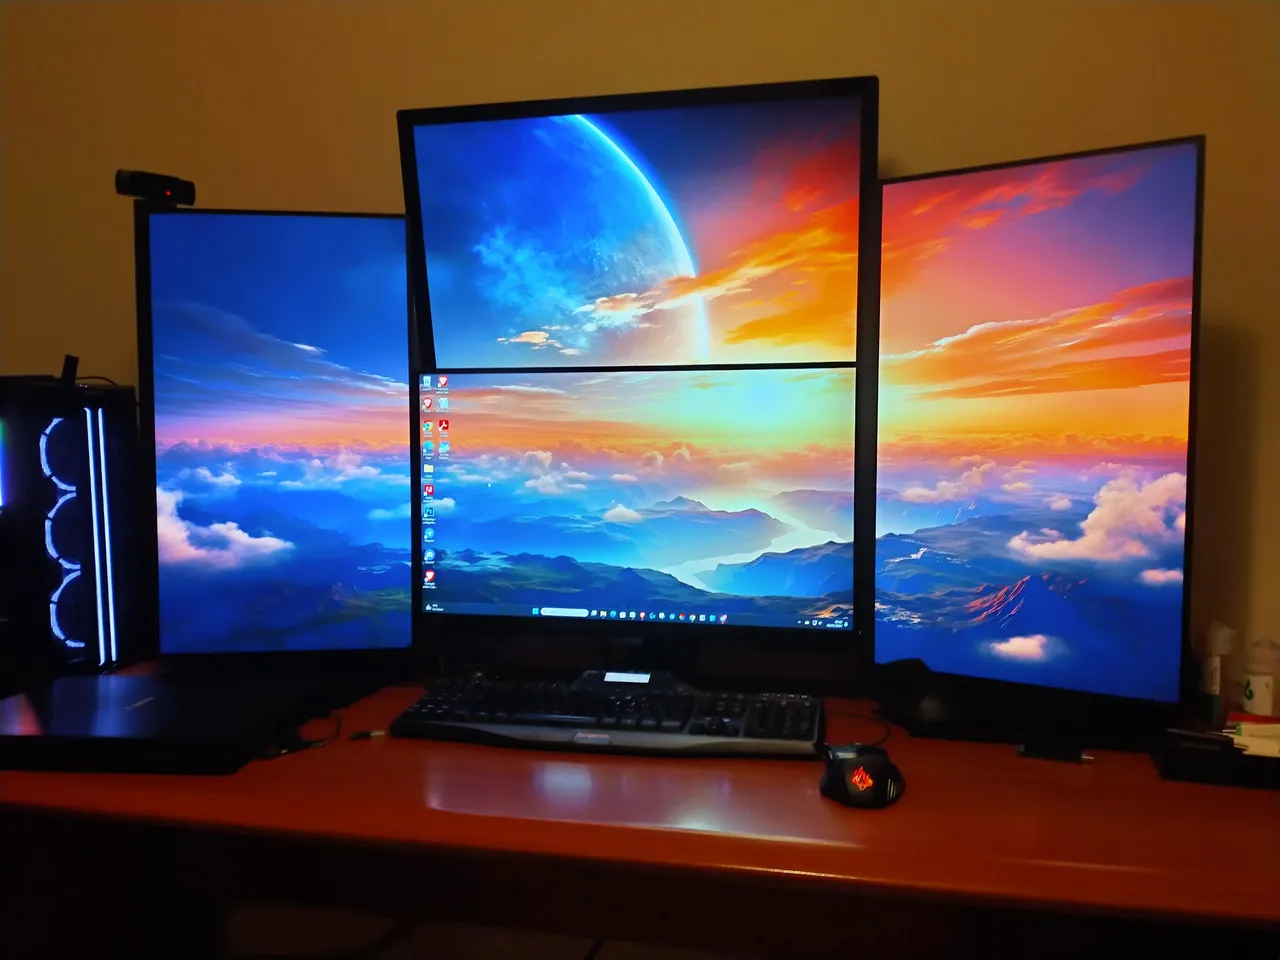
In the center I placed the 27-inch Samsung Odissey G4 monitor that has 240Hz and 1ms response time.
In the center I placed the 27-inch Samsung Odissey G4 monitor that has 240Hz and 1ms response time.
On the two sides I placed two 27-inch MSI monitors (100Hz and 1ms response time) vertically.
I chose IPS as the panel type for my 3 new monitors preferring a wide viewing angle and better color reproduction than VA and TA panels.
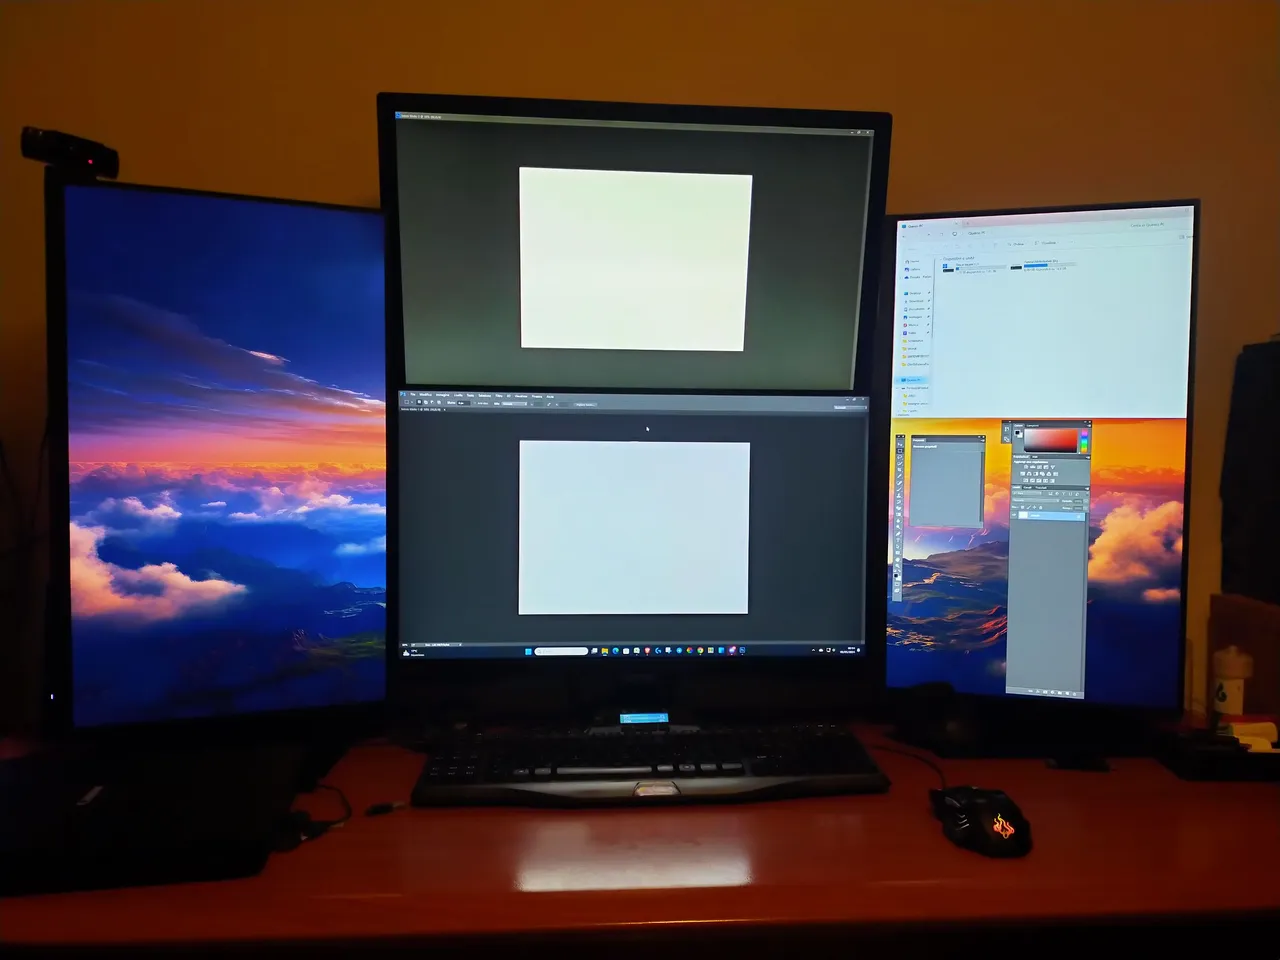
I have not yet calibrated and optimized the 4 monitors to have similar brightness and will do so soon but for now I am enjoying the ability to organize my activities on the computer with still more freedom of space and movement than before.
For example now when I use Photoshop I can work on two/three images/photos at the same time and I can arrange the tools on a monitor vertically.
Also my playful activity on the Hive games will be faster and easier with four monitors.
In fact, I am an active player on almost all Hive-based games and have already tried some setups to have many games always viewable without having to switch from one window to another.
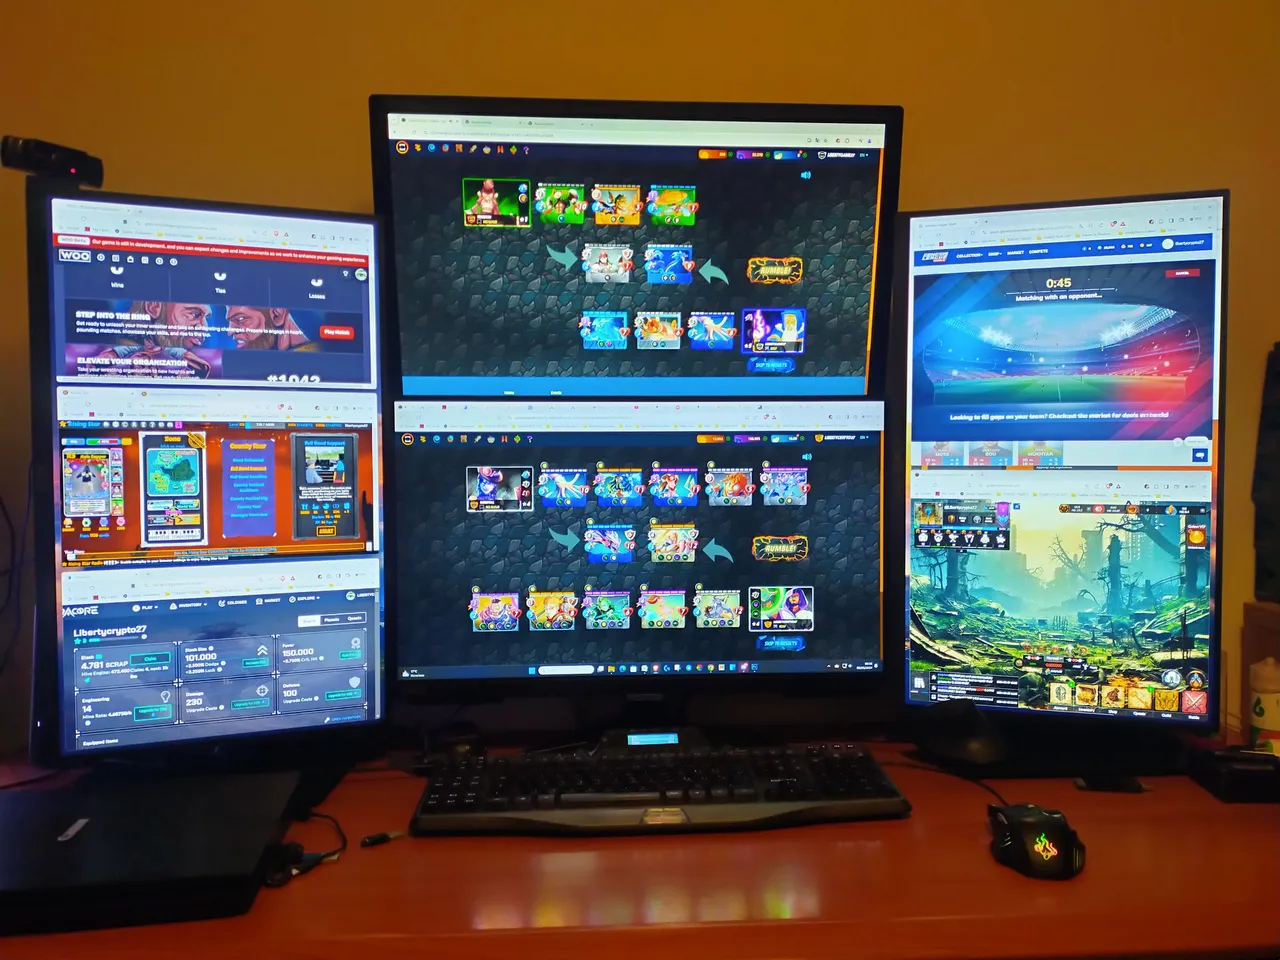
In one of my test setup I opened 2 windows of Splinterlands which is my favorite blockchain game plus 5 other Hive games.
As support applications for multitasking, I tried and found very useful the Fancy Zones functionality of the Microsoft PowerToys application.
PowerToys is a set of Windows customization utilities that I downloaded from this link: Installation with Windows executable file from GitHub
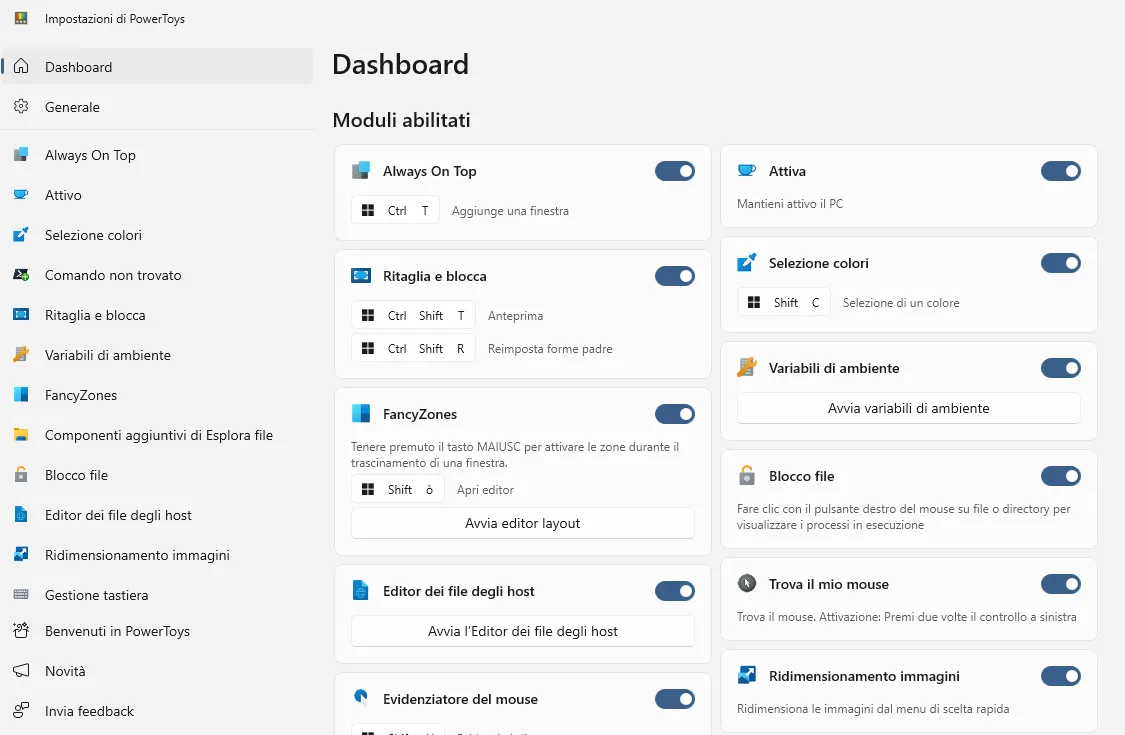
In the next screenshot you can see the Dashboard of PowerToys.
The feature that I found very useful for people like me who use more than one monitor is FancyZones.
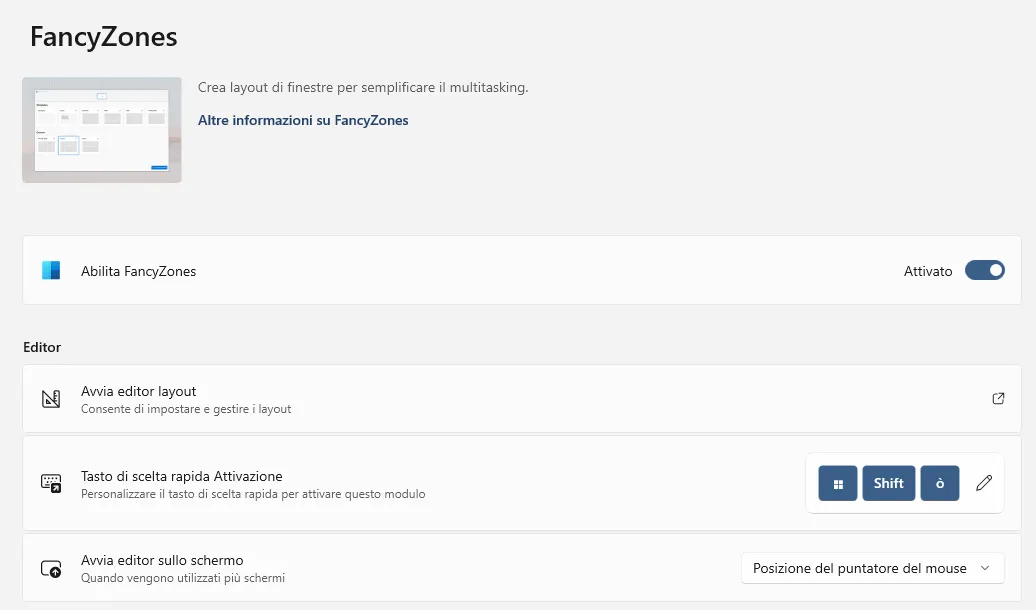
Thanks to the FancyZones editor, you can choose from ready-made layout templates or create a custom layout for each of the monitors you use.
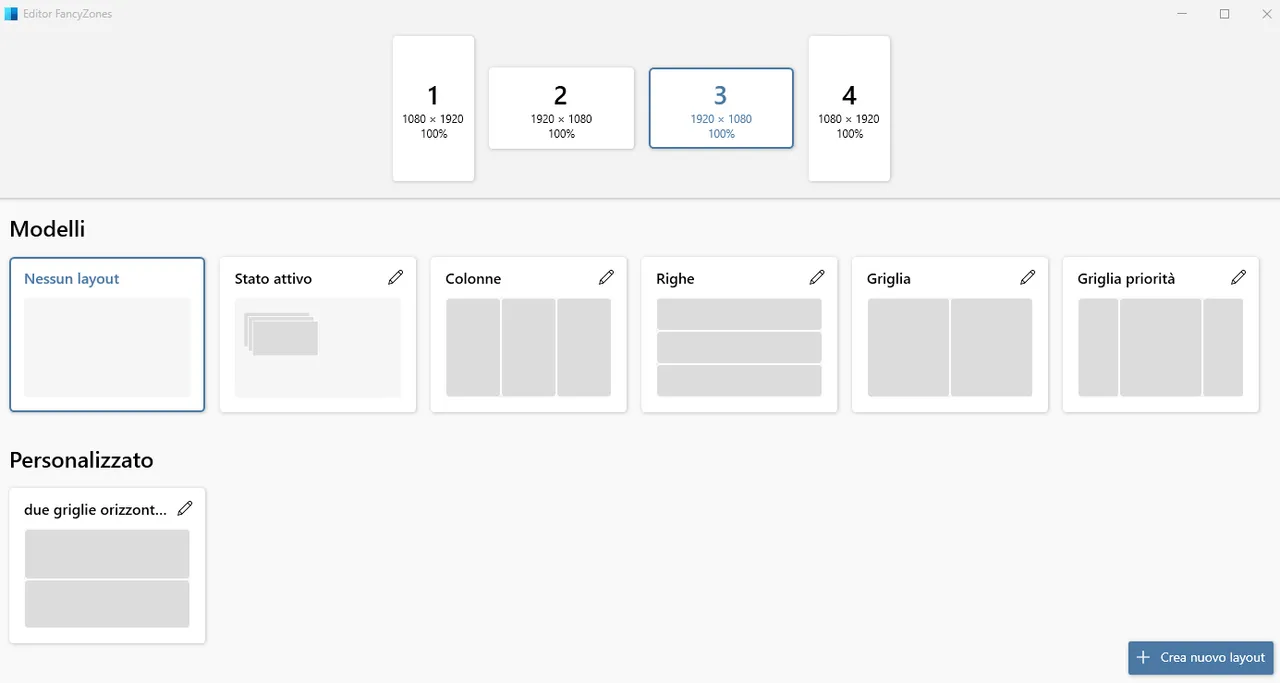
For example, I created a custom layout for my fourth monitor with two horizontal grids.
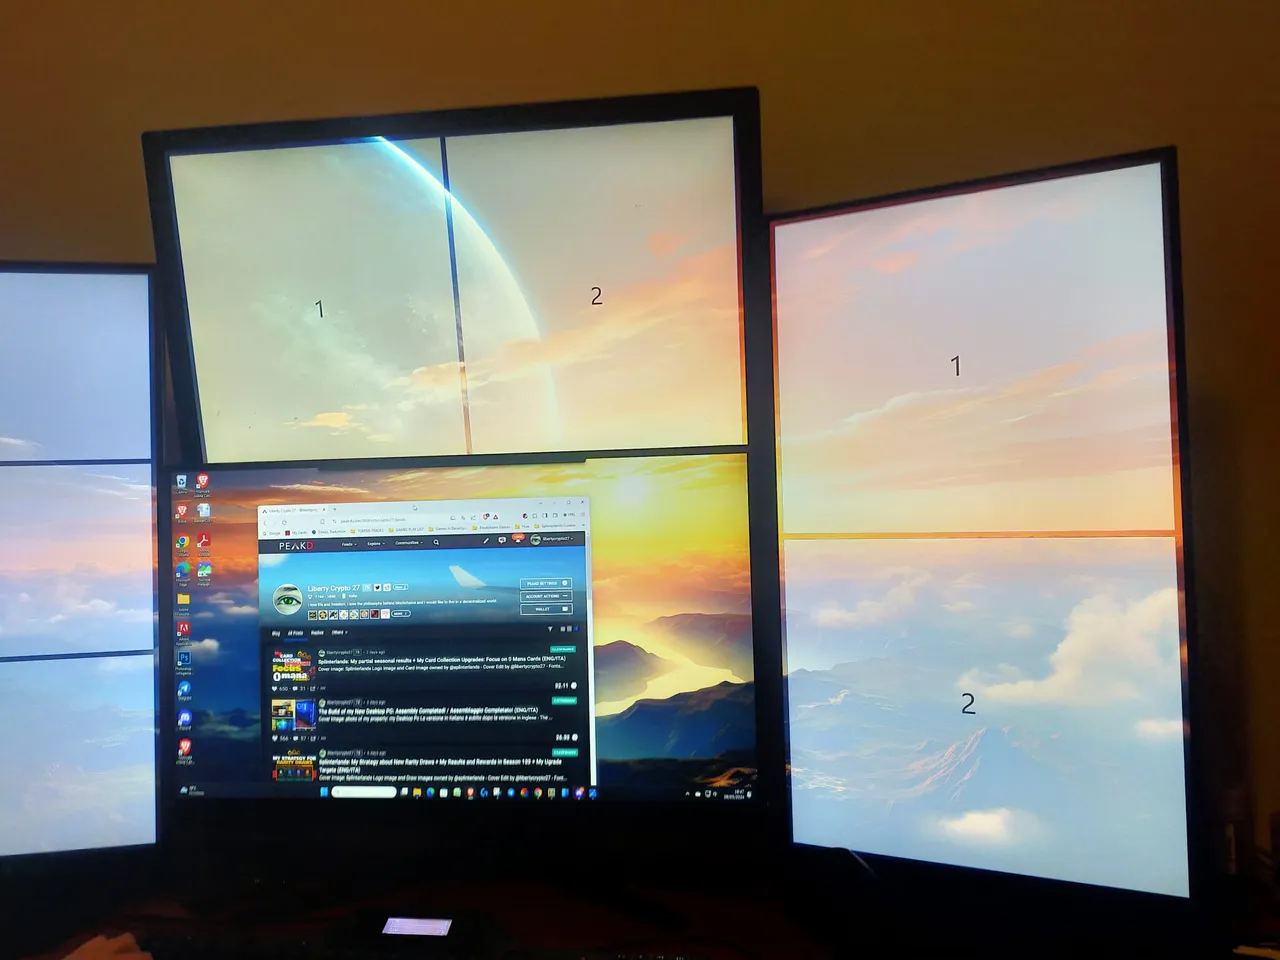
Placing a window in one of the layout grids is very simple because you simply hold down the SHIFT key and move the window to one of the grids indicated by the numbers as you can see from the following picture.

Il mio nuovo multi-monitor setup e l'utilità FancyZones
Dopo più di 12 anni di utilizzo ho deciso di mandare in vacanza il mio (dinosaur) Desktop Pc per costruire un nuovo Pc più veloce e anche più silenzioso.
Il mio nuovo Desktop Pc ha questa configurazione:
CPU: Intel i5-14500
RAM: 32 GB DDR5 6000Mhz
VIDEO: NVIDIA GeForce RTX 4060 OC 8GB
HD: 2TB M.2 SSD 7000 MB/s
PSU: Be Quiet! Pure Power 12 M 850W 80 Plus Gold
Case: Be Quiet! Pure Base 500 FX
Ho condiviso tutti gli steps della costruzione del mio nuovo desktop pc su Hive partendo dalla scelta dei componenti fino all'assemblaggio finale.
Ai link seguenti puoi leggere i miei quattro precedenti post sulla costruzione del mio nuovo Desktop Pc.
| c | | |
|---|---|---|---|
| STEP 1: Choosing components to purchase | STEP 2: Components Purchased! | STEP 3: CPU Installation on the Motherboard | STEP 4: Assembly Completed! |
Dopo l'assemblaggio del mio nuovo Desktop Pc ho deciso di modificare anche il mio multi-monitor setup.
Infatti prima utilizzavo 2 monitor: 1 monitor 24 pollici e 1 monitor 27 pollici posizionati uno sopra l'altro.
La scheda video del mio vecchio desktop pc mi permetteva di utilizzare al massimo due monitor.
Adesso il mio nuovo desktop pc ha una scheda video che ha 3 display port e 1 HDMI port e ho deciso di potenziare il multitasking anche da un punto di vista visivo limitando ancora di più il tempo speso nel passare da una finestra ad un'altra aggiungendo due monitor al mio precedente dual monitors setup.
Ho spostato il mio vecchio monitor 27 pollici in alto al posto del monitor da 24 pollici e l'ho fissato ad un supporto a parete.
Ho acquistato altri 3 monitor.
Al centro ho posizionato il monitor 27 pollici Samsung Odissey G4 che ha 240Hz e 1ms di tempo di risposta.
Ai due lati ho posizionato in verticale due monitor da 27 pollici MSI da 100Hz e 1ms di tempo di risposta.
Ho scelto come tipologia di pannello per i miei 3 nuovi monitors l'IPS prediligendo un ampio angolo di visione e una riproduzione dei colori migliore rispetto ai pannelli VA e TA.
Non ho ancora calibrato e ottimizzato i 4 monitor per avere luminosità simili e lo farò presto ma per il momento mi godo la possibilità di organizzare le mie attività sul computer con ancora più libertà di spazio e movimento rispetto a prima.
Ad esempio adesso quando uso Photoshop posso lavorare su due/tre immagini/foto contemporaneamente e posso disporre gli strumenti su un monitor in verticale.
Anche la mia attività ludica sugli Hive games sarà più veloce e semplice con quattro monitor.
Infatti sono un giocatore attivo su quasi tutti i giochi basati su Hive e ho già provato alcuni setup per avere molti giochi sempre visualizzabili senza dover passare da una finestra ad un'altra.
Nel mio setup di test ho aperto 2 finestre di Splinterlands che è il mio gioco blockchain preferito più altri 5 Hive games.
Come supporto per il multitasking ho provato e ho trovato molto utile la funzionalità Fancy Zones dell'applicativo Microsoft PowerToys.
PowerToys è un set di utilità per la personalizzazione di Windows che ho scaricato da questo link: Installazione con il file eseguibile Windows da GitHub
Nello screenshot successivo puoi vedere la Dashboard di PowerToys.
La funzionalità che ho trovato molto utile per chi come me usa più di un monitor è FancyZones.
Grazie all'editor FancyZones è possibile scegliere tra modelli di layout già pronti oppure creare un layout personalizzato per ognuno dei monitor utilizzati.
Ad esempio io ho creato un layout personalizzato per il mio quarto monitor con due griglie orizzontali.
Posizionare una finestra in una delle griglie dei layout è molto semplice perchè è sufficiente tenere premuto il tasto SHIFT e spostare la finestra in una delle griglie indicate dai numeri come puoi vedere dalla foto seguente.