Hola buenas noches a todos las mamá y papá de esta linda comunidad, hotel quiero compartir con ustedes y tutorial de un lindo gorrito que le hice a mí sobrinito, es muy fácil de hacer y con materiales fáciles de conseguir que todos tenemos en nuestro hogar. A continuación le mostraré los materiales que utilice y el paso paso de la realización de mi gorrito.
Hello, good evening to all the moms and dads of this beautiful community, I want to share with you a tutorial for a cute hat that I made for my little nephew, it is very easy to do and with easy-to-find materials that we all have in our home. Next I will show you the materials that I use and the step of making my hat.
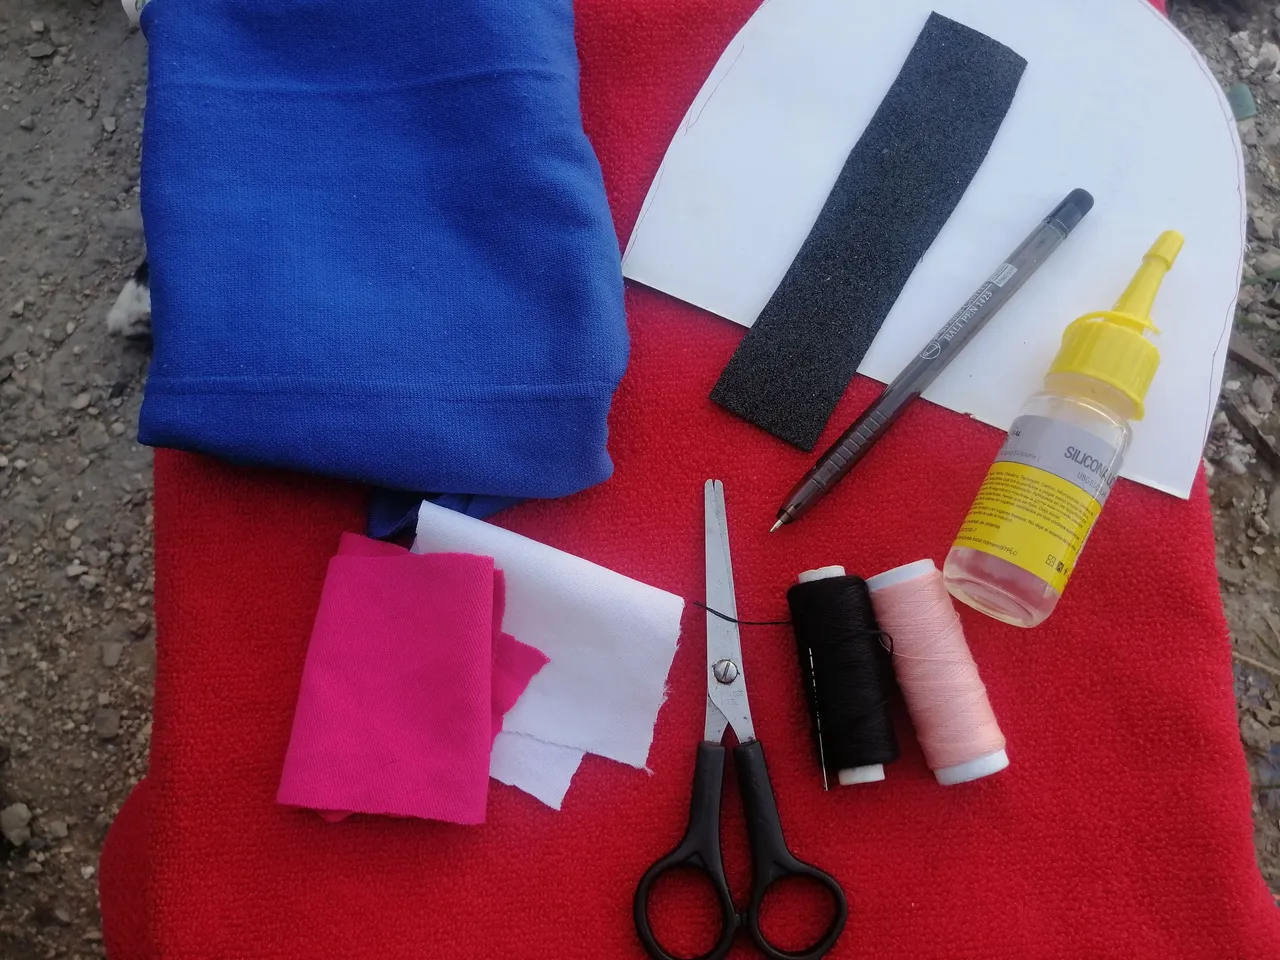
Materiales
- Tela
- Hilos y aguja
- Tijera
- Silicón
- Foami
- Lapicero
- Patrón de gorro
Materials
- Fabric
- threads and needle
- Scissors
- silicone
- foamy
- Pencil
- hat pattern
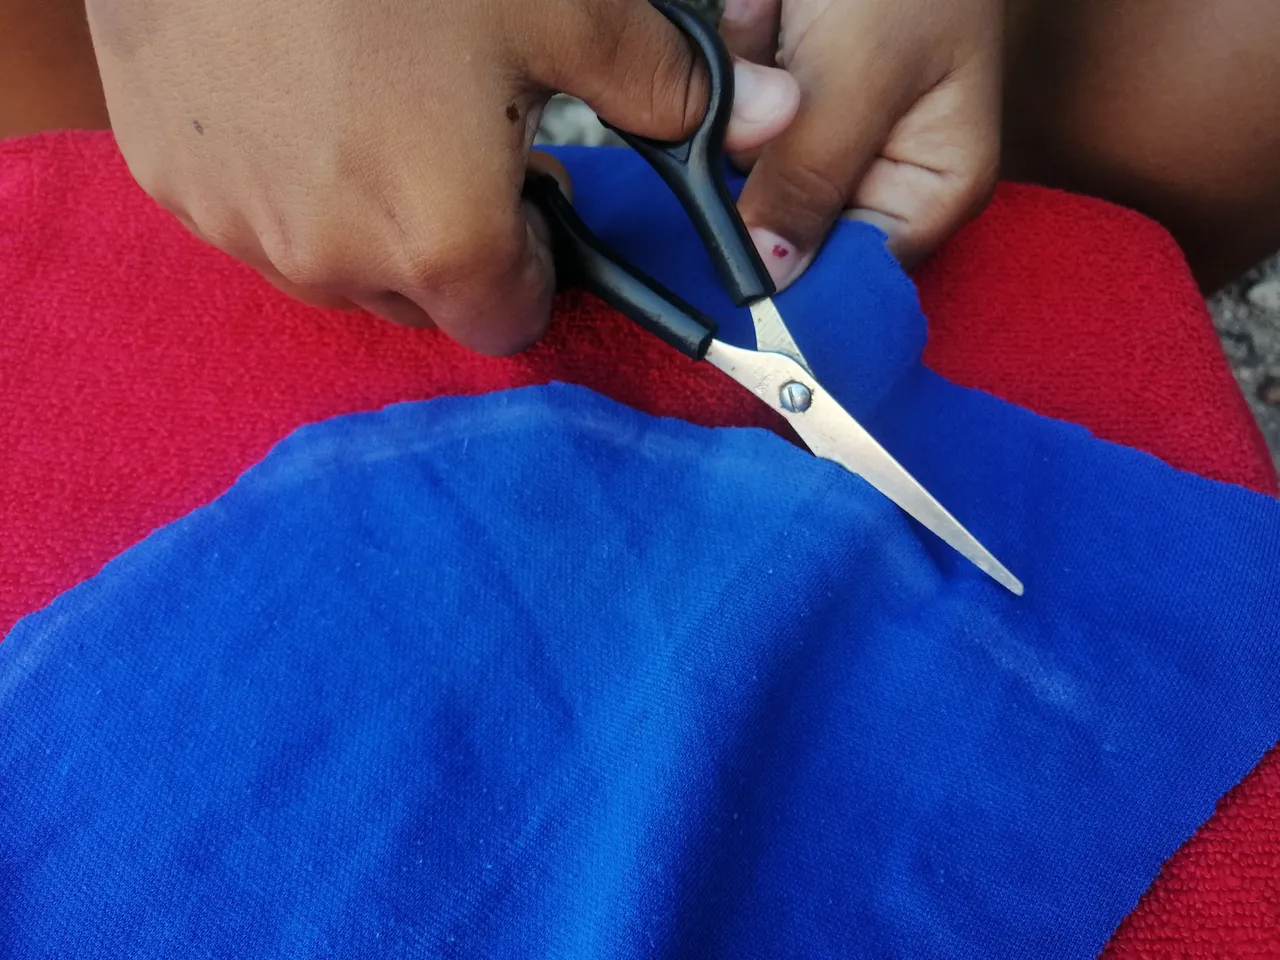
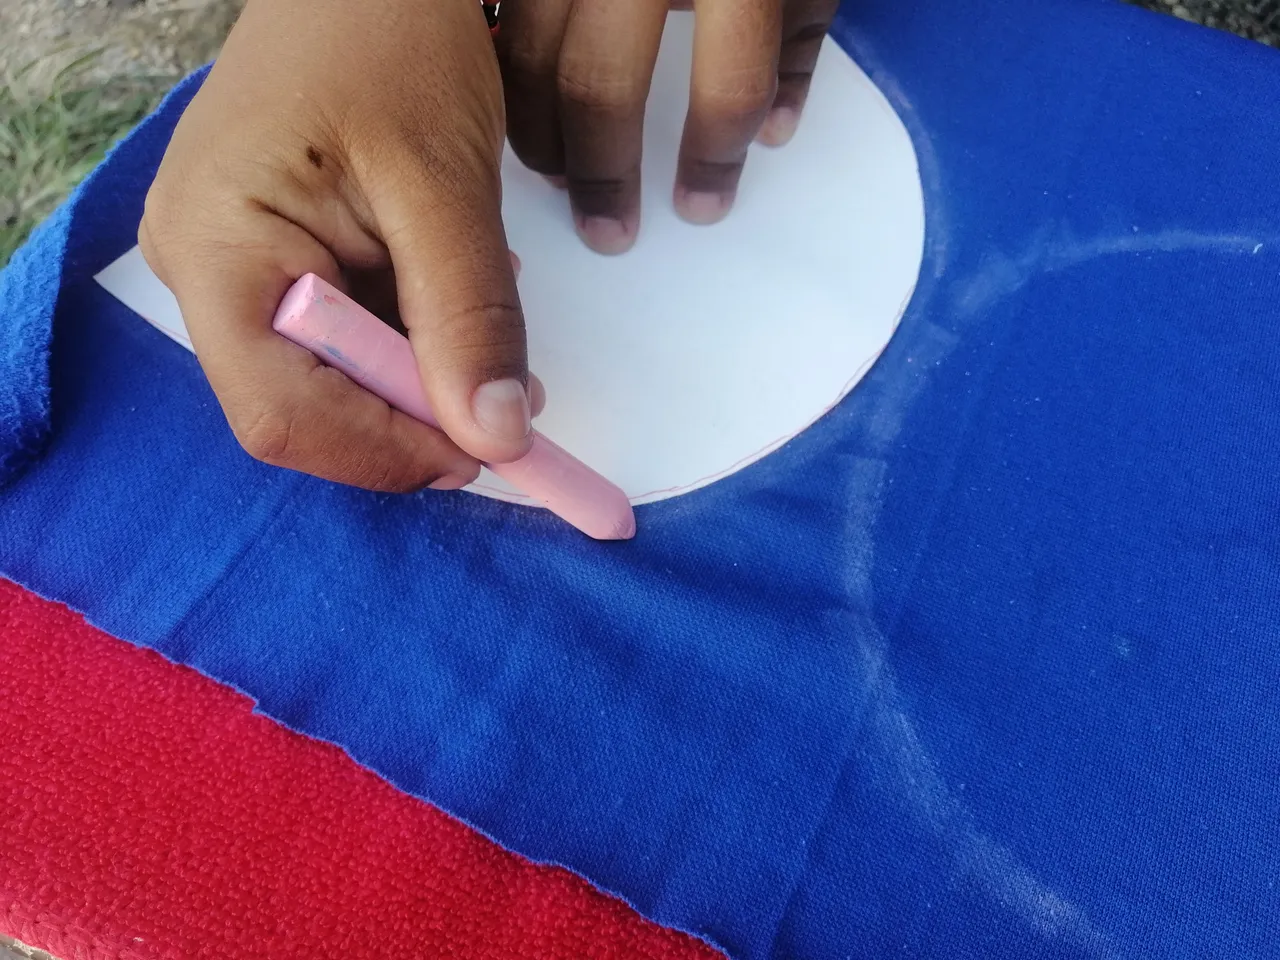
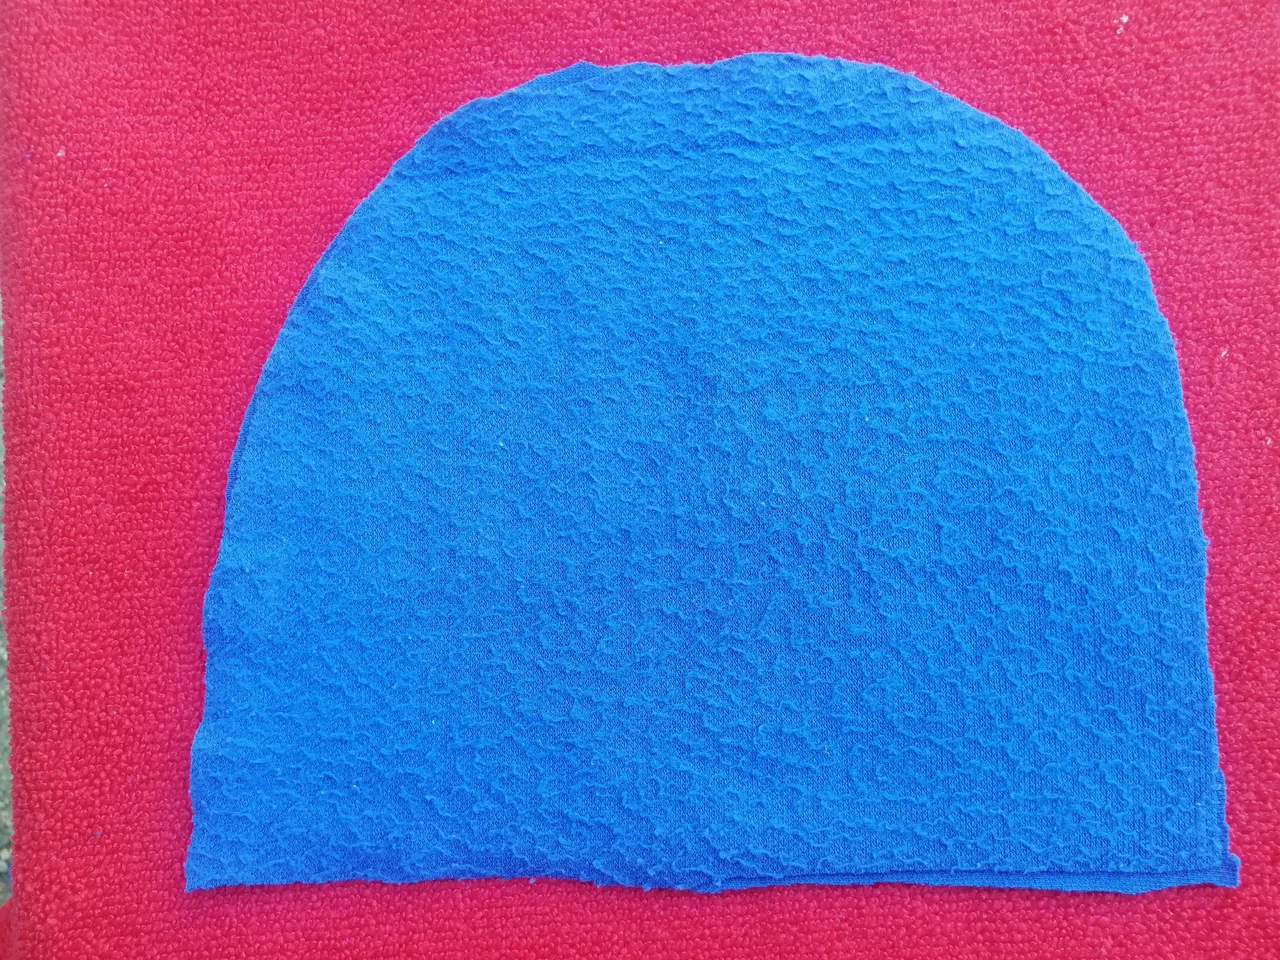
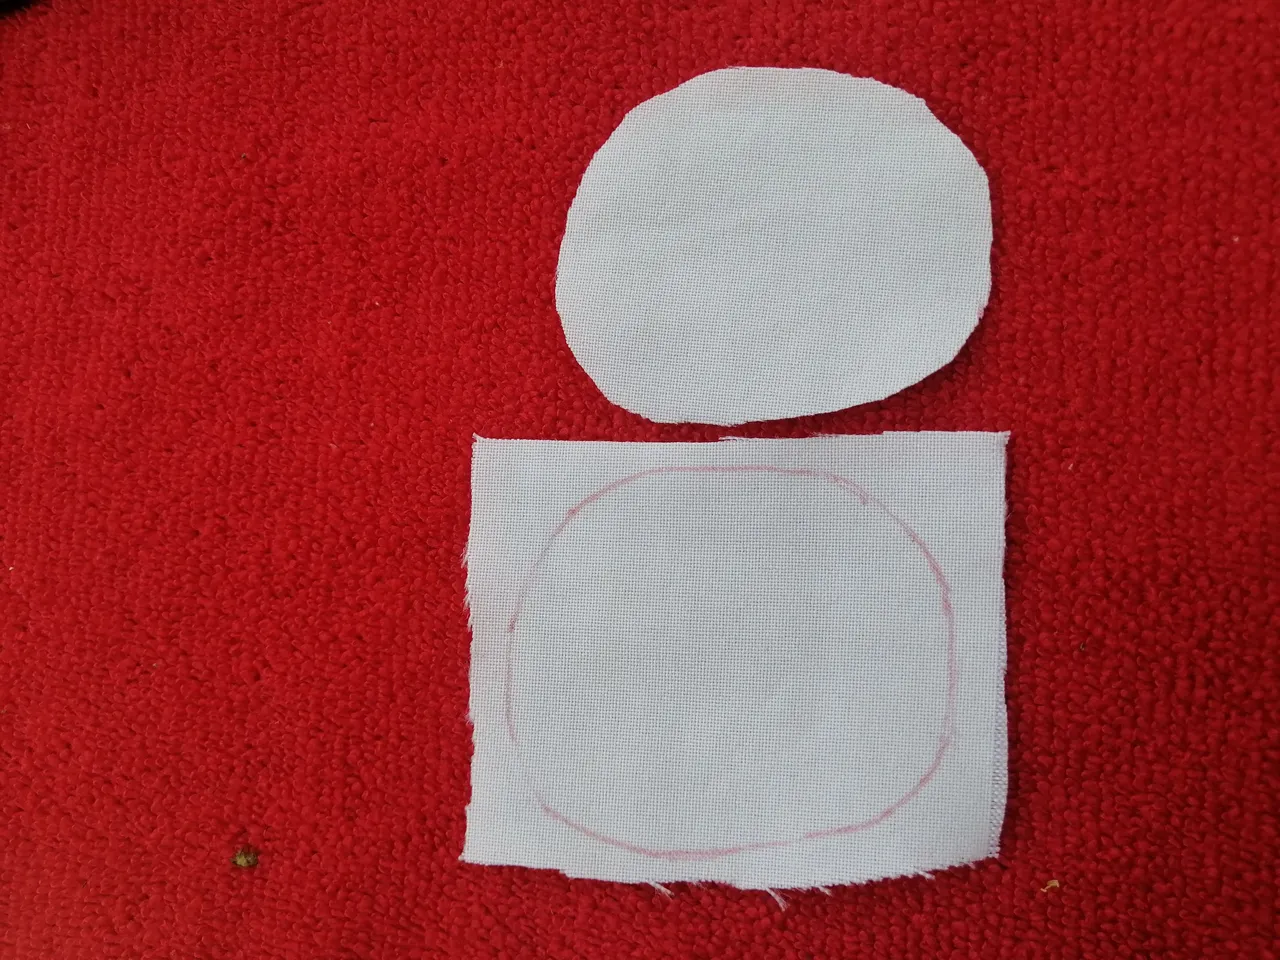
Paso 1
Tenemos nuestra tela del color de su preferencia, yo la elegí azul porque me quise inspirar en Stitch, marcamos con el patrón de gorrito en la tela para poder proceder a recortar con ayuda de la tijera.
Step 1
We have our fabric in the color of your choice, I chose blue because I wanted to be inspired by Stitch, we mark the hat pattern on the fabric so that we can proceed to cut it with the help of scissors.
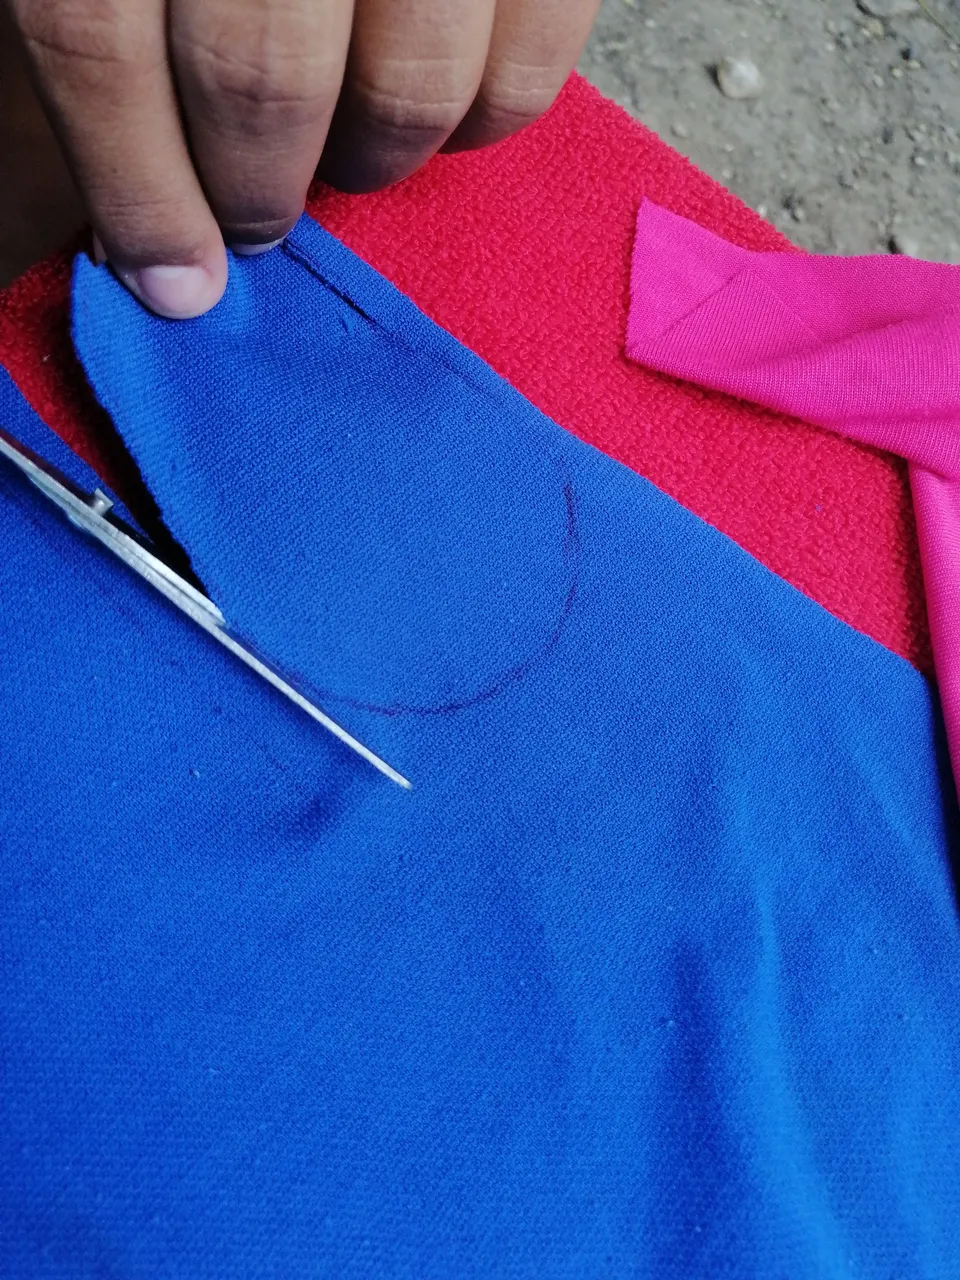
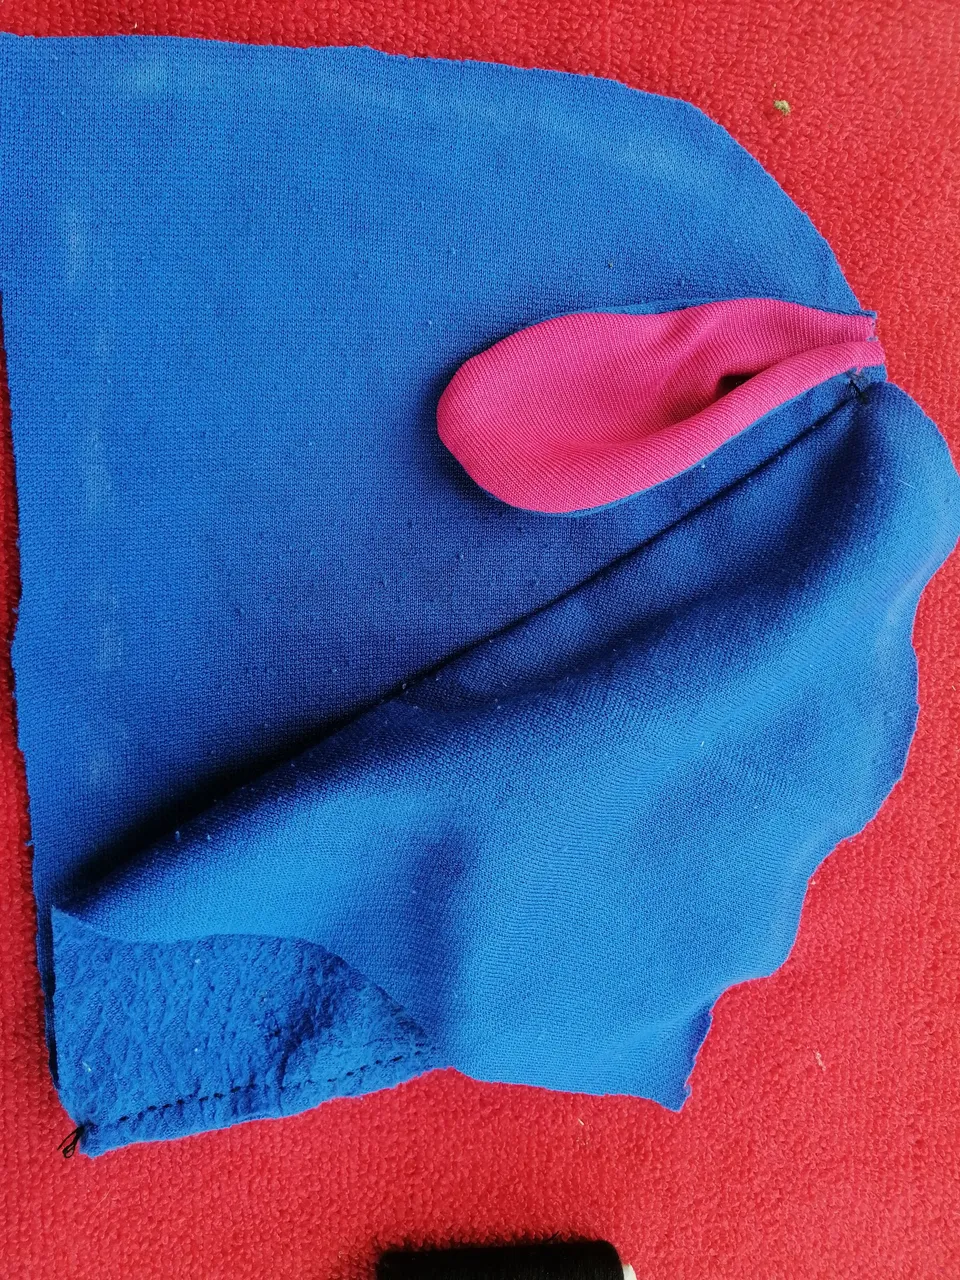
Paso 2
Ya que tengamos nuestro patrón del gorrito ya recortado, continuamos con las orejitas, con ayuda de un bolígrafo dibujamos unas orejitas para luego recortar con ayuda de la tijera, procedemos a cocer las orejitas de nuestro gorro.
Step 2
Once we have our hat pattern already cut out, we continue with the ears, with the help of a pen we draw some ears and then cut out with the help of scissors, we proceed to sew the ears of our hat.

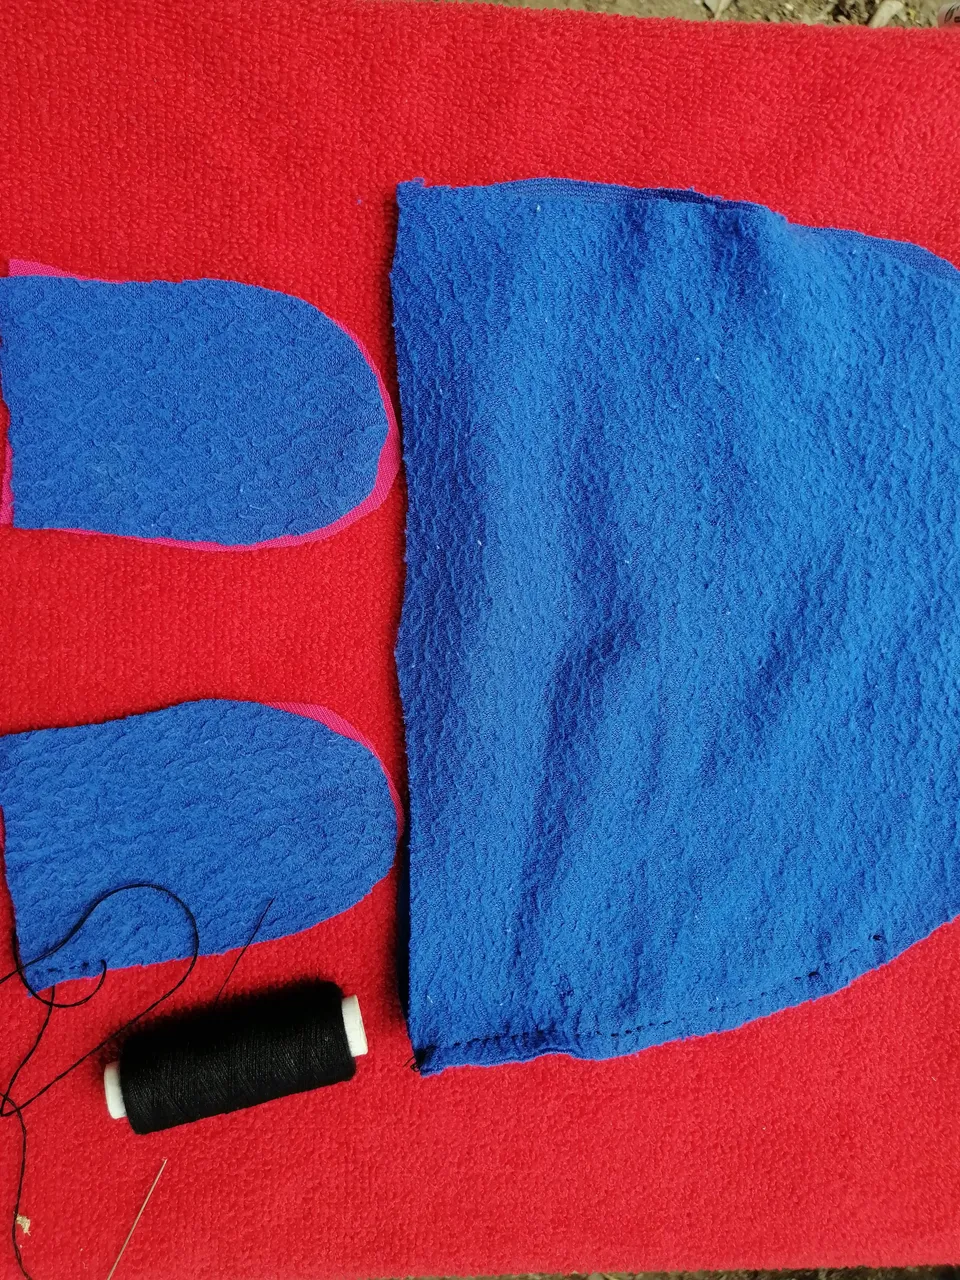
Paso 3
Procedemos a coser nuestro gorro para que vaya tomando forma, con ayuda del hilo y aguja, no olvidemos colocar las orejitas por dentro de la tela, para poder coserla.
Step 3
We proceed to sew our hat so that it takes shape, with the help of the thread and needle, do not forget to place the ears inside the fabric, to be able to sew it.
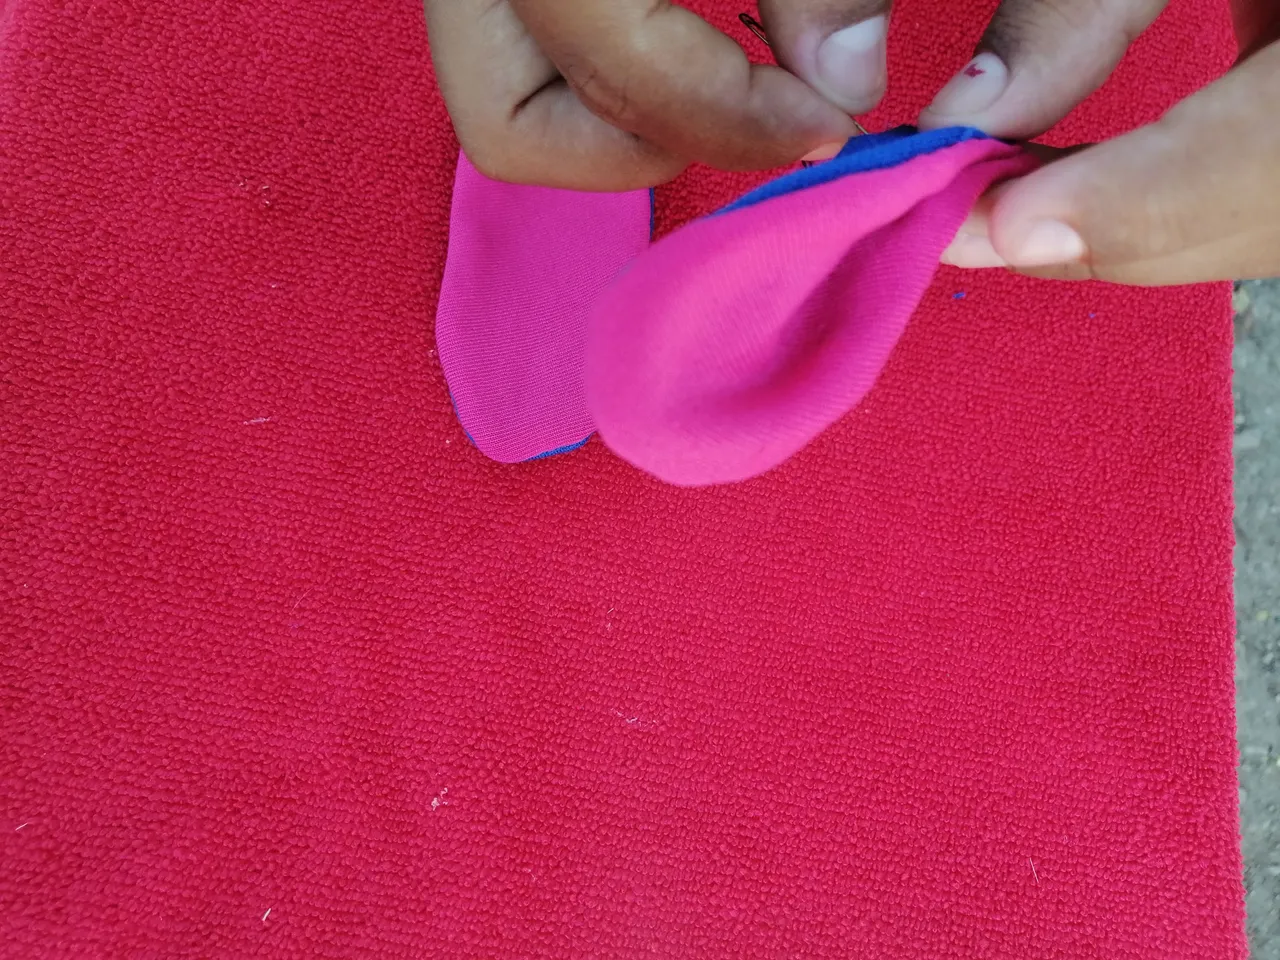
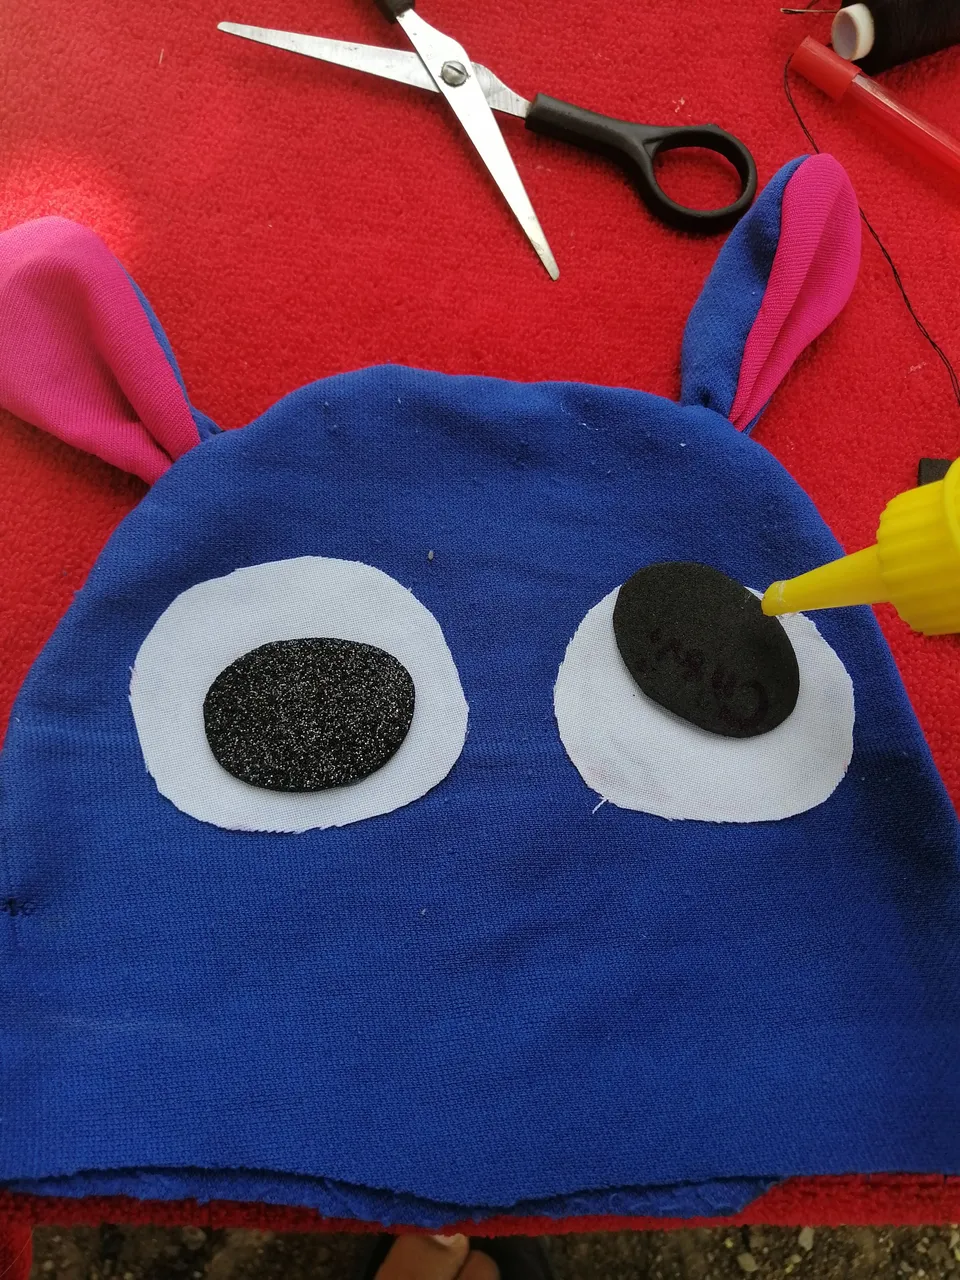
Paso 4
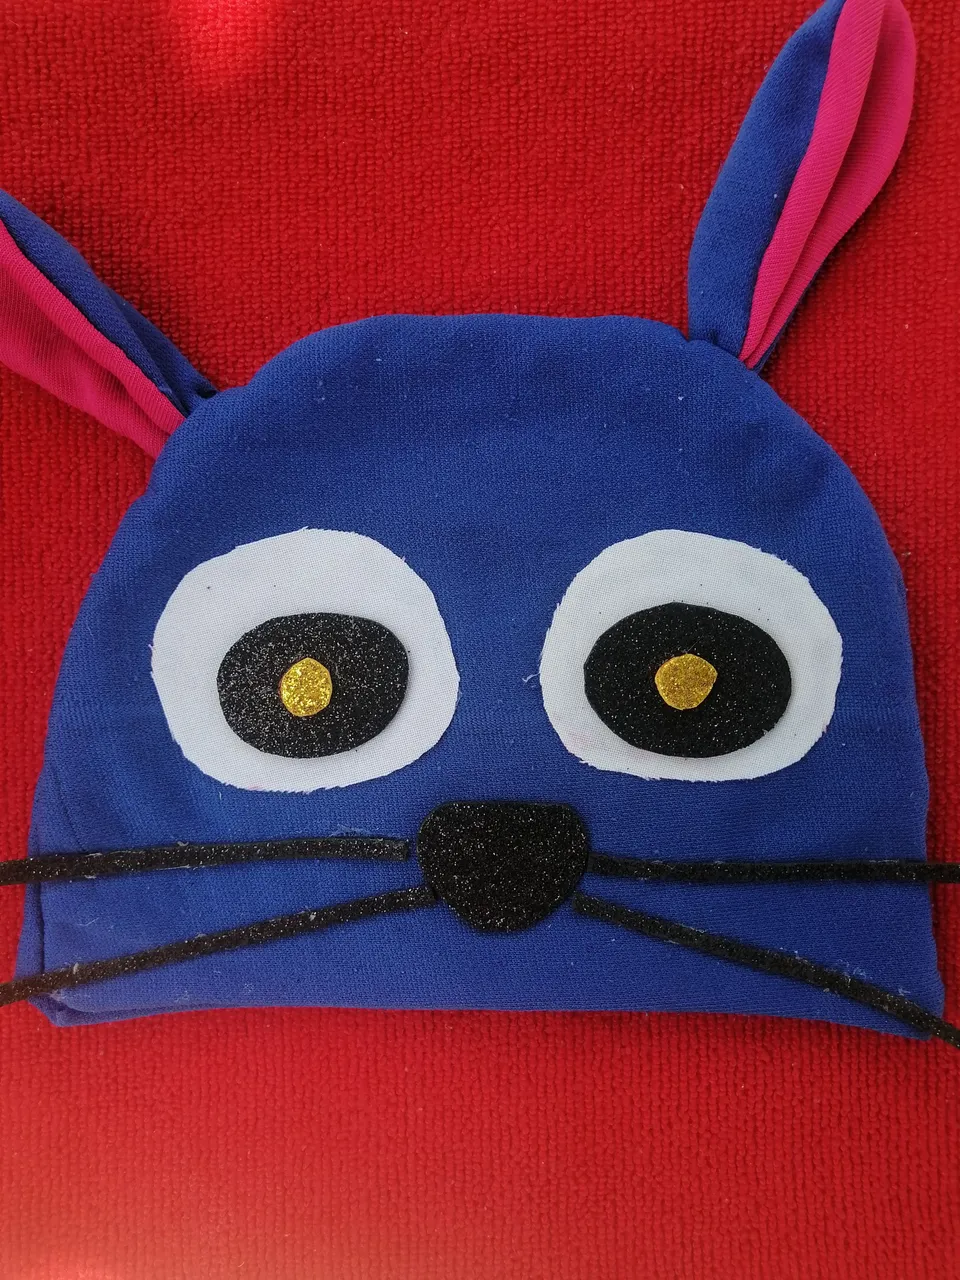
Ya casi vamos finalizando nuestro gorrito y de esta manera nos quedará, ya que este cosido procedemos a hacer los detalles del rostro de nuestro gatito inspirado en stich. Con la tela blanca le haremos los ojitos y con el Foami le haremos las pupilas de los ojos, los bigotes y la nariz, con ayuda del silicón lo pegaremos.
Step 4
We are almost finishing our hat and in this way it will fit us, since this stitching we proceed to make the details of the face of our kitten inspired by stich. With the white cloth we will make the eyes and with the Foami we will make the pupils of the eyes, the mustaches and the nose, with the help of silicone we will glue it.

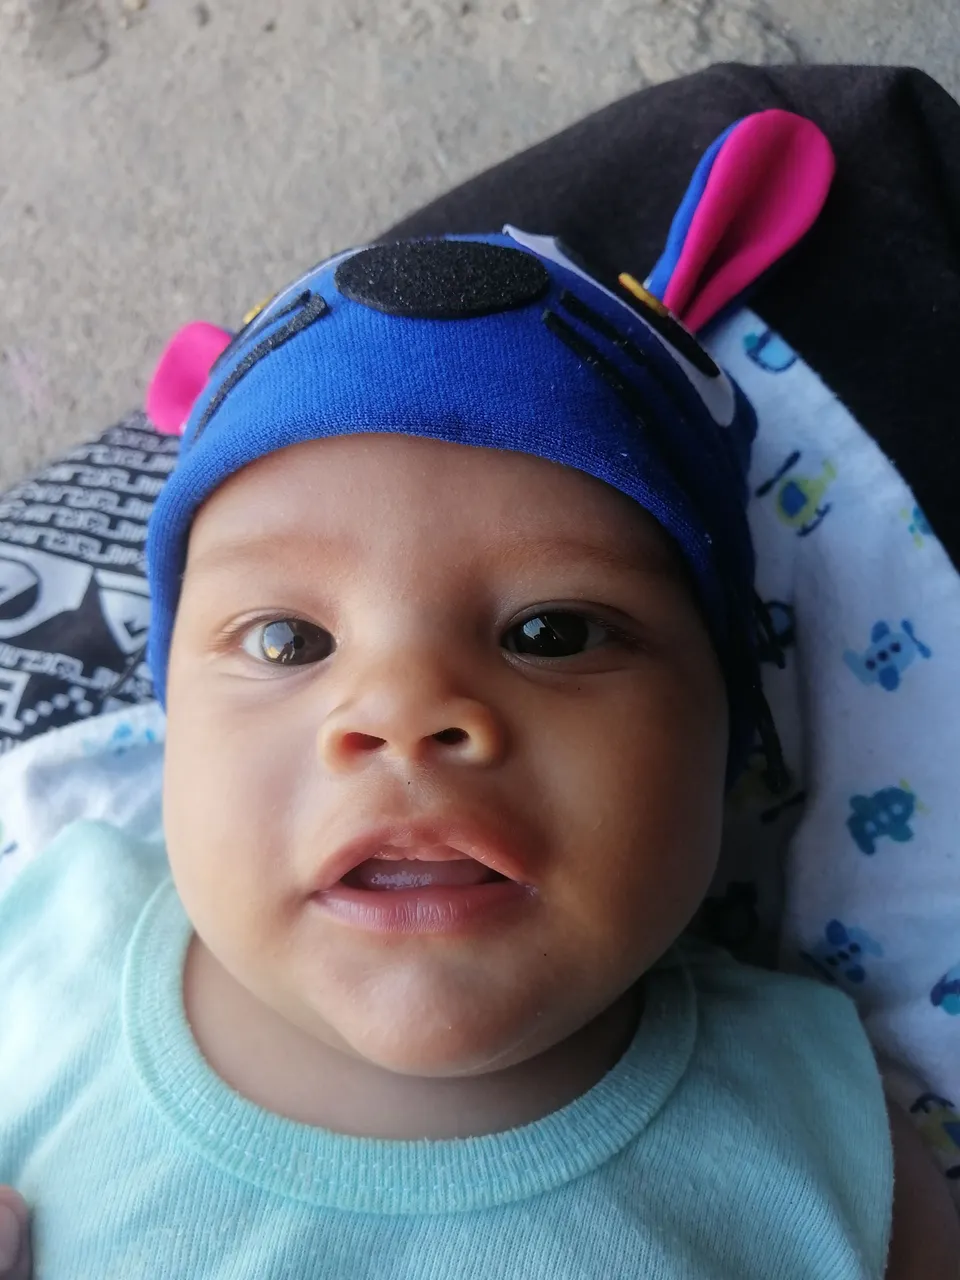
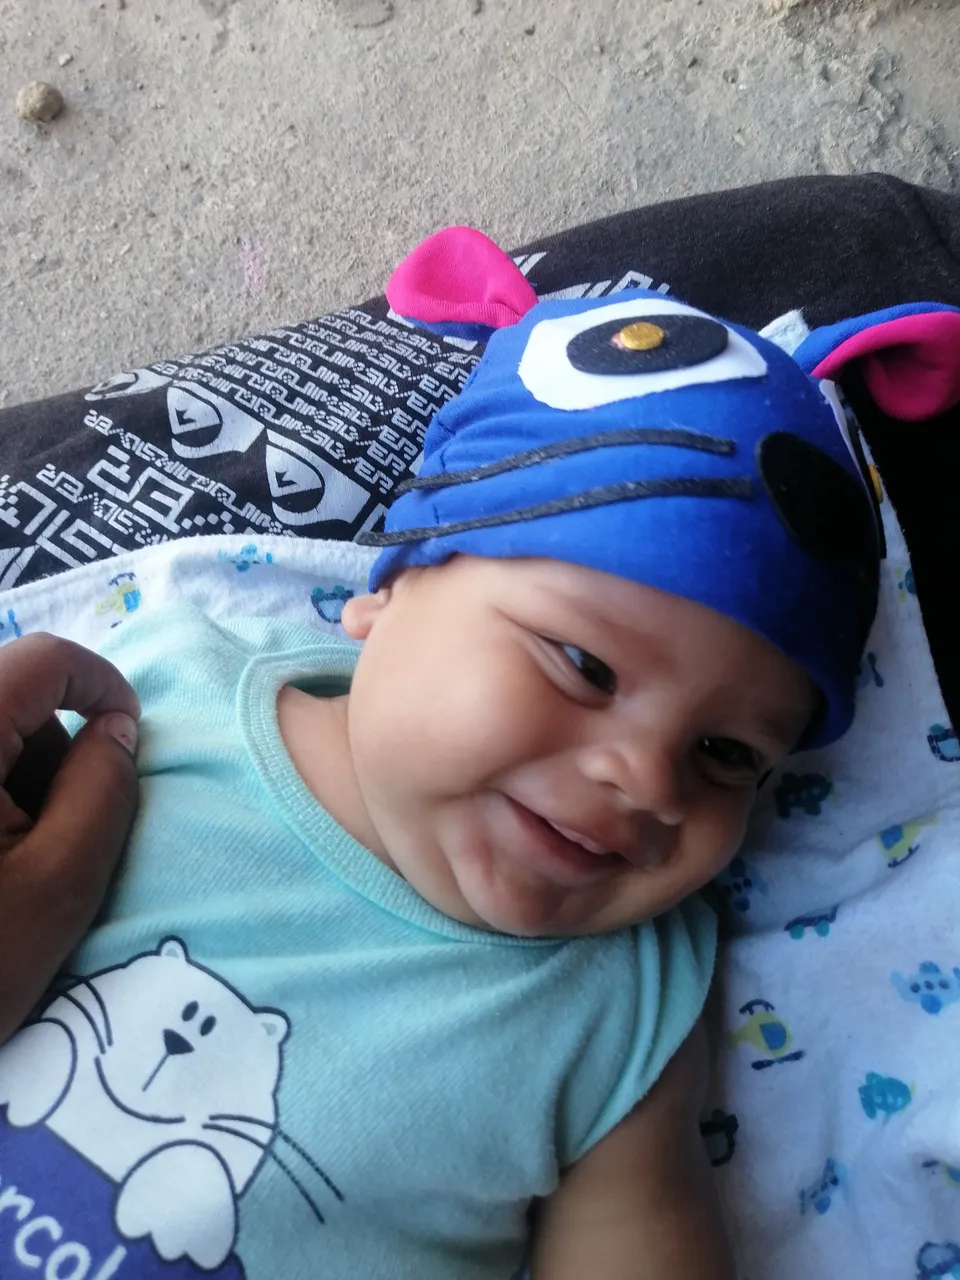
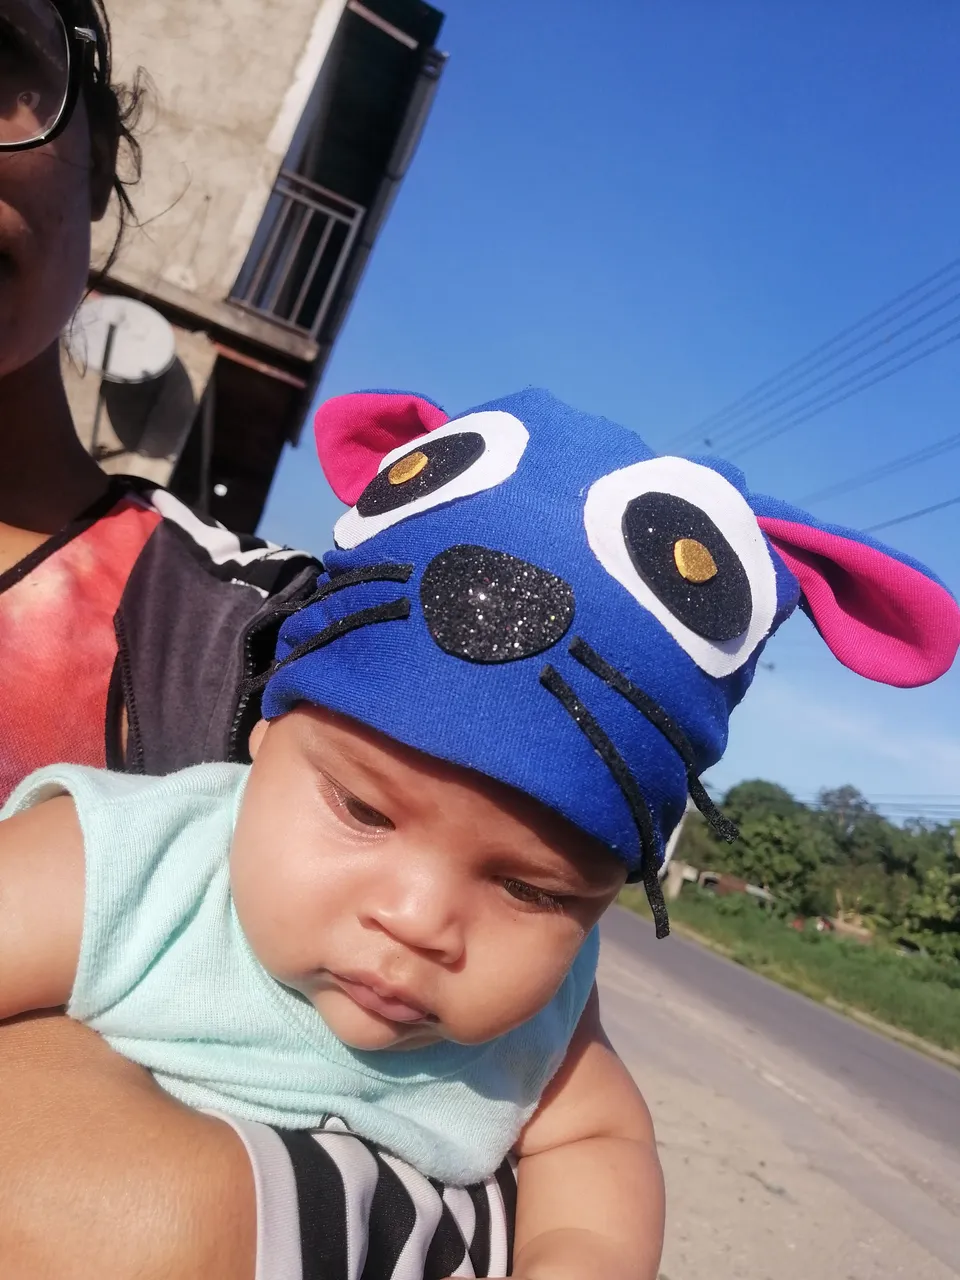
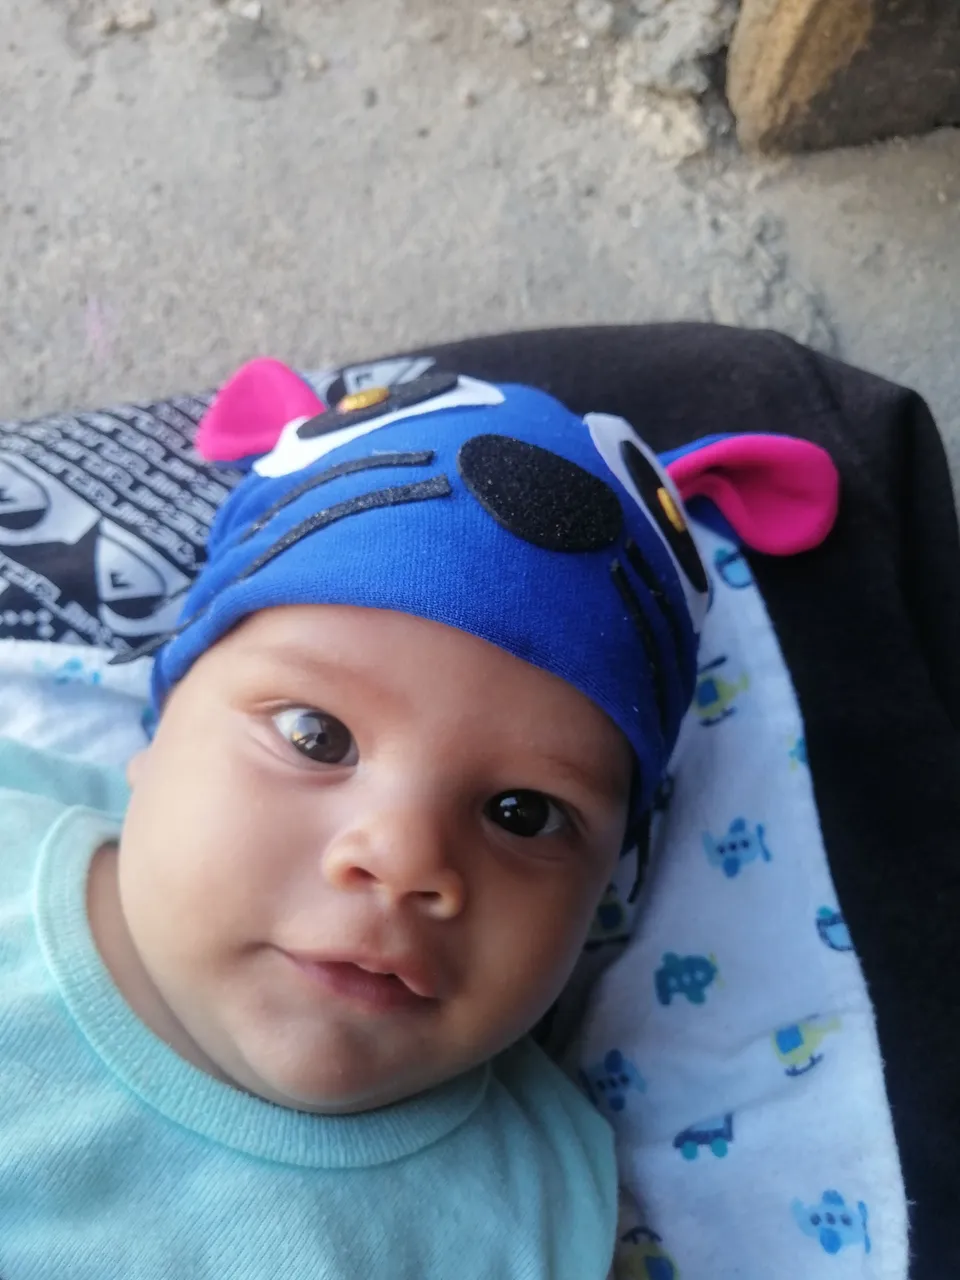
Y así quedó nuestro gorrito, este es el resultado final de mí creación de hoy, espero les haya gustado y puedan hacerlo a sus niños. Que pasen una linda noche, nos vemos en el próximo Post... Gracias por su atención 😊✨
Las fotos las tomé con mí teléfono Huawei Y9 Prime y los textos los traduje con el traductor DeepL.
And that's how our hat turned out, this is the final result of my creation today, I hope you liked it and you can do it to your children. Have a nice night, see you in the next Post... Thank you for your attention 😊✨
The photos were taken with my Huawei Y9 Prime phone and the texts were translated with the DeepL translator.