Hello dear community, I hope you had an excellent Christmas with your families and loved ones, today I want to share with you a new photo shoot and editing that I made to a dear friend @patricia17_5 a few days ago in my beautiful city of Los Teques. For the pictures I used a semi professional 48mp camera from a Spark 7t phone that I acquired thanks to the unexpected rise of the token and product of that opportunity I'm doing quite a lot of content sessions and experiences to share here with all of you.
Que tal querida comunidad, espero que hayan teniendo una excelente navidad con sus familias y sus seres queridos, el día de hoy quiero compartir con ustedes una nueva sesión y edición fotográfica que le realice a una querida amiga @patricia17_5 hace unos cuantos días en mi bella ciudad de Los Teques. Para las fotografías utilicé una cámara semi profesional de 48mp de un teléfono Spark 7t que adquirí gracias a la inesperada subida del token y producto de esa oportunidad estoy haciendo bastante contenido de sesiones y experiencias que compartir por aquí con todos ustedes.
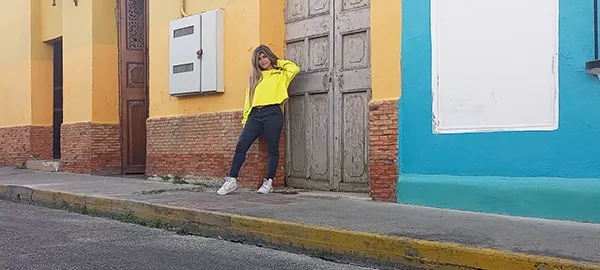
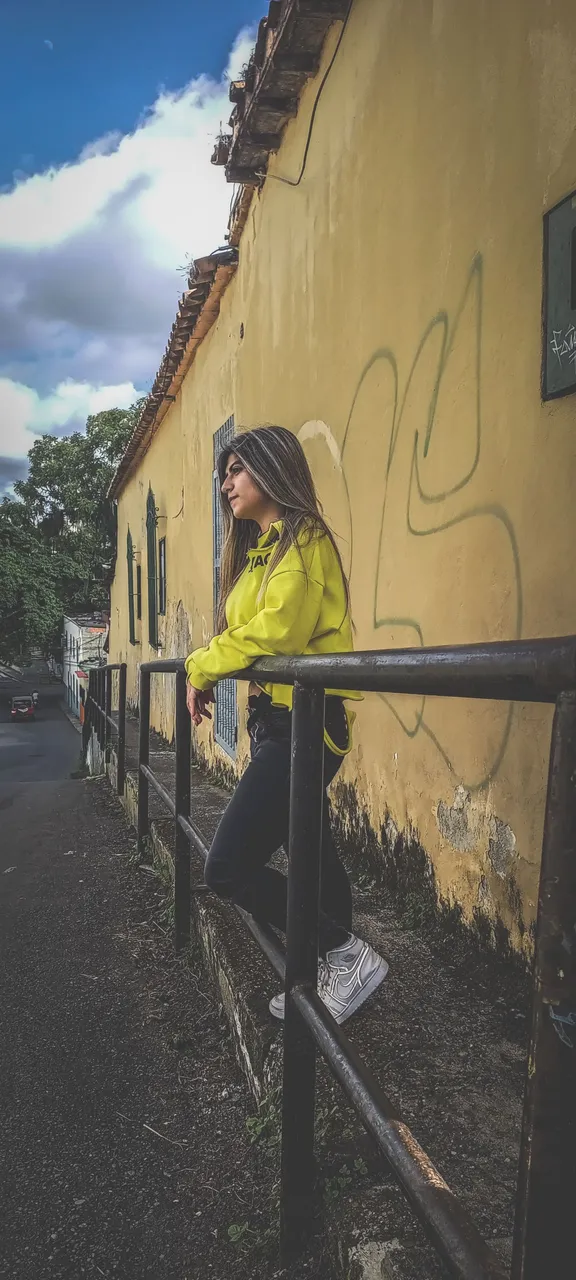
For all the editions I used the adobe programs Photoshop 2020 and Lightroom 5 using mostly the cropping tools, position, tonal balance, curves, focus and colors of the photographs. For this specific one I increased the illumination of the red, orange, green and blue colors and decreased a little the tonality of the green and orange, to give more vividness to the colors of the walls. I increased the presence to half and the intensity a little less than that and finally I decreased the high lights and the white tones, I also increased a little the black tones. The place was the old parrot walk of Los Teques. Roque street.
Para todas las ediciones utilices los programas de adobe Photoshop 2020 y Lightroom 5 utilizando más que todo, las herramientas de recorte, posición, el balance de tonalidades, curvas, enfoque y colores de las fotografías. Para esta en específico aumenté la iluminación de los colores rojo, naranja verde y azul y disminuí un poco la tonalidad del verde y del naranja, para darle más viveza a los colores de las paredes. Aumente la presencia hasta la mitad y la intensidad en un poco menos que eso y por ultimo disminuí sus altas luces y los tonos blancos, también aumente un poco los tonos negros. El lugar era el antiguo paseo de los papagayos de los Teques. Calle roque.

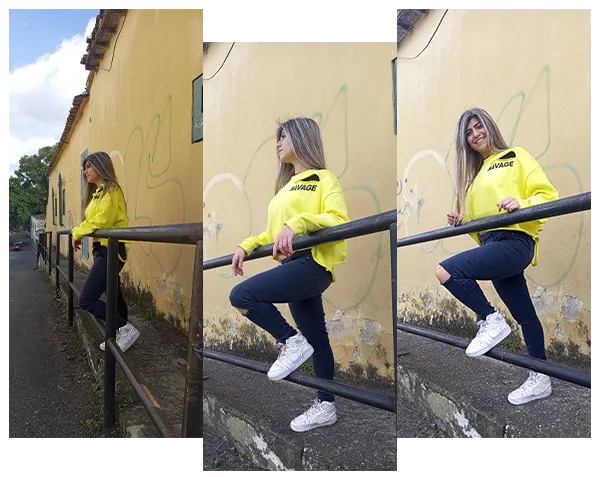
These are one of my favorites and one of the ones I worked hardest on because I felt I was able to capture the purity of her reaction and smile, along with a good camera angle and scenery, so I had to highlight those points to make the most of her natural beauty and harmonize and emphasize the colors of the environment. The pictures were taken on the stairs of the 19 de abril park in the town of Los Teques.
Estas son unas de mis favoritas y una en las que más me esmere en realizar ya que sentí que logre captar la pureza de su reacción y sonrisa, junto con un buen ángulo de cámara y de escenario por ende tenía que resaltar más esos puntos para aprovechar al máximo su belleza natural y lograr armonizar y enfatizar los colores del entorno. Las fotografías fueron tomadas en las escaleras del parque 19 de abril en el pueblo de Los Teques.


For these I started by increasing its exposure by only +0.52 degrees, without touching its contrast I decreased its highlights and white tones and added more shadows and dark tones. I increased its presence and its light tones in the tone curve, there I decreased its shadows just a little and increased its light tones, then I modified the saturation of the colors yellow green and blue, being the first one the one I added more saturation to give more vividness to those colors and to the sky. To finish I decreased the tonality of these same to give more harmony to the colors, I increased the luminance of the orange and green colors to almost the maximum, I lowered just a little the yellow and blue colors, I added a little focus with a radius of 1.0 and a dark vignette effect. The result was this...
Para estas comencé subiéndole solo +0,52 grados a su exposición, sin tocar su contraste disminuí sus altas luces sus tonos blancos y añadí más sombras y tonos oscuros. Aumenté su presencia y sus tonos claros en la curva de tonos, allí disminuí sus sombras solo un poco y subí sus tonos claros, luego pasé a modificar la saturación de los colores amarillo verde y azul, siendo el primero el que más saturación añadí para darle más viveza a esos colores y al cielo. Para finalizar disminuí la tonalidad de estos mismos para darle más armonía a los colores, les aumenté la luminancia de los colores naranja y verde a casi el máximo, bajé solo un poco los colores amarillo y azul, le agregué un poco de enfoque con un radio de 1,0 y un efecto de viñeta oscura. El resultado fue este…


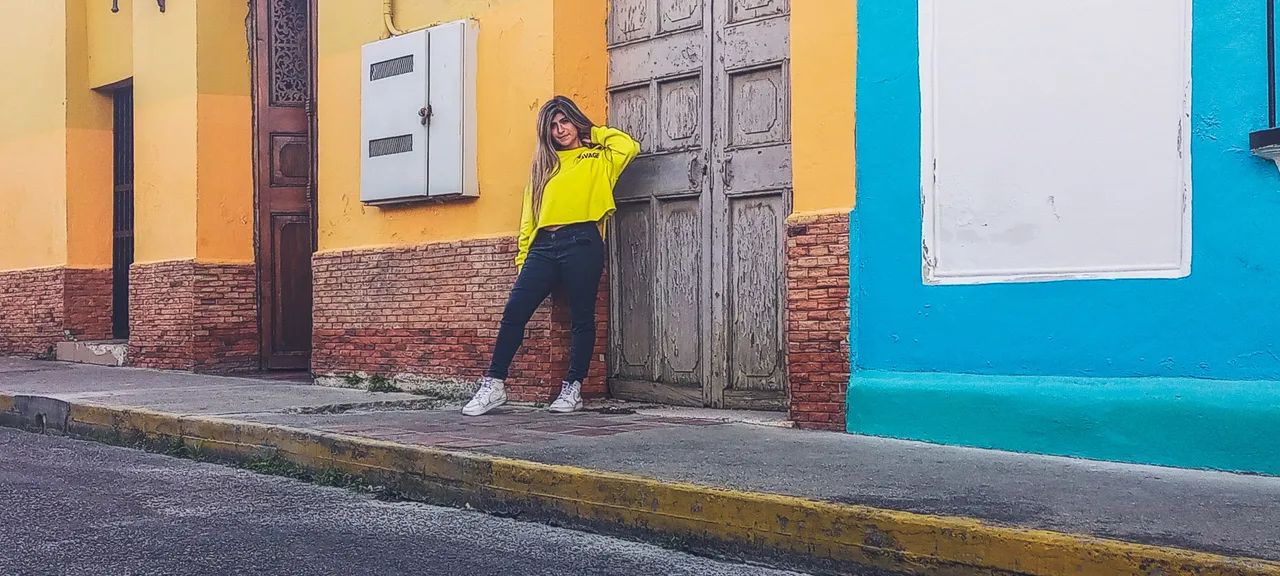
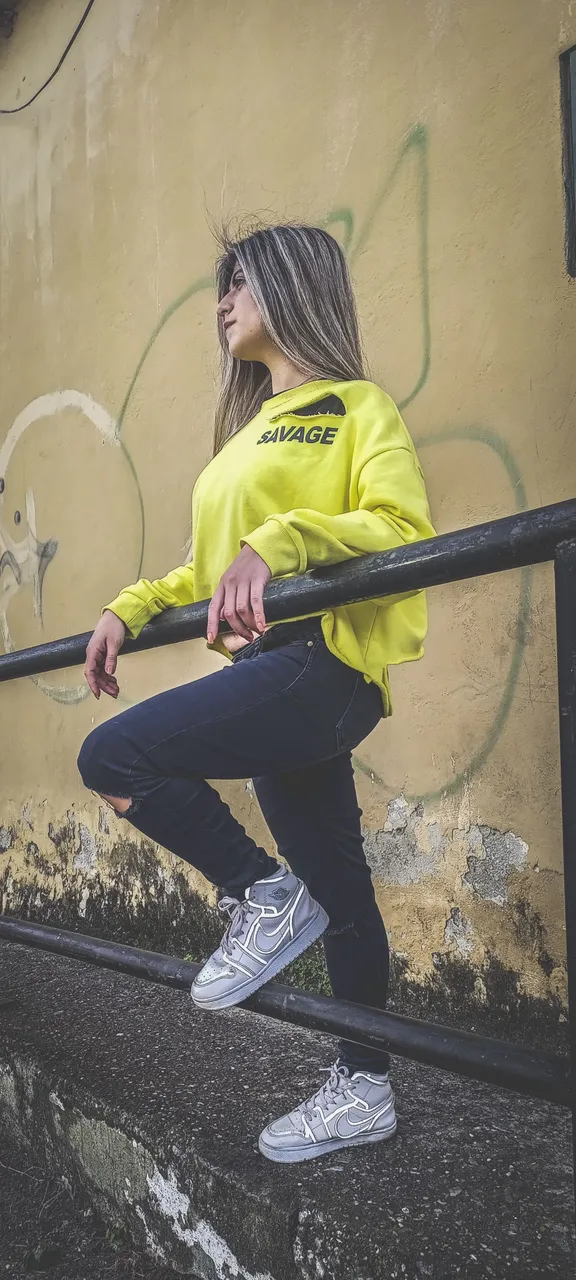
The following pictures were taken on Guaicaipuro street right next to the governor's house and I thought it was a perfect angle for the color of the house, the clouds in the background and the subtle moon levitating in the sky, so I wanted to give a cinematic filter to this picture and the first thing I did was a crop to remove certain parts that did not look good on it, then I increased the contrast a little, its high lights and white tones, its shadows and dark tones I increased them in a 20+ and up to a +50, in its presence I increased its clarity up to 77%, its intensity to 20% and I decreased its saturation in 10%.
Las siguientes fotografías fueron tomadas en la calle Guaicaipuro justo al lado de la casa del gobernador y me pareció un ángulo perfecto por el color de casa, las nubes de fondo y la sutil luna levitando en el cielo, por eso quise darle un filtro de cinemático a esta fotografía y lo primero que realice fue un recorte para eliminar ciertas partes que no quedaban bien en ella, luego le subí un poco el contraste, sus altas luces y sus tonos blancos, sus sombras y sus tonos oscuros los aumente en un 20+ y hasta un +50, en su presencia aumente su claridad en hasta 77%, su intensidad a un 20% y disminuí su saturación en 10%.
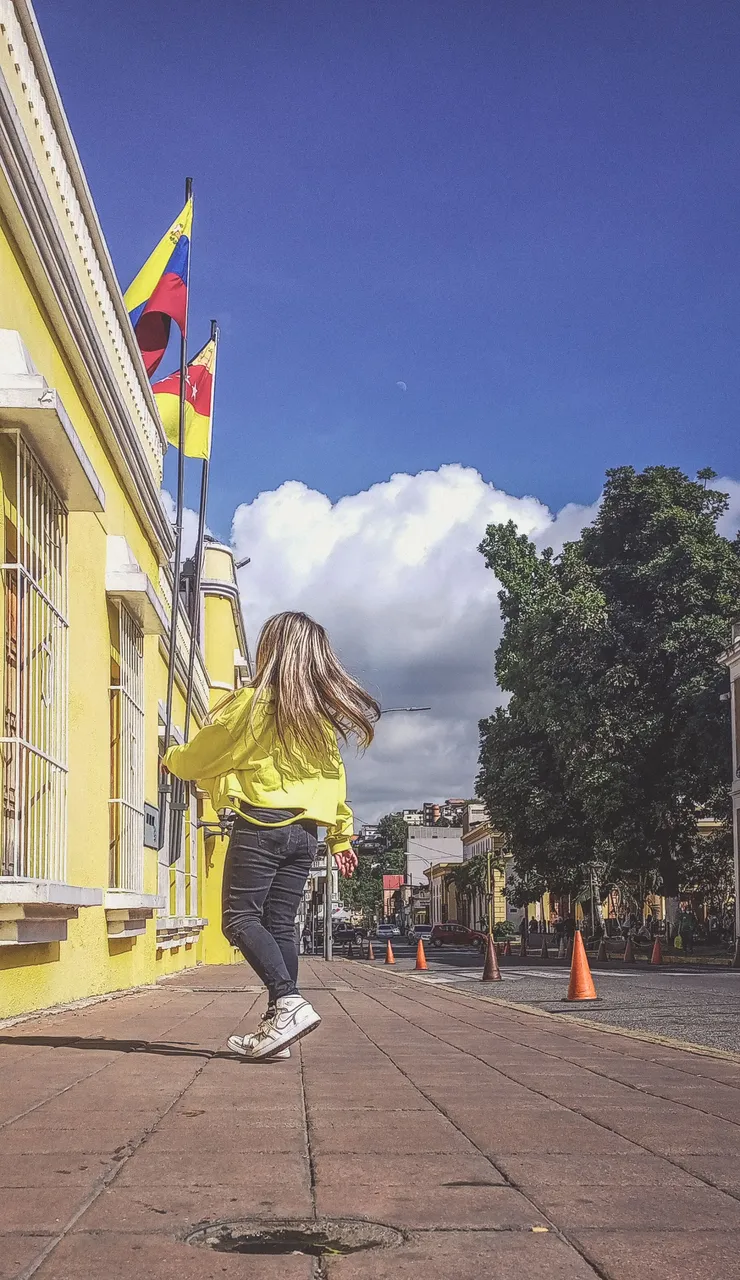


In the tone curve I only lowered a little clear -27, but in the saturation of the colors from red to magenta I increased only between 5% to 8%, adding in the orange and purple colors the highest amount of saturation with 75% and 10% to give more life to them. I increased the luminance of the orange by 100% to even out the skin tone as it looked very red due to the saturation I had added. Then I proceeded with the tone splitting tool, in her highlights I placed a gray color 62 with a saturation of 9% and in the shadow a tone of 17 and a saturation of 3%, I added a sharpening of 91% and a vignette and grainy effect.
En la curva de tonos solo baje un poco claros -27, pero en la saturación de los colores desde el rojo al magenta aumente solo un entre un 5% a un 8%, añadiendo en los colores naranja y purpura la mayor cantidad de saturación con un 75% y un 10% para darle más vida a estos mismos. Aumente la luminancia del naranja en un 100% para nivelar más la tonalidad de su piel ya que la veía muy roja por la saturación que había añadido. Luego procedí con la herramienta de división de tonos, en sus altas luces coloqué un color gris 62 con una saturación del 9% y en la sombra un tono de 17 y una saturación del 3%, le añadí un enfoque del 91% y un efecto de viñeta y granulado.

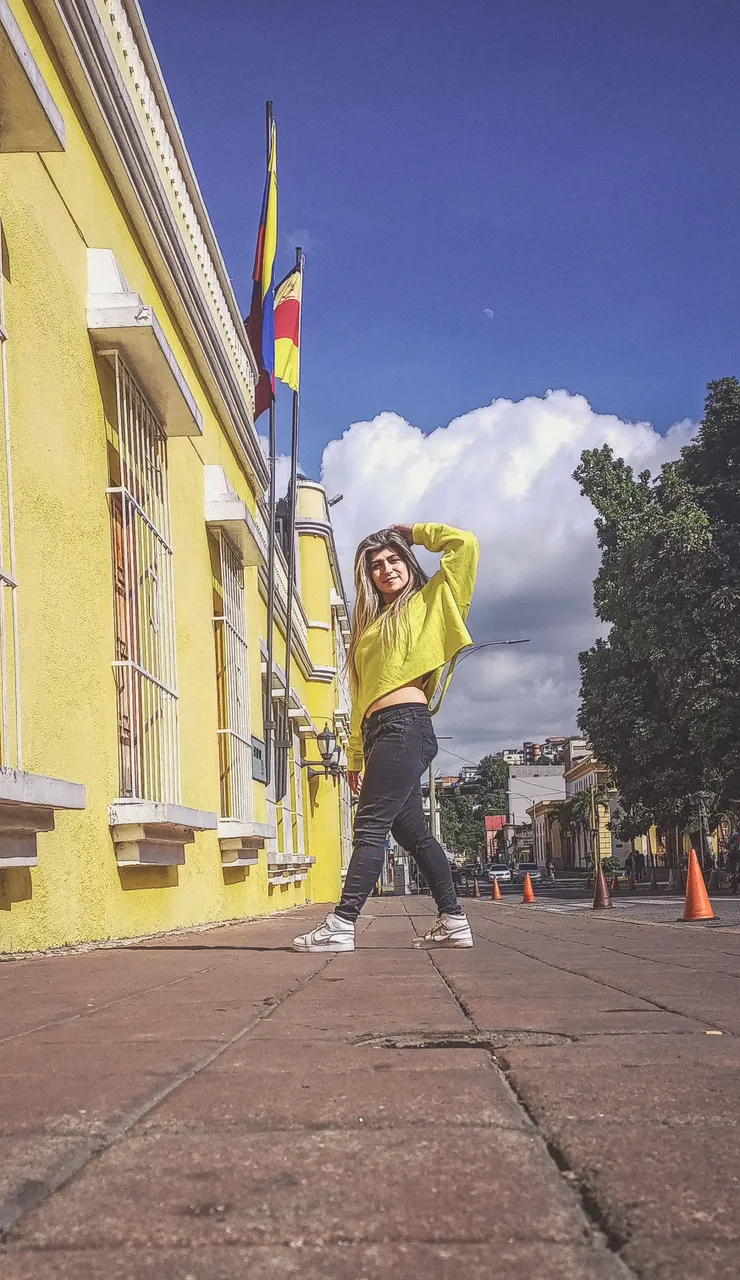
This is another of my favorites, I wanted to make it as dramatically artistic as I could highlighting the dark colors and shading the bright ones, for that I lowered the contrast by -13%, the highlights by -85% to make the clouds and their thickness more noticeable, I lowered the hue of the black colors and raised the clarity to +100%. In the HSL tool I just increased the saturation of the orange color by +4% and the luminance to +100% to lighten even more the color of her skin and give her more presence, then I increased her focus to +25% and added a noise reduction of 27% and in the color of 25%.
Estas es otra de mis favoritas, en ellas quise hacerla lo más dramáticamente artístico que podía resaltando los colores oscuros y matizando los brillantes, para eso bajé el contraste un -13%, las altas luces un -85% para dar a notar más las nubes y su espesor, bajé la tonalidad de sus colores negros y subí la claridad a un +100%. En la herramienta HSL solo aumente la saturación del color naranja en un +4% y la luminancia a un +100% para aclarar más aun el color de su piel y darle más presencia, luego aumente su enfoque a un +25% y añadí una reducción de ruido del 27% y en el color del 25%.

In the last picture I added a radial filter around her face with a contrast of -12%, her high lights at +8, decreased her clarity a bit to soften and set her saturation to 100 with a focus of 60%, to give more prominence to her face and her beautiful smile. Photograph taken at the corner of Ricaurte street, Los Teques.
En la última fotografía añadí un filtro radial alrededor de su rostro con un contraste del -12%, sus luces altas en un +8, disminuí un poco su claridad para suavizar y puse su saturación al 100 con un enfoque del 60%, para darle más protagonismo a su roso y su hermosa sonrisa. Fotografía tomada en la esquina de la calle Ricaurte, Los Teques.

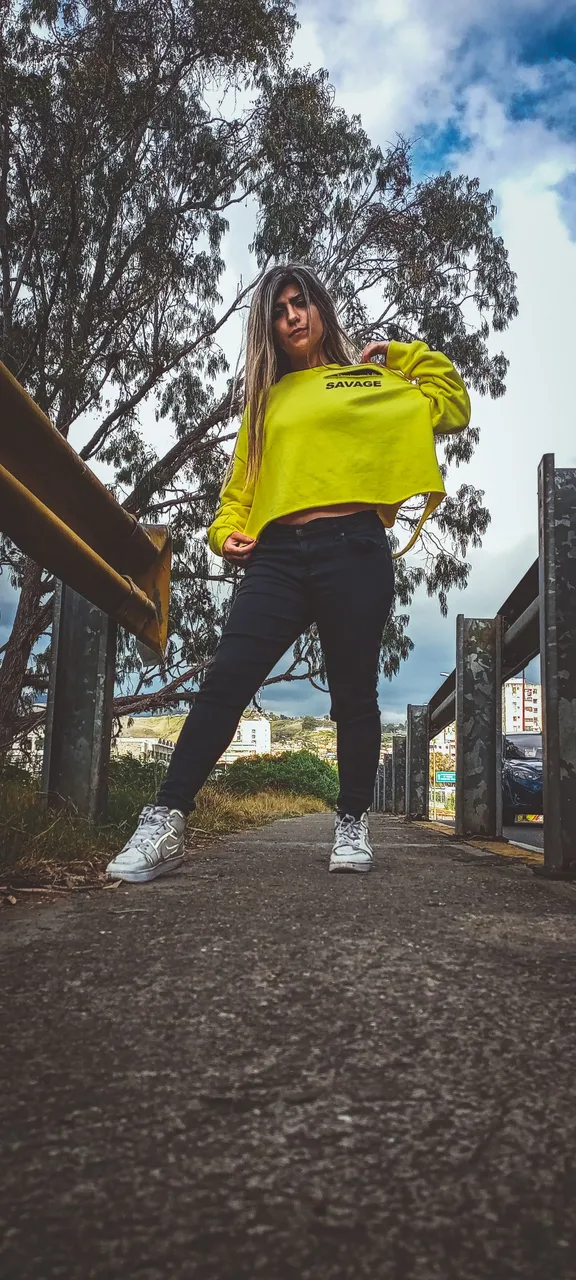
For these two pictures I just wanted to give more depth and sharpness, highlight the beauty of the muse with the beautiful sky that was overshadowed by the bad balance of the camera, to solve that I set an exposure of 0.48% and a contrast of +31%, increased the tone of the shadows to 21% and decreased the highlights and black tones by -85% and -14%, then the clarity to +73% all to highlight even more the cloudy sky and the environment.
Para estas dos fotografías solo quería darle más profundidad y nitidez, resaltar la belleza de la musa con el precioso cielo que era opacado por mi mal balance de la cámara, para solventar eso configuré una exposición del 0,48% y un contraste del +31%, aumenté la tonalidad de las sombras a un 21% y disminuí las altas luces y las tonalidades negras en un -85% y un -14%, luego la claridad a un +73% todo para resaltar aún más las el cielo nublado y el entorno.
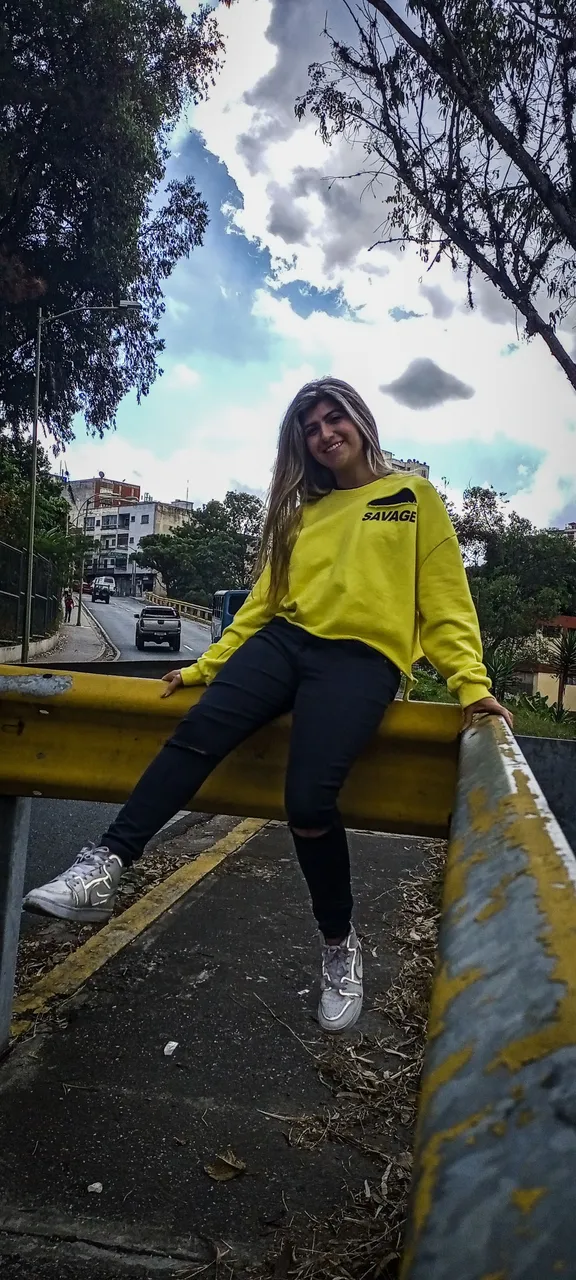
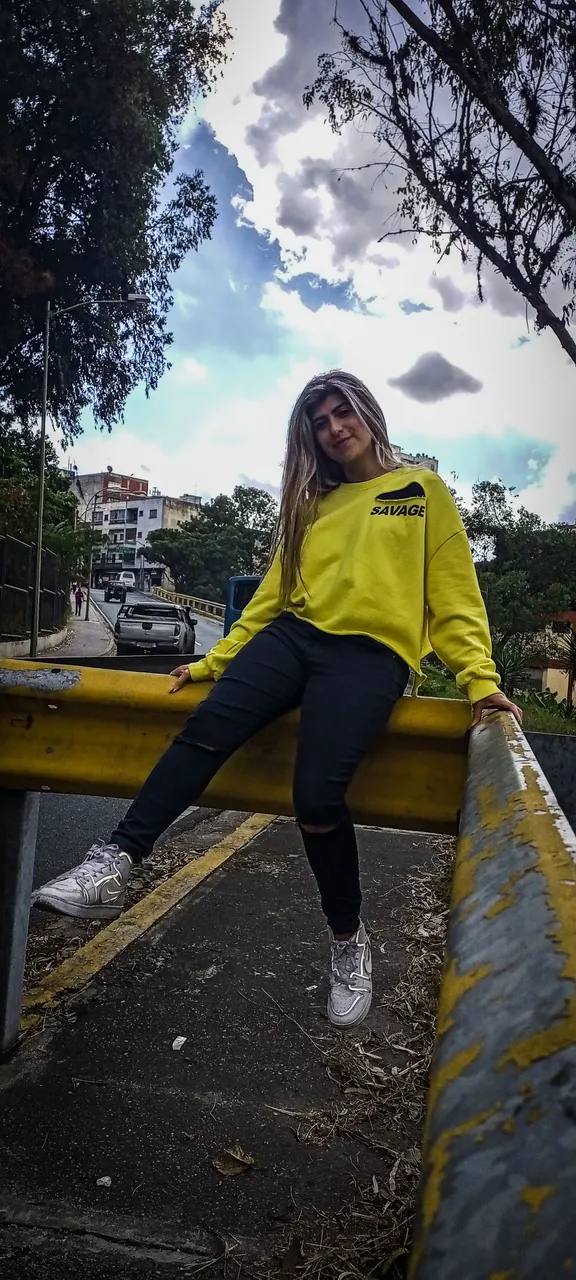
Lastly in the color adjustments, I only modified the orange giving it a hue of +29%, a slight saturation of +24% and a luminance of 100% to highlight her skin more, and finally I added a vignette of -19%. Photographs taken at the intersection of Av. Bicentenaria, Los Teques.
Por ultimo en los ajustes de colores, solo modifique el naranja dándole una tonalidad del +29% una saturación leve del +24% y una luminancia del 100% para resaltar más su piel, para finalizar agregue una viñeta del -19%. Fotografías tomadas en el cruce de la Av. Bicentenaria, Los Teques.


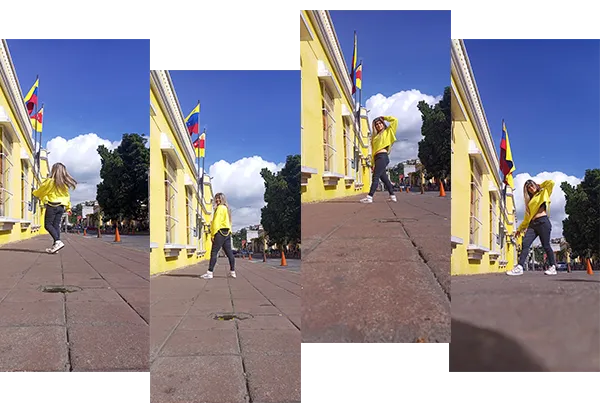
For the last session I even added lens corrections since I wanted to highlight absolutely everything in them and for that I went crazy with the adjustments and started by increasing the contrast of her tonality by +16%, her shadows, white tones, black tones and clarity by +55%, +18% and +20%. On the other hand, I decreased its highlights by -100% and its saturation by -10%. This to soften the brightness of the shadows and colors, but without losing tonality in the tone curve I also increased its shadows by +13%.
Para la última sesión agregué hasta correcciones de lente ya que quería resaltar absolutamente todo en ellas y para eso me volví loco con los ajustes y comencé subiendo contraste de su tonalidad un +16%, sus sombras, tonos blancos, tonos negros y claridad un +55%, +18% y un +20%. En cambio, sus altas luces las disminuí un -100% y un -10% su saturación. Esto para suavizar el brillo de las sombras y los colores, pero sin perder tonalidad en la curva de tonos también aumente sus sombras un +13%.

I increased the hue of the colors red, yellow, aquamarine, purple and magenta by +20%, +5%, +10%, 20%, 20% and as for the saturation I decreased its amount including the colors, green, Blue. Then I decreased the luminance of the colors aquamarine and blue to make the sky more noticeable, increased the luminance of the colors purple, magenta, yellow, red and orange being the last one the one I increased the most percentage.
La tonalidad de los colores rojo, amarillo, aguamarina, purpura y magenta la aumenté en un +20%, +5%, +10%, 20%, 20% y en cuanto a la saturación disminuí su cantidad incluyendo los colores, verde, Azul. Luego disminuí la luminancia de los colores aguamarina y azul para dar a notar más el cielo, aumente la luminancia de los colores purpura, magenta, amarillo, rojo y naranja siendo este último el que más porcentaje le aumente.

Then add a 52% sharpening with a radius of 1. 0, a vignette effect of -16% and a midpoint of 45%, finally I added a camera calibration with a shade of -4%, the tone of the primary red colors I increased it to 20% and its saturation to 85%, in the greens I increased its tone to 31% and decreased its saturation to -15%, in the blues I only decreased -10% and -15% its tone and saturation to achieve the following effect in the photographs. Photographs taken at the intersection of Av. Bicentenaria, Los Teques.
Después agregue un enfoque del 52% con un radio de 1.0, un efecto de viñeta del -16% y un punto medio de 45%, por ultimo agregue una calibración de cámara con un matiz de sombras en -4%, el tono de los colores rojos primarios lo aumente a un 20% y su saturación a un 85%, en los verdes aumente su tonalidad a un 31% y disminuí su saturación a un -15%, en los azules solo disminuí un -10% y un -15% su tonalidad y saturación para lograr el siguiente efecto en las fotografías. Fotografías tomadas en el cruce de la Av. Bicentenaria, Los Teques.

And well dear community this has been all the editing work after this photo shoot that I must say that I quite enjoyed doing it and editing it, there are still more pictures of this same session that I have not yet edited because of time and the holidays, plus there are quite a few pictures. Soon I will upload the second part with the others to read your opinions and tips 🤗, if you liked the editing or the photos do not forget to leave me your vote and express your opinion or your advice, the truth would help me a lot to improve and continue creating content of this style, without more to comment, I hope you have a great end of the year, my best vibes and wishes for all a hug. ❤
Y bueno querida comunidad este ha sido todo el trabajo de edición tras esta sesión fotográfica que debo decir que disfrute bastante haciéndola y editándola, aún faltan más fotografías de esta misma sesión que aún no he editado por cuestión de tiempo y las fiestas, además de que son bastantes fotografías. Pronto subiré la segunda parte con las demás para leer sus opiniones y consejos 🤗, si te gusto la edición o las fotos no olvides dejarme tu voto y expresar tu opinión o tus consejos, la verdad me ayudarían bastante para mejorar y seguir creando contenido de este estilo, sin más que comentarles, espero que tengan un grandioso fin de año, mis más buenas vibras y deseos para todos un abrazo. ❤