Hola a todos! Hoy les voy a enseñar cómo hacer Pixel Arts en Adobe Illustrator, fácil y rápido. Comencémos!
Hello everyone! Today I am going to teach you how to make Pixel Arts in Adobe Illustrator, easy and fast. let's start!
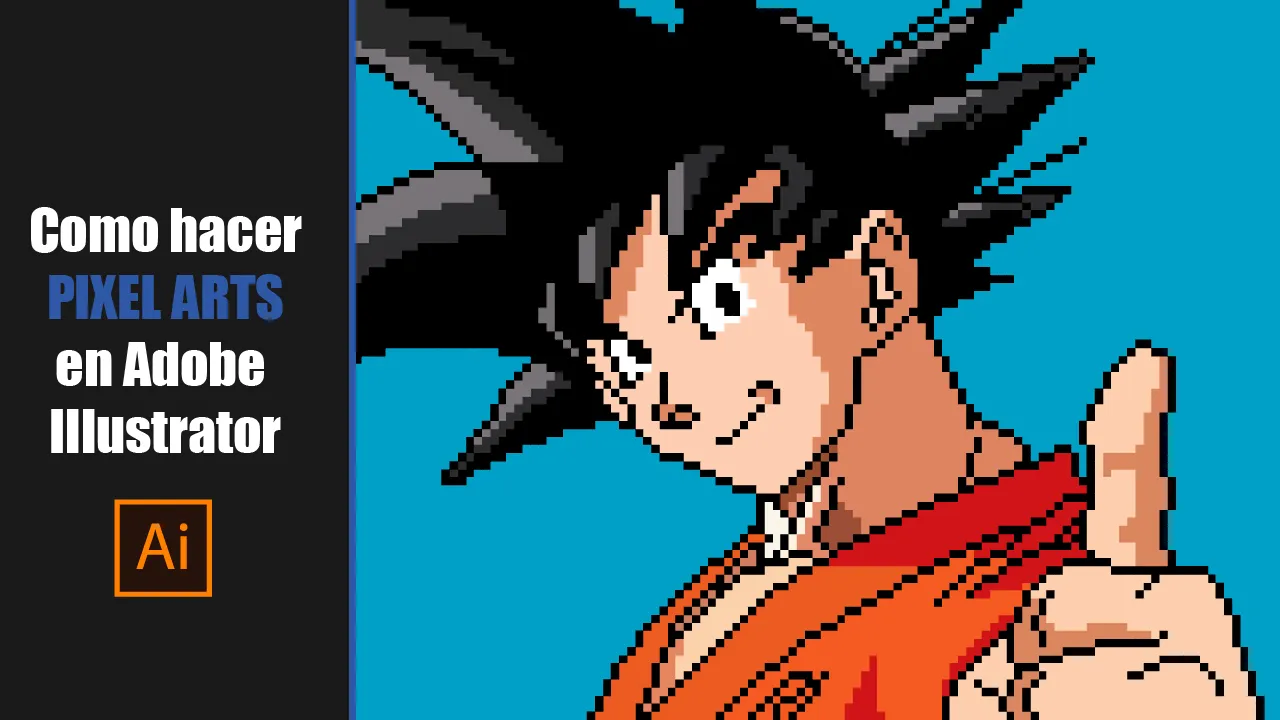
Fuente imagen Inspiración Pixel Art
Source image Inspiration Pixel Art
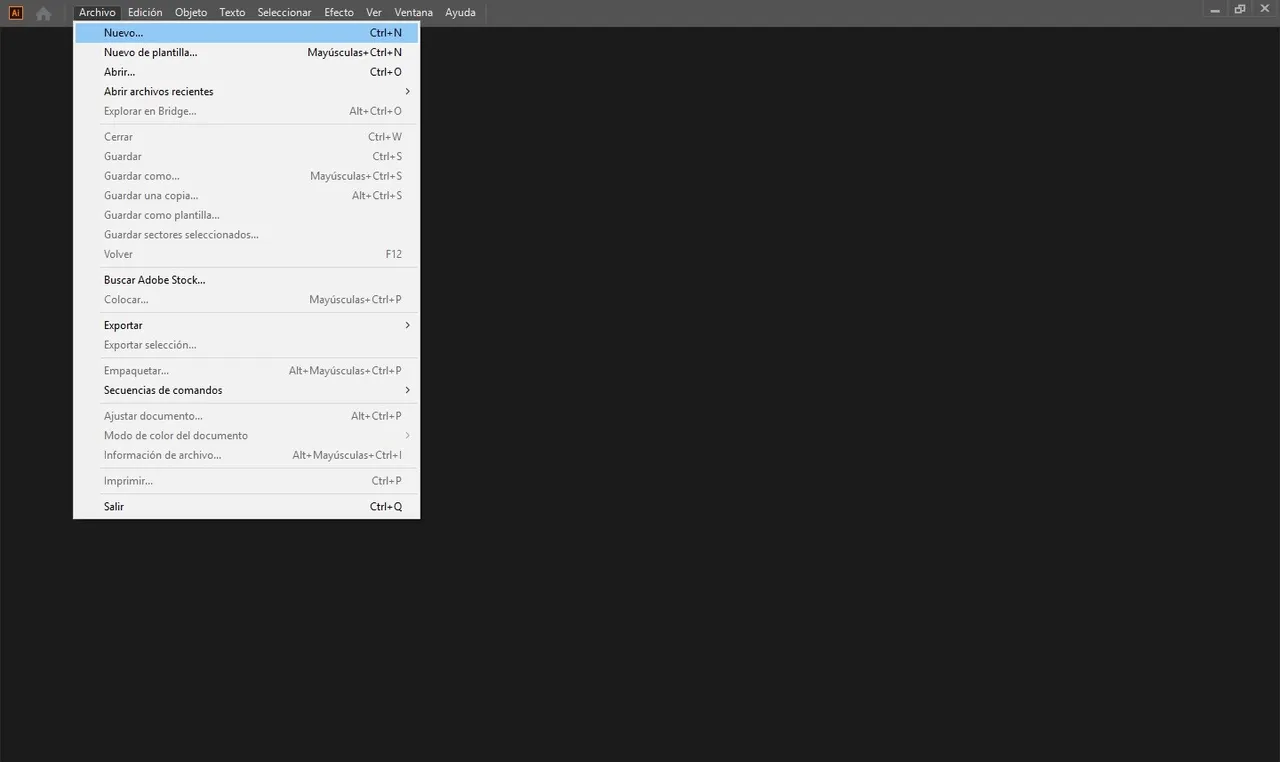
1° Paso: Lo primero que tendremos que hacer es crear un nuevo documento, esto lo podemos hacer con el comando de teclas (Ctrl + N) o yendonos a la pestaña "Archivo" (Nuevo).
1st Step: The first thing we will have to do is create a new document, we can do this with the key command (Ctrl + N) or by going to the "File" tab (New).
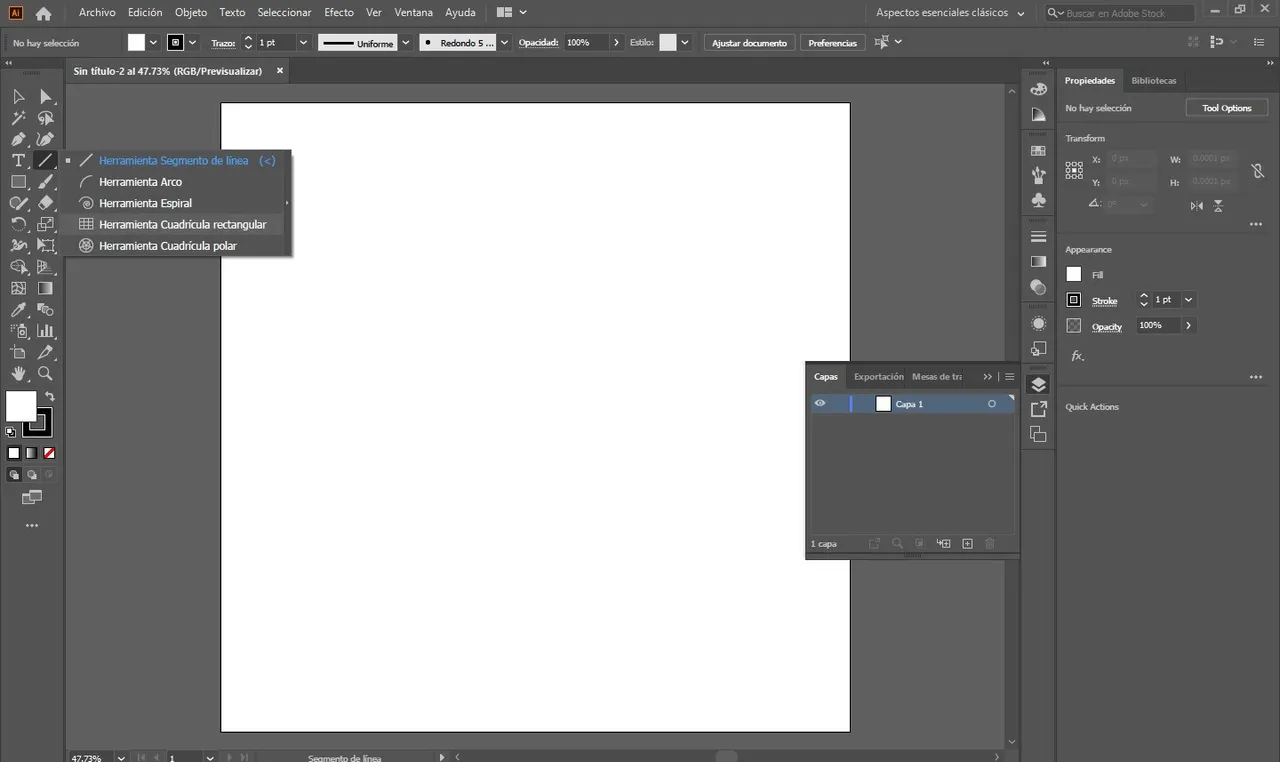
2° Paso: Ya que tengamos nuestra mesa de trabajo creada, tenemos que dirigirnos a la herramienta "Línea" que se encuentra en el panel de herramientas a la izquierda, luego tenemos que presionar Click Derecho a la herramienta "Línea" y seleccionamos la herramienta "Cuadrícula Rectangular".
2nd Step: Once we have our artboard created, we have to go to the "Line" tool that is in the tool panel on the left, then we have to Right Click on the "Line" tool and select the tool "Rectangular Grid".
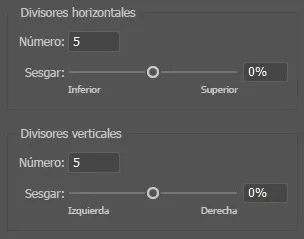
Seguido de eso, tenemos que presionar Click Izquierdo en la mesa de trabajo, luego se les va a abrir un panel que trae varias opciones interesantes. La primera opción es para cambiar el tamaño de la cuadrícula, en este caso, mi mesa de trabajo tiene una Anchura y una Altura de 1200 Px X 1200 Px. Nota: Ustedes pueden colocar el tamaño de su mesa de trabajo.
Following that, we have to press Left Click on the artboard, then a panel will open that brings several interesting options. The first option is to resize the grid, in this case my artboard has a Width and Height of 1200 Px X 1200 Px. Note: You can set the size of your artboard.
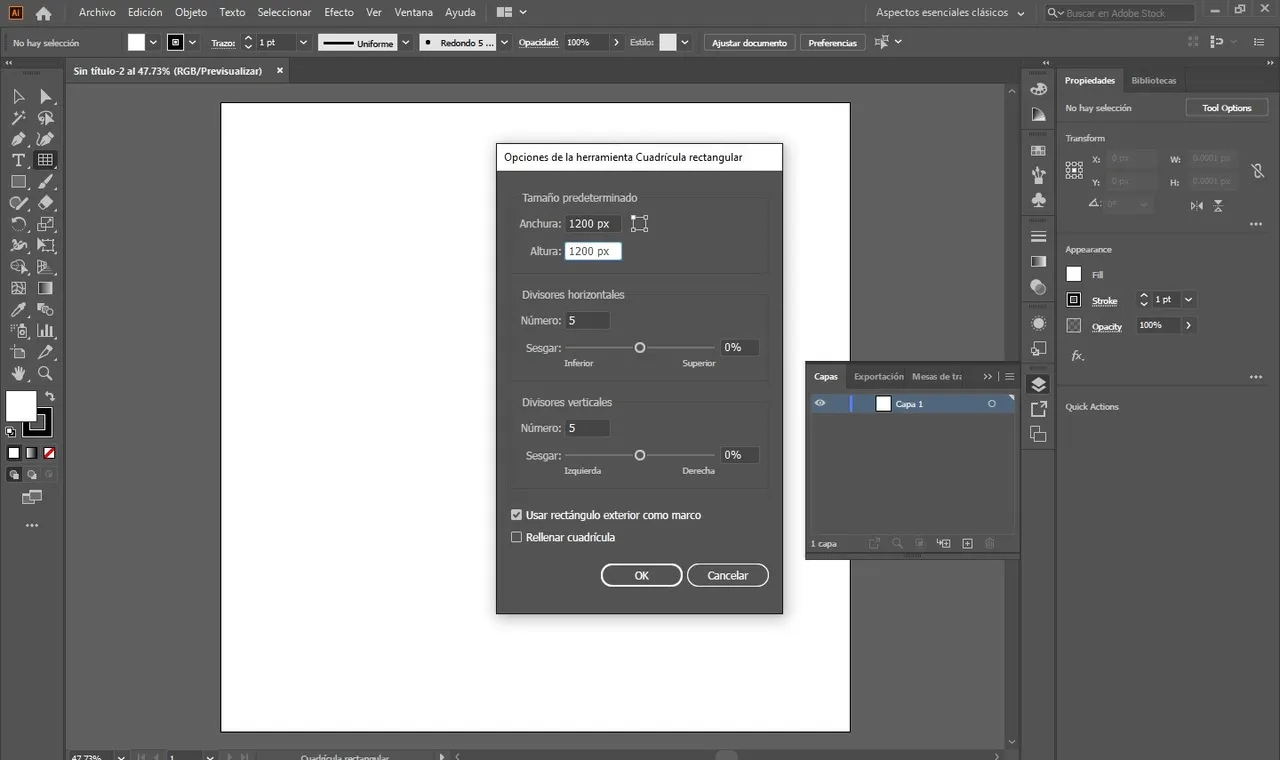
Las otras opciones sirven para aumentar el número de Divisores de forma Horizontal y Vertical, mientras más le pongas, va a haber más cuadros en tu Cuadrícula.
The other options are used to increase the number of Dividers Horizontally and Vertically, the more you put, the more squares there will be in your Grid.
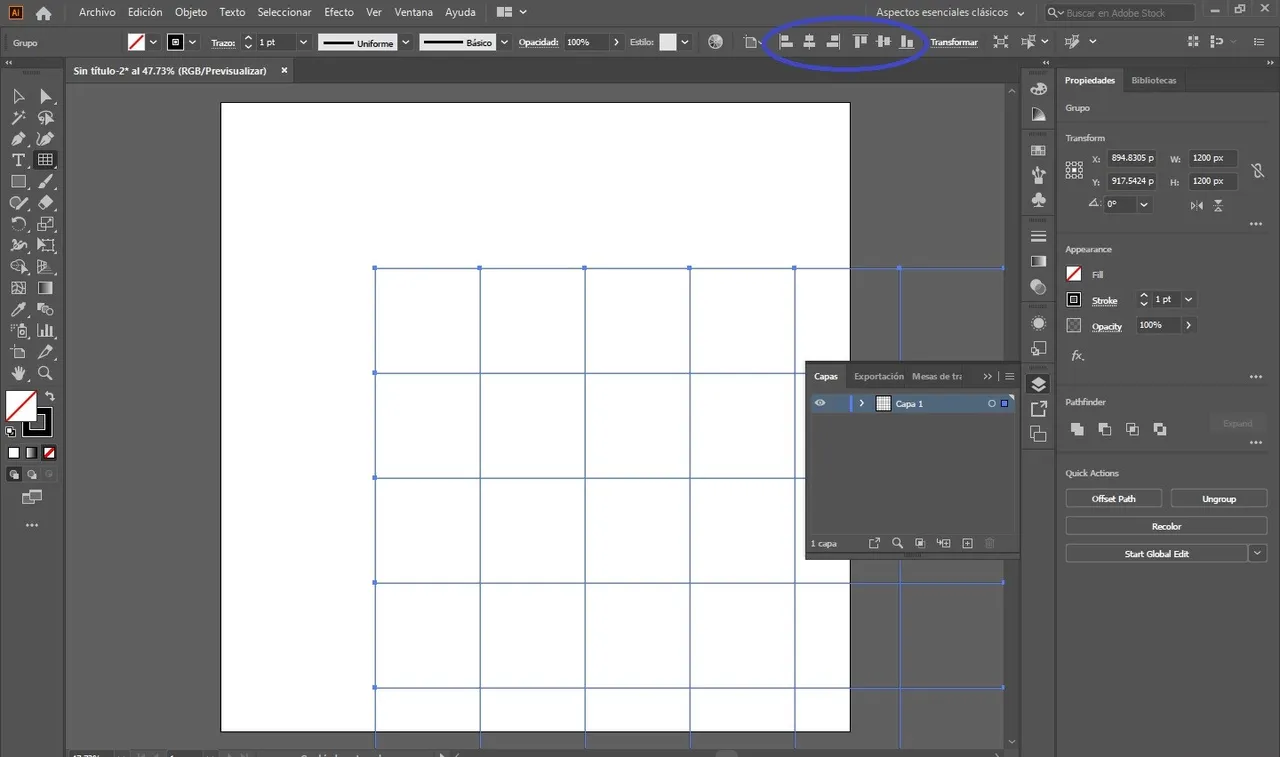
3° Paso: Una vez hecho todo esto, vamos por el último paso, teniendo la Cuadrícula seleccionada vamos a Centrarla en la mesa de trabajo.
3rd Step: Once all this is done, we go through the last step, having the Grid selected we are going to Center it on the artboard.
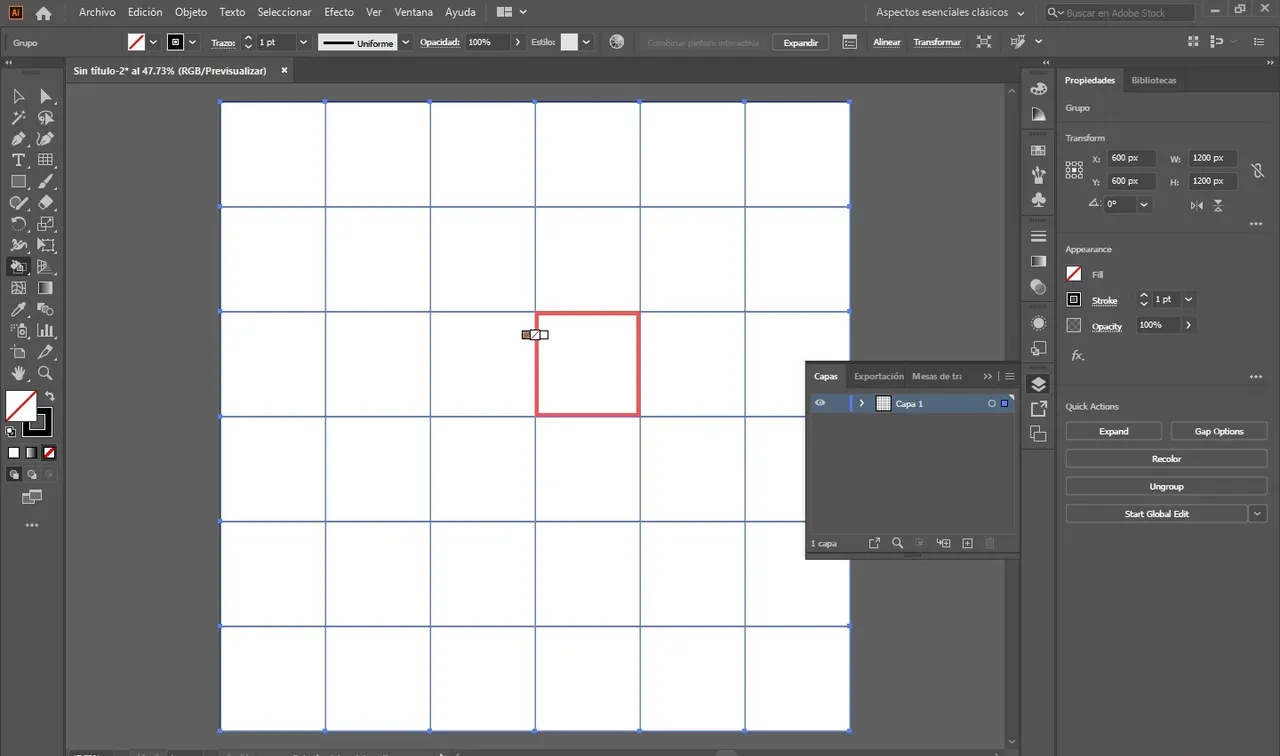
Luego tenemos que seleccionar la herramienta "Bote de Pintura Interactiva" presionando la tecla "K" en nuestro teclado.
Then we have to select the "Live Paint Bucket" tool by pressing the "K" key on our keyboard.

Una vez hecho esto, tenemos que presionar Click Izquierdo sobre la Cuadrícula.
Once this is done, we have to press Left Click on the Grid.
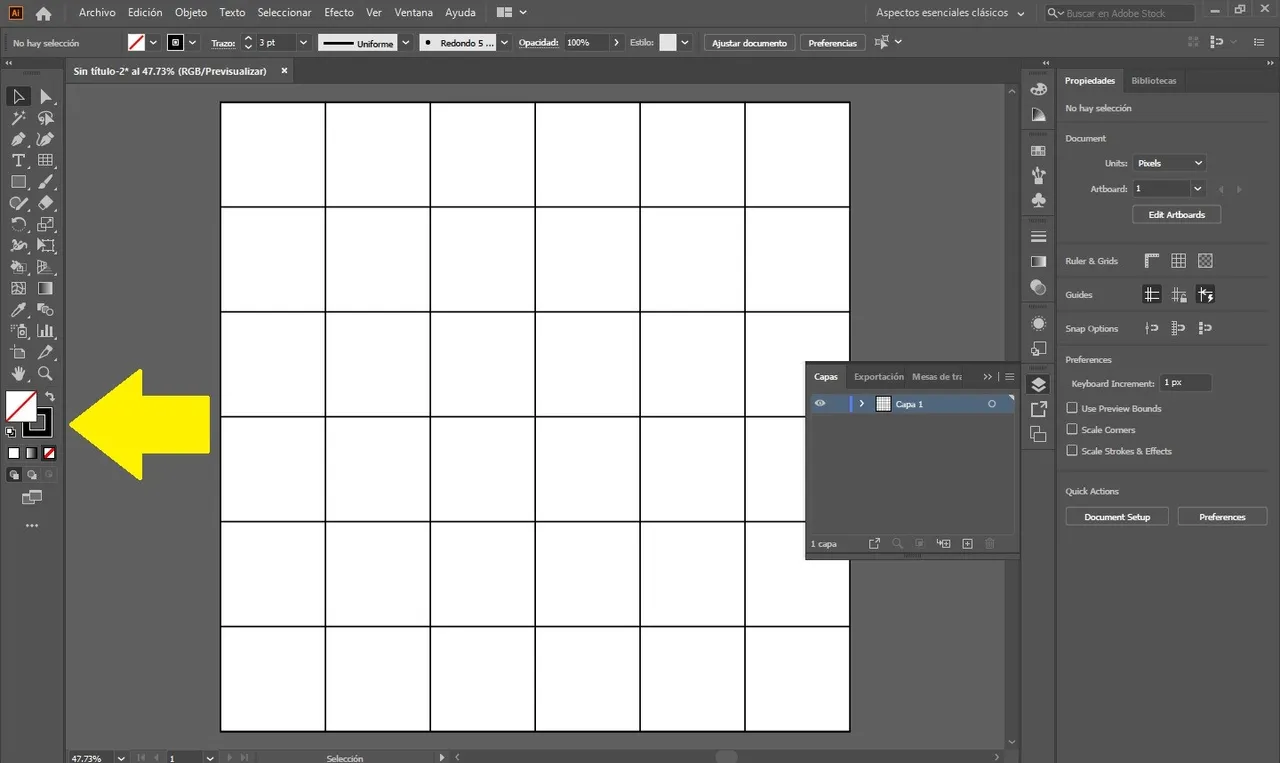
Por último tenemos que cambiar de Trazo a Relleno presionando el comando de teclas Mayúsculas + X y listo! Podemos empezar a pintar sobre nuestra cuadrícula. Nota: Puedes cambiar el color en el Panel de propiedades.
Finally we have to change from Stroke to Fill by pressing the key command Shift + X and that's it! We can start painting on our grid. Note: You can change the color in the Properties Panel.
Estos captures lo tomé directamente desde el programa Adobe Illustrator 2020
I took these captures directly from the Adobe Illustrator 2020 program